

Page 1
Page 2
ii
DiabloSport, LLC.
Predator Satisfaction Guarantee/
Return Policy
Predator ReFlash
Policy
All DiabloSport
products have a guarantee of satisfac-
tion. If in the rst 15 days from the date of
purchase you are not satised with the results the
Predator generates in your vehicle, simply restore the
factory tune to your vehicle and return the Predator to the selling dealer.
Pending examination of the tool by DiabloSport, you will receive a refund
from your selling dealer. Under no circumstances will DiabloSport ac-
cept the return of a Predator unit that has a factory tune remaining
in it.
The Predator will “marry” to the vehicle upon
upload of the factory tune and cannot be
re-ashed back to a blank tool. The
marrying of the VIN# to the tool is what
makes it possible for DiabloSport to
allow the vehicle to be re-ashed by GM
and still be re-programmed again by the
Predator. Re-ashing of the Predator is not
possible without the complete disassembly,
replacement and re-programming of critical
components within the Predator tool.
Predator Revisions:
In an effort to keep the DiabloSport Predator
at the forefront of technology, DiabloSport will
offer revisions to the Predator when necessary.
To return the Predator for a revision update,
please contact DiabloSport to obtain a Return
Merchandise Authorization Number (RMA)
and a shipping address. Predators shipped
without an RMA number clearly labeled on
the outer box will be refused. The updates will
be provided free of charge with original proof
of purchase. The customer is responsible for
all freight expenses.
Page 3

iii
THIS END USER LICENSE AGREEMENT
(the “Agreement”) is an
agreement between you, as the purchaser (the “Purchaser”) of either the
Diablo Module (the “Module”) or the ToolRama hand-held computer unit (the
“Unit”), and ProgRama Tools, Inc., DiabloSport, LLC or ToolRama, LLC (collectively, “ToolRama”), as the manufacturer of the Product. The Product and
the Unit shall be referred to collectively here in as the “Product.”
1. Acknowledgment And Acceptance Of Agreement.
If you do not agree to
the terms and conditions of this Agreement, do not use the Product. Instead,
promptly contact the distributor from which you purchased the Product in
writing, requesting a refund of the purchase price. Any use of the Product
by you will constitute your agreement to the terms and conditions contained
herein.
2. Grant Of License.
The parties here to acknowledge that ToolRama is granting a non-transferable restricted license to Purchaser to use the
Product for the sole purpose of installation in Purchaser’s vehicle. ToolRama
shall retain all title, ownership rights and intellectual property rights in and to
the Product. Purchaser agrees that Purchaser shall not, directly or indirectly,
modify, translate, reverse engineer, decompile, disassemble, or create derivative works based on the Product. Purchaser further agrees not to permit any
third parties to modify, translate, reverse engineer, decompile, disassemble,
or create derivative works based on the Product.
3. Disclaimer.
The Product
is being sold with no warranties of any kind, express or implied. The Product
is not endorsed by the manufacturer of your vehicle and there is no affiliation between ToolRama and the manufacturer of your vehicle. Installation of
the Product in your vehicle or use of the Product with your vehicle may limit
or void your rights under any warranty provided by the manufacturer of your
vehicle, and ToolRama assumes no responsibility in such event. Any warranty
not provided here in, and any remedy which, but for this provision, might
arise by implication or operation of law, is here by excluded and disclaimed.
The implied warranties of merchantability and of fitness for any particular
purpose here in are expressly disclaimed.
4.
No Liability For Damages,
Injuries Or Incidental, Special Or Consequential Damages. Under
no circumstances shall ToolRama, Inc., DiabloSport, LLC or ToolRama, LLC,
or any other party related to ToolRama, be liable to Purchaser or any other
person for any damage to Purchaser’s vehicle, loss of use of Purchaser’s
vehicle, or for personal injuries suffered by any person, or for any incidental,
special or consequential damages, whether arising out of negligence, breach
of warranty, breach of contract, or otherwise. ToolRama’s liability for any damages, loss and/or claims associated with the Product shall be limited to the
price of the Product paid by purchaser. Purchaser hereby releases ToolRama
from all liability, claims and damages associated with the Products, with the
sole exception of ToolRama’s liability for the refund of the purchase price of the
Product to Purchaser in the event that a court of competent jurisdiction determines the Purchaser suffered damages directly resulting from the malfunction
of the Product.
5.Warranty.
Not with standing the provisions of the End User
License Agreement, DiabloSport warrants the Product to be free from all defects
in material and workmanship for the life of the Product. This limited warranty
applies only to the original Purchaser of the Product. This limited warranty
does not cover damage caused by modification, alteration, repair or service
of the Product by anyone other than DiabloSport, physical abuse, misuse, use
in a manner contrary to the instructions, which accompany the Product, or any
damage caused by acts of God. Contacting your Distributor or Dealer may
make claims for repair service or replacement of the Product pursuant to this
limited warranty. The Chip will either be repaired or replaced, at the option of
DiabloSport, at no cost to Purchaser, if the defective Product is covered by this
limited warranty. DiabloSport’s liability pursuant to this limited warranty and for
any damages, loss and/or claims associated with the Product shall be limited to
the price of the Product paid by Purchaser, or, at DiabloSport’s option, repair or
replacement of the Product.
6. State Law.
Some states do not allow limitations
of implied warranties, or the exclusion or limitation of incidental, special or
consequential damages, so the above limitations may not apply to you. In such
states, liability shall be limited to the greatest extent permitted by applicable
law.
7. Governing Law & Venue.
This Agreement shall be governed by and
construed in accordance with the laws of the State of Florida, and venue for any
legal proceeding or action at law arising out of or construing this Agreement
shall lie in the state or federal courts of Orange County, Florida, and the parties
specifically waive any other venue.
DISCLAIMER
Not legal for sale or use on
any pollution controlled motor vehicles.
Legal in California only for racing vehicles
which may never be used upon a highway.
End User License Agreement, Warranty and Disclaimer
End User License Agreement,
Warranty and Disclaimer
Page 4

Before Installing DiabloSport Performance Tune v
Display and Keypad description vi
Preparing For Performance Tune Installation 1
OBD-II Diagnostic port locations 3
Vehicles equipped with the GM OnStar system 4
Fuse Removal on all GM vehicles 5
Predator Applications 8
Installing the tune into the vehicle 9
Restoring the factory/stock tune 15
Modifying parameters 17
Diagnostic Section 23
How to check and erase the SES light 24
Monitoring Real Time Data 27
Options Section 29
Table of Contents
Page 5

Before Installing
DiabloSport
Performance Tune
Page 6
vi
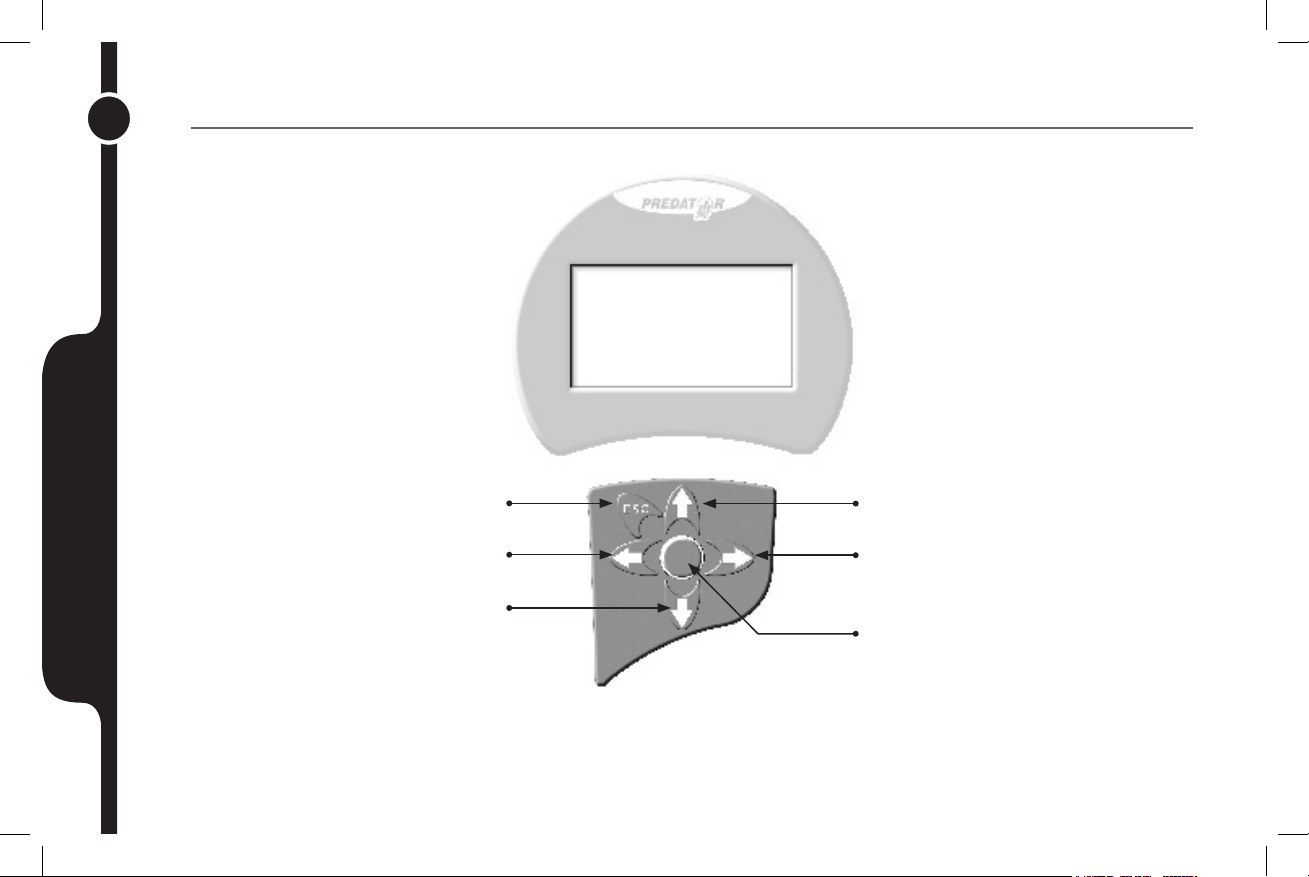
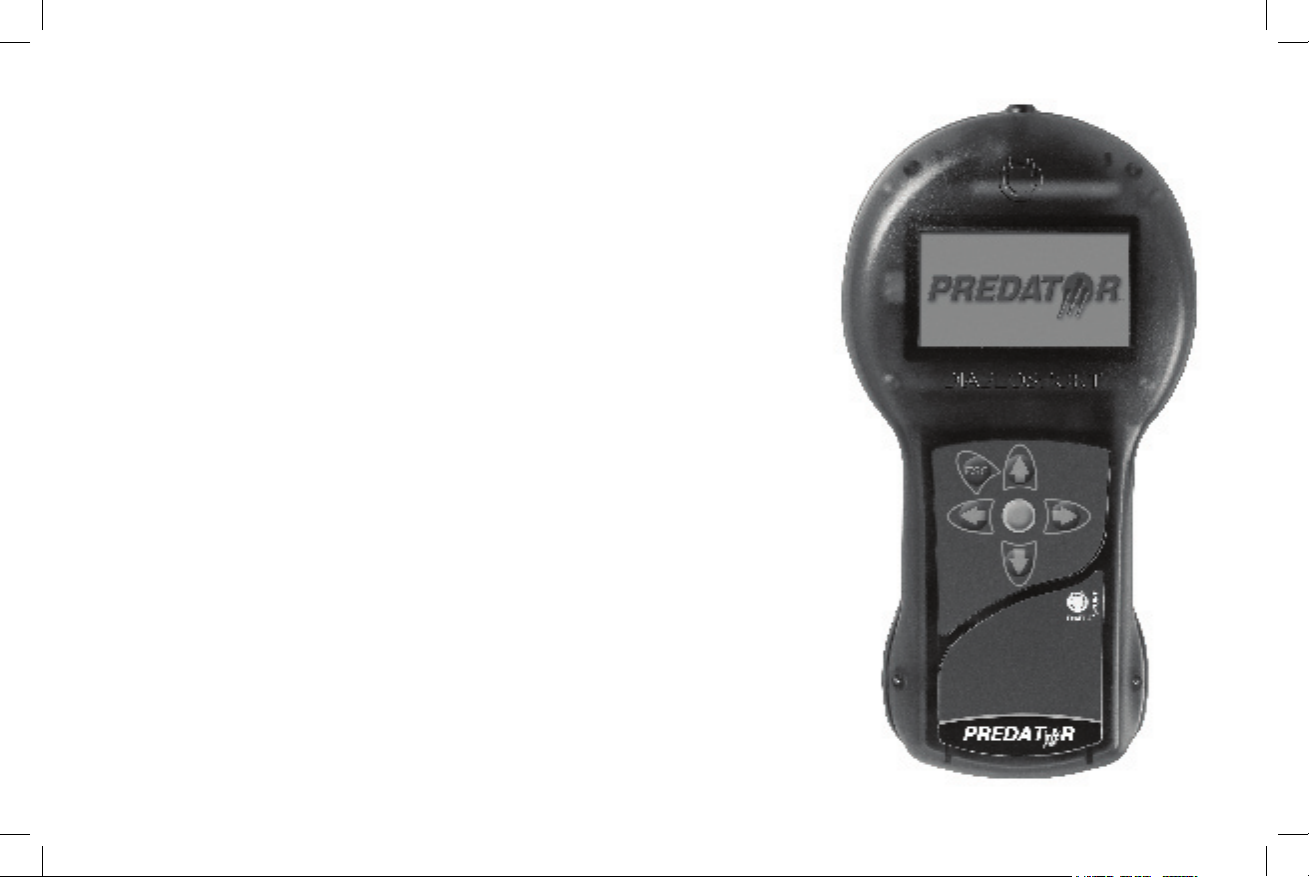
Display and Keypad description
This is a simulation of the
Predator’s screen.
Have the tool in front of
you while reading this
manual !
ESC Key:
Scroll page back to previous page
Arrow left: Scroll menu to the left
Arrow down: Scroll down the menu
Arrow up: Scroll up the menu
Arrow right: Scroll menu right
(Use this key to view entire descriptions)
Enter/Continue Key:
Select parameter highlighted in menu
Display and Keypad description
Page 7
Please read through the entire manual before installing a tune in your
vehicle. Failure to follow instructions can result in a damaged or disabled
PCM (Powertrain Control Module).
User must ensure that the factory “stock” tune is in the vehicle’s PCM before
installing the DiabloSport tune. GM dealer re-flashes are considered stock
factory tunes.
Serious engine damage will occur if the Predator tune is installed over a
non-factory/aftermarket performance tune. Predator tunes cannot be used
in conjunction with other tuning devices such as chips or plug-in modules of
any kind.
Do not perform any operations on Predator (expect live data diagnostics)
while vehicle is running. The vehicle must be parked, and the engine OFF.
Very important! Do not perform any operations on Predator
(expect live data diagnostics) while vehicle is running. The vehicle
must be parked, and the engine OFF.
IMPORTANT
Page 8

Notes
Page 9
Preparing For
Performance Tune
Installation
Page 10

2
• Apply parking brake to de-activate daytime running lights.
• Always have all the doors closed while installing the
DiabloSport Performance tune, and keep them closed
until the process is complete.
• Do not activate any electrical accessories while installing the
DiabloSport Performance tune. Ensure that there are
no electronic devices wired or plugged into the vehicle
that can cause a substantial voltage drop when activated
during installation of the DiabloSport Performance tune.
Please contact DiabloSport dealer if uncertain about
devices that are on your vehicle.
• Certain cellular phones or radio equipment may also cause
interference. Please remove or turn such devices off.
• Do not try to install tune in a vehicle with low battery voltage.
Charge your battery if necessary.
• Unless instructed, never turn the ignition key OFF while
the Predator is plugged in diagnostic port.
• Do not unplug the Predator while it is installing the DiabloSport
performance tune.
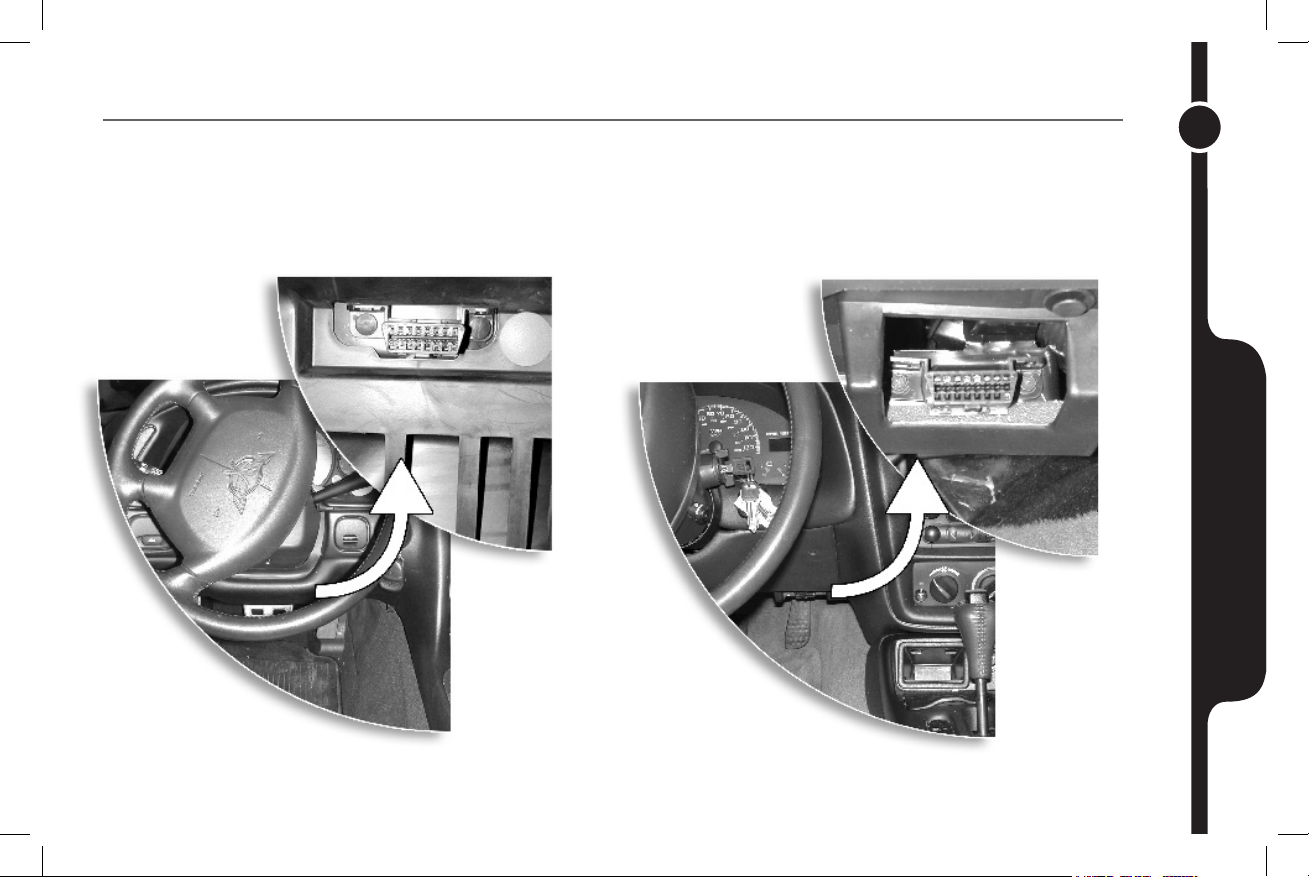
OBD-II Diagnostic port locations
99-05 Chevy, GMC, Cadillac (SUV/Truck)
OBD II location
Driver side underneath dash,
left hand side above
parking brake.
Preparing Vehicle for DiabloSport Performance Tune Installation
Preparing Vehcile For
DiabloSport Performance
Page 11
3
99-04 Corvette
Driver side underneath dash in the center, facing
floor.
OBD-II Diagnostic port locations
99-02 Firebird/Camaro
Driver side underneath dash, right hand side facing
driver.
Diagnostic Port Locations
Page 12

4
IMPORTANT!
Due to the fact that the GM OnStar system sends transmissions
periodically to the vehicle, we suggest that the system be temporarily disabled during the installation
and modification process.
If the OnStar system is not disabled during install or modification
and the system should receive a transmission in the middle of tune
install or backup, the tool will be interrupted and the process will
have to be started over again.
To avoid this problem it is recommended that the OnStar system be
disabled during tune install, backup and modification.
To disable the OnStar system, please refer to your owner’s manual
and locate the fuse(s) associated with OnStar. The OnStar system is
disabled when the OnStar light is not illuminated.
On some vehicles it is necessary to remove more than one fuse;
this will be indicated by the OnStar light remaining illuminated after
removal of the fuse from the engine compartment fuse panel.
Vehicles equipped with the GM OnStar system
Vehicles equipped with
the GM OnStar system
Page 13

5
Turn the ignition OFF!
Locate the fuse panel in the engine compartment or in vehicle
interior. Carefully remove cover and locate the RADIO, RADIO
AMP, and INFO.
Fuse Removal For GM Vehicles - Step1
Fuse Removal For All
GM Vehicles
Note: Fuses & Fuse panel location vary by
Year and Model
Note: Your vehicle may be equipped with “Special
Equipment Option Power”. If so, you must remove
the fuse labelled “SEO 1” in addition to the “Radio”,
“Amp”, and “Info” fuses.
Page 14

6
Turn the ignition ON. Look and confirm that the OnStar dash
light is turned OFF.
If the light is still ON, continue with step 3; if it is OFF, continue
with step 4.
Step 3
Turn the ignition OFF.
Locate the fuse panel located on the driver’s side dashboard,
carefully remove cover and locate the following fuses:
SEO IGN RAP 2
RDO 1 TBC ACCY
Location may vary from illustration - consult your user manual.
Remove each fuse with the ignition OFF.
Turn ignition ON, look and confirm that the OnStar Dash light is
turned OFF.
Continue and install DiabloSport tune.
Step 4
Install DiabloSport tune.
Once completed reinstall the fuses with the ignition OFF.
Fuse Removal For All Gm Vehicles - Step 2 - 4
Fuse Removal For All
GM Vehicles
Interior 1999-2002
Page 15

7
Important!
Do you have the correct predator?
Check the list of applications on the next page.
Fuse Diagram for 2002.5-2005
Fuse Removal For All
GM Vehicles
Fuse Removal For All Gm Vehicles
For LS2 vehicles...
You must remove the “Radio/Cell phone” fuse. Failure to
do so may result in radio failure due to bus communica-
tion activity. Fuses are typically located in interior fuse
box location. Please refer to vehicle owner’s manual for
exact locations.
Corvette LS2: “OnStar” and “Radio/S-Band/VICS” Fuse
GTO LS2: Fuse #’s 16, 23, and 24
SSR LS2: Fuse #’s 11, 27, and 41
Page 16

8
Predator Applications
U7198-Will cover the following!
1999-03 Corvette 5.7L LS1
1999-03 Corvette 5.7L LS6,
1999-02 Camaro 5.7L LS1,
1999-02 Firebird / Trans Am 5.7L LS1,
1999-02 Chevrolet Silverado, Tahoe, Suburban, Avalanche, (4.8L, 5.3L, 6.0L, 8.1L),
1999-02 GMC Sierra, Denali, Yukon, (4.8L, 5.3L, 6.0L, 8.1L)
2002 Cadillac Escalade,
(The U7198 will NOT work on1999 5.7L Trucks/SUV)
U7195-Will cover the following!
2003 Chevrolet Silverado, Tahoe, Suburban, Avalanche(4.8L, 5.3L, 6L, 8.1L)
2003 GMC Sierra, Denali, Yukon(4.8L, 5.3L, 6L, 8.1L)
2003 Cadillac Escalade, EXT and ESV
2003 Hummer H2
U7193-Will cover the following!
2004 Corvette 5.7L LS1
2004 Corvette 5.7L LS6
2004-05 Chevrolet Silverado, Tahoe, Suburban, Avalanche(4.8L, 5.3L, 6L, 8.1L)
2004-05 GMC Sierra, Denali, Yukon(4.8L, 5.3L, 6L, 8.1L)
2004-05 Cadillac Escalade EXT, ESV
2004-05 Hummer H2
2003-04 SSR Truck
2004 Pontiac GTO
U7191-2005 Corvette, SSR, and GTO 6.0L LS2
Predator Applications
Page 17

Installing the
DiabloSport Tune
into the vehicle
Page 18

• Locate the OBD-II diagnostic port on your vehicle. (see reference pictures on page 2)
• Connect the Predator into vehicle’s diagnostic port and turn the ignition key to ON position (DO NOT start the engine) The
following screen will be displayed: (If Predator does not turn on, please check the cigarette lighter fuse).
NOTE: FOR CORVETTE - Make sure vehicle is in “Accessory Mode”. With keys in vehicle, the “Start” button lights up green. Press “ACC” on
the Start button once. An orange LED should illuminate on the Start button and the green light should turn off. The instrument cluster message
center will display “Accessory Mode”.
*****Predator v.xrxx*****
Performance Tune
Diagnostics
Options
Predator v.xrxx
Performance Tune: This will take the user through the
process of programming and modify
ing the tune for the vehicle.
Diagnostics: This will take the user through scanning
or erasing fault codes and monitoring
live data.
Options: This contains tool options and trouble
shooting menus.
Note:
To view current tune in vehicle, go to “Options” and select “Show Last
Tune Written”. This will display last tune uploaded from Predator.
Press ESC
to go to the
previous
page during
procedures.
Installing the DiabloSport tune into a vehicle
10
Installing the DiabloSport
tune into a vehicle
Page 19

11
Select the type of Transmission for your vehicle.
Press “Enter” key.
Installing the DiabloSport
tune into a vehicle
***Select Transmission***
Autom atic
Manua l
Installing the DiabloSport tune into a vehicle
About DiabloSport Performance Tunes
Diablo Tune: Designed to add power and torque for a
stock to mildly modified vehicle.
Factory HP Tune: Allows user adjustments of stock
tune.
Original Backup: Restore the original Factory Backup
and reset the tool for use on another vehicle.
NOTE: When changing HP tunes, there is no need to
restore Factory Tune before installing a new (different) HP
tune. You will be prompted to reset parameters. Press
Yes or No as you desire.
*Premium grade unleaded fuel must be used;
Amoco, Mobil, Sunoco fuels are recommended.
NOTE: For vehicles running in areas where only 91
octane is available (ex. CA and AZ):
We recommend that you monitor your vehicle for
detonation (pinging), which is common when using lower
quality fuels. If detonation occurs, please go to “Modify
Tune” and adjust “Spark Advance” to 10% retard in
both RPM ranges. Increase the % retard if necessary to
eliminate detonation.
Page 20

12
Installing the DiabloSport
tune into the vehicle
The tool will automatically back up the factory/stock
tune. This step will only take place the very first time
the Predator is used on the vehicle. Please wait until
completed. This may take a moment!
During the backup process the gauges may sweep
and various messages may be displayed in the
message center. This is normal; do not be alarmed.
Original Backup will now
be saved
Continue
The Predator will display a progress status bar while
performing the original backup.
Installing the DiabloSport tune into a vehicle
Select the desired tune.
Press “Enter” key.
*** Select Tune ***
Diabl o Tune
Factory HP Tune
Origi nal Bac ku p
Page 21

13
Original Backup has been
saved.
Continue
Press “Enter” to continue.
You may now select “Install Tune” on the following screen.
***Performance Tune***
Install Tune
Modify Tune
After selecting “Install Tune”, and pressing “Enter”,
the Predator will install the Tune into the vehicle. A
progress bar will be displayed, followed by the screen
displayed below.
Installing the DiabloSport
tune into a vehicle
Installing the DiabloSport tune into a vehicle
Pleas e turn th e key O FF. T hen
wait 10 sec an d turn the key
ON.
Conti nue
Press “Continue”. The Diablo Tune is now installed
in the vehicle. You may now unplug the Predator.
When the Predator has completed performing
the original backup, the following screen will be
displayed.
Page 22

14
Installing the DiabloSport
tune into a vehicle
Notes
Page 23

Restoring
the Orginal Backup
(Stock tune)
Page 24

16
We recommend restoring the stock tune to the vehicle
whenever the vehicle goes in for service. This will allow any
reflashing of the PCM by the dealership without affecting the
Predator.
The stock tune can be reinstalled at any time using the
“restore original backup” feature. This feature will take the
DiabloSport tune out and reset the computer to stock. The
DiabloSport tune will be saved in the Predator.
Plug the tool into the diagnostic port, select “Performance
Tune”. From the “Select Tune” screen, select “Original
Backup”.
Restoring the orginal backup/stock tune
Select “Original Backup”. The tool will go through
the same installation process as when installing a
performance tune.
Restoring the orginal
backup/ stock tune
*** Select Tune ***
Diablo Tune
Factory HP Tune
Original Backup
Follow all the steps, and once you see this screen,
your vehicle has been restored back to stock tune:
Res to re a nd Reset done.
Page 25

Modifying
Parameters
Page 26

Modifying Parameters
The Predator allows you to modify the factory stock tune, or
the Diablo Tune. If you wish to modify a tune, simply select
“Modify Tune” prior to installing the tune.
Modify Parameters:
This
allows user to see and
adjust parameter settings
Reset ALL Parameters
: This
allows user to reset
parameters back to original
tune settings. Using the reset
feature will reset ALL modified
parameters back to original
tune parameters.
*** Modify Tune ***
Modify Parameters
Res et A LL Pa ra me te rs
Page 27

19
Modifying Parameters - Important information regarding DiabloSport Performance Tune Parameter modification
Select “Modify Parameters”, go through and carefully
read the disclaimers…
adjusted parameters;
therefore we recommend that
this should be left untouched
by inexperienced users.
DiabloSport will not be
held responsible for vehicles
with modified parameters
since we are not present to
monitor the
Press Enter if you understand
and agree else Esc to quit.
Note: Adjusting parmeters may severly affect the engine and
the performance of the vehicle. We recommend that only
experienced tuners use these functions.
Modifying Parameters
Page 28

20
Installing a
tune
into a vehicle
Modifying Parameters
Modifying Parameters
Note: Tune selection and available parameters may vary between
Predator model numbers. Not all parameters are available on all
Predators.
* Torque Management ON/OFF adjustment
o Torque Management abuse mode time limit ON/OFF
o % torque reduction vs. RPM ON/OFF
o Upshift torque reduction (all gears) ON/OFF
* Injector Adjustments
o Adjust for different injector size
o Adjust for long term fuel trims
* Catalytic Overtemp protection Adjustement
o Disable P0430 and P0430 codes
o Adjust COT enable temperature
* Multiple Misfire P0300 adjustement
o Misfire Low rev
o Misfire Low cyl
o Misfire idle cyl
* EGR disable
o Enable/disable MPH, set high to disable
o Disable P-codes: 0400,0401,0402, 0405, 1404 and 1409
* AIR code disable
o Disable P-codes: 0410, 0412 and 0418
* Rear 02 disable code
o Disable P-codes:
P0137, P0138, P0140, P0141,P 0157, P0158, P0160, and P0161
* Timing Tables 1000-4000rpm (+15/- 20%)
* Timing Table 4000-7000rpm (+15/- 20%)
* Fuel Table 2000-4000rpm (+/- 20%)
* Fuel Table 4000-7000rpm (+/- 20%)
* Idle (+ 500rpm / -300rpm)
* Speed Limiters (Trucks Only)
* Rev Limiters
* RPM Shift Points
* MPH Up and Downshifts
* Shift Timing
* Shift Pressure
* CAGS ON/Off
* Cooling Fan ON/OFF temps (LS2: Power vs. ECT)
* Re-Calibrate Speedometer for Gear and Tire Size Changes
Ex 285/75/17
Width=285 Aspect Ratio=75 Rim Size=17
Ajustable Parameters
Page 29

21
Modifying Parameters
Modifying Parameters
Once the desired parameter has been selected, its
current value will be shown. Press “Enter” to save
the adjustments.
Increase
De
crease
Save the adjustment
Back
****Install Performance*****
Insta lling t he file
Do yo u want to contin ue?
Press En ter for Y ES
Or Es c for N O.
............Gear Ra ti o. .. .. .. .. .. .
Press Enter to
save or ESC to cancel
3.72
2.00 6.00
Note: Regarding Tire Size
Adjust only if speedometer is off due to the increase
or decrease in tire size. The factory GM PCM can only
calculate up to a certain tire size before it will disable
the traction control system ( i.e. ABS brake system). It will
correct the speedometer but if tire size is over PCM limit, it
will trigger a check engine light or an ABS light. The Max
Tire size limit is a 35 inch tire.
Page 30

22
Modifying Parameters Definitions
Modifying Parameters
Definitions
%Torque Reduction vs RPM: This is Torque reduction as a function of RPM. Turning it off in
conjunction with TM “abuse mode” time limit and upshift torque reduction will eliminate
torque management. However we have noticed that the shift feel when disabling the upshift
torque reduction in trucks and SUV’s is reduced. Therefore, we recommend leaving it ON for
trucks and SUV’s.
Upshift Torque reduction: This is torque reduction control for each individual gear. Turning it
off in conjunction with TM “abuse mode” time limit and %Torque Reduction vs RPM will eliminate torque management. However, we have noticed that the shift feel when disabling the
upshift torque reduction in trucks and SUV’s s reduced. Therefore, we recommend leaving it
ON for trucks and SUV’s.
COT: This is Catalytic over tempeture protection. This parameter is used to cool down the
catalytic converters by adding fuel. This should only be disabled when cats are removed.
COT enable temp: This is the temperature to enable the COT process. Set this high 1200 to
disable it.
P-0420 turn this off when turning COT off
P-0430 turn this off when turning COT off
P0300
Multiple Misfire code. Only disable this code if it is triggered due to larger cam or other such
modifications. This parameter will raise the threshold for triggering the DTC at misfire; it will
not disable the test completely.
The following parameters are tables that dictate the misfire test. You have to turn ALL off in
order to completely disable the false P0300.
Misfire Low Rev
Misfire Low Cyl.
Misfire idle Cyl.
EGR
The EGR group contains “P” code disable for EGR related codes.
O2 sensor
The O2 sensor group contains “P” code disable for rear O2 sensor related codes.
Injector Slope: Determines the injector size and is used when correcting long term
fuel trims.
Injector change: To properly set up injector size, you have to multiply the (current
slope x injector % change). Example: changing #24 to #30 (30-24)/24*100=
25. Multiplying the entire slope by 25% will get you in range.
Determining long term fuel trims: Long term fuel trims are an accumulated value
of fuel added or subtracted during closed loop operation. These values should be
in the 0 to -2 range.To verify and tune for long term fuel trims, drive the vehicle for
30min or until warmed up, and monitor long term fuel trims. Get an average value.
The easiest way to accomplish this is to get on the highway, enable cruise control
and drive at 55mph while monitoring the data. Ideal values should be in the 0 to -2
range.
Now, once you get the average long term fuel trim value:
Positive long term fuel trims: For a positive value, subtract the value in percent in the
Predator injector slope; it is also recommended to lean both fuel tables by the same
percentage.
Negative long term fuel trims: For a negative value, add the value in percent in the
Predator injector slope; it is also recommended to richen both fuel tables by that
same percentage.
Once adjustments are made and the tune is installed, take the vehicle out and verify
the long term fuel trims as previously described. Adjust again if necessary.
Torque Management
PLEASE NOTE: Disabling torque management will put greater stress on your drive
line.
TM Abuse Mode time limit: This is the time in “abuse mode” as related to the function of temperature. Turning it off in conjunction with Upshift Torque reduction and
% Torque Reduction vs RPM will eliminate torque management. However, we have
noticed that the shift feel when disabling the upshift torque reduction in trucks and
SUV’s is reduced. Therefore we recommend leaving it ON for trucks and SUV’s.
Page 31

Diagnostic Section
Page 32

24
***Transmission Type ** *
Automatic
Manual
Diagnostic Section - How to check and erase the SES light.
The diagnostic features on this tool can check and erase
Service Engine Soon (SES) light as well as monitor live
data from supported sensors.
Select “Diagnostics” from main menu. Then select
transmission type if prompted.
Diagnostic Section
Page 33

25
Diagnostic Section
** Diagnostics **
Trouble Codes
Rea l Time Data
Log P la y Ba ck
Show Calibration IDs
Diagnostic Section - How to check and erase the SES light.
Select your transmission type, then press “Enter”.
Trouble Codes:
Allows user to view and erase
stored trouble codes
Real Time Data:
Displays live data
Log Play Back:
Displays logged data in
memory
Show Cal IDs:
Displays all calibration IDs in
the ECM
Select “Trouble Codes”
****Trouble Codes****
Show Trouble Codes
Clear Trouble Codes
Page 34

26
Diagnostic Section
Diagnostic Section - How to check and erase the SES light.
To view the specific trouble code, select “DTC information”.
DTC All: View all DTC’s
Specific DTC: Enter DTC to view status
DTC Not Ran SCC: Displays what DTC tests
where not performed
during the DTC check
****General Data****
DTC All
Specific DTC
DTC Not Ran SCC
*Select “DTC All” to view all DTC codes; once viewed, press ESC twice then select
“Erase DTC’s”, your SES light should now turn off as long as the problem is fixed. If
the light remains, the problem still exists, and needs to be diagnosed by a mechanic.
NOTE: Because the PCM performs tests of modules during driving
cycles, some modules are not tested at the time the “DTC All”
command is performed. This feature displays what modules where
excluded during the “DTC All” test. This information always bases
itself from last “Erase DTC’s” command performed.
Abbreviation list :
SES- Service Engine Soon
DTC- Diagnostic Trouble Code
SCC- Since Code Cleared
Page 35

Real Time Data
Page 36

Monitoring Real Time Data
Predator will display an array of sensor input
values as the engine is running. This is known
as real-time data.
• Select “Diagnostics” from the main screen.
• Select “Real Time Data”
• Monitor desired parameters
NOTE: Only values supported by the vehicle model
will be displayed.
Abbreviation
If you select “Abbreviations”, you will be able to look
through a list of all the abbreviations that may be used
during the live data session.
Testing
Unless instructed, DO NOT USE THIS MENU!
The “Testing” menu is designed to aid DiabloSport in
troubleshooting your Predator.
If you select “Show Calibration IDs”, the following
screen will be displayed.
** **Calib rations ** **
xxxxx xxx: EC M Softwar e
xxxxx xxx: Veh Sy sCal
xxxxx xxx:FuelSy sC al
xxxxx xxx: Veh Sp dSens Ca l
xxxxx xxx: En gD iagCal
The above “x”’s are placeholders for the actual GM
part numbers for each individual calibration or software
set written to the ECM. If the list is longer, simply use
the arrow keys to scroll down the screen to view all ID
numbers.
Page 37

Options Section
Page 38

Options Section
When you select “Options”, the following parameters may be displayed on the screen (due to functional
differences from one vehicle model to another, you may have only a few of these parameters available):
*****Options*****
PC. Communication
Display Serial No.
Set Password
Clear Password
Tool ID
Show Current Ticks
Buy Ticks
Performance Type
Car Tune
Send Software Info
• This option is used to upload/download info to the PC
• This option shows the tools serial number and manufacture date
• This option is used to set a security password
• This option is used to clear the security password
• This displays the identification number of the tool
• This option displays the amount of ticks available
• This option is used to buy more ticks
• Performance tune information
• Last tune written to the vehicle
• Option for Revolution Software
The Options menu is mainly for the DiabloSport Predator Dealer.
It contains functions for up- and downloading of tunes into the tool, tick purchases and specific tool identification.
Page 39

1.My Predator will not power up when I plug it into the OBDII port. Why?
A: Make sure that the cigarette lighter fuse in your vehicle is functional. You may also want to try plugging the Predator into any other
vehicle with an OBDII port to see if it powers up. If it does not, please return to point of purchase for a warranty exchange.
2.My Predator lights up, but nothing happens.
A :Please return your Predator to point of purchase for warranty exchange.
3. My Predator is flashing “Script error: Interpreter stopped.”
A: Verify that you have done the following:
-Pulled the proper fuses from the fuse panel
-Disabled any aftermarket electronics in the vehicle such as alarm systems, stereos, CD players etc.
-Closed the doors and applied the parking brake.
-Removed anything that is plugged into the cigarette lighter.
4. My Predator says “FEATURE NOT SUPPORTED ON THIS VEHICLE,” What do I need to do?
A: Check that your Predator is on the latest revision. Look on the top of the main menu of the Predator after it boots up to see your
revision information. Check the number after the word “Predator” and verify that it matches the latest revision on our website...
www.diablosport.com
5. The Predator says “VEHICLE NOT IN DATABASE”, what should I do?
A: Check that your Predator is on the latest revision. Look on the top of the main menu of the Predator after it boots up to see your
revision information. Check the number after the word “Predator” and verify that it matches the latest revision on our website...
www.diablosport.com. If you update your Predator and it still displays this message, please call technical support at (561)908-0040.
Troubleshooting
Page 40

 Loading...