

RACK MOUNT KIT, P/N 401929, INCLUDES
RPM4™
Rack Mount Kit
P/N 401929
Installation Instructions
QTY PART NO
1 123699 1 Front panel
2 124155 2 Side bracket
4 100972-Z 3 M4 hex nut
4 102668-Z 4 M4 split lock washer
4 101016-Z 5 M4 x 12 SHC screw
4 100918-Z 6 M4 flat washer
1 123703 7 Rear support bracket
1 123764 8 Foam gasket
4 103448-Z N/A M3 x 12 self-tapping screw
FIGURE
CALLOUT DESCRIPTION
INSTALLATION INSTRUCTIONS
Remove the four feet from the bottom of the
RPM4™ by removing the screw and then
removing the foot. Replace the screw with the
shorter M3 x 12 self-tapping screw included in this
kit. Repeat for the other three feet.
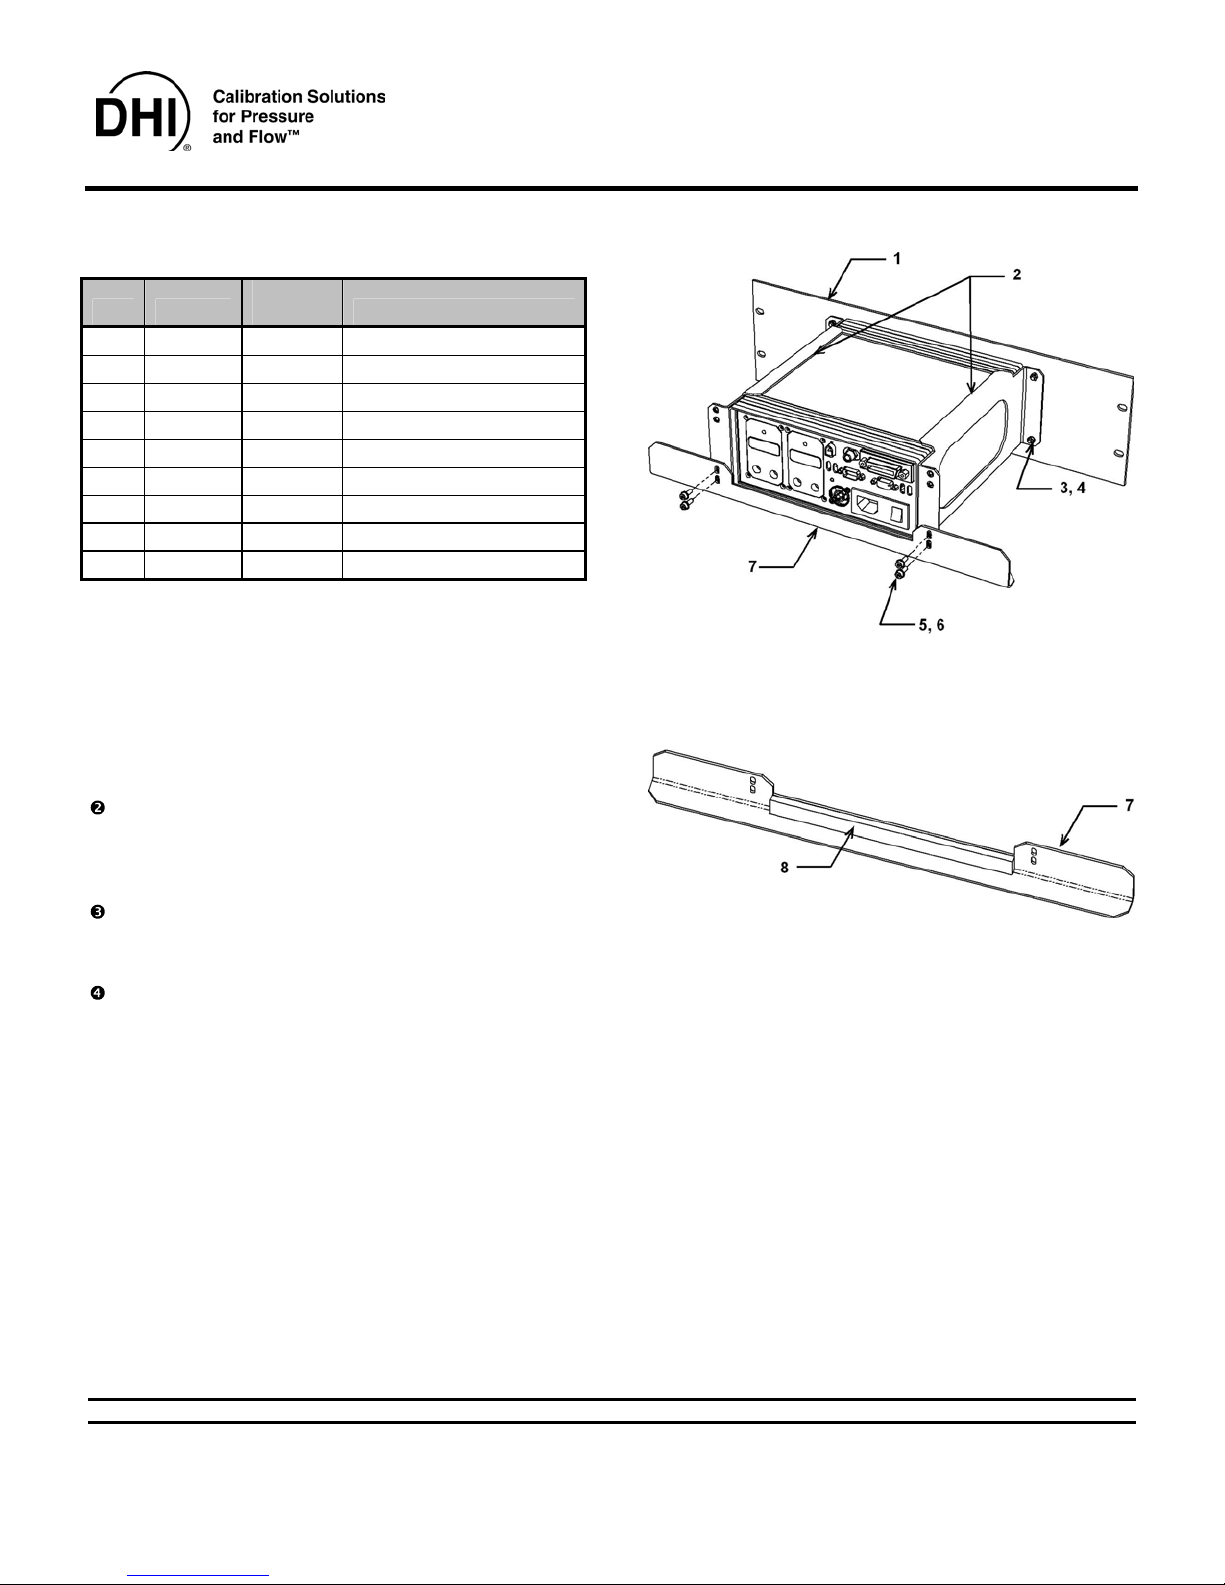
Place one side bracket (2) on each side of the RPM4.
Position each bracket with the front panel
attachment flange (flange with two holes) facing
the front of the RPM4.
Attach the front panel (1) to the side brackets (2)
using four M4 split lock washers (4) and four M4
hex nuts (3). Recommended torque is 3 Nm.
Figure 1. Rack Mount Kit
Figure 2. Rear Support Bracket and Foam
Remove adhesive backing from foam strip (8).
Adhere the foam strip to the rear support bracket
(7), centering the foam as shown in figure 2.
Attach the rear support bracket (7) to the side
brackets (2) using four M4 flat washers (6) and
four M4 X 12 SHC screws (5). Recommended
torque is 3 Nm.
For adequate support of the RPM4, the rear
support bracket (7) shall be supported on the side
rails of the rack system or by other means.
RPM4 is a trademark, registered and otherwise, of DH Instruments, Inc.
Document 560061b 041124
DH Instruments, Inc.
4765 East Beautiful Lane
Phoenix AZ 85044-5318
USA
Tel 602.431.9100
Fax 602.431.9559
dhi@dhinstruments.com
www.dhinstruments.com
 Loading...