

Page 1
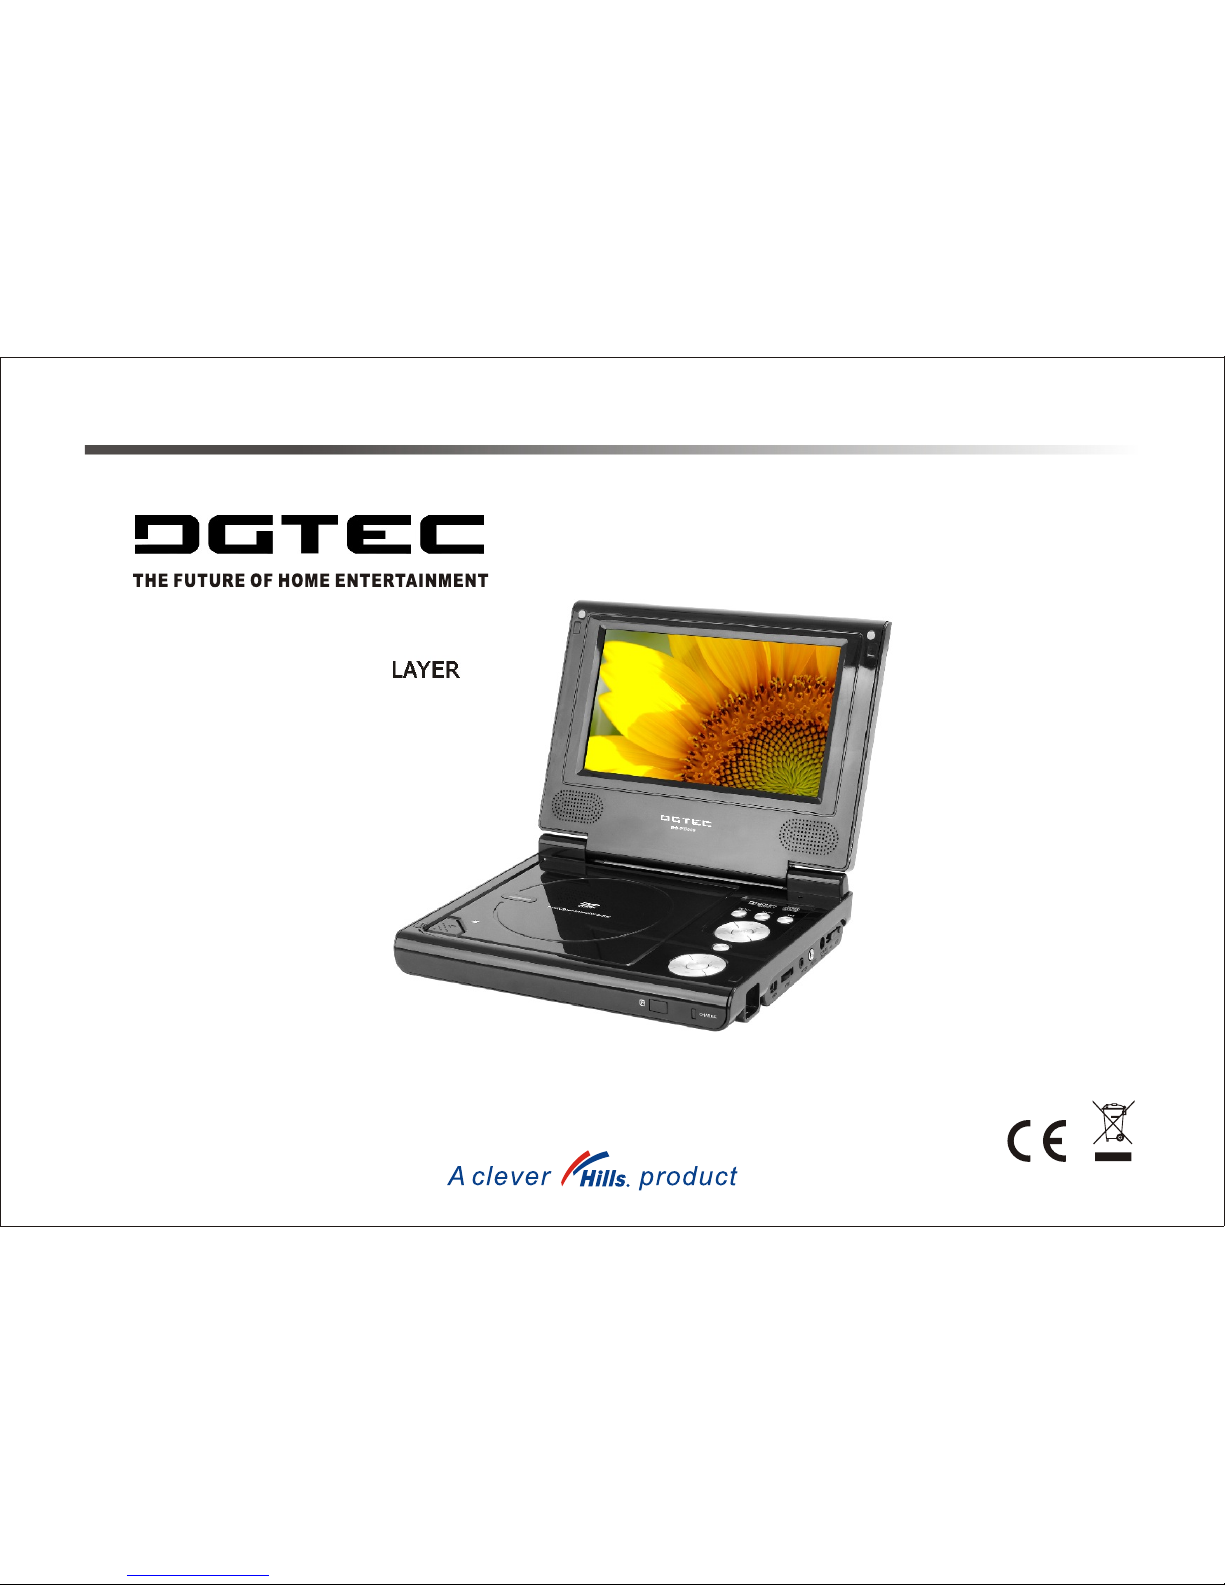
Please read this User Manual carefully to ensure proper use of this
product and keep for future reference.
Technical Support:-1800 189 941
DG-PD009
DVD/MPEG4/CD/MP3/PLAYERDVD/MPEG4/CD/MP3/PLAYER
USER MANUAL
Page 2
Safety Precautions
1
2
3
INTRODUCTION
Remote Control
CONNECTIONS
Connecting to a TV set
4
PICTURE CD PLAYBACK
MP3/WMA/MPEG4
5
6
SYSTEM SETUP
6
Accessories
Panel Illustration
Connecting to the USB
4
Advanced Features
OTHERS
Specifications
8
8
Content
Page 3
Safety Instructions
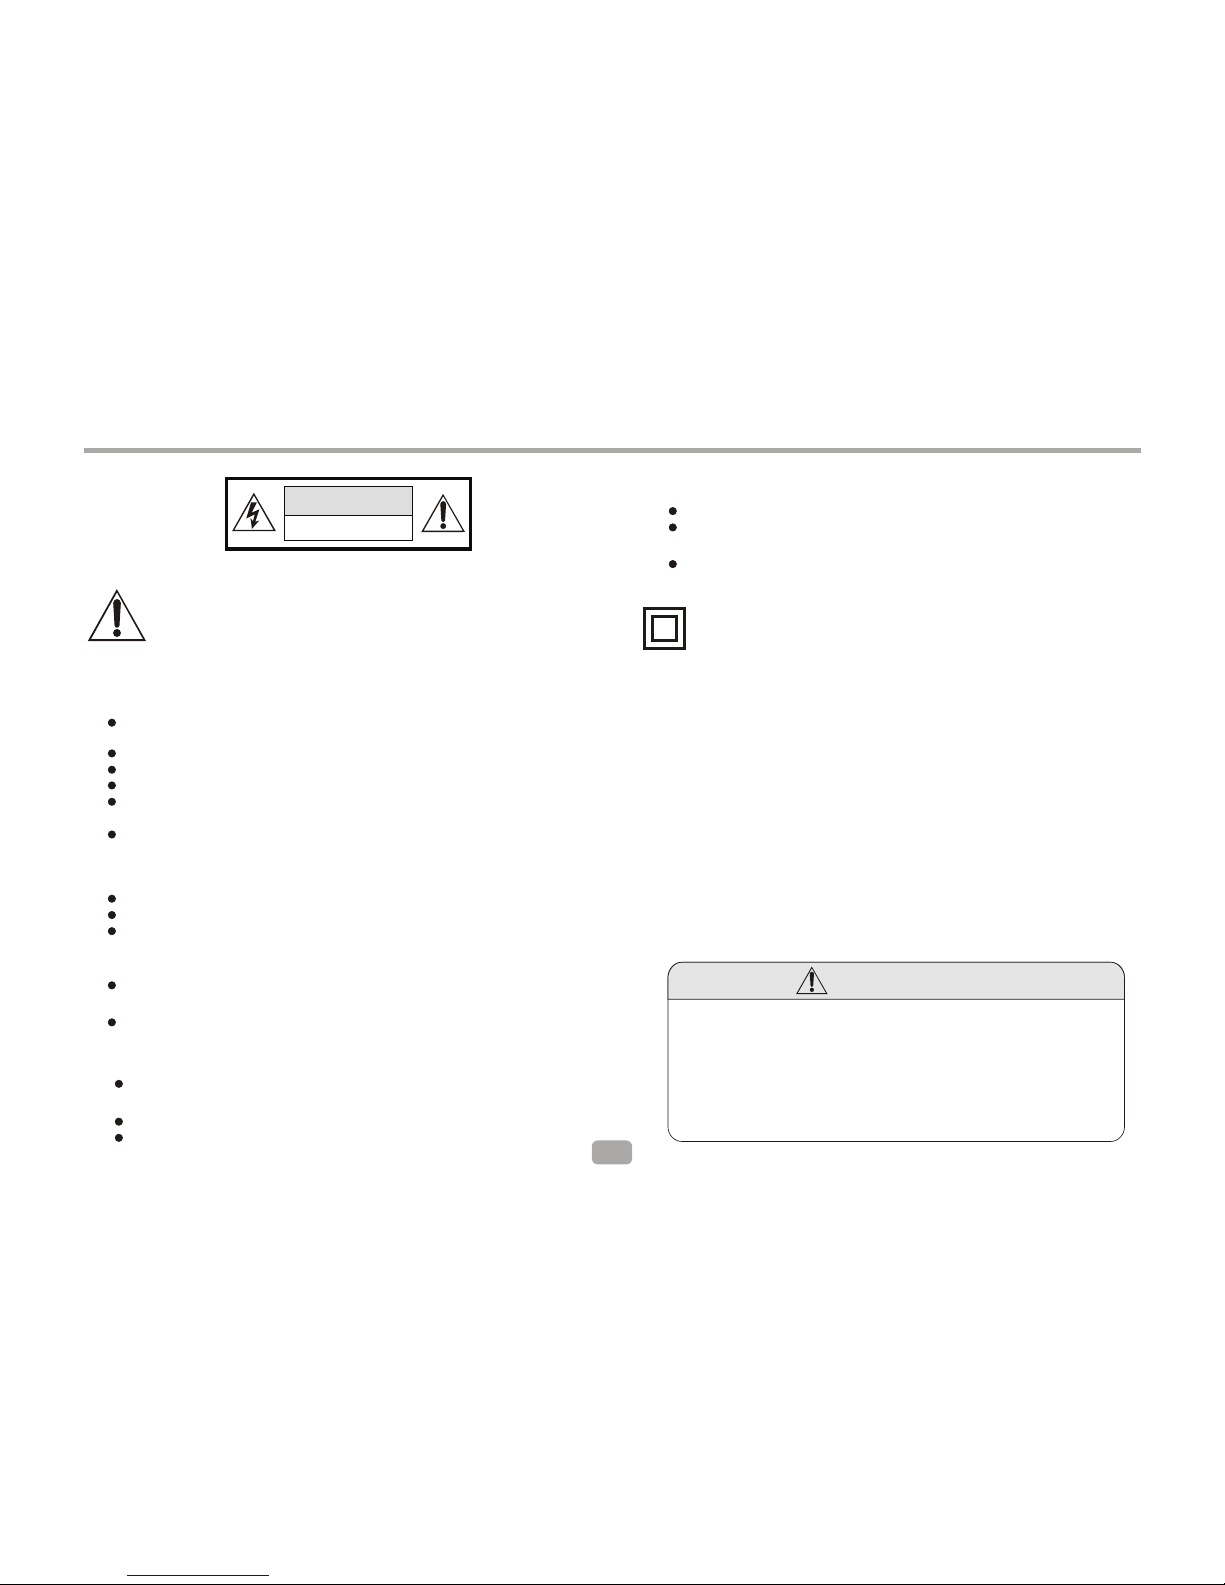
CAUTION
RISK OF ELECTRIC SHOCK
DO NOT OPEN
Position the cables so that they cannot be walked on or
pinched by items placed on or against them.
Do not use the in humid or damp conditions.
Do not allow the portable DVD Player to get wet.
Do not expose the portable DVD Player to dripping or splashing.
Do not place water filled objects such as vases on top of the
portable DVD Player.
Do not place naked flame sources, such as candles, on the top
of the portable DVD Player.
portable DVD Player
Cleaning
ALWAYS unplug the portable DVD Player before you clean it.
Do not use liquid or aerosol cleaners.
Clean the portable DVD Player with a soft, damp (not wet) cloth.
Ventilation
The slots and openings on the set top box are for ventilation.
Do not cover or block them as it may cause overheating.
NEVER let children push anything into the holes or slots on
the case.
Servicing
There are no user serviceable parts in this portable DVD
Player.
When servicing, refer to qualified service personnel.
Consult your dealer if you are ever in doubt about the
installation, operation or safety of this unit.
Safety is Important
Keep this information in a safe place for future reference.
Please read all the safety information before using the product.
Safety Considerations.
To ensure your safety and the safety of others, please
read the Safety Instructions before you operate this
product.
Battery Disposal
Please ensure batteries are disposed of safely.
Check with your local authority for disposal regulations.
Never dispose of batteries in a fire or with other household
waste.
This symbol indicates that this product incorporates double
insulation between hazardous mains voltage and user
accessible parts. When servicing use only identical
replacement parts.
WARNING: To reduce the risk of fire or electric shock, do
not expose this apparatus to rain or cords.
1. The apparatus shall not be exposed to dripping or Splashing and
that no objects filled with liquids, such as Vases, shall be placed
the apparatus.
2. The mains plug is used as the disconnect device, the disconnect
device shall remain readily operable.
3. To be completely disconnect the power input, the mains plug of
apparatus shall be disconnected from the mains.
4. The mains plug of apparatus should not be obstructed or should
be easily accessed during intended use.
1
Special notice
A few highlights or dark spots may occur on the LCD screen. It is a
very common phenomenon of the activematrix display technology,
and does not mean any defects or faults. Never try to repair this
machine by yourself. In case of any faults. Please turn off the unit at
once, and notify . The display is made up of many precision
electronic components. Any disassembly or modification may lead to
further damage.
DGTEC
Page 4
1
2
3
4
5
6
7
8
9
10
11
12
13
14
15
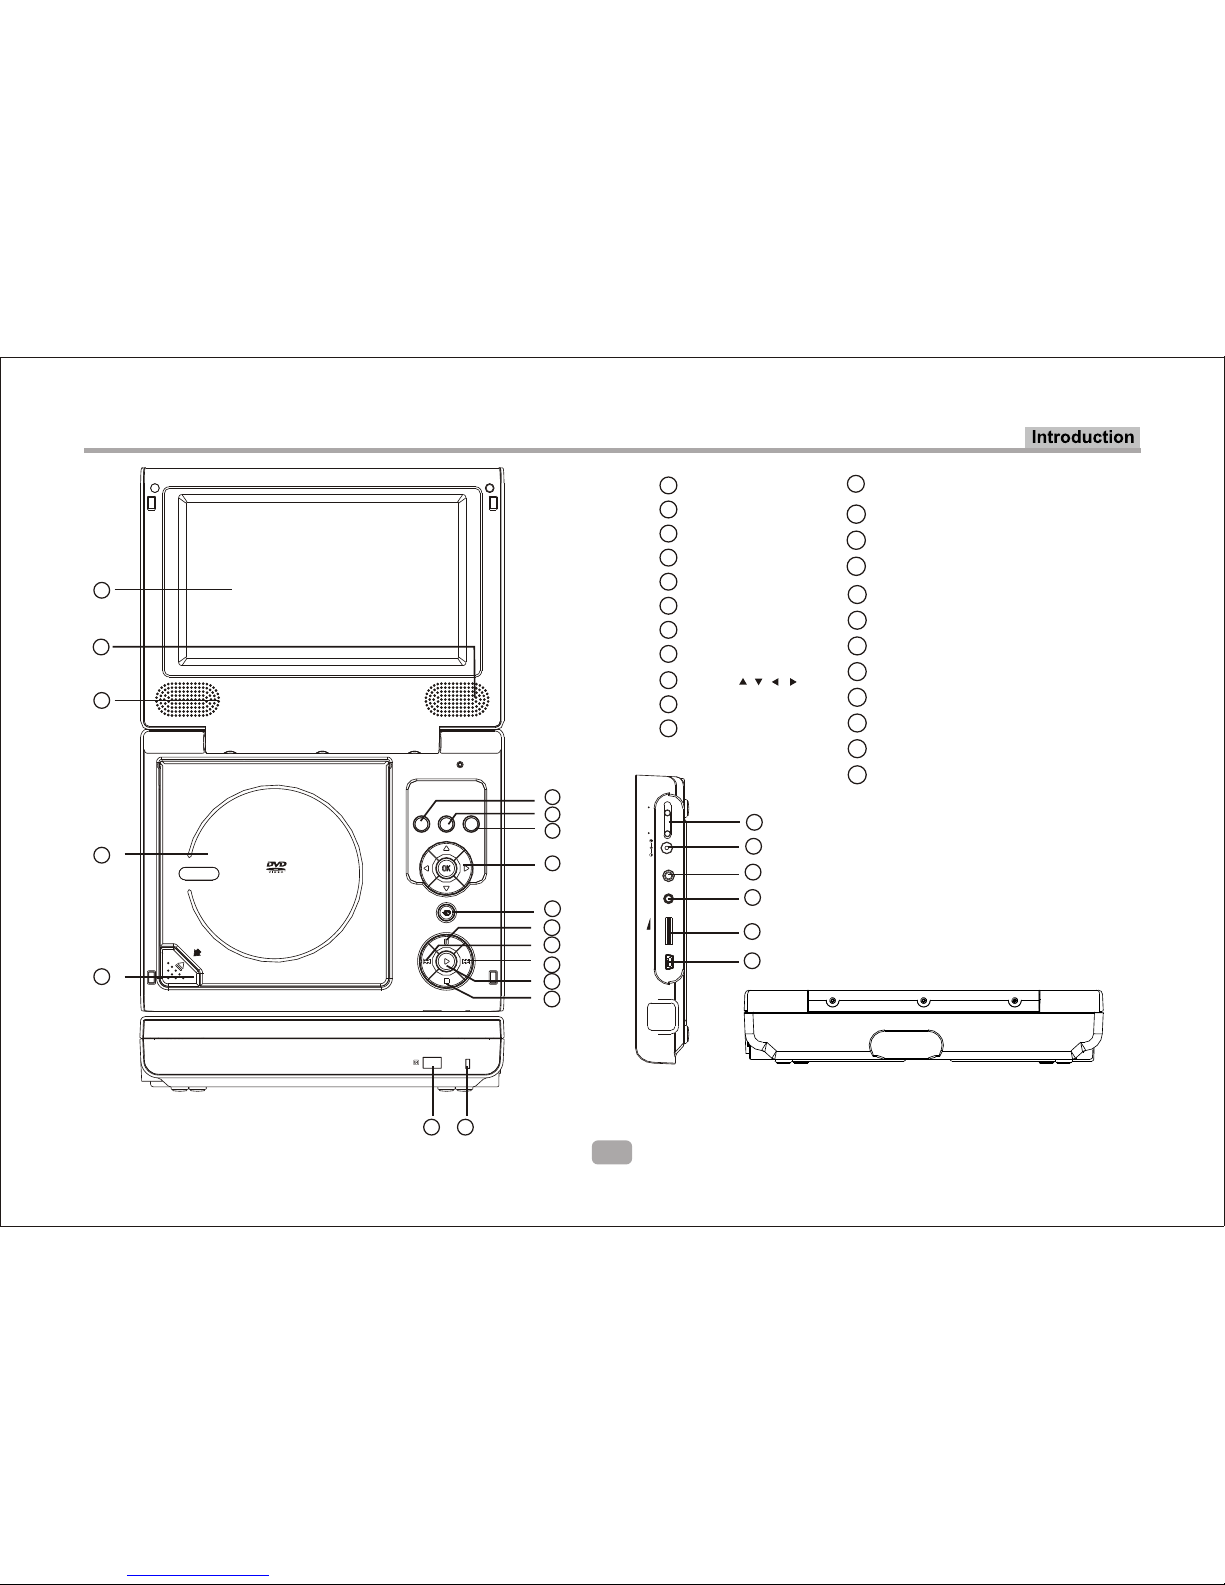
LCD DISPLAY
SPEAKER RIGHT
SPEAKER LEFT
DISC TOP
OPEN DISC TOP
SETUP
MENU
TFT
MOVE( , , , )
SOURCE
PAUSE
PREV
NEXT
PLAY
STOP
1
2
3
4
11
12
13
14
15
6
7
8
9
10
16
17
5
DVD/CD/MP3/HDCD/CD-RW
SETUP
TFT
MENU
CHARGE
VOL ON OFFAV PHONEUSB
DC IN 12V
16
17
18
19
20
21
22
23
CHARGE
SENSOR
POWER ( ON/OF)
DC 12V INPUT JACK(power supply)
PHONE JACK
AV OUTPUT
VOLUME
USB
18
19
20
21
22
23
Panel Illustration
2
Page 5
3
1
2
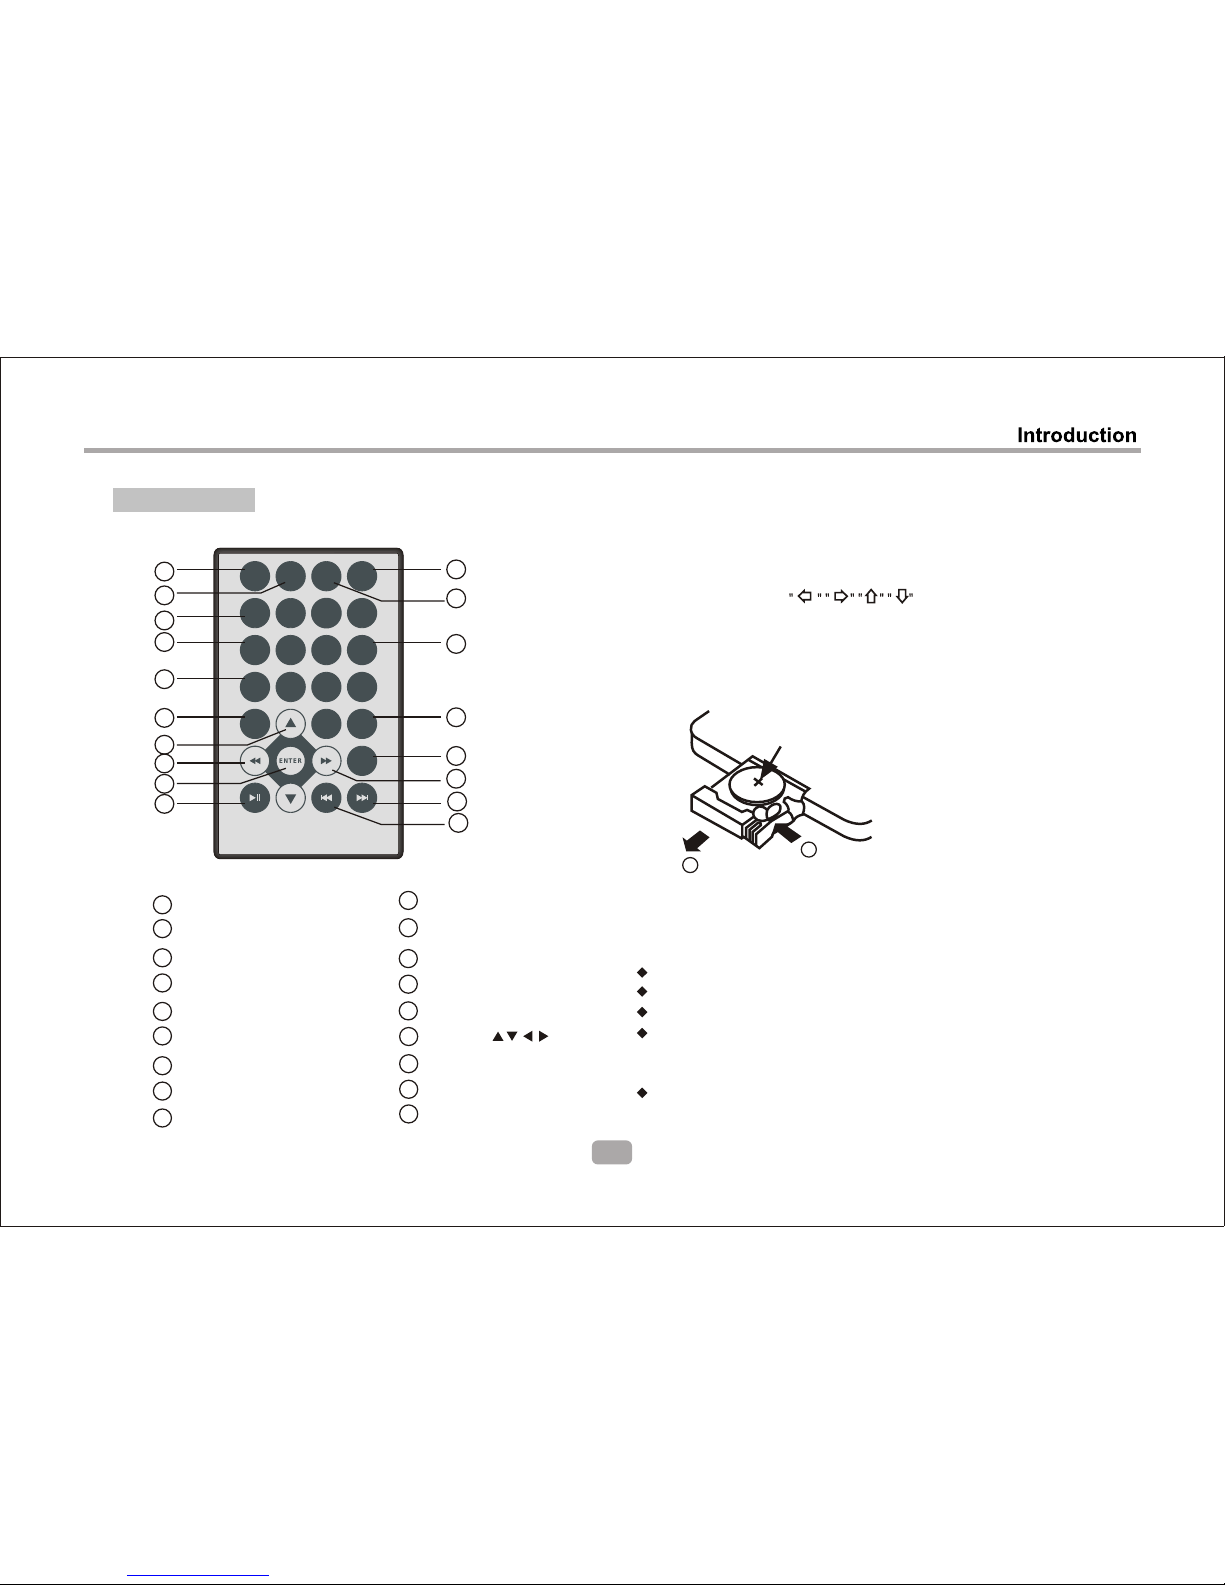
CR2025
HOW TO REPLACE THE BATTERY
STEP 1: PUSH THE BUTTON TOWARD LEFT;
STEP 2: PULL THE BATTERY LOADER OUT.
Remote Control
BATTERIES
INCORRECT USE OF BATTERIES MAY CAUSE THEM TO LEAK,
CORRODE OR EXPLODE.
Be sure to place the batteries in the correct direction.
It is dangerous to charge/heat/open or short-circuit the batteries.
Do not leave dead or expired batteries or mix old/new batteries.
When not using the remote control for a long duration of time,
remove the batteries. When operating range becomes reduced,
replace all batteries with new, fresh ones.
If leakage from the battery occurs, wipe the battery liquid from the
battery compartment, then replace.
Remote Control
Note:
1. Please note that reference numbers for the remote are
described on page 15 to 20 of this manual.
2. In this manual, will be used to represent
different NAVIGATION ARROWS on the remote respectively.
3. In order to operate any of the remote functions, you must first
press the Power button on the DVD player.
4. Some of the keys .have multiple functions
SOURCE
MENU
ANGLE
STOP
0
7 8 9
4
5
6
1 2
3
REPEAT
SUBTITLE
AUDIO
ENTER
DISPLAY
GOTO
SETUP
7
9
10
11
12
1
2
3
4
5
6
13
14
15
16
17
8
18
ANGLE
GOTO
MENU
NUMBER KEY SELECT
NEXT
PREV
9
8
7
6
5
4
3
2
1
STOP
SOURCE
FWD
DISPLAY
SUBTITLE
AUDIO
REPEAT
13
12
11
10
14
SETUP
MOVE ( )
15
16
17
18
REV
ENTER
PLAY/PAUSE
Page 6
4
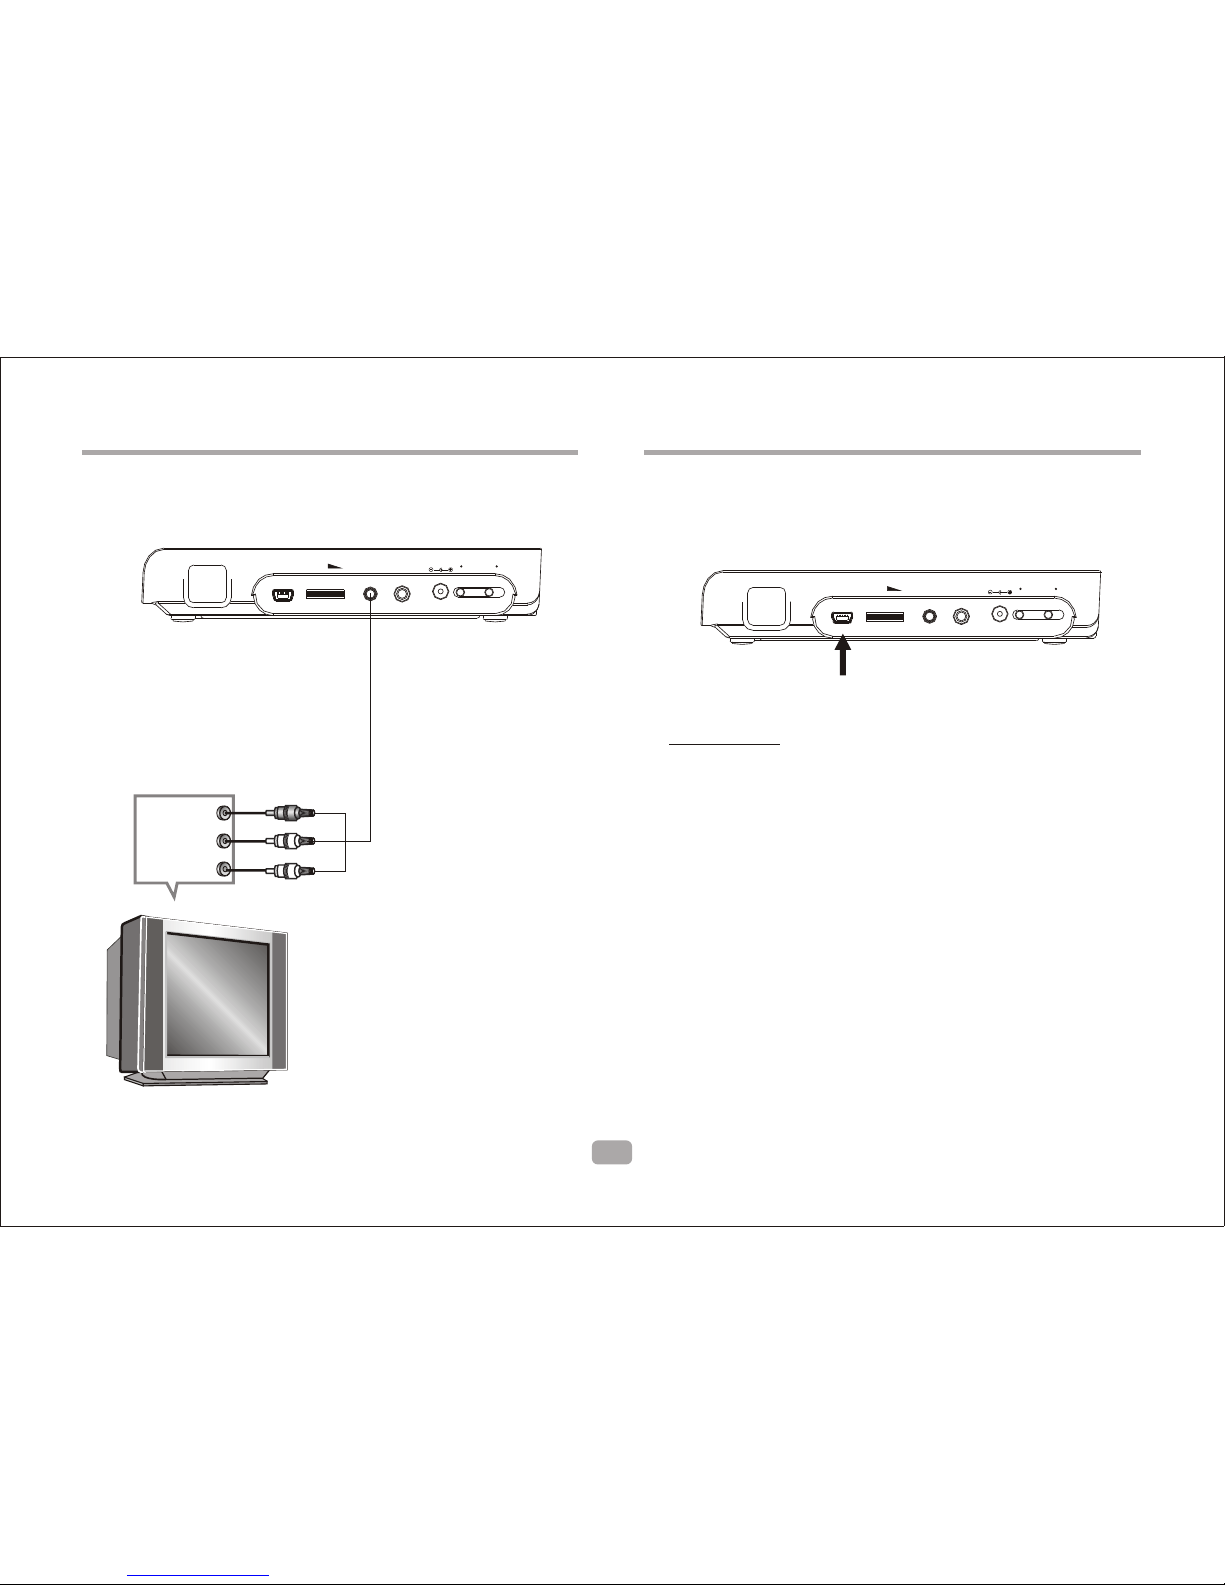
Connecting to a TV Set
Connections
L
R
CVBS
Red
Green
Yellow
VIDEO IN
AUDIO IN
VOL ON OFFAV PHONEUSB
DC IN 12V
Connect to the USB
Connections
Press the SOURCE key on the remote control repeatedly
until USB mode is displayed.
VOL ON OFFAV PHONEUSB
DC IN 12V
USB
USB interface
This unit has a USB jack to play MP3 music, JPEG or other files.
Press the <SOURCE> button to USB mode.
NOTE:
When using USB function, please do not insert in the wrong
direction.
select
Page 7
MP3/WMA/MPEG4
AVI
Mp3
Mp4
Photo
WMA
XVID
Repeat off
Mode Normal
Filter
JPEG Preview
Audio
1/7
1
2
101
102
103
104
105
00:00:15
Repeat off
Mode Normal
Filter
Music Playing
MP3/WMA/MPEG4
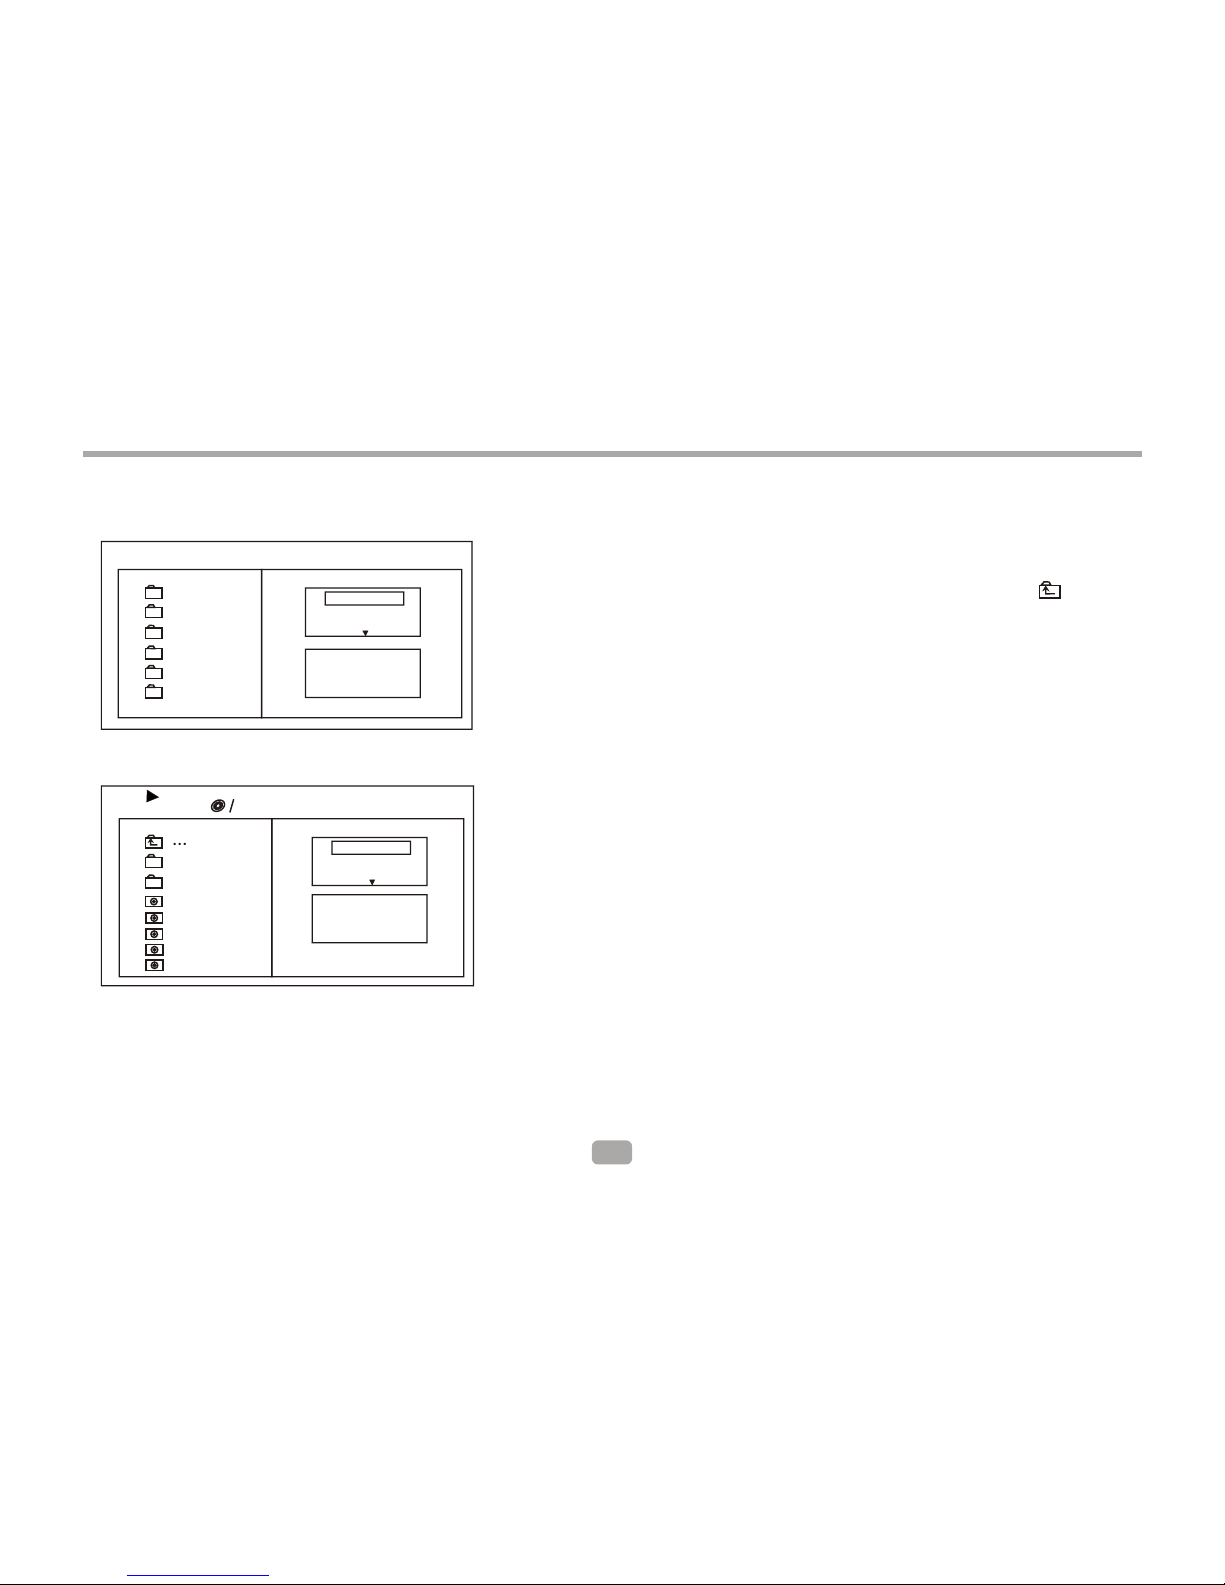
Press Direction key to select the root directory, then press ENTER to enter into
the sub directory. Press Direction key to choose the desired track, then press
ENTER or PLAY to play the music or movie.
If you want to return to the main menu, press Direction key to select icon
and press ENTER button.
Filter: Allows selecting the categories of files displayed in the browser list.
This selection is made from 3 categories: Audio, Photo and Video.
Repeat: To switch different repeat playing mode
discs will display a menu similar to this diagram.
Browser
Mode: Select different playing mode
Normal: Shuffle mode is inactive.
Shuffle: Shuffle mode enabled. When playback reaches the end of the current
chapter/track, playback jumps to a random chapter/track. As the end of
each chapter/track is reached, another random chapter/track will be played
until all tracks/chapters have been played or the Shuffle mode is cancelled
by toggling to a different Mode Option.
Music Intro: In this mode, the media will play 10 seconds then skip to next media
Edit Mode: To enable programmed playback mode. When you select the mode,
press LEFT Direction key to directory and press ENTER to choose the
desired track and press Add to program to start program playback.
Program view: Display program track
view: Display track directory
Add to program: Select the track press Add to program to add the track of the
program play directory
Clear program: In the complete stop state(press the STOP button twice),
select the track press Clear program to delete the track from the
program play directory
5
Page 8
PICTURE CD PLAYBACK
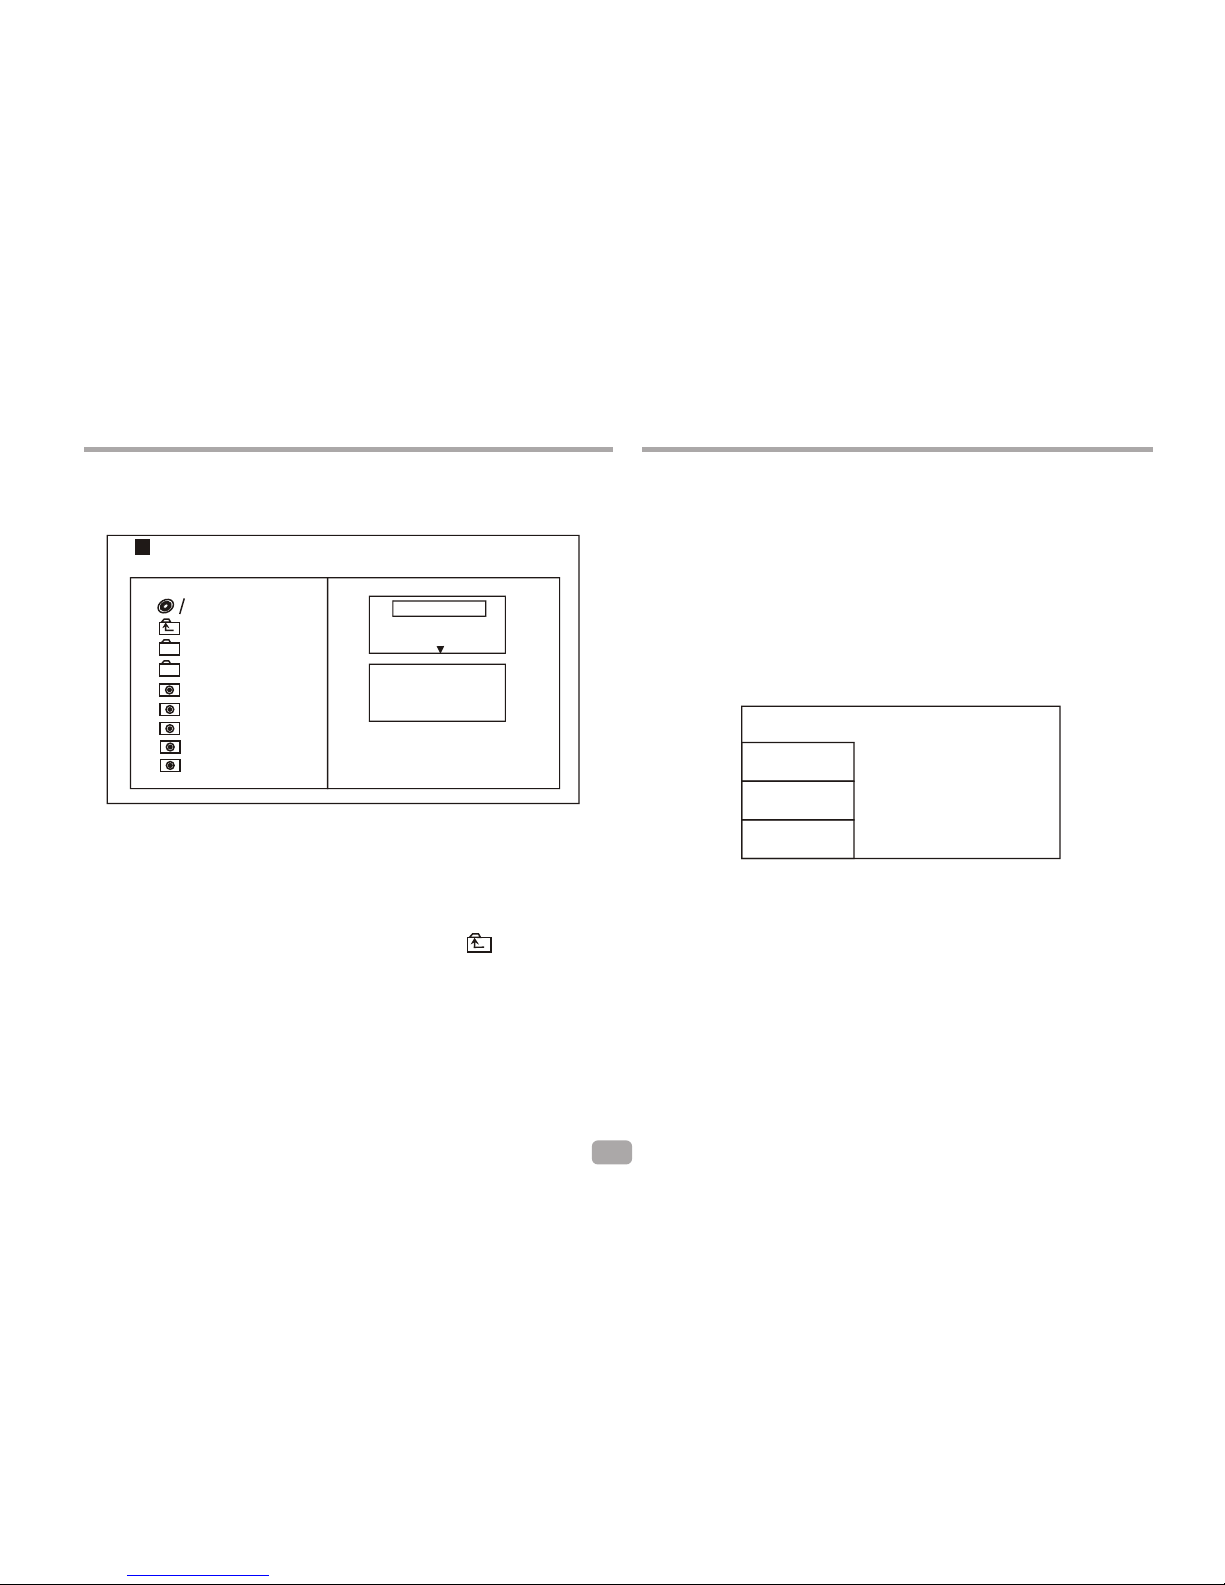
PICTURE CD discs will display a menu similar to this diagram.
1/7
1
2
100
102
103
104
105
Repeat off
Mode Normal
Filter
JPEG Preview
Photo
Press Direction key to select the root directory and then
press ENTER button to enter the sub directory. Press
Direction key to select the desired picture and then press
ENTER or PLAY to view the picture. If you want to return to
the main menu, press Direction key to select icon and
press ENTER button.
Image rotation
In picture play state, press Direction key to rotate the
picture, press ANGLE button to change the picture scan
mode.
6
SYSTEM SETUP
MENU OPERATION
Press the SETUP button on the remote control, the SETUP
MENU(main)will be displayed.
After accessing the setup menu, press the direction buttons for
up and down movement to select an item, then press the ENTER
button to confirm.
Press LEFT direction button to return to the menu of upper level.
To exit the setup, press the SETUP button again. In the SETUP
MENU, you may choose any of the following options.
LANGUAGE SETUP
Select Language in the setup menu, and display the Language
submenu:
OSD Language
Use this item to select the language of the setup menu and screen
display.
MPEG4 Subtitle
Audio
Follow the operating instructions stated in
Subtitle
This option provides the preset subtitle language.
Follow the operating instructions stated in DVD MENU SETUP
different MPEG4 subtitle encoding option
DVD MENU SETUP
This option provides built-in disc dubbing language options.
to
select an option.
Select
to
select an option.
Language
Video
Rating
Misc
OSD Language
Subtitle
MPEG4 Subtitle
DVD Menu
Page 9
SYSTEM SETUP
VIDEO SETUP
Select Video in the setup menu to display the Video submenu:
DVD Menu
This option provides the titles menu language options.
Follow the operating instructions stated in DVD MENU SETUP
to select an option.
Language
Video
Rating
Misc
TV System
Smart Picture
TV System
This product supports output of various system, including NTSC
and PAL. If your TV set has only NTSC or PAL system, the screen
will blink and become colorless when the wrong system is selected.
Note: For more information of output format, refer to the
instructions or your TV set.
Smart picture
Adjust the display effect for video output:
Standard: default effect.
Bright: internal setting for bright view effect.
Soft: internal setting for soft viewing effect.
Dynamic: user adjusted brightness, contrast, color etc.
7
RATING SETUP
Select Rating in the setup menu to display the Rating submenu:
Note: Not all DVD support ratings.
Parental Control
Selecting a Rating allows the user to set the parental control
feature of the player Select Parental Control, and press ENTER
to change the different mode.
Note: Unlock the password before setting Parental Control.
Set Password
Use the 0-9 keys to input four digits(password), then press ENTER
to confirm.
Note: If you forget your password, please use the universal
password 6666 to unlock.
Language
Video
Rating
Misc
Parental Control
Set Password
MISC SETUP
Select MISC in the setup menu, and display the submenu:
* Use Default Settings
Reset setup data to factory default and re-load disc.
Language
Video
Rating
Misc
Use Default Settings
Page 10
8
Specifications are subject to change without notice.
Other
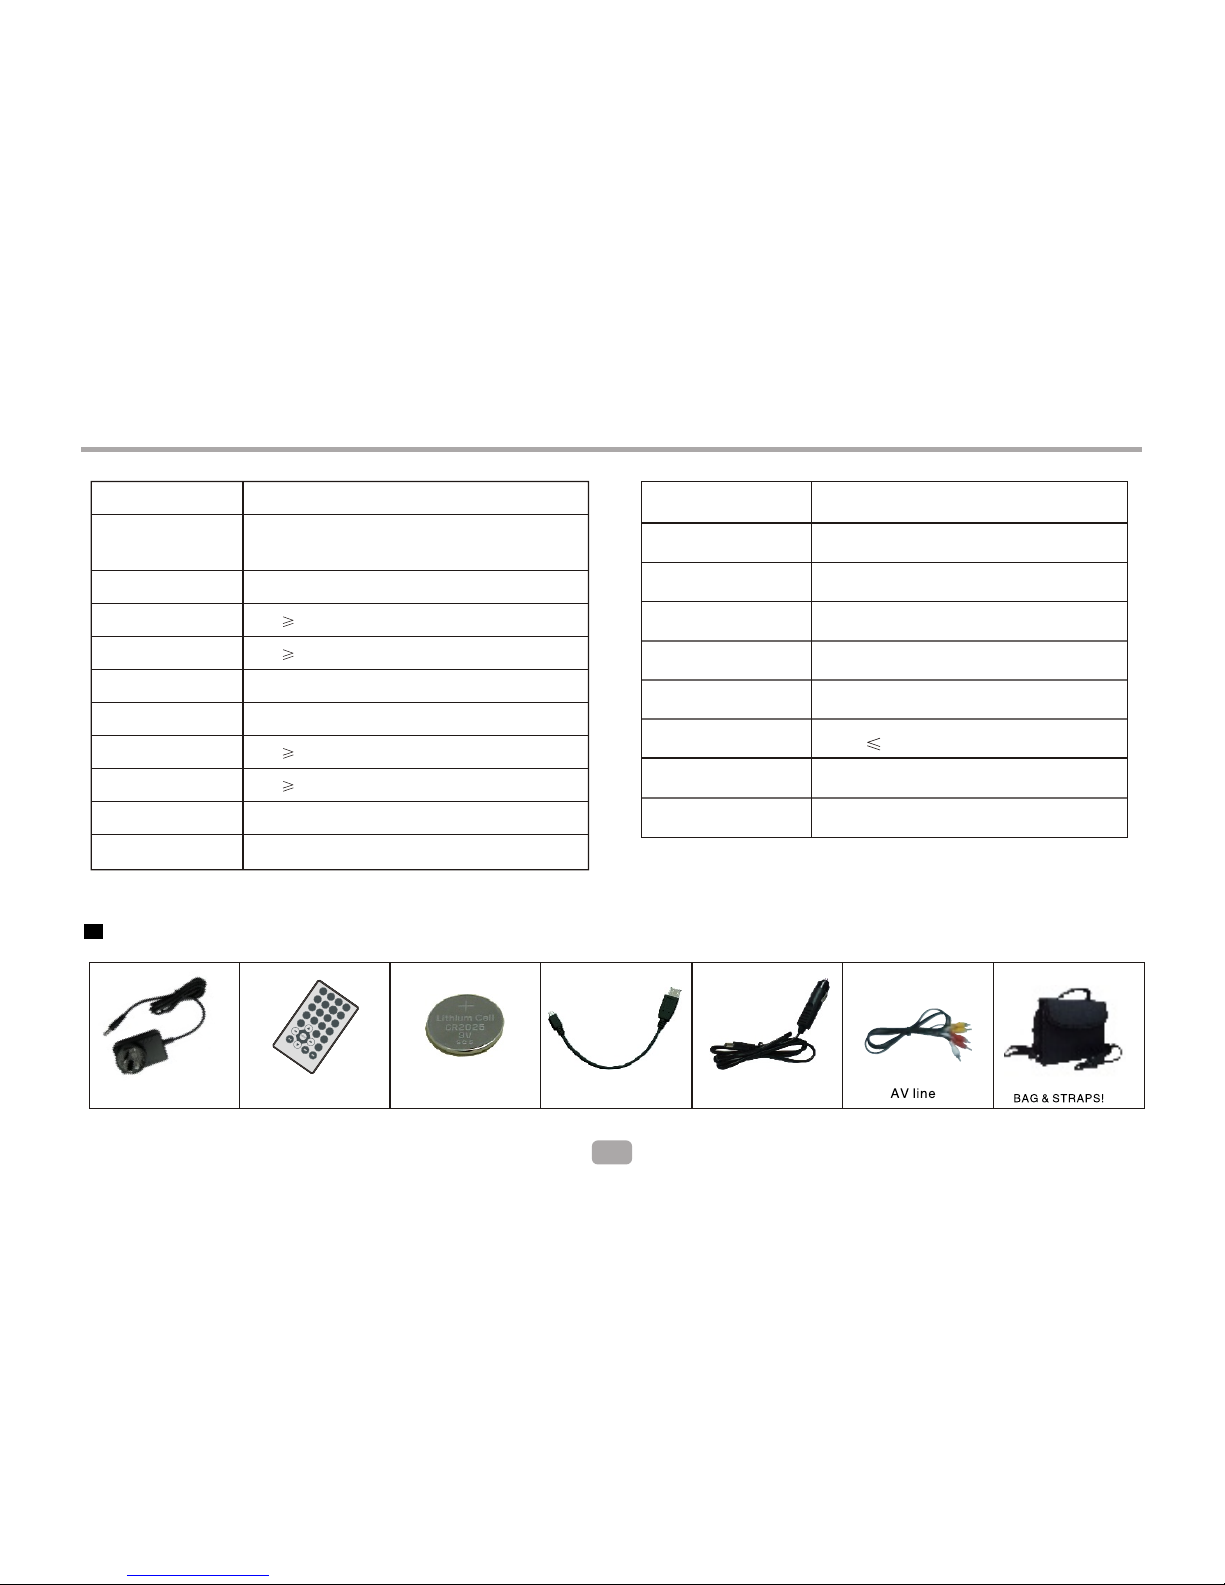
Specifications
Play mode
Disc mode
Video characteristic
Video S/N ratio
Resolution
Audio characteristic
Frequency response
Audio S/N ratio
Dynamic range
Distortion
D/A Converter
NTSC/PAL
DVD,VCD, CD, MP3, CD-R, CD-RW, JPEG,
DVD+ -R/W, MPEG4,
65dB.
500 lines.
fs 96KHz: 20Hz-20KHz:+/-1dBI
90dB
80dB
< 0.01%
96KHz/24bit
Output characteristic
Display Device
Screen Size
Video output
Audio output
Power Voltage
Power consumption
Size
Weight
Color TFT-LCD
7 inches
1Vp-p(75 W)
2CH
DC IN 12V
15W
206x160x40mm
1.0kg
AC/DC adapter
Remote control
LI type batteries
Accessories
SO
UR
CE
MENU
AN
GL
E
ST
OP
0
7
8
9
4
5
6
1
2
3
RE
PEAT
SU
BT
ITLE
AU
DI
O
EN
TE
R
DI
SP
LA
Y
GO
TO
SE
TU
P
USB Cable
Car adapter
Page 11

If at any time in the future you should need to dispose of this product please
note that: Waste electrical products should not be disposed of with household
waste. Please recycle where facilities exist. Check with your Local Authority
or retailer for recycling advice. (Waste Electrical and Electronic Equipment
Directive)
 Loading...