

Page 1
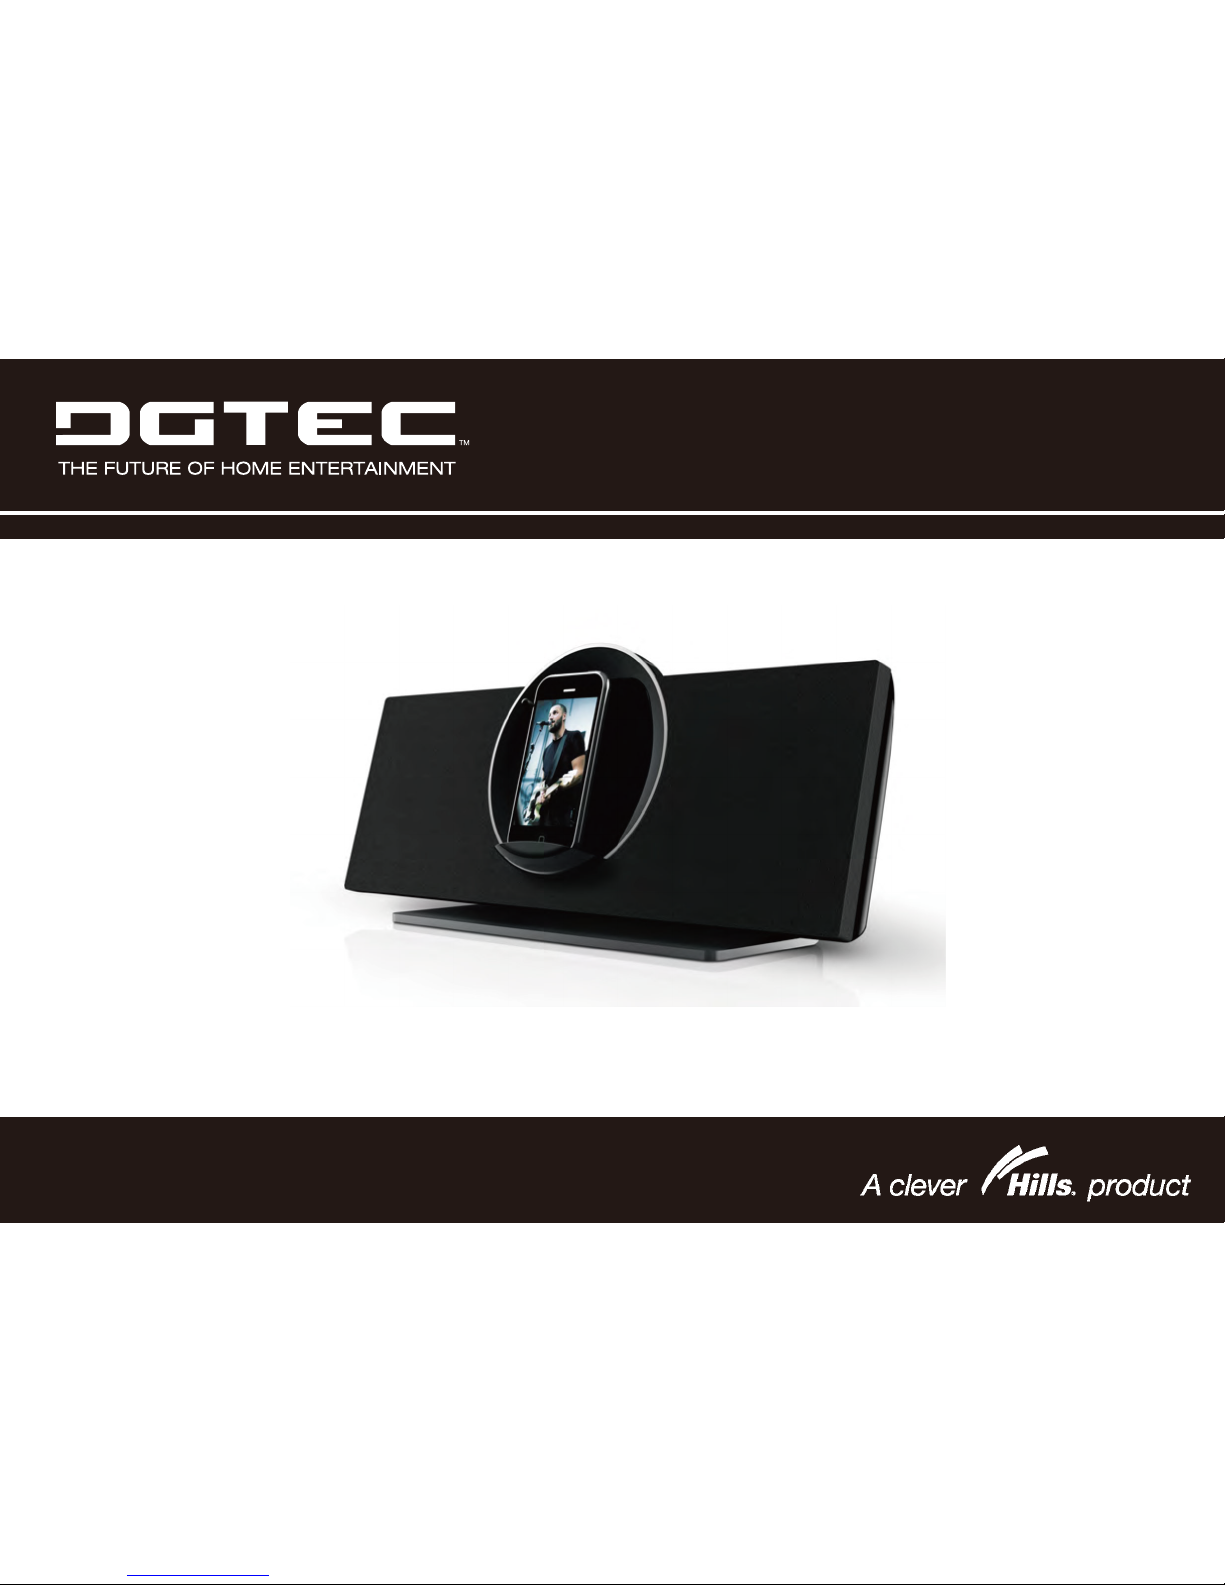
Sound System for iPod® & iPhone
®
User Manual
DG-iPodMSS
Page 2

Page 3
NEED HELP?
If you are experiencing difficulty operating this product or require set up
assistance please contact the DGTEC Service Centre. The call is free from
anywhere in Australia. Our operators will assist you in plain English without the
technical jargon:
(Australia)
8:OOam-6:OOpm Australian EST
* Subject to change without notice.
HELPPROVIDED
Page 4

1 THANK YOU 1
Package Contents..................................................................................... 4
Features....................................................................................................4
2
AT A GLANCE 5
Main Unit ..................................................................................................5
Remote Control........................................................................................ 7
About the Remote Control Battery.............................................9
Table of Contents
Page 5

3
GETTING STARTED 10
Connections............................................................................................10
Connecting Power....................................................................10
Connecting an iPod
®
or iPhone®............................................10
Connecting an Auxiliary Device .............................................. 11
Basic Controls..........................................................................................11
4 USING IPOD®/IPHONE® MODE 12
Controls..................................................................................................12
Browsing iPod/iPhone Menus with the Remote ..................... 13
Rotating the Dock ...................................................................................
13
Table of Contents
Page 6

5 USING AUX MODE 14
Controls ................................................................................................. 14
6 SPECIFICATIONS 15
7 SUPPORT 16
8 SAFETY & REGULATORY STATEMENTS 17
Table of Contents
Page 7

Thank you for purchasing the DG-iPodMSS for iPod® and iPhone®. Please read this manual
carefully before using this device and retain it for future reference.
Package Contents
tinu niaM
♦
Power adapter♦
Remote control♦
3.5mm auxiliary cable♦
Instruction manual♦
If any of the above items are missing,
please contact the supplier on
1800 189 941.
This package may contain plastic
bags or other materials that pose
a hazard to children. Be sure to
safely dispose of all packing
materials after opening.
Features
Premium sound system designed for iPod
®
♦
& iPhone
®
Built-in Universal dock charges and plays ♦
your iPod/iPhone
One-touch dock rotation lets you browse ♦
with Cover Flow or watch movies in
landscape mode
Bass Boost circuitry for low end frequency ♦
enhancement
Supports iPod shuffle and other portable ♦
players with a 3.5mm audio connection
Adjustable ambient lighting♦
| 1
Thank You
Page 8
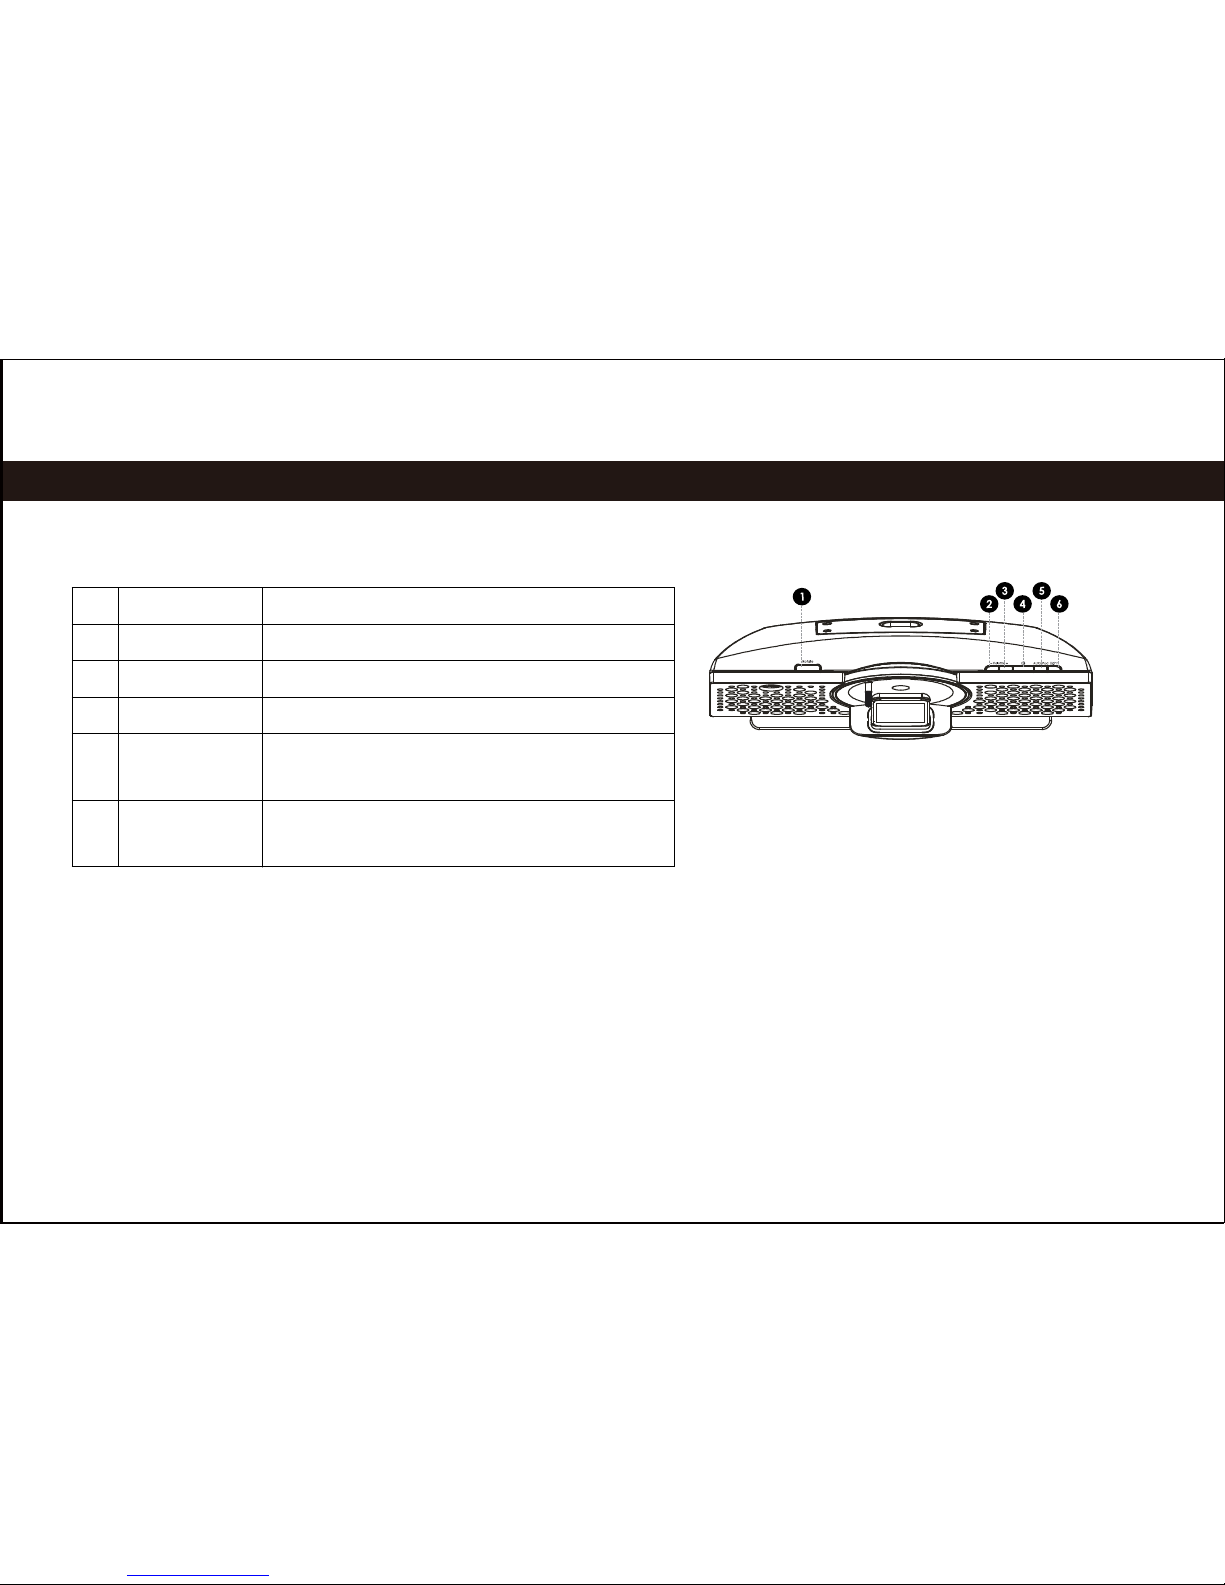
Main Unit
1 [Rotate] Press to rotate the dock.
2 [Volume –] Press to decrease the volume level.
3 [Volume +] Press to increase the volume level
4 [Standby] Press to turn the unit on or off.
5 [AUX/iPod] Press to switch between AUX and
iPod modes.
6 [Light] Press to increase or decrease the
intensity of the background light.
|
2
At a Glance
Page 9
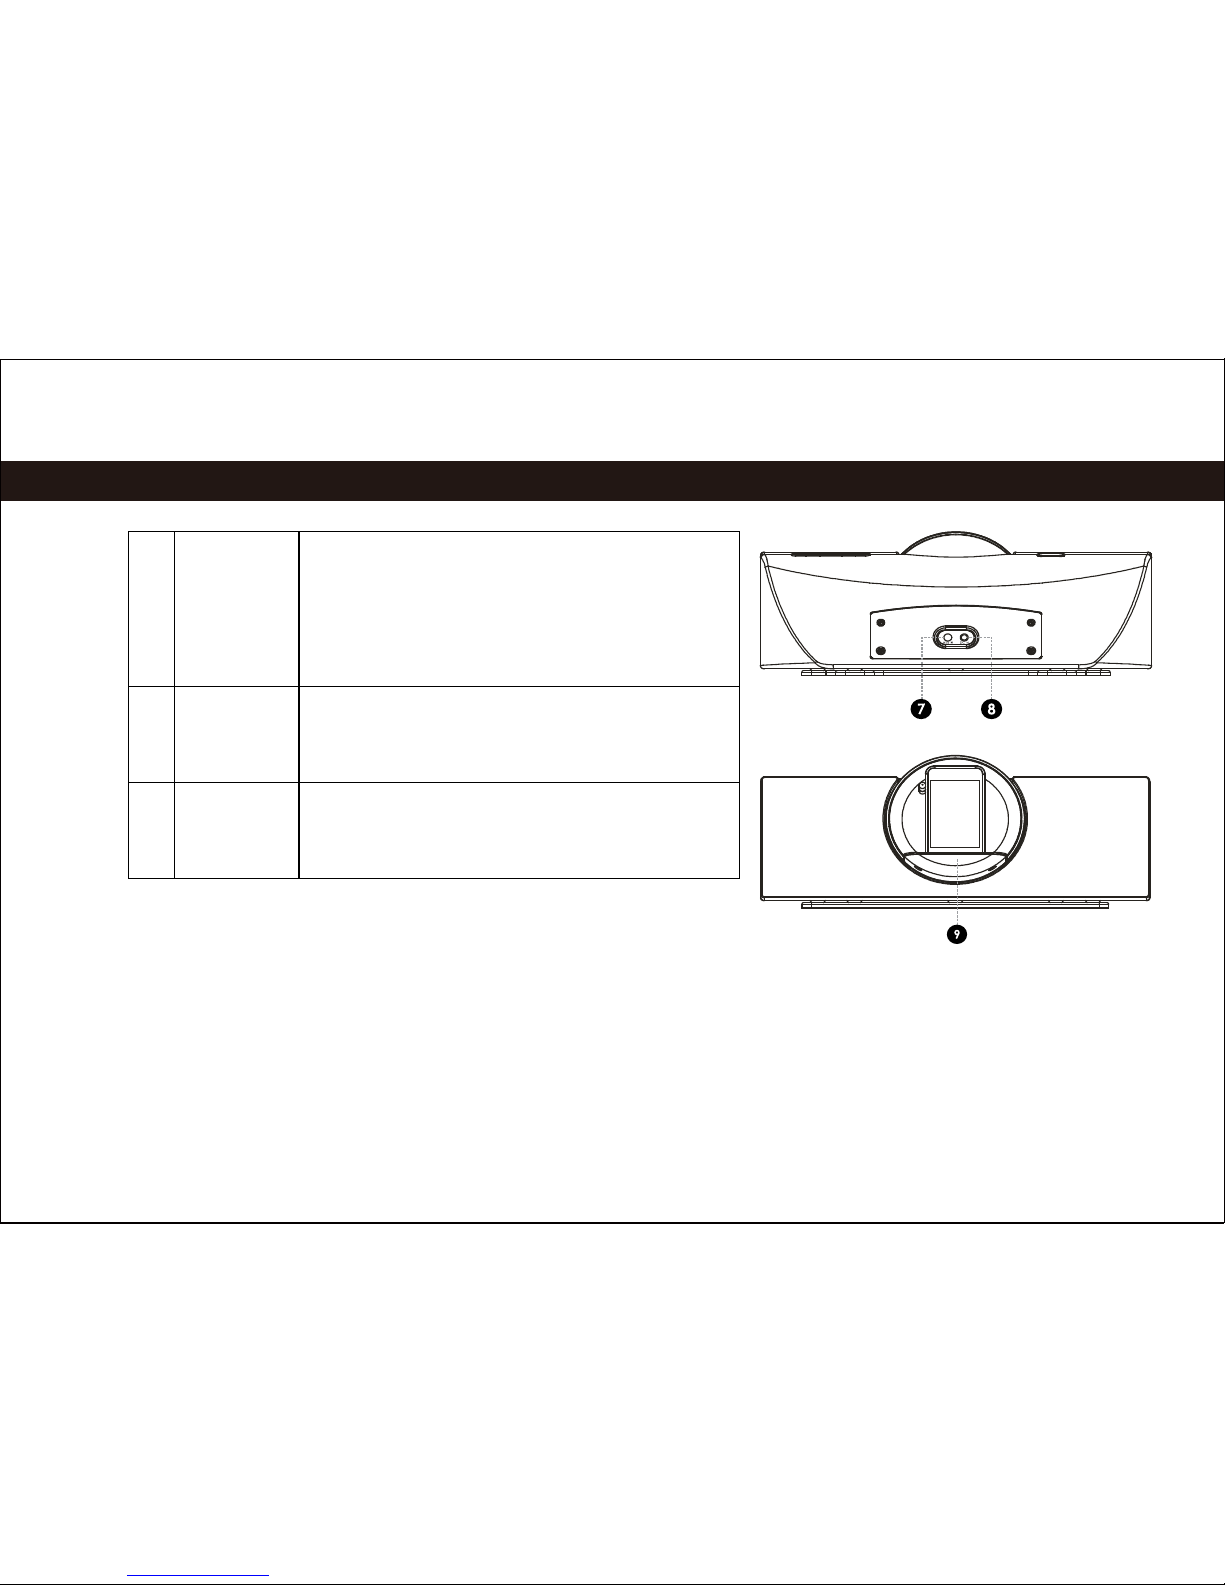
7 AUX IN 3.5mm auxiliary connector. Use a
3.5mm auxiliary cable to connect
portable audio devices with a 3.5mm
headphone output (e.g., iPod shuffle,
MP3 players).
8 DC IN Power connector. Use the AC adapter
to connect to an AC 100-240V power
outlet.
Universal
Dock
Dock for iPod
®
and iPhone®.
Connector for your compatible iPod
or iPhone.
9
| 3
At a Glance
Page 10
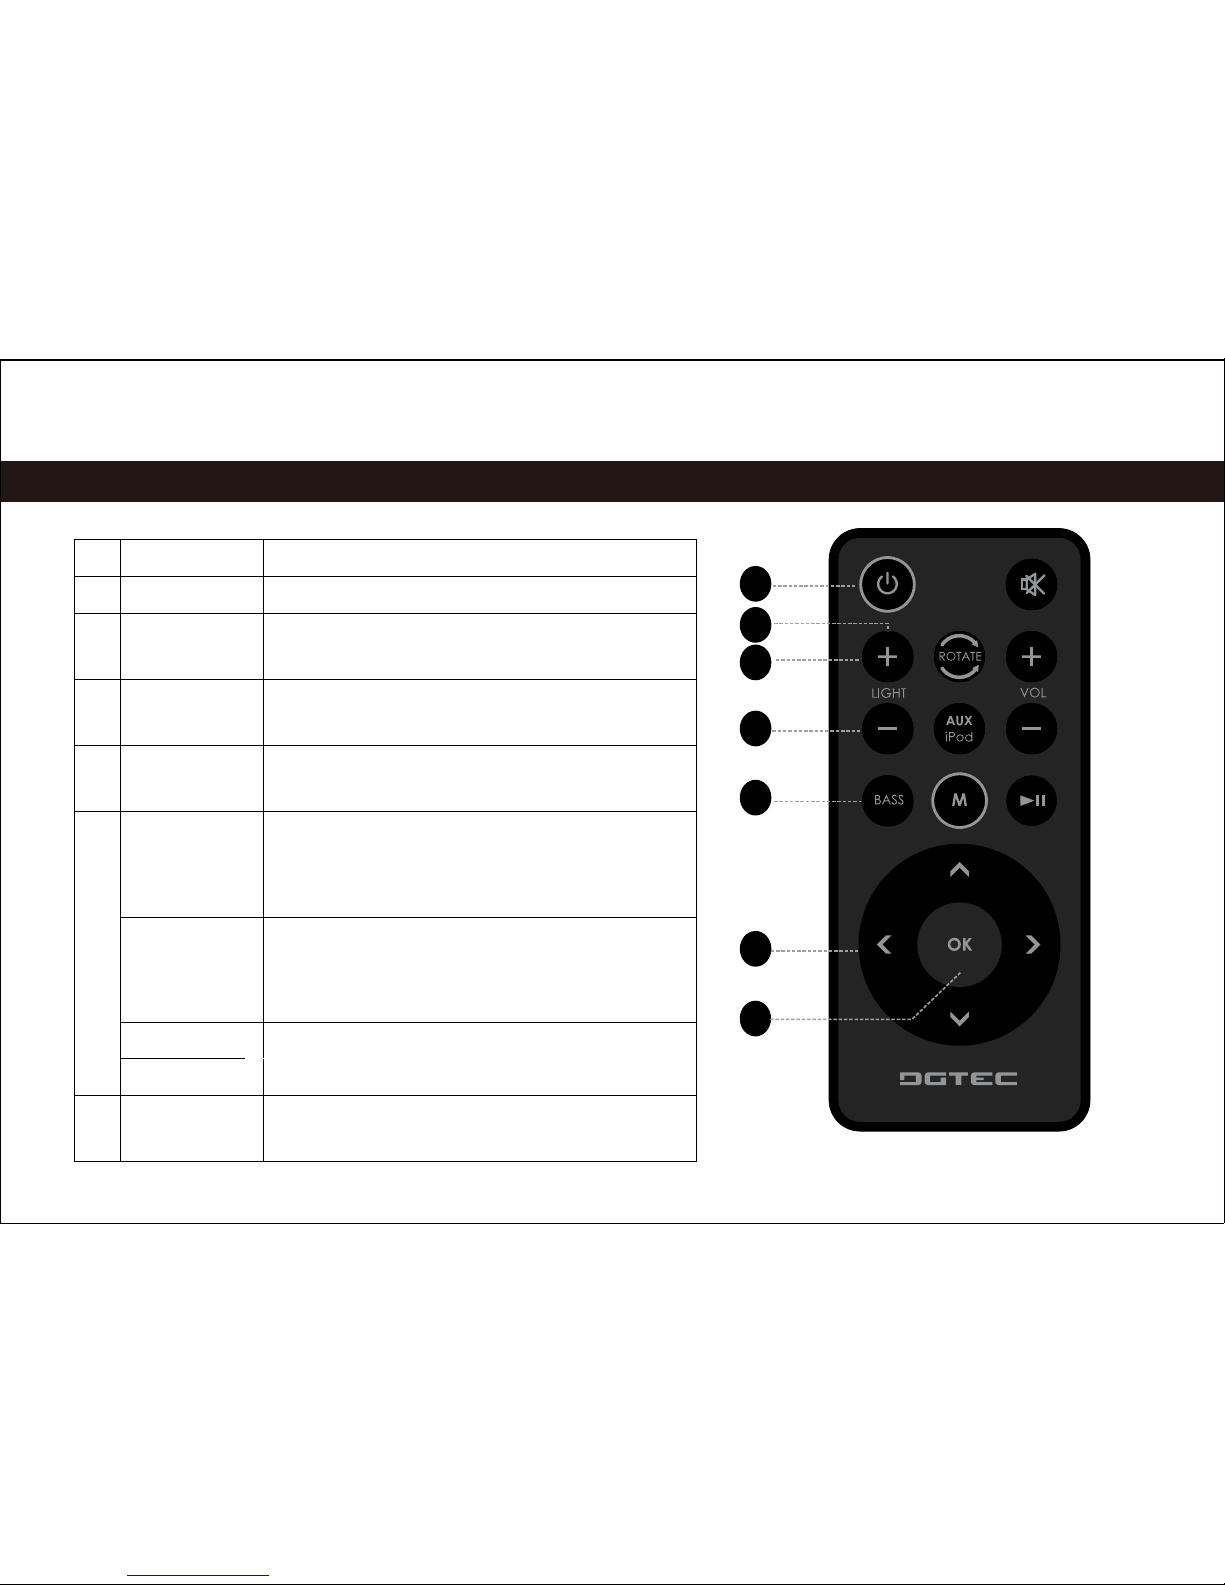
1 [Standby] Press to turn the unit on or off.
2 [ROTATE] Press to rotate the dock.
3 [LIGHT +] Press to increase the intensity of the
background light.
4 [LIGHT –] Press to decrease the intensity of the
background light.
5 [BASS] Press to turn the Bass Boost
enhancement on or off.
6 [LEFT] Press to skip to the previous track.
Hold to scan in reverse quickly
through the current track.
[RIGHT] Press to skip to the next track.
Hold to scan forward quickly through
the current track.
[UP] Use to browse iPod
®
or iPhone®
menus.
[DOWN]
7 [OK] Press to enter an iPod or iPhone
menu selection.
|
4
Remote Control
1
2
3
4
5
6
7
Page 11
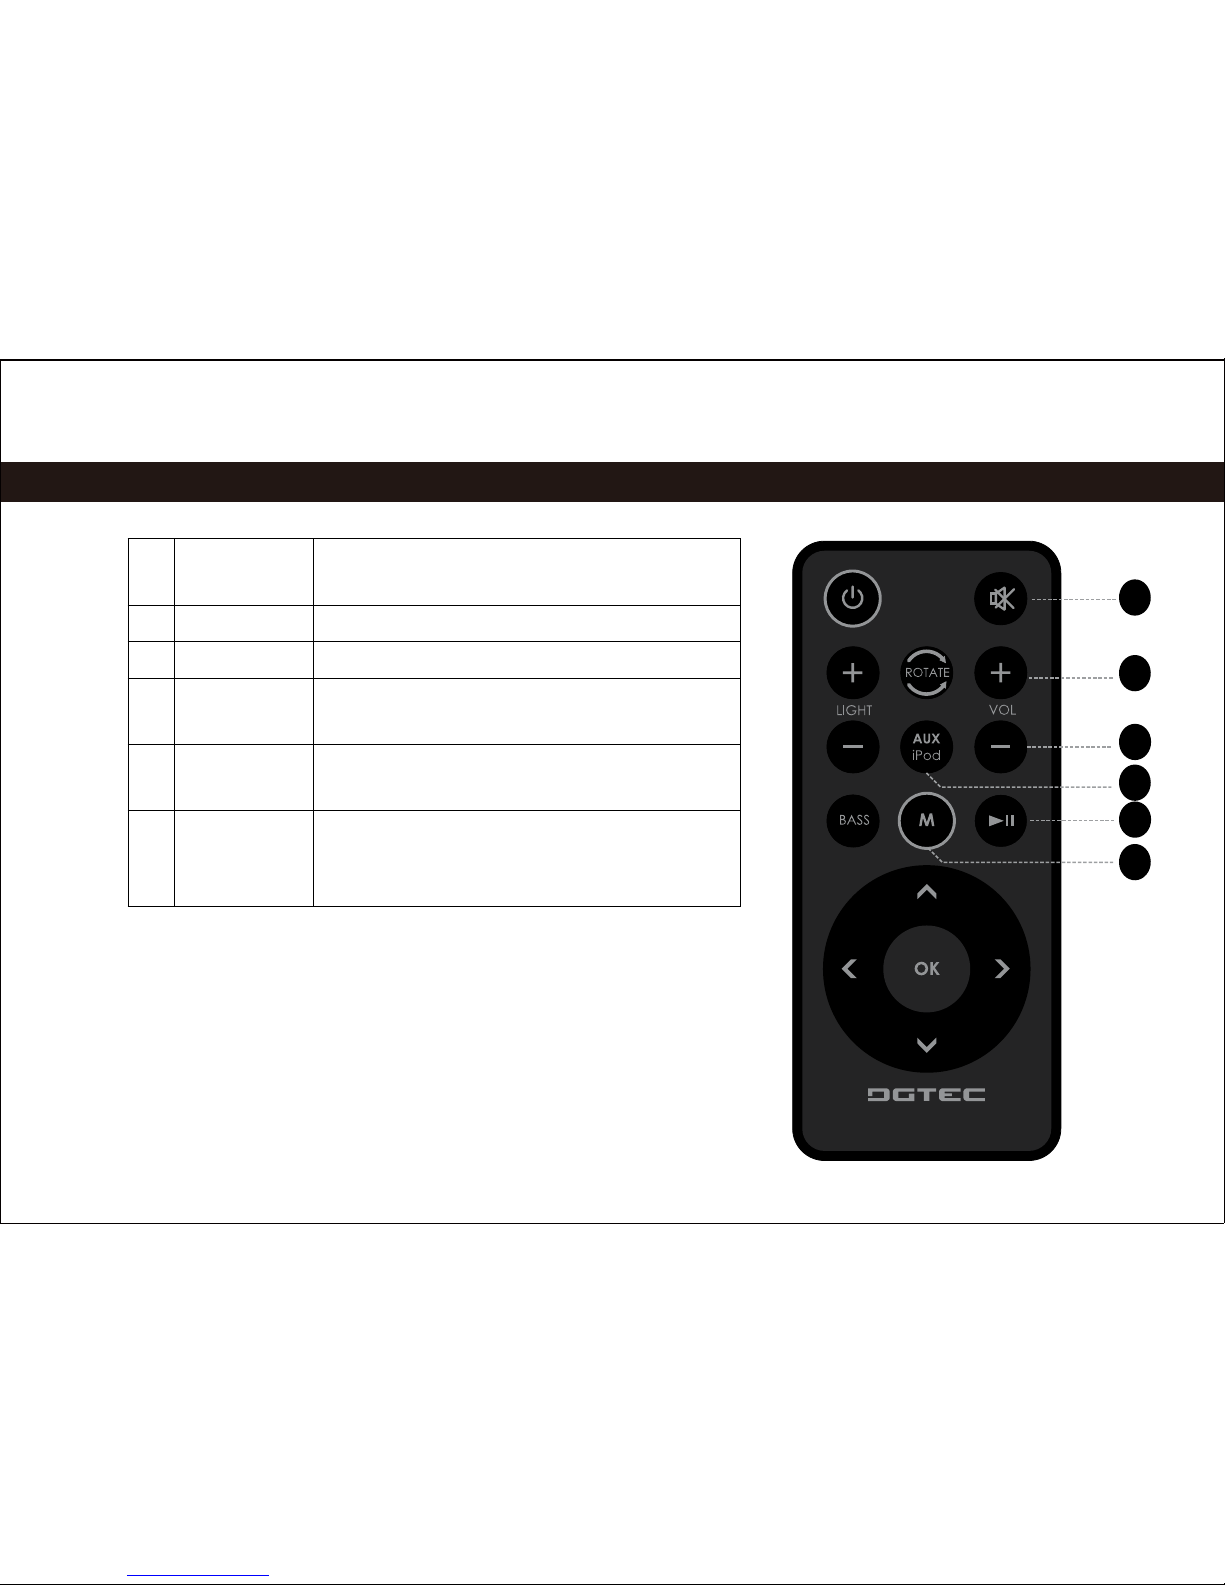
8 [MUTE] Press to disable or enable speaker
output.
9 [VOL +] Press to increase the volume level.
10 [VOL –] Press to decrease the volume level.
11 [AUX/iPod] Press to switch between AUX and
iPod modes.
12 [Play/
Pause]
Press to start or pause iPod or iPhone
playback.
13 [M] Press to access the iPod or iPhone
menu, or to return to a previous
screen.
| 5
8
9
10
11
12
13
Remote Control
Page 12
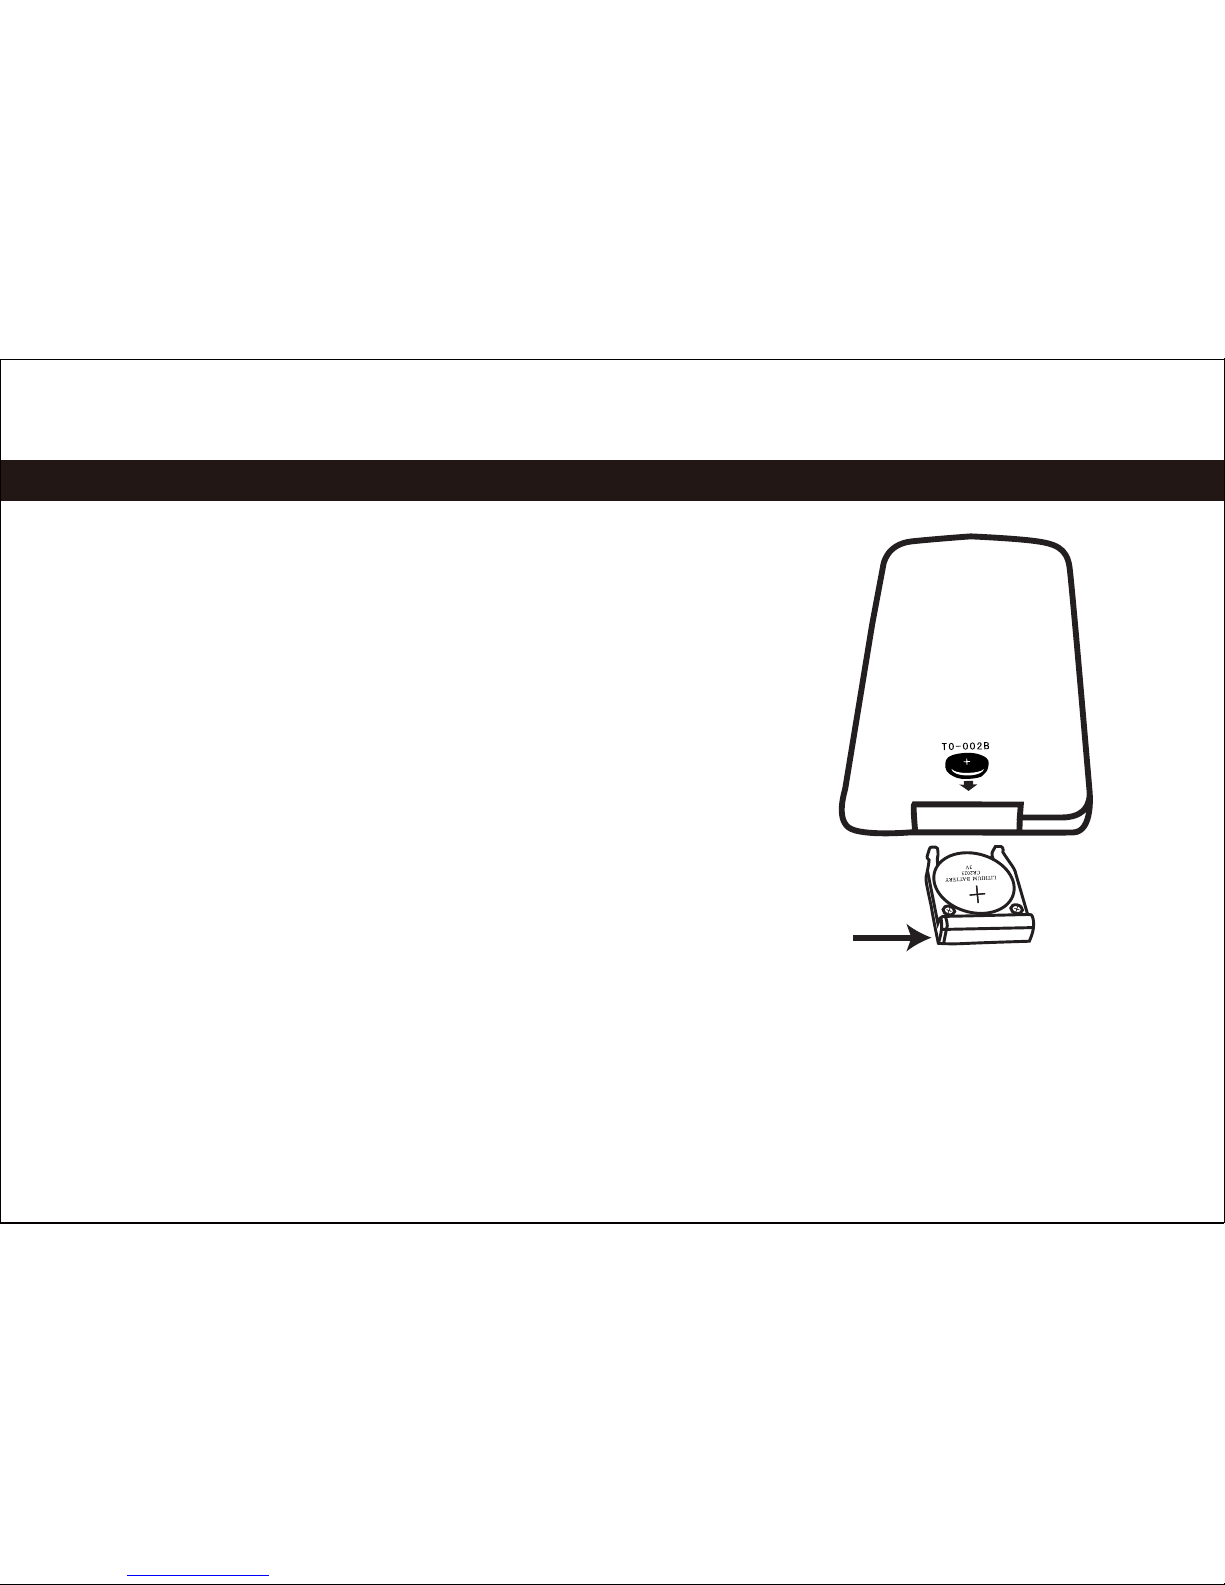
The remote control is powered by one (1) CR2025-type battery.
Before using the remote, be sure to remove the plastic protective
tab from the battery compartment.
To replace the battery:
Squeeze the tab of the battery compartment to the right while
drawing the compartment out.
♦
Remove the battery and replace it with a new “CR2025” lithium
battery.
♦
Replace the compartment.♦
|
6
About the Remote Control Battery
Page 13

Connections
Connecting Power
This unit is powered by an AC/DC adapter.
Connect one end of the AC/DC adapter
to an AC 100-240V 50/60Hz mains outlet.
Connect the other end to the DC IN connector
located on the rear of the unit.
Do not connect the power adapter to
a power outlet other than that which is
indicated here or on the label as this
may result in the risk of fire or electric
shock.
Do not handle the power plug with wet
hands. Doing so may cause electric
shock.
Conne c ting a n iPod® or iPhone
®
If you have a compatible iPod or iPhone,
you can play it through the speakers of
the main unit.
♦
Compatible iPod/iPhone models are
listed in the Specifications section of this
manual.
♦
To c o nnec t your iPod / iPhone:
Plug your compatible iPod/iPhone into
the Universal Dock.
♦
| 7
Getting Started
Page 14
Dock adapters are provided by Apple
with their recent iPod models.
Compatible iPod or iPhone models
will be charged when connected.
Connecting an Auxiliary Device
If you have an audio device with a 3.5mm
headphone out or line-out jack, you can play
it through the speakers of the main unit.
To connect your auxiliary audio
device:
Connect one end of a 3.5mm auxiliary
cable to the headphone out/line-out jack
of the audio device.
♦
Connect the other end of the cable to
AUX IN connector located on the rear
of the main unit.
♦
Basic Controls
To do this… …do this.
Turn the unit on or off Press [Standby]
Change between iPod/iPhone
and AUX playback mode
Press [AUX/iPod]
Adjust the volume level Press [VOL +] or
[VOL –]
Start, pause, or resume iPod/
iPhone playback
Press [Play/Pause]
Rotate the dock Press [ROTATE]
When the unit is in iPod mode, you
may use the controls of your iPod/
iPhone directly.
|
8
Getting Started
Page 15
To listen to your iPod or iPhone, simply place
your iPod/iPhone in the Universal Dock.
The main unit will turn on automatically.♦
Music on the iPod/iPhone will start playing ♦
automatically.
Press [Play/Pause] to start music
playback if it does not start automatically.
Controls
When an iPod/iPhone is connected to the
Universal Dock and the main unit is in iPod
mode, the following controls are available.
Remote
Key
Function
[Play/Pause] Start or pause/resume playback.
[RIGHT] Skip to the next track.
Remote
Key
Function
[LEFT] Skip to the previous track.
Hold
[RIGHT]
Scan forward quickly through
the current track.
Hold [LEFT] Scan in reverse quickly
through the current track.
[VOL +] Increase the volume level.
[VOL –] Decrease the volume level.
[MUTE] Disable or enable speaker
output.
[BASS] Turn the Bass Boost
enhancement on or off.
[ROTATE] Rotate the dock.
[AUX/iPod] Press to switch between
AUX and iPod modes.
| 9
Using iPod®/iPhone® Mode
Page 16
Browsing iPod/iPhone Menus with the
Remote
Some functions of your iPod/iPhone can be
controlled with the DG-iPodMSS remote control.
Remote
Key
Function
[M] Press to access the iPod/iPhone
menu, or return to a previous screen.
[UP] Use to browse iPod® or iPhone
®
menus.
[DOWN]
[OK] Press to enter an iPod or iPhone
menu selection.
For iPod touch and iPhone models,
you may need to start the Music/Video
player application before the remote
controls will work.
Rotating the Dock
Rotate the dock horizontally to view
your compatible iPod touch or iPhone
in landscape position.
Press [ROTATE] to rotate the dock
landscape position.
♦
Press [ROTATE] again to return the
dock to its normal, vertical position.
♦
When your iPod/iPhone is in landscape
position,you may:
Browse your media collection with
Cover Flow
♦
View album art♦
Watch videos♦
|
10
Using iPod®/iPhone® Mode
Page 17
To listen to an auxiliary device, use a 3.5mm
auxiliary cable to connect it to the main unit.
Press [Standby] to turn on the main unit.♦
Start playback on the auxiliary device.♦
Press [AUX/iPod] to set the main unit to ♦
AUX mode.
The auxiliary device must have a
3.5mm headphone out or line-out
connection. Examples of an
auxiliary device are iPod
®
shuffle
and MP3/MP4 players.
Controls
When the main unit is in AUX mode, the
following controls are available.
Remote
Key
Function
[VOL +] Increase the volume level.
[VOL –] Decrease the volume level.
[MUTE] Disable or enable speaker
output.
[BASS] Turn the Bass Boost
enhancement on or off.
[ROTATE] Rotate the dock.
[AUX/iPod] Press to switch between
AUX and iPod modes.
Use the controls of the auxiliary
device directly to control playback.
| 11
Using AUX Mode
Page 18
Speaker
Output (RMS)
10W x 2
Frequency
Response
40 –20,000Hz
Impedance 4Ω 8Ω
Aux Input 3.5mm stereo
Power Input: AC 100-240V 50/60Hz
Output: DC 20V, 1.8A
Remote: CR2025 battery x 1
Unit
Dimensions
(LWH)
Made for*
iPhone 3G
SiPhone 3G
iPhone 4G
iPhoneiPod classic
iPod touch
iPod touch 2G
iPod touch 3G
iPod touch 4G
iPod nano
iPod nano 2G
iPod nano 3G
iPod nano 4G
iPod nano 5G
iPod nano 6G
iPod 5G
iPod photo
iPod 4G
iPod 3G
iPod mini
|
12
Specifications
40.6 x 12.6 x 18.2 cm
Page 19
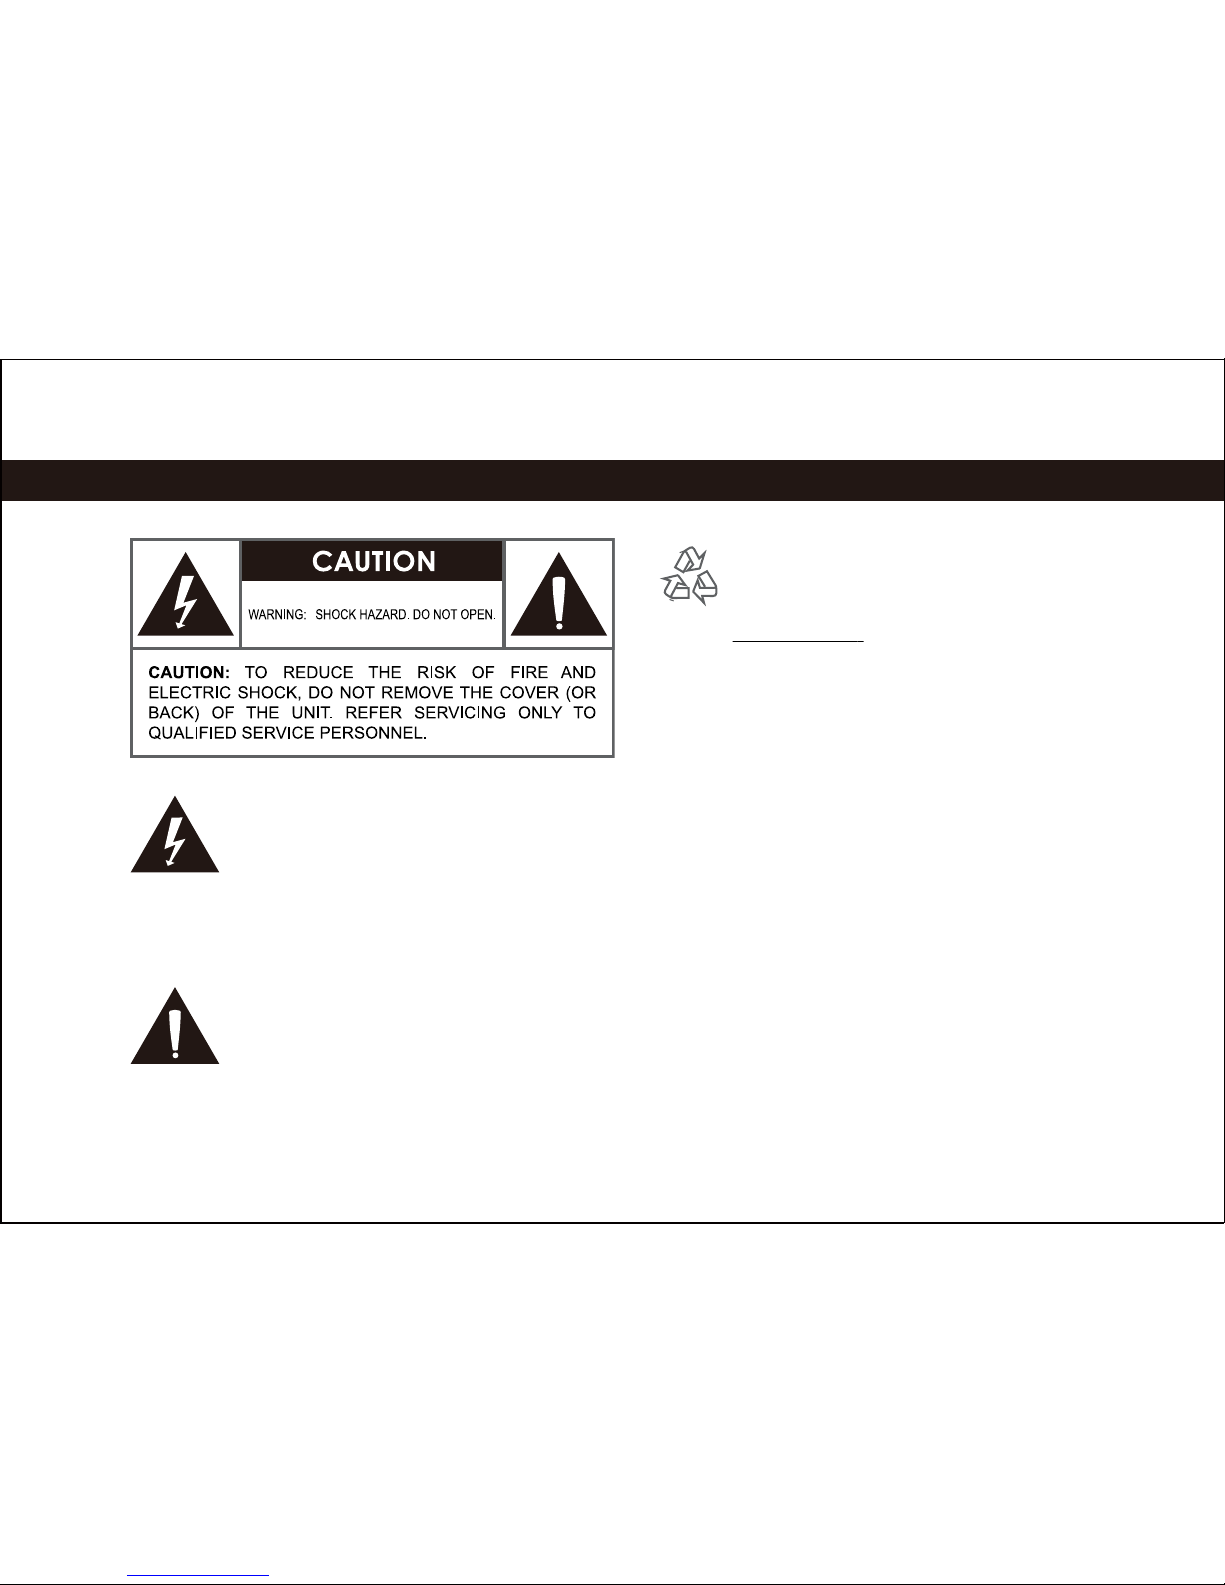
The lightning flash with arrowhead symbol
within an equilateral triangle is intended to
alert the user to the presence of uninsulated
“dangerous voltage” within the product’s
enclosure that may be of sufficient
magnitude to constitute a risk of electric
shock.
The exclamation point within an equilateral
triangle is intended to alert the user to the
presence of important operation and
servicing instructions in the literature
accompanying the appliance.
For recycling or disposal information about this
product, please contact your local authorities
or the Electronics Industries Alliance:
www.eiae.org
.
WARNING: To prevent fire or shock hazard, do not
expose this device to rain or moisture.
Dangerous high voltage is present inside
the enclosure. Do not open the cabinet.
CAUTION: To prevent electric shock, match wide
blade of plug to wide slot of outlet and
fully insert.
NOTE:This product contains electrical or electronic
materials. The presence of these materials
may, if not disposed of properly, have potential
adverse effects on the environment and human
health. Presence of this label on the product
means it should not be disposed of as unsorted
waste and must be collected separately. As a
consumer, you are responsible for ensuring
that this product is disposed of properly.
| 13
Safety & Regulatory Statements
Page 20

Warnings and Prec autions
To prevent any injuries, the following safety precautions
should be observed in the installation, use, servicing and
maintenance of this equipment. Before operating this
equipment, please read this manual completely, and
keep it nearby for future reference.
Imp orta nt Sa fety Instruc tio ns
Read Instructions: All the safety and operating
instructions should be read before the product is
operated.
♦
Retain Instructions: The safety and operating
instructions should be retained for future reference.
♦
Heed Warnings: All warnings on the product and in ♦
the operating instructions should be adhered to.
Follow Instructions: All operating and usage
instructions should be followed.
♦
Do not place the equipment on uneven or unstable
carts, stands, tables, shelves etc. The equipment
may fall, causing serious injury to children or adults
and serious damage to the equipment itself. Always
place the equipment on the floor or on a surface
that is sturdy, level, stable and strong enough to
support the weight of the equipment.
♦
Use only a cart or stand recommended
by the manufacturer. This
equipment and recommended
cart or stand should be handled
with care. Quick stops, excessive
force, and uneven surfaces may
cause the equipment and cart/stand to overturn.
♦
Do not disable the 3-wire grounding type plug.
The grounding pin on the 3-prong plug is an
important feature. Removing the grounding pin
will increase the risk of damaging the equipment.
♦
If you can not fit the plug into the electrical outlet,
contact an electrician to install a grounding outlet.
♦
Always operate this equipment from the type of
power source indicated on the rear of the serial/
model plate.
♦
Never overload wall outlets and extensions.♦
Remove the plug from the wall outlet, if the
equipment will not be used for a long period of time.
♦
Do not place, use or handle this equipment near
water.
♦
Never expose the equipment to liquid, rain, or
moisture. Seek service if any of the above is
spilled into the equipment.
♦
|
14
Safety & Regulatory Statements
Page 21

Do not expose the equipment to extreme
temperature or to direct sunlight, as the equipment
may heat up and suffer damage.
♦
Do not install the equipment near any heat sources
such as radiators, heat registers, stoves, or any
other apparatus that might produce heat.
♦
Do not attempt to service the equipment yourself.♦
Opening and removing the covers may expose
you to dangerous voltage or other hazards and
may void your warranty. Refer service to qualified
personnel.
♦
Do not place or drop any other objects on top.♦
Do not insert anything into the ventilation holes of
your equipment. Inserting any metal or flammable
objects may result to fire or electric shock.
♦
Refer all servicing to qualified service personnel.
Servicing is required when the apparatus has
been damaged in any way, such as power-supply
cord or plug is damaged, liquid has been spilled
or objects have fallen into the apparatus, the
apparatus has been exposed to rain or moisture,
does not operate normally, or has been dropped.
♦
Always remove the power cord from the outlet
before cleaning the equipment.
♦
Never use liquid or aerosol cleaners on the
equipment. Clean only with a soft dry cloth.
♦
Only use attachments/accessories specified by
the manufacturer.
♦
Where the mains plug is used as the
disconnected device, the disconnect device
shall remain readily operable.
♦
Listening with Earphones
Listen at moderate Volumes to avoid hearing
damage.
♦
If you hear no sound during playback, do not
turn the Volume up as the music may suddenly
begin at a high Volume. Excessive sound
pressure from earphones and headphones can
cause hearing loss.
♦
To avoid damaging your ears, adjust the Volume
to the lowest level before playback, and turn up
to the desired level when playback has started.
♦
| 15
Safety & Regulatory Statements
Page 22

Legal and Trademark Notices
“Made for iPod” and “Made for iPhone” mean that an electronic accessory has been
designed to connect specifically to iPod or iPhone, respectively, and has been certified
by the developer to meet Apple performance standards. Apple is not responsible for the
operation of this device or its compliance with safety and regulatory standards. iPod and
iPhone are trademarks of Apple Inc., registered in the U.S. and other countries.
iPod and iPhone are trademarks of Apple Inc., registered in the U.S. and other countries.
|
16
Safety & Regulatory Statements
Page 23

Page 24

Head Office:
Cnr Cambria & Bridge Road
Keysborough VIC 3173
Technical Support - 1800 189 941
For more information go to - www.dgtec.com.au
 Loading...