


WIRELESS OFFICE-WEB OPTICAL MOUSE
USER’S MANUAL (Model #: DC-2090)
Important Ergonomic Information
Some experts believe that using any mouse or trackball may cause serious injury to
hands, wrists, arms, neck, or back. If you feel pain, numbness, or weakness in these
areas, see a qualified health professional.
TO REDUCE THE RISK OF INJURY, FOLLOW THESE PRECAUTIONS:
Take frequent breaks, get up and walk around several times every hour.
Vary your tasks throughout the day.
Keep your shoulders relaxed with your elbows at your side. Position your
keyboard and mouse so you do not have to reach.
Adjust your chair and keyboard so your upper arms and wrists are straight.
Avoid resting your wrists on sharp edges.
System Requirement
Mouse compatible with standard Microsoft mode
3rd button and wheel function require Win98/2000/ME/NT/XP
4th & 5th button require Win2000/XP to function, or will require to install additional
driver as attached with this product.
th
th
& 7
6
If your computer’s operating system uses Windows98/98SE, please prepare the
Windows98 or 98SE compact disk for system’s request during the installation of
mouse.
Before you begin
Keep this installation guide for future reference! It contains Important
Troubleshooting Information.
button require installing additional driver as attached with this product.
Keep your old PS/2 mouse as a back-up device.
Getting Started
Congratulations on your purchase of an 800dpi Office-Web mouse. The 800dpi high
resolution will bring users the best operation accuracy and efficiency, especially for a
display at 1024*768 or higher. It has a double operation speed and only requires 1/4
space by comparing with a 400dpi mouse. With the ergonomic design in extra buttons,
1

the short-cut functions about MS-Office and Internet provide you an efficient
operation to access defaulted path or hot-functions chosen by yourself.
Package Contains
Your DC-2090 Mouse package includes the following:
1. Optical Mouse
2. Mini Receiver
3. User’s manual
4. CD-ROM Driver for Windows 98SE/2000/ME/NT/XP
5. 2 AA size alkaline batteries
Note:If any part is missing, please contact your dealer for a replacement
immediately.
Precaution
! The optical mouse cannot work on a glass or mirror surface. Avoid operating this
mouse on a glossy surface. Otherwise, this mouse may not operate normally.
! For consideration of saving battery power and have a good performance, it is
strongly recommended to operate an optical mouse on a bright surface with fine
texture.
Battery Warning!
When replace the batteries, use alkaline. You may use rechargeable NiMH or
other type of batteries, but do not mix then with alkaline. Do not mix used and new
batteries together!
Installation Guide (Mouse Connection)
! If your computer’s operating system uses Windows98/98SE, please prepare the
Windows98 or 98SE compact disk for system’s request during the installation of
mouse.
Step 1. Inserting the Batteries
1. Turn the mouse to the bottom side.
2. Remove the batteries cover by moving the opening tabs and pull the battery cover
out.
3. There are signs to indicate batteries' positive and negative poles. Follow the signs
to place the batteries
2
4. Place the batteries cover back and make sure it is firmly closed
Insert 2 AA Batteries.
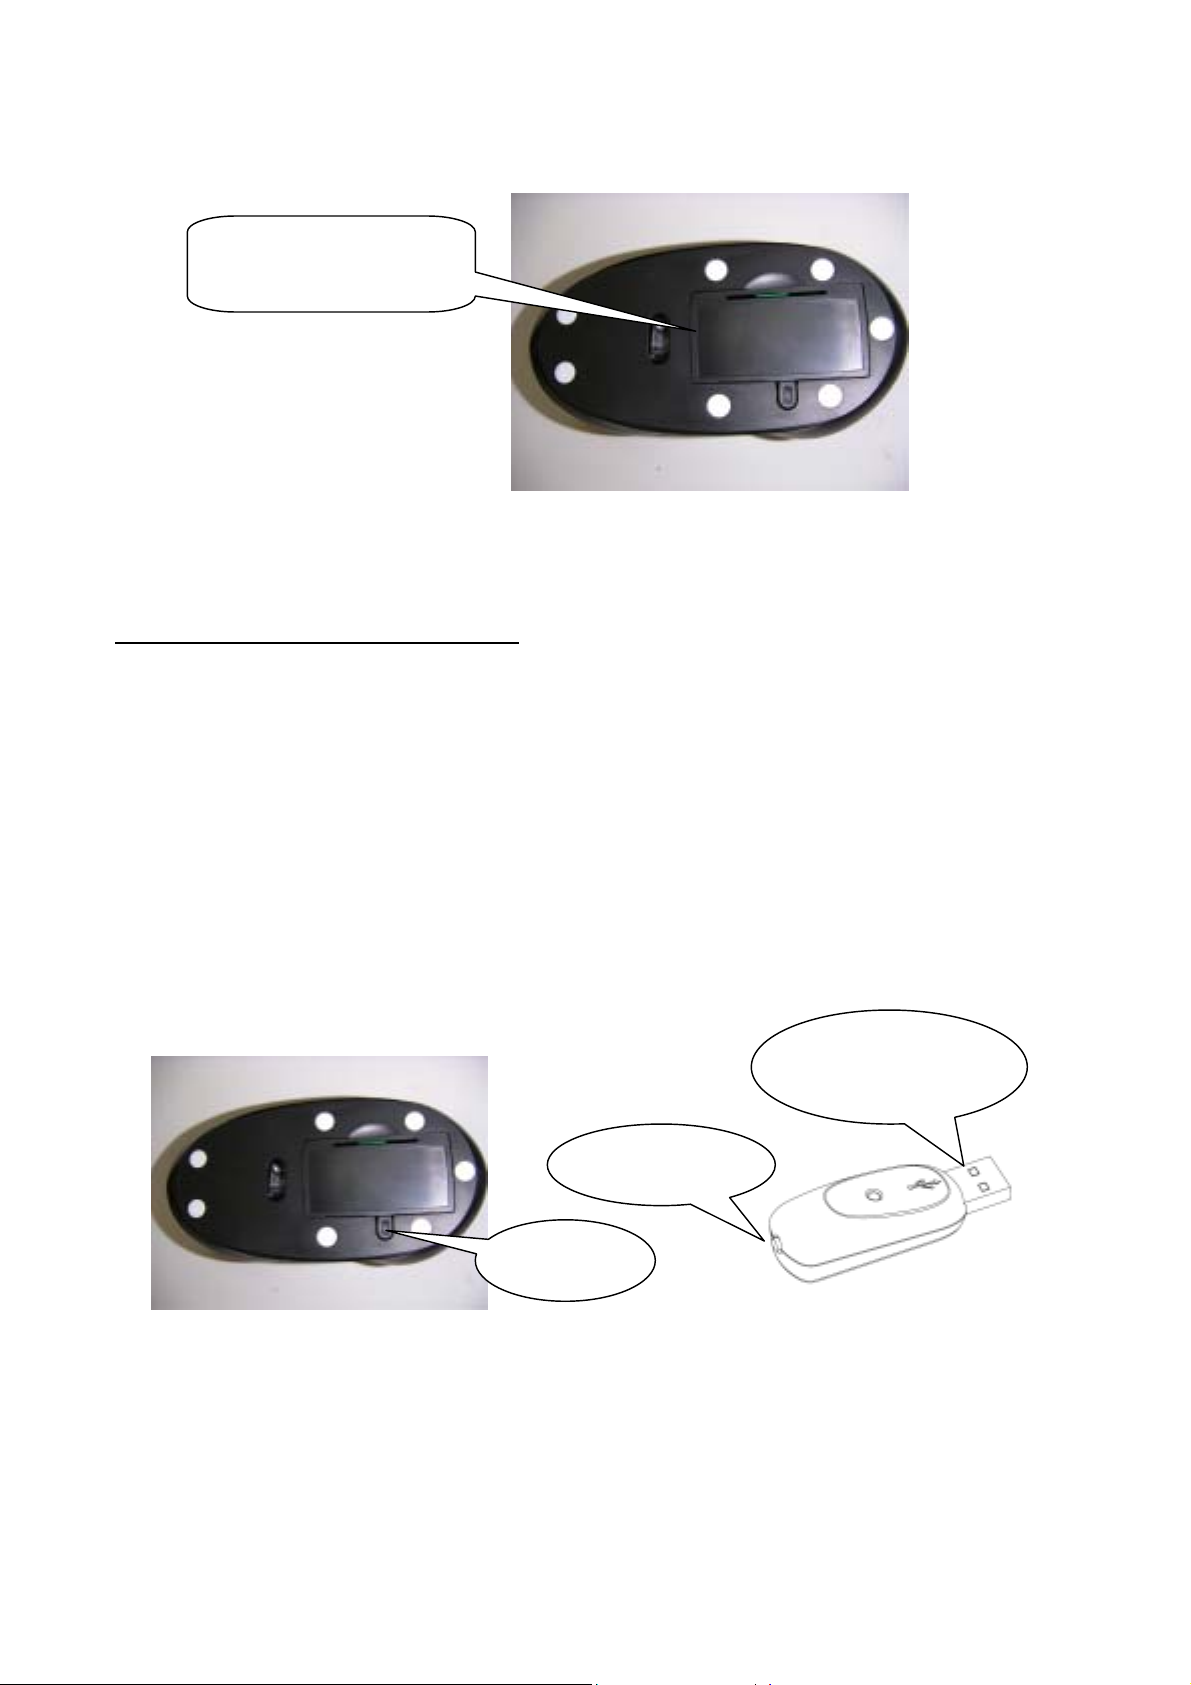
Step 2. Synchronize the RF Mouse
If the mouse is in sleep mode click the mouse button once to wake it up.
1. Plug the receiver into the notebook Computer’s USB ports or into the
keyboard’s USB port.
2. Bring the mouse within 1 ft range from the receiver, Hold the mouse
upside-down and use a pointed object, such as a pen tip, to click the
“CONNECT” button once. Do Not depress the CONNECT button longer then
1.5 seconds. (The red sensor light will go off when the “CONNECT” button is
pressed down.)
! Please poke the Mouse Connect button first, and then click the receiver’s
button!
Plug into
USB port
2. Click
1. Click
3. Click the receiver’s connect button once (located on the back of the receiver)
within 5 seconds of clicking the connect button on the mouse. The LED will
start blinking, when the connection is established.
4. Move the mouse around to test if it was successful.
5. If the synchronization is not successful for some reason please (1) Remove the
batteries and unplug the receivers (2) Wait for 20 sec then try the steps 1 to 4
3

again.
Note: * During normal use, please make sure that the mouse is no more than 3 ft
away from the receiver in order to have reliable connection.
** The LED on the receiver will light up or blink while the mouse is being
used.
PLEASE READ THIS BEFORE YOU INSTALL ANY DRIVERS
NOTE:
After the driver installation, your mouse should automatically function in any Windows
environment. If you are using Windows Version 3.1/3.11, the scroll function (and 4th~8th
buttons will not operate). The wheel scroll is an enhanced feature of Windows 98,
2000,ME & XP.
The 4
th
~ 7th buttons can be functioned only if you have installed Office-Web
driver(bundled CD). If users want to assign the 4th ~7th buttons as extra functions, please
follow the below steps to install the Office-Web driver and to program buttons.
Installing the Software
To install the software, please follow the steps below to finish:
1. Insert the Auto-Run CD-ROM onto CD-ROM driver, the installation menu
will be executed automatically. (If the auto-run does not function itself, double-click
the “setup” icon in the CD files.)
2. The setup program will guide you to finish the installation step by step
4

After you finish the installation, select "Restart" to reboot your system and
activate multimedia hot keys and wheel scrolling functions.
Programmable Office-Web Hot Keys
When you install the included software driver the mouse hot keys will be enable
with driver default.
The Office-Wheel Function is attached on the mouse software as following. Users
can change the default function of wheel and extra hot-keys.
Office-Wheel
(Scroll to choose and
to function)
press
Web-Wheel
Default:
Office-Whee
Default:
l
Web-Whee
5

g
Default setting for these hot keys is programmable as following as shown on the
application by running the “Office-Web Wheel Center” as following:
Office-Web
Group Setting
Electromagnetic Characteristics (EMC)
This unit complies with Part 15 of FCC Rules.
Operation is subject to following two conditions:
(1) This device may not cause harmful interference.
(2) This device must accept any interference received, includin
interference that may cause undesired operation.
Tested To Comply
With FCC Standards
6

Troubleshooting
! Optical sensor mouse functions best on surfaces with details for tracking. It may not
function on reflective, reflective pattern or non-visible detail surfaces!
MOUSE NOT DETECTED
Please note that USB mice are only supported under Windows 98 and Windows
2000, and Windows XP.
Make sure the mouse cable is plugged into the correct port-USB. An USB mouse
connects only to a USB port.
Make sure your USB port has the proper configuration. Refer to your computer
documentation for the correct port configuration.
You may have other system devices (e.g. a modem card) that conflict with the
mouse. Check the IRQ/address settings of these devices for conflicts, and change
the setting as required. Refer to your computer documentation to make these
changes.
Determine whether the problem is mouse or system related, try the mouse on a second
system or a different mouse on your current system.
Federal Communication Commission Interference Statement
This equipment has been tested and found to comply with the limits for a Class B digital device, pursuant to Part 15 of
the FCC Rules. These limits are designed to provide reasonable protection against harmful interference in a
residential installation. This equipment generates, uses and can radiate radio frequency energy and, if not installed
and used in accordance with the instructions, may cause harmful interference to radio communications. However,
there is no guarantee that interference will not occur in a particular installation. If this equipment does cause harmful
interference to radio or television reception, which can be determined by turning the equipment off and on, the user is
encouraged to try to correct the interference by one of the following measures:
- Reorient or relocate the receiving antenna.
- Increase the separation between the equipment and receiver.
- Connect the equipment into an outlet on a circuit different from that
to which the receiver is connected.
- Consult the dealer or an experienced radio/TV technician for help.
FCC Caution: Any changes or modifications not expressly approved by the party responsible for compliance could
void the user's authority to operate this equipment.
This device complies with Part 15 of the FCC Rules. Operation is subject to the following two conditions: (1) This
device may not cause harmful interference, and (2) this device must accept any interference received, including
interference that may cause undesired operation.
7
 Loading...