


MULTI-CHANNEL MINI RF OPTICAL MOUSE
USER’S MANUAL
Model #: DC-2038
Important Ergonomic Information
Some experts believe that using any mouse or trackball may cause serious injury to hands,
wrists, arms, neck, or back. If you feel pain, numbness, or weakness in these areas, see a
qualified health professional.
TO REDUCE THE RISK OF INJURY, FOLLOW THESE PRECAUTIONS:
Take frequent breaks, get up and walk around several times every hour.
Vary your tasks throughout the day.
Keep your shoulders relaxed with your elbows at your side. Position your keyboard
and mouse so you do not have to reach.
Adjust your chair and keyboard so your upper arms and wrists are straight.
Avoid resting your wrists on sharp edges.
System Requirement
Mouse compatible with standard Microsoft mode
3rd button and wheel function require Win98/98SE/2000/Me/XP
Before you begin
Keep this installation guide for future reference! It contains Important Troubleshooting
Information.
Keep your old PS/2 mouse as a back-up device.
Getting Started
Congratulations on your purchase of the multi-channel RF (Radio Frequency) optical
mouse. By using the advanced RF technology, a 360°of operation is possible, and no
line-of-sight is required between the receiver and the mouse. This mouse provides a high
resolution of 800dpi, which will bring users the best operation accuracy and efficiency,
especially for a display resolution at 1024*768 or higher. Since it has a double operation
speed, it requires only 1/4 operational space comparing to that required by a 400dpi
mouse.
Owing to the integration of multi-channel solution, this mouse is also an idea pointing
device to be used in an office without considering the arrangement of desk to desk, or in a
meeting room where two or more attendants are operating their own RF wireless mice.
1

Package Contains
Your DC-2038 Mouse package includes the following:
1. A multi-channel RF optical mouse (Transmitter)
2. A thumb size USB receiver
3. A user’s manual
Note: If any part of this package is missing, please contact your dealer for a replacement
immediately.
Precaution
! The optical mouse cannot work on a glass or mirror surface. Avoid operating this
mouse on a glossy surface, otherwise, this mouse may not operate normally.
! For consideration of saving battery power, it is strongly recommended to operate an
optical mouse on a bright surface with fine texture to obtain lower power consumption. A
very dark surface will cause higher power consumption.
! For optimal performance, place the receiver at least 8 inches or 20 centimeters
away from other electrical devices, such as a computer, a monitor, speakers, or other
external storage drives.
! For a better transmission distance, avoid to use this device on a metal plate or
desktop because a large surface of iron, aluminum, copper and other metal will be a
shielding or ground to the RF antenna of the mouse and receiver. Operating on a metal
may cause the transmission distance shorter.
! If your notebook computer has a metal (contains Al or Mg) case, the metal housing
of the LCD panel will isolate partial radiation of the RF signal from the mouse. This will
possibly result in reducing the distance of transmission when you operate the mouse right
in front of the notebook, and the receiver is connected on the back of the notebook.
However, the RF mouse should work properly while you are operating the mouse just
beside your notebook computer.
Installation Guide
Step 1. Connecting the Receiver
By using this RF optical mouse, you need to keep a free USB port for the included
receiver.
Please follow the steps below to finish the connecting:
1. Prepare your original Microsoft Windows CD.
2. Plug the USB connector end of the receiver into a USB port.
3. Turn your Notebook on if it was turned off. Then, follow the instructions of
Windows to complete the registration of a new USB device.
2
Step 2. Setting up connection between mouse and receiver
This RF wireless mouse provides 10 different RF channels, and 256 identification codes to
avoid interference with other radio devices, or other same model of RF wireless mice.
Before you go on, make sure that the mouse is in standby mode, i.e., the red light on the
bottom of the mouse is on. If it is not, press any key to wake it up.
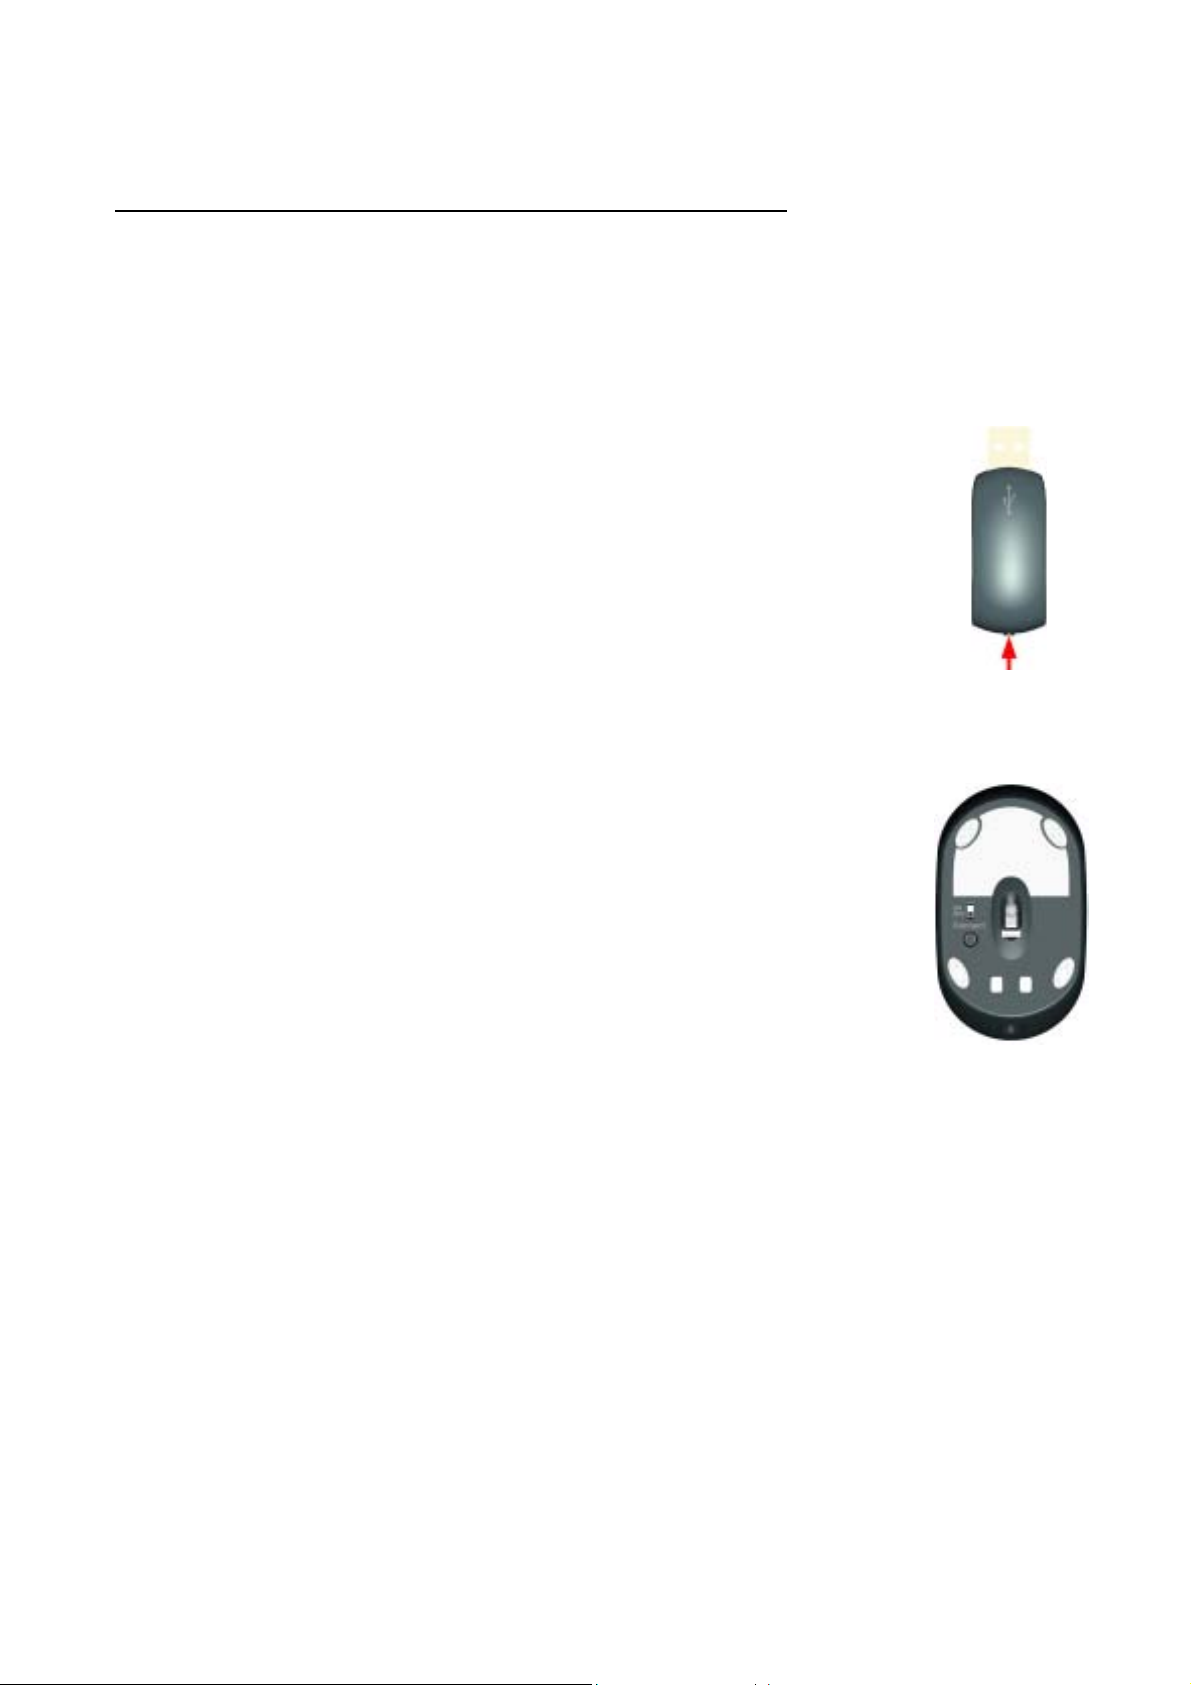
1. Press the Connect button on the receiver once (refer to Fig.1 for
the location of Connect button.) The LED inside the receiver will
light up to confirm the activation of Connect button.
The LED will stay on for around 7 seconds to indicate that the
receiver is waiting for a new configuration of ID and channel. If no
configuration message is received during this time, the receiver
will turn off the LED without any change of ID and channel. If a
valid configuration message is received before the end of wait
time, the receiver will turn off the LED as well, and validate the
Fig. 1
new ID and channel.
2. Press the “Connect” button on the mouse once (refer to Fig.2 for the
location of the “Connect” button.) The red light will go off, and turn on
again upon releasing the Connect button. (Warning: Be sure NOT to
depress the Connect button for more than 1.5 seconds when doing
mouse connection.)
There will be a duration of around 10 seconds for the mouse to get
connect with the receiver. As soon as The mouse is known by the
receiver, the LED on the receiver goes off, and the mouse is ready
Fig. 2
to operate.
Note:
Since the transmission is one way from the mouse to the receiver, and in order to avoid
possible interference of other RF devices, we urge you to put the mouse as close as
possible to the receiver when you are connecting the mouse to the receiver.
3

Operation Guide
Charge the mouse
This mouse comes with a Li-ion polymer battery, which is not user replaceable. This
battery should last the whole life span of the mouse if the mouse is recharged properly. So,
users not only can save a lot of money for periodically replacing batteries, but also
conserve the environment.
It is recommended to charge the battery to full before you start using the mouse. The
required charging time is:
3 hours on a charger base,
7 hours from an AC adapter, or
14 hours from a USB extension cord.
The Li-ion polymer battery inside the mouse is well protected both on charge and
discharge.
Warning!
During charging the mouse, it is recommended to turn off the mouse by sliding the power switch to
off position. (Refer to Fig. 2 for the location of the power switch.)
Battery low indication
When the voltage level of the battery goes down under the preset level, the scrolling
wheel will flash whenever the mouse is operated.
If the mouse is not recharged, and is kept operating for a certain amount of time, the
internal protection circuit will shut off the power. At this time, the mouse is not operable.
Users now should place the power switch to off position, and charge the mouse
immediately. Should the case occur, the internal controller might not be able to keep track
of the current ID and channel. And after charging the mouse to full, users may have to reconnect the mouse to the receiver.
Power on and off the mouse
This wireless mouse is designed specially for the purpose of travelling, so it comes with a
power switch. To turn on the mouse, simply slide the power switch to the ON position, and
to the OFF position vise versa. (Refer to Fig.2 for the location of power switch.)
Operations on power saving mode
In order to conserve battery power, the mouse is designed to reduce power consumption
gradually from standby mode to flash mode, and eventually to sleep mode, if it is not
operated.
4

Standby mode – As soon as the mouse stops moving, it enters standby mode
g
immediately, and sticks to this mode for up to 30 seconds, if no operation is done.
Flash mode – After 30 seconds (typically) of standby, the mouse enters into flash mode
by intermittently activates and deactivates the optical sensor. The lag time between
cursor running and the mouse movement is well controlled to be ignored, if the surface
on which the mouse resides is suitable for an optical mouse. The flash mode lasts for
up to approximate 20 minutes for the convenience of prompt moving operation.
Sleep mode – If the mouse is left intact for around 20 minutes, it goes to sleep mode and
shuts down the optical sensor to maintain minimum power consumption. No moving
operation is possible in this mode.
Wake up the mouse
This mouse can work promptly under standby and flash modes as it wasn’t in there. So,
users might not be able to tell the existence of these two modes. But, in sleep mode,
users have to press any button to wake up the mouse for normal operation.
Unlike almost all other wireless mice, clicking button to wake up the mouse will not cause a valid button activation which might
result in an unexpected Windows operation depending on where the cursor rested.
GENERAL SPECIFICATIONS
800dpi hardware resolution
Digital radio frequency transmission
10 channels of different radio frequencies
256 ID for further avoidance of interruption
Power on/off through the connect switch
3 buttons design with scrolling wheel
Ergonomic design for comfortable grip
Electromagnetic Characteristics (EMC)
This unit complies with Part 15 of FCC Rules.
Operation is subject to following two conditions:
(1) This device may not cause harmful interference.
(2) This device must accept any interference received, includin
interference that may cause undesired operation.
Tested T o Comply
With FCC Standards
CE - Type acceptance: ETS 300 220 short range devices
VCCI approval (Japan)
5

Tr ansmitter
Distance: 3 feet typical
Power: 3.7V DC (Lithium-ion polymer rechargeable battery)
Radio frequency: 27 MHz ISM band
Dimensions: 89.5*52*35 mm
Weight: 96 grams
Receiver
Interface: USB
Power: 5V DC, 100mA MAX connected to host computer
Dimensions: 63*22*17 mm (without counting the extended USB connector)
Weight: 16 grams
ELECTRIC SPECIFICATIONS
Operating Voltage Transmitter: 3.7V DC (powered by battery)
Receiver: 4.5 to 5.5V DC (powered by USB port)
Operating Current Transmitter: 30mA, operate on a white paper
Receiver: 30mA typical
Standby Current Transmitter: 4 m A @ 30 seconds
Flash mode Current Transmitter: below 2.8mA @ around 20 minutes.
Sleep Mode Current Transmitter: below 330µA
Modulation Type FSK
Transmission Rate 5K bps
Error Detection 8-bit CRC
Troubleshooting
1. Mouse does not function
If mouse is not functional, please turn off the computer first.
Check the receiver and make sure it is firmly attached to the USB port of the
computer.
Restart the computer again. After system is started, please establish the connection
between the mouse and the receiver by following Step 2 of the installation guide.
2. Reducing Interference with Other Wireless Devices
Reducing Interference with Other Wireless Devices:
All 27MHz radio-based devices are subject to interference from other 27MHz
radio-based devices, such as cordless telephones, cordless baby monitors, and
cordless toys. It may help to move the receiver unit and the base unit of other
6

wireless devices (such as cordless telephone cradle) as far apart as possible. You
may need to try several times for a location that is best in your operating
environment.
Move the receiver and the mouse closer to each other so that the receiver is
relatively shorter in distance to the mouse than to other 27MHz transmitters. You
may need to re-establish the “connection” by following Step 2 of the installation
guide.
Note: Avoid to use this device on a metal surface as a large surface of iron,
aluminum, copper, or other metal may act like a shielding to the RF antenna of the
mouse and the receiver.
3. Interference with other RF wireless mouse
If the interference comes from other same model of RF wireless mice, please follow
Step 2 “Setting up connection between mouse and receiver” of the installation guide to
switch to a new RF channel. A new identification code is also generated upon the
completion of channel switching.
Normally, the effective transmission distance is about 3 feet, depending on the
environment. If the effective distance between the mouse and the receiver is bad, try to
Change the location of the receiver.
4. If you have difficulty connecting the wireless mouse:
Increase the distance between the set of wireless mouse and other radio device units.
Turn off the other wireless devices, or their base units, that are in close proximity to
the receiver of this wireless mouse.
Try connecting the wireless mouse and its receiver again.
To verify that your device is connected and working properly, open a document and
Try the device.
7

Federal Communication Commission Interference Statement
This equipment has been tested and found to comply with the limits for a Class B
digital device, pursuant to Part 15 of the FCC Rules. These limits are designed to
provide reasonable protection against harmful interference in a residential
installation. This equipment generates, uses and can radiate radio frequency
energy and, if not installed and used in accordance with the instructions, may
cause harmful interference to radio communications. However, there is no
guarantee that interference will not occur in a particular installation. If this
equipment does cause harmful interference to radio or television reception, which
can be determined by turning the equipment off and on, the user is encouraged to
try to correct the interference by one of the following measures:
- Reorient or relocate the receiving antenna.
- Increase the separation between the equipment and receiver.
- Connect the equipment into an outlet on a circuit different from that
to which the receiver is connected.
- Consult the dealer or an experienced radio/TV technician for help.
FCC Caution: Any changes or modifications not expressly approved by the party
responsible for compliance could void the user's authority to operate this
equipment.
This device complies with Part 15 of the FCC Rules. Operation is subject to the
following two conditions: (1) This device may not cause harmful interference, and (2)
this device must accept any interference received, including interference that may
cause undesired operation.
8
 Loading...