

Page 1
Dexcom G5x Mobile System User Guide
Table of Contents
1
X"
®"
PDF compression, OCR, web optimization using a watermarked evaluation copy of CVISION PDFCompressor
Page 2

Dexcom G5x System User Guide
Glossary
2
Table of Contents
!"#$$%&'())))))))))))))))))))))))))))))))))))))))))))))))))))))))))))))))))))))))))))))))))))))))))))))))))(*"
+,%-./&(0())))))))))))))))))))))))))))))))))))))))))))))))))))))))))))))))))))))))))))))))))))))))))))))(01"
2/3455453(6#7&(8/9:#; G5®x +#5.457#7$(!"7:#$/(<#54.#&453(='$./;(
>!?9@(A#7&5/'())))))))))))))))))))))))))))))))))))))))))))))))))))))))))))))))))))))))))))))))))))))))(01"
1.1"Introduction"...................................................................................."14"
1.2"Self-Paced"Resources"......................................................................"15"
1.3"Your"Dexcom"Account"....................................................................."18"
+,%-./&(B())))))))))))))))))))))))))))))))))))))))))))))))))))))))))))))))))))))))))))))))))))))))))))))(BC"
D5E4:%.4#5$(F#&(G$/(% 5E (= % F/ .' (= .% ./ ;/5.()))))))))))))))))))))))))))))))))))))))))))))(BC"
2.1"Introduction"...................................................................................."20"
2.2"Important"User"Information"............................................................"20"
2.3"Safety"Statements"..........................................................................."21"
2.4"Overview"of"Safety"Statements"......................................................."23"
2.5"General"CGM"System"Warnings"......................................................"25"
2.6"Calibration"Warning"and"Precautions"............................................."27"
2.7"System/Hardware/Software"Warnings"and"Precautions"................"28"
+,%-./&(H())))))))))))))))))))))))))))))))))))))))))))))))))))))))))))))))))))))))))))))))))))))))))))))(HI"
J4$K$(%5E(2/5/F4.$()))))))))))))))))))))))))))))))))))))))))))))))))))))))))))))))))))))))))))))))))(HI"
3.1"Risks"................................................................................................"37"
3.2"Benefits"..........................................................................................."39"
+,%-./&(1())))))))))))))))))))))))))))))))))))))))))))))))))))))))))))))))))))))))))))))))))))))))))))))(1B"
L,%.(D$(.,/(!?9M())))))))))))))))))))))))))))))))))))))))))))))))))))))))))))))))))))))))))))))))))(1B"
4.1"System"Description"........................................................................."42"
4.2"Safety"Statement"............................................................................."42"
4.3"The"G5x"..........................................................................................."44"
4.4"What’s"New"to"the"G5x?"................................................................."46"
4.5"System"Information"........................................................................."47"
4.6"System"Components"......................................................................."47"
4.7"Smart"Device"Overview"..................................................................."57"
+,%-./&(?())))))))))))))))))))))))))))))))))))))))))))))))))))))))))))))))))))))))))))))))))))))))))))))(?N"
=/.(G-(6#7&(84$-"%'(8/O4:/$())))))))))))))))))))))))))))))))))))))))))))))))))))))))))))))))))(?N"
5.1"Introduction"...................................................................................."59"
5.2"Safety"Statement"............................................................................."59"
5.3"Why"Different"Monitoring"Methods?"............................................."60"
5.4"App".................................................................................................."61"
PDF compression, OCR, web optimization using a watermarked evaluation copy of CVISION PDFCompressor
Page 3

Dexcom G5x System User Guide
Glossary
3
5.5"Dexcom"Receiver"............................................................................."74"
+,%-./&(P())))))))))))))))))))))))))))))))))))))))))))))))))))))))))))))))))))))))))))))))))))))))))))))(*0"
=.%&.453(%(=/5$#&(=/$$4#5Q(D5$/&.453(=/5$#&R(S..%:,453(T&%5$;4../&R(%5E(
=.%&.453(6#7&(=/$$4#5())))))))))))))))))))))))))))))))))))))))))))))))))))))))))))))))))))))))))))(*0"
6.1"Overview"........................................................................................."81"
6.2"Safety"Statements"..........................................................................."82"
6.3"Prepping"for"Sensor"Insertion"........................................................."85"
6.4"Choosing"Your"Insertion"Site"..........................................................."88"
6.5"Inserting"Your"Sensor"......................................................................"90"
6.6"Attaching"Your"Transmitter"............................................................."94"
6.7"Loose"Transmitter"Holder"..............................................................."97"
6.8"Starting"Your"Sensor"Session"..........................................................."97"
6.9"Receiver"Bluetooth"Tips"................................................................."102"
6.10"Sensor"Session"Warmup".............................................................."106"
+,%-./&(I())))))))))))))))))))))))))))))))))))))))))))))))))))))))))))))))))))))))))))))))))))))))))))(0C*"
+%"4U&%.4#5())))))))))))))))))))))))))))))))))))))))))))))))))))))))))))))))))))))))))))))))))))))))))(0C*"
7.1"Introduction".................................................................................."108"
7.2"Safety"Statements"........................................................................."109"
7.3"Calibration"Overview"....................................................................."111"
7.4"When"to"Calibrate"........................................................................."113"
7.5"Calibration"Notifications"..............................................................."114"
7.6"Preparing"for"Calibration"..............................................................."118"
7.7"Ready?"Set?"Calibrate!".................................................................."119"
7.8"Calibration"Errors".........................................................................."126"
+,%-./&(*())))))))))))))))))))))))))))))))))))))))))))))))))))))))))))))))))))))))))))))))))))))))))))(0BN"
V5E453(6#7&(=/5$#&(=/$$4#5(%5E(T&%5$;4../&(=/$$4#5())))))))))))))))))))))))))(0BN"
8.1"Introduction".................................................................................."129"
8.2"Safety"Statements"........................................................................."129"
8.3"Ending"Your"Sensor"Session".........................................................."130"
8.4"Remove"Sensor,"Transmitter,"and"Transmitter"Holder"................."145"
8.5"End"of"Transmitter"Battery"............................................................"148"
8.6"Pair"New"Transmitter"...................................................................."151"
+,%-./&(N())))))))))))))))))))))))))))))))))))))))))))))))))))))))))))))))))))))))))))))))))))))))))))(0P0"
W#;/(=:&//5R(J%./(#F(+,%53/(S&&#X$R(%5E(V&&#&$()))))))))))))))))))))))))))))))(0P0"
9.1"Introduction"to"Home"Screens"......................................................"161"
9.2"Safety"Statements"........................................................................."161"
9.3"Overview"of"Home"Screen"............................................................."163"
PDF compression, OCR, web optimization using a watermarked evaluation copy of CVISION PDFCompressor
Page 4

Dexcom G5x System User Guide
Glossary
4
Apple"Today"View"Widget"..................................................................."171"
9.4"Rate"of"Change"Arrows"................................................................."181"
9.5"Error"Messages".............................................................................."182"
+,%-./&(0C())))))))))))))))))))))))))))))))))))))))))))))))))))))))))))))))))))))))))))))))))))))))))(0*N"
8%4"'(VO/5.$(SFF/:.(6#7&(!"7:#$/(T&/5E$(%5E(Y%../&5$())))))))))))))))))))))))(0*N"
10.1"Introduction"................................................................................"189"
10.2"What"Is"an"Event?"......................................................................."189"
10.3"Entering"Events"..........................................................................."198"
10.4"Viewing"Events"............................................................................"207"
+,%-./&(00())))))))))))))))))))))))))))))))))))))))))))))))))))))))))))))))))))))))))))))))))))))))))(BCN"
=/5$#&(!"7:#$/(S"%&;(%5E(S"/&.$())))))))))))))))))))))))))))))))))))))))))))))))))))))))(BCN"
11.1"Introduction"................................................................................"209"
11.2"Safety"Statements"......................................................................."210"
11.3"Alarm"and"Alerts"........................................................................."213"
11.4"Alarm"and"Alerts"Screens"............................................................"215"
11.5"App:"Alarm/Alert"Recommended"Settings".................................."221"
11.6"Receiver:"Default"Beeps"and"Vibrations"......................................"222"
11.7"Clearing"Alarm/Alerts".................................................................."226"
+,%-./&(0B())))))))))))))))))))))))))))))))))))))))))))))))))))))))))))))))))))))))))))))))))))))))))(BBN"
Next%StepsQ()))))))))))))))))))))))))))))))))))))))))))))))))))))))))))))))))))))))))))))))))))))))))(BBN"
Z5(.,/(!#(L4.,(!?9Q(+7$.#;4[453(6#7&(S"%&;(%5E(S"/&.$())))))))))))))))))))(BBN"
12.1"Introduction"................................................................................"229"
12.2"Safety"Statement"........................................................................."229"
12.3"Changing"app"Alarm"and"Alerts"..................................................."230"
12.4"Changing"Receiver"Alarm"and"Alerts"..........................................."243"
V\VJ6TWD]!(V^=V(!?9()))))))))))))))))))))))))))))))))))))))))))))))))))))))))))))))))))(B?B"
+,%-./&(0H())))))))))))))))))))))))))))))))))))))))))))))))))))))))))))))))))))))))))))))))))))))))))(B?H"
L%&&%5.'Q(T,/(_45/(Y&45.()))))))))))))))))))))))))))))))))))))))))))))))))))))))))))))))))))))(B?H"
13.1"Introduction"................................................................................"253"
13.2"Receiver"Warranty"Information".................................................."253"
13.3"Transmitter"Warranty"Information"............................................."256"
13.4"Dexcom’s"Obligations"Under"the"Limited"Warranty"..................."257"
+,%-./&(01())))))))))))))))))))))))))))))))))))))))))))))))))))))))))))))))))))))))))))))))))))))))))(BPC"
W#X(.#(T%K/(+%&/(#F(6#7&(!?9())))))))))))))))))))))))))))))))))))))))))))))))))))))))))))(BPC"
14.1"Introduction"................................................................................"260"
14.2"Basic"Maintenance"......................................................................"260"
PDF compression, OCR, web optimization using a watermarked evaluation copy of CVISION PDFCompressor
Page 5

Dexcom G5x System User Guide
Glossary
5
14.3"Storage"........................................................................................"268"
14.4"Checking"app"and"Receiver"Information"....................................."269"
14.5"System"Disposal".........................................................................."270"
+,%-./&(0?())))))))))))))))))))))))))))))))))))))))))))))))))))))))))))))))))))))))))))))))))))))))))(BIB"
Z5(.,/(!#(L4.,(!?9Q(!/..453(T,I,(=/:7&4.'()))))))))))))))))))))))))))))))))))(BIB"
15.1"Introduction"................................................................................"272"
15.2"Safety"Statement"........................................................................."272"
15.3"Going"Through"Security"..............................................................."273"
+,%-./&(0P())))))))))))))))))))))))))))))))))))))))))))))))))))))))))))))))))))))))))))))))))))))))))(BIP"
]//E(W/"-M(6#7`&/(]#.(S"#5/a()))))))))))))))))))))))))))))))))))))))))))))))))))))))))))) (BIP"
16.1"Dexcom"Technical"Support"Team"................................................"276"
16.2"Dexcom"Patient"Care"Team"........................................................."277"
16.3"Dexcom"Sales"Support"Team"......................................................."278"
16.4"Corporate"...................................................................................."279"
+,%-./&(0I())))))))))))))))))))))))))))))))))))))))))))))))))))))))))))))))))))))))))))))))))))))))))(B*C"
T/:,54:%"(D5F#&;%.4#5()))))))))))))))))))))))))))))))))))))))))))))))))))))))))))))))))))))))))(B*C"
17.1"Device"Performance"Characteristics"..........................................."280"
17.2"Product"Specifications"................................................................."325"
17.3"FCC"Requirements"......................................................................."334"
+,%-./&(0*())))))))))))))))))))))))))))))))))))))))))))))))))))))))))))))))))))))))))))))))))))))))))(HHP"
TU"/$,##.453()))))))))))))))))))))))))))))))))))))))))))))))))))))))))))))))))))))))))))))))))(HHP"
18.1"Introduction"................................................................................"336"
18.2"Safety"Statements"......................................................................."336"
18.3"Troubleshooting".........................................................................."337"
+,%-./&(0N())))))))))))))))))))))))))))))))))))))))))))))))))))))))))))))))))))))))))))))))))))))))))(H?H"
=';U#"$(#5(Y%:K%3/(^%U/"$()))))))))))))))))))))))))))))))))))))))))))))))))))))))))))))))))(H?H"
=WSJD]!(D=(+SJD]!())))))))))))))))))))))))))))))))))))))))))))))))))))))))))))))))))))))(H?P"
+,%-./&(BC())))))))))))))))))))))))))))))))))))))))))))))))))))))))))))))))))))))))))))))))))))))))))(H?I"
8/9:#;(Shareb()))))))))))))))))))))))))))))))))))))))))))))))))))))))))))))))))))))))))))))))))))(H?I"
20.1"Learning"About"Dexcom"Share"...................................................."357"
20.2"Dexcom"Share"Overview"............................................................."363"
20.3"Risks"and"Benefits"......................................................................."366"
20.4"Safety"Statement"........................................................................."367"
20.5"Setting"Up"Dexcom"Share"............................................................"371"
20.6"Using"Dexcom"Share"..................................................................."380"
20.7"Dexcom"Follow"App"...................................................................."386"
PDF compression, OCR, web optimization using a watermarked evaluation copy of CVISION PDFCompressor
Page 6

Dexcom G5x System User Guide
Glossary
6
20.8"Troubleshooting".........................................................................."389"
PDF compression, OCR, web optimization using a watermarked evaluation copy of CVISION PDFCompressor
Page 7

Dexcom G5x System User Guide
Glossary
7
1
GETTING STARTED
• Glossary
• Getting Started
• Indications for Use and Safety Statement
• Risks and Benefits
PDF compression, OCR, web optimization using a watermarked evaluation copy of CVISION PDFCompressor
Page 8

Dexcom G5x System User Guide
Glossary
8
Glossary
A1C
Blood test used to diagnose type 1 or 2 diabetes
and to gauge how well you’re managing your
diabetes. The A1C test result reflects your
average blood sugar level for the past two to
three months.
Accessory Device
Hardware, connected to your smart device by
Bluetooth
, you use to get easy access to some of
its features. For example,
Bluetooth
headset,
Apple watch, or smart watch.
Also called wearables.
Alternative Site
Testing
Using a blood sample from non-fingertip
(alternative) sites such as the palm, forearm, or
upper arm for meter readings.
Do not use alternative site testing to calibrate the
Dexcom G5
®
x CGM System (G5x), only use
fingerstick measurement.
App
A self-contained program or piece of software
designed to fulfill a particular purpose; an
application, especially as downloaded by a user
to a smart or mobile device.
The Dexcom G5® Mobile app (app) was
developed as a display for continuous glucose
monitoring.
Apple Watch®
Accessory device for iPhone®.
Blood Glucose (BG)
An abbreviation of blood glucose. Blood glucose
PDF compression, OCR, web optimization using a watermarked evaluation copy of CVISION PDFCompressor
Page 9

Dexcom G5x System User Guide
Glossary
9
(BG) value is the amount of glucose in the blood
measured by a BG meter.
Blood Glucose
Meter/Meter/BG
Meter
A medical device used to measure how much
glucose is in the blood.
Calibration
A comparison or measurement between your
meter’s fingerstick BG values and the sensor’s
interstitial fluid glucose readings. Although blood
and interstitial fluids are similar, glucose
concentration is higher in your blood. Calibration
allows alignment between your sensor and meter
readings.
When you calibrate, you take a fingerstick
measurement from your meter then enter the
value into your receiver or smart device. The
system uses that value to verify that the sensor
glucose reading is on track.
Continuous Glucose
Monitoring (CGM)
A system that uses a sensor inserted under the
skin to check glucose levels in interstitial fluid. A
transmitter sends sensor glucose readings to a
display device.
Users must confirm glucose levels with a BG
meter before making a change in treatment.
Contraindication
A safety statement outlining specific situations
where the system should not be used because it
may be harmful to you. The risk of use clearly
outweighs any possible benefit.
PDF compression, OCR, web optimization using a watermarked evaluation copy of CVISION PDFCompressor
Page 10

Dexcom G5x System User Guide
Glossary
10
Hyperglycemia
High BG. Same as “high” or high blood sugar.
Hyperglycemia is characterized by an excess of
glucose in the bloodstream.
It’s important to treat hyperglycemia. If left
untreated, hyperglycemia can lead to serious
complications.
The default High Glucose Alert in the G5x is set
to 200 mg/dL. Consult your healthcare
professional to determine the appropriate
hyperglycemic setting for you.
Hypoglycemia
Low BG. Same as “low” or low blood sugar.
Hypoglycemia is characterized by a low level of
glucose in the bloodstream.
It’s important to treat hypoglycemia. If left
untreated, hypoglycemia can lead to serious
complications.
The default Low Glucose Alert in the G5x is set to
80 mg/dL. Consult your healthcare professional
to determine the appropriate hypoglycemic
setting for you.
Indications
A condition making a particular treatment or
procedure advisable. How, for what purposes,
and under what circumstances you should use
the G5x. Indications let you know who should use
the G5x and when.
PDF compression, OCR, web optimization using a watermarked evaluation copy of CVISION PDFCompressor
Page 11

Dexcom G5x System User Guide
Glossary
11
IP
The International Electrotechnical Commission
(IEC) is a nonprofit, non-governmental,
international organization created to produce
safety standards for electronics. One of the
safety standards it designed is the Ingress
Protection (IP) Marking, which classifies and
rates how protected an electronic device is
against dust, water, accidental contact, etc.
IP ratings are numerical, with the number based
on the conditions the electronic device comes
across.
An IP22 rating lets you know your electronic
device won’t allow you to stick your fingers in it
and won’t get damaged or be unsafe during
specific testing with water dripping down.
An IP28 rating tells you your electronic device
won’t let you stick your fingers in it and is safe for
long-term immersion in liquid up to a specified
pressure.
Jailbroken
The removal of limitations and security measures
set by the manufacturer on a smart device. The
removal poses a security risk, and data may
become vulnerable.
Do not use, install, or run the Dexcom G5 Mobile
app on a jailbroken smart device. The app may
not work correctly on a jailbroken smart device.
Landscape
When your smart device is oriented sideways.
mg/dL
Milligrams per deciliter. The standard unit of
measure for glucose readings in the United
States.
PDF compression, OCR, web optimization using a watermarked evaluation copy of CVISION PDFCompressor
Page 12

Dexcom G5x System User Guide
Glossary
12
Portrait
When your smart device is oriented vertically.
Precaution
A safety statement regarding any special care to
be exercised by you or your healthcare
professional for the safe and effective use of the
G5x.
RF
Radio-frequency (RF) transmission used to send
glucose information from the transmitter to the
receiver or smart device. Also used to send
calibration data from the receiver or smart device
to the transmitter.
Safety Statement
A statement of the intended uses of G5x and
relevant warnings, precautions, and
contraindications.
Sensor Session
The seven-day monitoring period after inserting a
new sensor.
During this time frame, your glucose is being
monitored and reported every five minutes, with
data being sent to your display device(s).
Smart/Mobile Device
Electronic device that can be wirelessly
connected to networks over Wi-Fi,
Bluetooth
, or a
cellular data connection (3G, 4G, etc.
Examples are smartphones, tablets, and smart
watches.
Today View
Swipe down to access information and
notifications on your iPhone, iPad®, and iPod®.
Warning
A safety statement letting you know the following
feature has important hazard information.
PDF compression, OCR, web optimization using a watermarked evaluation copy of CVISION PDFCompressor
Page 13

Dexcom G5x System User Guide
Glossary
13
Describes serious and life-threatening
circumstances of using the G5x, their
consequences, and how to avoid the hazard.
PDF compression, OCR, web optimization using a watermarked evaluation copy of CVISION PDFCompressor
Page 14

Dexcom G5x System User Guide
Beginning Your Dexcom G5x Continuous Glucose Monitoring System (G5x) Journey
14
Chapter 1
Getting Started:
Beginning Your Dexcom G5®x Continuous Glucose
Monitoring System (G5x) Journey
1.1 Introduction
Welcome to the G5x family!
We are excited you chose us to partner with you in your journey to manage
your diabetes. As a continuous glucose monitoring (CGM) device, the G5x
allows you to break free from constant fingersticks. But how do you use the
G5x? What are its features? Do you need to avoid anything?
Where do you even begin?
This chapter is the first step to answering these and many other questions.
After this chapter, you will be able to:
•
Describe different training resources
•
Locate tutorials about using the G5x in your diabetes management
•
Find G5x’s step-by-step instructions
•
Recall how to use the user guide
•
Explain why you need a Dexcom® account
We have numerous resources available to help you get the most out of your
G5x. Between our self-paced training resources and our friendly and
knowledgeable Dexcom customer support teams, help is always available.
First Things First - Learning How to Learn
Knowing about the G5x is your first step in creating a successful CGM
experience. Before using it, learn about it.
You have numerous self-paced resources, helping you get to know the G5x:
1. Tutorials
2. Getting Started Guide
PDF compression, OCR, web optimization using a watermarked evaluation copy of CVISION PDFCompressor
Page 15

Dexcom G5x System User Guide
Beginning Your Dexcom G5x Continuous Glucose Monitoring System (G5x) Journey
15
3. User Guide
No matter which resource(s) you select, make sure you review them prior to
using your new CGM system.
1.2 Self-Paced Resources
Tutorials
Along with step-by-step instructions, our tutorials illustrate how real-time CGM
can assist in your daily diabetes management. The following is a list of
tutorials and how to access them.
Online Tutorials
First Steps With Your Dexcom CGM
Designed for those who have never used a Dexcom CGM. This tutorial
covers what to expect in your first week and includes links to step-by-step
videos on how to insert your sensor, calibrations, ending a sensor session,
etc.
Next Steps With Your Dexcom CGM
Just finished First Steps or already familiar with how a CGM can benefit
you? This tutorial covers looking at trends and introduces some advanced
features including our reporting tools.
Accessing Online Tutorials:
From dexcom.com homepage, click
Support
.
Once you have viewed the online tutorials, you should be pretty comfortable
with what CGMs do and how the G5x can help you.
Offline Tutorials
You don’t need to be tied to the Internet to view our instructional tutorials,
they’re also available offline.
Accessing Offline Tutorials:
PDF compression, OCR, web optimization using a watermarked evaluation copy of CVISION PDFCompressor
Page 16

Dexcom G5x System User Guide
Beginning Your Dexcom G5x Continuous Glucose Monitoring System (G5x) Journey
16
USB Card in the receiver package.
Guides
Getting Started Guide (GSG)
The G5x GSG complements the tutorials by providing the same step-by-step
instructions in a booklet form or within the app.
One of the great things about the GSG is you can use it in conjunction with the
videos, taking notes as you go!
Accessing the GSG:
Booklet in the receiver package.
Both the tutorial and the GSG give you a brief look at the G5x. But what if you
want more detailed information?
User Guide
Your G5x reference book!
This user guide gives you the most extensive overview of the system,
detailing features, important safety information, and so much more.
To download an eBook of the user guide or request a printed user guide, visit
dexcom.com/guides.
The G5x user guide is grouped into six separate parts:
Part 1:
Getting Started
•
Glossary
•
Getting Started
o
Learning how to learn about the G5x
o
Registering at dexcom.com
•
Indications for Use and Safety Statement
•
Risks and Benefits
Part 2:
Let’s G5x! The Basics
PDF compression, OCR, web optimization using a watermarked evaluation copy of CVISION PDFCompressor
Page 17

Dexcom G5x System User Guide
Beginning Your Dexcom G5x Continuous Glucose Monitoring System (G5x) Journey
17
•
Introduction to the G5x
•
Initial Setup
•
Starting a Sensor Session: Inserting the Sensor and Attaching
Transmitter
•
Calibration
•
Ending a Sensor Session and Transmitter Session
Part 3:
Next Steps - Getting the Most out of Your G5x
Once you are up and running, how you can maximize the G5x features:
•
Reading Trend Graph Screens and Recognizing Trends
•
Events
•
Alarm and Alerts
•
Sounds for Alarm, Alerts, and System Messages
Part 4:
Everything Else G5x
•
Warranty
•
G5x Maintenance
•
Travel Tips
•
Customer Service Contacts
•
Technical Information
•
Troubleshooting
•
Symbols on Package Labels
At the end of your G5x user guide, Part 5, is the user guide for Dexcom
Share
®
™.
Part 5:
Sharing Is Caring
•
Dexcom
Share
o
What Is Dexcom
Share
?
o
Setting Up Dexcom
Share
o
How to Use Dexcom
Share
PDF compression, OCR, web optimization using a watermarked evaluation copy of CVISION PDFCompressor
Page 18

Dexcom G5x System User Guide
Beginning Your Dexcom G5x Continuous Glucose Monitoring System (G5x) Journey
18
o
Your Followers
o
Troubleshooting
Part 6
•
Index for G5x System and Dexcom
Share
How to Use Your User Guide
All chapters in the G5x user guide are laid out the same way:
The beginning of each chapter lists what you’ll be able to do after you have
finished, after that, any applicable safety statements you need to know,
followed by the chapter’s content. At the end, there’s a recap of what was
covered and what’s in the next chapter.
1.3 Your Dexcom Account
You’ll need a username and password to set up the G5 Mobile app (app) and
for reordering.
If you haven’t already done so, go to dexcom.com and set up your own
account.
Or, if you prefer, the app walks you through creating your log-in credentials as
part of your initial app setup.
Summary
Now You Can:
•
Describe different training resources
•
Locate tutorials about using the G5x
•
Find step-by-step instructions for the G5x
•
Recall how to use the user guide
•
Explain why you need a Dexcom® account
What’s Next?
Now you are familiar with how to use this user guide and where to go for help.
Throughout the user guide you’ll see color-coded boxes containing Safety
Statements. The next chapter, Indications for Use and Safety Statement, lists
all Safety Statements along with how to read and interpret them.
PDF compression, OCR, web optimization using a watermarked evaluation copy of CVISION PDFCompressor
Page 19

Dexcom G5x System User Guide
Beginning Your Dexcom G5x Continuous Glucose Monitoring System (G5x) Journey
19
Next you’ll learn about when and how to use the G5x safely.
PDF compression, OCR, web optimization using a watermarked evaluation copy of CVISION PDFCompressor
Page 20

Dexcom G5x System User Guide
20
Chapter 2
Getting Started:
Indications for Use and Safety Statement
2.1 Introduction
We want the G5x to be a valuable tool in your diabetes management. Like any
system, there are steps to take to get the most out of it. As excited as you are
about getting started, did you know if you just took Tylenol®, maybe you
should wait? Did you know taking Tylenol is contraindicated?
In this chapter, you’ll learn about some key areas that might prevent you from
having the best CGM experience, or, if you’re not careful, might even harm
you or the system. You’ll even learn what a contraindication is!
2.2 Important User Information
Each part of your system has instructions including indications,
contraindications, warnings, precautions, and other important user
information. Please review the instructions for each part of the system in this
user guide before using the G5x.
This chapter is important to read. It helps you use the G5x safely and covers:
• What is a Safety Statement?
o Telling the difference between an indication and a
contraindication
o Explaining why warnings are so important
o Defining precautions
• How to read a chapter’s Safety Statement
• Overview of Safety Statements
PDF compression, OCR, web optimization using a watermarked evaluation copy of CVISION PDFCompressor
Page 21

Dexcom G5x System User Guide
21
Let’s start with definitions, look at a Safety Statement example used
throughout the User Guide, and then review the Safety Statements broken
down into the system’s components.
Safety Statement
A Safety Statement is a brief statement of the G5x’s indications, relevant
warnings, precautions, or its contraindications (when to avoid using it). The
Safety Statements are meant to keep you and the system safe while using the
G5x:
1) Indications
How, for what purposes, and under what circumstances you should use
the G5x. Indications let you know who should use the G5x and when.
Indications are the who, what, and why of the G5x.
2) Contraindications
Contraindications let you know when
not
to use the G5x. If used during
these situations, you may hurt yourself or the system; the risk of use
clearly outweighs the benefit.
3) Warning
Important hazard information: Describes serious or life-threatening
circumstances to stay away from while using the G5x, their
consequences, and how to avoid danger.
4) Precaution
Special steps you need to take while using the G5x, preventing minor or
moderate injury to either you or the system.
2.3 Safety Statements
This user guide presents Safety Statement two ways:
1. In this chapter’s Overview of Safety Statements
PDF compression, OCR, web optimization using a watermarked evaluation copy of CVISION PDFCompressor
Page 22

Dexcom G5x System User Guide
22
o Lists all Safety Statements
o Includes a section reviewing how the statements are formatted
2. Within each chapter
o Lists only those statements applicable to that specific chapter
Chapter’s Safety Statements
Each chapter will list all applicable indications, contraindications, warnings,
and precautions.
Some chapters will have multiple Safety Statements; others have none.
Safety Statements are located toward the front so you can keep them in mind
as you learn about that chapter’s topic. The same statement may be repeated
throughout the user guide. It’s important to recognize which factors could
prevent the system from working correctly, or even harm you.
Within chapters, each color-coded Safety Statement is in a box, broken down
into four sections:
1. Type of statement
a. Bold and color-coded
• WARNING-Red
• PRECAUTION-Blue
• INDICATION-Green
• CONTRAINDICATION-Purple
2. Do’s/Don’ts
a. An action you should or should not take
b.
Italicized
3. Why
a. A statement of the potential harm
4. Consequences
a. What could happen if you don’t follow the instructions
PDF compression, OCR, web optimization using a watermarked evaluation copy of CVISION PDFCompressor
Page 23

Dexcom G5x System User Guide
23
The following is an example of a chapter’s Safety Statement and how to read
it.
Warning
Do:
Calibrate at least once every 12 hours
Why: Calibrating less often than every 12 hours might cause inaccurate
sensor glucose readings
Consequences: Missing severe low (hypoglycemia ) or high
(hyperglycemia) Alarm or Alerts
Since this is a Warning, you know it covers important safety information.
Italics are the Do/Don’t steps to follow:
Calibrate at least once every 12
hours
. Below the italics is a statement explaining Why you need to follow the
steps: Calibrating less often than every 12 hours might cause inaccurate
sensor glucose readings. And finally what happens, or the Consequences, if
you don’t: Missing a severe low (hypoglycemia) or high (hyperglycemia)
glucose event.
2.4 Overview of Safety Statements
This section provides a review of Safety Statements containing the same
elements described above (type of Safety Statement, an action, a statement
of potential harm, and consequences) but listed in a narrative, not boxed,
format. Here you’ll learn what indications and contraindications are and what
to do to keep you safe and the system in proper working order.
Safety Statements are broken down into two major categories. First, general
CGM system Warnings which review warnings and precautions you take with
most CGM systems—and second, Hardware/Software Warnings and
Precautions which list warnings and precautions specific to the G5x
components.
Indications and Contraindications
Indications
PDF compression, OCR, web optimization using a watermarked evaluation copy of CVISION PDFCompressor
Page 24

Dexcom G5x System User Guide
24
What are the G5x indications? Well, in technical terms, the indications are:
The Dexcom G5x Continuous Glucose Monitoring (CGM) System (G5x) is a
glucose monitoring system indicated for detecting trends and tracking patterns
in persons (age 2 years and older) with diabetes. The system is intended for
single patient use and requires a prescription.
The system is indicated for use as an adjunctive device to complement, not
replace, information obtained from standard home glucose monitoring
devices.
The system aids in the detection of episodes of hyperglycemia and
hypoglycemia, facilitating both acute and long-term therapy adjustments,
which may minimize these excursions. Interpretation of the system results
should be based on the trends and patterns seen with several sequential
readings over time.
In Layman’s Terms
But what does that mean? Indications are the who, what, and why of the G5x.
Who
The G5x is a single patient use device (meaning you can’t share the
components with others) for people age 2 years and older with diabetes.
What
The G5x is a prescription-only glucose-monitoring device. G5x tracks your
glucose patterns and detects trends. Working with your home blood glucose
(BG) meter, the system is meant to complement, not replace, your BG meter.
Why
The CGM system’s trend and pattern information, its glucose Alarm/Alerts,
combined with your meter’s actual BG value, can help you manage your
diabetes.
By identifying low and high glucose level periods, the G5x allows you to take
action when needed and create long-term management strategies with your
healthcare professional. Using trend information to see your highs and lows
helps you stay inside your target range.
PDF compression, OCR, web optimization using a watermarked evaluation copy of CVISION PDFCompressor
Page 25

Dexcom G5x System User Guide
25
The G5x’s trend and pattern information is based on a series of sensor
glucose readings taken over a period of time.
Work with your healthcare professional and create a game plan on how to
best use your trend and pattern information in managing your diabetes.
Contraindications
Contraindications let you know when
not
to use the G5x; you may hurt
yourself or damage the system. Remember, if used during certain situations,
the risk of use may clearly outweigh any potential benefit. Within the chapters,
contraindications are in purple boxes.
MRI/CT/Diathermy
Don’t wear the system (sensor, transmitter, and receiver) before Magnetic
Resonance Imaging (MRI), Computed Tomography (CT) scan, or highfrequency electrical heat (diathermy) treatment.
The system hasn’t been tested during MRI, CT scans, or with diathermy
treatment. Magnetic fields and heat could damage the components, stopping
sensor glucose readings or Alarm/Alert notifications. Without sensor glucose
readings or Alarm/Alert notifications, you might miss a severe low or high
glucose event.
Medications
Taking medications with acetaminophen (such as Tylenol or Excedrin® Extra
Strength) while wearing the sensor may falsely raise your sensor glucose
readings. The level of inaccuracy depends on the amount of acetaminophen
active in your body and is different for each person.
2.5 General CGM System Warnings
Warnings
PDF compression, OCR, web optimization using a watermarked evaluation copy of CVISION PDFCompressor
Page 26

Dexcom G5x System User Guide
26
Warnings outline important hazard information, describing any serious and/or
life-threatening situations, their consequences, how to avoid danger while
using the system and how to protect the G5x from harm.
Review Training Materials
Thoroughly review the training materials included with your system before
using.
Incorrect use could lead you to misunderstand system information or might
affect its performance and you might miss a severe low or high glucose event.
Treatment Decisions
The system does not replace your BG meter.
When making treatment decisions, such as the amount of insulin you need,
only use your BG value. Don’t use the G5x sensor glucose readings because
they can be different from your BG value. If sensor glucose readings are used
in determining treatments, it could result in you missing a severe low or high
glucose event.
Don’t Ignore Low/High Symptoms
If your sensor glucose readings don’t match your symptoms, measure your
BG with a fingerstick. You may miss a severe low or high glucose event.
Who Shouldn’t Use
The system was not evaluated for the following persons:
• Pregnant women
• Persons on dialysis
Do not use the Dexcom G5x System in critically ill patients. It is not known
how different conditions or medications common to the critically ill population
may affect the performance of the system. Sensor glucose readings may be
inaccurate in critically ill patients.
The system’s accuracy hasn’t been tested in people falling into these groups
and sensor glucose readings may be inaccurate, resulting in missing a severe
low or high event.
PDF compression, OCR, web optimization using a watermarked evaluation copy of CVISION PDFCompressor
Page 27

Dexcom G5x System User Guide
27
2.6 Calibration Warning and Precautions
Calibration is the process of making sure your sensor continues to be
accurate. Your sensor doesn’t automatically know what your glucose levels
are—you have to teach your system what a given BG value is by entering in a
KNOWN glucose value from your BG meter.
Warning
Calibrate on Schedule
Calibrate at least once every 12 hours. Calibrating less often than every 12
hours might cause sensor glucose readings to be inaccurate, resulting in you
missing a severe low or high glucose event.
Precautions
Be Accurate, Be Quick
Enter the exact BG value displayed on your BG meter within five minutes of a
fingerstick.
Entering the wrong BG values, or waiting more than five minutes before entry,
might affect sensor performance, resulting in you missing a severe low or high
event.
Significant Glucose Rate Changes
Don’t calibrate when your BG is changing at a significant rate: more than 2
mg/dL per minute.
Look for rate of change arrows on your display device screen and don’t
calibrate when you see:
• A single arrow, pointing up
o Rising 2-3 mg/dL each minute
• Two arrows pointing up
o Rising more than 3 mg/dL each minute
• Single arrow pointing down
o Falling 2-3 mg/dL each minute
PDF compression, OCR, web optimization using a watermarked evaluation copy of CVISION PDFCompressor
Page 28

Dexcom G5x System User Guide
28
• Two arrows pointing down
o Falling more than 3 mg/dL each minute
Calibrating during a significant rise/fall of your BG may affect accuracy of
sensor glucose readings, resulting in you missing a severe low or high
glucose event.
Fingerstick Only
Only use fingerstick measurements from your BG meter for calibration.
Alternative site BG values from your arms, palm of your hand, etc., may be
different and less accurate than your fingerstick BG values. Using alternative
sites for calibration might affect sensor performance, resulting in you missing
a severe low or high glucose event.
Prior to Startup Calibration: Data/Alarm/Alert
After starting a new sensor session, until completing your startup calibrations
you won’t receive any sensor information such as readings, Alarm or Alerts.
Without these, you may miss a severe low or high glucose event.
Continue to take fingerstick measurements during a new sensor warmup
period.
Now that we have reviewed common CGM Safety Statements, let’s focus on
the G5x components.
2.7 System/Hardware/Software Warnings and
Precautions
In this section, you will learn how to safely use the G5x’s hardware and
software. Some sections have either Precautions or Warnings, others will
have both.
Sensor/Transmitter Holder Warnings and Precautions
Warnings
Sensor Breaking Off
PDF compression, OCR, web optimization using a watermarked evaluation copy of CVISION PDFCompressor
Page 29

Dexcom G5x System User Guide
29
On rare occasions, the sensor wire may break or detach from the transmitter
holder.
Within 24 hours of experiencing a broken sensor wire, please call our 24/7
Technical Support department, toll free at 1.888.738.3646
If a sensor wire breaks under the skin with no portion of it visible, don’t remove
it. Contact your healthcare professional if you have redness, swelling, or pain
at the insertion site.
Placement
Do not insert the sensor component of the system in a site other than the
belly/abdomen (ages 2 years and older) or the upper buttocks (ages 2 to 17
years). The placement and insertion of the sensor component of the system is
not approved for other sites.
The system has not been tested in other areas and may not work properly if
inserted in other areas.
Storage
During a sensor’s shelf life, store it between 36° F-86° F. While you don’t need
to keep your sensor in a refrigerator, you can as long as the refrigerator is
between 36° F-86° F.
Never store sensors and/or sensor packages in a freezer.
Storing the sensor incorrectly might cause the sensor glucose readings to be
incorrect, resulting in you missing a severe low or high glucose event.
Precautions
Expiration Date
Don’t use expired sensors. Before inserting, always check the package label
for the expiration date using the YYYY-MM-DD format.
If past the expiration date, don’t use because the sensor glucose readings
might not be accurate, resulting in you missing a severe low or high glucose
event.
Sensor Package
PDF compression, OCR, web optimization using a watermarked evaluation copy of CVISION PDFCompressor
Page 30

Dexcom G5x System User Guide
30
Don’t use sensor if its sterile package has been damaged or opened. Using a
non-sterile sensor might cause infection.
Clean and Dry Before Using
Before opening the sensor package, wash your hands with soap and water,
then dry. If your hands are dirty while inserting the sensor, you may
contaminate the insertion site and get an infection.
Before sensor insertion, clean the skin with alcohol wipes to prevent
infections. Don’t insert the sensor until the cleaned insertion site is dry, and
free from any lotions or perfumes.
If your insertion site is not clean and completely dry, you run the risk of
infection or the transmitter holder not sticking and falling off.
Sensor Placement
Don’t insert the sensor where bones are close to the skin’s surface (for
example, over your ribs or hip bones). If you insert the sensor in these areas,
you may feel excessive pain or damage your sensor.
Don’t remove the safety guard before placing the applicator on the skin. If you
remove the safety guard first, you may accidentally deploy the needle and
hurt yourself. Change the site where you place the sensor with each new
insertion. Using the same site too often might not allow the skin to heal,
causing scarring or skin irritation.
Sensor placement is important. Choose a site:
• At least 3 inches from insulin pump infusion set or injection site
• Away from waistband, scarring, tattoos, irritation
• Unlikely to be bumped or pushed
Insertion in these areas might affect sensor performance, resulting in you
missing a severe low or high glucose event.
Transmitter Warnings and Precautions
Warnings
Inspect Transmitter
PDF compression, OCR, web optimization using a watermarked evaluation copy of CVISION PDFCompressor
Page 31

Dexcom G5x System User Guide
31
If your transmitter is damaged or cracked in any way, don’t use it. Damaged
components could create an electrical safety hazard or malfunction, which
might cause electrical shocks.
Choking
The transmitter is small and may pose a choking hazard. Don’t put it in your
mouth or allow children to play with it.
Precautions
Reusable: Don’t Throw Away
When ending a session, don’t throw away the transmitter.
The transmitter is reusable and can be used in multiple sensor sessions. Keep
using it until the system notifies you the transmitter battery is about to expire.
Don’t Share Your Transmitter
Never share your transmitter with another person. The system is a
prescription-only medical device and is meant, or indicated, for your use only.
Your transmitter is tied to
your
readings. If used by someone else, your
reports, Alarm and Alerts, etc., would be wrong, resulting in you missing a
severe low or high glucose event.
System Precautions
Next are precautions for the receiver, transmitter, sensor, and the system.
Precautions
Use Correct Transmitter, Receiver, and Sensor
The G5x transmitter must be used with the G5x Sensor and is not
interchangeable with the Dexcom G5®Mobile/G4® PLATINUM Sensor. The
G5x transmitter is compatible with the G5 Mobile receiver.
The G5x transmitter and receiver are not compatible with the Dexcom G4
PLATINUM CGM System’s transmitter and receiver.
System Accuracy
PDF compression, OCR, web optimization using a watermarked evaluation copy of CVISION PDFCompressor
Page 32

Dexcom G5x System User Guide
32
System accuracy may be affected when your glucose is changing at a
significant rate such as during exercise or after a meal.
Significant glucose rise/fall rates:
• Rising 2-3 mg/dL each minute
• Rising more than 3 mg/dL each minute
• Falling 2-3 mg/dL each minute
• Falling more than 3 mg/dL each minute
Airport Scanners
Be aware of airport body scanners and baggage x-rays when you travel. Do
not place any part of the G5x system in the baggage x-ray machine or body
scanner. Ask for visual inspection instead:
• Baggage x-ray machine: Instead of putting any part of your G5x
through the baggage x-ray, ask the TSA officers to visually inspect it.
• Body scanner: When you are wearing your G5x, request handwanding or full-body pat-down and visual inspection instead of going
through the Advanced Imaging Technology (AIT) body scanner. AIT is
also called millimeter wave scanner.
The system has not been tested in x-rays or AIT body scanners, and it is
unknown if exposure to x-rays or AIT body scanners can affect the system
performance and result in you missing a severe low or high glucose event.
It is safe to wear the system through the walk-through metal detector or handwanding. If you are unsure of whether the airport scanner is a metal detector,
an AIT body scanner or an x-ray, ask the TSA officer or request hand-wanding
or full-body pat-down.
Receiver and Smart Device Precautions
The Dexcom receiver and your smart device share some warnings and
precautions.
PDF compression, OCR, web optimization using a watermarked evaluation copy of CVISION PDFCompressor
Page 33

Dexcom G5x System User Guide
33
Precautions
Communication Range
Do not separate the transmitter from the receiver or smart device by more
than 20 feet. The transmission range from the transmitter to receiver or smart
device is up to 20 feet without obstruction.
Types of obstruction differ and not all have been tested. Obstructions can
include water, walls, metal, etc. If your transmitter and display device(s) are
more than 20 feet from each other or are separated by an obstruction, they
might not communicate, resulting in you missing a severe low or high glucose
event.
As with any wireless device, water in reducing the communication distance.
This applies to the transmitter and display devices. Take special care when
swimming, taking a bath, or getting into a hot tub.
Setting Alarm/Alert Notifications
When using both a receiver and a smart device, you must set your settings
separately in each. If you set up one device and then use another, you might
not get an Alarm or Alerts, causing you to miss a severe low or high glucose
event.
Using an accessory device (like a smart watch) might override your smart
device sounds. Alarms or Alerts might vibrate or be heard on the accessory
instead of your smart device. After connecting any accessories, make sure
that the smart device settings allow you to continue receiving Alarms or Alerts
on the smart device.
Is It On?
If the receiver or smart device is turned off (Shut Down), it will not display
sensor data, information, Alarm or Alerts. Make sure they are turned on;
otherwise you won’t get sensor glucose readings or Alarm or Alerts, causing
you to miss a severe low or high glucose event.
Smart Device Warnings
Next are warnings for just your smart device.
PDF compression, OCR, web optimization using a watermarked evaluation copy of CVISION PDFCompressor
Page 34

Dexcom G5x System User Guide
34
Warnings
Smart Device Settings
The app can’t override your smart device’s internal settings. Also, accessory
devices (like a smart watch or other wearable smart devices) might override
your smart device’s Alerts and Alarm.
To receive Alarm or Alerts you must:
1. Make sure app Notifications are turned on in the
Setting’s
menu.
2. Verify app hasn’t been shut down.
3. Turn
Bluetooth®
on.
4. Turn off
Do Not Disturb
(if available on your smart device).
5. Restart app after device is restarted.
6. Set
Volume
at a level you can hear.
7. Do not close app, always run app in the background.
8. Make sure accessory devices do not override your smart device
settings.
If your settings are incorrect, you might miss a severe low or high glucose
event.
App Alarm/Alert vibrations aren’t any different from other vibrating apps on
your smart device. Medical device apps, like this app, don’t have any special
priorities over your smart device’s features. G5 Mobile app notifications or
Alerts may sound or feel the same as notifications from another app. The only
way to know is to look at the screen.
Did You Miss an Alarm or Alert?
An Alarm or Alert can’t be heard through your smart device’s speakers if
headphones are plugged in.
Make sure you unplug your headphones when you are done using them,
otherwise you might not hear an Alarm or Alert, causing you to miss a severe
low or high glucose event.
Receiver Warning and Precaution
PDF compression, OCR, web optimization using a watermarked evaluation copy of CVISION PDFCompressor
Page 35

Dexcom G5x System User Guide
35
Warning
Don’t Use Damaged Goods
If your receiver is damaged or cracked, don’t use it. This could create an
electrical safety hazard or malfunction, causing possible electrical shocks.
Avoid Strangulation
Use USB cable only as directed and store safely. Misuse of the USB cable
can present a strangulation risk.
Precaution
Test Receiver
If your receiver gets wet or dropped, make sure the speaker and vibrations
still work. To check, either plug it in, turn it on, or go to the
Profiles
menu and
select
Try It
. If it doesn’t vibrate and beep, contact Technical Support.
If the vibration motor and/or speaker on your receiver aren’t functioning
properly you may miss a severe low or high Alarm/Alert. Use the app on your
smart device until this issue is resolved
Keep Receiver Clean and Dry
Keep the USB port cover on the receiver closed whenever the USB cable is
not attached and do not submerge in water.
If dirt or water gets into the USB port, the receiver could become damaged
and stop displaying readings or providing Alerts; you might miss a severe low
or high glucose event.
Caution
U.S. law restricts the sale of the G5x to sale by or on order of a physician.
Summary
Now You Can:
• Define a Safety Statement
PDF compression, OCR, web optimization using a watermarked evaluation copy of CVISION PDFCompressor
Page 36

Dexcom G5x System User Guide
36
• Explain the difference between an indication and a contraindication
• Describe the importance of warnings
• Describe what a precaution is
• Correctly read a chapter’s Safety Statement
• Provide an overview of Safety Statements by category
What’s Next?
In our next chapter, you will learn about the risks and benefits of using the
G5x.
PDF compression, OCR, web optimization using a watermarked evaluation copy of CVISION PDFCompressor
Page 37

Dexcom G5x System User Guide
37
Chapter 3
Getting Started:
Risks and Benefits
When using any medical device, there are risks and benefits. In this chapter,
you’ll learn what they are so you can better understand the pros and cons of
CGM and the G5x.
First, let’s review some possible risks.
3.1 Risks
There are some risks with using real-time CGM.
Not Receiving Alarm/Alerts
If you aren’t getting your CGM Alarm/Alerts, you run the risk of not knowing
you are having a severe glucose low or high.
Some hardware issues preventing Alarm/Alerts:
• Alert function is turned off
• Transmitter or display device is out of range
• Display device isn’t showing sensor glucose readings
• Display device battery is dead
• Unable to hear Alarm/Alerts or feel vibration
• Speaker or vibration motor not working
• App not running in the background
• Smart device is on
Do Not Disturb
or Silent Mode
See Troubleshooting in Chapter 18 or recommended settings in Chapter 11
for more information.
Different Devices May Give Different Numbers
PDF compression, OCR, web optimization using a watermarked evaluation copy of CVISION PDFCompressor
Page 38

Dexcom G5x System User Guide
38
The sensor glucose reading can be different from your meter’s BG value.
If the sensor’s glucose reading is higher than your meter’s BG value, you may
miss a Low Alert. As an example, your last sensor glucose reading was 82
mg/dL, whereas your meter BG value shows 78 mg/dL. If your Low Alert is set
at 80 mg/dL, you won’t receive an alert because the sensor glucose reading is
82 mg/dL.
If you’re not receiving an Alarm/Alert, and not taking fingerstick
measurements, you may be unaware of low or high glucose levels.
Sensor Insertion Risks
Inserting the sensor and wearing the adhesive patch might cause infection,
bleeding, pain, or skin irritations (for example, redness, swelling, bruising,
itching, scarring, or skin discoloration). The chance of this happening is low.
The G5x uses a different applicator than older systems. The G5x clinical
studies showed slight redness and swelling occurring only in a few patients.
Different people may have different skin sensitivity to the sensor adhesive. If
skin irritation is seen, follow up with your healthcare professional on ways or
tips to reduce or avoid sensor site irritation.
With any sensor, if you don’t follow the instructions for sensor insertion, there
is a chance you may mistakenly insert the sensor before you are ready. Be
careful to ensure you place the sensor on your sensor insertion site
before
taking off the safety guard.
After
placing the applicator on the body, fold and
break the safety guard.
The safety guard can be a choking hazard. Carefully throw it away, especially
if around children.
During Dexcom’s G5x clinical studies, no sensor wires broke; however, there
is a remote chance a sensor wire could break or detach and remain under
your skin. Sterile broken sensor wires usually don’t pose a significant medical
risk.
If a sensor wire breaks off or detaches and remains under your skin, contact
your healthcare professional and call Dexcom’s Technical Support toll free,
24/7, at 1.888.738.3646 or toll at 1.858.200.0200 within 24 hours.
Those are the risks, let’s now review the benefits!
PDF compression, OCR, web optimization using a watermarked evaluation copy of CVISION PDFCompressor
Page 39

Dexcom G5x System User Guide
39
3.2 Benefits
Daily habits impact your BG levels. With the G5x, you can track how your
exercise, carbs, stress levels, medication, or illness influences your glucose
levels.
Knowing Your Trends
Providing sensor glucose readings every five minutes, for up to seven days,
the G5x helps you detect trends and patterns. Trend information reveals
where your glucose is now, where it’s been, where it’s heading, and how fast
it’s changing.
Understanding your trends allows you to take proactive action, helping you
avoid dangerously low or high glucose values.
Using Dexcom
Share
(see Part 5) allows friends and family, your Followers, to
monitor your glucose activity, adding another layer of support and peace of
mind.
Simplified Sensor Insertion
The redesigned G5x sensor applicator allows you to insert a sensor with fewer
steps while using just one hand. Fewer steps simplify the insertion process.
Helping Your Diabetes Management
Wearing the G5x on a consistent and ongoing basis helps you manage your
diabetes. The Alarm/Alerts features (see Chapter 11) keep you aware of your
glucose levels. Alerts notify you when your glucose goes outside your target
range or is rapidly falling or rising, letting you take action before you get too
low or too high. The Urgent Low Glucose Alarm lets you know when you are
dangerously or urgently low, going below 55 mg/dL. By taking corrective
measures, you reduce the time spent in your low/high range, while increasing
time in your target range (Garg, S. Z., 2006) (Battelino, T., 2011).
Real-time CGM can help improve your A1C as well as improve the quality of
your glucose control. If you are at or below 7%, using a CGM such as the G5x
helps reduce hypoglycemia (Tamborlane, W. V., 2008).
PDF compression, OCR, web optimization using a watermarked evaluation copy of CVISION PDFCompressor
Page 40

Dexcom G5x System User Guide
40
Lowering your A1C, increasing your time in your target range while
decreasing time in low/high BG range is believed to reduce your risk of
diabetes-related complications (Ohkubo, Y., 1995).
In some cases, patients perceived an increase in their quality of life and peace
of mind when using real-time CGM (Juvenile Diabetes Research Foundation
Continuous Glucose Monitoring Study Group, 2010).
What’s Next?
You’ve read the Safety Statements, reviewed the risks and benefits; now let’s
take a look at Dexcom’s G5x!
References:
Battelino, T., Phillip, M., Bratina, N., Nimri, R., Oskarsson, P., & Bolinder, J.
(2011). Effect of Continuous Glucose Monitoring on Hypoglycemia in Type 1
Diabetes.
Diabetes Care
, 34(4), 795-800.
Garg, S., Zisser, H., Schwartz, S., Bailey, T., Kaplan, R., Ellis, S., &
Jovanovic, L. (2006). Improvement in Glycemic Excursions With a
Transcutaneous, Real-Time Continuous Glucose Sensor: A Randomized
Controlled Trial.
Diabetes Care
, 29(1), 44-50.
Juvenile Diabetes Research Foundation Continuous Glucose Monitoring
Study Group (2010). Quality-of-Life Measures in Children and Adults With
Type 1 Diabetes.
Diabetes Care
, 33(10), 2175-2177.
Ohkubo, Y., Kishikawa, H., Araki, E., Miyata, T., Isami, S., Motoyoshi, S., &
Shichiri, M. (1995). Intensive Insulin Therapy Prevents the Progression of
Diabetic Microvascular Complications in Japanese Patients With Non-insulindependent Diabetes Mellitus: A Randomized Prospective 6-year Study.
Diabetes Research and Clinical Practice
, 28(2), 103-117.
Tamborlane, W. V., Beck, R. W., Bode, B. W., Buckingham, B., Chase, H. P.,
Clemons, R., ... & Xing, D. (2008). Continuous Glucose Monitoring and
Intensive Treatment of Type 1 Diabetes.
The New England Journal of
Medicine,
359(14), 1464-1476.
PDF compression, OCR, web optimization using a watermarked evaluation copy of CVISION PDFCompressor
Page 41

Dexcom G5x System User Guide
41
2
LET’S G5x! THE BASICS
• Introduction to the G5x
• Initial Setup
• Starting a Sensor Session: Inserting the Sensor and Transmitter
• Calibration
• Ending a Sensor Session and Transmitter Session
PDF compression, OCR, web optimization using a watermarked evaluation copy of CVISION PDFCompressor
Page 42

Dexcom G5x System User Guide
42
Chapter 4
Let’s G5x! The Basics:
What Is the G5x?
4.1 System Description
Now it’s time to get an overview of the the Dexcom G5x.
After this chapter, you’ll be able to:
• Explain the G5x
• Describe options to view trends
• Locate your historical readings
• Recognize system components
• Explain each part’s function
4.2 Safety Statement
While you can use the G5 Mobile receiver with the G5x, you can’t use the
sensor or transmitter from previous generations. If the transmitter or sensor
box says “G5 Mobile” or “G4 PLATINUM,” don’t use them with the G5x.
PDF compression, OCR, web optimization using a watermarked evaluation copy of CVISION PDFCompressor
Page 43

Dexcom G5x System User Guide
43
Warning
Don’t:
The system was not evaluated for the following persons:
•
Pregnant women
•
Persons on dialysis
Don’t use the system in critically ill patients. It is not known how different
conditions or medications common to the critically ill population may affect
the performance of the system. Sensor glucose readings may be
inaccurate in critically ill patients.
Consequences: The system’s accuracy hasn’t been tested in people
falling into these groups, and sensor glucose readings may be inaccurate,
resulting in missing a severe low or high event.
Precaution
Do
: The G5x transmitter must be used with the G5x Sensor and is not
interchangeable with Dexcom the G5®Mobile/G4
®
PLATINUM Sensor.
The G5x transmitter is compatible with the G5 Mobile receiver.
Why: The G5x transmitter and G5 receiver are not compatible with the
Dexcom G4 PLATINUM CGM System’s transmitter and receiver.
Consequences: Missing a severe low (hypoglycemia) or high
(hyperglycemia) glucose event.
PDF compression, OCR, web optimization using a watermarked evaluation copy of CVISION PDFCompressor
Page 44

Dexcom G5x System User Guide
44
G5x-Compatible Components
G5x System Components
Components Not Compatible with
G5x
G5x Sensor
G5x Transmitter
G5 Mobile Receiver
G5 Mobile App
G5 Mobile/G4 PLATINUM Sensor
G5 Mobile Transmitter
G4 PLATINUM Transmitter
G4 PLATINUM Receiver with Share
G4 PLATINUM Receiver
4.3 The G5x
The G5x is a medical device you use on yourself. It allows you to continually
see your sensor glucose readings, updated every five minutes for up to 7
days, without the bother of taking constant fingerstick measurements. A
single-use sensor inserted under your skin measures your sensor glucose
readings. A reusable transmitter sends your data to your display device.
The G5x provides personalized trend Alerts, notifying you to proactively react
when your glucose levels are getting too low or too high. Dexcom provides
web-based reports reflecting your glucose trends and patterns. Share the
reports with your healthcare professional when developing your diabetes
management treatment plans.
Some users of the G5x System may need a caregiver involved in their care.
Please consult your physician for guidance.
Options to View Your Trends
The G5x transmitter works with a number of display devices, giving you
flexibility to use what’s best for you, your situation, or your lifestyle.
1. Receiver
PDF compression, OCR, web optimization using a watermarked evaluation copy of CVISION PDFCompressor
Page 45

Dexcom G5x System User Guide
45
2. G5 Mobile app (app) on your smart device
While the system works with different smart devices, they’re not
interchangeable during a sensor session, so before starting one, select which
smart device you want to use and stick with it throughout your session. You
can’t use multiple smart devices at the same time, but you can combine the
receiver with a smart device during a session.
The G5x is the first CGM system where a smart device acts as a receiver. For
a list of current devices and operating systems, go to:
dexcom.com/compatibility.
Chapter 5 covers how to set up your smart device with the app.
The primary difference between the receiver and app is not the information
they give you, but how that information is presented. The following are some
of the shared CGM data and system information features.
Tracking Real-Time CGM Data
The receiver and app give you the ability to track your glucose trends in a
number of different ways. Each device’s home screen opens to your glucose
trend screen.
Viewing Glucose Levels
The receiver and app share many of the same glucose-monitoring features.
Your glucose values are color-coded to highlight what zone you are in,
allowing you, at a glance, to see what your levels are.
Color-coded glucose levels:
• Red - Low
• Gray - Within your target range
• Yellow – High
Trend Arrows
Glucose levels are not just about the numbers. The G5x includes trend arrows
so you know the speed and direction of your glucose, allowing you to
proactively react before your glucose gets too high or too low.
PDF compression, OCR, web optimization using a watermarked evaluation copy of CVISION PDFCompressor
Page 46

Dexcom G5x System User Guide
46
Alarm/Alerts
Being warned when your glucose value is too high or too low, falling or rising
too quickly, or trending toward a severe low or high is very important.
Warnings in the form of Alerts or an Alarm help you avoid getting too low or
too high. Alarm and Alert notifications help keep you aware of your glucose
trends and are made up of a combination of sounds, vibrations, and screens.
There are a number of Alerts, but only one Alarm: when your glucose level
dips below 55 mg/dL. Some customization options are available and are part
of the setup process for the receiver and smart device.
In Chapter 11, you can learn more about the Alarm and Alerts feature.
Viewing Your Glucose Values
The G5x allows you to see your last 1-3-6-12-24 hours of your sensor
glucose readings. On the receiver, from the home screen, press
Up/Down
Arrows
to view. On a smart device, hold upright in
portrait
mode to see the
most recent three hours; turn sideways to
landscape
mode to view your
glucose levels over the last 1-3-6-12-24 hours.
Go to Chapter 9 to learn more about viewing your glucose trends.
4.4 What’s New to the G5x?
Dexcom’s G5x has features not found in our previous generations. They
include:
•
G5x sensor applicator
•
Redesigned transmitter and transmitter holder
G5x Sensor Applicator
Inserting a sensor has never been easier! The redesigned G5x sensor
applicator allows you to insert a sensor with just one hand. Just peel away the
adhesive’s backing, place the applicator on your body, fold and break off the
safety guard, and push the applicator’s button. For detailed steps on sensor
insertion, see Chapter 6.
PDF compression, OCR, web optimization using a watermarked evaluation copy of CVISION PDFCompressor
Page 47
Dexcom G5x System User Guide
47
Redesigned G5x Transmitter Holder and Transmitter
The redesigned transmitter and its holder enjoy a lower profile. The
transmitter snaps into the newly designed holder and, with its new breakaway
feature, snaps out for easy transmitter removal. For more information on how
to attach the transmitter, go to Chapter 6. After a sensor session has ended,
see Chapter 8 for its removal.
4.5 System Information
The receiver and app also keep you informed on the system’s status.
Technical notifications provide information about your sensor session and
about the system’s hardware. Each chapter provides a table of the
notifications, system, and error messages applicable to its subject. As an
example, the calibration chapter will review all calibration messages you may
see.
Now that you know what the G5x does and what’s new, let’s open your G5x
packages, see what’s inside, and review each item.
4.6 System Components
Package
The G5x comes to you in a number of boxes; after opening, keep the
packaging until you are no longer using its contents.
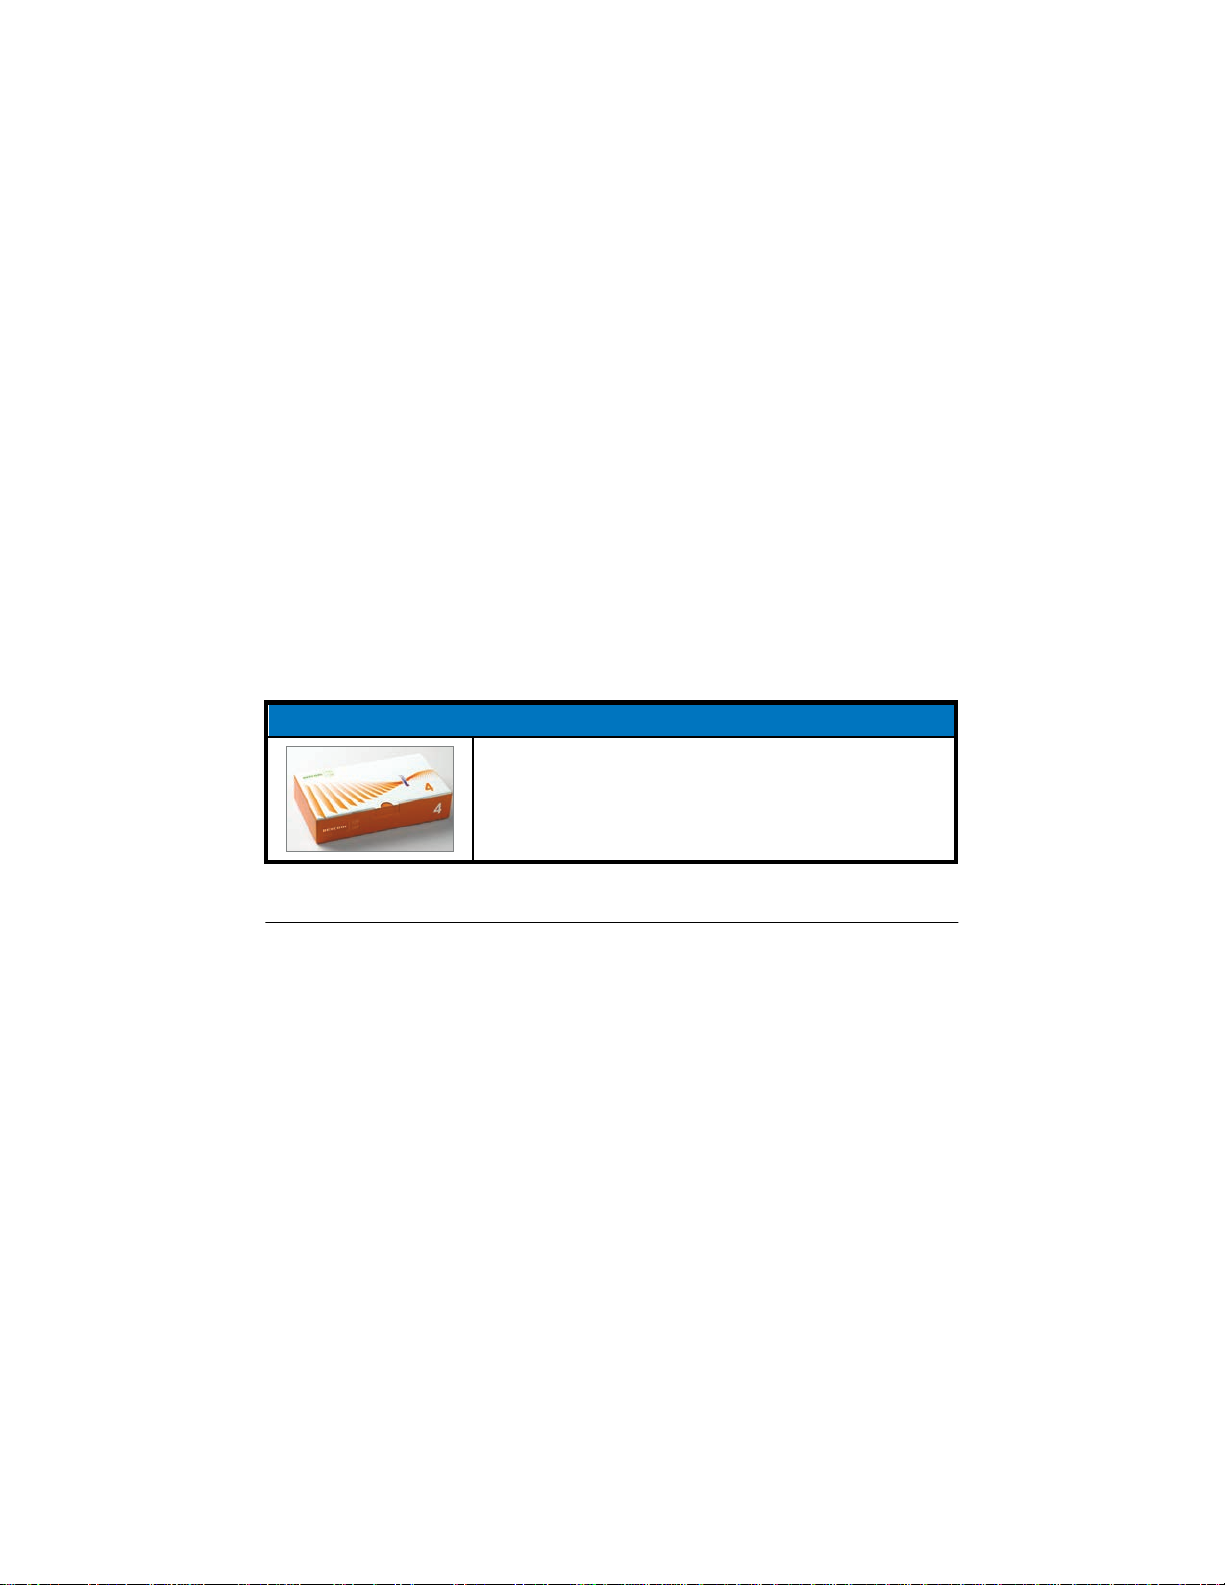
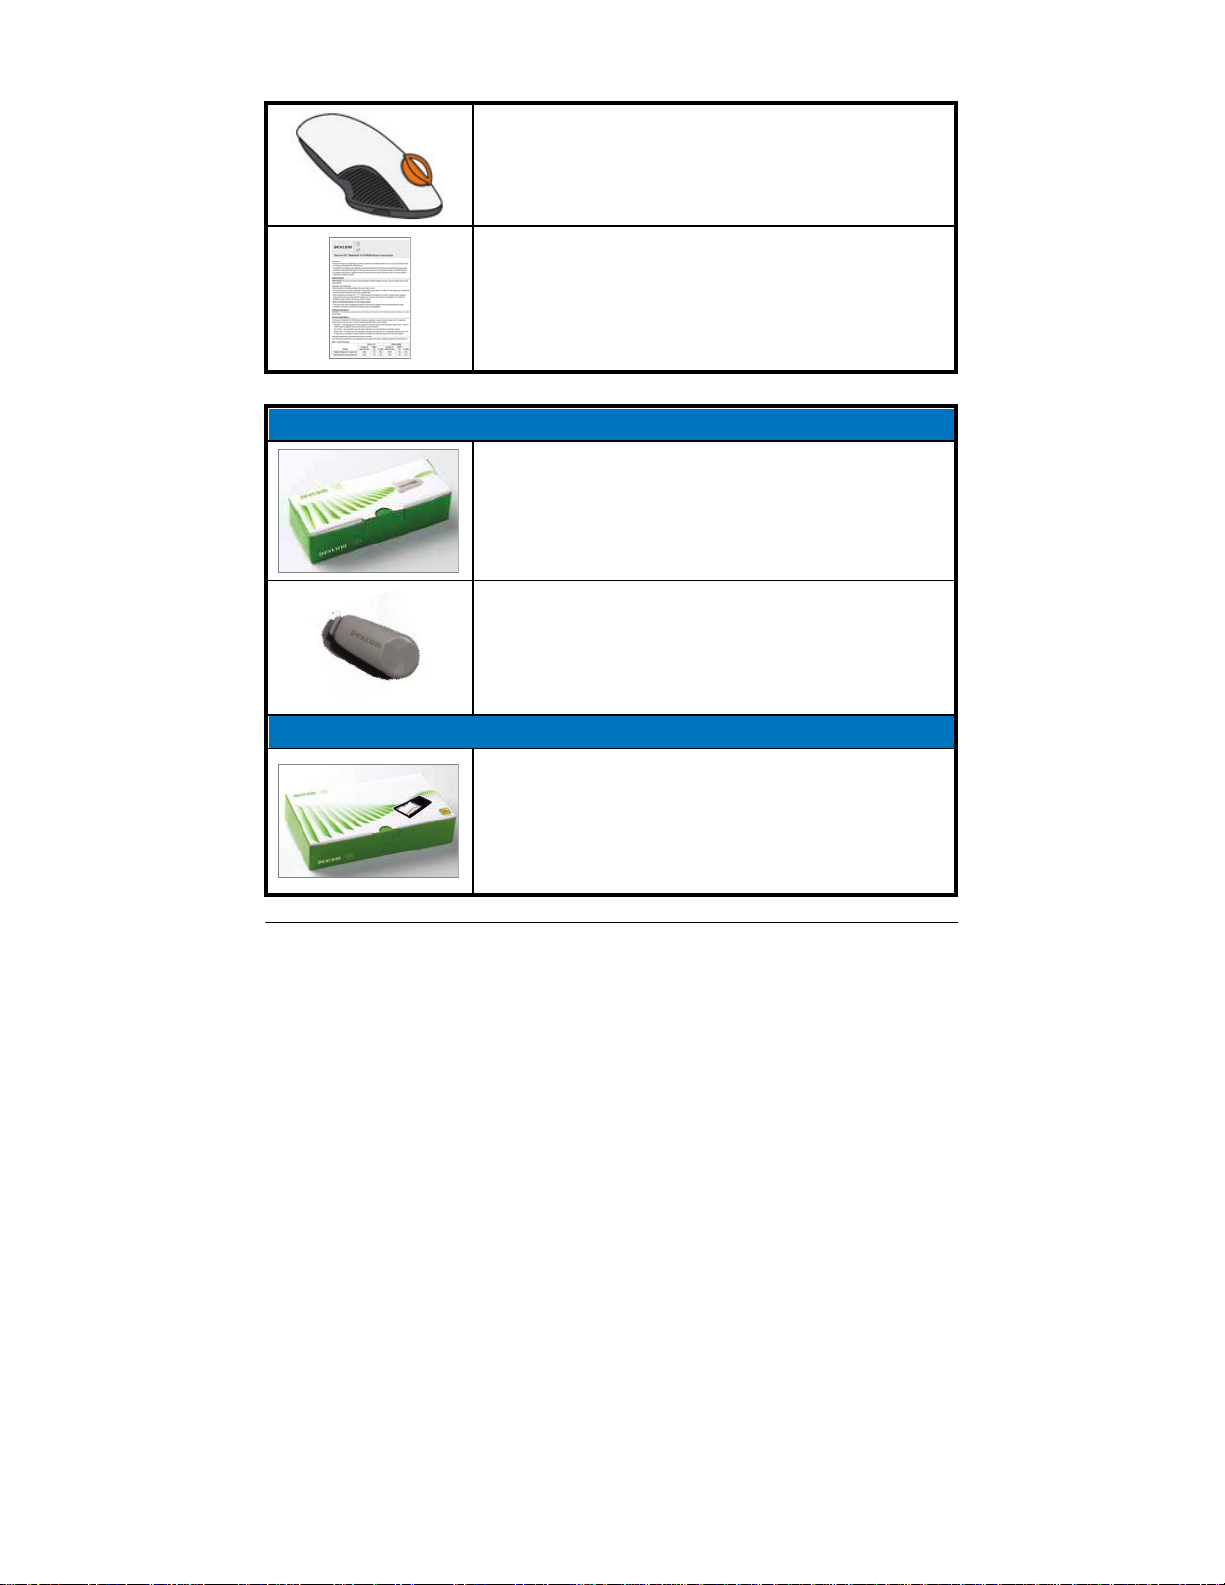
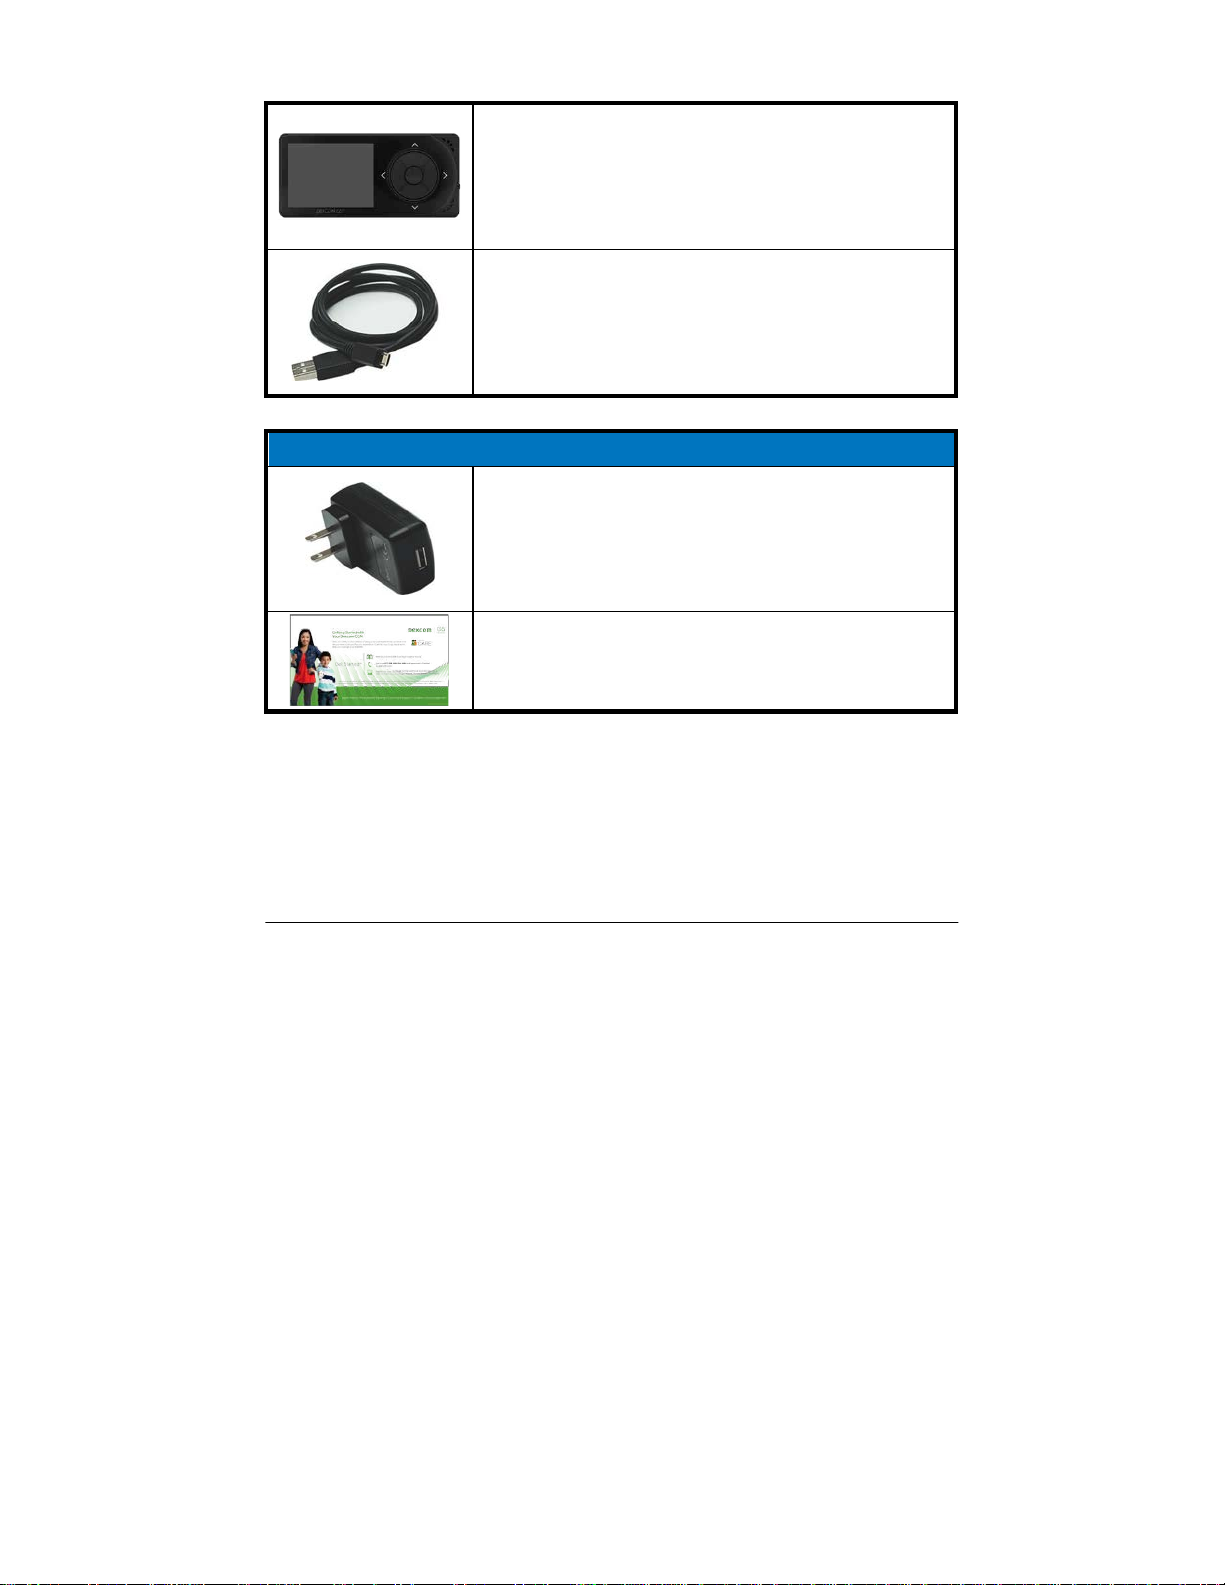
G5x System Component Packaging
Sensor
Sensor package
PDF compression, OCR, web optimization using a watermarked evaluation copy of CVISION PDFCompressor
Page 48
Dexcom G5x System User Guide
48
Single use sensor(s)
Sold separately.
Comes in a sterile pack.
Insert
Transmitter
Transmitter package
Reusable transmitter
Receiver
Receiver package
PDF compression, OCR, web optimization using a watermarked evaluation copy of CVISION PDFCompressor
Page 49
Dexcom G5x System User Guide
49
Receiver
Receiver’s USB charging and download cable
Receiver
AC power adapter
Welcome Card
PDF compression, OCR, web optimization using a watermarked evaluation copy of CVISION PDFCompressor
Page 50
Dexcom G5x System User Guide
50
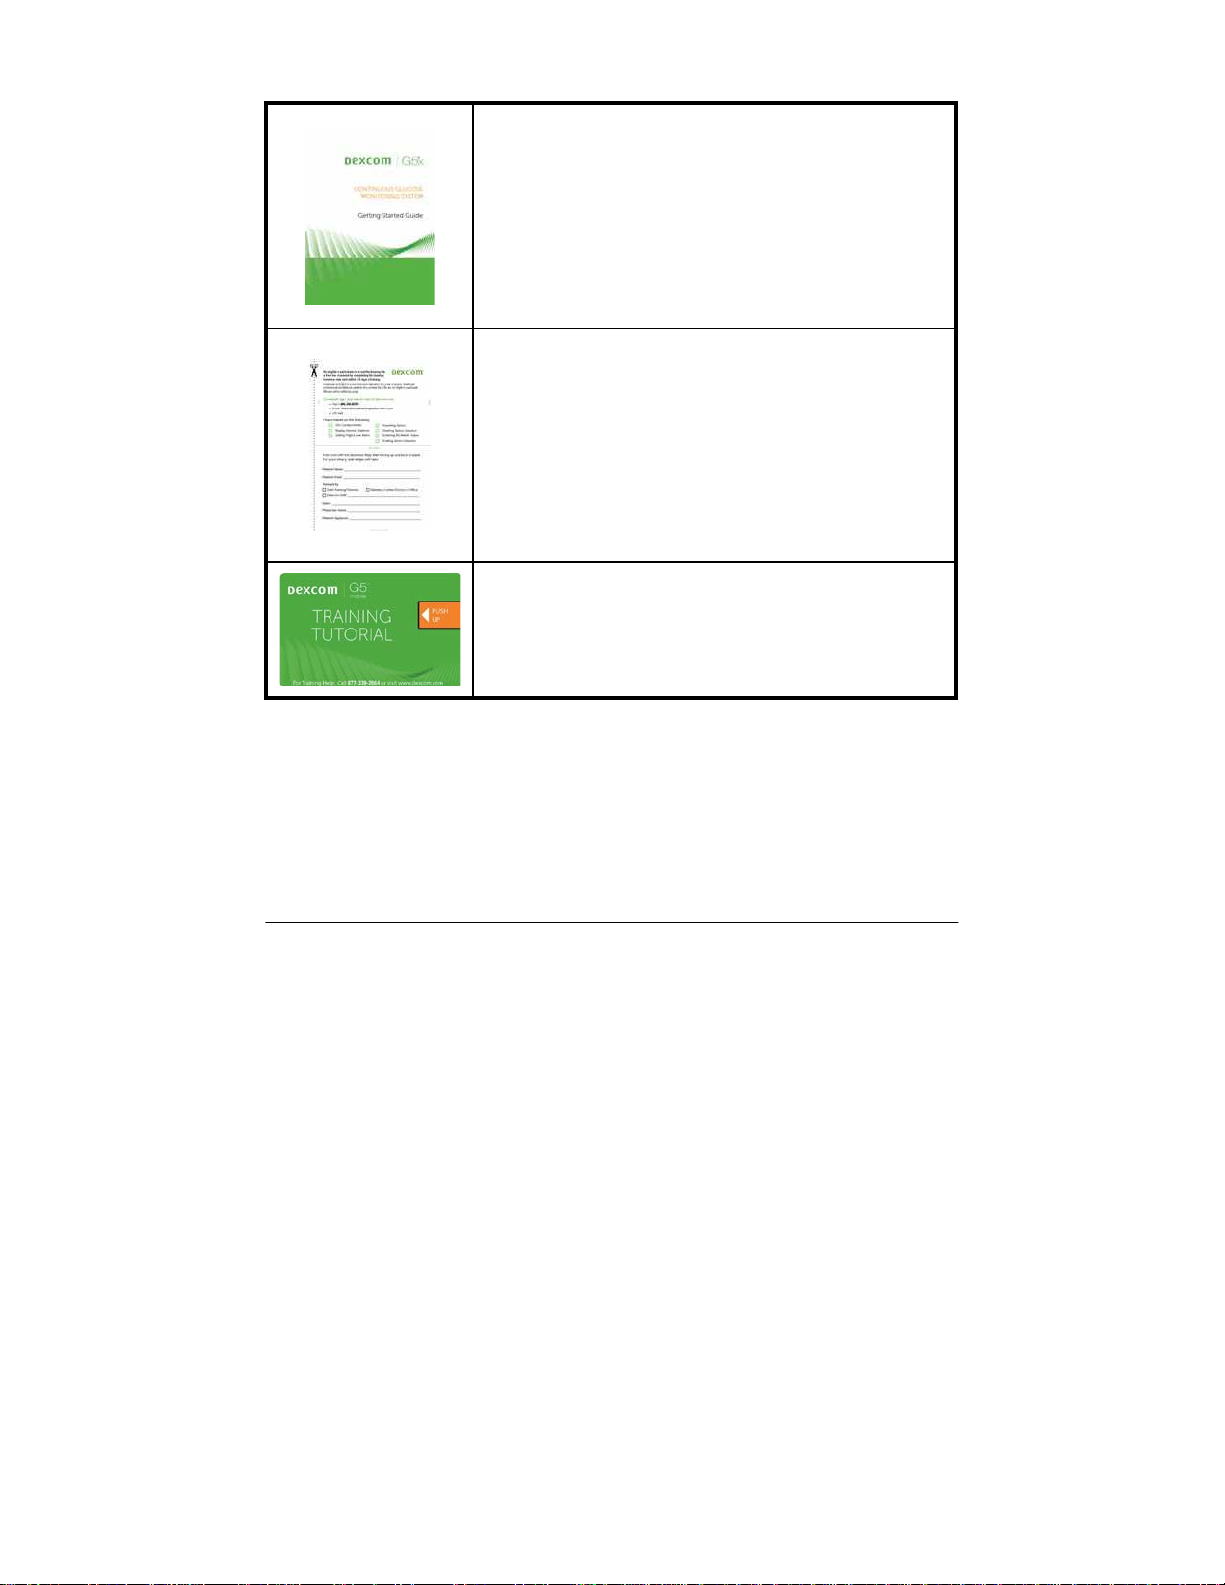
Getting Started Guide
Training Checklist attached to Getting Started
Guide
Training Tutorial USB Card
Overview of System Components
This section is meant as a quick overview of each part; specifics for each are
found in following chapters. For detailed product specifications and technical
information, please go to Chapter 17.
The G5x is comprised of four key parts:
1. Applicator with single use sensor
PDF compression, OCR, web optimization using a watermarked evaluation copy of CVISION PDFCompressor
Page 51
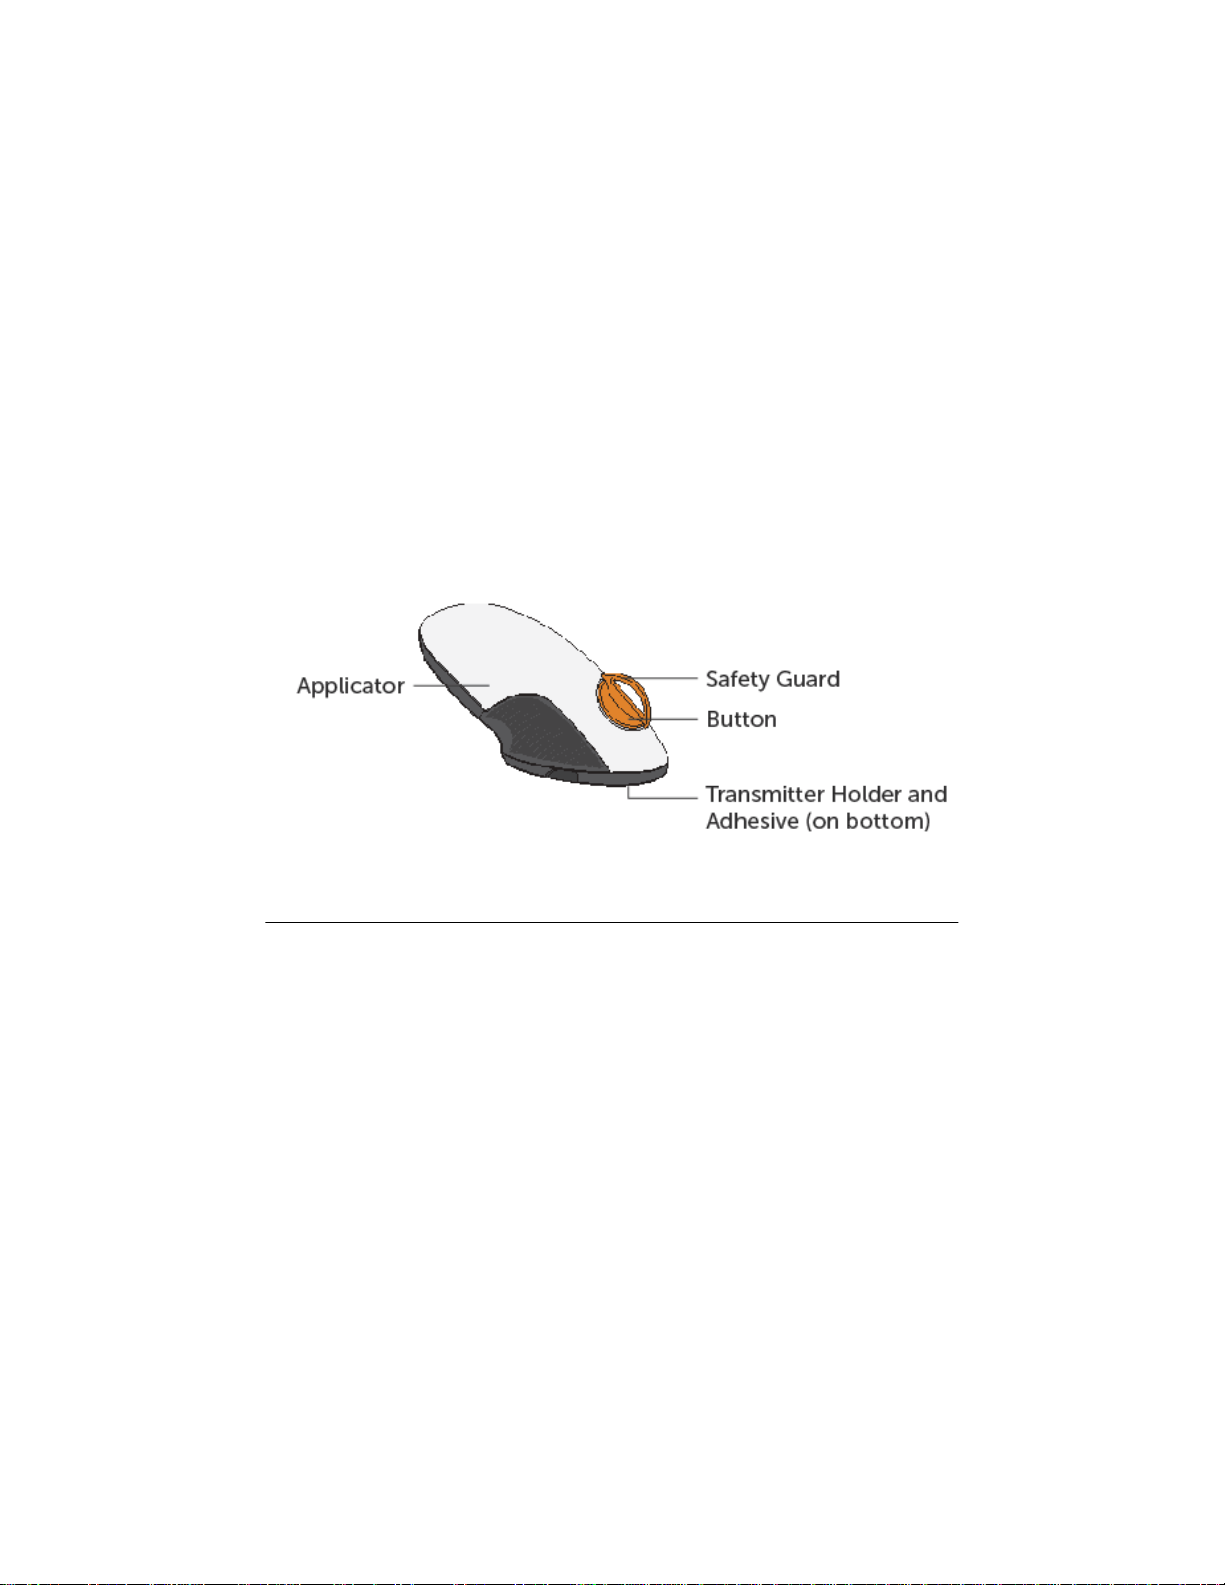
Dexcom G5x System User Guide
51
2. Reusable transmitter
3. Rechargeable receiver
4. G5 Mobile app
G5x optional:
Dexcom
Share
Sensor Applicator Overview
After removing the backing from the adhesive patch on the back of the sensor
applicator, place the applicator on your skin and remove the safety guard.
Push the orange button to insert the sensor wire and release the transmitter
holder.
The sensor wire is made of silver and platinum with polymer membranes.
Once inserted, the thin and flexible wire measures your glucose levels in the
fluid between your cells (interstitial fluid) for up to seven days.
This section is meant as a quick overview. More information on using and
inserting the applicator, sensor, and sensor wire can be found in Chapter 6.
Figure 1. G5x Sensor Applicator and Transmitter Holder
PDF compression, OCR, web optimization using a watermarked evaluation copy of CVISION PDFCompressor
Page 52
Dexcom G5x System User Guide
52
Applicator and Transmitter Holder
What it’s called
What it does
Applicator
Applicator
Contains small insertion needle and sensor wire.
Inserts sensor wire under the skin.
Disposable, for single use only.
Removed after insertion.
Safety Guard
Keeps all moving parts in place before insertion.
Prevents accidental sensor insertion.
Fold and break to remove.
Button
Press to insert sensor wire and release transmitter
holder.
Transmitter Holder
PDF compression, OCR, web optimization using a watermarked evaluation copy of CVISION PDFCompressor
Page 53
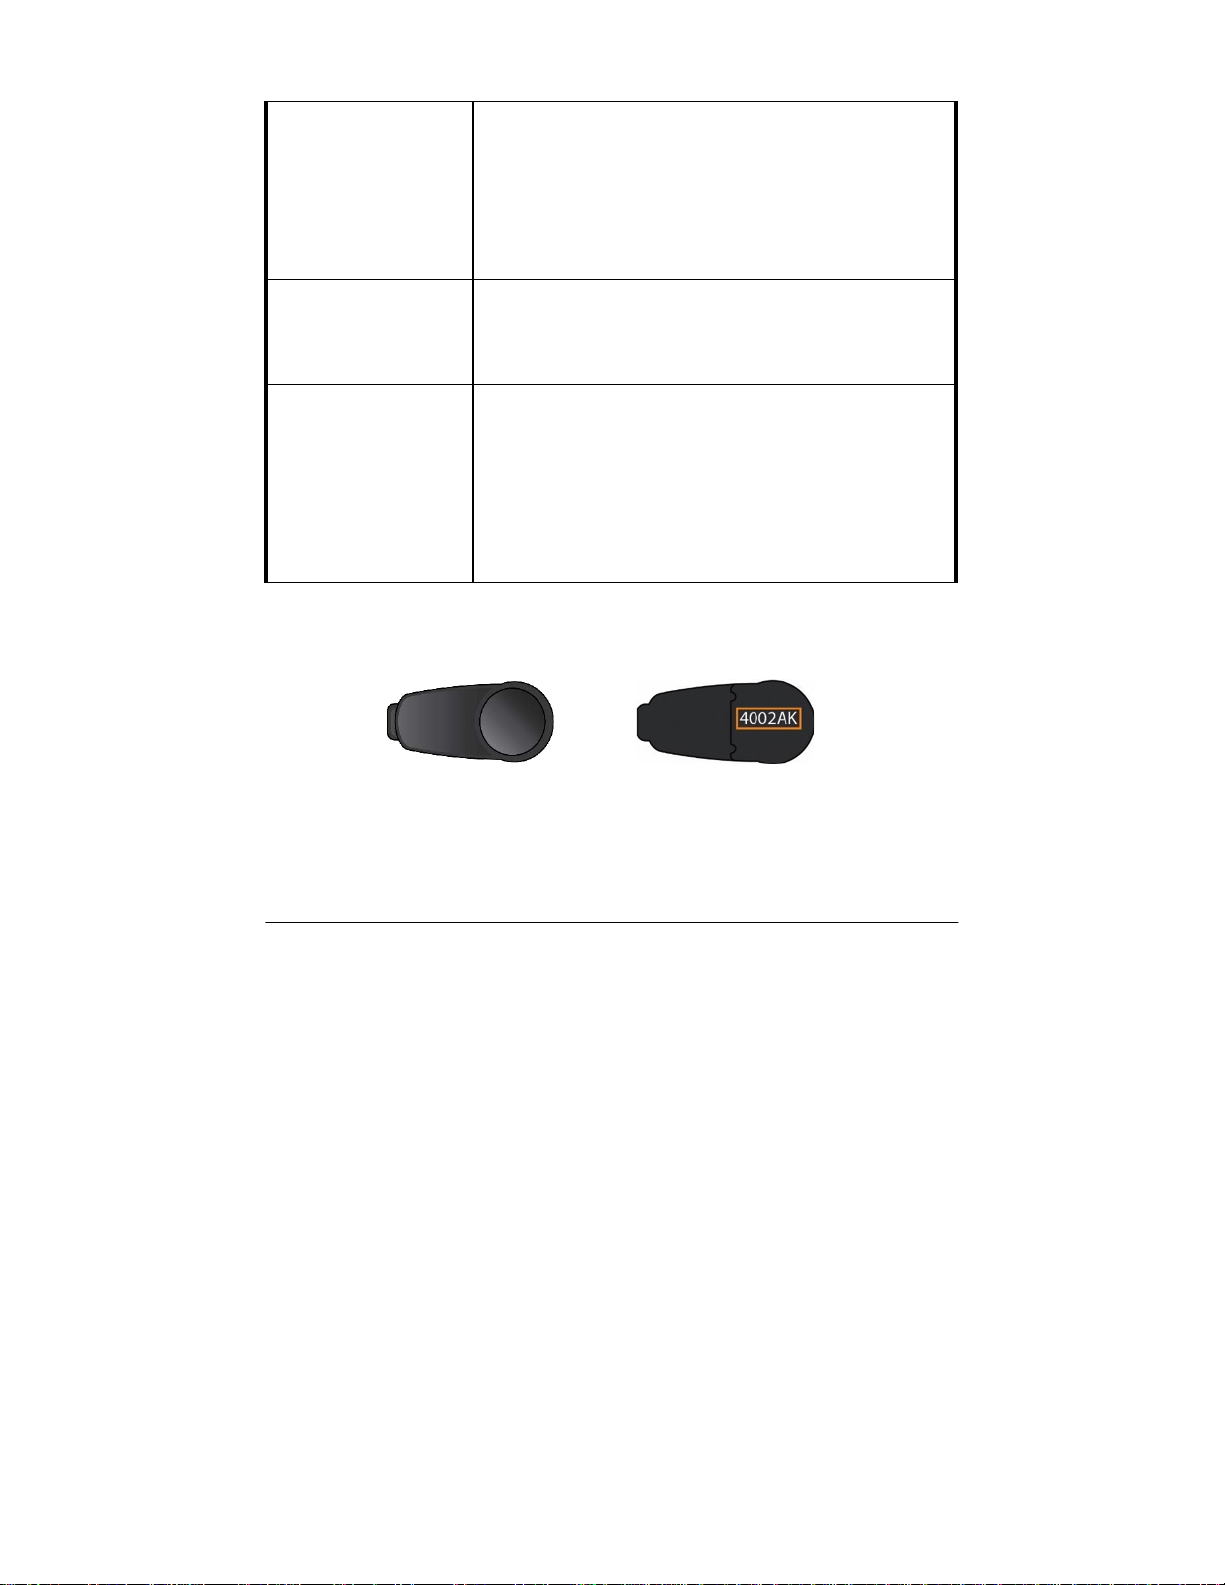
Dexcom G5x System User Guide
53
Transmitter Holder
Holds sensor wire and transmitter in place.
Water resistant when transmitter is properly
installed.
Discarded after sensor session.
Adhesive Patch
Keeps transmitter holder attached to your skin.
Sensor Wire
Measures glucose levels in the fluid between your
cells (interstitial fluid).
Attached to transmitter holder once inserted under
skin.
Discarded with holder after session.
Transmitter Overview
Figure 2. G5x Transmitter Front and Back
Please Note: Pictures above are representational only; your transmitter may look different.
Snapping into the transmitter holder, the gray plastic transmitter wirelessly
sends your glucose information to your display devices—receiver and/or smart
PDF compression, OCR, web optimization using a watermarked evaluation copy of CVISION PDFCompressor
Page 54

Dexcom G5x System User Guide
54
device. If you have a new transmitter, open the package when you are ready
to use it.
Transmitter features:
•
Reusable
o
Do not discard after sensor session.
o
Only for you, don’t share transmitter.
•
Water resistant
•
Can transmit data to your display devices for up to 20 feet
o
Range is less if you are in or under water.
•
Battery lasts approximately three months
o
Receiver or smart device notifies you when battery is running
low.
•
Transmitter’s serial number is on the back
More transmitter features and insertion information are in Chapter 6.
Now that you are familiar with the sensor applicator and transmitter, let’s
review the receiver.
Receiver
The receiver is a small hand-held device. Your receiver, along with your smart
device, shows your sensor glucose readings, trend graphs, and trend arrows,
and notifies you when your glucose is too high or too low or if there is
something you should be aware of or need to do.
The receiver is neither water resistant nor waterproof
and can get damaged if
moisture gets inside, so keep it away from any liquids and very high humidity
as well as dirt and dust. Keeping the micro USB port closed helps prevent
damaging fluids and dust from getting inside the receiver. If your receiver
does get wet or dirty, test it to make sure the speaker and vibrations still work
(see Chapter 12).
If your receiver isn’t charged, see Chapter 14 for charging your receiver’s
battery.
If you want to use the receiver along with a smart device, you need to set
them up separately.
PDF compression, OCR, web optimization using a watermarked evaluation copy of CVISION PDFCompressor
Page 55
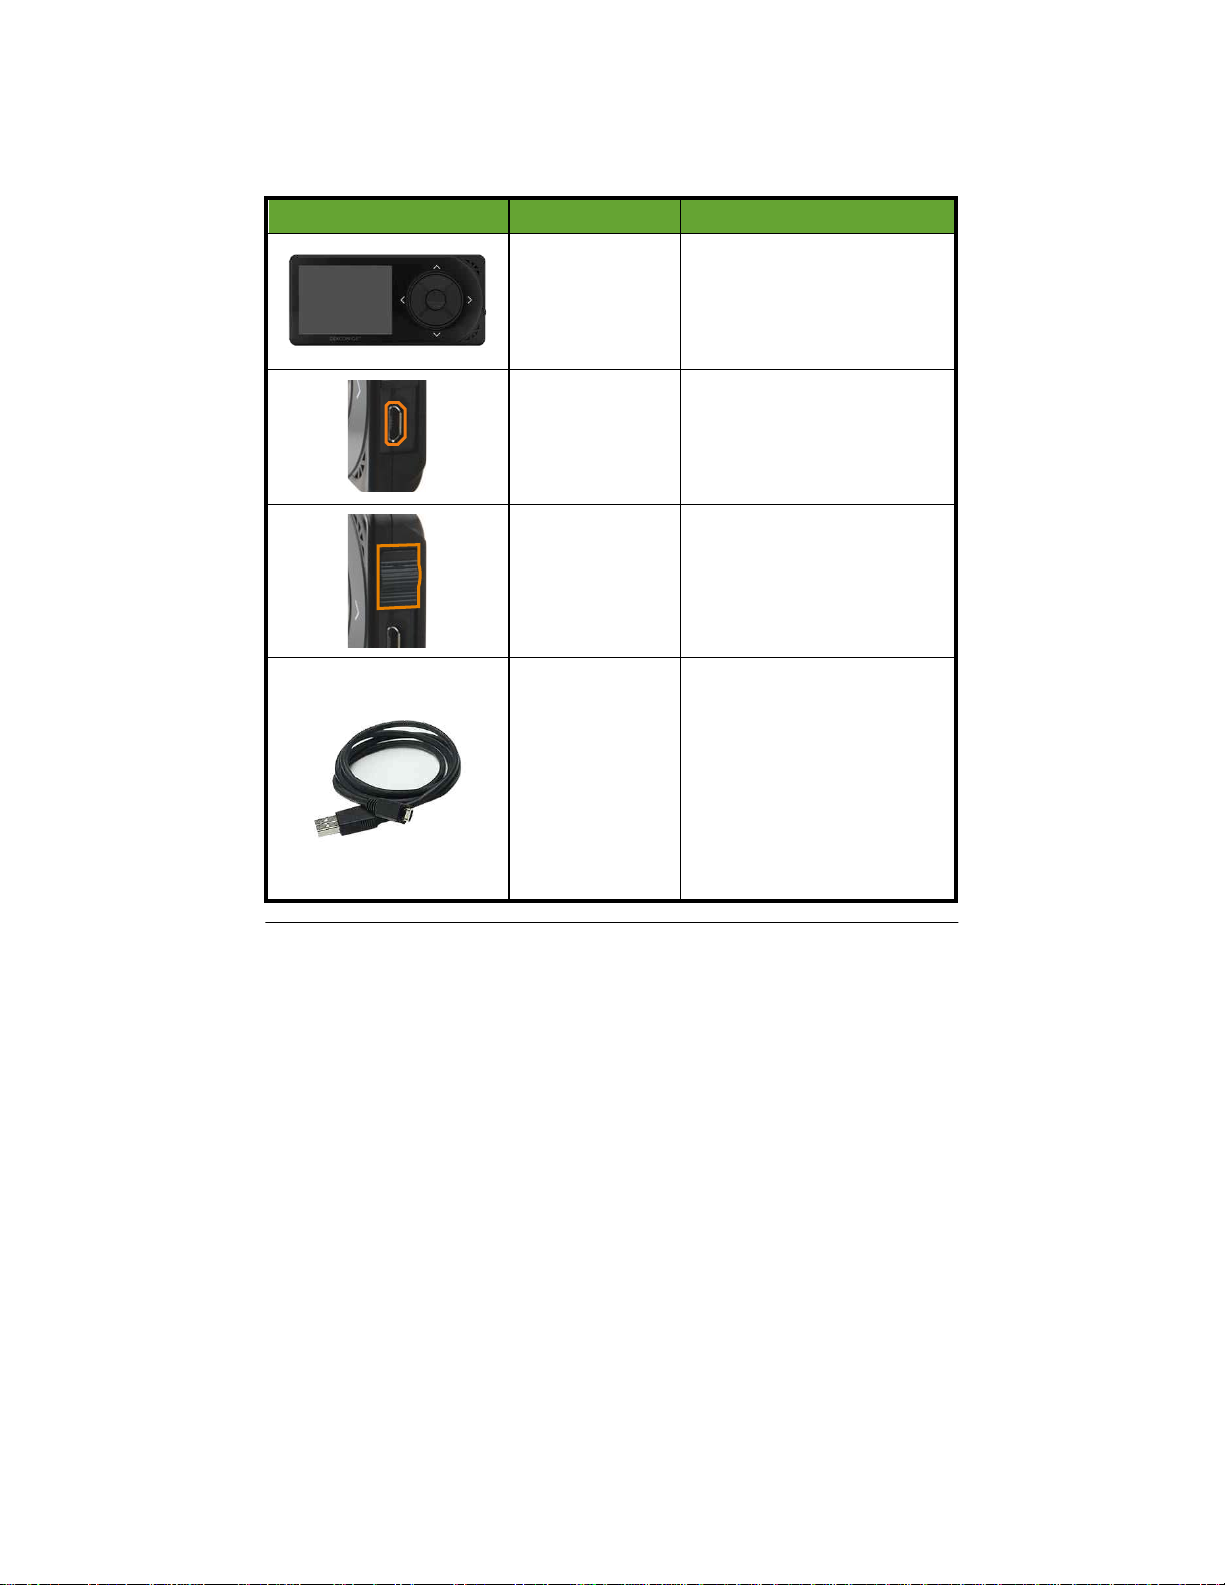
Dexcom G5x System User Guide
55
Remember, you can’t use a combination of smart devices during a sensor
session; select just one.
Receiver Overview
What you see
What it’s called
What it does
Receiver
Provides data about your
glucose trends via screen
display, sounds, and
vibration.
Micro USB Port
Plug
USB cable
into
port
for
recharging.
USB Port Door
Close
USB port door
after
removing
USB cable
to keep
receiver clean and dry.
Micro USB
Cable
Plug into
receiver
to charge
battery.
Don’t plug into a computer
port to charge.
Battery can only be charged
using the adapter/wall
charger.
PDF compression, OCR, web optimization using a watermarked evaluation copy of CVISION PDFCompressor
Page 56
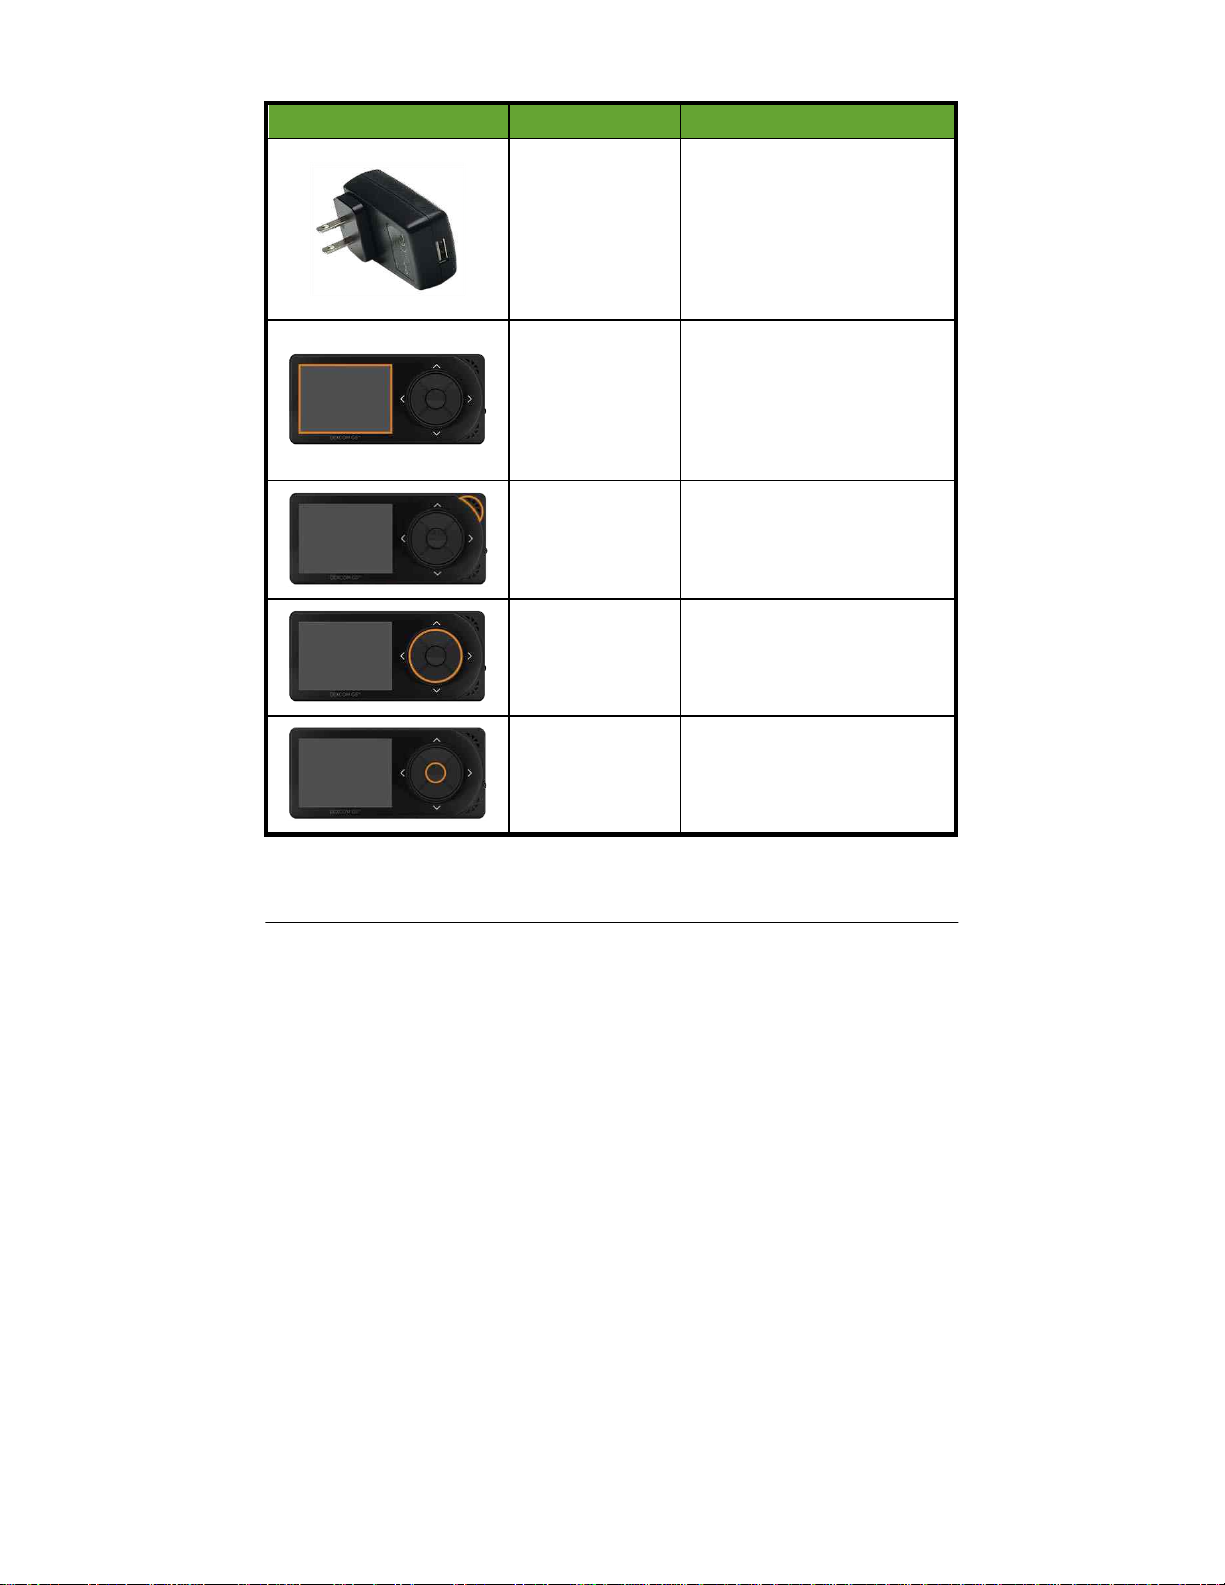
Dexcom G5x System User Guide
56
What you see
What it’s called
What it does
Wall Charger
Plug
USB cable
into
adapter/wall charger.
Plug
wall charger
into an
electrical outlet to charge
receiver’s battery.
Don’t block access to the
charger.
Display Screen
Shows sensor glucose
readings, trend graphs and
arrows, Alarm/Alerts, sensor
session status.
Change settings on Menu
screen.
Speaker
Allows you to hear your
Alarm/Alerts sounds.
Navigation
Wheel
Arrows and button to help
you navigate through the
receiver’s menu options and
choose features.
Select Button
Press to select menu
option.
PDF compression, OCR, web optimization using a watermarked evaluation copy of CVISION PDFCompressor
Page 57
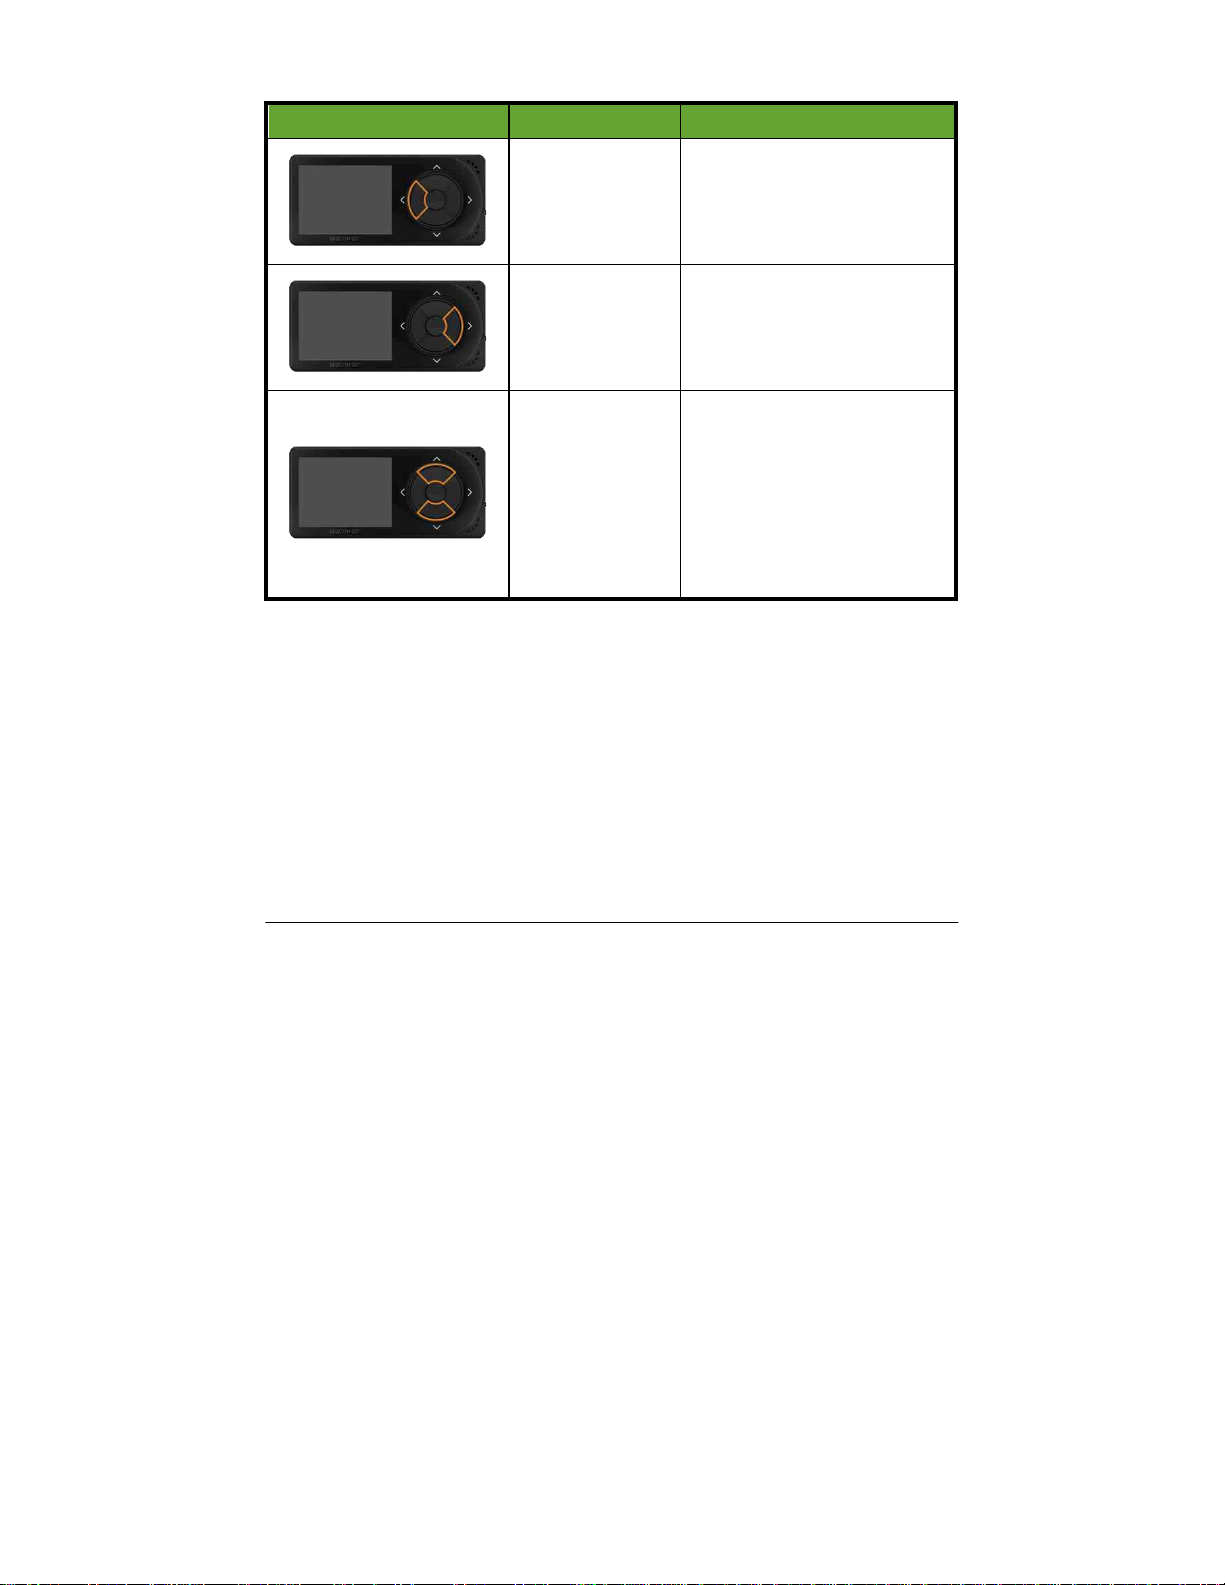
Dexcom G5x System User Guide
57
What you see
What it’s called
What it does
Left Arrow
Press to go back to last
item/screen or home
screen.
Right Arrow
Press to highlight next
item.
Up/Down
Arrows
Press to scroll up or down
to select menu items or set
values.
Press to scroll back and
forth from the 3-hour trend
graph to the 1-6-12-24
views.
4.7 Smart Device Overview
The app was created to work with your smart device, giving you even more
options in monitoring your glucose trends and patterns. The app is similar to
all other apps.
This user guide is not meant to show you how to use your smart device.
Please contact your smart device support or read your smart device’s user
guide for assistance.
Summary
Now You Can:
• Explain the G5x
PDF compression, OCR, web optimization using a watermarked evaluation copy of CVISION PDFCompressor
Page 58

Dexcom G5x System User Guide
58
• Describe options to view trends
• Locate your historical readings
• Recognize system components
• Explain each part’s function
Next Steps
Your next step in getting started with the G5x is selecting how to continuously
receive your sensor glucose readings: using the app, the receiver, or a
combination.
Our next chapter helps you set up both!
PDF compression, OCR, web optimization using a watermarked evaluation copy of CVISION PDFCompressor
Page 59

Dexcom G5x System User Guide
Set up Your Display Devices
59
Chapter 5
Let’s G5x! The Basics:
Set Up Your Display Devices
5.1 Introduction
In the previous chapter, you received a high level overview of the G5x and
learned you can monitor your glucose levels with different display devices.
Now it’s time to set up your app and your receiver.
After this chapter, you will be able to:
• Create a Dexcom username and password
• Download the app
• Set up the app with the recommended settings
• Successfully set up your receiver
5.2 Safety Statement
While you can use the G5 Mobile receiver with the G5x, you can’t use the
sensor or transmitter from previous generations. If the transmitter or sensor
box says “G5 Mobile” or “G4 PLATINUM,” don’t use them with the G5x.
PDF compression, OCR, web optimization using a watermarked evaluation copy of CVISION PDFCompressor
Page 60
Dexcom G5x System User Guide
Set up Your Display Devices
60
Precaution
Do
: The G5x transmitter must be used with the G5x Sensor and is not
interchangeable with the Dexcom G5® Mobile/G4
®
PLATINUM Sensor.
The G5x transmitter is compatible with the G5 Mobile receiver.
Why: The G5x transmitter and G5 receiver are not compatible with the
Dexcom G4 PLATINUM CGM System’s transmitter and receiver.
Consequences: Missing a severe low (hypoglycemia) or high
(hyperglycemia) glucose event.
G5x-Compatible Components
G5x System Components
Components Not Compatible with
G5x
G5x Sensor
G5x Transmitter
G5 Mobile Receiver
G5 Mobile App
G5 Mobile/G4 PLATINUM Sensor
G5 Mobile Transmitter
G4 PLATINUM Transmitter
G4 PLATINUM Receiver with Share
G4 PLATINUM Receiver
5.3 Why Different Monitoring Methods?
Your convenience!
By offering two separate monitoring systems, the app or receiver, you can
choose to monitor your glucose levels in the handiest method at that moment.
Forgot your receiver at home? Use your smart device! Battery died on your
smart device? Smart device memory full? Your receiver has you covered!
PDF compression, OCR, web optimization using a watermarked evaluation copy of CVISION PDFCompressor
Page 61

Dexcom G5x System User Guide
Set up Your Display Devices
61
With the exception of Dexcom
Share
, the primary difference between the two
monitoring systems is not the data itself, but how it’s presented.
The next section walks you through the initial setup for the app. To set up the
receiver, go to Section 5.5. If you want to use both the app and the receiver,
you need to setup each individually.
Once you have completed the initial setup, you’re one step closer to beginning
your sensor session!
5.4 App
Before starting your first sensor session, pick the smart device you want to
use. As mentioned in the previous chapter, you can use the receiver with one
smart device during a session; however, you can’t use multiple smart devices
during the same session.
While your smart device can have the app installed, part of your initial setup is
entering the transmitter’s serial number (SN). If by accident you enter the SN
into more than one smart device, the system warns you and you won’t be able
to complete the setup process.
Suggested Smart Device Settings
Bluetooth
is designed for wireless communication between devices (unlike
Wi-Fi®, which wirelessly connects devices to the Internet). Your transmitter
communicates to your app via
Bluetooth
®
Smart! Before beginning, make
sure your smart device’s
Bluetooth
is available and turned on.
Refer to your smart device’s user guide if you have questions on how to
change your smart device settings.
• While checking your
Bluetooth
settings, check to see
Silent
and
Do
Not Disturb
are off. Your app does not override these settings; if you
have them on, you will miss Alarm/Alerts
• After verifying all your settings are correct, there is one more thing to
check. Make sure your smart device’s
Volume
is loud enough for you
to hear any Alarm/Alerts
• Make sure your smart device settings allow your Alarm/Alerts to
always show on your lock screen
PDF compression, OCR, web optimization using a watermarked evaluation copy of CVISION PDFCompressor
Page 62

Dexcom G5x System User Guide
Set up Your Display Devices
62
• For information on how to set the above settings, see your smart
device’s user guide. Once you have verified your smart device’s
settings are right, the next step is installing the app
• The app needs to be open and running in the background. This may
drain your smart device’s battery; make sure you check its battery is
charged
• Don’t change your smart device’s time because it can make the time
on the trend screen wrong and the app may stop displaying data
If your smart device is broken or lost, use your receiver until it’s fixed or
replaced.
App Installation
Installing the app is easy! Simply download the Dexcom G5 Mobile app from
your smart device’s store. However, if your smart device has been jailbroken,
do not install the app.
For information on how to install an app, see your smart device’s user guide.
Initial App Setup
Setting up your app is easy! You’ll need your Dexcom account
username
and
password
, along with your
transmitter box
. Once inside, simply follow the
setup wizard instructions. The setup wizard walks you through safety
information, recommended settings, entering transmitter SN, setting your
high/low glucose levels, and receiving CGM notifications.
Your initial setup will require a Dexcom username and password. You can
create them by tapping
Sign Up
within the app, or by going to dexcom.com.
From Your Web Browser:
1. Go to dexcom.com.
2. Click
My Account
at top right of page
• If no
My Account
, click green menu bars at top left
• Click
My Account
3. Click
Create a Dexcom Account
PDF compression, OCR, web optimization using a watermarked evaluation copy of CVISION PDFCompressor
Page 63
Dexcom G5x System User Guide
Set up Your Display Devices
63
But what if you are unclear about a step?
The app has notifications allowing you to get more information. If you are
unsure of something during your initial setup process, look at the screen for
additional information notifications. Informational notifications include, but
aren’t limited to:
I don’t understand, Learn More,
or
Question Mark
. Tap your
informational notification
to get more information.
To close out of the information notification, tap the X in the upper right-hand
corner.
Initial App Setup
Step
What you see
What you do
Introductory Screens
1
Tap
app
icon to open app.
Introductory Screens
PDF compression, OCR, web optimization using a watermarked evaluation copy of CVISION PDFCompressor
Page 64
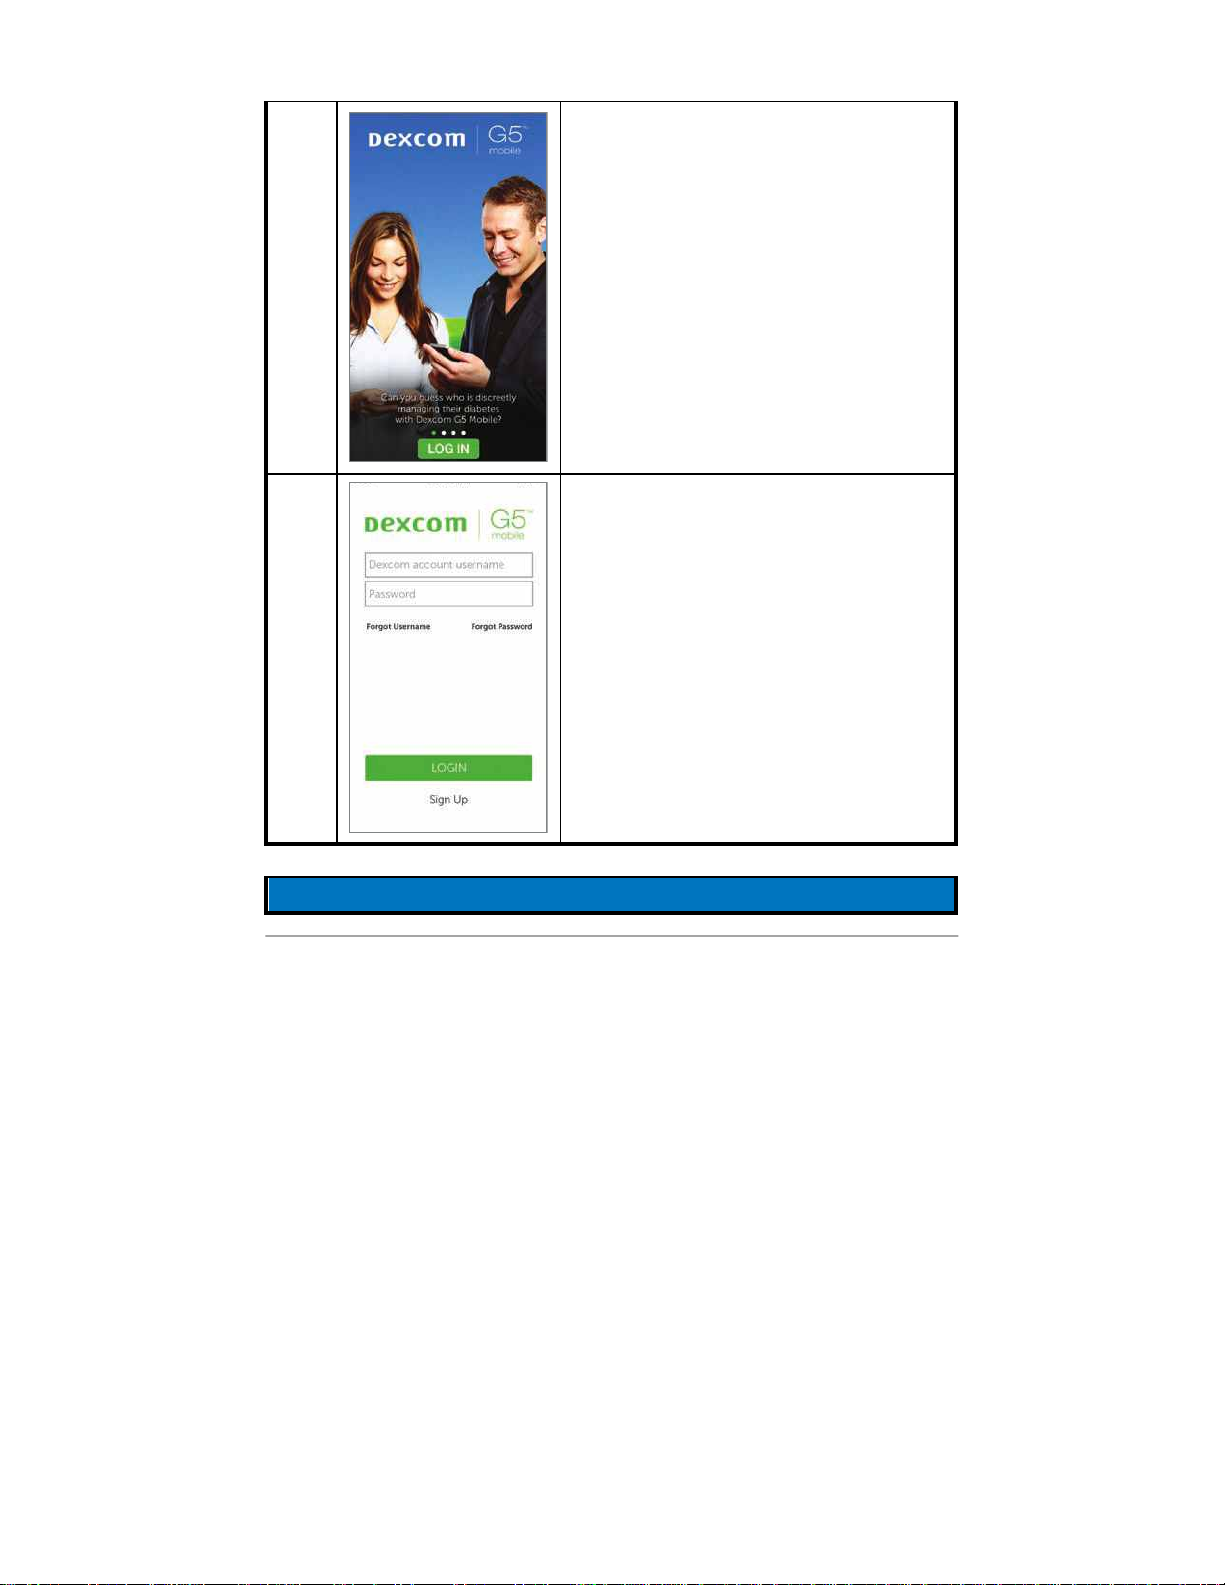
Dexcom G5x System User Guide
Set up Your Display Devices
64
2
Swipe through introductory screens or
tap
Log In
.
3
Enter existing
username
and
password
OR
Need a Dexcom username and
password?
Tap
Sign Up.
Complete
Username/Password
fields
.
Tap
Login
once.
Introductory Screens
PDF compression, OCR, web optimization using a watermarked evaluation copy of CVISION PDFCompressor
Page 65
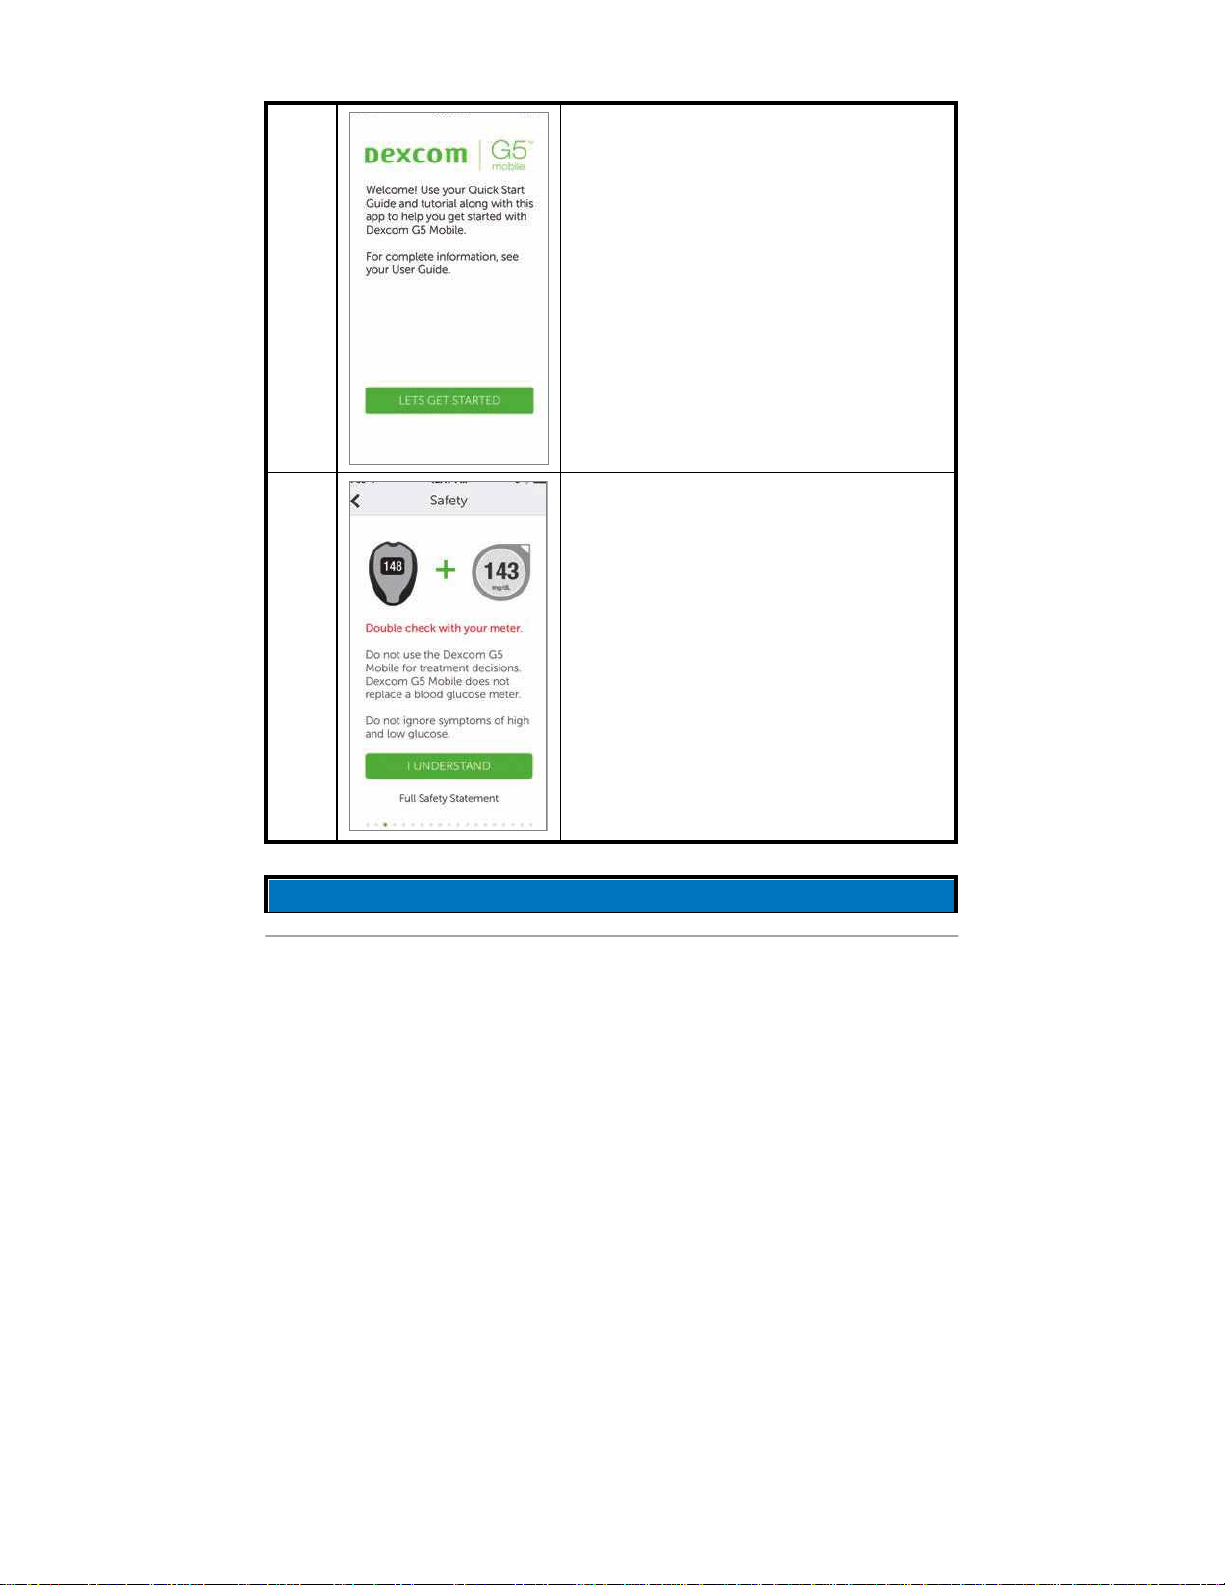
Dexcom G5x System User Guide
Set up Your Display Devices
65
4
Tap
Let’s Get Started.
5
The next screens are the Terms of Use,
safety warnings, contraindications, and
the recommended settings.
Once each screen is read, tap the
appropriate answer
to move forward.
Tap
Full Safety Statement
or, when
applicable,
I don’t understand
to get more
information.
Setting Up Your App Alarm/Alerts and Basic Settings
PDF compression, OCR, web optimization using a watermarked evaluation copy of CVISION PDFCompressor
Page 66
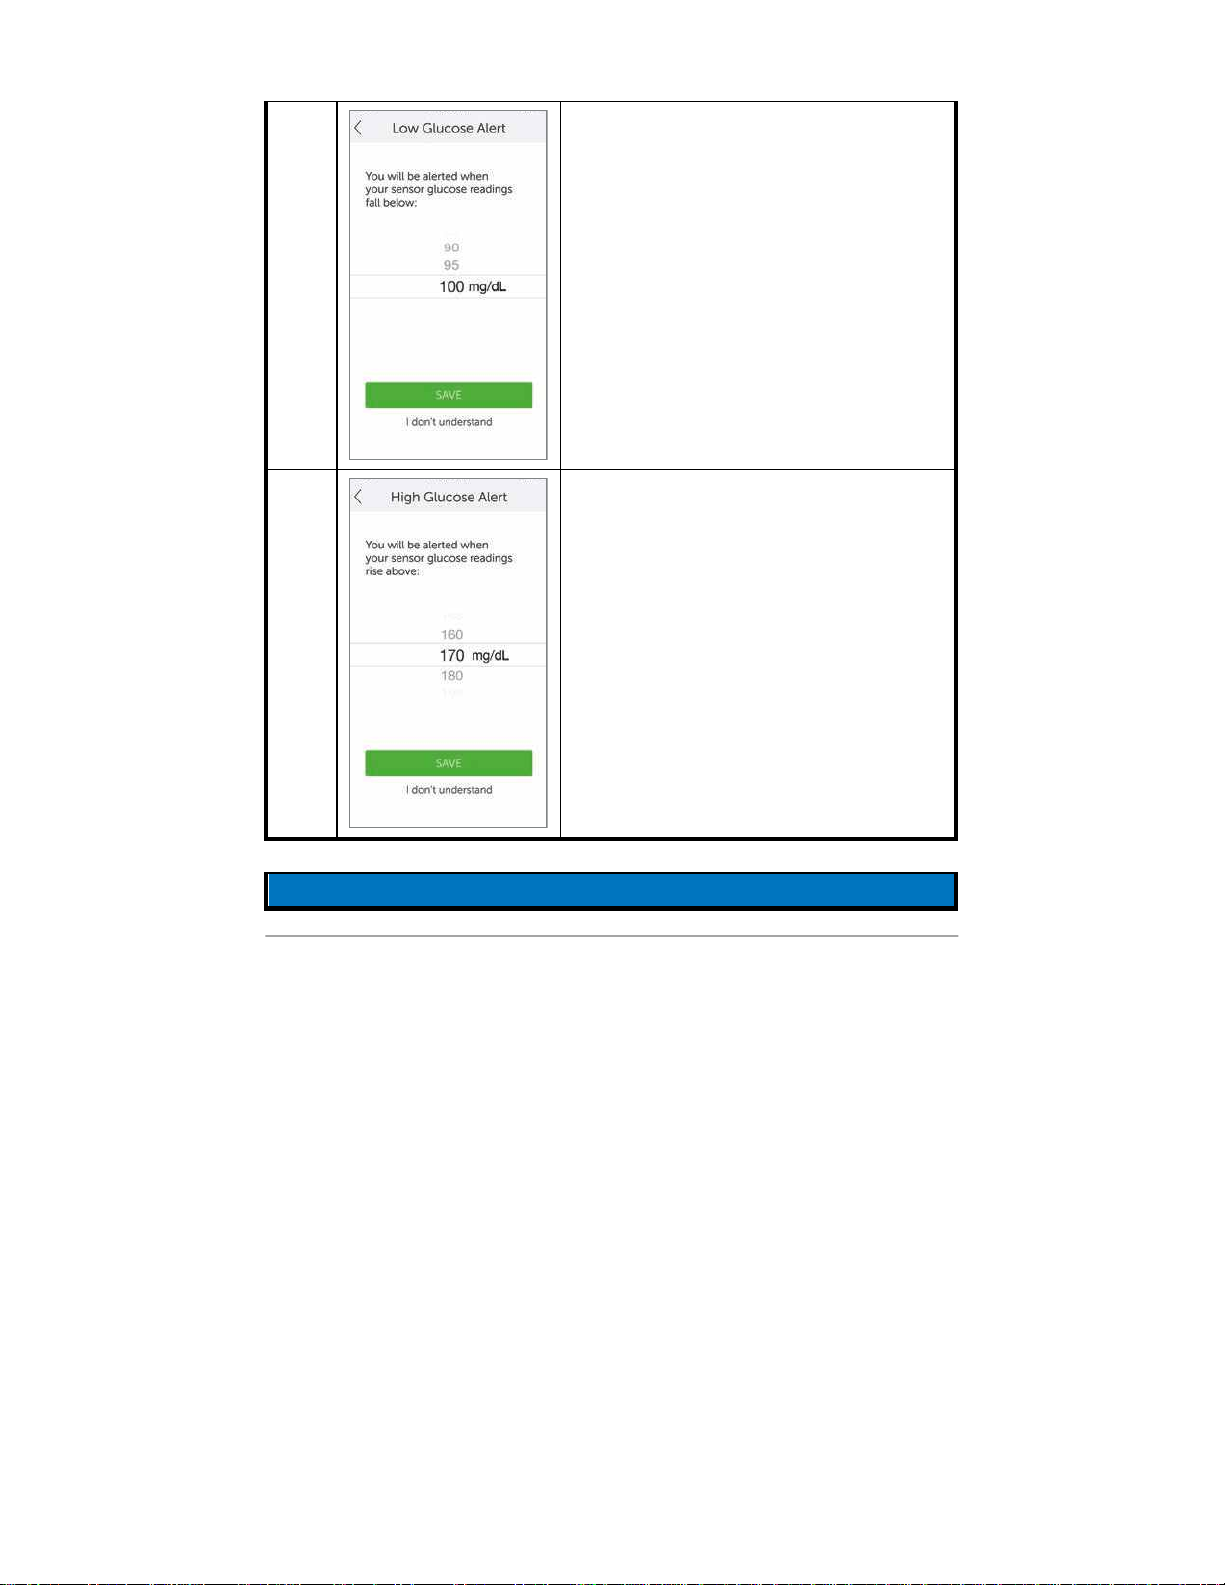
Dexcom G5x System User Guide
Set up Your Display Devices
66
6
Set your Low Glucose Alert.
Default is 80 mg/dL.
Scroll to select another amount.
Tap
Save
to move forward.
Once your Low Glucose Alert is set, you’ll
receive an Alert notification if your
glucose dips below your set amount.
7
Set your High Glucose Alert.
Default is 200 mg/dL.
Scroll to select another amount.
Tap
Save
to move forward.
Once your High Glucose Alert is set, you’ll
receive an Alert notification if your
glucose rises above your set amount.
Setting Up Your App Alarm/Alerts and Basic Settings
PDF compression, OCR, web optimization using a watermarked evaluation copy of CVISION PDFCompressor
Page 67
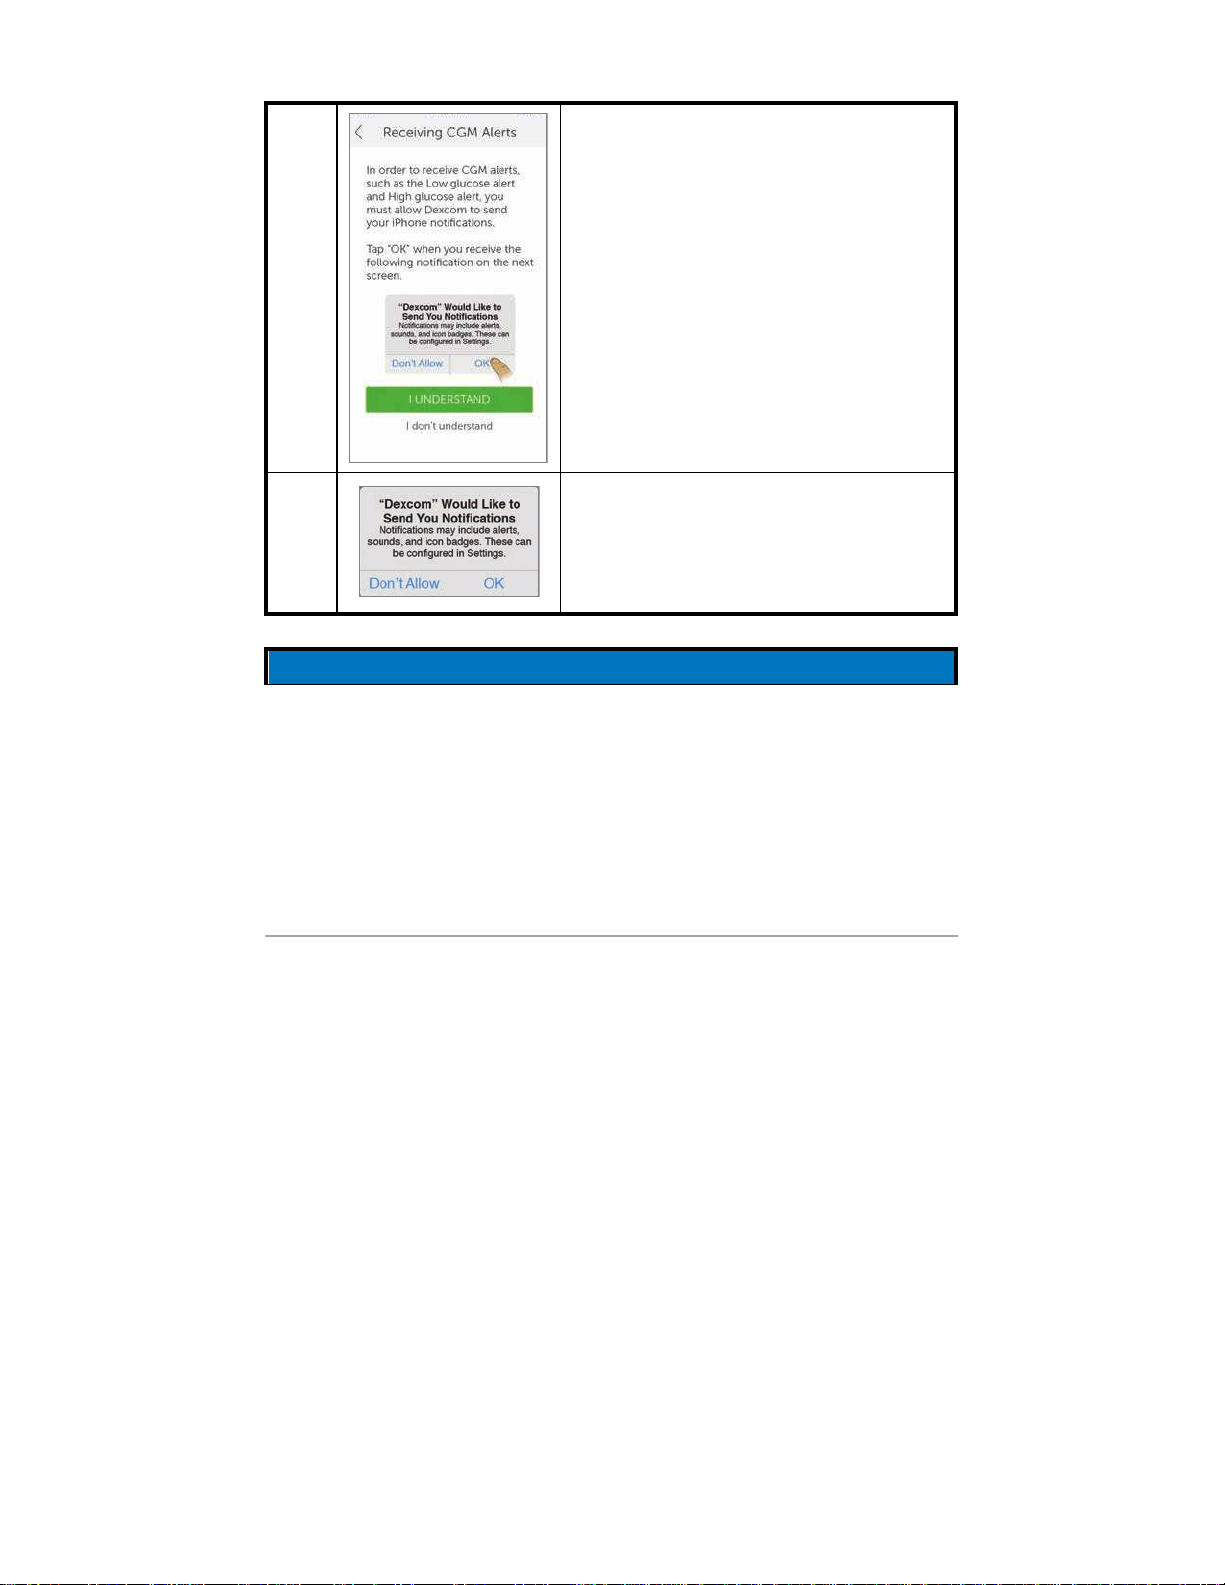
Dexcom G5x System User Guide
Set up Your Display Devices
67
8a
Make sure you get your Alarm/Alerts
notifications.
Tap the
appropriate response
to move
forward and set your notifications.
8b
Tap OK to receive Alarm/Alerts
notifications.
Setting Up Your App Alarm/Alerts and Basic Settings
PDF compression, OCR, web optimization using a watermarked evaluation copy of CVISION PDFCompressor
Page 68
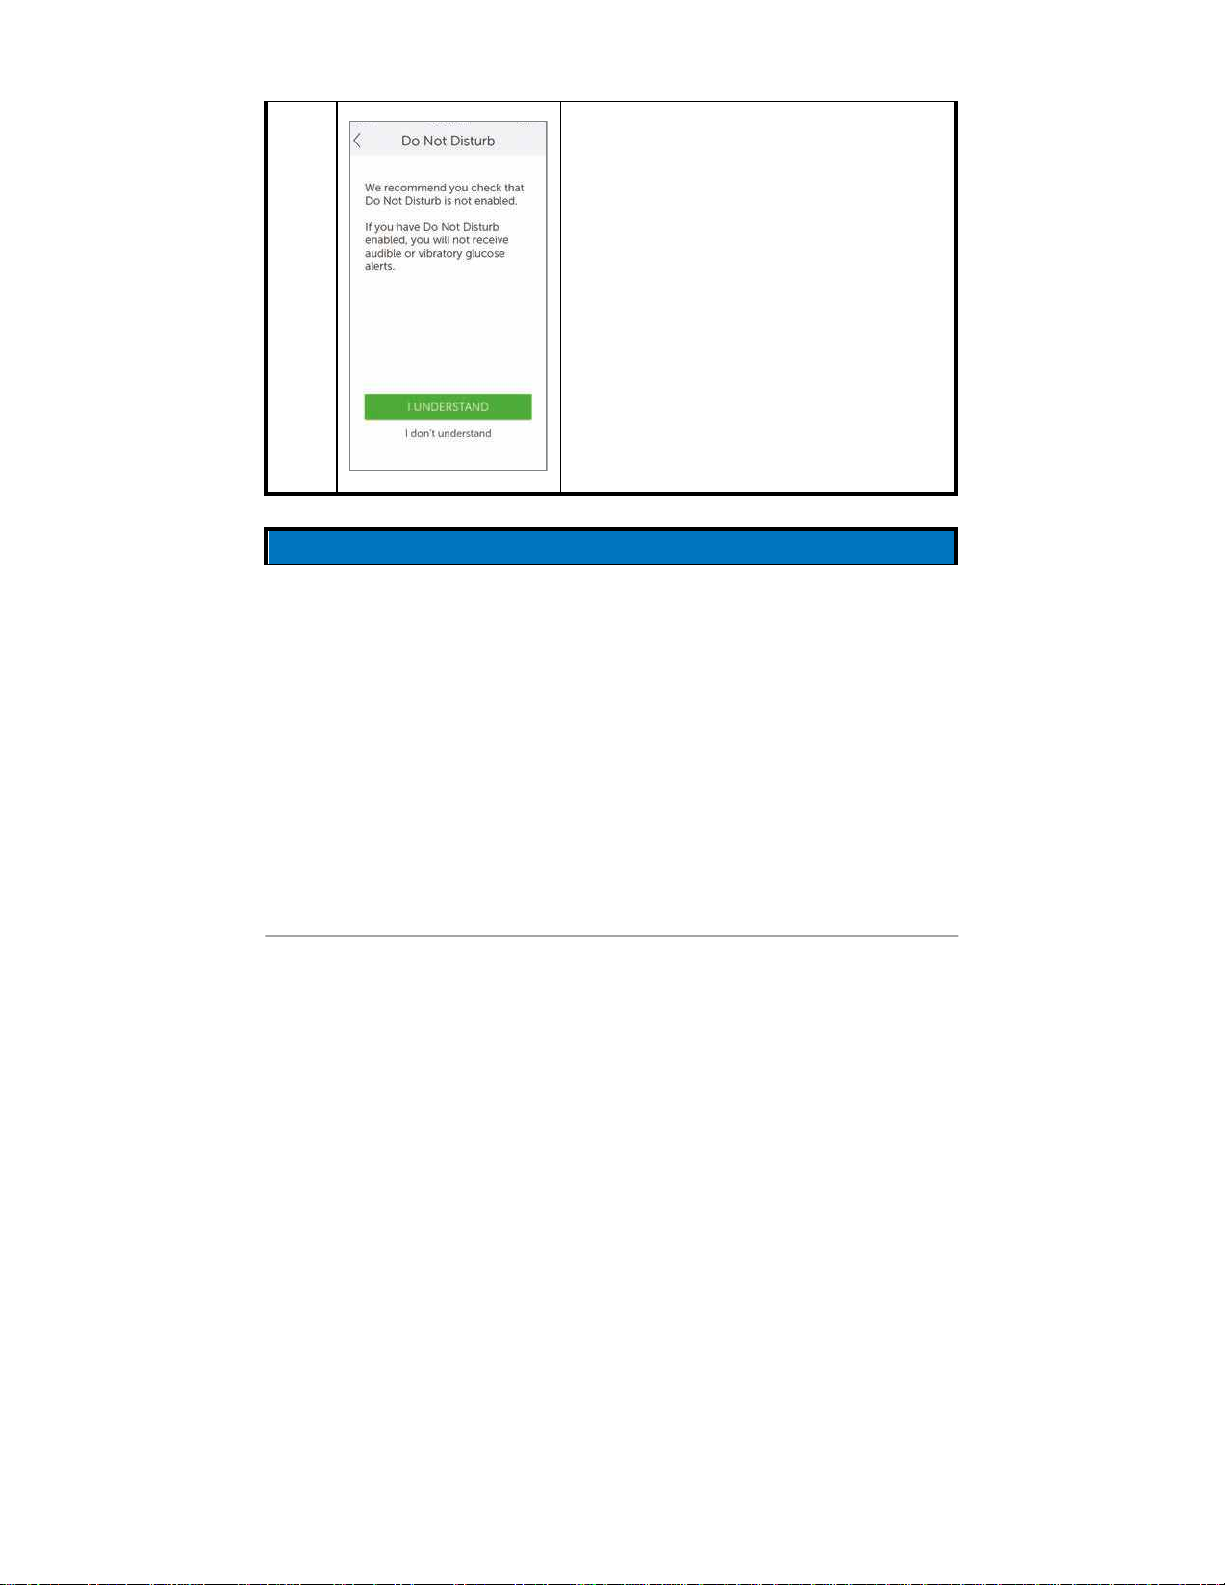
Dexcom G5x System User Guide
Set up Your Display Devices
68
9
The next screens provide suggestions for
device volume,
Do Not Disturb
, and other
basic settings.
Tap
appropriate answer
to move forward.
Connecting/Pairing Transmitter With App
PDF compression, OCR, web optimization using a watermarked evaluation copy of CVISION PDFCompressor
Page 69
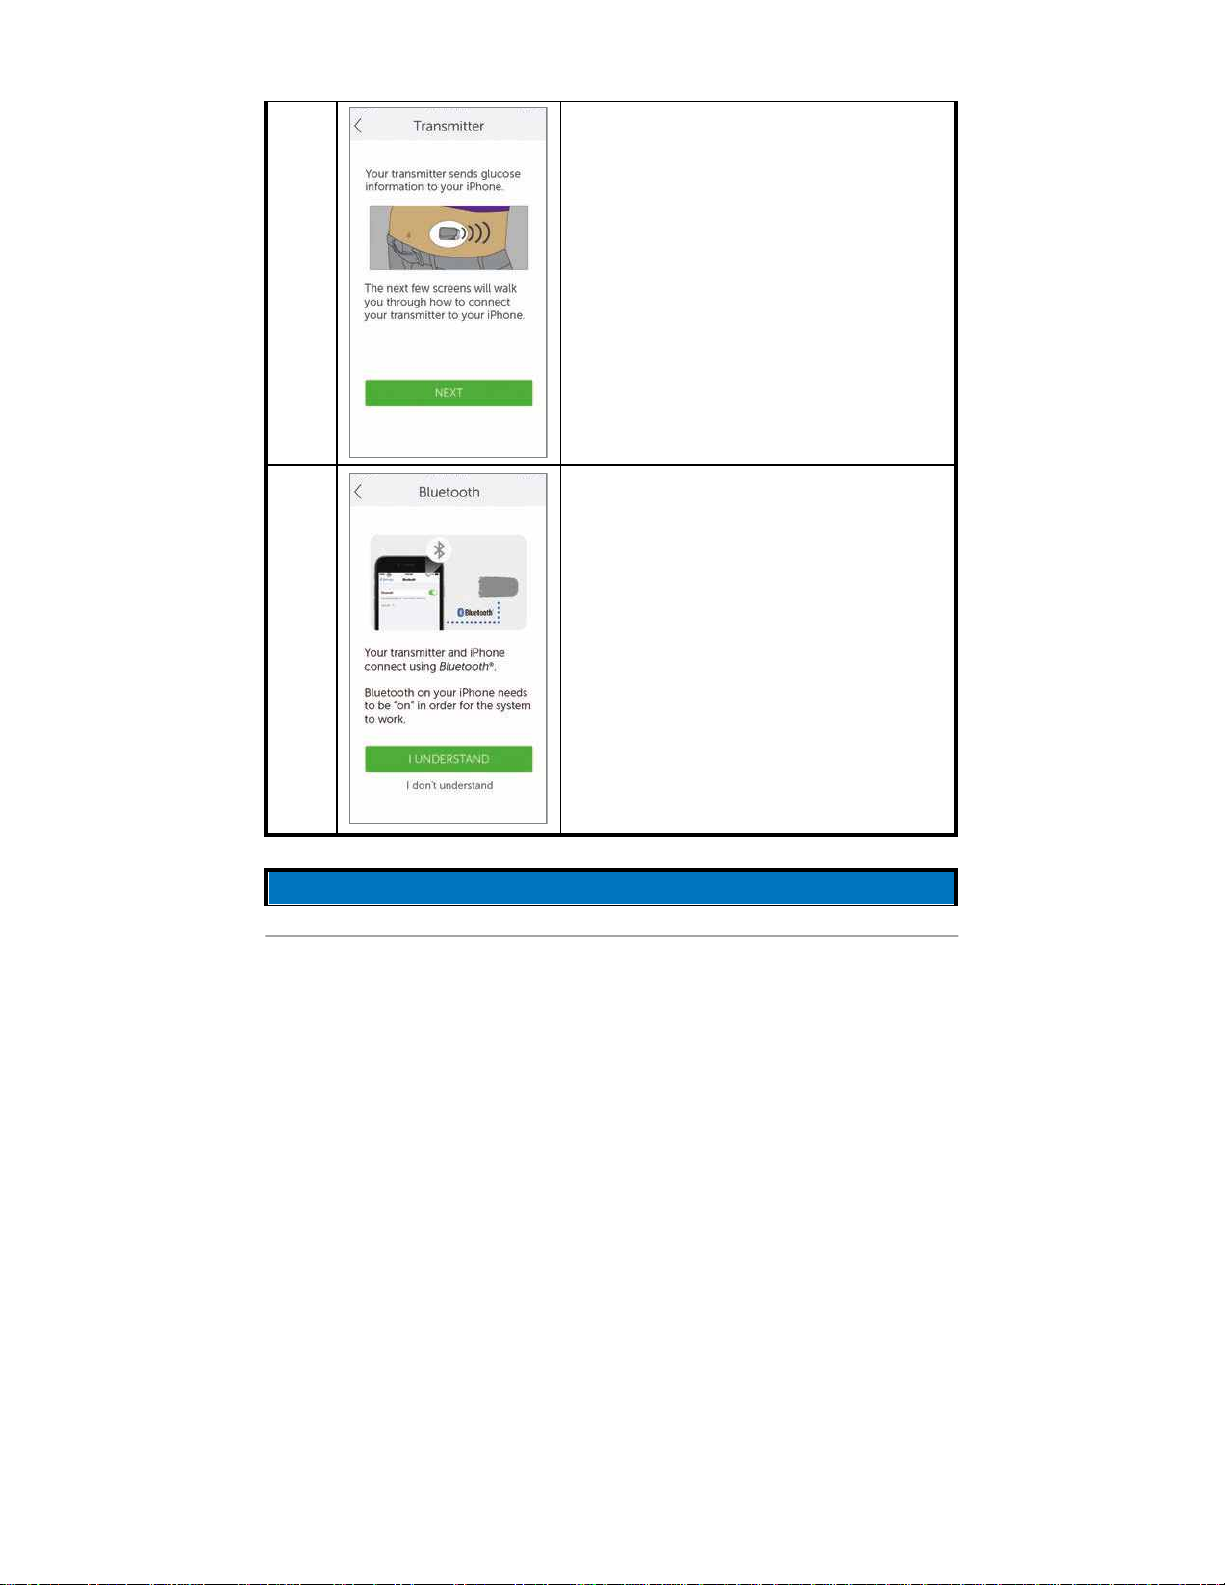
Dexcom G5x System User Guide
Set up Your Display Devices
69
10
Tap
Next
.
11
Verify
Bluetooth
is on.
The app will check to see if
Bluetooth
is
turned “on.”
Connecting/Pairing Transmitter With App
PDF compression, OCR, web optimization using a watermarked evaluation copy of CVISION PDFCompressor
Page 70
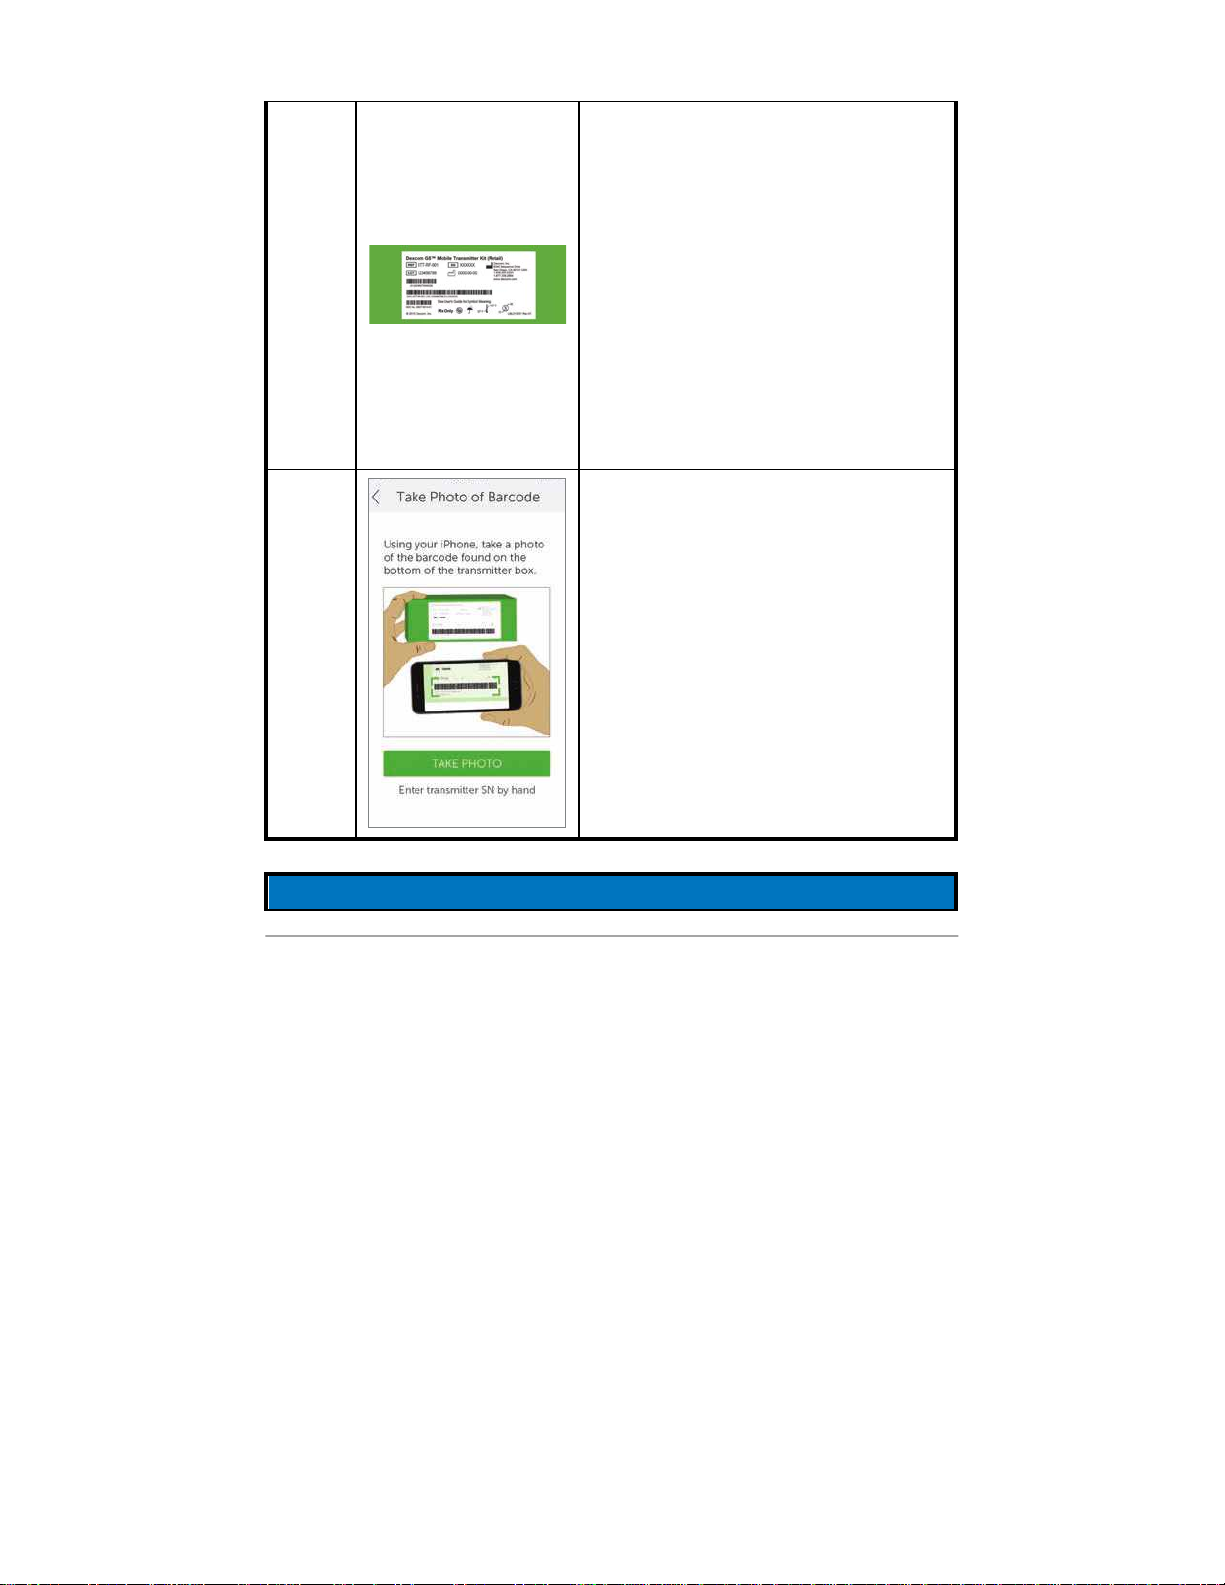
Dexcom G5x System User Guide
Set up Your Display Devices
70
12a
Turn transmitter box upside down on
a flat surface with barcodes facing up.
Center longest barcode within green
brackets.
For information on how to pair
transmitter after initial setup, see
Chapter 8.
12b
Center longest barcode within green
brackets.
Tap
Take Photo
Connecting/Pairing Transmitter With App
PDF compression, OCR, web optimization using a watermarked evaluation copy of CVISION PDFCompressor
Page 71
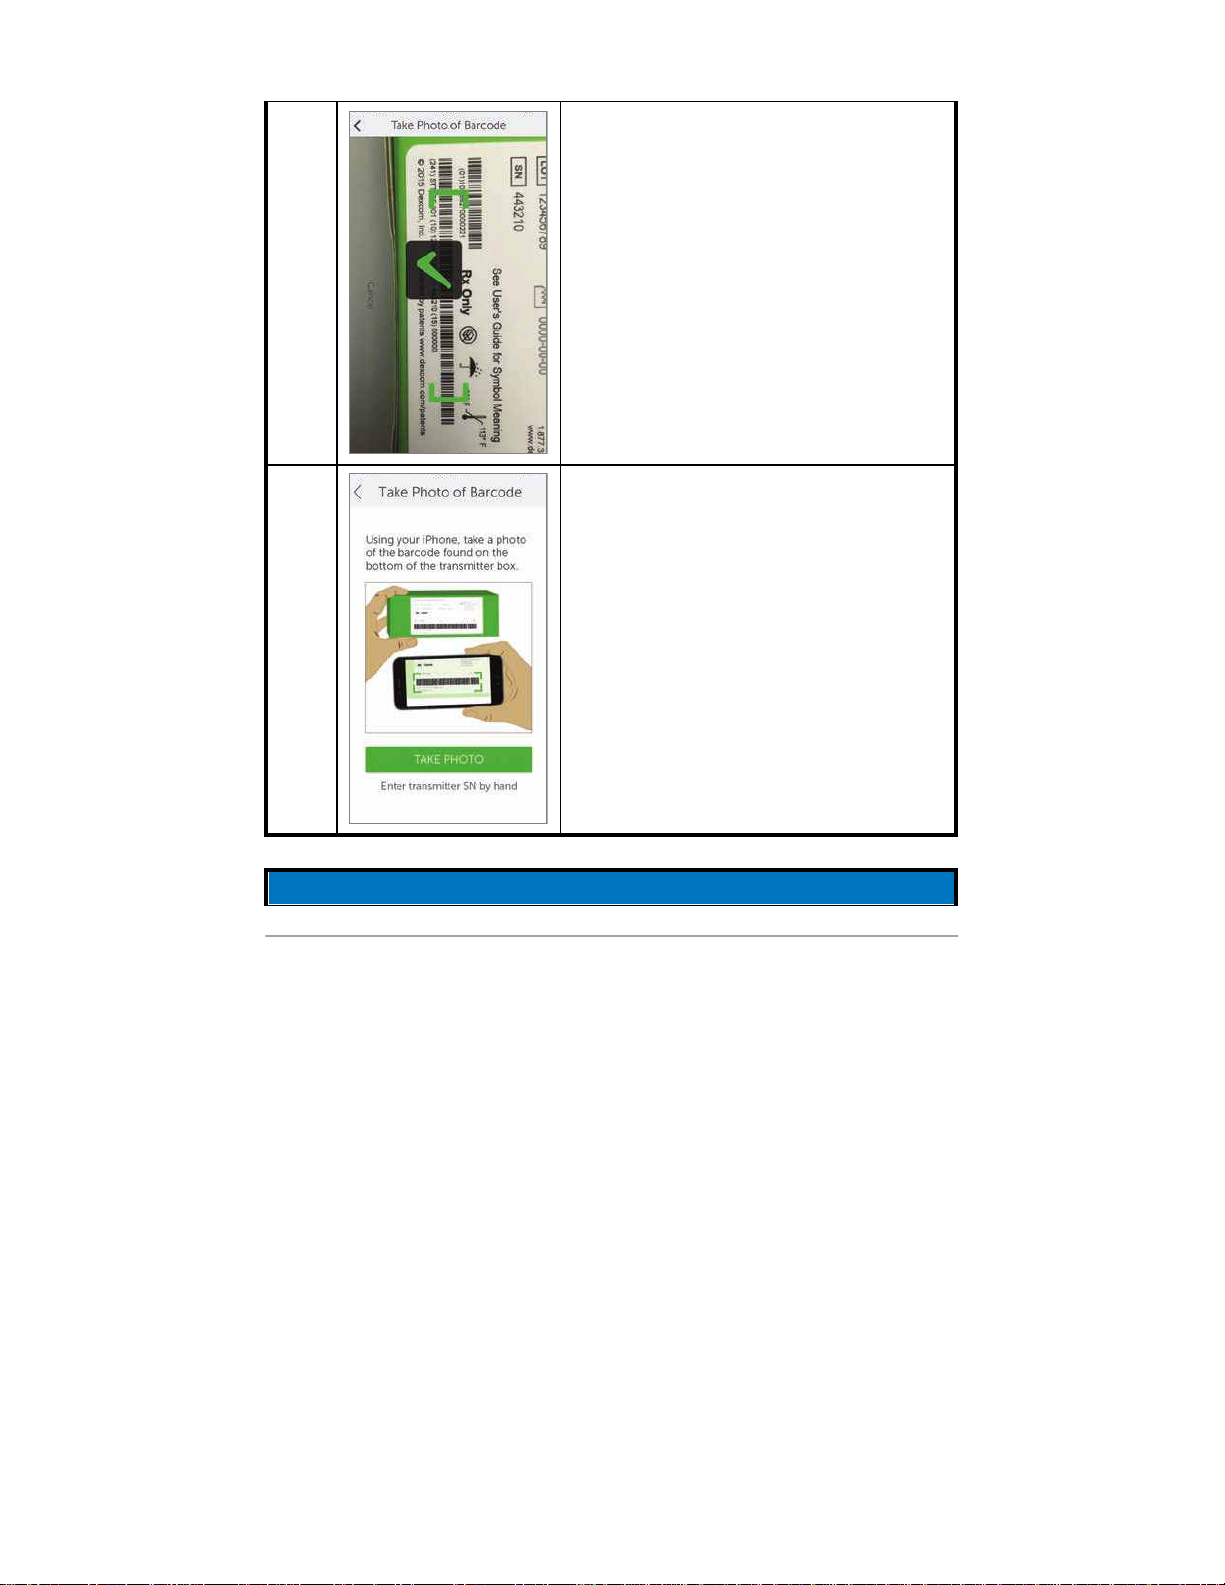
Dexcom G5x System User Guide
Set up Your Display Devices
71
12c
Check mark confirms successful
transmitter SN scan.
13a
If unable to use app’s scanning device:
Tap
Enter transmitter SN by hand
.
Connecting/Pairing Transmitter With App
PDF compression, OCR, web optimization using a watermarked evaluation copy of CVISION PDFCompressor
Page 72
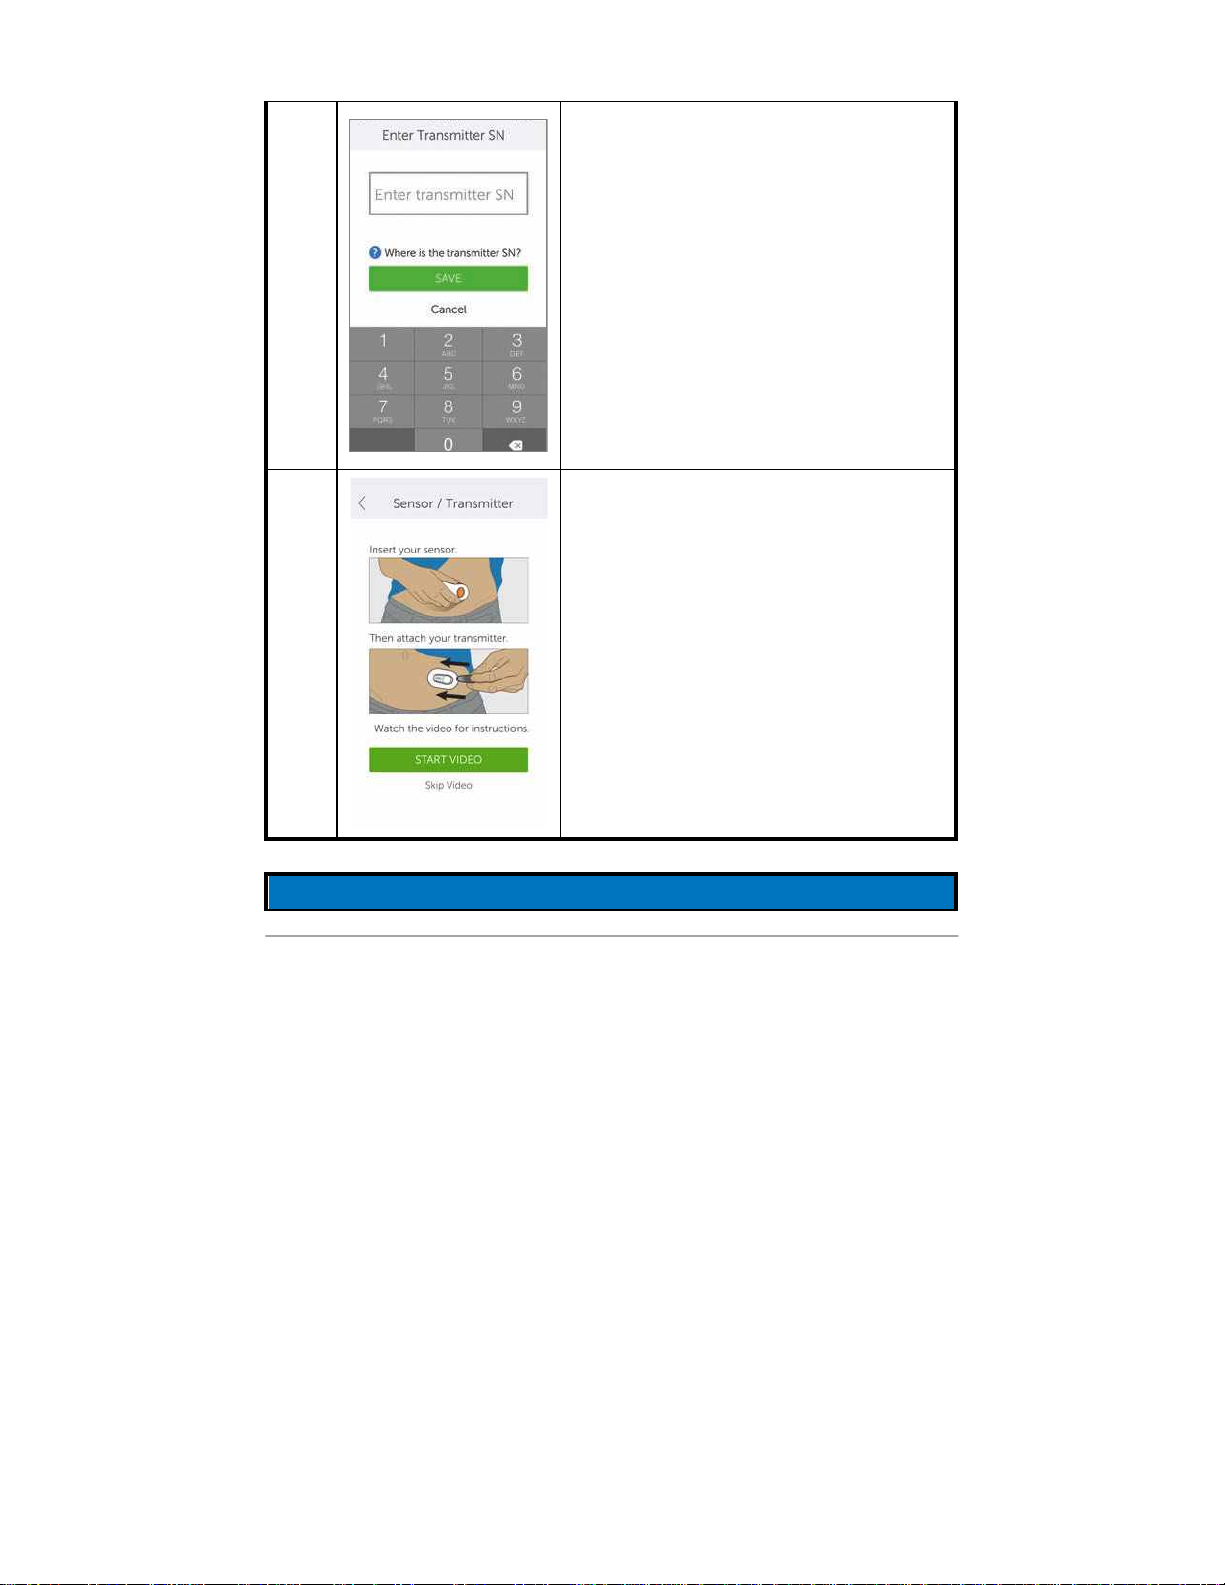
Dexcom G5x System User Guide
Set up Your Display Devices
72
13b
Use keyboard to enter transmitter SN.
Confirm correct SN .
Tap
Save
.
14
Insert sensor and attach transmitter
following video’s instructions.
See Chapter 6 for more information.
Connecting/Pairing Transmitter With App
PDF compression, OCR, web optimization using a watermarked evaluation copy of CVISION PDFCompressor
Page 73
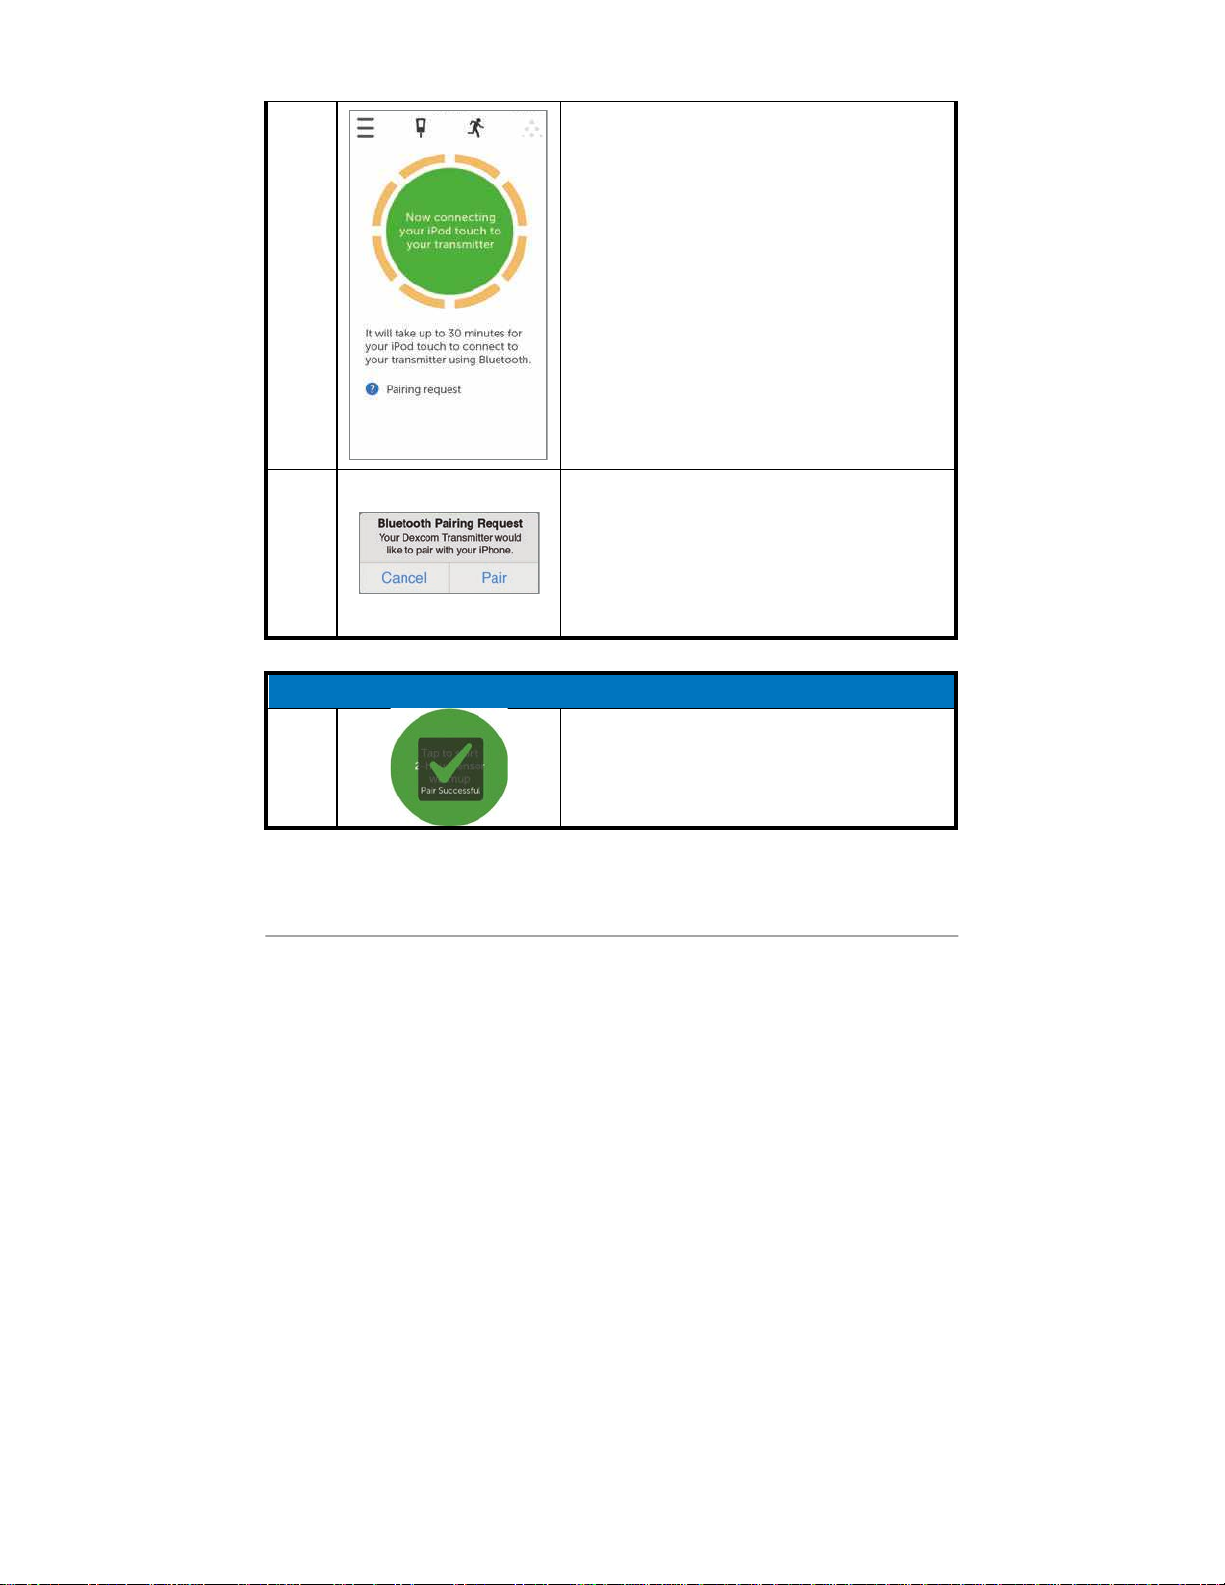
Dexcom G5x System User Guide
Set up Your Display Devices
73
15
Wait up to 30 minutes for smart device
and transmitter to connect.
16
At notification, Tap
Pair
to pair app with
smart device.
Connecting/Pairing Transmitter With App
17
Make sure your transmitter and smart
device have paired before starting your
sensor session
PDF compression, OCR, web optimization using a watermarked evaluation copy of CVISION PDFCompressor
Page 74
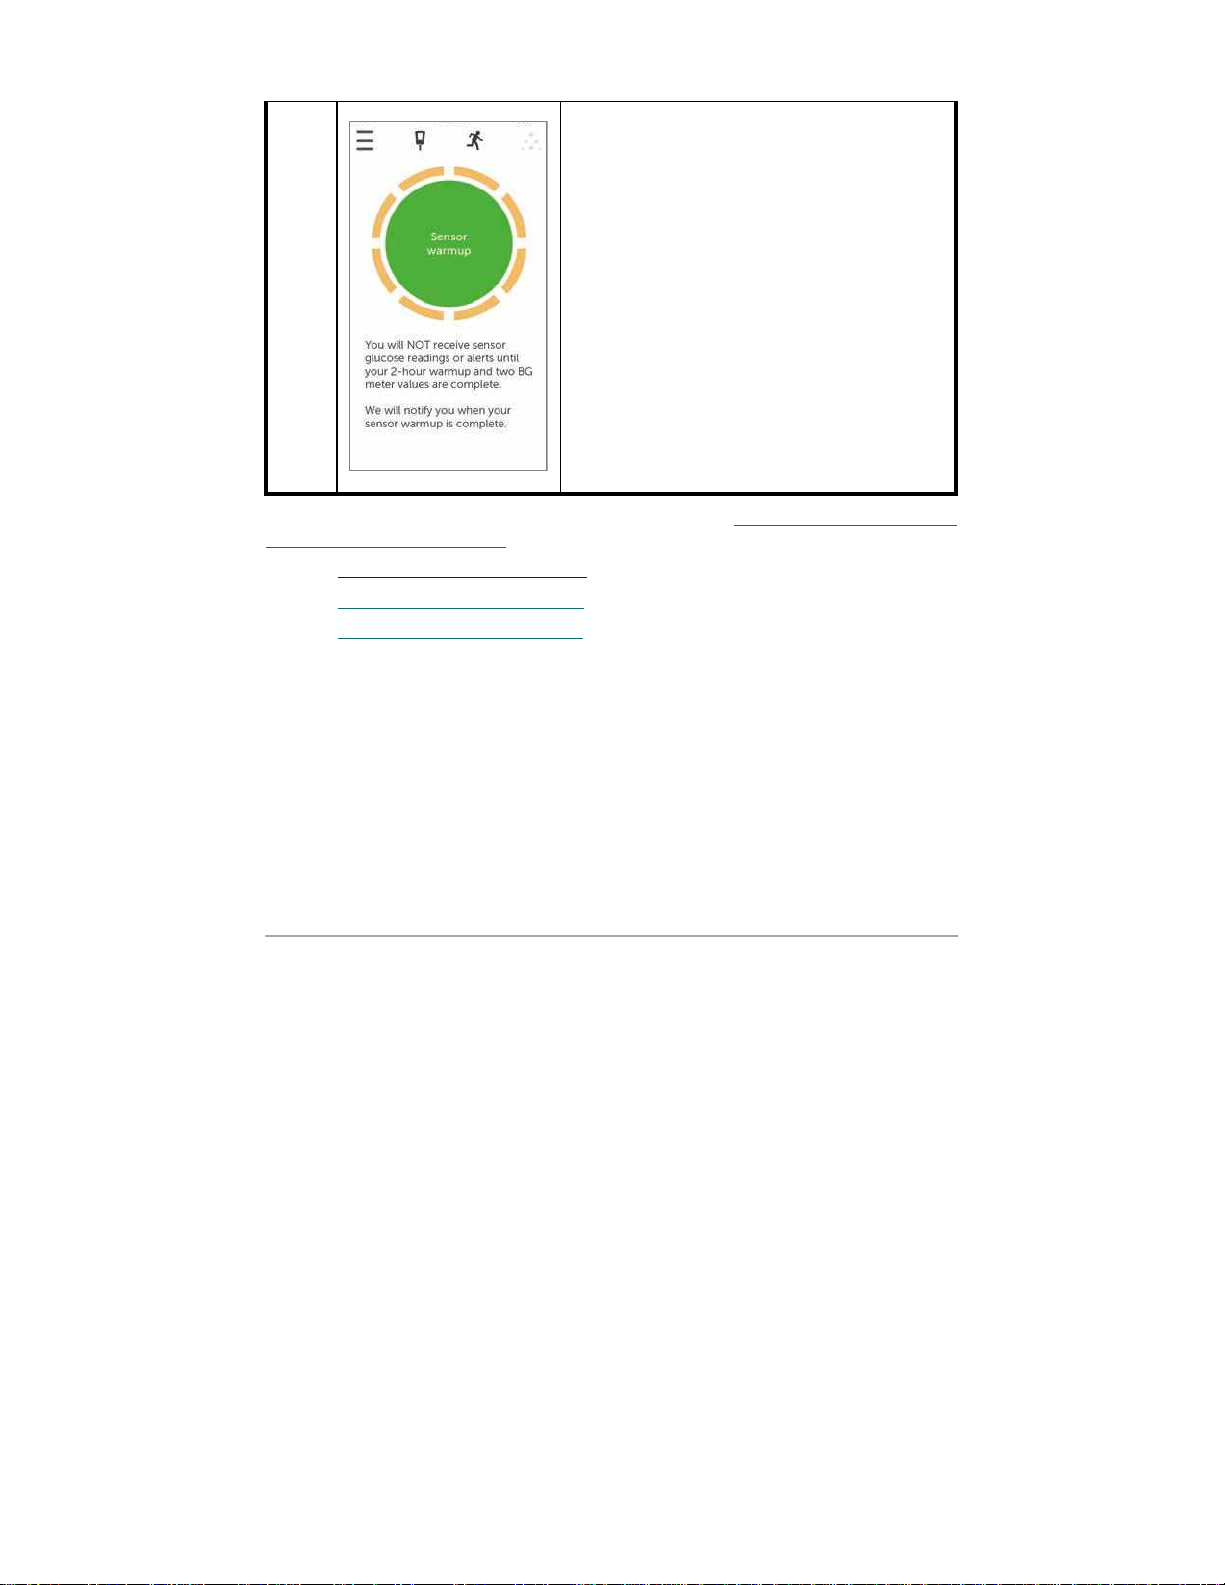
Dexcom G5x System User Guide
Set up Your Display Devices
74
18
Tap the
Sensor warmup
circle to start
your two-hour sensor warmup.
When you see the sensor warmup timer,
your initial setup is complete.
Congratulations!
If you have any issues setting up the G5 Mobile app, always contact Technical
Support (available 24/7) at:
• Toll free: 1.888.738.3646
• Toll call: 1.858.200.0200
If you are having problems with your smart device, contact your smart
device’s support line.
After completing your initial app setup, set up the receiver or go to Chapter 6
to start your initial sensor session.
5.5 Dexcom Receiver
In the previous chapter, you learned about the receiver’s components. The
following is a refresher to help in your initial setup.
Display Screen:
• Trend screen
PDF compression, OCR, web optimization using a watermarked evaluation copy of CVISION PDFCompressor
Page 75

Dexcom G5x System User Guide
Set up Your Display Devices
75
• Menu selection screen
Navigation Wheel:
• Select
o Button in the middle of the navigation wheel
! Center button does not say “Select”
o Press to:
! Turn on receiver
! Select options/features
! Accept changes
! Move forward through menus/features
• Up/Down
o Scroll through trend screens
o Highlight menu items
o Change values
• Left
o Go back to last item or screen
• Right
o Go to next item or screen
Initial Setup of the Dexcom Receiver
Press
Select
to turn receiver on.
The first screen you see is the startup screen with ascending green bars.
Once complete, a setup wizard guides you through the initial setup steps.
Don’t be worry if your receiver buzzes or makes other sounds during this
process.
After your initial setup is complete, you won’t see the setup wizard again. Your
settings can always be adjusted using menu options.
PDF compression, OCR, web optimization using a watermarked evaluation copy of CVISION PDFCompressor
Page 76
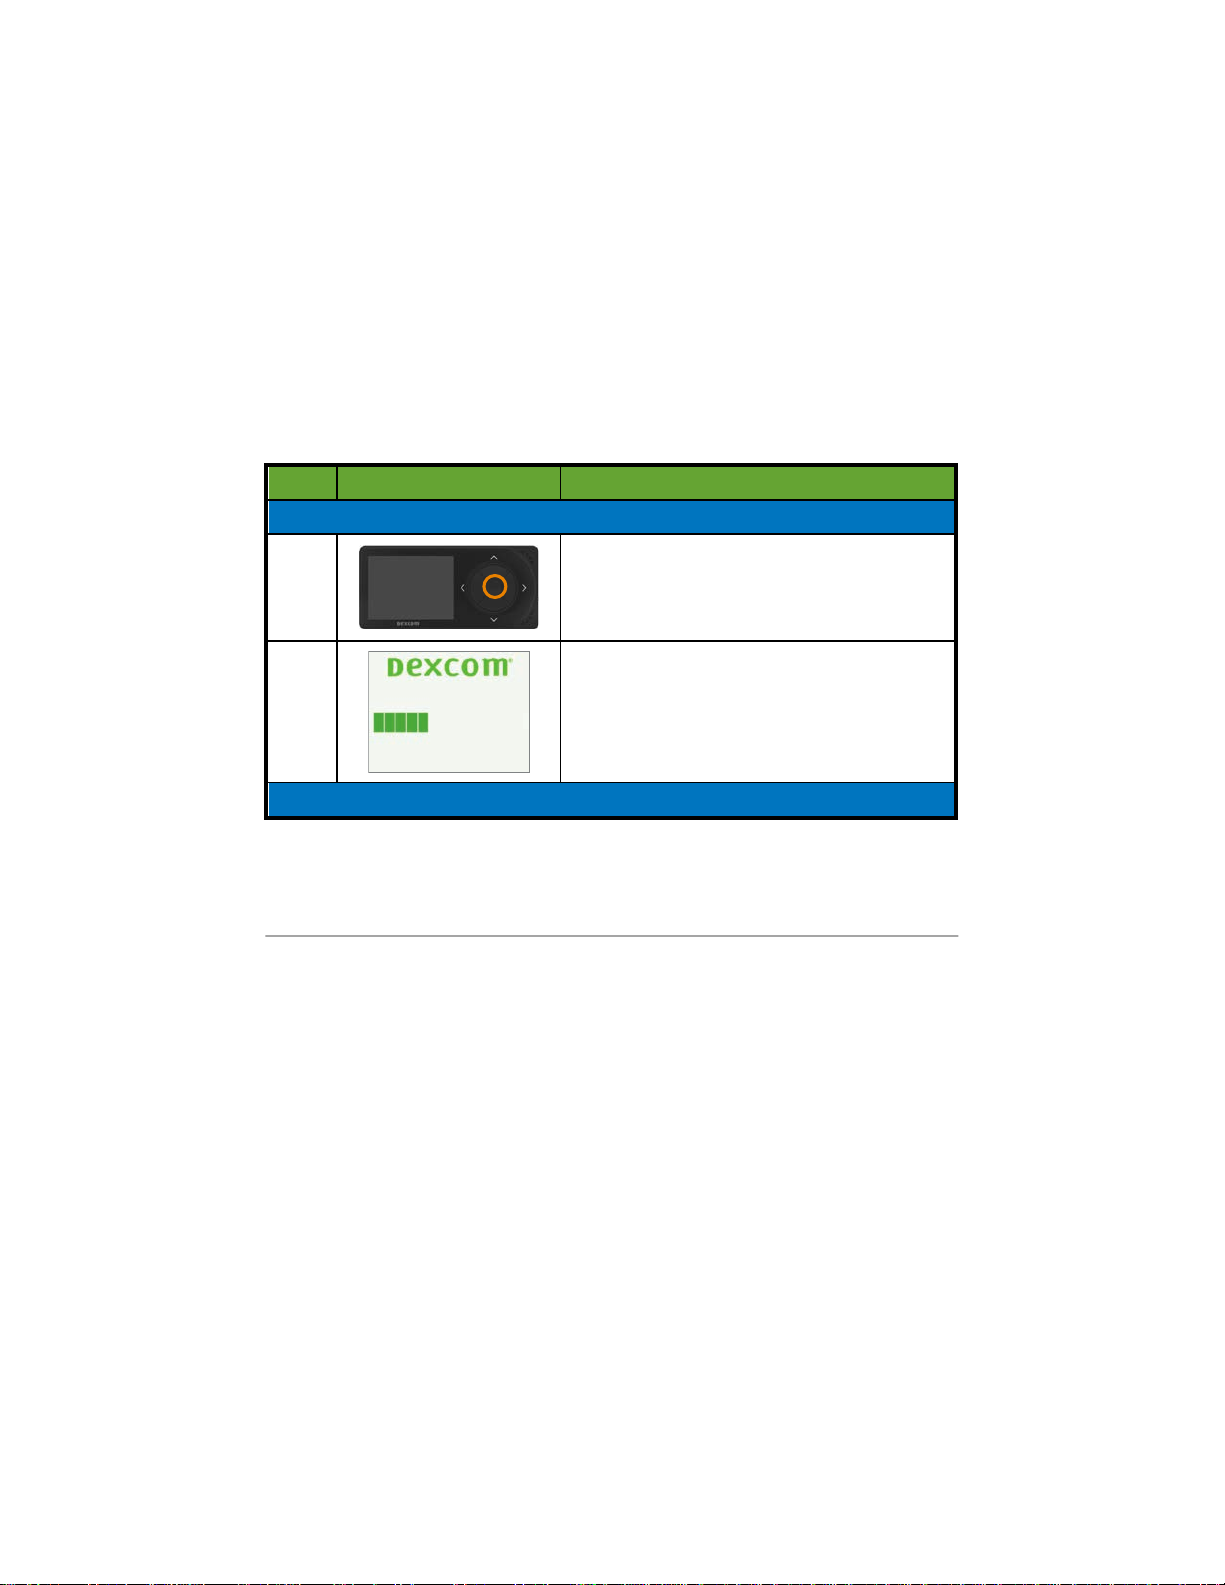
Dexcom G5x System User Guide
Set up Your Display Devices
76
How you complete your initial setup differs between the receiver and your
smart device; however, the data is the same.
Setup Wizard Notifications:
• Time/Date
• Transmitter Serial Number
o Back of transmitter
o Back of transmitter’s box
• Setting Low Glucose Alert
• Setting High Glucose Alert
Before starting a session, you may want to check the receiver’s battery level.
If it is less than half, go to Chapter 4 for charging instructions.
Initial Receiver Setup
Step
What you see
What you do
Initial Screens
1
Press
Select
to turn receiver on.
2
Wait.
Time/Date
PDF compression, OCR, web optimization using a watermarked evaluation copy of CVISION PDFCompressor
Page 77
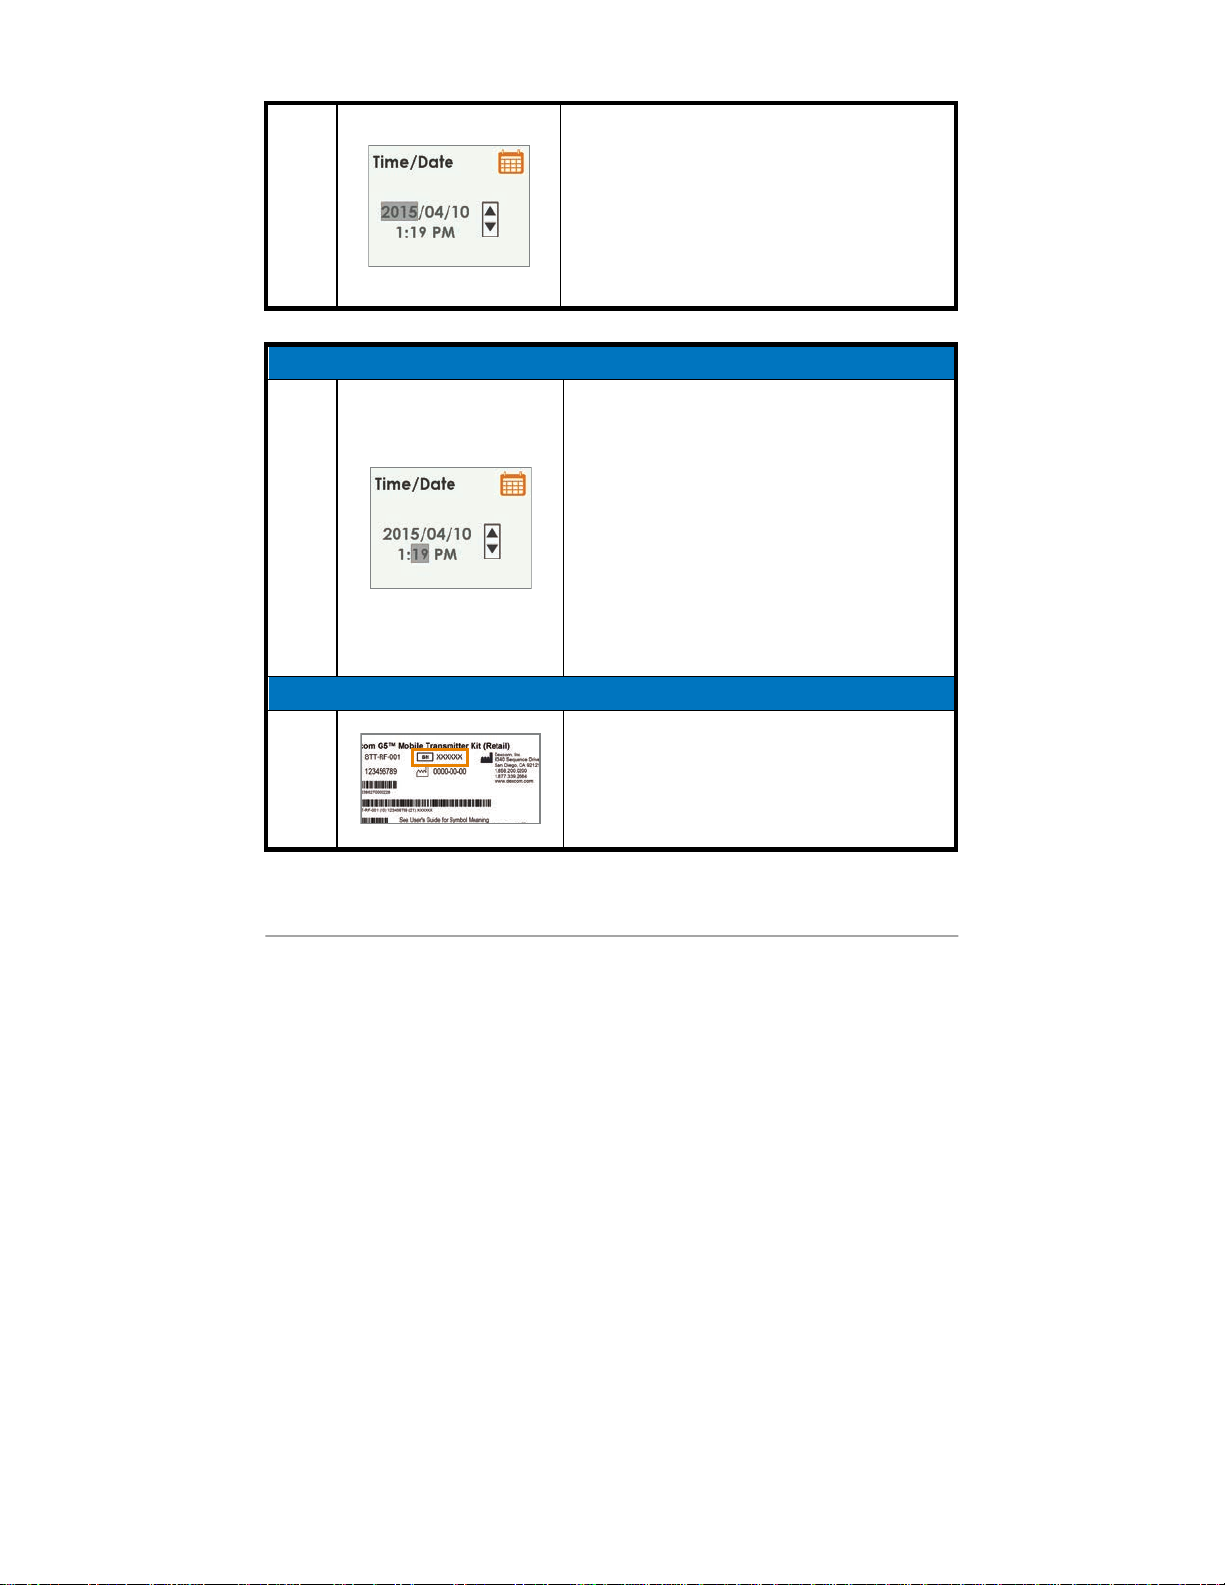
Dexcom G5x System User Guide
Set up Your Display Devices
77
3
Press
Up/Down Arrow
to change year.
Press
Right Arrow
to move forward.
Press
Up/Down Arrow
to change month.
Press
Right Arrow
.
Press
Up/Down Arrow
to change day.
Press
Right Arrow
to move to time.
Time/Date
3b
Press
Up/Down Arrow
to change hour.
Press
Right Arrow
.
Press
Up/Down Arrow
to change
minutes.
Press
Right Arrow
.
Press
Up/Down Arrow
to select AM/PM.
Press
Select
to save and close.
NOTE: After initial setup, if battery is
drained, receiver will vibrate once and
you will need to reset date and time.
Transmitter
4a
Turn
transmitter box
upside down to
locate SN number.
For information on how to pair transmitter
after initial setup, see Chapter 8.
PDF compression, OCR, web optimization using a watermarked evaluation copy of CVISION PDFCompressor
Page 78
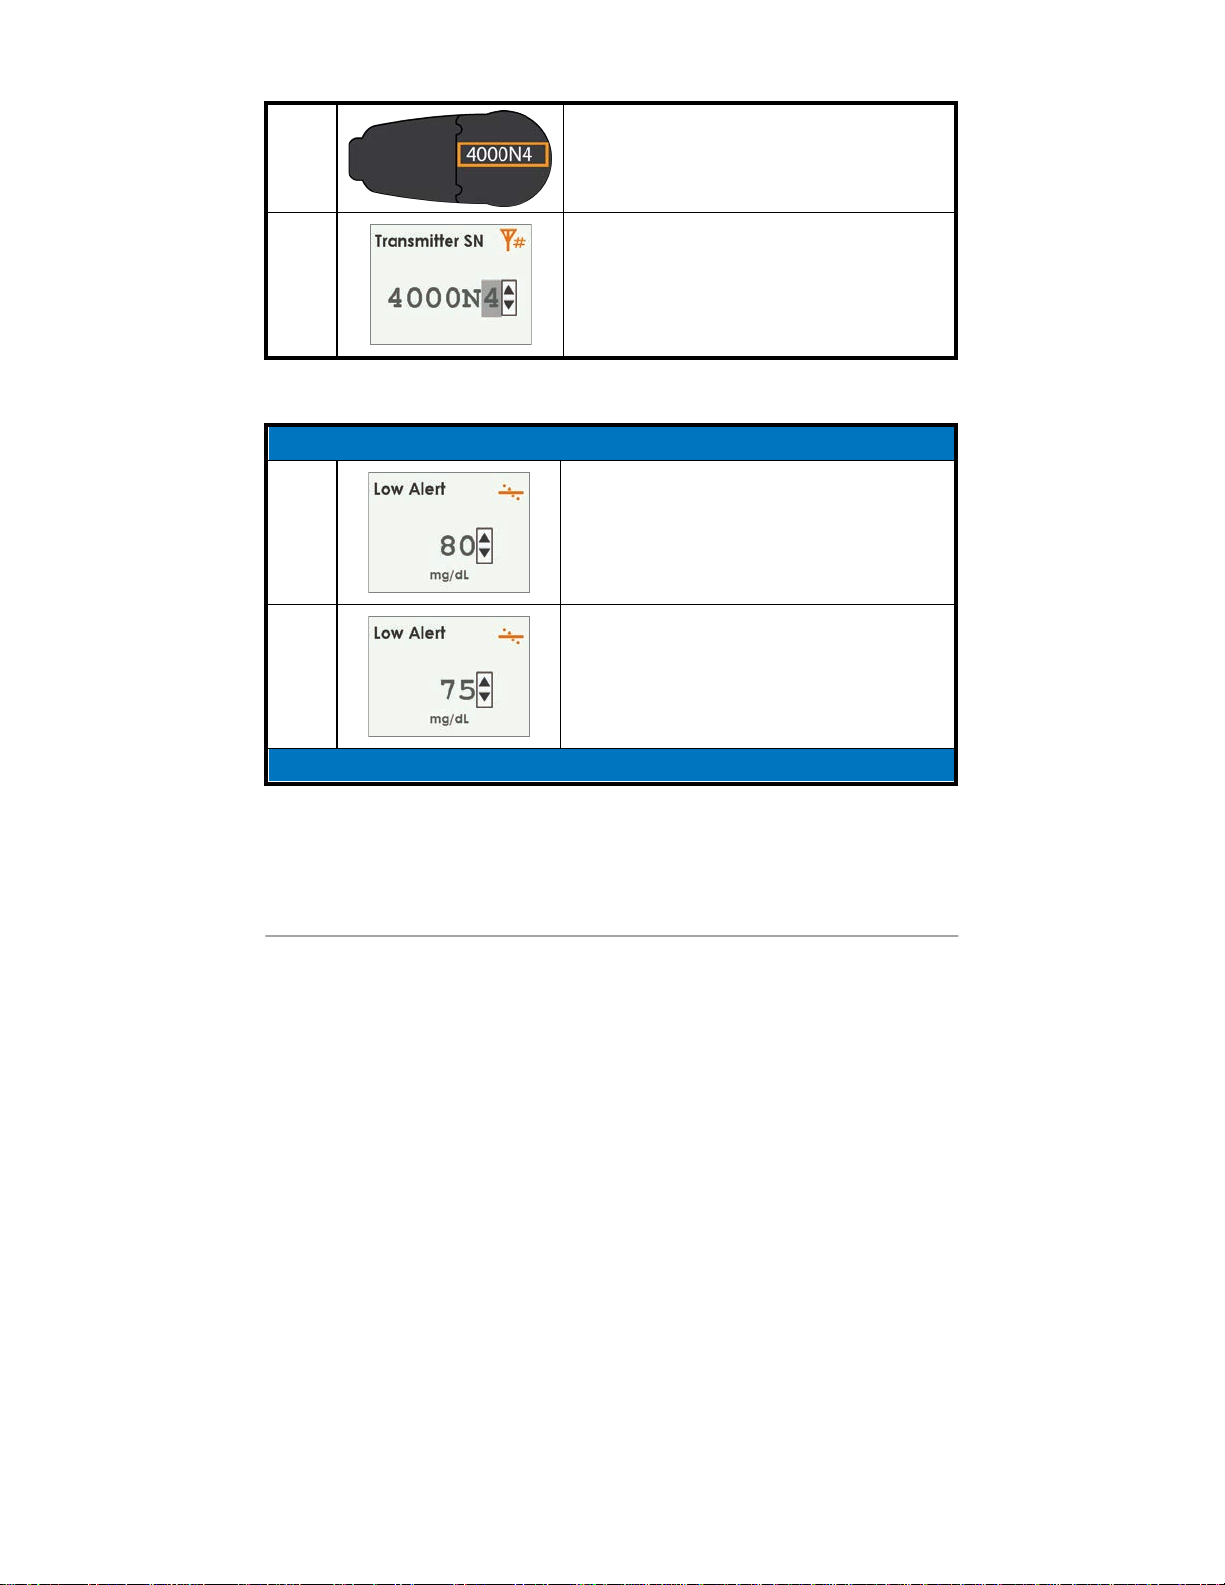
Dexcom G5x System User Guide
Set up Your Display Devices
78
4b
If transmitter package isn’t available:
• SN is on transmitter’s back
4c
Press
Up/Down Arrows
to select and
enter transmitter SN.
Press
Right Arrow
to move to next digit.
Press
Select
to save and close.
Setting Low Alert
5a
System default is at 80 mg/dL.
Press
Select
to save at present levels
and close.
5b
To change value:
Press
Up/Down Arrows
to change value
at 5 mg/dL increments.
Press
Select
to save and close.
Setting High Alert
PDF compression, OCR, web optimization using a watermarked evaluation copy of CVISION PDFCompressor
Page 79
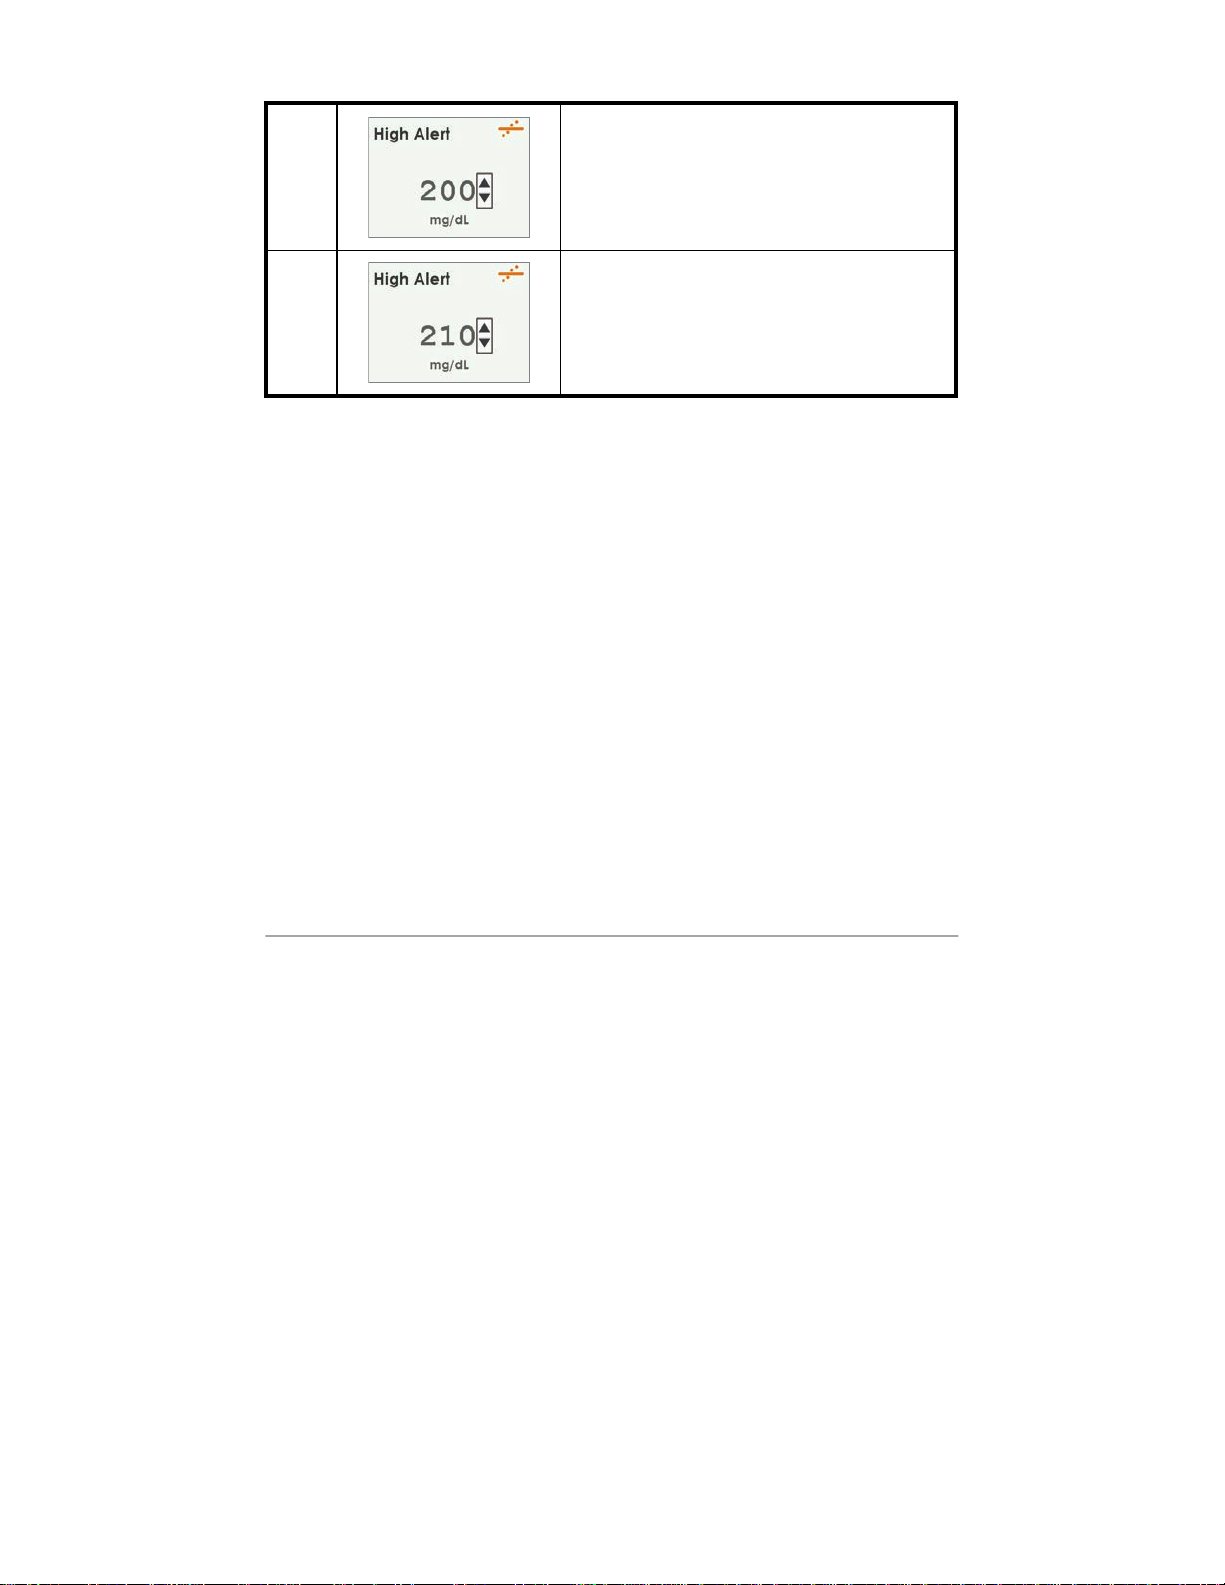
Dexcom G5x System User Guide
Set up Your Display Devices
79
6a
System default is at 200 mg/dL.
Press
Select
to save at present levels
and close.
6b
To change value:
Press
Up/Down Arrows
to change value
at 10 mg/dL increments.
Press
Select
to save and close.
These steps are enough to get you going; now you can start your sensor
session!
Summary
Now You Can:
• Create a Dexcom username and password
• Download the Dexcom G5 Mobile app
• Set up app with the recommended settings
• Successfully set up your receiver
What’s Next?
Now that you have completed setting up your app and/or the receiver, your
next step is starting a sensor session.
No matter what monitoring method you choose, starting a sensor session is
the same:
1. Inserting the sensor.
2. Attaching the transmitter.
3. Pairing the transmitter to your device.
PDF compression, OCR, web optimization using a watermarked evaluation copy of CVISION PDFCompressor
Page 80

Dexcom G5x System User Guide
Set up Your Display Devices
80
4. Two-hour sensor warmup.
5. Startup calibrations.
PDF compression, OCR, web optimization using a watermarked evaluation copy of CVISION PDFCompressor
Page 81

Dexcom G5x System User Guide
Calibration
81
Chapter 6
Let’s G5x! The Basics:
Starting a Sensor Session: Inserting Sensor, Attaching
Transmitter, and Starting Your Session
6.1 Introduction
Now that your display devices are set up, you’re ready to begin a sensor
session. If this is your first time inserting a sensor, you may want to watch the
G5x sensor insertion video to get a better understanding of the process.
There are three ways to get the sensor insertion video:
1. Through the app
2. On the USB card in your receiver package
3. Online at dexcom.com:
a. Top of page, click
Support
After inserting the sensor, start the sensor warmup on your smart device and
receiver. The sensor warmup takes approximately two hours; during this time
your body is getting used to the new sensor, allowing for more accurate
sensor glucose readings. Once the two-hour sensor warmup has passed, you
enter two back-to-back fingerstick measurements to calibrate the sensor’s
glucose readings with your fingerstick measurements (Calibration is covered
in the next chapter).
Make sure you give yourself enough time to finish the startup session.
Remember your smart device’s
Bluetooth
needs to pair with the transmitter,
adding up to 30 minutes to your wait time. Good news is you don’t need to sit
around waiting: as long as you have your display device near, you can go
about your day running errands, gardening, personalizing the G5x settings,
whatever you choose during that time frame.
Keep your display device(s) handy during the warmup period—it shows how
much time has passed, notifying you with beeps and an icon when your
sensor session is ready for its startup calibrations.
After this chapter you will be able to:
PDF compression, OCR, web optimization using a watermarked evaluation copy of CVISION PDFCompressor
Page 82

Dexcom G5x System User Guide
Calibration
82
• Identify sensor applicator features
• Properly prepare for sensor insertion
• Choose the best location to insert your sensor
• Correctly insert your sensor
• Prepare transmitter for placement
• Correctly attach transmitter to transmitter holder
• Outline what happens during the sensor warmup
• Identify countdown icon
6.2 Safety Statements
Following are some important Precautions and Warnings to review; we want
to make sure you and the system are safe before starting a sensor session.
Warning
Don’t:
If a sensor breaks under the skin with no portion visible above the
skin, don’t remove it.
Do:
Contact your healthcare professional if you have redness, swelling, or
pain at the insertion site.
Within 24 hours of experiencing a broken sensor wire, please call our 24/7
Technical Support department:
Email: [email protected]
Toll free: 1.888.738.3646
Toll call: 1.858.200.0200
Why: Sensors may fracture on rare occasions.
MRI with broken wire
For patients undergoing an MRI with a retained wire broken off from a G5x
sensor, in-vitro MRI testing did not detect any safety hazards. There was
no significant migration or heating of the wire and imaging artifacts were
limited to the area around the wire.
PDF compression, OCR, web optimization using a watermarked evaluation copy of CVISION PDFCompressor
Page 83
Dexcom G5x System User Guide
Calibration
83
Warning
Do:
During a sensor’s shelf life, store it between 36° F-86° F.
Why: Storing the sensor incorrectly might cause the sensor glucose
readings to be incorrect.
Never store sensors and/or sensor packages in the freezer.
Consequences: Missing a severe low or high glucose event.
Warning
Don’t:
Insert the sensor component of the system in a site other than
the belly/abdomen (ages 2 years and older) or the upper buttocks (ages
2 to 17 years).
Why: The placement and insertion of the sensor component of the
system is not approved for other sites.
Consequences: The system has not been tested in other areas and
may not work properly if inserted in other areas.
PDF compression, OCR, web optimization using a watermarked evaluation copy of CVISION PDFCompressor
Page 84
Dexcom G5x System User Guide
Calibration
84
Warning
Don’t:
Use the system sensor glucose readings for treatment decisions.
Do:
When making treatment decisions, such as the amount of insulin you
need, only use your BG value from your BG meter.
Why: Since they measure your glucose from different body fluids, sensor
glucose readings can be different from your meter’s BG values.
Consequences: If sensor glucose readings are used in determining
treatments, it could result in you missing a severe low or high glucose
event.
Precaution
Don’t:
Insert the sensor where bones are close to the skin’s surface (for
example, over your ribs or hip bones).
Why: If you insert the sensor in these areas, you may feel excessive pain
or damage your sensor.
Precaution
Do:
Change the site where you place the sensor with each new insertion.
Sensor placement is important. Choose a site:
•
At least 3 inches from insulin pump infusion set or injection site
•
Away from waistband, scarring, tattoos, irritation
•
Unlikely to be bumped or pushed
Why: Using the same site too often might not allow the skin to heal. Also,
insertion in these areas might affect sensor performance.
Consequences: Missing a severe low or high glucose event.
PDF compression, OCR, web optimization using a watermarked evaluation copy of CVISION PDFCompressor
Page 85
Dexcom G5x System User Guide
Calibration
85
Precaution
Don’t:
Use sensor if its sterile package has been damaged or opened.
Why: Make sure the sterile sensor pack has not been damaged or
previously opened. If opened or damaged, sensor may be unsterile.
Consequences: Using a non-sterile sensor might cause an infection.
Precaution
Don’t:
Don’t remove the safety guard before placing the applicator on the
skin.
Why: If you remove the safety guard first, you may accidentally deploy the
needle and hurt yourself.
Precaution
Don’t:
Get dirt or water in the receiver’s USB port or submerge in water.
Why: If dirt or water gets into the USB port, the receiver could become
damaged and stop displaying readings or providing Alerts.
Consequences: You might miss a severe low or high glucose event.
6.3 Prepping for Sensor Insertion
Before inserting a sensor, make sure you have everything you need. Some
items are included in your G5x packages, others are not.
Included in Your G5x Packages
For sensor insertion, you need the sensor and transmitter.
PDF compression, OCR, web optimization using a watermarked evaluation copy of CVISION PDFCompressor
Page 86
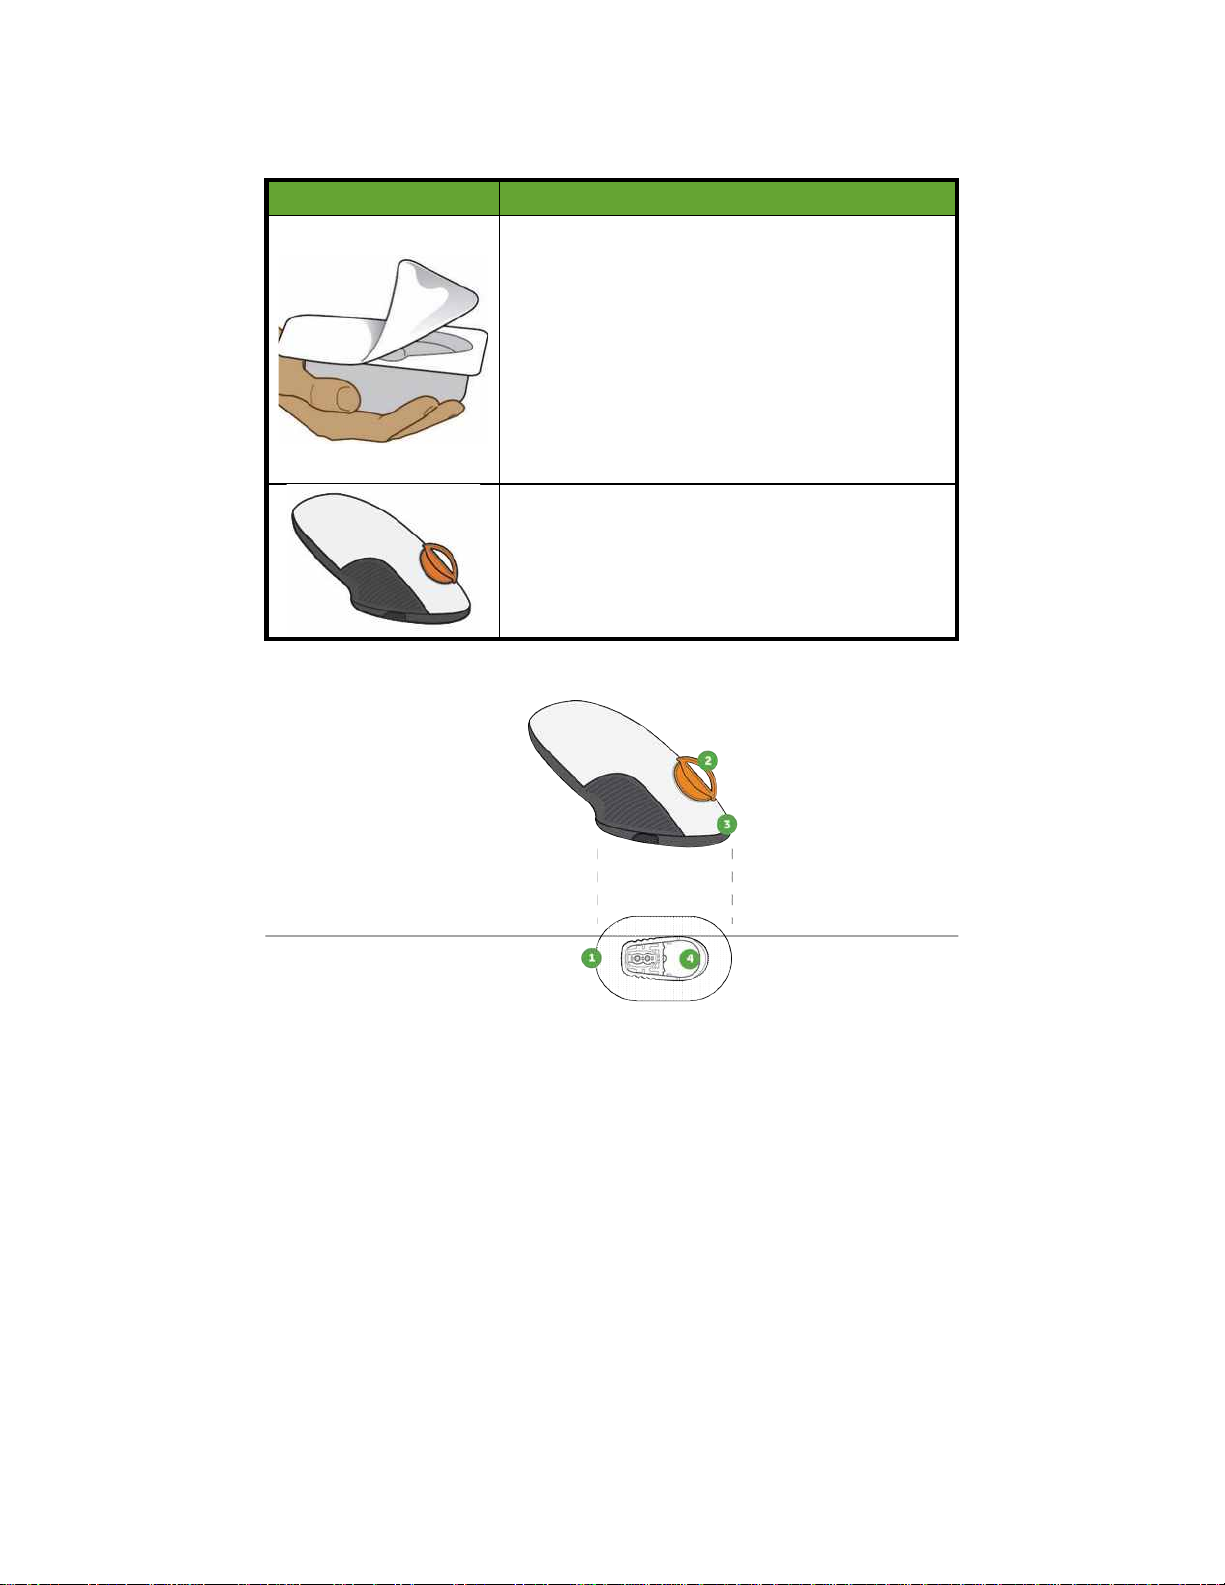
Dexcom G5x System User Guide
Calibration
86
Sensor Applicator
Inside Sensor Box
What you see
What it is
Sterilized applicator and sensor tray with
important label information.
Check
expiration
date.
Do not use if it is past the expiration date.
Open when ready to use.
Single use sensor applicator.
Knowing what each applicator piece does helps you successfully insert your
sensor. Chapter 4, Section 4.6 gave you an overview of the sensor applicator.
PDF compression, OCR, web optimization using a watermarked evaluation copy of CVISION PDFCompressor
Page 87
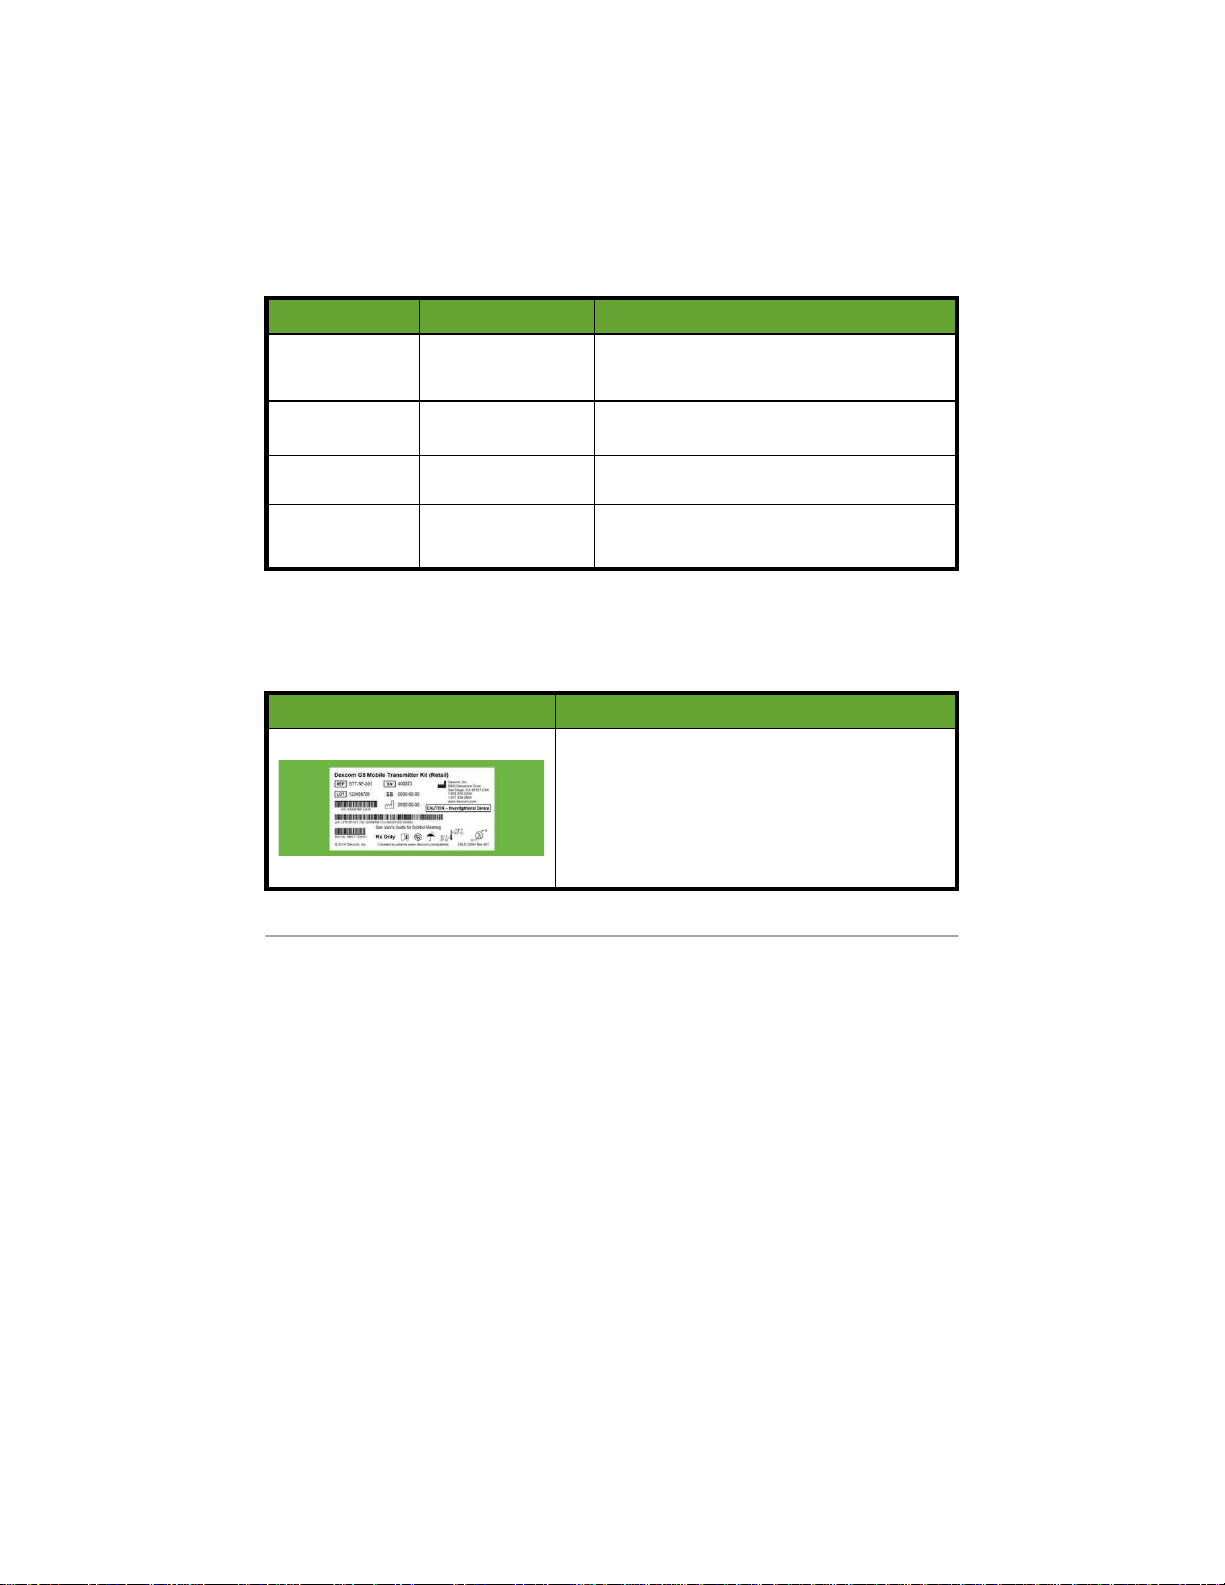
Dexcom G5x System User Guide
Calibration
87
Figure 3. G5x Sensor Applicator and Transmitter Holder
The following table reviews the sensor applicator components in order of use.
Sensor Applicator Components
Order of Use
Name
What it does
1
Adhesive Patch
Keeps transmitter holder securely on
your skin.
2
Safety Guard
Prevents applicator from inserting
sensor wire before you are ready.
3
Applicator
Inserts sensor under your skin.
4
Transmitter
Holder
Holds sensor wire in place under skin.
Holds transmitter.
Transmitter
Transmitter Box
What you see
What it is
Bottom of box with important label
information.
Keep box until transmitter battery dies.
Please Note: Picture is representative
only; your transmitter box may look
different.
PDF compression, OCR, web optimization using a watermarked evaluation copy of CVISION PDFCompressor
Page 88
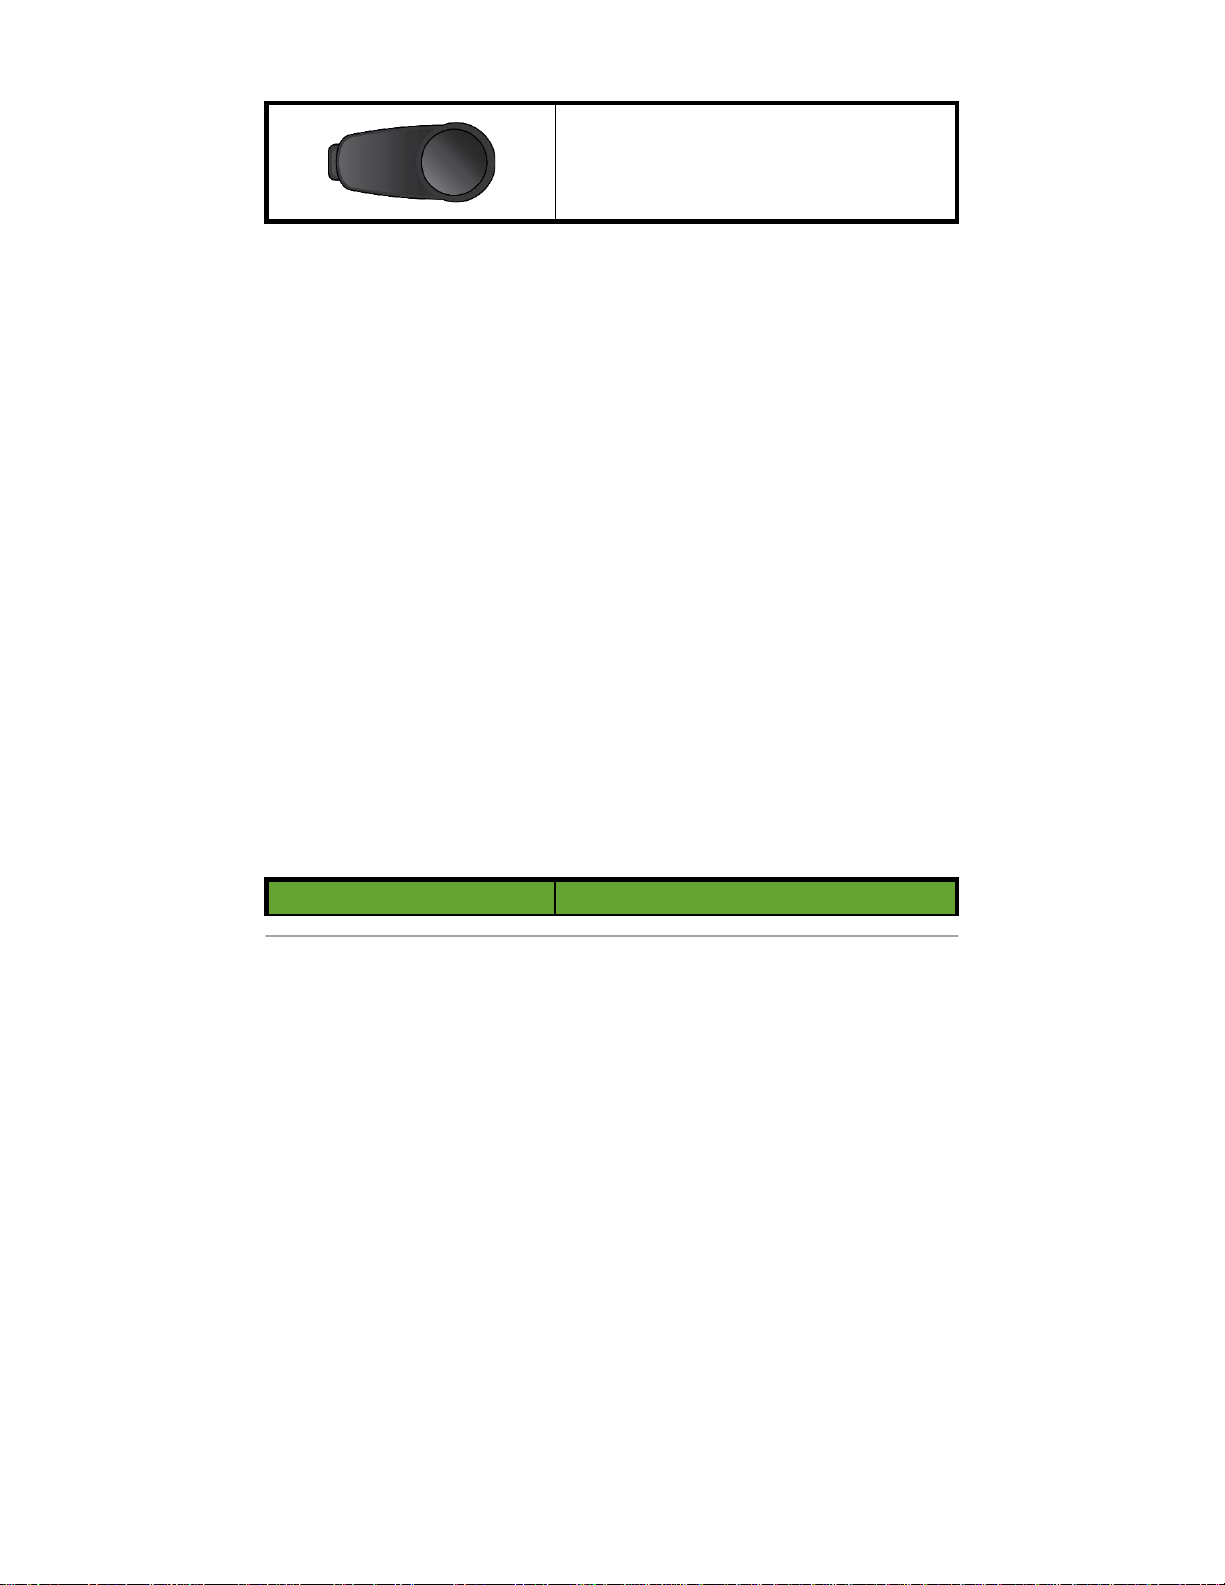
Dexcom G5x System User Guide
Calibration
88
Reusable transmitter.
Please Note: Picture is representative
only; your transmitter may look different.
In the previous chapter, you entered your transmitter SN into your display
devices and made sure your smart device and/or receiver connected with the
transmitter. You won’t be able to start a sensor session if your transmitter isn’t
paired with your receiver and/or smart device.
Not included in packages:
1. Alcohol wipes
2. Your BG meter
3. Your test strips
Before starting, check your BG meter; make sure it’s in good working order
following manufacturer’s directions and the meter’s date and time match your
display device’s date and time.
Make sure test strips haven’t expired and work with your meter.
Before removing the sensor applicator from its sterile pack, determine the best
place to insert your sensor.
6.4 Choosing Your Insertion Site
Choose a place on your belly (or if user is between the ages of 2 and 17,
upper buttocks) to insert the sensor; the site should be either above or below
your belt line. The best areas are usually flat, “pinchable,” and free from where
rubbing can occur (along the waistband, seat belt strap, or where you lie when
sleeping).
For more help on ideal sensor insertion sites, contact your healthcare
professional.
Insertion Sites
Location
Where it is
PDF compression, OCR, web optimization using a watermarked evaluation copy of CVISION PDFCompressor
Page 89
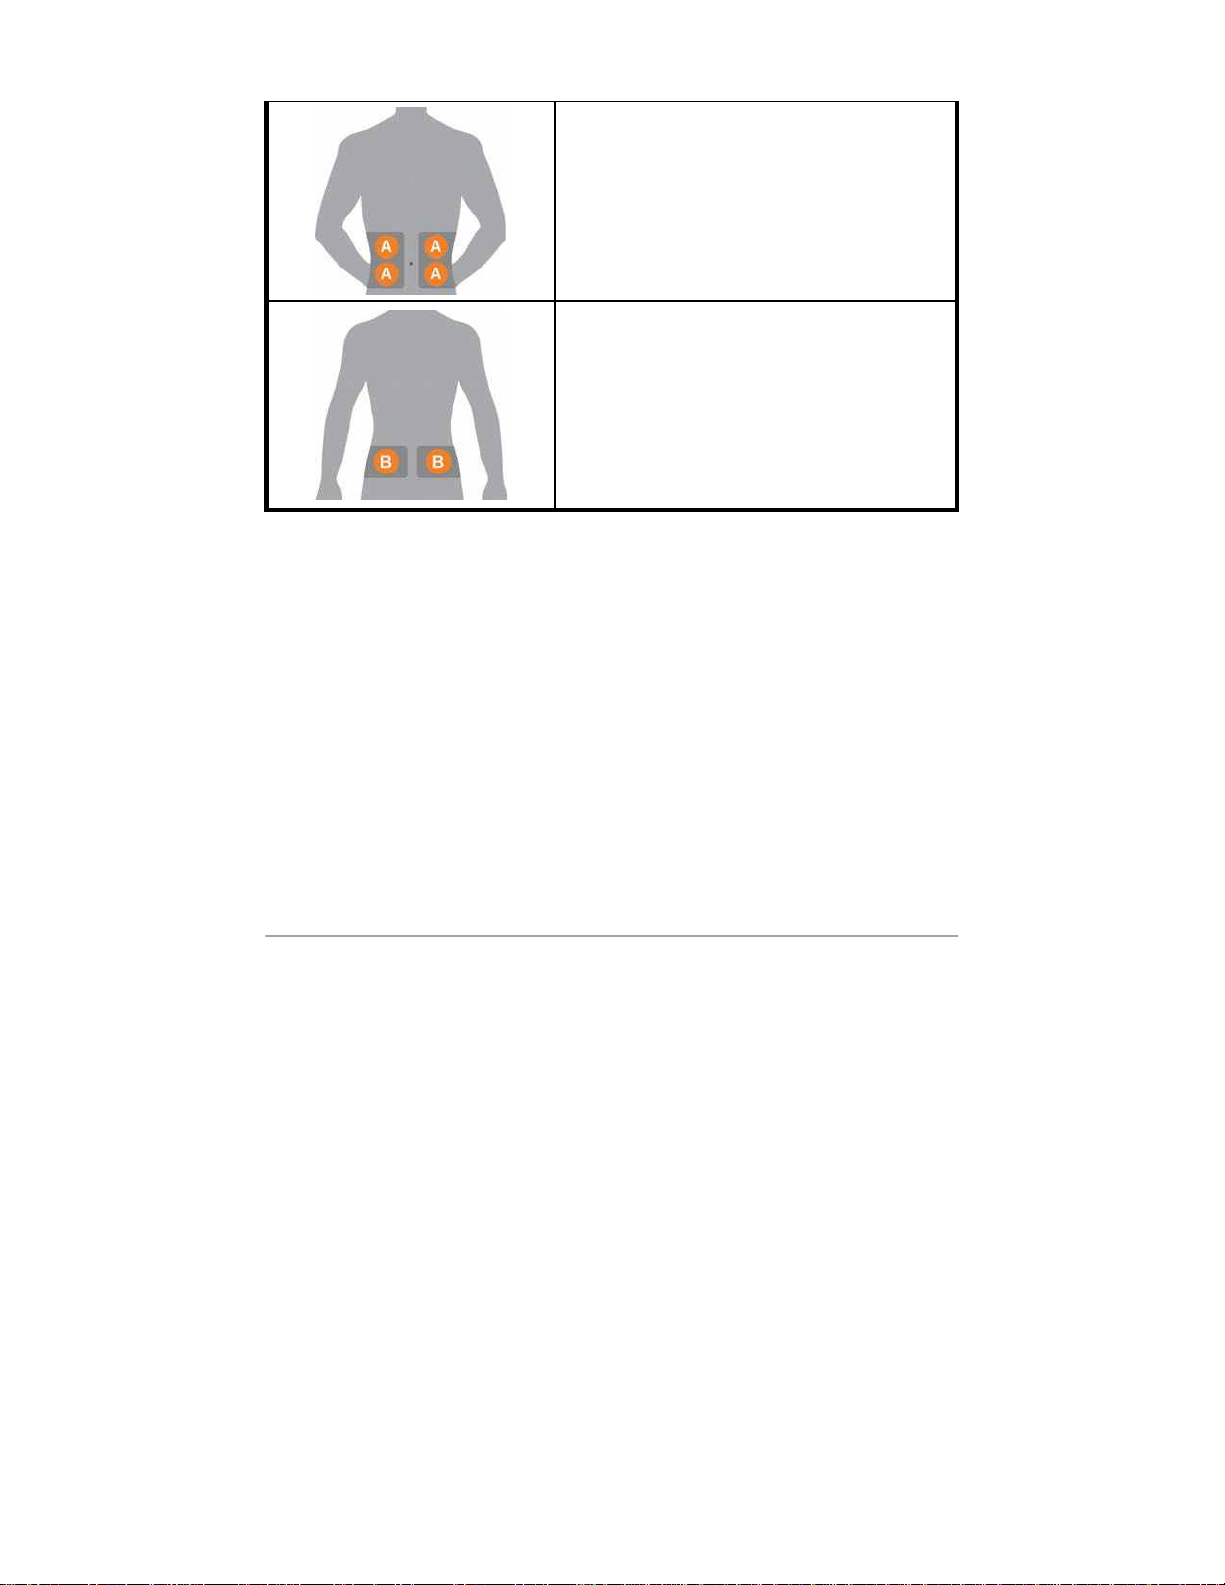
Dexcom G5x System User Guide
Calibration
89
Front of body (belly area) for ages 2 years
and older.
If user is between the ages of 2 years and
17:
Back of body (upper buttocks)
Do:
• Remove the sensor applicator and attached transmitter holder from its
sterile pack only at time of use
• Place at least 3 inches from your insulin pump infusion set or injection
site
• If needed, shave the area so adhesive patch sticks securely
• Make sure area is clean and free of lotions, perfumes, medications
Don’t:
• Never use same site repeatedly for sensor insertion
• Never use same site for 2 sensor sessions in a row
If you have concerns about the transmitter holder not sticking, before inserting
your sensor, you can make the sensor site stickier to help ensure the
transmitter holder does not peel up.
PDF compression, OCR, web optimization using a watermarked evaluation copy of CVISION PDFCompressor
Page 90
Dexcom G5x System User Guide
Calibration
90
Optional Site Preparation
Use optional skin adhesives (Mastisol™, SkinTac™) as part of your insertion
site preparation to help keep your transmitter holder attached. Apply the skin
adhesive after you selected and cleaned your insertion site. Create an empty
sideways oval, making sure you don't get any skin adhesive inside the oval. .
Let the oval dry based on skin adhesive manufacture’s instructions. Once dry,
your skin may feel slightly sticky.
See Step 3 in the next table for directions.
NOTE: Contact your healthcare professional for specific questions regarding
the use of medical tape, barrier wipes, and/or other adhesives as it relates to
your use of Dexcom CGM.
6.5 Inserting Your Sensor
You’ve collected all of the needed items to begin a sensor session, viewed the
tutorials, reviewed the sensor applicator, and prepped the transmitter holder
site. You’re now ready to insert your sensor!
Inserting Sensor
Step
Picture
What you do
Preparation
1
Wash and dry your hands.
PDF compression, OCR, web optimization using a watermarked evaluation copy of CVISION PDFCompressor
Page 91
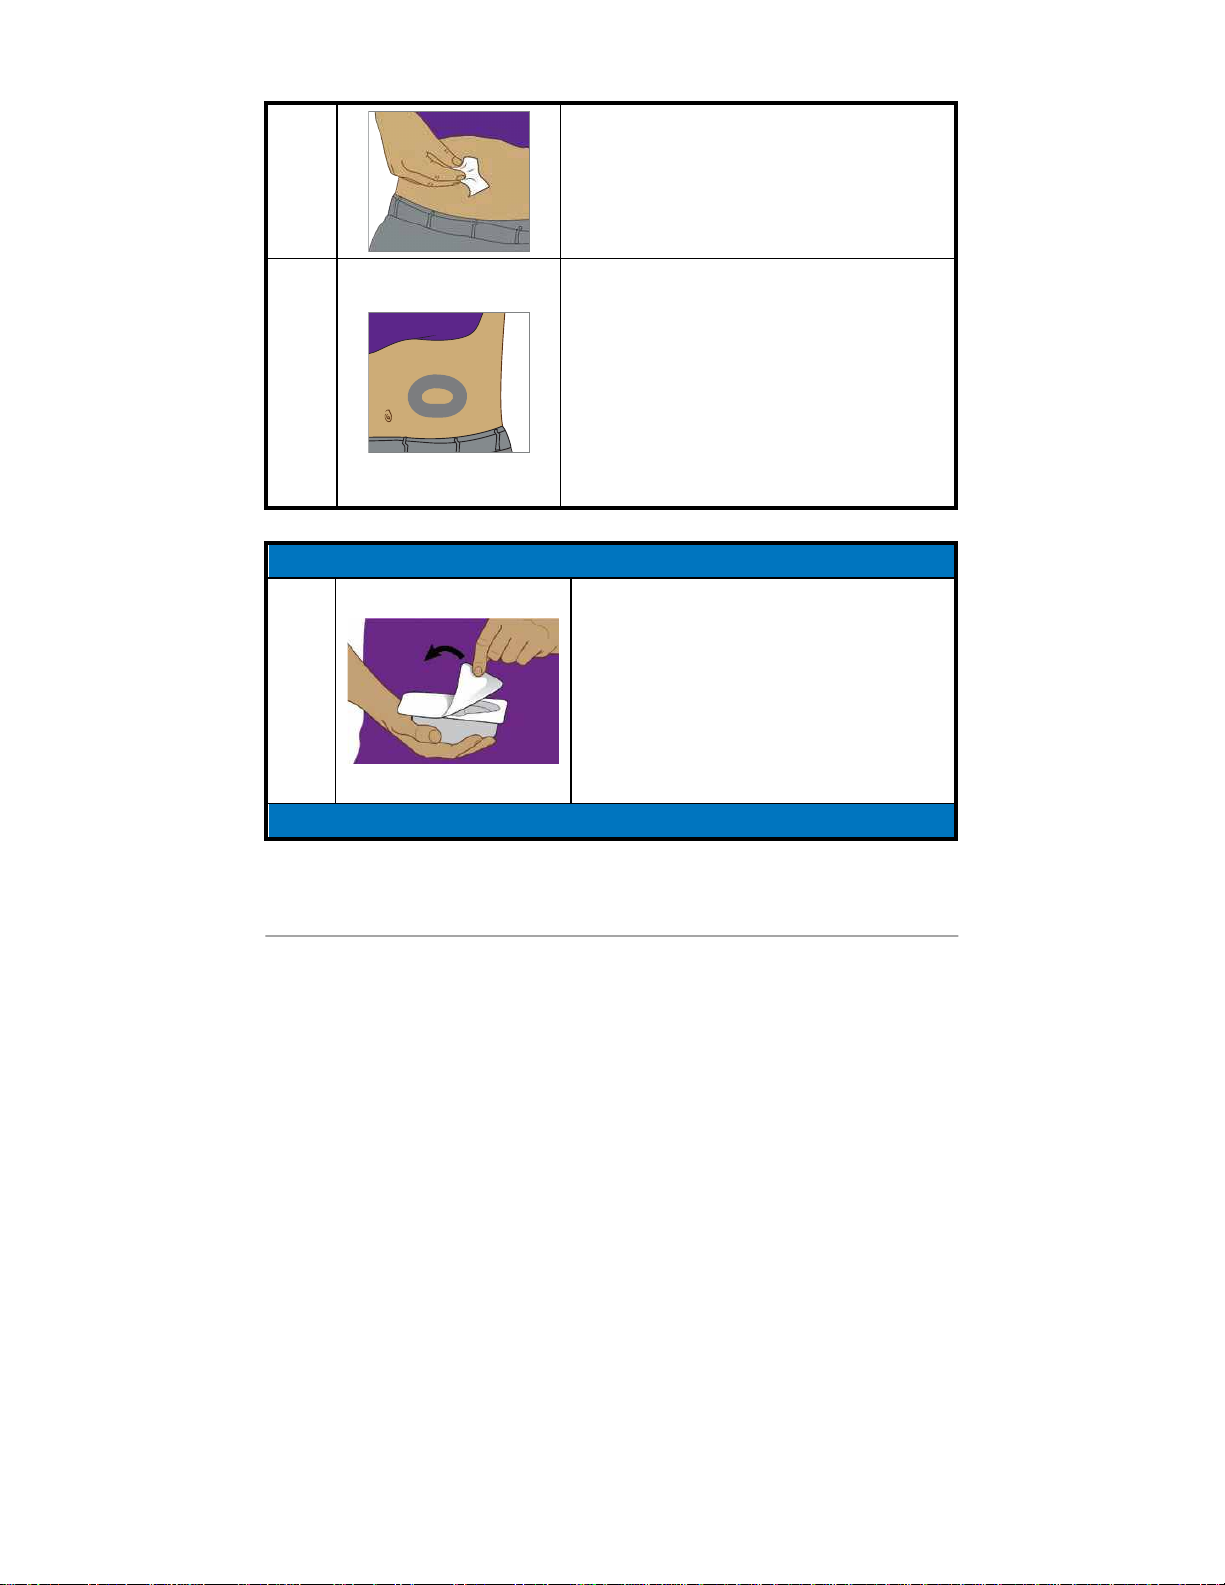
Dexcom G5x System User Guide
Calibration
91
2
Clean
insertion site
with alcohol wipe.
Let dry.
3
Optional Step: Skin Adhesive
Create a empty sideways
oval
on the
skin
•
Do not get any skin adhesive inside
the oval
•
Let skin adhesive dry (see
manufacturer’s instructions)
•
Insert sensor on clean skin at the
center of the oval
Preparation
4
Check
pack
. Is it damaged or already
opened?
• If yes, do not use
Peel
lid
off of sensor pack
Keep
sensor packaging
until sensor
session is complete.
Attaching Transmitter Holder
PDF compression, OCR, web optimization using a watermarked evaluation copy of CVISION PDFCompressor
Page 92
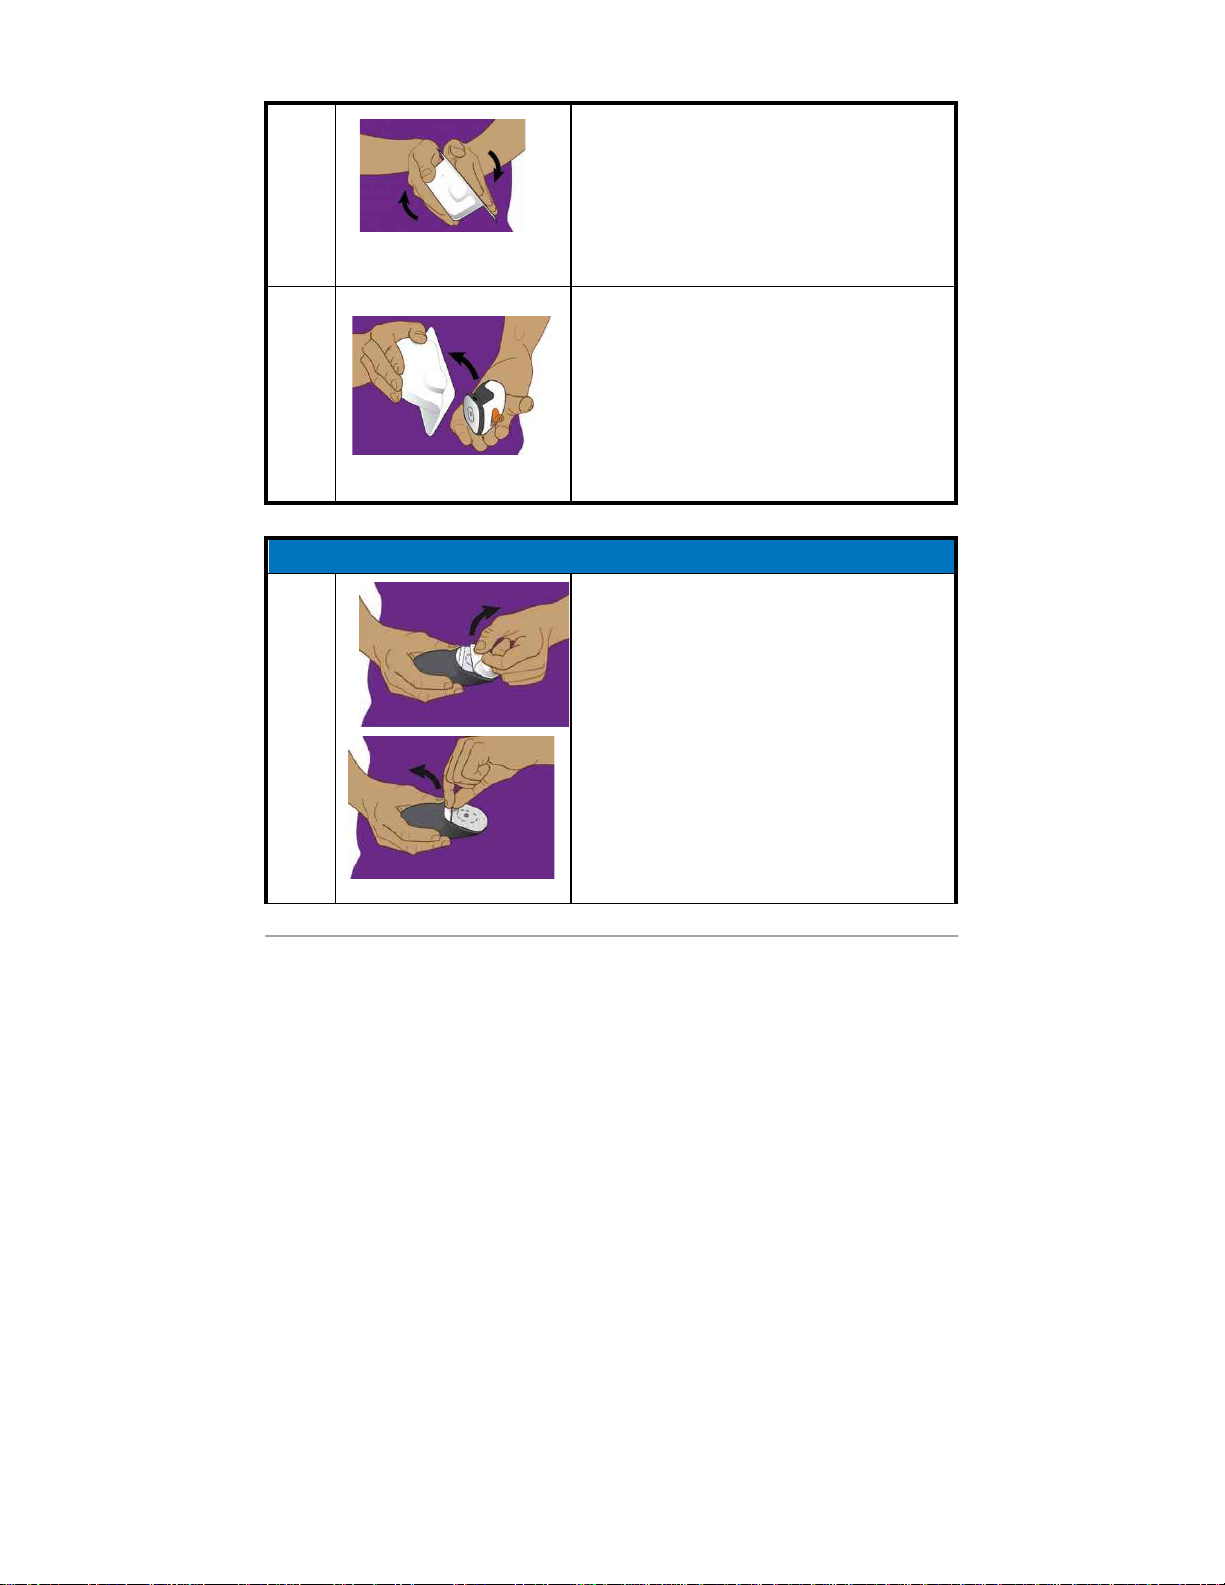
Dexcom G5x System User Guide
Calibration
92
5
Place hand over
pack’s
opening
6
Gently roll
pack
so applicator falls out
and rests in the palm of your hand.
Closely inspect
sensor applicator
, to
check it has not been damaged.
Remove Adhesive Backing
7
2-step process:
1. Remove
large tab
covering
adhesive patch.
2. Remove
small tab.
Don’t touch adhesive after removing
backing.
PDF compression, OCR, web optimization using a watermarked evaluation copy of CVISION PDFCompressor
Page 93
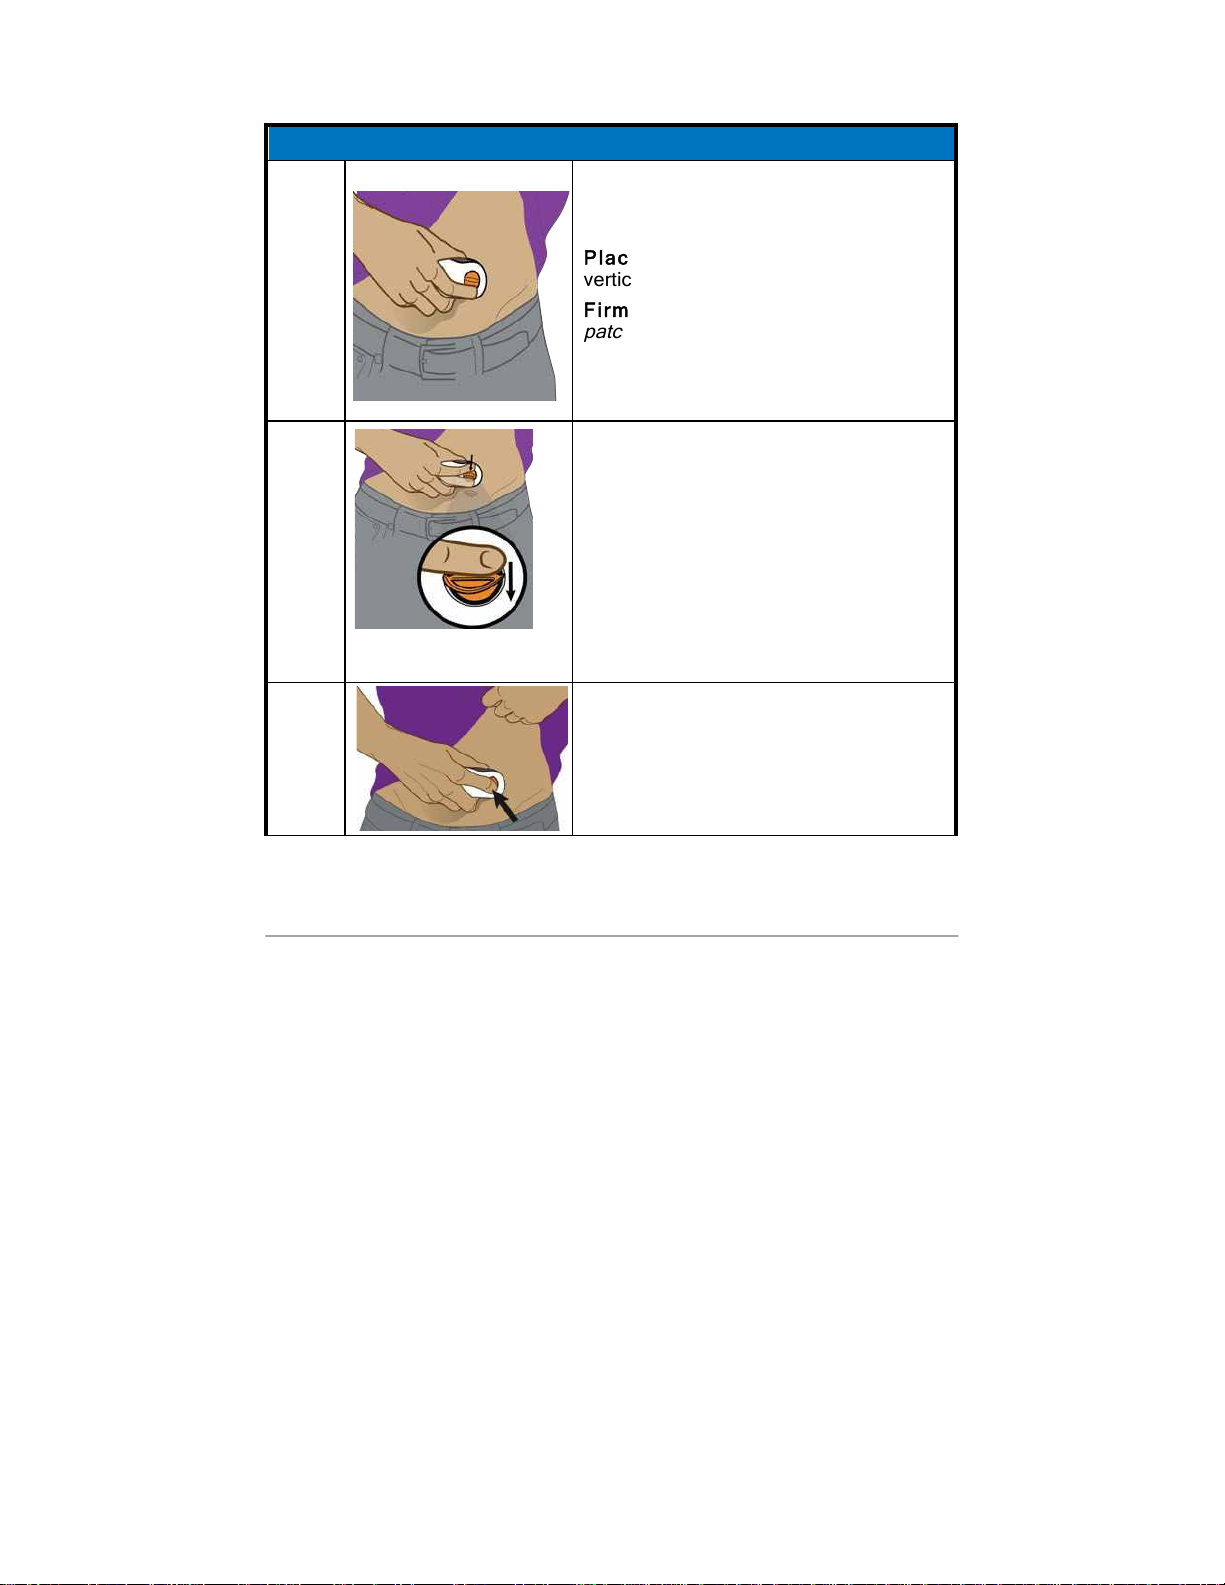
Dexcom G5x System User Guide
Calibration
93
Inserting Sensor Wire and Transmitter Holder
8
Place
applicator
horizontally, not
vertically, on skin.
Firmly press down, sticking
adhesive
patch
to your skin.
9
Fold and break
safety guard.
Throw
safety guard
away.
10
Push
button
to insert sensor.
PDF compression, OCR, web optimization using a watermarked evaluation copy of CVISION PDFCompressor
Page 94
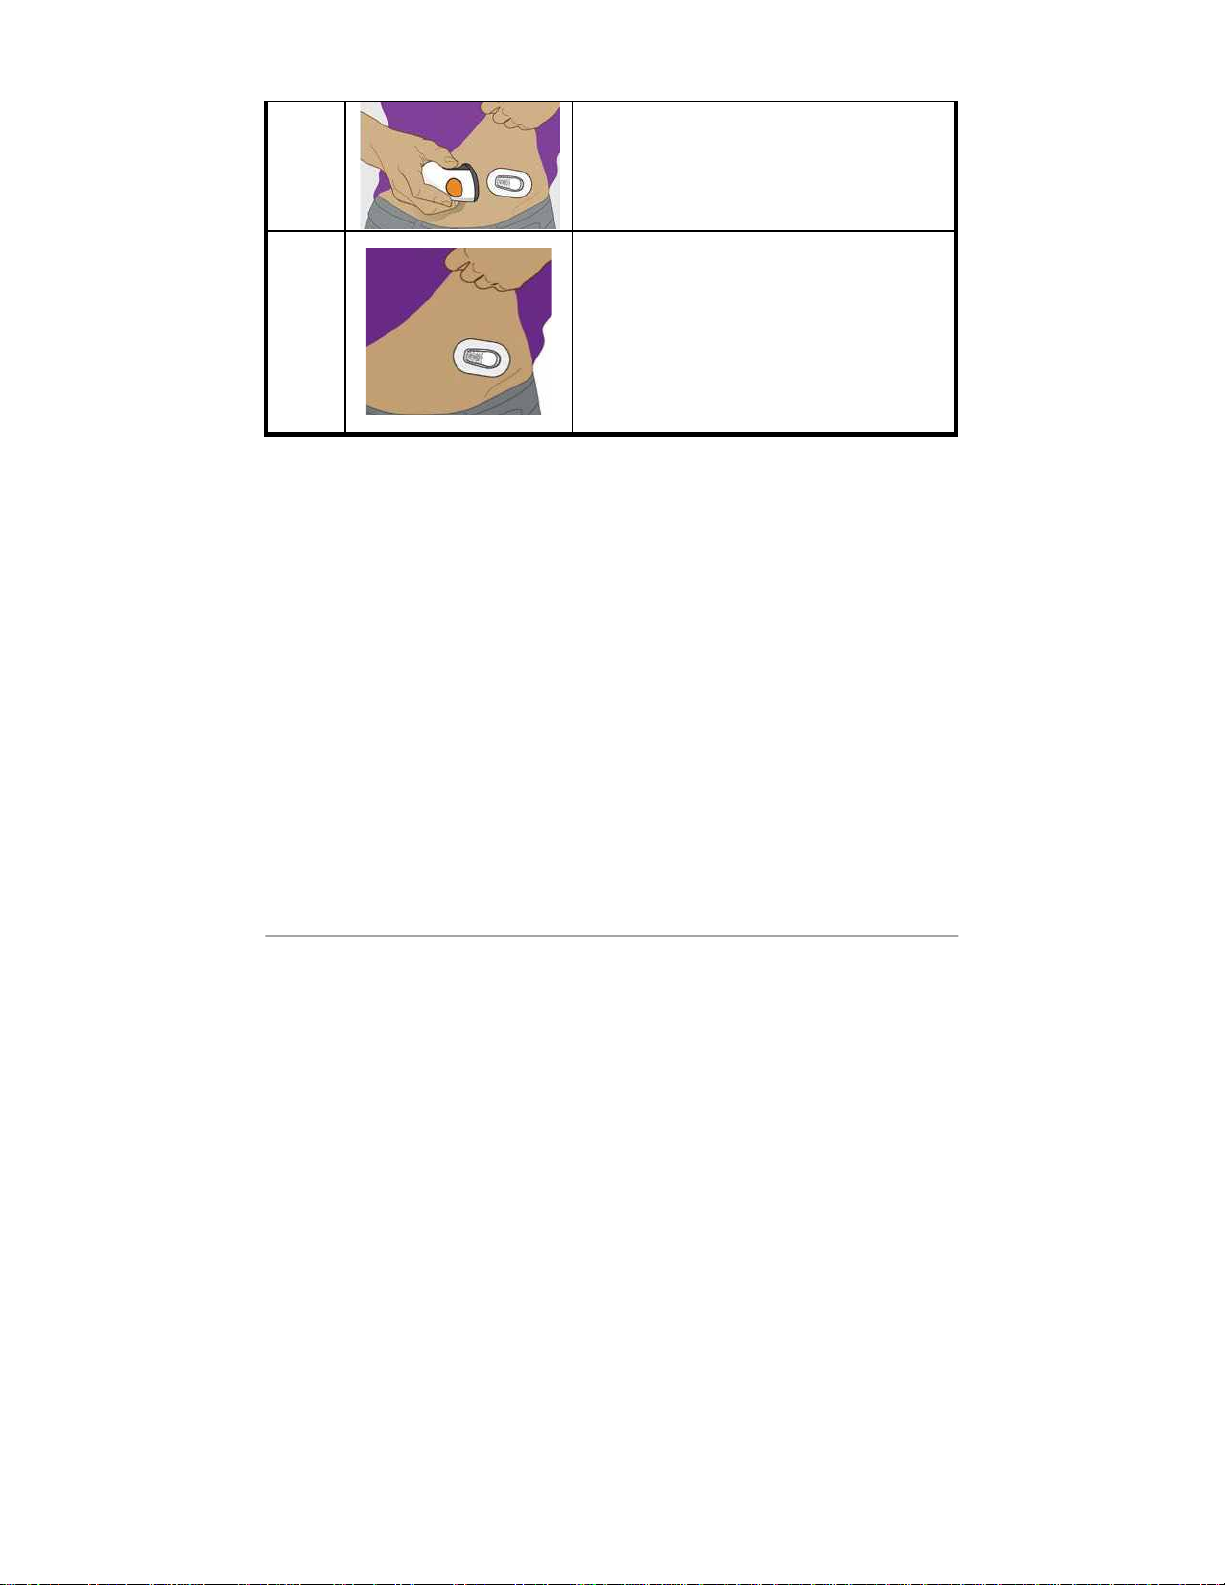
Dexcom G5x System User Guide
Calibration
94
11
Release
button
and remove
applicator.
Throw out
applicator
following local
guidelines for disposal of bloodcontacting components.
What’s left on your skin?
• Sensor wire
• Transmitter holder
You have successfully inserted the sensor! Now the transmitter holder and
sensor wire are attached to your body.
Having problems?
If it’s the first time inserting a sensor, you may have questions or need help. If
you do, please contact Technical Support (available 24/7) at:
• Toll free: 1.888.738.3646
• Toll call: 1.858.200.0200
The next step is attaching your transmitter to the transmitter holder.
6.6 Attaching Your Transmitter
Now that you have inserted your sensor, you need to attach your transmitter.
Since the transmitter is reusable, you don’t need a new one every time you
start a sensor session. Keep your current session’s transmitter box. The
bottom label has important information you may need after you’ve attached
the transmitter. Once the transmitter has been attached, you can’t remove it
PDF compression, OCR, web optimization using a watermarked evaluation copy of CVISION PDFCompressor
Page 95
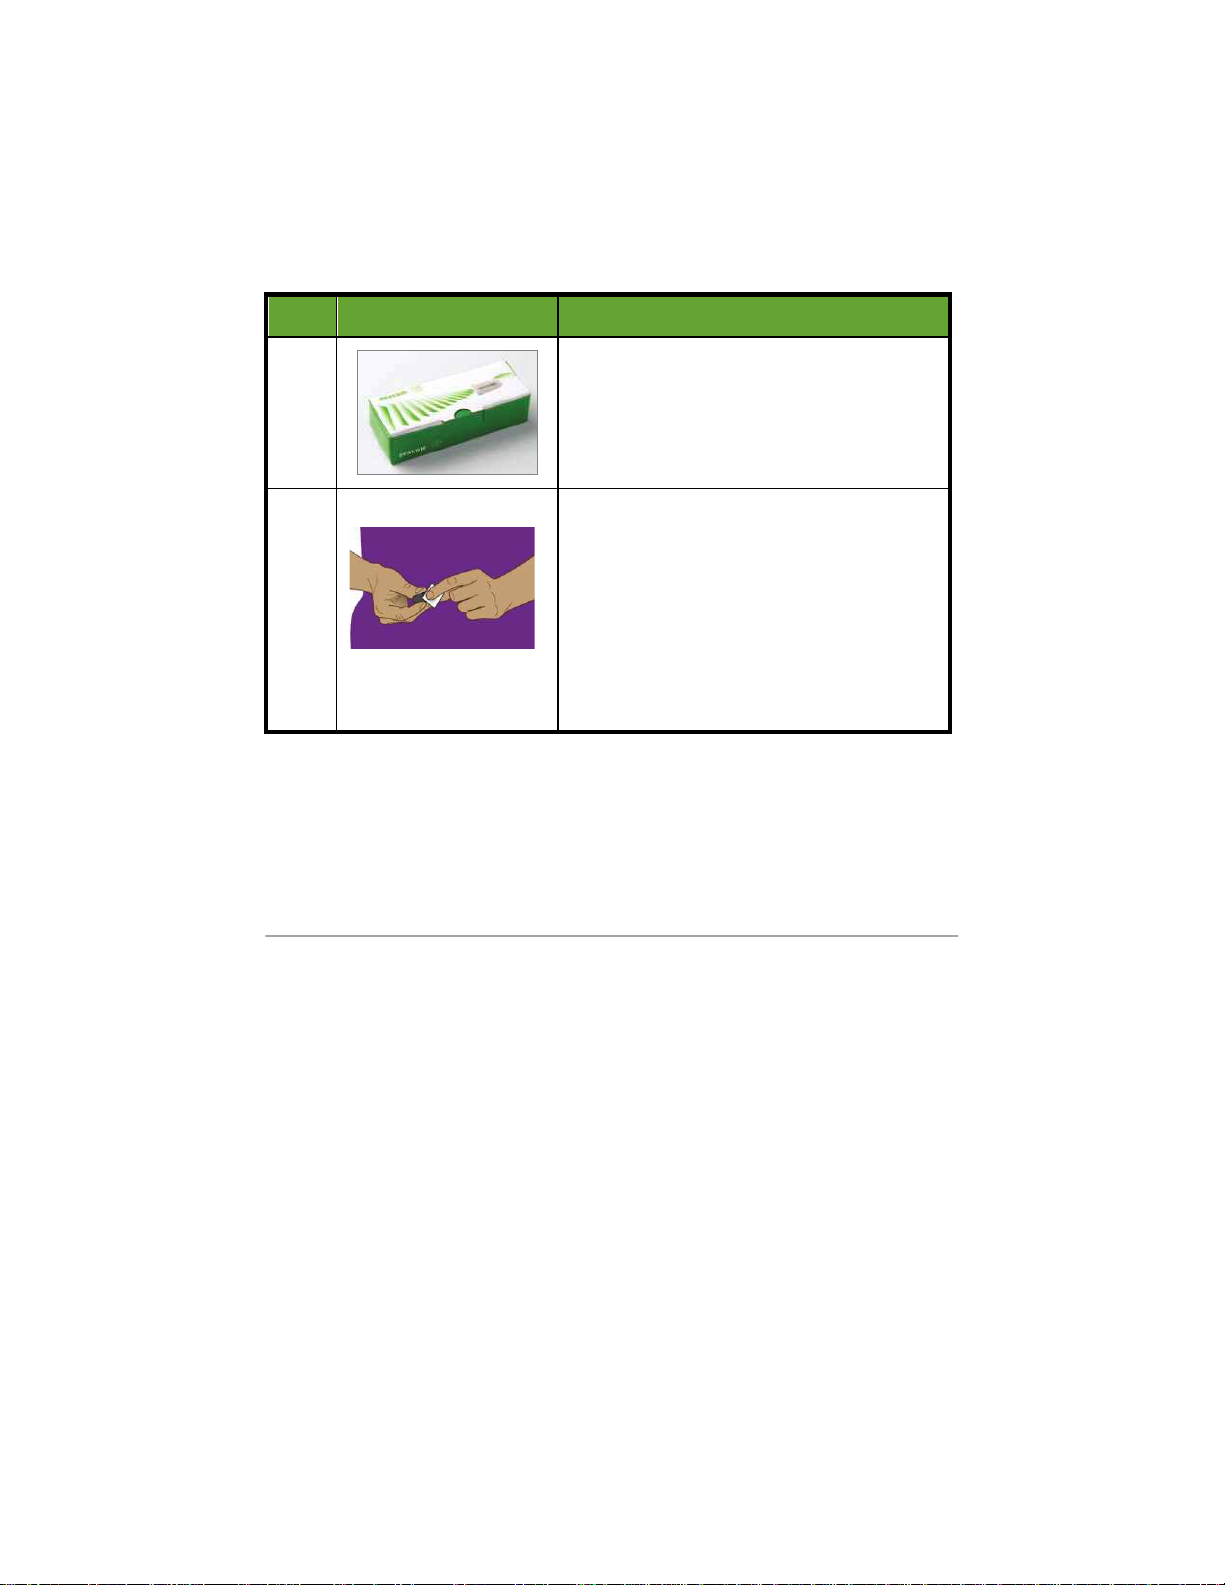
Dexcom G5x System User Guide
Calibration
95
until your session is over. Chapter 8 reviews when and how to remove your
transmitter.
Before attaching your transmitter, check you’ve entered the correct transmitter
SN into your display device. Chapter 5 covers entering transmitter’s SN
number during initial setup. See Chapter 8 for pairing your transmitter after the
startup wizard
Attaching Transmitter
Step
Picture
What you do
1
Remove
transmitter
from box only when
you are ready to insert it.
Keep box.
Get alcohol wipe.
2
Wipe back of
transmitter
with alcohol
wipe.
Let dry for 2-3 minutes.
Do not let the back of transmitter touch
your skin.
Do not scratch transmitter’s back; this
can harm the waterproof seal.
Do not touch metal dots on transmitter’s
bottom.
PDF compression, OCR, web optimization using a watermarked evaluation copy of CVISION PDFCompressor
Page 96
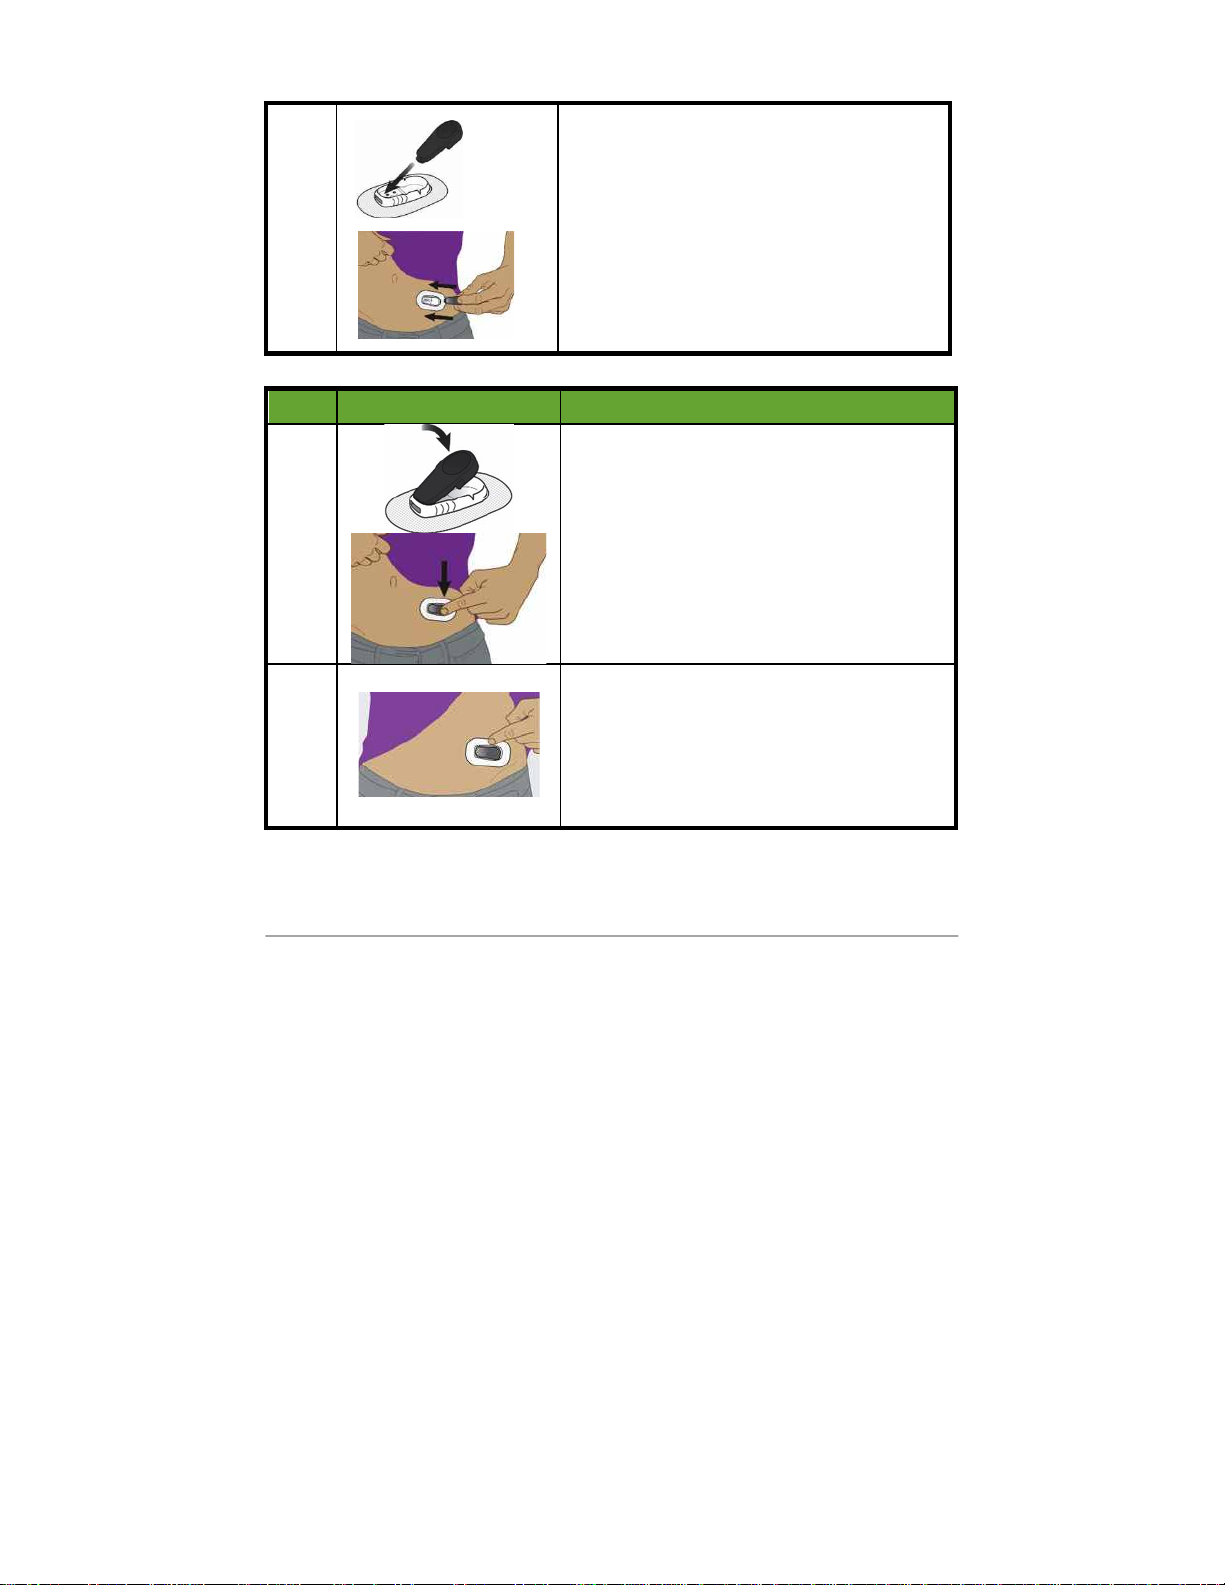
Dexcom G5x System User Guide
Calibration
96
3
Hold
transmitter’s round end
.
Slide
transmitter’s narrow tip
into slot at
the narrow end of transmitter holder.
Step
Picture
What you do
4
Press down firmly on
round end
of the
transmitter until it clicks into place.
5
Move fingers around top of
adhesive
patch
three times to secure tape.
You’re almost done starting your sensor session!
Inserting the sensor, attaching the transmitter, and the two-hour sensor
warmup are the same, regardless of whether you use the receiver or app.
PDF compression, OCR, web optimization using a watermarked evaluation copy of CVISION PDFCompressor
Page 97
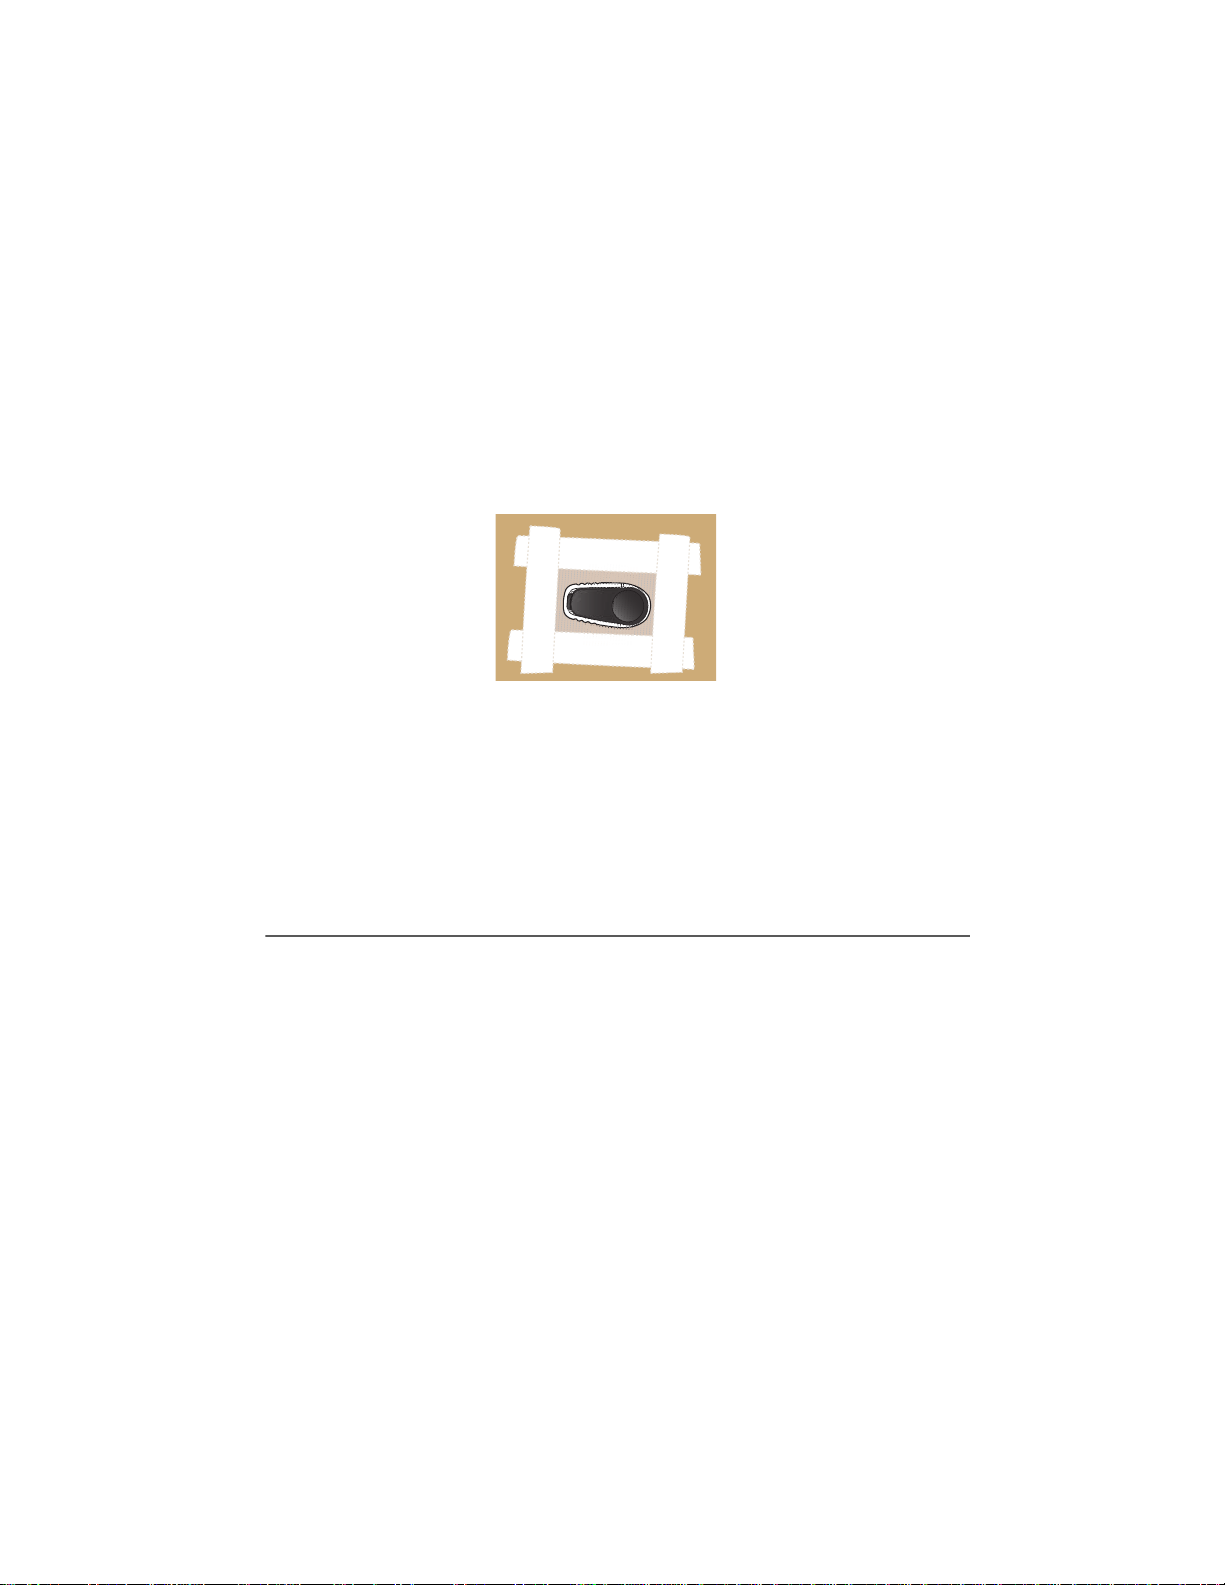
Dexcom G5x System User Guide
Calibration
97
The remaining steps vary from app to receiver:
1. Letting your device know you need to start the sensor warmup.
2. Following your warmup countdown.
6.7 Loose Transmitter Holder
The transmitter holder should be able to stay on your skin using its own
adhesive.
If the patch peels up, use medical tape (such as Blenderm™, Tegaderm™,
Smith & Nephew IV3000®, 3M™ tape) for extra support.
• Tape over white adhesive patch on all sides for even support
• Don’t tape over the transmitter or any plastic parts of the transmitter
holder
• Don’t tape under transmitter holder
• Don’t leave any substance on the skin where you insert the sensor
Figure 4. The Right Way to Use Tape for Extra Support
Image is representational only. Your transmitter may look different.
6.8 Starting Your Sensor Session
If you choose to use both the receiver and the app, each system requires
individual setups (see Chapter 5).
After pairing the transmitter to your display device(s), inserting your sensor,
and attaching the transmitter to the transmitter holder, your next step is telling
PDF compression, OCR, web optimization using a watermarked evaluation copy of CVISION PDFCompressor
Page 98
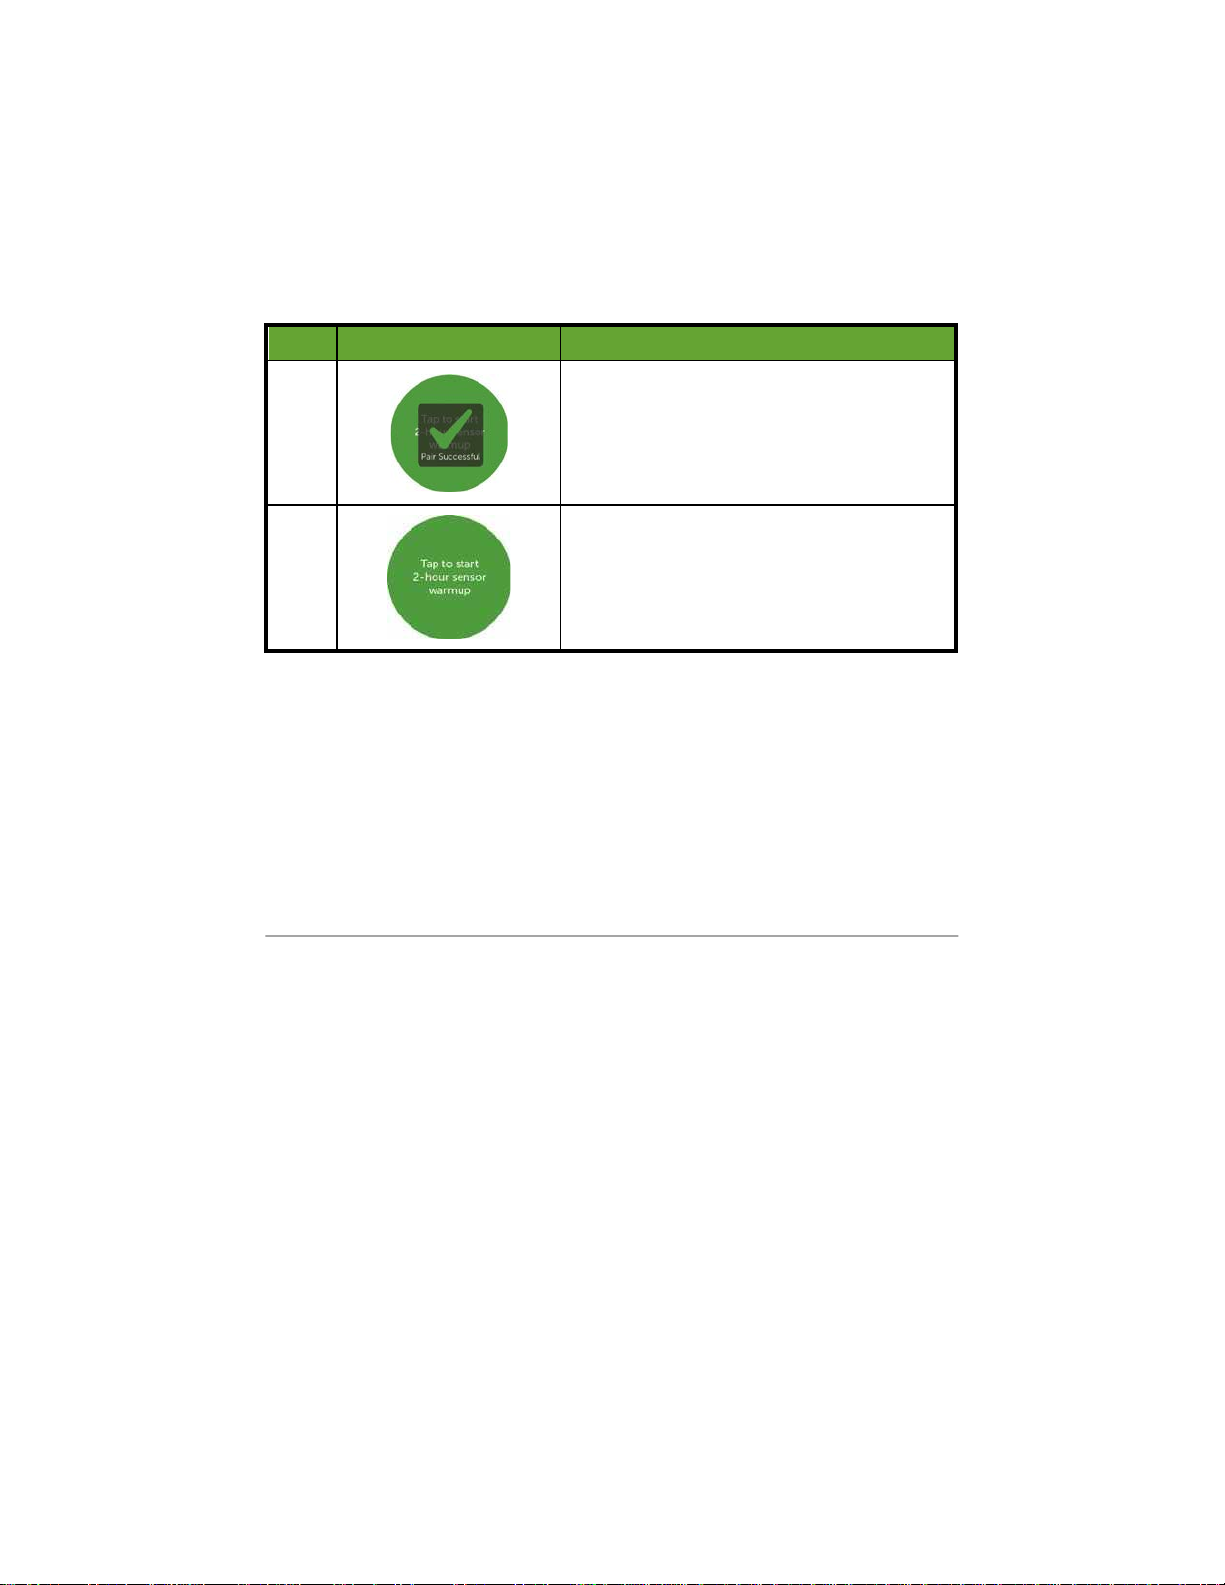
Dexcom G5x System User Guide
Calibration
98
your device(s) you want to start a sensor session. Transmitters are reusable;
pairing is required only when using a new transmitter.
During the warmup period, neither device will provide any sensor glucose
readings. Your sensor glucose readings begin after the two-hour sensor
warmup has passed and you entered the two startup calibration BG values
into either the smart device or the receiver.
We’ll first review starting the sensor session for the app.
Dexcom App: Starting a Session
Step
What you see
What you do
1
Wait for
Pair Successful
notification.
Tap
green checkmark
in black square.
2
Tap
sensor warmup
circle to start your
two-hour sensor warmup.
NOTE: You will NOT get any sensor
glucose readings, Alarm/Alerts during
your two-hour sensor warmup period.
PDF compression, OCR, web optimization using a watermarked evaluation copy of CVISION PDFCompressor
Page 99
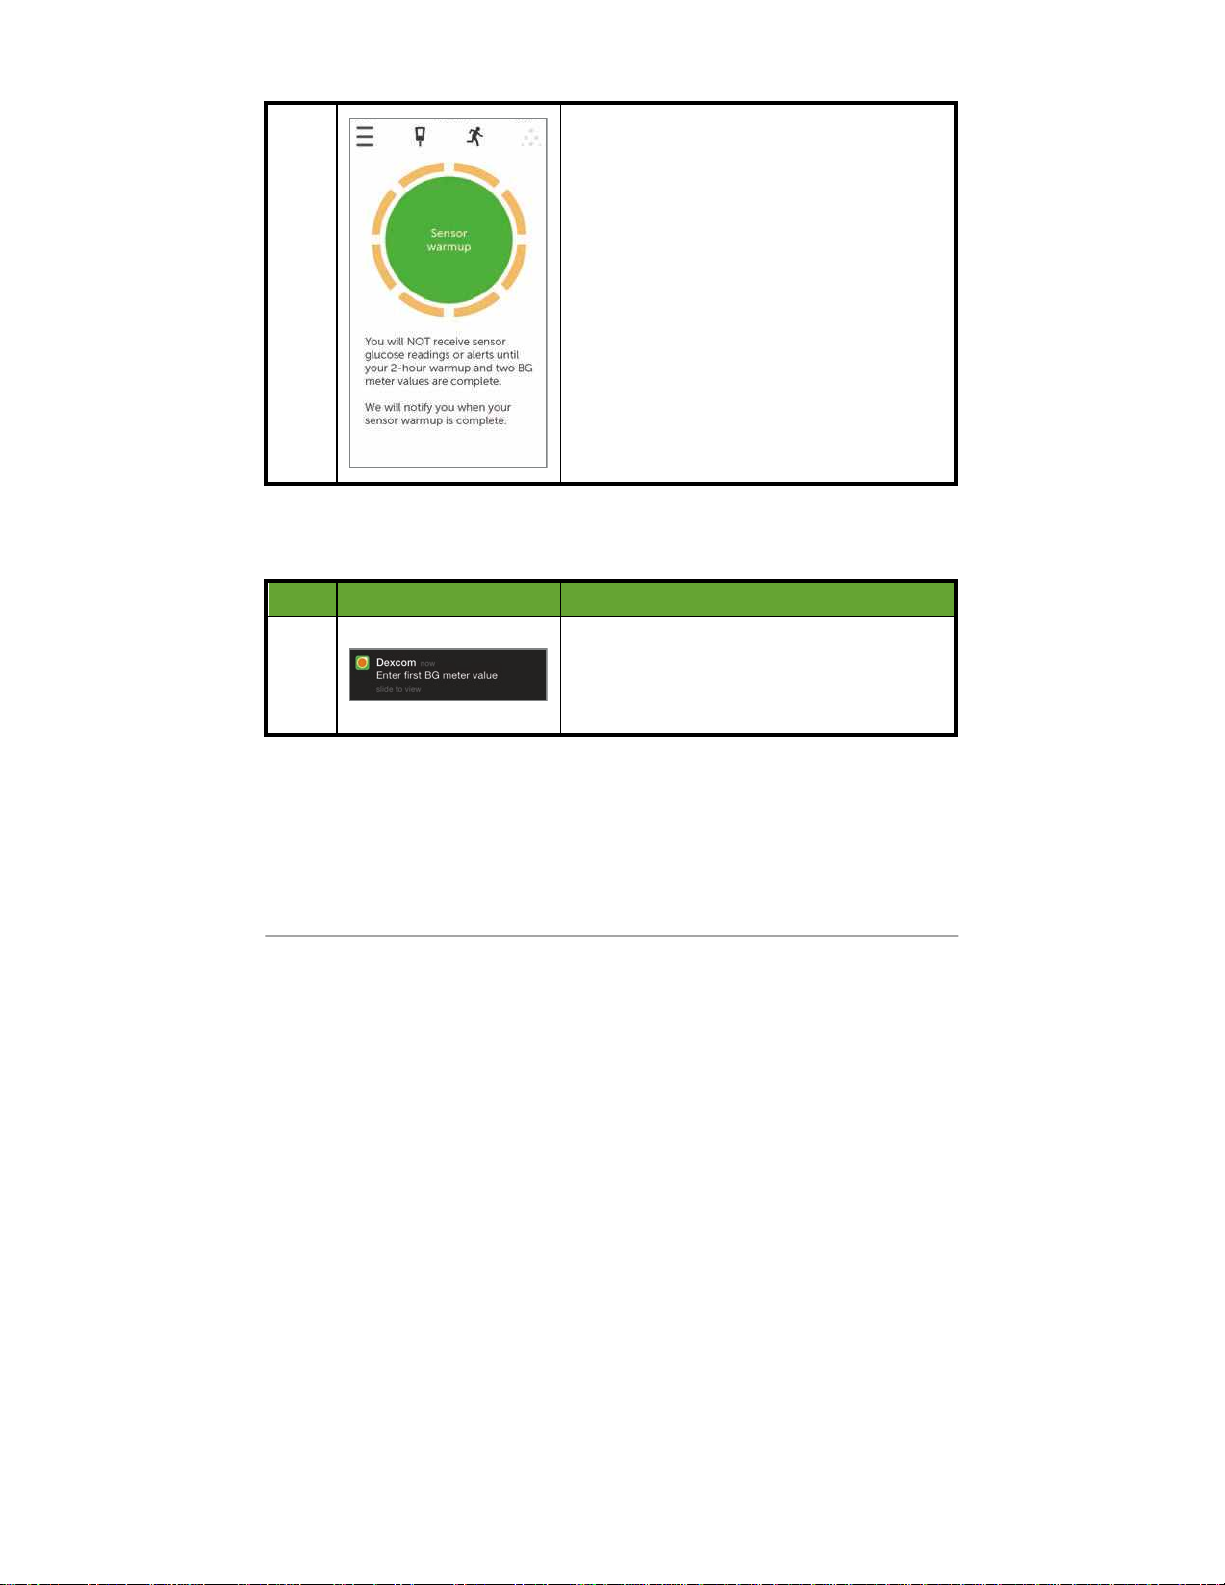
Dexcom G5x System User Guide
Calibration
99
3
Wait.
Screen provides countdown to sensor
warmup. The orange dashes darken as
the countdown moves forward.
Keep
smart device
within 20 feet of
transmitter during the sensor warmup
period.
Step
What you see
What you do
4
Locked screen.
Startup calibration
notification tells you
when warmup is complete.
Chapter 7 covers calibrating.
PDF compression, OCR, web optimization using a watermarked evaluation copy of CVISION PDFCompressor
Page 100
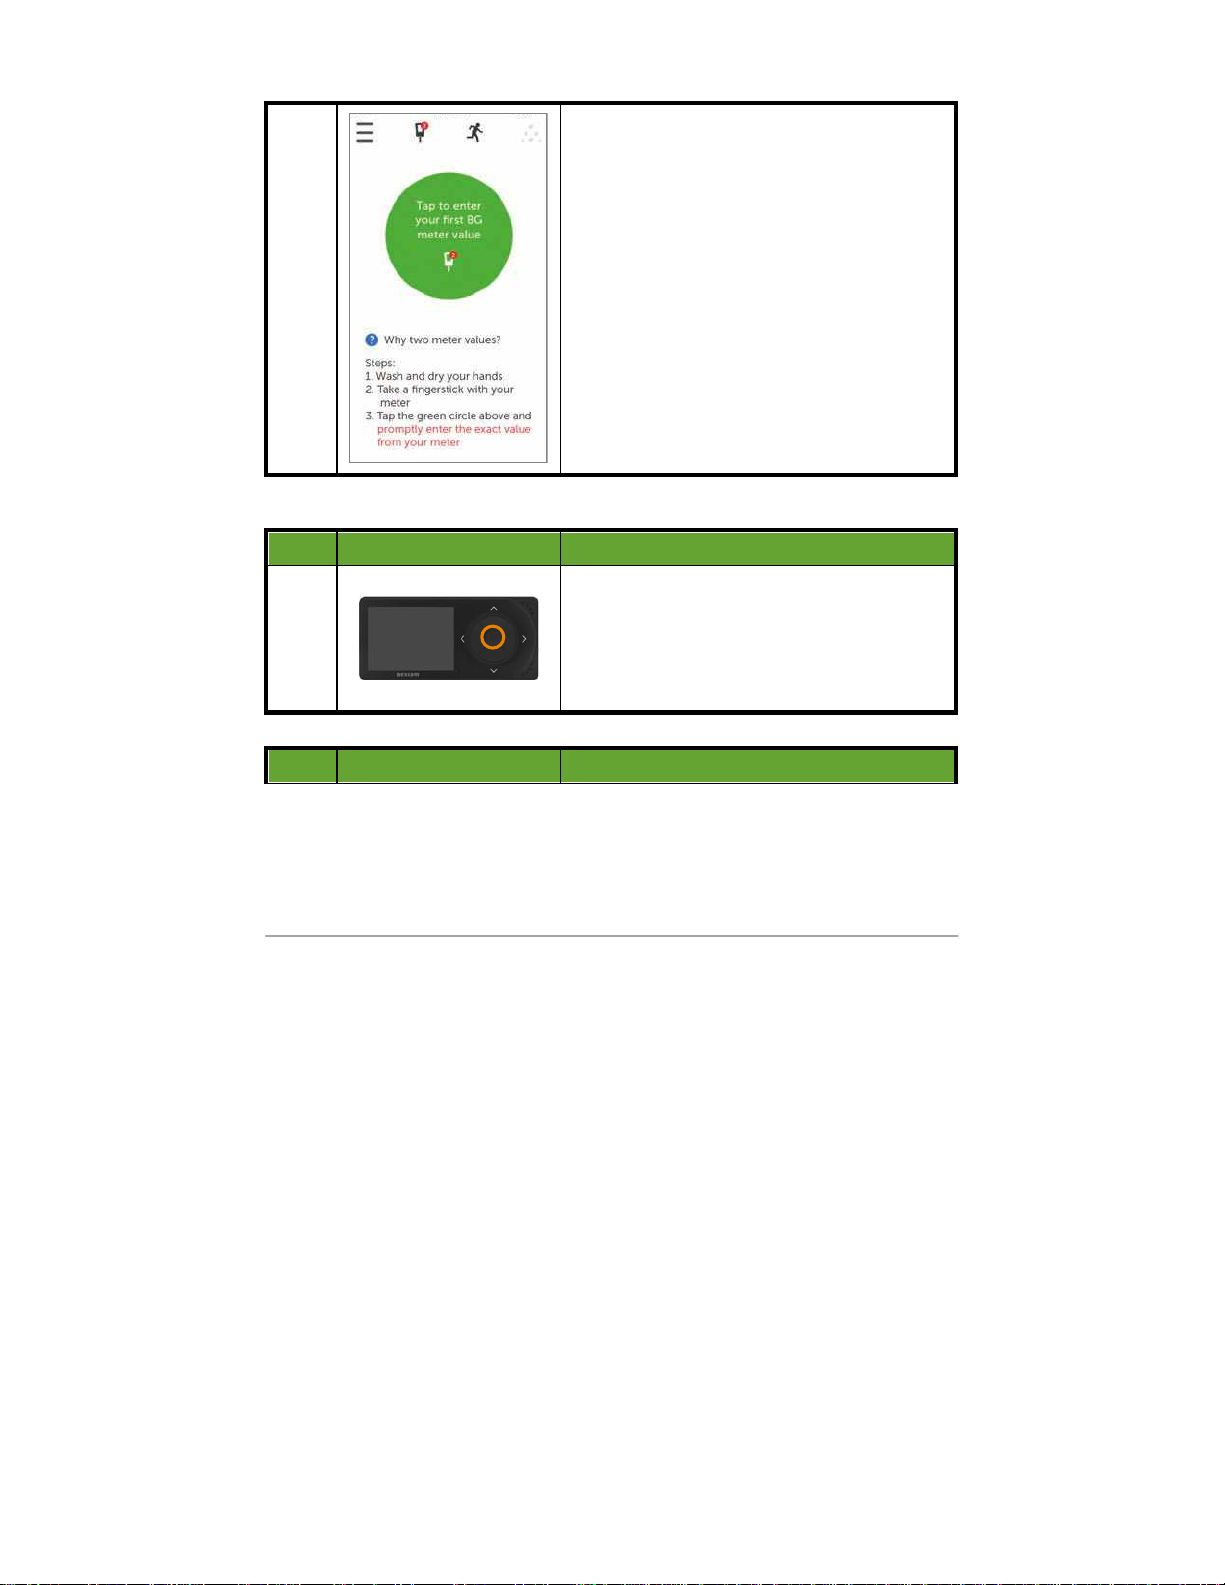
Dexcom G5x System User Guide
Calibration
100
5
Startup calibration
notification tells you
when warmup is complete.
Sensor warmup is complete.
You’re ready to calibrate!
Receiver: Starting a Session
Step
What you see
What you do
1
Press
Select
to turn on receiver.
Step
What you see
What you do
PDF compression, OCR, web optimization using a watermarked evaluation copy of CVISION PDFCompressor
 Loading...