

Page 1

Home Control Room Thermostat
rst steps
Page 2

2
Thank you for placing your trust in this devolo product.
Carefully read all instructions before setting up the device and store the instructions for later reference.
Icons
Very important note. Failure to observe this note may result in damage.
Important note that should be observed.
Background information and configuration tips for your device.
Intended use
Use the Home Control Room Thermostat as described in these instructions and in the Home Control online
help to prevent damage and injuries.
Except for occasional battery replacement, the Home Control Room Thermostat is
completely maintenance-free. Otherwise, the device contains no user-serviceable
parts!
CE conformity
When used as intended, the product conforms to the basic requirements of the
directives 2014/53/EU, 2014/35/EU and the other relevant provisions of the Radio and
Telecommunications Terminal Equipment Act (FTEG) and is designed for use in the EU,
Switzerland and Norway. A printout of the CE declaration is included.
Page 3

3
devolo Home Control
Home Control (also known as home automation) refers to the specific control of electrically operated indoor
household devices. The Home Control system by devolo uses the Z-WaveTM wireless standard.
A Home Control system requires a Z-WaveTM-compatible control unit such as the Home Control Central Unit
from devolo. Use its Home Control portal to coordinate the Home Control Room Thermostat and all other
Home Control devices. You can access the Home Control Central Unit through the my devolo app and at
www.mydevolo.com in a browser.
For more information about setting up the Home Control Central Unit, please refer to the installation guide and/or Home Control online help.
Accessing the Home Control Central Unit via the my devolo app (for smartphone/tablet)
Open the my devolo app Home Control and select your Home Control Central Unit.
Accessing the Home Control Central Unit via web browser (PC/laptop)
At www.mydevolo.com
Home Control select your Home Control Central Unit.
For more information on the control and configuration of all devolo Home Control devices, as well
as application examples, please refer to the Home Control online help.
Page 4

4
Page 5
5
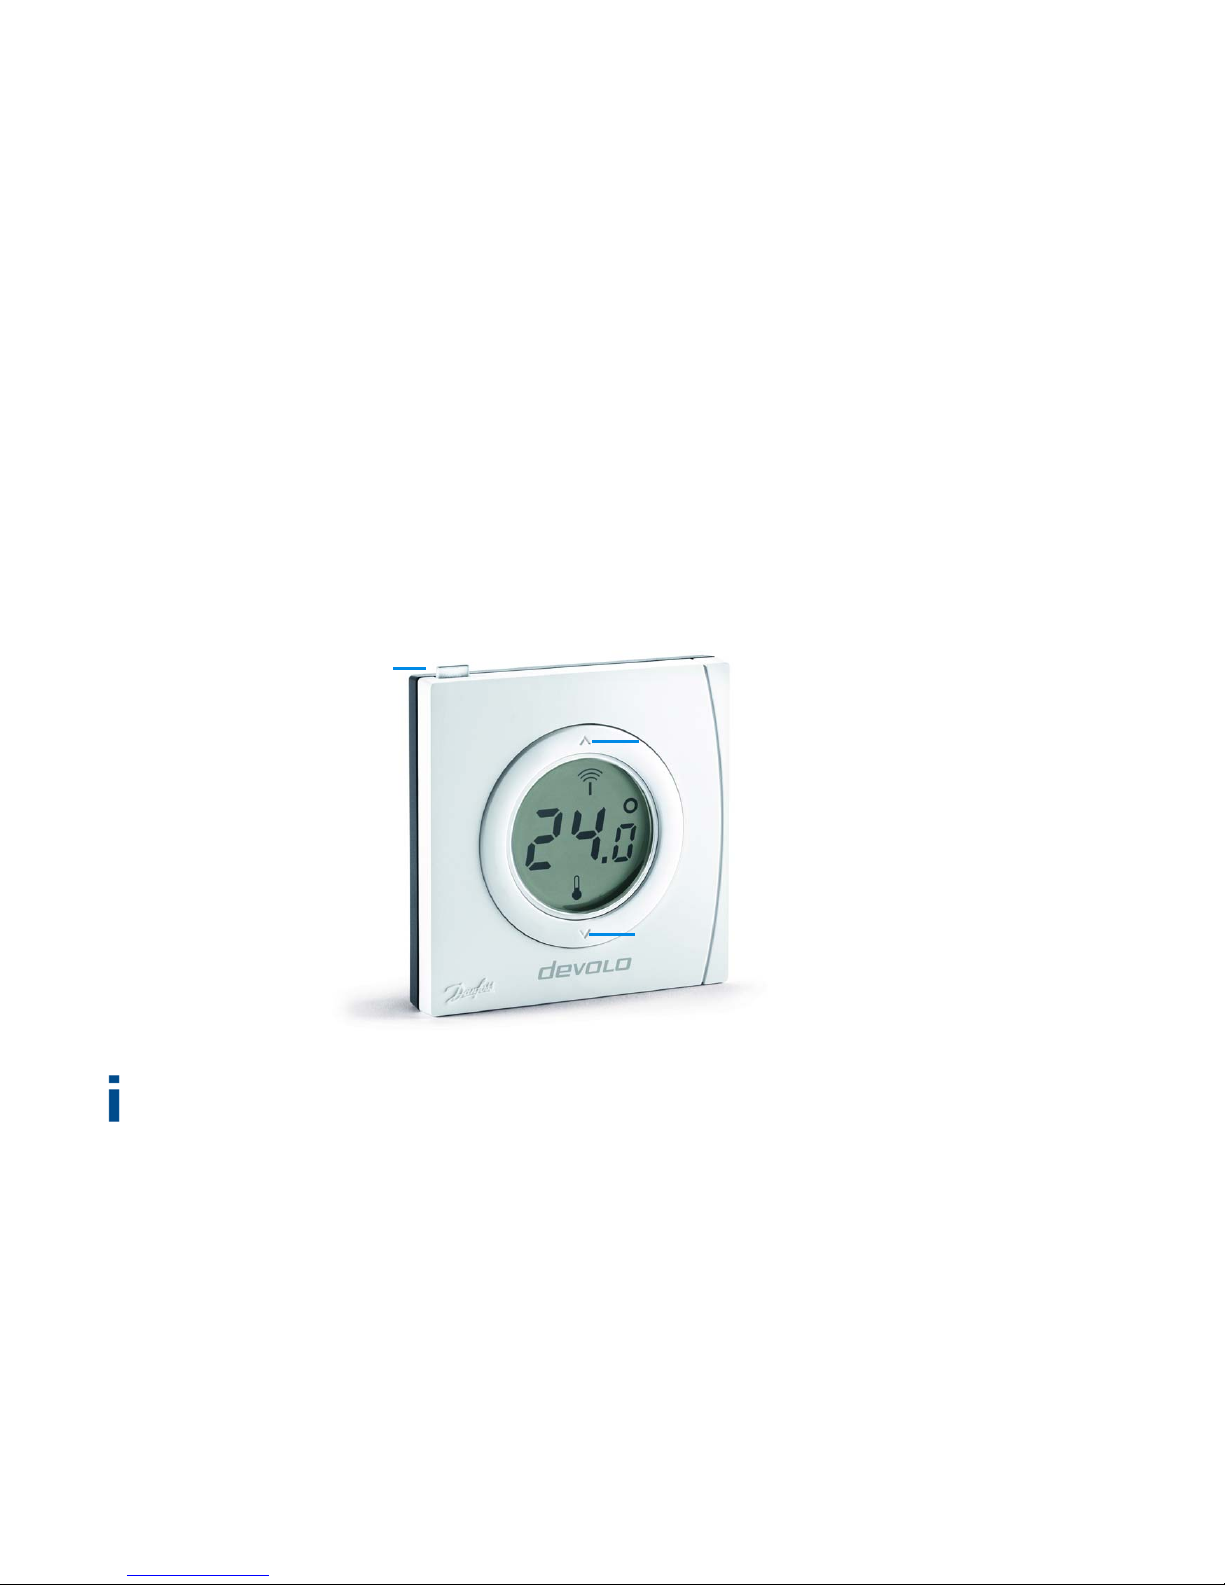
The Home Control Room Thermostat
Room temperature is controlled electronically, e.g. via the Home Control Central Unit (see section devolo
Home Control on page 3) or manually via the navigation buttons on the thermostat. In the latter case, the
Home Control Room Thermostat sends a change notification to the control unit, e.g. the Home Control Central
Unit. In addition to the target temperature, the display shows the status of the respective battery, the wireless
connection and any keypad lock that may be in effect.
For more detailed descriptions of the Home Control Room Thermostat functions, refer to the
Home Control online help.
Navigation button
Navigation button
Button with LED
Page 6

6
Batteries
Always keep batteries away from open flame and high temperatures. Avoid direct
sunlight and radiant heat!
Always remove all batteries from battery-operated devices that are only in storage
and are not in use. Old batteries can leak and damage the device!
Do not use rechargeable batteries!
When inserting the batteries, ensure that the polarity is correct. Using the batteries
incorrectly can damage the device!
The Home Control Room Thermostat uses commercially available AA alkaline batteries. For information on replacing the battery, please refer to the Home Control online help.
Page 7

7
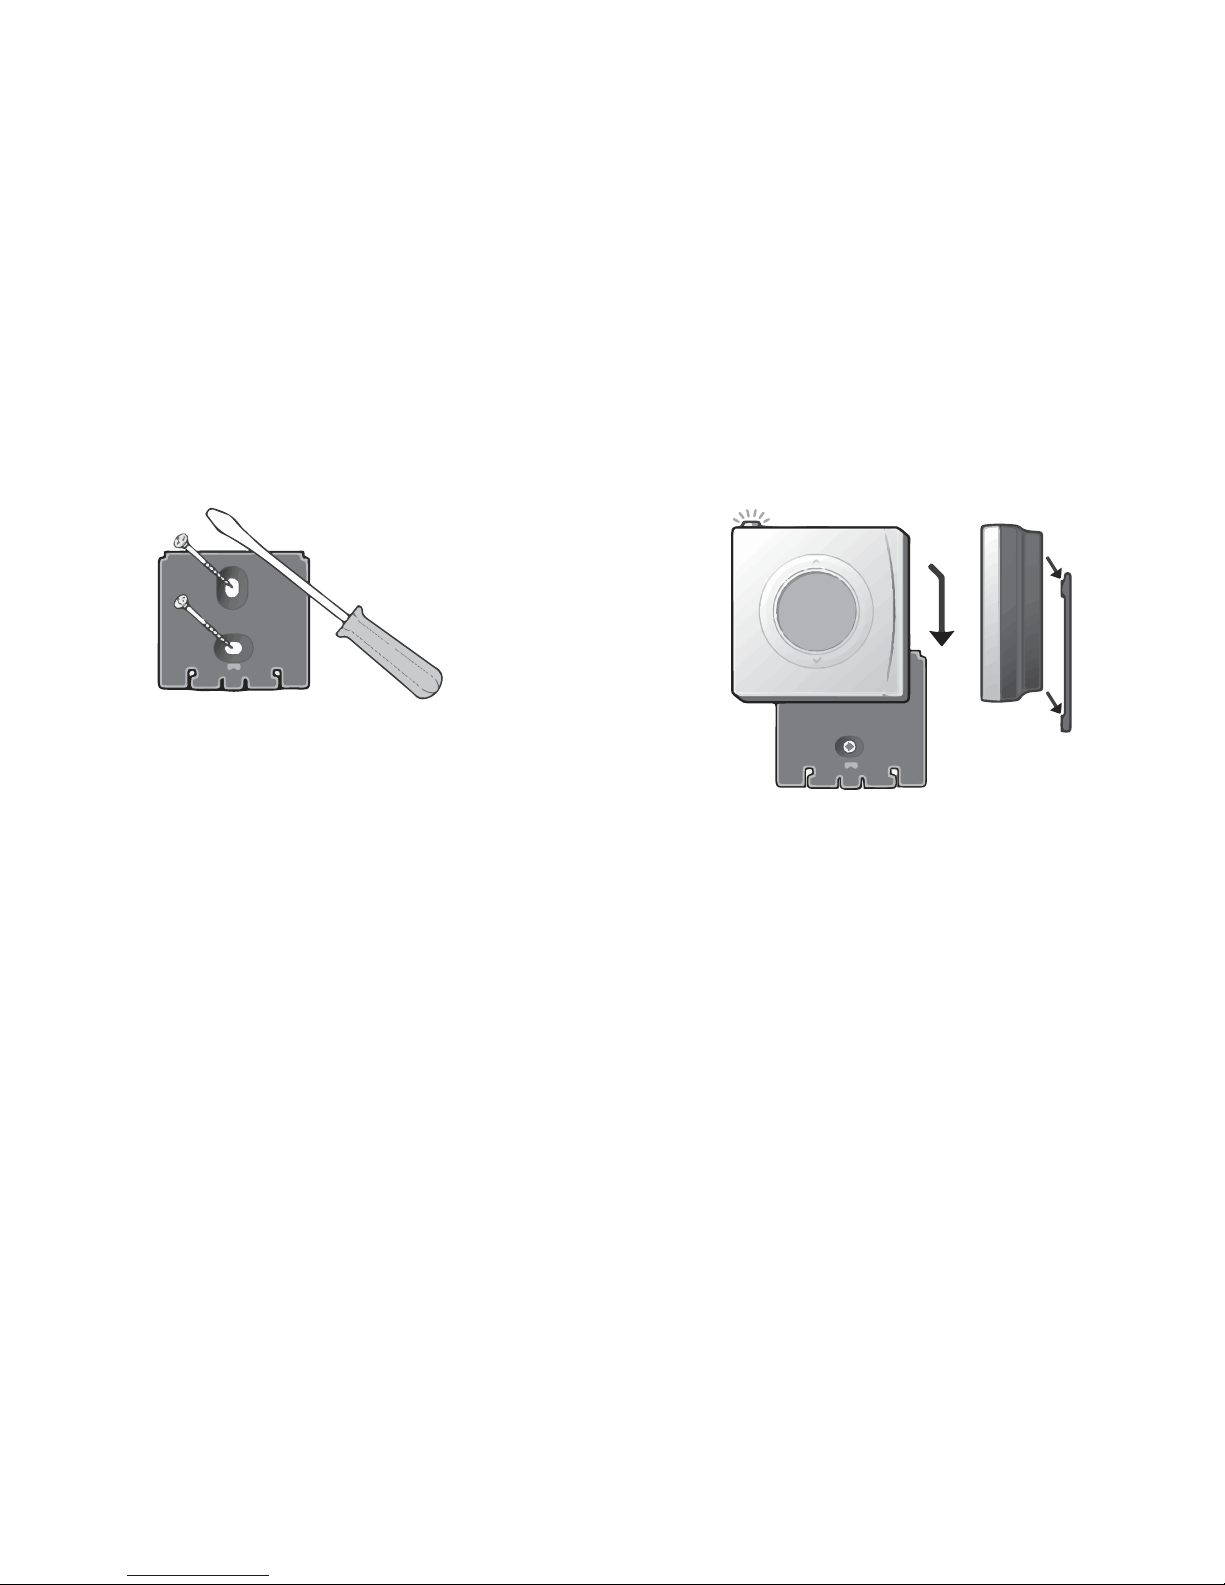
Installing the Home Control Room Thermostat
If installing to a wall using screws, make sure that no gas, water or power lines in
the wall get damaged. There is a danger of electric shock!
Only use the Home Control Room Thermostat indoors.
햲 Disconnect the housing backplate, which also acts as both a holder and battery compartment cover,
from the device by pushing it down and away.
햳 Then, based on the template on the housing backplate, drill holes into the desired location and attach
the housing backplate in the correct mounting position using the included screws.
햴 Remove the black battery tab inside the Home Control Room Thermostat to establish battery contact.
Page 8
8
햵 Then slide the Home Control Room Thermostat from above onto the housing backplate fastened on the
wall.
Page 9

9
Registering the Home Control Room Thermostat on the control unit (e.g. Home Control Central Unit)
햶 After you have successfully installed the Home Control Room Thermostat, continue with its electronic
registration on the control unit.
햷 When you use the Home Control Central Unit from devolo, follow the description in the section
devolo Home Control on page 3 to call up your Home Control Central Unit and select Devices
Add device devolo Home Control Room Thermostat. Follow the instructions there to log into
your Home Control Central Unit.
From now on, you can take electronic control conveniently using the Home Control portal of the
Home Control Central Unit.
For more information on the control and configuration of all devolo Home Control devices, as well
as application examples, please refer to the Home Control online help.
Page 10

10
Service and warranty
Warranty: 3 years
If your devolo device is found to be defective during initial installation or within the warranty period, please
contact the vendor who sold you the product. The vendor will take care of the repair or warranty claim for you.
The complete warranty conditions can be found at www.devolo.com/warranty
.
* Detailed information about the actual costs of the telephone calls can be found on the devolo website.
Disposal
Neither the Home Control Room Thermostat nor the batteries may be disposed of with the household waste.
Instead, you can return these at no charge at your municipal collection point or at the retailer (e. g.
supermarket, specialist shop).
Great Britain +44 203 0241 838 * support@devolo.co.uk
Portugal +351 707 200 896 * support@devolo.pt
Spain +34 902 887 682 * support@devolo.es
Sweden +46 771 400 480 * support@devolo.se
Other countries +49 241 70 525 18 * support@devolo.com
Page 11

11
Page 12

devolo AG
Charlottenburger Allee 60
52068 Aachen – Germany
www.devolo.com
44463/0516
 Loading...