

DeVilbiss KK-5058-2 Service Manual
SERVICE MANUAL
EN
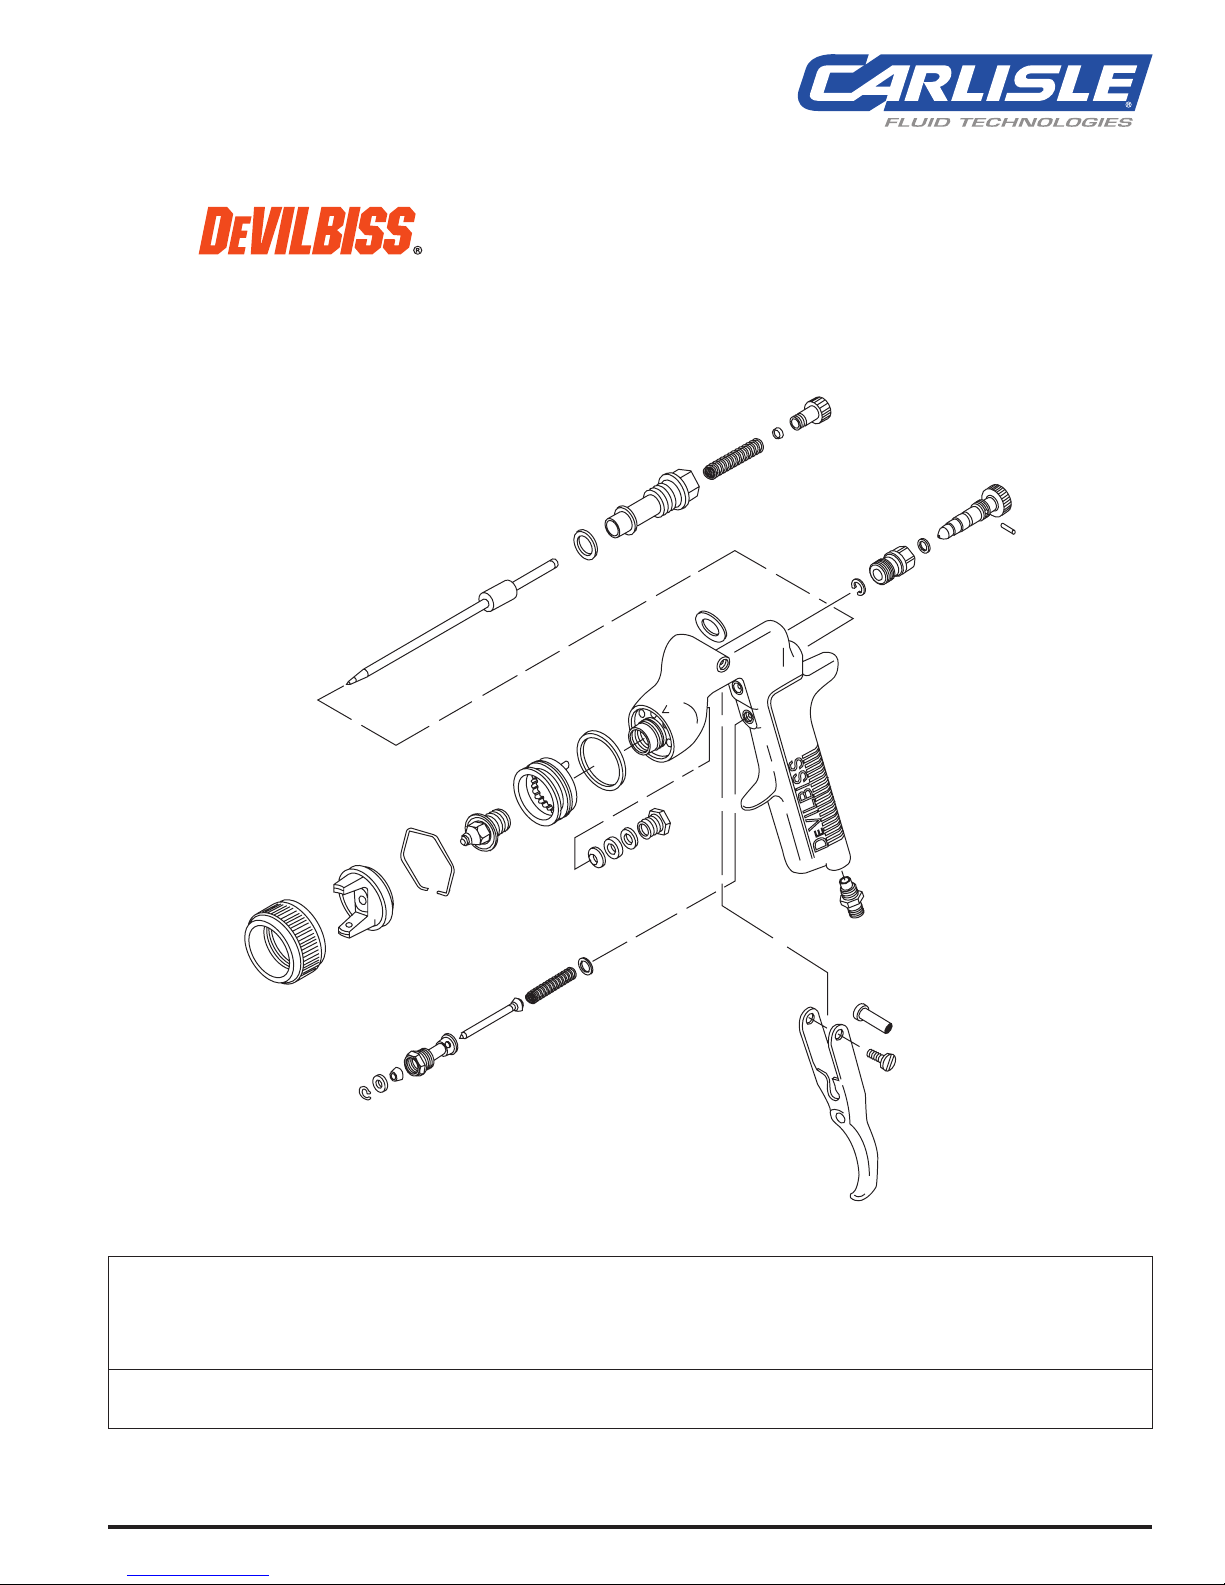
KK-5058-2 GUN REPAIR KIT
"WATERBORNE COMPATIBLE"
This repair kit can be used on all GTI guns, all EXL guns,
all PLUS guns and all PRI guns.
IMPORTANT! DO NOT DESTROY
It is the Customer's responsibility to have all operators and service personnel read and understand this manual.
Contact your local DeVilbiss representative for additional copies of this manual.
READ ALL INSTRUCTIONS BEFORE OPERATING THIS DEVILBISS PRODUCT.
SI-2-25-33-R1 (6/2018) 1 / 4 www.carlisleft.com
EN
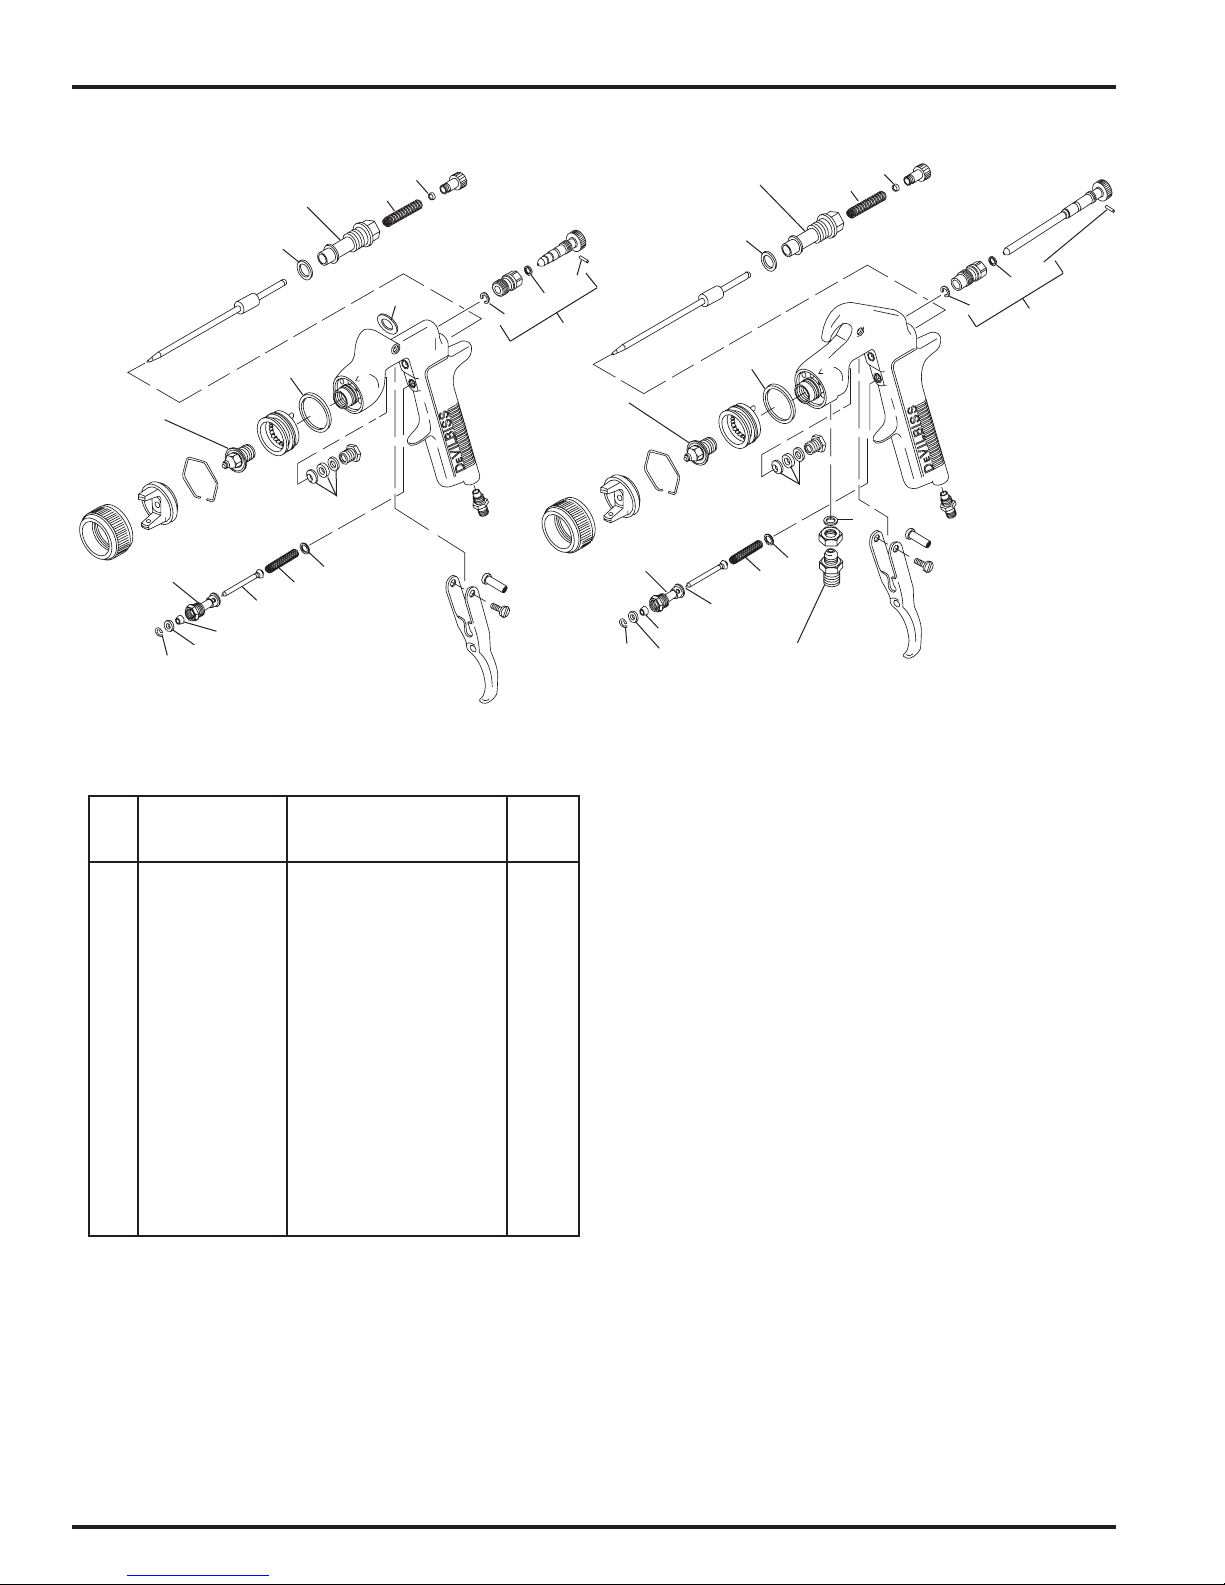
Gravity Feed Spray Guns Suction and Pressure Feed Spray Guns
4
See note below
3
2
11
5
Fluid Tip
(Torque to
15-20 ft. lbs.)
1
See note below
7
2
6
8
9
10
NOTE: If the color of these parts is blue or black,
then the parts marked with a "*" below are not
required and should not be used.
13
12
14
15
Fluid Tip
(Torque to
15-20 ft. lbs.)
See note
below.
10
See note below
2
5
1
2
6
7
8
9
Fluid Inlet Adapter
(Torque to 20-25 ft. lbs.)
Use medium strength thread
sealant (i.e. Devcon #2242 blue
or equal) on threads.
4
3
14
13
12
15
16
PARTS LIST
Qty. of
Ref. Replacement Parts in
No. Part No. Description Kit
1 JGA-4035-K5 Packing 1
*2 JGS-72-K10 Gasket Kit (PTFE) 2
3 --- Fluid Needle Spring 1
4 --- Spring Pad 1
■5 GTI-33-K5 Baffle Seal 1
6 --- Air Valve Spring 1
7 --- Air Valve 1
*8 --- U Cup Seal 1
*9 --- Washer 1
*10 --- Snap Ring 1
11 KGP-13-K5 Cup Gasket 1
(Gravity Guns Only)
12 --- Retaining Clip 1
13 --- Seal 1
14 --- Pin 1
15 GTI-428-K5 Clip, Seal & Pin Kit (5 ea.) 1
16 --- Fluid Inlet Gasket (PTFE) 1
(Suction and Pressure
Feed Guns Only)
Suffixes -K5, -K10 designates kits of multiple parts.
Example: JGA-4035-K5 is a kit of 5 packings.
■ Some gun models do not require a baffle seal. If white seal is present, order GTI-33-K5.
PREVENTIVE MAINTENANCE
To clean air cap and fluid tip, brush exterior with a stiff bristle
brush. If necessary to clean cap holes, use a broom straw or toothpick if possible. If a wire or hard instrument is used, extreme care
must be used to prevent scratching or burring of the holes which
will cause a distorted spray pattern.
To clean fluid passages, remove excess material from cup, then
flush with a suitable solvent. Wipe gun exterior with a solvent
dampened cloth. Never completely immerse in solvent as this is
detrimental to the lubricants and packings.
FLUID INLET GASKET (16) REPLACEMENT INSTRUCTIONS
1. Remove fluid inlet adapter with appropriate wrench.
2. Clean Loctite from gun body inlet threads and seal area.
3. Place gasket (16) squarely onto the fluid inlet adapter and push
it down until it is flat against the shoulder.
4. Use medium strength thread sealant (i.e. Devcon #2242 blue,
or equal) on threads before installing fluid inlet adapter.
5. Torque fluid inlet adapter to 20-25 ft. lbs. and tighten locknut.
SI-2-25-33-R1 (6/2018)2 / 4www.carlisleft.com
 Loading...