

Page 1

FK-506
ineo 163/213
Dynamic balance
www.d evelop.d e
User Manual
Page 2

Page 3

Contents
1Introduction
1.1 Trademarks and copyrights............................................................. 1-3
1.2 Available fax features....................................................................... 1-4
Sending.......................................................................................... 1-4
Receiving........................................................................................ 1-6
1.3 Explanation of manual conventions................................................ 1-8
Safety advices................................................................................ 1-8
Sequence of action........................................................................ 1-8
Tips ................................................................................................ 1-9
Special text markings..................................................................... 1-9
1.4 Safety information .......................................................................... 1-10
Warning and precaution symbols ................................................ 1-10
Meaning of symbols..................................................................... 1-11
Disassemble and modification..................................................... 1-11
Power cord................................................................................... 1-12
Power source............................................................................... 1-13
Power plug................................................................................... 1-14
Grounding .................................................................................... 1-14
Installation.................................................................................... 1-15
Ventilation .................................................................................... 1-16
Actions in response to troubles ................................................... 1-16
Consumables ............................................................................... 1-17
When moving the machine .......................................................... 1-18
1.5 Special notice to user..................................................................... 1-19
For Canada .................................................................................. 1-19
For U.S.A...................................................................................... 1-20
For New Zealand.......................................................................... 1-23
For Europe ................................................................................... 1-23
2Precaution
2.1 Part names and their functions ....................................................... 2-3
Main unit ........................................................................................ 2-3
2.2 Control panel parts and their functions.......................................... 2-5
Names of control panel parts and their functions.......................... 2-5
Display indications......................................................................... 2-9
2.3 Power supply................................................................................... 2-11
Default settings ............................................................................ 2-11
FK-506 Contents-1
Page 4

2.4 Entering text..................................................................................... 2-12
Changing the input mode ............................................................. 2-12
Key operation................................................................................ 2-12
Text input example ....................................................................... 2-14
Correcting text and input precautions.......................................... 2-18
To add a character within text ...................................................... 2-18
To enter text with the keypad ....................................................... 2-18
To enter a space........................................................................... 2-18
To stop entering text..................................................................... 2-18
2.5 Selecting and checking initial settings.......................................... 2-19
Required settings.......................................................................... 2-19
Checking the initial settings.......................................................... 2-19
Setting the current date and time ("DATE&TIME" parameter)...... 2-20
Specifying the machine’s fax number
("USER FAX NO." parameter) ....................................................... 2-23
Programming the transmission source name
("USER NAME" parameter)........................................................... 2-25
Selecting the telephone dialing system
("TONE/PULSE" parameter) ......................................................... 2-28
Selecting the telephone wiring system
("PSTN/PBX" parameter) .............................................................. 2-31
3Faxing
3.1 General transmission operation....................................................... 3-3
3.2 Positioning the document................................................................. 3-6
Loading the document into the document feeder .......................... 3-6
Placing the document on the original glass.................................... 3-9
3.3 Selecting the fax quality.................................................................. 3-10
Selecting a Quality setting ............................................................ 3-11
3.4 Specifying a recipient...................................................................... 3-12
Specifying a single recipient ......................................................... 3-12
Manual dialing............................................................................... 3-13
One-touch dialing ......................................................................... 3-14
Speed dialing................................................................................ 3-16
Group dialing ................................................................................ 3-18
Program dialing............................................................................. 3-20
Phone book dialing....................................................................... 3-22
Chain dialing ................................................................................. 3-25
Specifying multiple destinations (broadcast transmission)........... 3-27
Manual redialing............................................................................ 3-30
3.5 Operations while scanning documents......................................... 3-31
If the memory becomes full .......................................................... 3-31
Contents-2 FK-506
Page 5

3.6 If the fax cannot be sent ................................................................ 3-32
3.7 Faxing after completing a telephone call (manual faxing) .......... 3-33
3.8 Stopping the transmission............................................................. 3-35
Canceling (deleting) a queued transmission................................ 3-35
3.9 Checking machine counters.......................................................... 3-37
Machine counters that can be checked....................................... 3-37
3.10 Checking communication results (reports/lists) ......................... 3-39
Checking communication results................................................. 3-39
Printing reports/lists..................................................................... 3-40
3.11 Types of reports/lists ..................................................................... 3-42
TX RESULT REPORT................................................................... 3-42
RX RESULT REPORT................................................................... 3-42
ACTIVITY REPORT....................................................................... 3-43
MEMORY DATA LIST................................................................... 3-43
MEMORY IMAGE PRINT.............................................................. 3-43
ONE TOUCH LIST........................................................................ 3-44
SPEED DIAL LIST......................................................................... 3-44
KEY SETTING LIST...................................................................... 3-44
RELAY BOX LIST ......................................................................... 3-44
MACHINE STATUS LIST.............................................................. 3-44
Configuration Page ...................................................................... 3-44
PCL Font List ............................................................................... 3-44
3.12 Memory transmission and real-time transmission...................... 3-45
Memory transmission................................................................... 3-45
Real-time transmission ................................................................ 3-46
3.13 Sending a fax at a specified time.................................................. 3-48
3.14 Batch transmission......................................................................... 3-51
3.15 Receiving......................................................................................... 3-52
Memory reception........................................................................ 3-52
Paper sizes for received faxes ..................................................... 3-52
Automatic reception (dedicated fax mode).................................. 3-52
Manual reception ......................................................................... 3-53
3.16 Making a telephone call................................................................. 3-54
3.17 Receiving a telephone call............................................................. 3-54
4 Useful transmission and reception functions
4.1 Using F-codes................................................................................... 4-3
Specifying F-codes when sending faxes ....................................... 4-4
Specifying F-codes when registering destinations........................ 4-6
FK-506 Contents-3
Page 6

4.2 Mailbox communication ................................................................... 4-8
Registering mailboxes .................................................................... 4-8
Mailbox transmission...................................................................... 4-9
Printing documents received in mailboxes................................... 4-12
4.3 Polling transmission........................................................................ 4-14
Deleting a polling transmission document.................................... 4-17
4.4 Polling reception.............................................................................. 4-19
4.5 Relay initiating transmission .......................................................... 4-22
4.6 Relay broadcast transmissions...................................................... 4-26
Relay station ................................................................................. 4-26
4.7 Forwarding ....................................................................................... 4-28
4.8 Faxing from a computer (direct faxing) ......................................... 4-29
5 Internet faxing
5.1 Sending internet faxes ...................................................................... 5-3
Sending internet faxes.................................................................... 5-3
General transmission operation ...................................................... 5-4
5.2 Specifying transmission settings ..................................................... 5-8
Specifying the transmission time.................................................... 5-8
Selecting BASIC/ADVANCED settings ......................................... 5-10
Selecting the setting for "MAX TX SIZE" ...................................... 5-12
Selecting the setting for "MAX QUALITY" .................................... 5-14
Selecting the setting for "CODING METHOD" ............................. 5-16
5.3 Specifying the image quality and density when scanning........... 5-18
Quality settings ............................................................................. 5-18
Density settings ............................................................................ 5-19
5.4 Specifying additional settings........................................................ 5-20
Specifying a subject ("DEFAULT SUBJECT" parameter) ............. 5-20
Specifying the reply address ("REPLY ADDRESS" parameter) .... 5-22
Specifying header printing ("HEADER PRINT" parameter)........... 5-24
5.5 Receiving internet faxes ................................................................. 5-26
Receiving internet faxes................................................................ 5-26
Data that can be received............................................................. 5-26
Automatically receiving internet faxes.......................................... 5-27
Manually receiving internet faxes ................................................. 5-30
Contents-4 FK-506
Page 7

6 Utility mode/Fax mode parameters
6.1 "UTILITY MODE" menu.................................................................... 6-3
6.2 MACHINE SETTING .......................................................................... 6-5
Displaying the "MACHINE SETTING" menu .................................. 6-7
Selecting the buzzer volume ("BUZZER VOLUME" parameter)..... 6-8
Changing the initial mode ("INITIAL MODE" parameter) ............... 6-9
Changing the scanning threshold
("SCAN THRESHOLD" parameter) .............................................. 6-10
6.3 ADMIN. MANAGEMENT ................................................................. 6-11
Displaying the "ADMIN. MANAGEMENT" menu.......................... 6-13
Specifying remote monitoring
("REMOTE MONITOR" parameter) .............................................. 6-15
Selecting the line monitoring volume
("LINE MONITOR" parameter) ..................................................... 6-17
6.4 DIAL REGISTRATION ..................................................................... 6-19
Displaying the "DIAL REGISTRATION" menu.............................. 6-20
Registering one-touch dial destinations ...................................... 6-21
Changing/canceling a programmed one-touch dial key.............. 6-25
Registering speed dial destinations ............................................. 6-27
Changing/canceling a programmed speed dial number.............. 6-31
Registering a group of fax numbers............................................. 6-33
Changing/deleting a registered group of fax numbers ................ 6-36
Registering a dialing program...................................................... 6-39
Changing/deleting a broadcast transmission program................ 6-41
Changing/deleting a timer transmission program........................ 6-44
Changing/deleting a mailbox transmission program ................... 6-46
Changing/deleting a polling reception program .......................... 6-48
Changing/deleting a relay initiating transmission program.......... 6-50
6.5 FAX REGISTRATION....................................................................... 6-53
Displaying the "FAX REGISTRATION" menu ............................... 6-54
Registering mailboxes.................................................................. 6-55
Deleting mailbox settings............................................................. 6-58
Registering a relay box ................................................................ 6-60
Deleting relay box settings........................................................... 6-65
6.6 FAX TX OPERATION....................................................................... 6-67
Displaying the "FAX TX OPERATION" menu ............................... 6-68
Selecting the default scanning density
("DENSITY LEVEL" parameter) .................................................... 6-69
Selecting the default image quality
("QUALITY PRIORITY" parameter)............................................... 6-70
Selecting the default transmission mode
("DEFAULT TX" parameter).......................................................... 6-71
Selecting header printing ("HEADER" parameter) ....................... 6-72
FK-506 Contents-5
Page 8

6.7 FAX RX OPERATION ....................................................................... 6-73
Displaying the "FAX RX OPERATION" menu................................ 6-75
Selecting the memory reception mode
("MEMORY RX MODE" parameter) .............................................. 6-76
Canceling memory reception........................................................ 6-78
Specifying the number of rings ("NO. of RINGS" parameter)....... 6-80
Selecting the reduced printing setting
("REDUCTION RX" parameter) ..................................................... 6-82
Selecting printing of the received document
("RX PRINT" parameter)................................................................ 6-83
Selecting the reception mode ("RX MODE" parameter) ............... 6-84
Specifying the forwarding settings ("FORWARD" parameter)...... 6-85
Selecting footer printing ("FOOTER" parameter) .......................... 6-87
Selecting the paper drawer ("SELECT TRAY" parameter)............ 6-88
Selecting a closed reception setting ("CLOSED NETWORK"
parameter)..................................................................................... 6-90
6.8 REPORTING ..................................................................................... 6-91
Displaying the "REPORTING" menu............................................. 6-92
Selecting automatic printing of the activity report
("ACTIVITY REPORT" parameter)................................................. 6-93
Selecting automatic printing of the queued jobs report
("RESERVATION REPORT" parameter) ........................................ 6-94
Selecting automatic printing of the transmission results report
("TX RESULT REPORT" parameter).............................................. 6-95
Selecting automatic printing of the reception results report
("RX RESULT REPORT" parameter) ............................................. 6-96
7 Troubleshooting
7.1 Main error messages and their remedies ....................................... 7-3
7.2 When faxing is not performed correctly.......................................... 7-4
Faxes cannot be sent ..................................................................... 7-4
Faxes cannot be received............................................................... 7-5
Calls cannot be made..................................................................... 7-6
8 Appendix
8.1 Main specifications ........................................................................... 8-3
8.2 Local Setup for Diagnostic (LSD) ..................................................... 8-4
About Local Setup for Diagnostic (LSD) ......................................... 8-4
LSD operating environment............................................................ 8-4
General setup procedure................................................................ 8-5
Installing LSD.................................................................................. 8-6
Starting up LSD .............................................................................. 8-7
Main window of LSD....................................................................... 8-8
Contents-6 FK-506
Page 9

Connecting to this machine........................................................... 8-9
Downloading registered information from the machine................. 8-9
Creating a new settings file............................................................ 8-9
Registering one-touch dialing settings ........................................ 8-10
Editing one-touch dialing settings ............................................... 8-12
Registering speed dialing settings ............................................... 8-13
Editing speed dialing settings ...................................................... 8-15
Registering group dialing settings ............................................... 8-16
Editing group dialing settings ...................................................... 8-18
Printing the list of one-touch dialing, speed dialing and
group dialing settings................................................................... 8-19
Saving settings to a computer ..................................................... 8-19
Saving settings to this machine ................................................... 8-19
Specifying Utility mode settings .................................................. 8-20
Specifying administrator settings................................................. 8-23
Checking the counter totals ......................................................... 8-26
Checking the configuration page ................................................. 8-27
Uninstalling LSD........................................................................... 8-27
8.3 Glossary........................................................................................... 8-28
9Index
FK-506 Contents-7
Page 10

Contents-8 FK-506
Page 11

1
Introduction
Page 12

Page 13

Introduction
1 Introduction
Thank you for purchasing this machine.
This user manual contains details on the operation of the various functions
of the machine with fax kit FK-506 installed, precautions on its use, and basic
troubleshooting procedures. In order to ensure that this machine is used
correctly and efficiently, carefully read this user manual before using the
machine. After reading the user manual, store it in the designated holder so
that it can easily be referred to when questions or problems arise during
operation.
Views of the actual equipment may be slightly different from the illustrations
used in this user manual.
1.1 Trademarks and copyrights
Netscape is a registered trademark of Netscape Communications
Corporation in the United States and other countries.
Novell and Novell NetWare are registered trademarks of Novell, Inc. in the
United States and other countries.
Microsoft, Windows, and Windows NT are either registered trademarks or
trademarks of Microsoft Corporation in the United States and/or other
countries.
Adobe, the Adobe logo, Acrobat and PostScript are either registered
trademarks or trademarks of Adobe Systems Incorporated in the United
States and/or other countries.
Ethernet is a registered trademark of Xerox Corporation.
PCL is a registered trademark of Hewlett-Packard Company Limited.
All other product and brand names are trademarks or registered trademarks
of their respective companies or organizations.
1
FK-506 1-3
Page 14
1
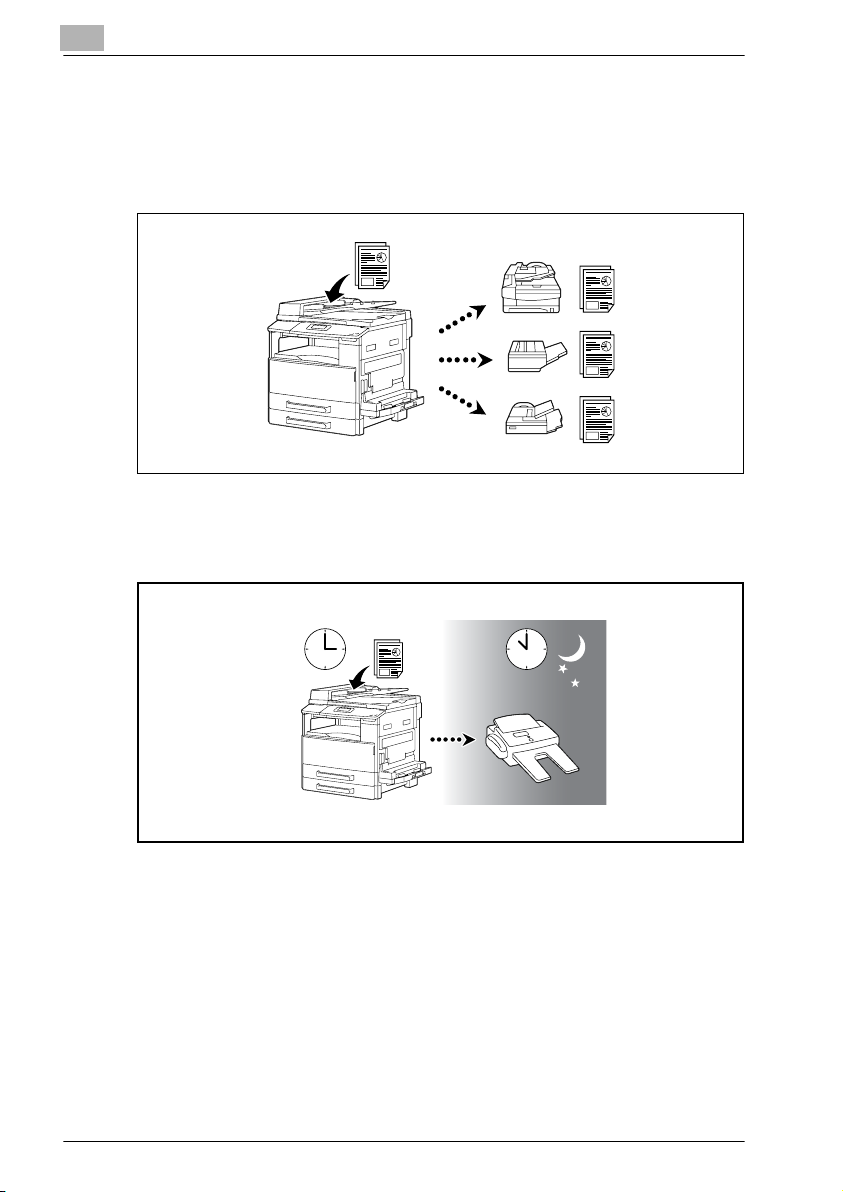
1.2 Available fax features
Sending
Broadcast transmission
For details, refer to page 3-27.
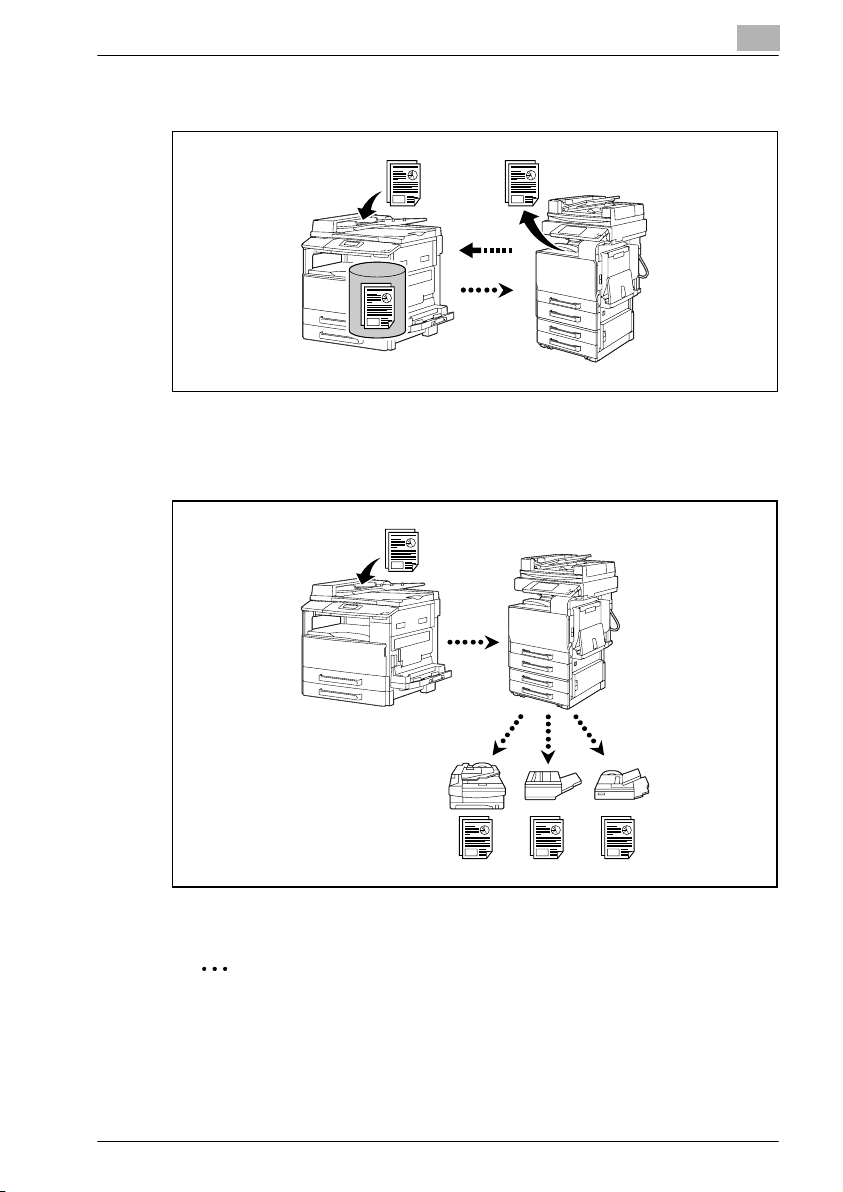
Timer transmission
Introduction
For details, refer to page 3-48.
1-4 FK-506
Page 15
Introduction
Polling transmission
For details, refer to page 4-14.
Relay initiating transmission
1
For details, refer to page 4-22.
2
Reminder
Specify a model compatible with F-code communications for the relay
station.
FK-506 1-5
Page 16
1
Introduction
Receiving
Memory reception
For details, refer to page 3-52.
Mailbox reception
For details, refer to page 4-12.
2
Note
Mailbox reception is compatible with F-code communication.
1-6 FK-506
Page 17
Introduction
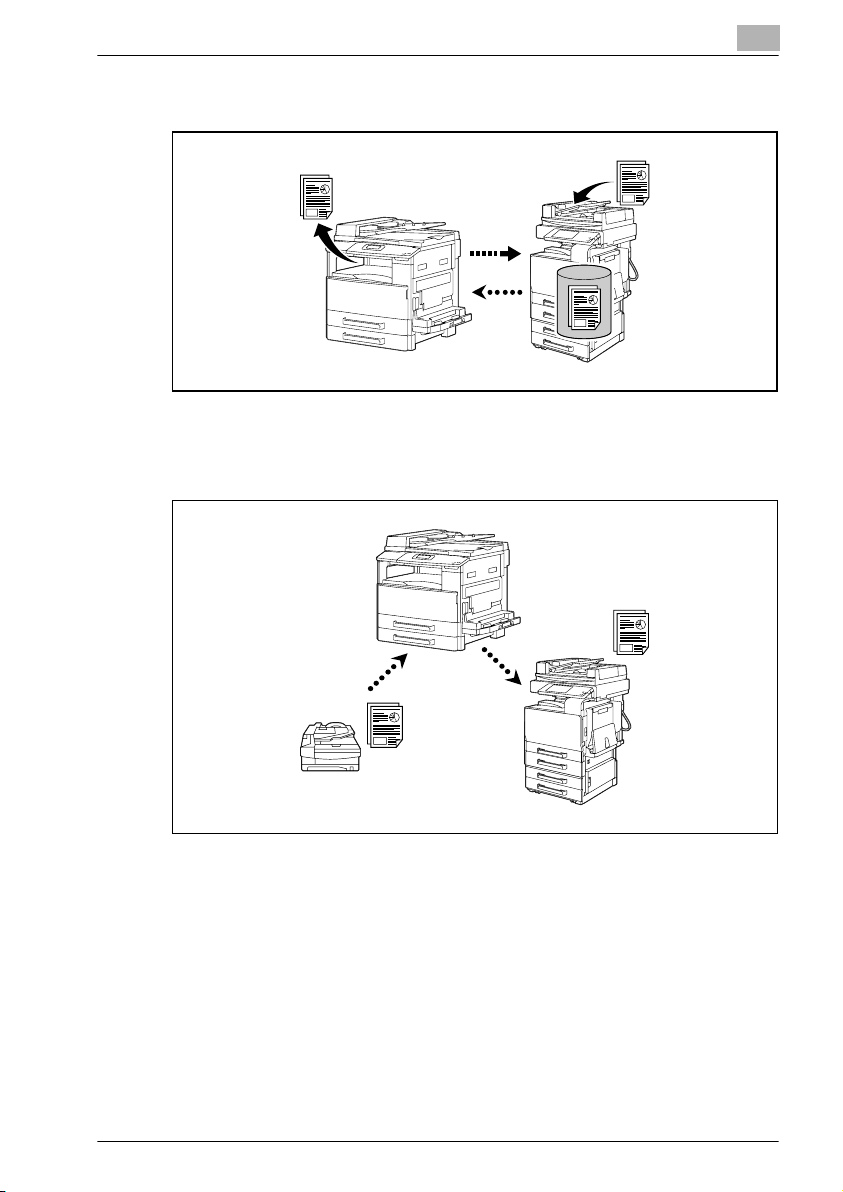
Polling reception
For details, refer to page 4-19.
Forwarding
1
For details, refer to page 4-28.
FK-506 1-7
Page 18

1
1.3 Explanation of manual conventions
The marks and text formats used in this manual are described below.
Safety advices
6 DANGER
Failure to observe instructions highlighted in this manner may result in
fatal or critical injuries in fact of electrical power.
% Observe all dangers in order to prevent injuries.
7 WARNING
Failure to observe instructions highlighted in this manner may result in
serious injuries or property damage.
% Observe all warnings in order to prevent injuries and to ensure safe use
of the machine.
7 CAUTION
Failure to observe instructions highlighted in this manner may result in
slight injuries or property damage.
% Observe all cautions in order to prevent injuries and to ensure safe use
of the machine.
Introduction
Sequence of action
1 The number 1 as formatted here indicates the first step of a sequence
of actions.
2 Subsequent numbers as formatted here indicate subsequent steps of
a sequence of actions.
Text formatted in this style provides additional assistance.
?
% Text formatted in this style describes the action that will ensure the
desired results are achieved.
1-8 FK-506
Page 19

Introduction
Tips
2
2
!
Special text markings
[Stop] key
The names of keys on the control panel are written as shown above.
MACHINE SETTING
Display texts are written as shown above.
1
Note
Text highlighted in this manner contains useful information and tips to
ensure safe use of the machine.
Reminder
Text highlighted in this manner contains information that should be
reminded.
Detail
Text highlighted in this manner contains references for more detailed
information.
FK-506 1-9
Page 20

1
1.4 Safety information
This section contains detailed instructions on the operation and maintenance
of this machine. To achieve optimum utility of this device, all operators
should carefully read and follow the instructions in this manual.
Please read the following section before connecting the machine to the
supply. It contains important information related to user safety and
preventing equipment problems.
Please keep this manual in a handy place near the machine.
Make sure you observe all of the precautions appear in each section of this
manual.
KM_Ver.01E_C
2
Note
Some parts of the contents of this section may not correspond with the
purchased product.
Warning and precaution symbols
The following indicators are used on the warning labels or in this manual to
categorize the level of safety warnings.
Introduction
7 WARNING
Ignoring this warnings could cause serious injury or even death.
% Do not ignore this safety advices.
7 CAUTION
Ignoring this cautions could cause injury or damage to property.
% Do not ignore this safety advices.
1-10 FK-506
Page 21
Introduction
Meaning of symbols
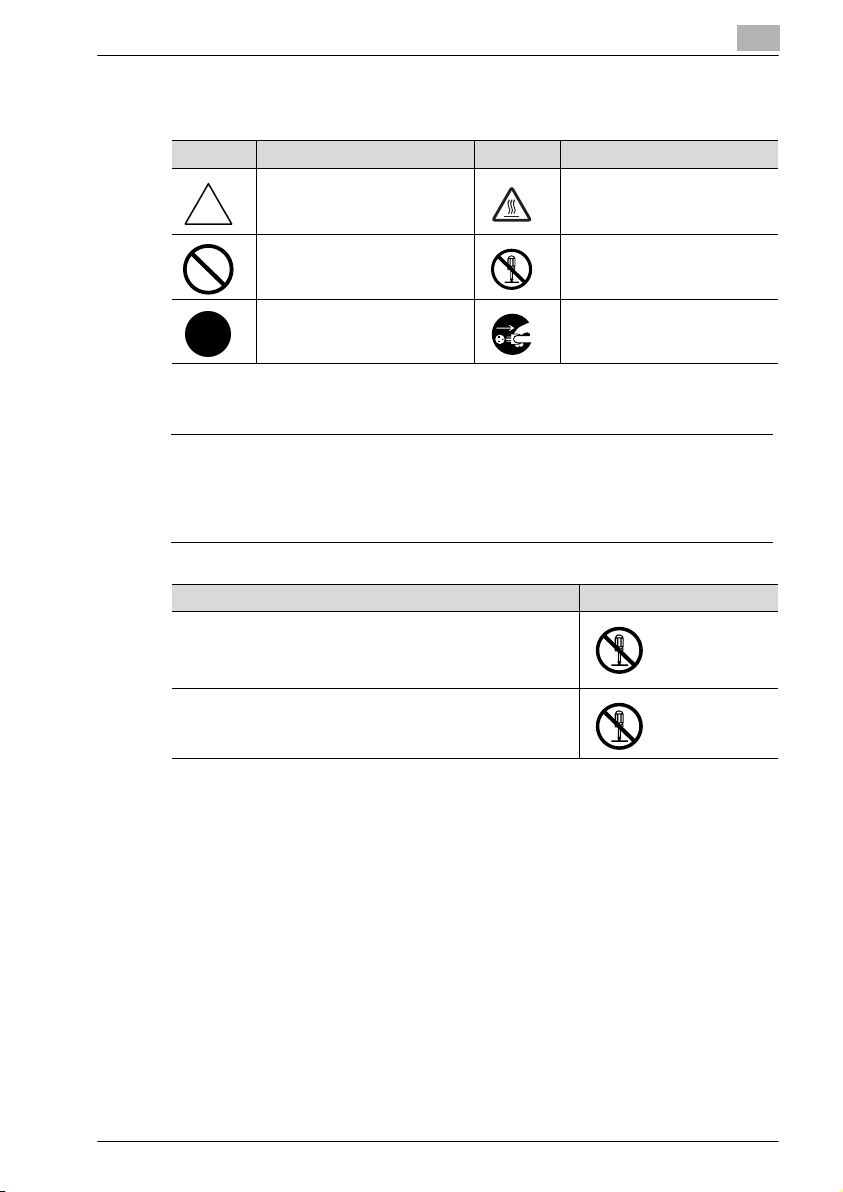
Symbol Meaning Example Meaning
A triangle indicates a danger
against which you should take
precaution.
A diagonal line indicates a prohibited course of action.
This symbol warns against possible causes of burns.
This symbol warns against dismantling the device.
1
A black circle indicates an imperative course of action.
This symbol indicates you must
unplug the device.
Disassemble and modification
7 WARNING
Ignoring this warnings could cause serious injury or even death.
% Do not ignore this safety advices.
Warning Symbol
• Do not attempt to remove the covers and panels which have
been fixed to the product. Some products have a high-voltage part or a laser beam source inside that could cause an
electrical shock or blindness.
• Do not modify this product, as a fire, electrical shock, or
breakdown could result. If the product employs a laser, the
laser beam source could cause blindness.
FK-506 1-11
Page 22

1
Introduction
Power cord
7 WARNING
Ignoring this warnings could cause serious injury or even death.
% Do not ignore this safety advices.
Warning Symbol
• Use only the power cord supplied in the package. If a power
cord is not supplied, only use the power cord and plug that
is specified in POWER CORD INSTRUCTION. Failure to use
this cord could result in a fire or electrical shock.
• Use the power cord supplied in the package only for this machine and NEVER use it for any other product. Failure to observe this precaution could result in a fire or electrical shock.
• Do not scratch, abrade, place a heavy object on, heat, twist,
bend, pull on, or damage the power cord. Use of a damaged
power cord (exposed core wire, broken wire, etc.) could result in a fire or breakdown.
Should any of these conditions be found, immediately turn
OFF the power switch, unplug the power cord from the power outlet, and then call your authorized service representative.
1-12 FK-506
Page 23
Introduction
Power source
7 WARNING
Ignoring this warnings could cause serious injury or even death.
% Do not ignore this safety advices.
Warning Symbol
• Use only the specified power source voltage. Failure to do
that could result in a fire or electrical shock.
• Connect power plug directly into wall outlet having the same
configuration as the plug. Use of an adapter leads to the
product connecting to inadequate power supply (voltage,
current capacity, grounding), and may result in fire or shock.
If proper wall outlet is not available, the customer shall ask
qualified electrician for the installation.
• Do not use a multiple outlet adapter nor an extension cord in
principle. Use of an ad apter or an extension cord could cause
a fire or electrical shock.
Contact your authorized service representative if an extension cord is required.
• Consult your authorized service representative before connecting other equipment on the same wall outlet. Overload
could result in a fire.
1
7 CAUTION
Ignoring this cautions could cause injury or damage to property.
% Do not ignore this safety advices.
Caution Symbol
• The outlet must be near the equipment and easily accessible.
Otherwise you can not pull out the power plug when an emergency occurs.
FK-506 1-13
Page 24
1
Introduction
Power plug
7 WARNING
Ignoring this warnings could cause serious injury or even death.
% Do not ignore this safety advices.
Warning Symbol
• Do not unplug and plug in the power cord with a wet hand,
as an electrical shock could result.
• Plug the power cord all the way into the power outlet. Failure
to do this could result in a fire or electrical shock.
7 CAUTION
Ignoring this cautions could cause injury or damage to property.
% Do not ignore this safety advices.
Caution Symbol
• Do not tug the power cord when unplugging. Pulling on the
power cord could damage the cord, resulting in a fire or electrical shock.
• Remove the power plug from the outlet more than one time a
year and clean the area between the plug terminals. Dust that
accumulates between the plug terminals may cause a fire.
Grounding
7 WARNING
Ignoring this warnings could cause serious injury or even death.
% Do not ignore this safety advices.
Warning Symbol
• Connect the power cord to an electrical outlet that is
equipped with a grounding terminal.
1-14 FK-506
Page 25
Introduction
Installation
7 WARNING
Ignoring this warnings could cause serious injury or even death.
% Do not ignore this safety advices.
7 CAUTION
Ignoring this cautions could cause injury or damage to property.
% Do not ignore this safety advices.
Warning Symbol
• Do not place a flower vase or other container that contains
water, or metal clips or other small metallic objects on this
product. Spilled water or metallic objects dropped inside the
product could result in a fire, electrical shock, or breakdown.
Should a piece of metal, water, or any other similar foreign
matter get inside the product, immediately turn OFF the power switch, unplug the power cord from the power outlet, and
then call your authorized service representative.
1
Caution Symbol
• After installing this product, mount it on a secure base. If the
unit moves or falls, it may cause personal injury.
• Do not place the product in a dusty place, or a site exposed
to soot or steam, near a kitchen table, bath, or a humidifier.
A fire, electrical shock, or breakdown could result.
• Do not place this product on an unstable or tilted bench, or
in a location subject to a lot of vibration and shock. It could
drop or fall, causing personal injury or mechanical breakdown.
• Do not let any object plug the ventilation holes of this product. Heat could accumulate inside the product, resulting in a
fire or malfunction.
• Do not use flammable sprays, liquids, or gases near this
product, as a fire could result.
FK-506 1-15
Page 26
1
Introduction
Ventilation
7 CAUTION
Ignoring this cautions could cause injury or damage to property.
% Do not ignore this safety advices.
Caution Symbol
• Always use this product in a well ventilated location. Operating the product in a poorly ventilated room for an extended
period of time could injure your health. Ventilate the room at
regular intervals.
Actions in response to troubles
7 WARNING
Ignoring this warnings could cause serious injury or even death.
% Do not ignore this safety advices.
Warning Symbol
• Do not keep using this product, if this product becomes inordinately hot or emits smoke, or unusual odor or noise. Immediately turn OFF the power switch, unplug the power cord
from the power outlet, and then call your authorized service
representative. If you keep on using it as is, a fire or electrical
shock could result.
• Do not keep using this product, if this product has been
dropped or its cover damaged. Immediately turn OFF the
power switch, unplug the power cord from the power outlet,
and then call your authorized service representative. If you
keep on using it as is, a fire or electrical shock could result.
1-16 FK-506
Page 27
Introduction
7 CAUTION
Ignoring this cautions could cause injury or damage to property.
% Do not ignore this safety advices.
Consumables
7 WARNING
Ignoring this warnings could cause serious injury or even death.
% Do not ignore this safety advices.
Caution Symbol
• The inside of this product has areas subject to high temperature, which may cause burns.
When checking the inside of the unit for malfunctions such as
a paper misfeed, do not touch the locations (around the fusing unit, etc.) which are indicated by a "Caution HOT" caution
label.
Warning Symbol
• Do not throw the toner cartridge or toner into an open flame.
The hot toner may scatter and cause burns or other damage.
1
7 CAUTION
Ignoring this cautions could cause injury or damage to property.
% Do not ignore this safety advices.
Caution Symbol
• Do not leave a toner unit or drum unit in a place within easy
reach of children. Licking or ingesting any of these things
could injure your health.
• Do not store toner units and PC drum units near a floppy disk
or watch that are susceptible to magnetism. They could
cause these products to malfunction.
FK-506 1-17
Page 28

1
Introduction
When moving the machine
7 CAUTION
Ignoring this cautions could cause injury or damage to property.
% Do not ignore this safety advices.
Caution Symbol
• Whenever moving this product, be sure to disconnect the
power cord and other cables. Failure to do this could damage
the cord or cable, resulting in a fire, electrical shock, or
breakdown.
• When moving this product, always hold it by the locations
specified in the user manual or other documents. If the unit
falls it may cause severe personal injury. The product may
also be damaged or malfunction.
1-18 FK-506
Page 29

Introduction
1.5 Special notice to user
For Canada
NOTICE:
This product meets the applicable Industry Canada technical specifications.
The Ringer Equivalence Number is an indication of the maximum number of
devices allowed to be connected to a telephone interface. The termination
on an interface may consist of any combination of devices subject only to the
requirement that the sum of the RENs of all the devices does not exceed five.
Disconnect TNV circuit connectors before disconnecting power.
Use only the attached telephone cord (Listee’s No. E66597, Part No.
127A9002).
CAUTION: To reduce the risk of fire, use only No. 26 AWG or larger (e.g., 24
AWG) UL Listed or CSA Certified Telecommunication Line Cord
IMPORTANT SAFETY INSTRUCTIONS - When using your telephone
equipment, basic safety precautions should always be followed to reduce
the risk of fire, electric shock and injury to persons, including the follwing:
1. Do not use this product near water for example, near a bathtub,
washbowl, kitchen sink or laundry tub, in a wet basement or near a
swimming pool.
2. Avoid using a telephone (other than a cordless type) during an electrical
storm. There may be a remote risk of electric shock from lightning.
3. Do not use the telephone to report a gas leak in the vicinity of the leak.
4. Use only the power cord and batteries indicated in this manual. Do not
dispose of batteries in a fire. They may explode. Check with local codes
for possible special disposal instructions.
SAVE THESE INSTRUCTONS"
1
AVIS:
Le present materiel est conforme aux specifications techniques applicables
d’Industrie Canada.
L’indice d’equivalence de la sonnerie (IES) sert a indiquer le nombre maximal
de terminaux qui peuvent etre raccordes a une interface telephonique. La
terminaison d’une interface peut consister en une combinaison quelconque
de dispositifs, a la seule condition que la somme d’indices d’equivalence de
la sonnerie de tous les dispositifs n’excede pas 5.
FK-506 1-19
Page 30

1
Introduction
IMPORTANTES MEASURES DE SÉCURITÉ
Certaines measures de sécurité doivent être prises pendant l’utilisation de
matérial téléponique afin de réduire les risques d’incendie, de cho électrique
et de blessures.
En voici quelquesunes:
1. Ne pas utiliser l’appareil prés de l’eau, p.ex., prés d’une baignoire, d’un
lavabo, d’un évier de cuisine, d’un bac à laver, dans un sous-sol humide
ou prés d’une piscine.
2. Éviter d’utiliser le téléphone (sauf s’il s’agit d’un appareil sans fil) pendant
un orage électrique. Ceci peut présenter un risque de choc électrique
causé par la foudre.
3. Ne pas utilier l’appareil téléponique pour signaler une fuite de gaz s’il est
situé prés de la fuite.
4. Utilier seulement le cordon d’alimentation et le type de piles Indiqués
dans ce manuel. Ne pas jeter les piles dans le feu: eles peuvent exploser.
Se conformer aux réglements pertinents quant à l’élimination des piles.
CONSERVER CES INSTRUCTIONS
For U.S.A.
FCC PART 68 REQUIREMENTS:
This equipment complies with Part 68 of the FCC rules and the requirements
adopted by the ACTA. On the cover of this equipment is a label that contains,
among other information, a product identifier in the format
US:AAAEQ##TXXXX. If required, this information must be provided to the
telephone company.
This equipment uses certification jack USOC RJ11C.
A plug and jack used to connect this equipment to the premises wiring and
telephone network must comply with the applicable FCC Part 68 rules and
requirements adopted by the ACTA.
A compliant telephone cord and modular plug is provided with this product.
It is designed to be connected to a compatible modular jack that is also
compliant. See installation instructions for details.
The REN is used to determine the number of devices that may be connected
to a telephone line. Excessive RENs on a telephone line may result in the
devices not ringing in response to an incoming call. In most but not all areas,
the sum of RENs should not exceed five (5.0).
1-20 FK-506
Page 31

Introduction
To be certain of the number of devices that may be connected to a line, as
determined by the total RENs, contact the local telephone company For
products approved after July 23, 2001, the REN for this product is part of the
product identifier that has the format US: US:AAAEQ##TXXXX.. The digits
represented by ## are the REN without a decimal point (e.g., 03 is a REN of
0.3). For earlier products, the REN is separately shown on the label.
If this equipment FK-506 causes harm to the telephone network, the
telephone company will notify you in advance that temporary discontinuance
of service may be required. But if advance notice isn’t practical, the
telephone company will notify the customer as soon as possible. Also, you
will be advised of your right to file a complaint with the FCC if you believe it
is necessary.
The telephone company may make changes in its facilities, equipment,
operations or procedures that could affect the operation of the equipment. If
this happens the telephone company will provide advance notice in order for
you to make necessary modifications to maintain uninterrupted service.
If trouble is experienced with this equipment FK-506, for repair or warranty
information, please contact the Develop dealer location where you
purchased this equipment. If the equipment is causing harm to the telephone
network, the telephone company may request that you disconnect the
equipment until the problem is resolved.
1
Connection to party line service is subject to state tariffs. Contact the state
public utility commission, public service commission or corporation
commission for information. If you home has specially wired alarm
equipment connected to the telephone line, ensure the installation of FK-506
does not disable you alarm equipment. If you have questions about what will
disable alarm equipment, consult your telephone company or a qualified
installer.
The Telephone Consumer Protection Act of 1991 makes it unlawful for any
person to use a computer or other electronic device, including FAX
machines, to send any message unless such message clearly contains in a
margin at the top or bottom of each transmitted page or on the first page of
the transmission, the date and time it is sent and an identification of the
business or other entity, or other individual sending the message and the
telephone number of the sending machine or such business, other entity, or
individual. (The telephone number provided may not be a 900 number or any
FK-506 1-21
Page 32

1
Introduction
other number for which charges exceed local or long-distance transmission
charges.)
Disconnect TNV circuit connectors before disconnecting power.
Use only the attached telephone cord (Listee’s No. E66597, Part No.
127A9002).
CAUTION: To reduce the risk of fire, use only No. 26 AWG or larger (e.g., 24
AWG) UL Listed or CSA Certified Telecommunication Line Cord
IMPORTANT SAFETY INSTRUCTIONS - When using your telephone
equipment, basic safety precautions should always be followed to reduce
the risk of fire, electric shock and injury to persons, including the follwing:
1. Do not use this product near water for example, near a bathtub,
washbowl, kitchen sink or laundry tub, in a wet basement or near a
swimming pool.
2. Avoid using a telephone (other than a cordless type) during an electrical
storm. There may be a remote risk of electric shock from lightning.
3. Do not use the telephone to report a gas leak in the vicinity of the leak.
4. Use only the power cord and batteries indicated in this manual. Do not
dispose of batteries in a fire. They may explode. Check with local codes
for possible special disposal instructions.
SAVE THESE INSTRUCTONS"
7 WARNING
The exclamation point within an equilateral triangle followed by the
word "Warning" is intended
to alert the user to the possibility that a disregard for the warning may
result in fatal hazards
or critical injuries.
% Be sure to focus your att ention on the Warning headings when reading
the user manual for the copier.
7 CAUTION
The exclamation point within an equilateral triangle followed by the
word "Caution" is intended
to alert the user to the possibility that a disregard for the caution may
result in minor injuries
or in physical damage.
% Be sure to focus your att ention on the Caution headings when reading
the user manual for the copier.
1-22 FK-506
Page 33

Introduction
For New Zealand
1. This device is equipped with pulse dialing while the Telecom standard is
DTMF tone dialing. There is no guarantee that Telecom lines will always
continue to support pulse dialing.
2. This equipment does not fully meet Telecom’s impedance requirements.
Performance limitations may occur when used in conjunction with some
parts of the network. Telecom will accept no responsibility should difficulties
arise in such circumstances.
3. The grant of a Telepermit for any item of terminal equipment indicates only
that Telecom has accepted that the item complies with minimum conditions
for connection to its network. It indicates no endorsement of the product by
Telecom, nor does it provide any sort of warranty. Above all, it provides no
assurance that any item will work correctly in all respects with another item
of Telepermitted equipment of a different make or model, nor does it imply
that any product is compatible with all of Telecom’s network services.
4. The automatic calling functions of this equipment must not be used to
cause a nuisance to other customers.
5. Telepermitted equipment only may be connected to the auxiliary
telephone port. The auxiliary port is not specifically designed for 3-wire
connected equipment. 3-wire might not respond to incoming ringing when
connected to this port.
1
For Europe
The Facsimile has been approved in accordance with Council Decision
1999/5/ EC for pan-European single terminal connection to the public
switched telephone network (PSTN). However, due to differences between
the individual PSTNs provided in different countries, the approval does not,
of itself, give an unconditional assurance of successful operation on every
PSTN network terminal point.
In the event of problems, you should contact your equipment supplier in the
first instance.
The CE marking must be affixed to the
product or to its data plate. Additionally it
must be affixed to the packaging, if any,
and to the accompanying documents.
FK-506 1-23
Page 34

1
Introduction
1-24 FK-506
Page 35

2
Precaution
Page 36

Page 37

Precaution
2Precaution
2.1 Part names and their functions
Main unit
1
2
34
2
7
6
5
13
8
9
10
11
12
FK-506 2-3
Page 38

2
Precaution
No. Part name Description
1 Copy output tray Collects copies and printouts fed out facing down.
2 Front door Opened when replacing the toner bottle.
3 1st paper drawer • Can be loaded with up to 250 sheets of paper.
4 Manual bypass tray • Used for manually feeding paper for making copies.
5 Right-side door release lever Used to open/close the right-side door.
6 Right-side door Opened when clearing paper misfeeds.
7 Mechanical counter Indicates the total number of copy and printout pages
8 RJ45 connector for networking
(optional)
9 USB connector Used for connecting a USB cable from the computer.
10 Telephone line connector (LINE) Used for connecting the telephone cord from the wall
11 Telephone jack (TEL) Used for connecting the cord from a telephone.
12 Power switch Used to turn the machine on and off.
13 Control panel Used to start copying or sending or to specify various
• The paper size can be adjusted freely.
• Special paper can be loaded.
• Load only one sheet of paper at a time.
• Special paper can be loaded.
that were printed.
Used for connecting the network cable when this machine is used for network printing.
jack.
settings. (See p. 2-5.)
2-4 FK-506
Page 39

Precaution
2.2 Control panel parts and their functions
Names of control panel parts and their functions
123 4 56
2
21
20
19
101112131415161718
No. Part name Description
1 [Power Save] key/indicator Press to enter Power Save mode.
2 [Mixed Original] key/indicator Press to select the "Mixed Original" setting.
3 [Simplex/Duplex] key/indicator Press to select double-sided copying. Select "1-
4 Display Displays the number of copies, zoom ratio, fax mode,
5[+], [,], [*] and [)] keys
[OK] key
6 [Printer] key/indicator This indicator lights up while data is being printed from
7 [Access] key Press when account track settings have been applied.
8 [Speed Dial] key Press to register frequently used fax numbers and ad-
9 [Phone Book] key Press to display the information programmed for one-
10 [Back] key Press to return to the previous screen.
11 "Caution" indicator This indicator lights up or flashes if an error has oc-
SIDE%1-SIDE", "1-SIDE%2-SIDE", "2-SIDE%1-SIDE"
or "2-SIDE%2-SIDE". If any setting other than 1SIDE%1-SIDE is selected, the indicator lights up.
setting menus and error messages.
Press the [+], [,], [*] and [)] keys to select menu
items in the display and change their settings.
Press the [OK] key to apply the setting.
the computer and flashes while data is being sent. For
details, refer to the user manual for the printer driver.
dresses, and to recall them during transmissions.
touch dialing, group dialing and speed dialing.
curred. For details, refer to "Troubleshooting" on
page 7-3.
7
8
9
FK-506 2-5
Page 40

2
Precaution
No. Part name Description
12 [Density] key Press to select the scanning density of copies and fax
13 [Quality] key Press to select "TEXT", "PHOTO" or "TEXT/PHOTO"
14 [Zoom] key Press to specify whether to enlarge or reduce the im-
15 [Paper] key Press to select the paper drawer that is to be used.
16 [Function] key/indicator Press to specify settings for advanced copy opera-
17 [Finishing] key/indicator Press to select a copy Finishing function.
18 [Combine Original] key/indicator Specify settings to copy multiple (2 or 4) document
19 [Confirm] key Press to view the counters or communication results,
20 [Utility] key Press to specify settings in Utility mode.
21 [Mode Memory] key Press to register specified copy programs and recall
documents.
as the document quality.
age when copying.
tions and useful fax transmission/reception functions,
such as copying with a binding margin added and
sending/receiving confidential documents.
pages together within a single sheet of paper (2in1 or
4in1).
or to print a communication results report.
MACHINE SETTING, PAPER SOURCE SETTING,
CUSTOM SIZE MEMORY, USER MANAGEMENT, ADMIN. MANAGEMENT, COPY SETTING 1, COPY SETTING 2, DIAL REGISTRATION, FAX REGISTRATION,
FAX TX OPERATION, FAX RX OPERATION, REPORTING
them.
22 23 24 25 26
27
28
2930
2-6 FK-506
Page 41

Precaution
No. Part name Description
22 [Fax] key/indicator Press to enter Fax mode. The indicator on the key
23 [Scan] key/indicator Press to enter Scan mode. The indicator on the key
24 [Copy] key/indicator Press to enter Copy mode. The indicator on the key
25 [123/ABC] key Press to switch bet ween number input mode and lette r
26 [Reset] key • Press to clear all settings (except programmed set-
27 [Interrupt] key/indicator Press to enter Interrupt mode. The indicator on the key
28 [Clear/Stop] key • Press to erase the entered letters and numbers.
29 [Start] key/indicator • Press to start a copy operation.
30 Keypad • Use to type in the number of copies to be produced.
lights up in green to indicate that the machine is in Fax
mode.
lights up in green to indicate that the machine is in
Scan mode. (Available only when network interface
card NC-503 or image controller IC-206 are installed)
lights up in green to indicate that the machine is in
Copy mode.
input mode.
tings) entered from the control panel.
• The currently specified job is canceled. (Pressing
this key does not swi tch the machine to Copy or Fax
mode.)
lights up in green to indicate that the machine is in Interrupt mode.
Press the key again to cancel Interrupt mode and return to the mode before Interrupt mode was entered.
If this key is pressed while a received fax or computer
document is being printed, printing stops so that the
interrupting copy job can be performed. Press this key
again to continue print ing the received fax or computer
document.
• Press to stop a continuous copy operation.
• Press to stop the transmission/reception of the fax.
• Press to stop the print job from the computer.
• Press to start sending a fax.
• If this key is pressed while this machine is warming
up, the next copy job is queued.
• The key lights up in green to indicate that copy jobs
can be queued, and the key lights up in orange to
indicate that the machine is not ready to begin copy
operations.
• Use to type in the various settings.
• Use to type in fax numbers.
• Use to type in speed dial numbers and text.
• In Fax mode, the [ ] key is used for tone transmissions (pulse dialing), and the [#] key is used for accessing an outside line.
2
FK-506 2-7
Page 42

2
Precaution
31 32 33 34
35
36
No. Part name Description
31 "Auto RX" indicator This indicator lights up when the automatic reception
32 [Memory TX] key/indicator Press to selec t the memory transmission function. This
33 [On Hook] key Press to answer the call. Press this key again to hang
34 [Redial/Pause] key • Press to redial the last recipient called.
35 One-touch dial keys • Use to dial previously registered fax numbers.
36 Switching plate Switches the numbers assigned to the one-touch dial
function is selected.
indicator lights up in green when the memory transmission function is selected.
up.
• While dialing, this key is used to generate a pause
when transferring from an internal to an external line
or receiving information services.
• Use [01] through [32] for specifying one-touch dialing and group dialing settings.
• Use keys [29] through [32] for specifying program
dialing settings.
keys. When the switching plate is closed in the lower
position, the keys are numbered 01 through 16. When
the switching plate is open in the upper position, the
keys are numbered 17 through 32.
2-8 FK-506
Page 43

Precaution
2
Display indications
Fax mode screen
1
2
Memory:100%
QUALITY:STD/TEXT
6
01234_
OTHER SETTING=
No. Display indication Description
1 Time Indicates the time currently specified on the machine.
2 Available memory Indicates the percentage of the memory that is not used.
3 Image quality Indicates the selected Quality setting.
STD/TEXT Indicates that the "STD/TEXT" setting is selected.
FINE/TEXT Indicates that the "FINE/TEXT" setting is selected.
S-FINE/TEXT Indicates that the "S-FINE/TEXT" setting is selected.
STD/PHOTO Indicates that the "STD/PHOTO" setting is selected.
FINE/PHOTO Indicates that the "FINE/PHOTO" setting is selected.
S-FINE/PHOTO Indicates that the "S-FINE/PHOTO" setting is selected.
4 Input mode Indicates the currently selected input mode.
[1…] Indicates that the number input mode is selected.
[A…] Indicates that the letter/symbol input mode is selected.
5 Messages Displays instructions for displaying the "FAX OTHER SET-
6 Fax number/e-mail ad-
dress
When the amount of memory available is near 0%, it may not
be possible to scan new documents since the memory is full.
TING" menu and the status of operations, such as computer
printing, while the machine is in Fax mode.
Displays the fax number or e-mail address being entered.
3
4
5
FK-506 2-9
Page 44

2
Precaution
Fax mode icons
Symbol Description
Dialing A fax number is being dialed.
Ringing The machine is being called.
Sending The document is being sent.
Receiving A document is being received.
In standby for timer
transmission
In standby for polling transmission
In standby for mailbox reception
Memory reception A document is being received and stored in the mem-
A document is queued for timer transmission.
A document is queued for polling transmission.
A mailbox reception document is ready to be printed.
ory or has been received and stored in the memory.
2-10 FK-506
Page 45

Precaution
2.3 Power supply
Default settings
The settings that are automatically selected when the machine is turned on
or when the settings are reset are called the "default settings". These
settings serve as a reference for all functions.
2
Note
The default settings can be changed from Utility mode. (Refer to
page 6-3.)
Fax mode
- Quality: TEXT
- Density: STD
- Transmission setting: MEMORY TX
- Reception setting: AUTO RX
2
FK-506 2-11
Page 46

2
2.4 Entering text
Follow the procedure described below to enter text when specifying the user
name or programming one-touch dial keys with the recipient name.
Changing the input mode
Each press of the [123/ABC] key switches between number input mode and
letter/symbol input mode.
[1...]: Numbers can be entered.
[A...]: Letters and symbols can be entered.
Key operation
Using the keypad, type in numbers, letters and symbols.
Switch between numbers and letters/symbols by pressing the [123/ABC]
key.
When "[1...]" appears in the display, numbers will be entered.
When "[A...]" appears in the display, letters/symbols will be entered.
The following characters can be entered with each key in the keypad.
Characters that can be entered with keypad
Precaution
Keypad Available characters
[1...] [A...]
1 1 . (period) @ _ (underscore) - (hyphen) 1
22A B C 2 a b c
33D E F 3 d e f
4 4 G H I 4 g h i
5 5 J K L 5 j k l
66M N O 6 m n o
77P Q R S 7 p q r s
8 8 T U V 8 t u v
9 9 W X Y Z 9 w x y z
0 0 (space) 0
* + & / * = ! ? ( ) % [ ] ^ ’ ‘ { } | ~ $ , : ; < > "
###
2-12 FK-506
Page 47

Precaution
2
!
Detail
Repeatedly press the keypad to scroll through the corresponding
characters and symbols listed until the desired character appears in the
display.
FK-506 2-13
Page 48

2
Precaution
Text input example
When entering a name: Office 01
Press the [123/ABC] key until input mode [A...] is selected.
*The cursor (_) flashes alternately in the display with the character at its
current location.
ONE-TOUCH DIAL
NAME
:_
Press the [6] key three times.
ONE-TOUCH DIAL
NAME
:O
Press the [3] key seven times.
ONE-TOUCH DIAL
NAME
:Of
2-14 FK-506
Page 49

Precaution
2
Press the [)] key.
ONE-TOUCH DIAL
NAME
:Of_
Press the [3] key seven times.
ONE-TOUCH DIAL
NAME
:Off
Press the [4] key seven times.
ONE-TOUCH DIAL
NAME
:Offi
FK-506 2-15
Page 50

2
Precaution
Press the [2] key seven times.
ONE-TOUCH DIAL
NAME
:Offic
Press the [3] key six times.
ONE-TOUCH DIAL
NAME
:Office
Press the [0] key.
ONE-TOUCH DIAL
NAME
:Office_
2-16 FK-506
Page 51

Precaution
2
Press the [123/ABC] key.
ONE-TOUCH DIAL
NAME
:Office _
Press the [0] key.
ONE-TOUCH DIAL
NAME
:Office 0
Press the [1] key.
ONE-TOUCH DIAL
NAME
:Office 01
FK-506 2-17
Page 52

2
Precaution
Correcting text and input precautions
To delete an entered character
% Press the [*] or [)] key to move the cursor (_) below the character to
be deleted, and then press the [Clear/Stop] key.
To add a character within text
% Press the [*] or [)] key to move the cursor (_) below the character
where a character is to be added, and then type in the new character.
(The new character is inserted in front of the character at the cursor’s
position.)
To enter text with the keypad
% To enter a character with the same key used to enter the previously
entered character, press the [)] key before entering the next character.
(Refer to "Text input example" on page 2-14.)
To enter a space
% Press the [123/ABC] key until input mode [A...] is selected, and then
press the [0] key in the keypad.
To stop entering text
% Press the [Reset] key.
2-18 FK-506
Page 53

Precaution
2.5 Selecting and checking initial settings
In order to take advantage of this machine’s many functions, certain settings
including the one-touch dialing settings and the time, which is described
below, must first be specified.
In addition, several settings, such as when the various reports are printed,
are specified during production, but can be changed as required. Before
starting to operate this machine, check these settings.
Required settings
Before using the machine, settings must be specified for the following.
- Current date/time
- Machine’s fax number
- Telephone dialing system
- Telephone wiring (external/internal) system
If settings are specified for the following, the machine can be used more
efficiently. We recommend specifying the appropriate settings.
- Transmission source (your name and fax number)
- One-touch dialing
- Speed dialing
- Program dialing
Checking the initial settings
Since settings have been specified for each function during production, the
settings should be checked, then changed as necessary. (Refer to "6 Utility
mode/Fax mode parameters".)
2
FK-506 2-19
Page 54

2
Precaution
Setting the current date and time ("DATE&TIME" parameter)
1 Press the [Utility] key.
The "UTILITY MODE" menu appears.
2 Press the [+] or [,] key until "ADMIN. MANAGEMENT" is selected, and
then press the [OK] key.
UTILITY MODE
USER MANAGEMENT
ADMIN. MANAGEMENT
COPY SETTING 1
3 Use the keypad to type in the administrator access code, and then
press the [OK] key.
– The default administrator access code is "000000".
ADMIN. MANAGEMENT
ADMIN. NO.:------
The "ADMIN. MANAGEMENT" menu appears.
2-20 FK-506
Page 55

Precaution
2
4 Press the [+] or [,] key until "USER SETTING" is selected, and then
press the [OK] key.
ADMIN. MANAGEMENT
REMOTE MONITOR
COMM.SETTING
USER SETTING
5 Press the [+] or [,] key until "DATE&TIME" is selected, and then press
the [OK] key.
USER SETTING
DATE&TIME
USER FAX NO.
USER NAME
6 Use the keypad to type in time and date, and then press the [OK] key.
– Enter the time in the 24-hour format.
– For the year, enter the last two digits.
DATE&TIME
TIME
DATE
ZONE GMT+
FK-506 2-21
Page 56

2
Precaution
7 Press the [+] or [,] key until the desired time zone is selected, and then
press the [OK] key.
– This setting is required only if optional image controller IC-206 or
optional network interface card NC-503 is installed on the machine.
DATE&TIME
TIME
DATE
ZONE GMT+
The "USER SETTING" menu appears again. To return to the main
screen, press the [Reset] key.
2-22 FK-506
Page 57

Precaution
2
Specifying the machine’s fax number ("USER FAX NO." parameter)
1 Press the [Utility] key.
The "UTILITY MODE" menu appears.
2 Press the [+] or [,] key until "ADMIN. MANAGEMENT" is selected, and
then press the [OK] key.
UTILITY MODE
USER MANAGEMENT
ADMIN. MANAGEMENT
COPY SETTING 1
3 Use the keypad to type in the administrator access code, and then
press the [OK] key.
ADMIN. MANAGEMENT
ADMIN. NO.:------
The "ADMIN. MANAGEMENT" menu appears.
FK-506 2-23
Page 58

2
Precaution
4 Press the [+] or [,] key until "USER SETTING" is selected, and then
press the [OK] key.
ADMIN. MANAGEMENT
REMOTE MONITOR
COMM.SETTING
USER SETTING
5 Press the [+] or [,] key until "USER FAX NO." is selected, and then
press the [OK] key.
USER SETTING
DATE&TIME
USER FAX NO.
USER NAME
6 Use the keypad to type in the fax number, and then press the [OK] key.
– For details on entering text, refer to "Entering text" on page 2-12.
– A maximum of 20 digits can be entered for the fax number.
– Characters that can be entered: Numbers (0 through 9), spaces, +
and -
USER FAX NO.
:012_
The "USER SETTING" menu appears again.
2-24 FK-506
Page 59

Precaution
2
Programming the transmission source name ("USER NAME" parameter)
The transmission source name is the name that will appear in the header of
faxes sent from this machine.
!
Detail
The transmission source name is printed at the top of sent documents.
Faxes can also be sent without adding the transmission source name.
1 Press the [Utility] key.
The "UTILITY MODE" menu appears.
2 Press the [+] or [,] key until "ADMIN. MANAGEMENT" is selected, and
then press the [OK] key.
UTILITY MODE
USER MANAGEMENT
ADMIN. MANAGEMENT
COPY SETTING 1
FK-506 2-25
Page 60

2
Precaution
3 Use the keypad to type in the administrator access code, and then
press the [OK] key.
– The default administrator access code is "000000".
ADMIN. MANAGEMENT
ADMIN. NO.:------
The "ADMIN. MANAGEMENT" menu appears.
4 Press the [+] or [,] key until "USER SETTING" is selected, and then
press the [OK] key.
ADMIN. MANAGEMENT
REMOTE MONITOR
COMM.SETTING
USER SETTING
5 Press the [+] or [,] key until "USER NAME" is selected, and then press
the [OK] key.
USER SETTING
DATE&TIME
USER FAX NO.
USER NAME
2-26 FK-506
Page 61

Precaution
2
6 Use the keypad to type in the user name, and then press the [OK] key.
– For details on entering text, refer to "Entering text" on page 2-12.
– A maximum of 32 characters can be entered for the transmission
source name.
USER NAME
:ABC
The "USER SETTING" menu appears again.
FK-506 2-27
Page 62

2
Precaution
Selecting the telephone dialing system ("TONE/PULSE" parameter)
There are two types of telephone dialing systems: tone dialing (PB) and pulse
dialing (DP10pps or DP20pps). Faxes cannot be sent if this machine is not
set to the system used by your telephone line. Select the correct setting after
checking which type of dialing system is used.
1 Press the [Utility] key.
The "UTILITY MODE" menu appears.
2 Press the [+] or [,] key until "ADMIN. MANAGEMENT" is selected, and
then press the [OK] key.
UTILITY MODE
USER MANAGEMENT
ADMIN. MANAGEMENT
COPY SETTING 1
3 Use the keypad to type in the administrator access code, and then
press the [OK] key.
ADMIN. MANAGEMENT
ADMIN. NO.:------
The "ADMIN. MANAGEMENT" menu appears.
2-28 FK-506
Page 63

Precaution
2
4 Press the [+] or [,] key until "COMM. SETTING" is selected, and then
press the [OK] key.
ADMIN. MANAGEMENT
REMOTE MONITOR
COMM.SETTING
USER SETTING
5 Press the [+] or [,] key until "TONE/PULSE" is selected, and then
press the [OK] key.
COMM.SETTING
TONE/PULSE
LINE MONITOR
PSTN/PBX
6 Press the [+] or [,] key until "TONE" or "PULSE" is selected, and then
press the [OK] key.
TONE/PULSE
TONE
PULSE
FK-506 2-29
Page 64

2
Precaution
– If "PULSE" was selected, select "10pps" or "20pps" in the next
menu that appears, and then press the [OK] key.
PULSE
10pps
20pps
The "COMM. SETTING" menu appears again.
2-30 FK-506
Page 65

Precaution
2
Selecting the telephone wiring system ("PSTN/PBX" parameter)
The connected wiring system can be set to either "PSTN" (Public Switched
Telephone Network) or "PBX" (Private Branch Exchange). If "PBX" is
selected, the outside line access number (or extension number) must be
specified. The outside line access number (or extension number) is
programmed with the [#] key.
1 Press the [Utility] key.
The "UTILITY MODE" menu appears.
2 Press the [+] or [,] key until "ADMIN. MANAGEMENT" is selected, and
then press the [OK] key.
UTILITY MODE
USER MANAGEMENT
ADMIN. MANAGEMENT
COPY SETTING 1
3 Use the keypad to type in the administrator access code, and then
press the [OK] key.
ADMIN. MANAGEMENT
ADMIN. NO.:******
The "ADMIN. MANAGEMENT" menu appears.
FK-506 2-31
Page 66

2
Precaution
4 Press the [+] or [,] key until "COMM. SETTING" is selected, and then
press the [OK] key.
ADMIN. MANAGEMENT
REMOTE MONITOR
COMM.SETTING
USER SETTING
5 Press the [+] or [,] key until "PSTN/PBX" is selected, and then press
the [OK] key.
COMM.SETTING
TONE/PULSE
LINE MONITOR
PSTN/PBX
6 Press the [+] or [,] key until "PSTN" or "PBX" is selected, and then
press the [OK] key.
PSTN/PBX
PSTN
PBX
2-32 FK-506
Page 67

Precaution
2
– If "PBX" was selected, type the outside line access number in the
next screen that appears, and then press the [OK] key.
PBX
PRE-FIX NO.:1_
The "COMM. SETTING" menu appears again.
FK-506 2-33
Page 68

2
Precaution
2-34 FK-506
Page 69

3
Faxing
Page 70

Page 71

Faxing
3Faxing
3.1 General transmission operation
This section contains information on the general operation for sending a fax.
2
Note
This is a G3 fax machine. Faxes can only be sent or received with this
machine if the recipient’s or sender’s machine complies with the G3
standard.
1 Press the [Fax] key.
The machine enters Fax mode, and
the Fax mode screen appears.
3
2 Position the document to be faxed.
– For details on positioning the document, refer to "Positioning the
document" on page 3-6.
FK-506 3-3
Page 72

3
Faxing
3 Select the Quality setting.
– For details on selecting the Quality setting, refer to "Selecting the
fax quality" on page 3-10.
4 Type in the fax number of the recipient.
– For details on specifying the recipient, refer to "Specifying a
recipient" on page 3-12.
Memory:100%
QUALITY:STD/TEXT
01234_
OTHER SETTING=
5 Press the [Start] key.
– If the document is loaded into the document feeder, the machine
starts scanning the document and sending the fax.
When the transmission is finished, a beep is sounded.
To stop the transmission, press the [Clear/Stop] key, and then
select "YES" in the screen that appeared.
– If the document is placed on the original glass, continue with step 6.
6 Press the [+] or [,] key until "AUTO DETECTION" or "MANUAL" is
selected, and then press the [OK] key.
BOOK SCAN
AUTO DETECTION
MANUAL:
– If "MANUAL" was selected, specify the paper size.
3-4 FK-506
Page 73

Faxing
3
7 To begin scanning, press the [OK] key.
– To change the size of paper to be scanned, press the [,] key, and
then specify the size.
Memory:100%
QUALITY:STD/TEXT
SCAN BOOK(AUTO)
SCAN=OK (SIZE= )
8 To continue scanning document pages, position the next document
page, and then press the [OK] key.
Repeat this step until all document pages have been scanned.
Memory:100%
QUALITY:STD/TEXT
NEXT PAGE?(AUTO)
SCAN=OK (TX=START)
9 After all document pages have been scanned, press the [Start] key.
The transmission begins.
When the transmission is finished, a beep is sounded.
To stop the transmission, press the [Clear/Stop] key, and then select
"YES" in the screen that appeared.
!
Detail
For details on canceling the transmission of a scanned document, refer
to "Canceling (deleting) a queued transmission" on page 3-35.
If the fax could not be sent, a transmission report is printed. For details,
refer to "Checking communication results (reports/lists)" on page 3-39.
FK-506 3-5
Page 74

3
3.2 Positioning the document
Loading the document into the document feeder
2
Reminder
Document pages bound with staples or paper clips can damage the
machine. Be sure to remove all staples and paper clips before faxing a
document.
1 Press the [Fax] key.
The machine enters Fax mode, and
the Fax mode screen appears.
2 Load the document into the document feeder with the side to be
scanned facing up.
Faxing
– A maximum of 50 sheets of plain A3-size paper can be loaded.
– Only a single page can be loaded if the document has a length of
432 mm (17 inches) or more.
3-6 FK-506
Page 75

Faxing
3 Slide the document guides to fit the size of document being loaded.
– Non-standard-sized documents with the following maximum sizes
can be scanned.
Maximum size Minimum size
297 mm
(11-3/4 inch)
210 mm
(Sizes less than 210 mm
are scanned as 210 mm.)
1000 mm
(39-1/4 inch)
Paper feed
direction
139.7 mm
(5-
1/2 inch)
Paper feed
direction
3
FK-506 3-7
Page 76

3
Faxing
!
Detail
If the memory does not contain data for received faxes or polling
reception, a maximum of 280 standard A4-size document pages can be
scanned and stored in the memory at one time. However, if the optional
expanded memory unit is installed, a maximum of 1,024 scanned pages
can be stored.
The scanned document is sent with a width of A4 w, B4 w or A3 w,
(Letter w, Legal w, Ledger w) whichever is closest to but greater than
the width of the document.
If the length of the document exceeds 1,000 mm (39-1/4 inches), this
machine may determine that a document misfeed occurred and stop
scanning.
Any part of the image within a 2-mm (1/16-inch) border around the edge
of the document cannot be scanned.
When a document with an A3-size (Ledger-size) width is scanned with
the "S-FINE" setting, a document with a maximum length of 900 mm (351/2 inches) can be scanned.
3-8 FK-506
Page 77

Faxing
3
Placing the document on the original glass
1 Press the [Fax] key.
The machine enters Fax mode, and
the Fax mode screen appears.
2 Lift open the document feeder, and then place the document on the
original glass with the side to be scanned facing down.
– Align the document on the scales above and to the left of the
original glass.
3 Close the document feeder.
FK-506 3-9
Page 78

3
3.3 Selecting the fax quality
Selecting one of the following image quality settings to match the type of
document (whether it contains a large amount of small print, detailed
illustrations or photos) to be faxed will produce a sharper result.
Document type Quality setting
Text documents (TEXT), photo documents (PHOTO), or documents containing
text and photos (TEXT/PHOTO)
Faxing
STD/FINE/S-FINE
3-10 FK-506
Page 79

Faxing
3
Selecting a Quality setting
1 Press the [Fax] key.
The machine enters Fax mode, and the Fax mode screen appears.
2 Position the document to be faxed.
3 Press the [Quality] key.
4 Press the [+] or [,] key until the desired Quality setting is selected, and
then press the [OK] key.
QUALITY
STD/TEXT
FINE/TEXT
S-FINE/TEXT
!
Detail
Depending on the recipient’s fax machine, it may not be possible to send
faxes using the "S-FINE/TEXT" or "S-FINE/PHOTO" setting. In this case,
the fax is sent with the "FINE/TEXT" or "FINE/PHOTO" setting.
If the "PHOTO" or "S-FINE/PHOTO" setting is selected, the fax may have
a decreased image quality, depending on the quality of the recipient’s fax
machine or on whether the document size is larger than the paper loaded
in the recipient’s fax machine.
FK-506 3-11
Page 80

3
3.4 Specifying a recipient
Specifying a single recipient
Use any of the following methods to specify a single recipient.
- Manual dialing
- One-touch dialing
- Speed dialing
- Group dialing
- Program dialing
- Phone book dialing
As an example, the following procedures describe how to send faxes using
the document feeder.
!
Detail
If the country code and recipient’s fax number are entered immediately
after the prefix for an international call (001, 0061 or 0041) when sending
international faxes, not enough time may be allowed for establishing a
connection, causing a busy signal to be heard. If this is the case, press
the [Redial/Pause] key twice before entering the country code and fax
number so that there is a pause of about 6 seconds after the prefix for
international calls is dialed. If a connection still cannot be established,
send the fax manually. For details, refer to "Faxing after completing a
telephone call (manual faxing)" on page 3-33.
Faxing
3-12 FK-506
Page 81

Faxing
3
Manual dialing
1 Press the [Fax] key to enter Fax mode.
2 Position the document to be faxed.
– Refer to "Positioning the document" on page 3-6.
3 If necessary, select the Quality setting.
– For details on selecting the Quality setting, refer to "Selecting the
fax quality" on page 3-10.
4 Using the keypad, type in the fax number of the recipient.
– F-codes (SUB and SID) can also be entered. Refer to "Using F-
codes" on page 4-3.
Memory:100%
QUALITY:STD/TEXT
01234_
OTHER SETTING=
5 Press the [Start] key.
Scanning and transmission begin.
!
Detail
A maximum of 30 digits can be entered for the fax number.
Characters that can be entered: Numbers (0 through 9), , #, spaces, and
pauses
For details on entering text, refer to "Entering text" on page 2-12.
If the [Redial/Pause] key is pressed while entering the fax number, a 3second pause is added. A pause appears as "P" in the display.
If the machine is connected to a PBX line and the outside line access
number has been specified as described in "Selecting the telephone
wiring system ("PSTN/PBX" parameter)" on page 2-31, enter "#" to dial
the outside line access number automatically.
FK-506 3-13
Page 82

3
Faxing
One-touch dialing
If one-touch dial keys have already been programmed with fax numbers, the
fax number of a recipient can be specified simply by pressing the
corresponding one-touch dial key.
2
Note
For details on programming a one-touch dial key, refer to "Registering
one-touch dial destinations" on page 6-21.
1 Position the document to be faxed.
– Refer to "Positioning the document" on page 3-6.
2 If necessary, select the Quality setting.
– For details on selecting the Quality setting, refer to "Selecting the
fax quality" on page 3-10.
3 Press the one-touch dial key ([01] through [32]) programmed with the
destination where the fax is to be sent.
– When the switching plate is closed in the lower position, the keys
are numbered 01 through 16.
3-14 FK-506
Page 83

Faxing
3
– When the switching plate is open in the upper position, the keys are
numbered 17 through 32.
– If a one-touch dial key was incorrectly pressed, press the
[Clear/Stop] key to clear the specified destination.
4 Press the [Start] key.
Scanning and transmission begin.
To stop the transmission, press the [Clear/Stop] key, and then press
the [OK] key when the next screen appears.
FK-506 3-15
Page 84

3
Faxing
Speed dialing
If speed dial numbers have already been registered, the fax number of a
recipient can be specified quickly by entering the corresponding speed dial
number.
2
Note
For details on programming speed dial numbers, refer to "Registering
speed dial destinations" on page 6-27.
1 Position the document to be faxed.
– Refer to "Positioning the document" on page 3-6.
2 If necessary, select the Quality setting.
– For details on selecting the Quality setting, refer to "Selecting the
fax quality" on page 3-10.
3 Press the [Speed Dial] key.
4 Use the keypad to type in the 3-digit speed dial number, and then press
the [OK] key.
Memory:100%
QUALITY:STD/TEXT
SPEED DIAL:011
-PRESS OK KEY-
– If the number was incorrectly entered, press the [Reset] key, and
then type in the correct number.
3-16 FK-506
Page 85

Faxing
3
5 Press the [Start] key.
Memory:100%
QUALITY:STD/TEXT
AAA OASAKA
OTHER SETTING=
Scanning and transmission begin.
To stop the transmission, press the [Clear/Stop] key, and then select
"YES" in the screen that appeared.
FK-506 3-17
Page 86

3
Faxing
Group dialing
If one-touch dial keys have already been programmed with a group of fax
numbers, the fax numbers of all destinations in the group can be specified
simply by pressing the corresponding one-touch dial key.
2
Note
For details on programming a one-touch dial key with a group of
recipients, refer to "Registering a group of fax numbers" on page 6-33.
1 Position the document to be faxed.
– Refer to "Positioning the document" on page 3-6.
2 If necessary, select the Quality setting.
– For details on selecting the Quality setting, refer to "Selecting the
fax quality" on page 3-10.
3 Press the one-touch dial key ([01]
through [32]) programmed with the
group of fax numbers where the fax
is to be sent.
– If a one-touch dial key was
incorrectly pressed, press the
[Clear/Stop] key to clear the
specified destination.
– When the switching plate is
closed in the lower position, the
keys are numbered 01 through 16.
– When the switching plate is open in the upper position, the keys are
numbered 17 through 32.
3-18 FK-506
Page 87

Faxing
3
4 Press the [Start] key.
Memory:100%
QUALITY:STD/TEXT
NAGOYA
OTHER SETTING=
Scanning and transmission begin.
To stop the transmission, press the [Clear/Stop] key, and then select
"YES" in the screen that appeared.
FK-506 3-19
Page 88

3
Faxing
Program dialing
If one-touch dial keys have already been programmed with fax numbers and
a transmission/reception function (such as timer transmission or polling
reception), that function can be performed simply by pressing the
corresponding one-touch dial key.
2
Note
For details on registering a program, refer to "Registering a dialing
program" on page 6-39.
1 Position the document to be faxed.
– Refer to "Positioning the document" on page 3-6.
– For polling reception, this step can be skipped.
2 If necessary, select the Quality setting.
– For details on selecting the Quality setting, refer to "Selecting the
fax quality" on page 3-10.
– For polling reception, this step can be skipped.
3 Press the one-touch dial key ([29] through [32], labeled in blue)
programmed with the desired function.
– When the switching plate is open in the upper position, the keys are
numbered 17 through 32.
– If a one-touch dial key was incorrectly pressed, press the
[Clear/Stop] key to clear the specified destination.
3-20 FK-506
Page 89

Faxing
3
4 Press the [Start] key.
The registered function automatically begins.
To stop the transmission, press the [Clear/Stop] key, and then select
"YES" in the screen that appeared.
!
Detail
To cancel a timer transmission, press the [Function] key, and then select
"CANCEL RESERV.". For details, refer to "Canceling (deleting) a queued
transmission" on page 3-35.
FK-506 3-21
Page 90

3
Faxing
Phone book dialing
Pressing the [Phone Book] key displays all destinations registered with onetouch dial keys and speed dial numbers, allowing the desired destination to
be searched for and selected.
1 Position the document to be faxed.
– Refer to "Positioning the document" on page 3-6.
2 If necessary, select the Quality setting.
– For details on selecting the Quality setting, refer to "Selecting the
fax quality" on page 3-10.
3 Press the [Phone Book] key.
4 Press the [+] or [,] key until "LIST" or "SEARCH" is selected, and then
press the [OK] key.
PHONE BOOK
LIST
SEARCH
3-22 FK-506
Page 91

Faxing
3
– If "LIST" was selected: The list of all destinations registered with
one-touch dial keys and speed dial numbers appears. Press the [+]
or [,] key until the desired destination is selected, and then press
the [OK] key. (Press the [*] or [)] key to search for the desired
starting character.) After selecting the destination, continue with
step 7.
PHONE BOOK LIST
AAA NEW YORK
AAA OSAKA
AAA TOKYO
– If "SEARCH" was selected: A screen appears, allowing you to enter
the text to be searched for. Continue with step 5.
5 Use the keypad to type in the first few characters of the name
registered for the desired destination, and then press the [OK] key.
– A maximum of 10 characters can be entered.
PHONE BOOK SEARCH
:AAA_
A screen appears, containing the list of destinations registered with a
name beginning with the entered characters.
FK-506 3-23
Page 92

3
Faxing
6 Press the [+] or [,] key until the desired destination is selected, and
then press the [OK] key.
PHONE BOOK SEARCH
AAA NEW YORK
AAA OSAKA
AAA TOKYO
7 Press the [Start] key.
Scanning and transmission begin.
3-24 FK-506
Page 93

Faxing
3
Chain dialing
A fax can be sent after specifying destinations using a combination of the
one-touch dial keys, the speed dial numbers, directly typing in the fax
number, or pressing the [Redial/Pause] key.
2
Note
Use memory transmission to send a fax to multiple destinations.
Use any of the following methods to specify the destinations.
- Manual dialing
- One-touch dialing
- Speed dialing
- Phone book dialing
The following procedure describes how to specify destinations using the
one-touch dial keys, then directly typing in the fax number.
1 Press the [On Hook] key.
The indicator on the [Memory TX] key
goes off, and then "*ON HOOK*"
appears in the display.
2 Press the one-touch dial key for the desired destination, and then press
the [Start] key.
Memory:100%
QUALITY:STD/TEXT
AAA
FK-506 3-25
Page 94

3
Faxing
3 Use the keypad to type in the fax number of the recipient, and then
position the document to be faxed.
– Refer to "Positioning the document" on page 3-6.
Memory:100%
QUALITY:STD/TEXT
AAA
4 Press the [Start] key.
The registered function automatically begins.
To stop the transmission, press the [Clear/Stop] key, and then select
"YES" in the screen that appeared.
3-26 FK-506
Page 95

Faxing
3
Specifying multiple destinations (broadcast transmission)
A document can be sent to multiple destinations with a single operation. This
is called a broadcast transmission.
2
Note
Use memory transmission to send a fax to multiple destinations.
Use any of the following methods to specify multiple destinations.
- Manual dialing
- One-touch dialing
- Speed dialing
- Group dialing
- Phone book dialing
Destinations can be specified using any combination of the methods listed
above.
!
Detail
A maximum of 255 destinations can be specified for the same
transmission.
When the one-touch dial keys are used, a maximum of 32 destinations
can be specified.
When the speed dial numbers are used, a maximum of 240 destinations
can be specified.
When fax numbers are directly typed in, a maximum of 16 destinations
can be specified.
1 Position the document to be faxed.
– Refer to "Positioning the document" on page 3-6.
2 Press the [Function] key.
The "FAX FUNCTION" menu
appears.
FK-506 3-27
Page 96

3
Faxing
3 Press the [+] or [,] key until "BROADCAST" is selected, and then press
the [OK] key.
FAX FUNCTION
BROADCAST
MAILBOX TX
PRINT MAILBOX RX
4 Specify a recipient, and then press the [OK] key.
BROADCAST
DESTINATION
– When specified using the one-touch dial keys: Press the one-touch
dial key programmed with the destination where the fax is to be
sent.
– When specified using speed dial numbers: Press the [Speed Dial]
key, and then type in the 3-digit speed dial number of the
destination where the fax is to be sent.
– When specified using group dialing: Press the one-touch dial key
programmed with the group of destinations where the fax is to be
sent.
– When specified using the phone book: Press the [Phone Book] key,
and then specify the destination after selecting either "LIST" or
"SEARCH". (Refer to "Phone book dialing" on page 3-22.)
– When directly typed in: Type in the fax number of the destination
where the fax is to be sent.
3-28 FK-506
Page 97

Faxing
3
5 To add a recipient, select "ADD", and then press the [OK] key.
BROADCAST
ADD
CHECK/EDIT
RETURN
– Repeat steps 4 and 5 until all of the desired recipients have been
added.
6 Select "RETURN", and then press the [OK] key.
BROADCAST
ADD
CHECK/EDIT
RETURN
7 If necessary, select the Quality setting.
– For details on selecting the Quality setting, refer to "Selecting the
fax quality" on page 3-10.
8 Press the [Start] key.
Scanning and transmission begin.
FK-506 3-29
Page 98

3
Faxing
!
Detail
Since the result report is printed after the transmission is finished, you
can check whether the fax was sent to all destinations.
To stop the transmission, press the [Clear/Stop] key, and then select
"YES" in the screen that appeared. Performing this operation cancels all
selected destinations.
To cancel a timer transmission, press the [Function] key, and then select
"CANCEL RESERV.". For details, refer to "Canceling (deleting) a queued
transmission" on page 3-35.
Manual redialing
Dialing the last destination where a fax was sent is called "redialing".
1 Position the document to be faxed.
– Refer to "Positioning the document" on page 3-6.
2 If necessary, select the Quality setting.
– For details on selecting the Quality setting, refer to "Selecting the
fax quality" on page 3-10.
3 Press the [Redial/Pause] key.
The fax number of the last
destination where a fax was sent is
displayed.
4 Press the [Start] key.
Scanning and transmission begin.
3-30 FK-506
Page 99

Faxing
3.5 Operations while scanning documents
If the memory becomes full
If the memory becomes full while documents are being scanned when
queuing a transmission (specifying a fax transmission while another fax
transmission job is being performed) or for a timer transmission, a message
appears, allowing you to select whether to send the scanned pages or cancel
the transmission.
MEM.FULL/TX CANCEL
YES
NO
2
Note
If the memory becomes full (0% appears for the amount of memory
available), all pages that have been scanned are erased.
3
If the transmission is to be canceled
The data for the scanned pages are erased. Wait until all fax transmission or
reception operations are finished, check the amount of memory that is
available, and then perform the fax transmission again.
If the scanned pages are to be sent
If the document was scanned from the original glass, send the scanned
document pages, and then finish the operation. Check the amount of
memory that is available, and then perform the fax transmission again.
If the document was scanned from the document feeder or reverse
automatic document feeder, send the scanned document pages, and then
scan and send the document pages remaining in the document feed tray.
FK-506 3-31
Page 100

3
3.6 If the fax cannot be sent
While faxing, if the recipient’s fax machine is busy or does not answer or if,
for any other reason, such as due to a transmission error, the fax is not sent
correctly, this machine automatically redials the fax number. The document
to be sent is treated as a queued fax waiting for redialing until the fax number
is redialed.
If the redialing or fax transmission could not be completed correctly, a
transmission result report is printed.
2
Note
For details on the transmission result report, refer to "Types of
reports/lists" on page 3-42.
Faxing
3-32 FK-506
 Loading...