

Page 1

DEVA Broadcast Limited is an ISO 9001:2008 certified company.
65 Aleksandar Stamboliyski Str., 8000 Burgas, Bulgaria
Tel.: +359 56 820027, Fax: +359 56 836700
Email: office@devabroadcast.com, Web: www.devabroadcast.com
DB4000
FM Radio Monitoring Receiver
Quick User Guide
BEFORE YOU USE THIS PRODUCT
In order to be able to enjoy all the benefits of owning your new
DEVA product, please verify first that the latest software and
firmware release were installed.
Visit www.devabroadcast.com/downloads
recent software and firmware downloads, prior the installation.
for the most
Page 2

This Quick user guide will make the installation of DB4000 - FM Radio Monitoring Receiver quick and
easy. Applying these principles, you can simplify the process and save yourself extra time and effort. For
more information about the Safety precautions and the Operating environment recommendations
please refer to the User Manual.
1. Install the unit on its operation place;
2. Before connecting the device to the power supply, make sure that the internal selector is in
accordance with the mains supply at your location. DB4000 Power Supply Factory Settings are 115230V, 50-60Hz AC mains ;
3. Connect the antenna cable to the RF antenna input connector located on the rear panel of the device;
4. Connect DB4000 to the TCP/IP network using a direct network cable.
In order to establish connection with DB4000 you have to install “DB4000 Device Manager”
Software. Connect your PC to Internet or to the Local network. The network must be properly configured
to allow access to the device via TCP/IP.
NOTE: To register the device in the software you need to know its Serial Number, IP Address of the device
and both Data and Status Port.
Each device has a factory assigned Serial number. This number can be found on the rear panel of the
device.
NETWORK >3.1 IP :192.168.020.070
3.2 GATEWAY :192.168.020.001
NETWORK >
3.6 TCP CON. PORT:2200
3.5 DHCP :Enabled
91.10 ST RDS 2. LOGGER SETTINGS
>3. NETWORK CONFIG
16:16
NETWORK >
3.10 STATUS PORT :2201
3.9 HTTP PORT :2204
1. Connect the device to the local network or to the
Internet by LAN cable;
2. Using the Front panel navigational menu press
“OK” button to enter the device Menu;
3. Using the navigational buttons find the
3.
4. Press the “OK” Button to enter the selected
section. A screen containing information about
the IP Address of the device and the GATEWAY
will appear;
Network Configuration menu;
The Serial number of DB4000 could also be
verified using the front panel menu:
1. Press "OK" to enter the device Menu;
2. Using the DOWN button find the 6. Other
settings menu and press "OK" to enter it;
3. Using the DOWN button find the 6.8 Serial and
MAC menu and press "OK" to enter it.
If all steps are performed correctly, the screen
containing information about the Serial number and
the MAC Address will appear.
OTHER SETTINGS >6.1 TIME SETTINGS
6.2 RDS STANDARD :RDS
91.10 ST RDS 16:16 5. GSM MODEM
>6. OTHER SETTINGS
OTHER SETTINGS 6.7 MEMORY SPACE
>6.8 SERIAL AND MAC
Serial Number:12B50A11 Press
MAC Address : 00-04-A3-00-12-11 Button
5. Using the DOWN button, find 3.6 TCP Con. Port sub-menu. This is the Data port used by the device;
6. Using the DOWN button, find 3.10 Status Port sub-menu.
IP Address Identification
STEP 4
DB4000 Identification
STEP 3
PC Configuration
STEP 2
Connection
STEP 1
Page 3
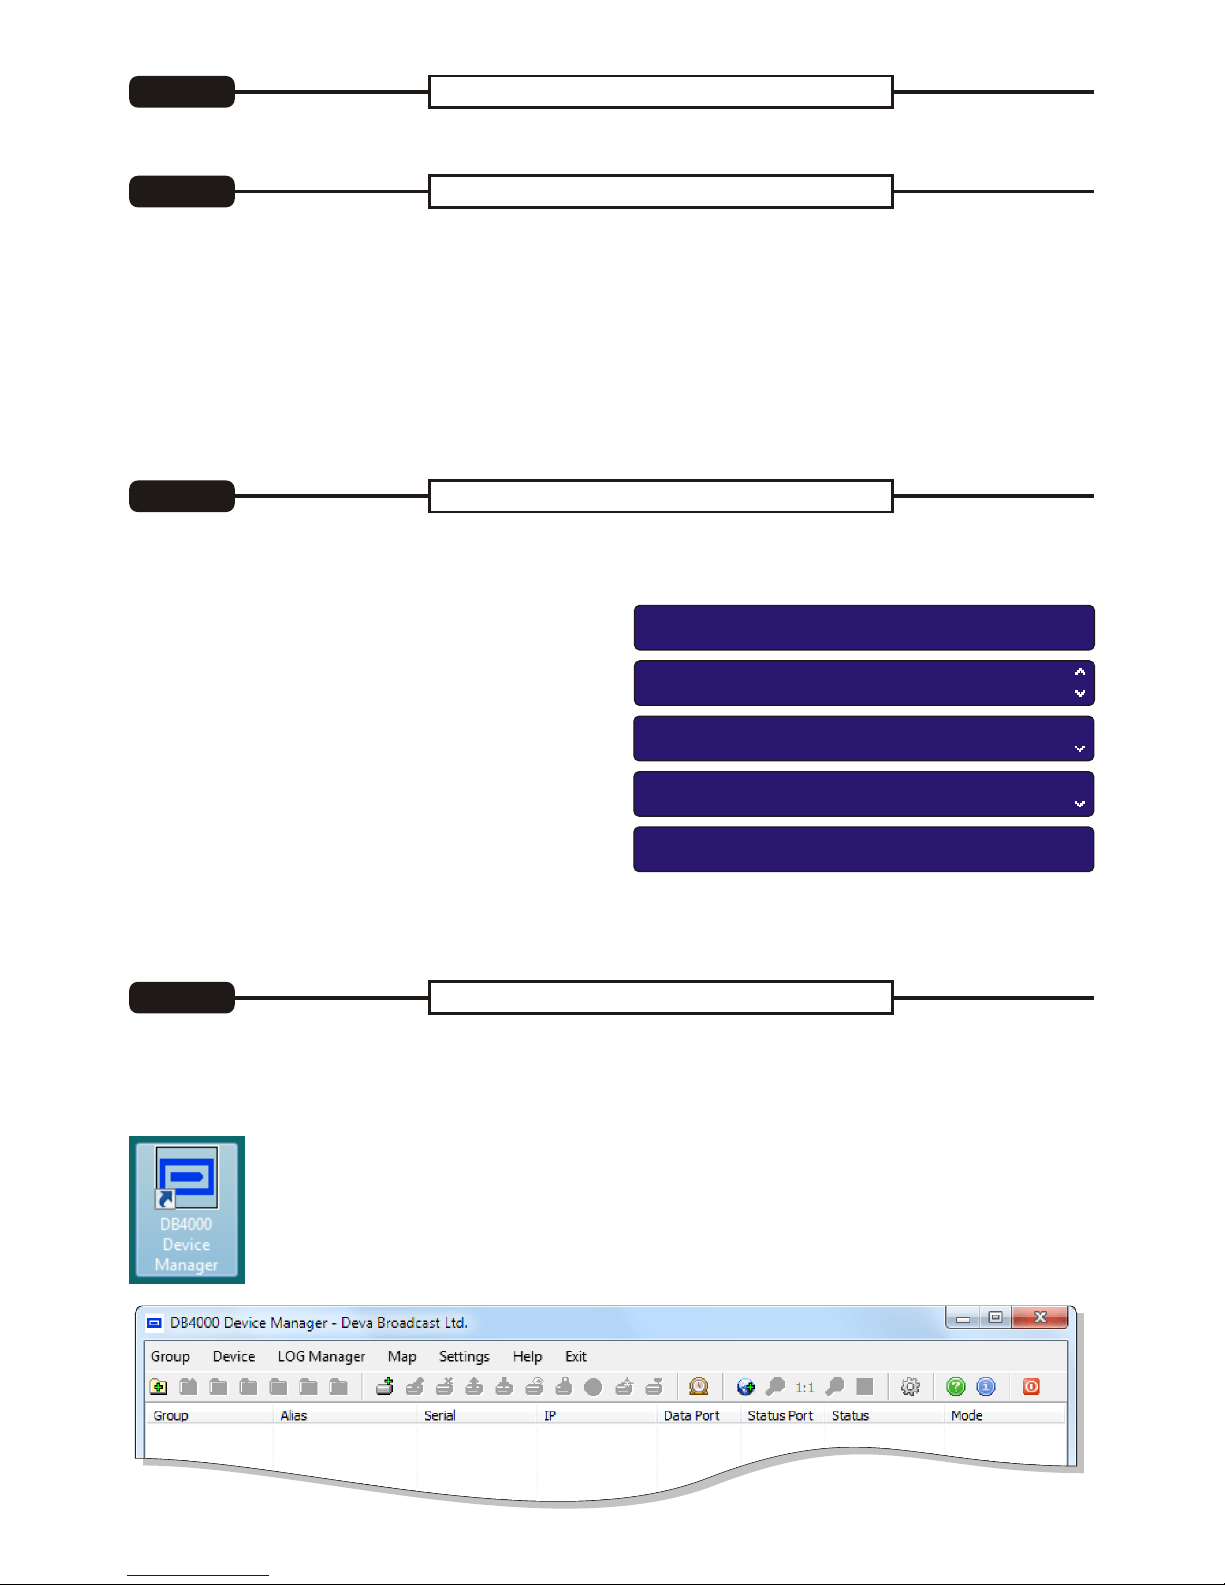
After the installation process is completed a shortcut of the Software will appear on the
desktop of your PC.
Double click on the shortcut to enter the Software. This will open the main application
window. Most of the functions will be disabled, because there will be no devices listed in the
Device Manager.
Depending on the TCP/IP network properties there are two options for Network assigning.
Enable the DHCP client following steps 1 to 4 from Option 1. If your network uses DHCP server for
assigning an IP Addresse, such will be assigned automatically to DB4000.
IMPORTANT: Make sure that your network DHCP server supports 'automatic allocation' or 'static
allocation' methods (Static DHCP Assignment) before using the DHCP client.
When these modes are activated, the DHCP server supports a record of past IP address assignments
(bounded to DB4000's MAC address - refer to Step 3), so that it can preferentially assign to the device the
same IP address that the client previously had. Please, if you are not familiar with the matter, consult with
your network administrator about the appropriate settings and for further assistance.
1. Use the Installation file which can be found on the supplied CD or downloaded from
www.devabroadcast.com/downloads;
2. Double click on the installation file to launch the Wizard, then follow the instructions.
In order to receive all required settings, please refer to your network administrator. If you do not have
one all settings can be obtained automatically by using the internal DHCP client (refer to Step 5, Option 2).
5. Enter the IP Address manually (3.1 IP sub-menu );
6. Save the changes - enter 3.12 Back sub-menu, press the LEFT button to select "Save and quit", then
press "OK".
1. Using the Front panel navigational menu press
“OK” button to enter the device Menu;
2. Using the navigational buttons find the
3.Network Configuration menu and press the
“OK” button;
3. Find the 3.5 DHCP sub-menu. Press the RIGHT
navigational button to enter this option;
4. Disable the DHCP using the UP and DOWN
navigational buttons and press LEFT to exit;
NETWORK >
3.6 TCP CON. PORT:2200
3.5 DHCP :Enabled
NETWORK
>3.12 BACK
3.11 WAN IP :192.168.020.082
91.10 ST RDS 2. LOGGER SETTINGS
>3. NETWORK CONFIG
16:16
NETWORK >3.1 IP :192.168.020.070
3.2 GATEWAY :192.168.020.001
NETWORK
>3.12 BACK QUIT *SAVE & QUIT*
3.11 WAN IP :192.168.020.082
Device Manager Software Installation
STEP 6
Configuring using Static IP Address
STEP 5.2
Configuring using DHCP Server
STEP 5.1
Network Settings
STEP 5
Page 4

Please refer to the User manual for detailed information on
how to configure and explore your device.
?Group Name is used for easier recognition of the
device location (site, town, country, etc.);
?Alias is user-defined name for each device and along
with Group Name makes the devices unique and easy
to identify;
?Serial Number is the factory number of the device. It is
a prerequisite for further device operations (Step
2.1);
?Mode defines the software behavior but it is
uninfluential on DB4000 functions;
?IP Address Must be configured and taken from the
Device (Step 2.2);
?Data Port is the main communication port used by the
software (Step 2.3);
?Status Port is for the status query (Step 2.3);
?FTP User and FTP Password are for FTP access
only. Default values are: user - admin, pass - deva;
?Password is to protect from unauthorized access.
Default password: 1234;
Fill in the needed information and press "OK".
Immediately after the data is confirmed, the software will try to establish connection with the specified
IP and Status Port to verify the Device. If the connection is successful, the Device will be added promptly,
otherwise software will ask for further actions.
In order to establish connection with the
device follow these steps:
- Press "View Device Button" or
select "View Device" from Device
Menu;
- Device Control Window will appear;
- Press the "Connect" button.
Each device has its own Control Window,
which displays specific functions and
readings.
When the device is not connected most of
the functions and buttons are disabled,
otherwise the Control Window looks like this:
Follow these steps in order to define a new device:
- press the "New Device Button" ;
- or select "New Device" from Device Menu.
A dialog box requiring obligatory information about the device will appear:
View Device
STEP 8
Defining a New Device
STEP 7
 Loading...