

Page 1
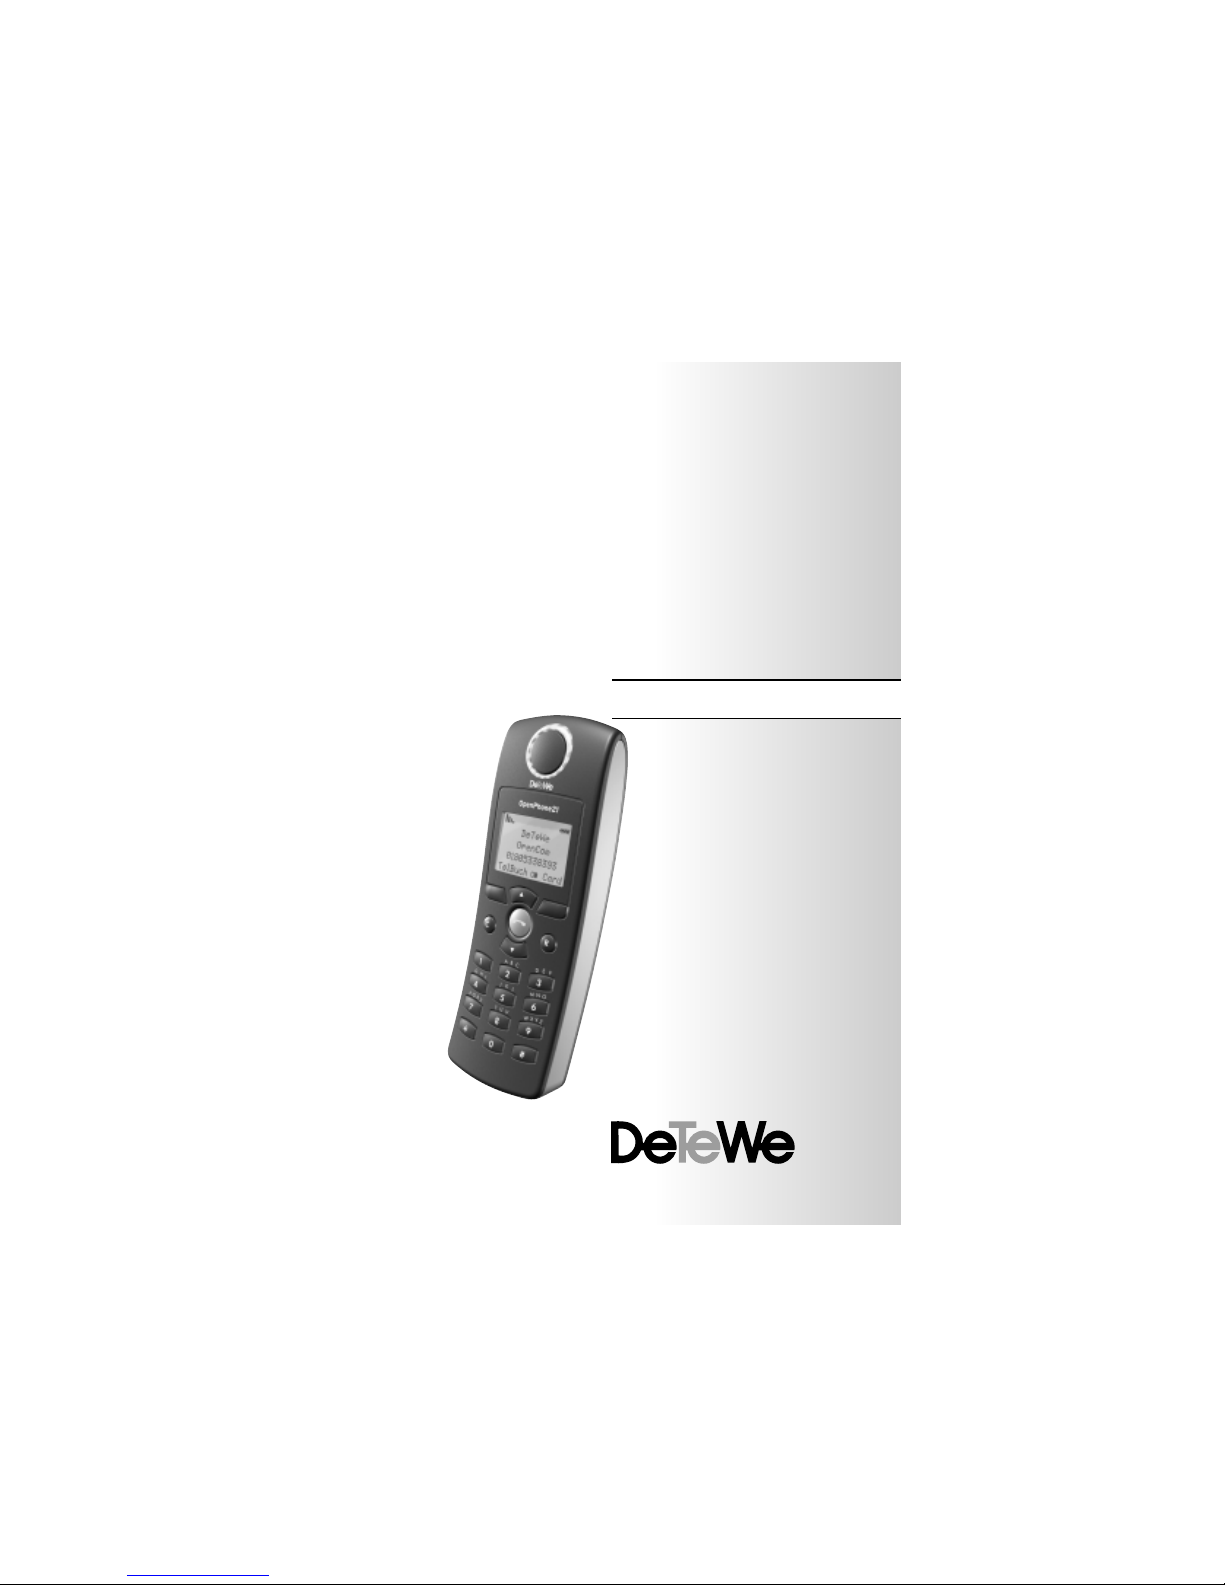
OpenPhone 21
User Guide
Page 2

Thank you for choosing this
DeTeWe product. Our products
meet the highest quality demands
and are outstandingly designed.
The following operating instructions
will guide you through the operation of your OpenPhone 21, and
answer all the important questions
you may have.
Should you require further assistance or information, please contact
the person responsible for your system or your dealer.
In addition, an expert adviser can be
contacted on our service number
+49 18 05 33 83 93 *
24 hours a day, seven days a week.
You can also contact us as follows:
fax: +49 18 05 33 83 94 *
e-mail: [email protected]
Internet: www.detewe.de
We hope you enjoy using your
OpenPhone 21.
OpenPhone 21
in the OpenCom 100
Communications System
General . . . . . . . . . . . . . . . . . . . . . . . .3
Glossary . . . . . . . . . . . . . . . . . . . . . . .3
The Features of Your Telephone
Using Your Telephone . . . . . . . . . . .5
Safety Precautions . . . . . . . . . . . . . .5
Power Supply . . . . . . . . . . . . . . . . . . .5
Usage . . . . . . . . . . . . . . . . . . . . . . . . .5
General . . . . . . . . . . . . . . . . . . . . . . . .5
DECT and GAP . . . . . . . . . . . . . . . . . .6
Installation . . . . . . . . . . . . . . . . . . . .7
Installation Location . . . . . . . . . . . . .7
Inserting/Removing the Battery
Pack . . . . . . . . . . . . . . . . . . . . . . . . . . .7
Connecting the Charger . . . . . . . . . .8
Important Information about the
Battery . . . . . . . . . . . . . . . . . . . . . . . .8
Charging and Discharging . . . . . . . .9
Charging the Battery . . . . . . . . . . . .9
Commissioning . . . . . . . . . . . . . . . . .9
Charging and Operating Times . . .9
Charge Display . . . . . . . . . . . . . . . .10
Charge Warning . . . . . . . . . . . . . . .10
Commissioning . . . . . . . . . . . . . . . .10
Enrolling the Handset . . . . . . . . . .10
Display and Keys . . . . . . . . . . . . . . .11
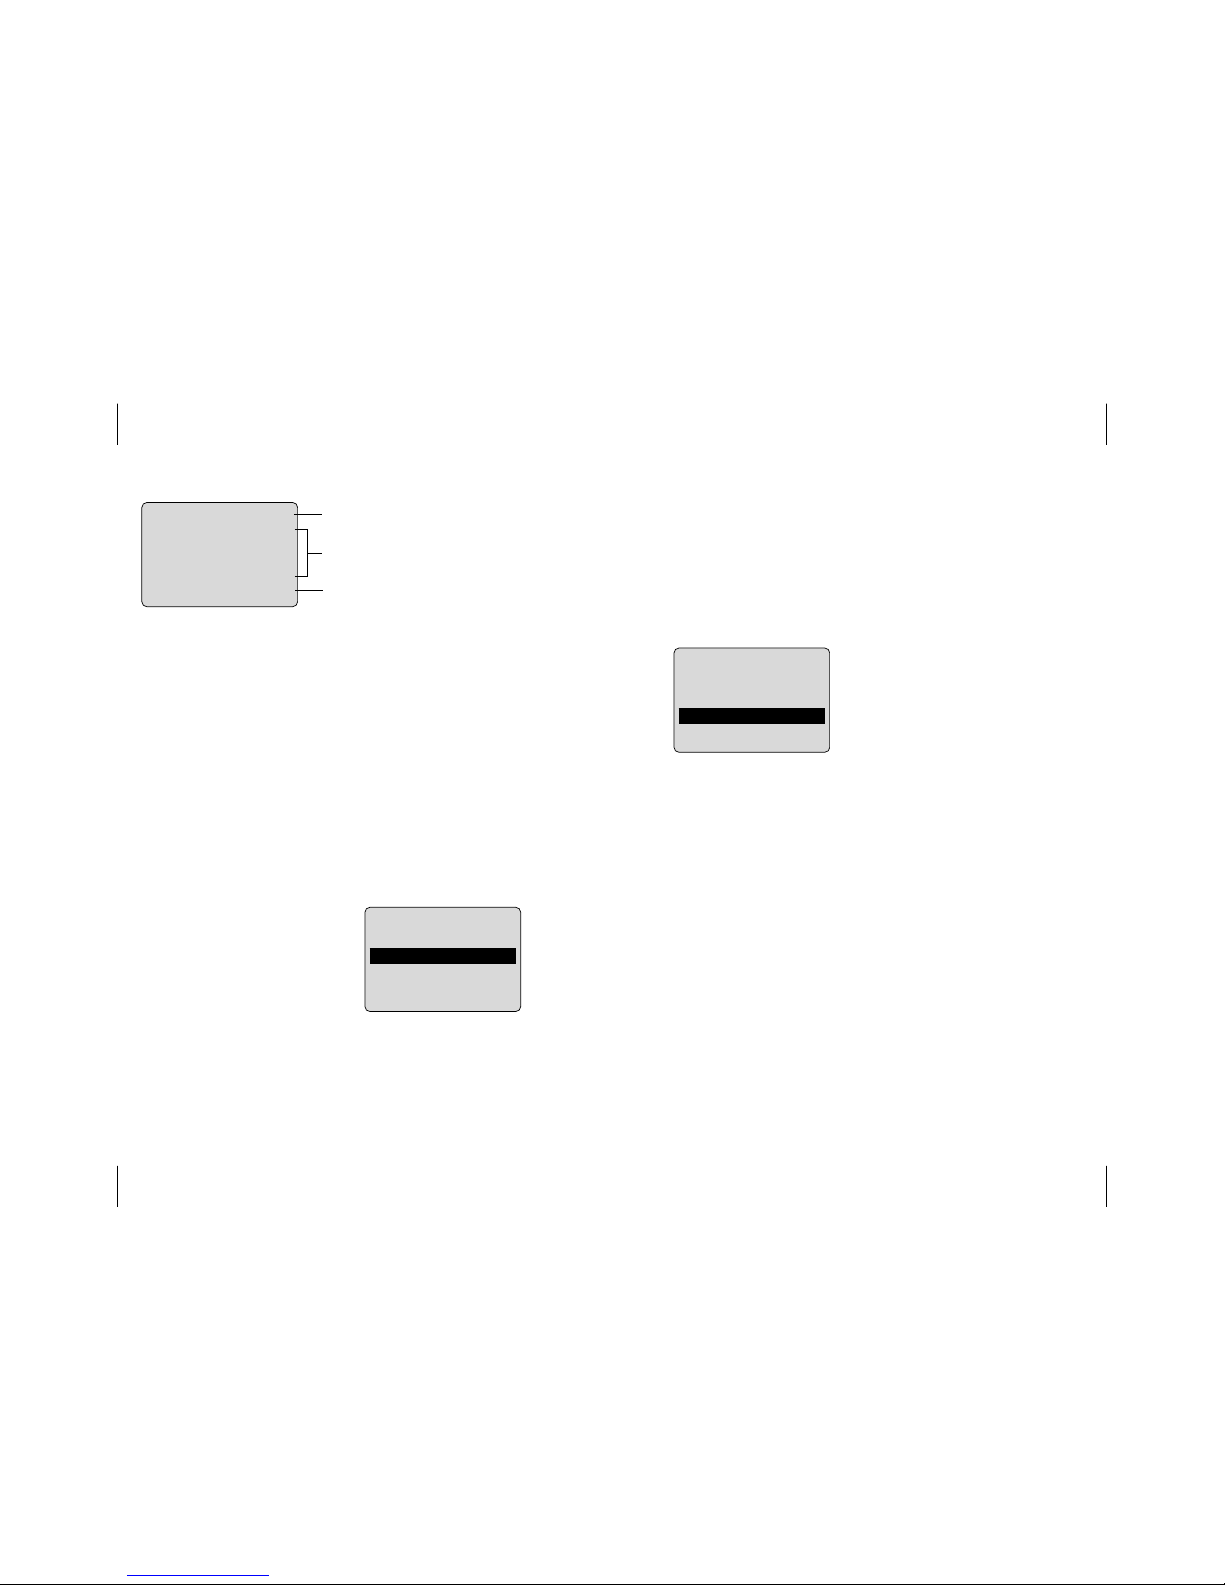
Display Arrangement . . . . . . . . . . .12
Symbol Line . . . . . . . . . . . . . . . . . . .12
Text Lines . . . . . . . . . . . . . . . . . . . . .12
Softkey Line . . . . . . . . . . . . . . . . . . .12
Illumination . . . . . . . . . . . . . . . . . . .13
1
Contents
Softkeys and Keys . . . . . . . . . . . . . .13
Softkey: Arrow Keys . . . . . . . . . . . .13
Softkey: OK . . . . . . . . . . . . . . . . . . . .14
Softkey: Esc . . . . . . . . . . . . . . . . . . .14
Cancel Key . . . . . . . . . . . . . . . . . . . .14
R-Key . . . . . . . . . . . . . . . . . . . . . . . . .14
Text Input . . . . . . . . . . . . . . . . . . . . .15
Quick Switch . . . . . . . . . . . . . . . . . .16
Automatic Hide . . . . . . . . . . . . . . . .16
Telephoning
General . . . . . . . . . . . . . . . . . . . . . . .17
Display of Operation . . . . . . . . . . .17
Switching the Handset On/Off . . .17
Keypad Lock On/Off . . . . . . . . . . . .17
Adjusting the Loudspeaker
Volume . . . . . . . . . . . . . . . . . . . . . . .17
Muting . . . . . . . . . . . . . . . . . . . . . . .17
Optical Call Indicator . . . . . . . . . . .17
Internal and External Telephone
Numbers . . . . . . . . . . . . . . . . . . . . . .18
Multiple Connections . . . . . . . . . . .18
VF Postdialling . . . . . . . . . . . . . . . . .18
Display of Call Charges and Call
Duration . . . . . . . . . . . . . . . . . . . . . .18
Making a Call from the Redial
Stack . . . . . . . . . . . . . . . . . . . . . . . . .18
Black- and Whitelists . . . . . . . . . . .19
Keypad Dialling . . . . . . . . . . . . . . . .19
Least Cost Routing (LCR) . . . . . . . .19
Transmission of Your Telephone
Number . . . . . . . . . . . . . . . . . . . . . .19
CLIP . . . . . . . . . . . . . . . . . . . . . . . . . .19
CLIR . . . . . . . . . . . . . . . . . . . . . . . . . .20
Menu Before and During a Call . .20
“Selection” Menu in the Idle State20
External/Internal Calls . . . . . . . . . .23
Making a Call . . . . . . . . . . . . . . . . . .23
Welcome to DeTeWe
Person responsible for your system:
Name: ....................................................
Tel: ........................................................
Page 3

3
Making a Call from the
Redial Stack . . . . . . . . . . . . . . . . . . .23
Making a Call from the
Phone Book . . . . . . . . . . . . . . . . . . .24
Making a Call from the Call List . .24
Ending a Call . . . . . . . . . . . . . . . . . .24
“Calling...” Menu . . . . . . . . . . . . . . .25
“Busy” Menu . . . . . . . . . . . . . . . . . .25
Accepting a Call . . . . . . . . . . . . . . .26
Normal Calls . . . . . . . . . . . . . . . . . . . .26
VIP Calls . . . . . . . . . . . . . . . . . . . . . .26
Calls During a Conversation . . . . .27
“Call” Menu . . . . . . . . . . . . . . . . . . .27
“Call Waiting” Menu . . . . . . . . . . . .27
Consultation, Toggle, Transfer
and Conference . . . . . . . . . . . . . . . .28
Consultation / Toggle
via the R-Key . . . . . . . . . . . . . . . . . .28
Transferring an Internal/External
Call to an Internal Subscriber . . . .28
Transferring an External Call to an
External Subscriber . . . . . . . . . . . . .29
“Subscriber held” Menu . . . . . . . . .29
Internal/External 3-Party-
Conference . . . . . . . . . . . . . . . . . . . .29
“Conference“ Menu . . . . . . . . . . . .30
Special Calls / Conversations . . . . .31
Baby Call . . . . . . . . . . . . . . . . . . . . . .31
Doorbell, Entrance Intercom Call,
Door Opener . . . . . . . . . . . . . . . . . .31
Announcement . . . . . . . . . . . . . . . .32
Answering Callbacks . . . . . . . . . . .32
Making a Call from the
Telephone Book . . . . . . . . . . . . . . .32
The Telephone Book in Your
2
Contents
Communications System . . . . . . . .32
“Phone book“ Menu . . . . . . . . . . . .33
Speed Dialling . . . . . . . . . . . . . . . . .33
Features and Menus
Feature Settings . . . . . . . . . . . . . . .34
Menus . . . . . . . . . . . . . . . . . . . . . . . .34
Star and Hash Keys . . . . . . . . . . . . .34
“Main” Menu . . . . . . . . . . . . . . . . . .35
“Calls” Menu . . . . . . . . . . . . . . . . . .35
“Call forwarding” Menu . . . . . . . . .36
“Messages” Menu . . . . . . . . . . . . . .37
“Phone Settings” Menu . . . . . . . . .38
“Protection“ Menu . . . . . . . . . . . . .41
“Connections“ Menu . . . . . . . . . . .42
“Phone book” Menu . . . . . . . . . . . .43
“Voicebox” Menu . . . . . . . . . . . . . .44
“Central Settings“ Menu . . . . . . . .44
Setting Variants in Other
Communications Systems . . . . . . .45
General . . . . . . . . . . . . . . . . . . . . . . .45
Keypad Lock On/Off . . . . . . . . . . . .45
“Ringer Settings” Menu . . . . . . . . .45
“Phone Book Settings” Menu . . . .46
“System“ Menu . . . . . . . . . . . . . . . .47
“Telephone Options“ Menu . . . . .48
Appendix
Care and Maintenance . . . . . . . . . .50
Service and Guarantee . . . . . . . . . .50
Technical Specifications . . . . . . . . .51
Menu Structure – Main Menu . . .52
Menu Structure – Local Functions .53
Index of Keywords . . . . . . . . . . . . .54
Declaration of Conformity . . . . . . .57
OpenPhone 21
in the OpenCom 100 Communications
System
General
The OpenPhone 21 is a telecommunications terminal for use with your
OpenCom 100 communications system.
The newly-designed menus enable
ease of operation and rapid access
to the many features and functions
of your system.
Make yourself familiar with your
telephone equipment. You will discover many new functions that
make communication and organisation easier.
Glossary
These operating instructions
describe all the basic functions of
your telephone. Should you require
further information on the system
features, please refer to the
glossary
supplied with your communications
system.
Page 4

Safety Precautions
Only use this product in countries
where the relevant authorities have
authorised its operation.
The CE symbol on the product confirms that it meets the technical
guidelines on user safety and electromagnetic compatibility valid at
the time of authorisation, in accordance with the European Directive
91\263\EEC.
Please also refer to the other documentation supplied for safety precautions relating to the components
of your telephone system.
Power Supply
This product requires a 230 V alternating current power supply *. This
product can only be switched off
only by removing the adapter plug
from the mains socket.
* The mains supply voltage in some countries
is 110 V. The adapter plug is designed accordingly.
5
The Features of Your Telephone
Using Your Telephone
4
The Features of Your Telephone
Using Your Telephone
Usage
This handset, like any cordless telephone, operates using radio signals,
which cannot guarantee the set-up
of a connection in all conditions.
Therefore, you should never rely
solely upon any cordless telephone
for essential communication (e.g.
medical emergencies).
General
The OpenPhone 21 is a cordless
telephone for operation in the
OpenCom 100 communications system. In addition to convenient softkey control for the support of the
system features, this telephone also
offers a variety of features that
enable you to make calls more
easily.
To increase your accessibility you
can also operate your handset in
other communications systems, and
thus use the same handset in different places.
Furthermore, it is possible to operate the handset in the communications systems of other manufacturers, providing they meet the GAP
standard.
Page 5

76
DECT and GAP
Your handset uses a digital radio
connection in accordance with the
DECT (Digital Enhanced Cordless
Telephone) standard for the connection to the base station. This
digital channel guarantees the highest voice quality without static or
background noise. For signalling
between the communications system and the handset, the OpenPhone 21 uses the Generic Access
Profile (GAP).
The Generic Access Profile (GAP)
and the DECT standard define methods according to which digital cordless telephones can establish connections. The GAP standard is not
manufacturer-specific, so it is possible to combine the base-stations
and handsets of different vendors
with each other. The basic functions
(making and receiving calls) are
always possible with these combinations. Other functions (display of
call numbers or call charges) which
your OpenCom 100 communications system provides together with
your handset may not be available
with the devices of other manufacturers.
The Features of Your Telephone
Using Your Telephone
Installation Location
Place the charger on a flat, even surface. Do not place the charger or
accessories in the vicinity of:
• Water, moisture or damp areas
• Heat sources, direct sunlight or
inadequately ventilated areas
• Devices which produce strong
magnetic fields, electrical
devices, fluorescent lamps,
computers, radios, television
sets, fax machines and telephone terminals
• Areas where the equipment
may be covered, its ventilation
impaired, or where fluids could
penetrate into it
• Areas where there is excessive
dust, and areas subject to vibration, shock or extreme temperature fluctuations.
Place and/or store the handset and
accessories out of the reach of small
children.
The Features of Your Telephone
Using Your Telephone
Inserting/Removing the
Battery Pack
To insert/remove the battery pack,
please proceed as shown in the diagram:
Push the back cover of the handset
upwards and insert or remove the
battery pack.
Make sure that the battery contacts
are correctly positioned, as your
telephone could otherwise be damaged.
Installation
Page 6

98
Charging and Discharging
The battery can be charged and discharged hundreds of times, but it
will eventually be used up. When
the operating time (i.e. call and
standby time) has become noticeably shorter than normal, the battery should be replaced.
A fully charged but unused battery
discharges itself in approx. one
week at room temperature.
In order to achieve long operating
The Features of Your Telephone
Using Your Telephone
times, you should discharge the
battery at intervals by not placing
the handset in the charger, and
leaving it switched on until it
switches itself off. Only use this
method to discharge the battery.
Extreme fluctuations in temperature
have an effect on the charging
capacity of the battery.
Charging the Battery
Commissioning
Charge the battery for six to seven
hours before using your handset for
the first time. This safety precaution
extends the lifetime of your battery.
The maximum performance of the
battery is only reached after three
to five charging/discharging cycles.
Place your handset in the charger
tray regularly, in order to reach the
optimum battery charge.
Be careful to observe the correct
polarity when replacing the battery.
It is absolutely essential that you
only use rechargeable batteries
authorised by the manufacturer.
The manufacturer does not accept
responsibility for malfunction or
damage when other types of
rechargeable battery or normal batteries are used.
Charging and Operating
Times
Charging time: (discharged battery)
to full capacity 6 - 7 hours.
Call time: up to 8 hours (fully
charged).
Standby time: up to 80 hours (fully
charged).
Connecting the Charger
To operate the charger you need a
230 V AC mains connection.
Connect the cable of the adapter
plug to the socket on the side of the
charger, and then put the adapter
plug into the mains socket.
The Features of Your Telephone
Using Your Telephone
Use the battery only as directed.
Never use a damaged or flat battery.
Heat and cold reduce the performance and the lifetime of the battery. A handset with either a hot or
a cold battery can be temporarily
out of operation, even when the
battery is fully charged.
Important Information about the Battery
Dispose of used batteries in accordance with your local regulations.
Make use of available recycling facilities.
Never throw a battery into a fire.
Page 7

11
The Features of Your Telephone
Display and Menus
Display and Keys
A
B
C
J
K
L
T
U
V
G
H
I
P
Q
R
S
D
E
F
M
N
O
W
X
Y
Z
2
C
Receiver
LED ring
lights up on an incoming call
Display
Softkeys
for controlling functions
and features
Accept / end call
Cancel-, delete- or
transfer key
Keypad
for entering numbers
and characters
Microphone
Signal key
for call transfer functions
Arrow keys
for menu selection
R
5
8
1
4
7
3
6
9
0
} ¡“¶¢ ≠ [
Station 1
Peters
1
TelBook∑„ Menu
10
Charge Display
The charge level of the battery is
shown by the
[ in the display.
The symbol has the following
meanings:
[
Battery is 75 - 100 % charged
] Battery is 50 - 75 % charged
| Battery is 25 - 50 % charged
{ Battery is 0 - 25 % charged
{ (Frame flashes) battery
nearly discharged, warning
signal.
When the battery has been replaced
there is no display of the charge
level until a whole charge cycle has
been completed. Instead, the battery symbol flashes to indicate
charging.
The Features of Your Telephone
Using Your Telephone
If you have activated the option
“Optical Charge Indicator” (LED ring
around the receiver), the LEDs flash
during charging.
Charge Warning
When the battery capacity is nearly
exhausted, you will hear three short
beeps repeated once a minute as a
warning. If you are making a call at
the time, you have five minutes
remaining in which to complete it
before the handset switches itself
off.
Commissioning
Enrolling the Handset
Your handset can be operated on
up to ten different communications
systems. In order to do this, it must
be enrolled on every system.
In the case of operation on the
OpenCom 100 communications system, the enrolment is done by your
system administrator.
In the case of other communications systems you must do the following:
Enrol your handset on the communications system as described on
p. 39.
Page 8
1312
Illumination
The display is automatically illuminated when calls come in or when
you press a key. The illumination is
The Features of Your Telephone
Display and Menus
The two keys below the display, as
well as the arrow keys, are known as
softkeys. The functions assigned to
the keys are shown in the lowest
line of the display. The key function
changes automatically according to
the operating status of the handset.
Softkey: Arrow Keys
Above the arrow keys there are
symbols indicating their respective
functions:
≤
If a selection is being displayed (e.g. telephone book
or menu), you use the
arrow keys to move the cursor and select the desired
item.
Softkeys and Keys
∑„
Enables the selection from
the redial stack.
≥
When you are entering
names or telephone numbers, you can make corrections by moving the cursor.
The arrow keys then move
the cursor to the beginning
or the end of the entry.
If a text is being displayed
(e.g. a message), you can
use the arrow keys to scroll
up or down
Á
During a call you can
… adjust the volume
ˇ
to one of six levels.
Display Arrangement
Symbol Line
} Ringer off.
¡“¶¢ Radio connection good
when at least two bars.
≠ On: active call
Flashing: incoming call.
∫ E-mail or short message
received.
o--o Indicates that a voice mes-
sage has been received.
This requires a voice-mail
system to be connected to
your communications system. The symbol is only visible if there is no live connection to the communications system.
[ Battery charge status (see
p. 10).
Í You have activated the key-
pad lock.
The Features of Your Telephone
Display and Menus
Text Lines
The text lines display information
on the current call status or menu
lists and texts. In the idle state, it
displays the system names, your
programmed user name, and the
telephone number of the terminal.
Selection lists (e.g. telephone book)
and the features menu are displayed in a three-line section of the
display. The lines are scrolled up or
down by means of the arrow keys.
An item that can be selected is
highlighted in a dark colour.
Softkey Line
The texts and symbols in this line
refer to the keys below. The contents of the line change according
to the operating status.
Symbol line
Text lines
Softkey line
switched off again automatically ten
seconds after the last key press.
} ¡“¶¢ ≠ ∫ [
Station 1
Peters
1
TelBook ∑„ Menu
¡“¶¢ [
Calls
Call forwarding
Messages
OK ≤ Esc
¡“¶¢ [
Müller, Hans
Neumann, Erwin
Peters, Max
OK ≤ Esc
Page 9

1514
Example Telephone Number Input
OK
confirms your entry, and c
deletes single characters.
Text Input
The c key deletes single numbers/letters. The
Esc
key breaks off
the entire procedure.
You can input the following characters by pressing the number keys
several times. The cursor moves on
automatically if there is no input or
new character for a time.
The Features of Your Telephone
Display and Menus
Key Character
1 1?!,.:;” ‘
2 ABC2ДЕАБГЖЗ
3 DEF3ÈÉÊË∂
4 GHI4Ì Í Î Ï
5 JKL5
6 MNO6СЦТУФХШ
7 PQRS7ß
8 TUV8ÜÙÚÛ
9 WXYZ9
0 0 (Leerzeichen)@$&
* *-+=~<>^%
# #(){}[]/ \
r shifts to lower-case letters.
Lower case remains in force until
the
r key is pressed again. In the
case of texts running over several
lines, the line breaks are automatic.
Softkey: OK
You use OKto confirm the selected
function; menus are closed, or further menus displayed.
Softkey: Esc
With a short press of the
Esc
softkey you exit the section of the menu
displayed. You will subsequently
see the selection from the previous
menu, or the current idle or call display.
Cancel Key
c cancels your menu selection
without saving the previous entry.
In the case of alphanumeric input,
the last character is deleted.
R-Key
Initiates a consultation call.
The Features of Your Telephone
Display and Menus
Example Menu
The telephone is in the idle state.
Press the softkey
Menu
for longer
than 2 s.
Scroll through this list with the
arrow keys and confirm the desired
function with
OK
.
Example Phone Book
When the telephone book is open
(softkey
TelBook
) or menu item
Phone Book, you can use the arrow
keys to select a name, and dial the
corresponding number by means of
G.
¡“¶¢ [
Calls
Call forwarding
Messages
OK ≤ Esc
¡“¶¢ ≠ [
Müller, Hans
Neumann, Erwin
Peters, Max
Search ≤ Next
¡“¶¢ [
Number:
1234_
OK ≥ Esc
Page 10

17
Display of Operation
In the following you will find listed,
below the display, all the softkey
functions of the left and right keys
you are able to activate by pressing
the arrow keys or
OK
softkey
Switching the Handset
On/Off
You can switch the handset off by
pressing
G for approx. two sec-
onds in the idle state. You switch it
on by pressing
G again or by
placing the handset in the charger.
If the handset is switched off, neither the ringer nor the alarm signal
will sound.
Keypad Lock On/Off
You can lock the keypad to prevent
accidental activation: press
c for
approx. two seconds.
To unlock the keypad (as shown in
the display), first press
¡ and then
‘.
Telephoning
General
When the keypad is locked you can
still accept calls. During the call you
can use all keys. When the call has
been completed, the keypad lock
becomes active again.
Adjusting the Loudspeaker Volume
During a call you can use the arrow
keys to adjust the loudspeaker volume to any one of six levels. The
current volume level is shown by a
symbol in the middle of the bottom
display line.
Muting
When the
Mute
softkey is shown on
the display during a call, you can
use it to deactivate the handset
microphone.
Optical Call Indicator
The LED ring around the loudspeaker flashes to indicate an incoming
call.
Telephoning
General
Quick Switch
A “+“ preceding the name of a function indicates that it is active, a “-“
that it has been switched off. If you
press
OK
, a switch window appears.
Automatic Hide
Menus are automatically hidden
under the following conditions:
• In the call state, when you are
making input requiring a function to be performed (e.g. initiating a conference, see "Internal/External 3-Party Conference", p. 17).
• When a softkey invoking a
menu other than the one displayed is pressed.
If you are in a menu when a party
attempts to call you, he will hear
the busy signal. You exit the menu
automatically when you perform no
input for a time.
Saved inputs to the menu remain
saved when you leave the menu.
16
The Features of Your Telephone
Display and Menus
Page 11

1918
Black- and Whitelists
Note: Your telephone can be
blocked from dialling all or only certain external telephone numbers. It
is always possible to call the emergency numbers 110/112 (in Germany). Please contact your System
Administrator.
Keypad Dialling
Some European providers require
the Keypad Protocol in order to set
features such as e.g. call diversion
(not in Germany). Before dialling,
you must set your handset by pressing certain keypad code digits specified by your provider. These code
digits are transmitted to the
exchange and evaluated there. You
will normally receive an announcement in reply.
G±¡“
Your telephone is now set to the
Keypad Protocol. You can enter the
keypad code digits.
Note: The setting will be deleted
when you replace the handset.
Telephoning
General
Least Cost Routing (LCR)
Your system uses LCR to establish
external outgoing calls automatically via the provider set by the System
Administrator. If you do not want to
use this preferred connection, then
before your call, select and
LCR from
the menu described in the following
section. Ask your System Administrator if LCR has been set up for you.
Note: Baby call and external call
diversion are not automatically
established via preferred connections. In order to use a provider
other than the standard provider,
you can preface the telephone
number with the code digits of the
desired provider.
Transmission of Your
Telephone Number
In ISDN there are various services
enabling and disabling the transmission of telephone numbers
between subscribers.
CLIP
The calling number is displayed (if
transmitted).
If this number is stored in your telephone book, the name will be displayed.
Internal and External
Telephone Numbers
The internal and external telephone
numbers under which you can be
reached are assigned when the
communications system (OpenCom
100) is set up.
Multiple Connections
Two calls can be made to your
handset simultaneously. Any further
callers will hear a busy signal.
VF Postdialling
In the call state, your telephone is
automatically set to VF signalling
(“voice-frequency signalling“). You
can use VF signalling to query an
answerphone or voice box.
Display of Call Charges
and Call Duration
If your provider transmits call
charge information, you can see the
current charge in the display during
or subsequent to a – direct-dialled
external - call.
Telephoning
General
Making a Call from the
Redial Stack
With the handset in the idle state,
press one of the arrow keys (several
times, if necessary). The last ten
numbers dialled will appear. If a
telephone number is also in your
telephone book/name directory of
your system, the name will appear.
Dialling: Press G, and the tele-
phone number selected will be
dialled.
Additional possibilities:
Press OKto see a drop-down menu
enabling you to
dial the selected
number from the redial stack, to
delete the number, or to delete all
numbers from the redial stack.
Page 12

21
date sent) and delete selected messages or the entire list.
Use the arrow keys to scroll in viewing mode.
E-mail: This menu item is only avail-
able if e-mails are present in your email list. You are shown a list of the
e-mails that have arrived (with the
sender's name). Select an entry, and
a drop-down menu appears
enabling you to view the e-mails
(subject, sender, date) and delete
selected ones or all the e-mails in
the list.
Use the arrow keys to scroll in viewing mode.
Dial: Various functions allowing you
to dial a number in a particular way
can be activated via this menu item.
Specifically, these are:
Redial: This menu item is only avail-
able if there are entries in your
redial list. You can view up to
ten destination phone numbers
that you have called. If the subscriber is listed in the system
telephone book, the name is
displayed instead of the telephone number. To redial, select
an entry. After
OK
you can dial
the entry with
Dial, delete it
with
Delete, or delete the entire
list with
Del. all.
20
Voicebox: This menu item is only
available if there are messages in
your voicebox. The telephone numbers of callers who left messages in
your voicebox are displayed (this
depends on whether the network
operator enables telephone numbers to be transmitted via its network). If a caller is listed in the system telephone book, the name will
be displayed instead of the telephone number. Messages you
haven’t listened to yet are marked
with a "+" in front of the telephone
number, while messages you have
already listened to are marked with
a "-". In order to hear a message,
you select an entry. After pressing
OK
you can listen to the message
via
Play, call the person who left the
message via
Dial, delete the mes-
sage via
Delete, view the telephone
number (if the name appears), the
time you were called and the number of calls via
Info, or delete the
entire list via
Del. all.
Short messages:
This menu item is
only displayed if there are entries in
the short messages list. A list of the
messages (senders) that other subscribers have sent you using the Virtual Phone is displayed. Select an
entry, and a drop-down menu
appears enabling you to view the
short messages (content, sender,
Telephoning
General
CLIR
Prior to dialling an external call, you
can specify whether the transmission of your telephone number to
the called party is to be disabled. In
order to do this, before your call,
select
CLIR in the menu described in
the following section. If the feature
is not available, then your number is
either always transmitted or never
transmitted. Please consult your
System Administrator.
Menu Before and During a
Call
When the handset is in the idle or
call state, menus dependent on that
state are displayed by a brief press
of the
Menu
softkey. Frequently
used features are displayed, which
you can then activate.
Example: Another telephone in your
hunting group rings, and you want
to take the call. Accept with
G,
press the
Menu
softkey, select Pick-
up
and confirm with OK. You will be
connected with the caller.
Or a subscriber is busy, and you
want to be called back. While the
busy signal is still audible, press the
Menu
softkey, and confirm the call-
back
with OK.
Telephoning
General
The respective state-dependent
menus are depicted at the ends of
the following sections.
"Selection" Menu in the
Idle State
Press the softkey
Menu
briefly (this
is also possible when you have
already pressed
G), and then
select ...
Missed calls: This menu item is only
available if entries appear in your
call list showing callers who
attempted to contact you in your
absence. The telephone numbers of
the last ten callers who tried to contact you are displayed (this depends
on whether the network operator
enables telephone numbers to be
transmitted via its network). If a
caller is listed in your telephone
book, the name will be displayed
instead of the telephone number. In
order to call someone back, first
select the particular entry. After
pressing
OK
you can dial the entry
via
Dial, delete it via Delete, view
the telephone number (if the name
appears), the time you were called
and the number of calls via
Info, or
delete the entire list via
Del. all.
* This menu item is only available if the appropriate user access rights have been configured in
the Configurator.
Page 13

23
Telephoning
External/Internal Calls
External/Internal Calls
Making a Call
Dialling:
Press G and dial the telephone
number.
Pre-dialling:
Enter the telephone number and
press
OK
or G.
Edit pre-dialling:
c deletes single characters; a long
press deletes the entire telephone
number.
Input position:
Use the arrow keys ≤≥ to
move the input position (cursor) to
the beginning or the end of the
number. Additional characters will
always be inserted in front of the
flashing cursor.
Note: If you select more than ten
digits, the display switches to
depicting smaller characters (max.
26 digits in two lines).
Making a Call from the
Redial Stack
Selecting:
When the handset is in the idle
state, press one of the arrow keys
(several times, if necessary). The last
ten subscribers called will appear
(telephone number or name). The
beginning and end of the list are
indicated by broken lines.
Dialling:
Press G, and the telephone number selected will be dialled.
¡“¶¢ [
03061040
OK ≥ Esc
¡“¶¢ [
04331136888
04311696500
03061040
OK ≤ Esc
Phone book: This menu item allows
you to access the telephone
book of your communications
system. (See also the chapter
"Making a Call from the Phone
Book", p. 24)
Announcement:* When you have
entered the telephone number,
you can initiate an announcement to a system telephone
(not possible to handsets).
Suppress number:* Your telephone
number will not be transmitted
to the called party during the
subsequent external call. This
menu item depends on the system setting.
Transmit number:* Your telephone
number will be transmitted to
the called party during the subsequent external call. This menu
item depends on the system
setting.
LCR off:* This switches the LCR off.
VIP call:* Your next call will be treat-
ed as a VIP call. Even if the internal party you are calling has
activated call-waiting protection, call protection or call forwarding, your call will be indicated by an acoustic signal.
Pick-up:* Pick up a call to another
telephone in your hunting group.
Pick-up select:* Enter the telephone
number and subsequently pick up a
call from any other telephone. If the
other telephone is in the call state
(e.g. an answerphone making an
22
Telephoning
General
announcement), you pick up the
call.
Charges: You can see the charges
for the last call and the total call
charges for your telephone.
Door opener*: This function acti-
vates the door opener.
Notes: Note a telephone number
and a name, or dial a telephone
number you have noted.
Main menu: the "Main" menu will
be displayed. See "Main" menu p.
35.
* This menu item is only available if the appropriate user access rights have been configured in
the Configurator.
Page 14

2524
“Calling...” Menu
In the call state, press the
Menu
softkey briefly and select ...
Disconnect: The call will be discon-
nected.
Pick-up:* You pick up a call made to
another telephone in your hunting
group. Your first call is held.
Pick-up select:* Enter the telephone
number and subsequently pick up a
call from any other telephone. If the
other telephone is in the call state
(e.g. an answerphone making an
announcement), you pick up the
call. Your first call is held.
Intercept:* The telephone numbers
of malicious callers can be stored in
the provider’s exchange (if this service has been ordered). This function is still possible, even when the
caller has already hung up!
Door opener*: This function acti-
vates the door opener.
Telephoning
External/Internal Calls
“Busy” Menu
You have called a busy subscriber,
or the subscriber has ended the call.
Press the
Menu
softkey briefly and
select ...
Disconnect: The call will be discon-
nected.
Callback:* You leave your callback
request with a busy internal party.
Pick-up select:* Enter the telephone
number and subsequently pick up a
call from any other telephone. If the
other telephone is in the call state
(e.g. an answerphone making an
announcement), you pick up the
call.
VIP call:* Even if the called internal
party (system telephone only) has
activated call-waiting protection,
call protection or call diversion, your
call will still be acoustically signalled.
Intercept:* The telephone numbers
of malicious callers can be stored in
the provider’s exchange (if this service has been ordered). This function is still possible, even when the
caller has already hung up!
Door opener*: This function acti-
vates the door opener.
Making a Call from the
Phone Book
Selecting:
When the handset is in the idle
state, press
TelBook
, select the
menu item
Look up name, and enter
the initial letter of the desired
name. In order to orientate you, two
entries with the given initial letters
will be displayed immediately. Press
OK
, and a list of names will appear,
alphabetically sorted with the first
entry beginning with the letter you
specified. Use the arrow keys to
select an entry.
Dialling:
Press G to dial the selected number. Press
OK
to choose from Office,
Mobile and Private. Press
OK
again
to see a drop-down menu enabling
you to dial the number of the
selected entry in your telephone
book, or to view more detailed
information on the telephone book
entry.
Telephoning
External/Internal Calls
Making a Call from the
Call List
Your handset stores the telephone
numbers of the last ten callers in the
call list (this is dependent on the
transmission of the telephone numbers by the provider). Only the telephone numbers of the calls you didn’t accept are stored. Entries are
deleted from the list if a caller is
able to contact you with a subsequent call. If the name of a caller is
listed in your telephone book, it will
be displayed.
Selecting:
In the idle state, press the
Menu
softkey. Select Missed calls, then use
the arrow keys to select the entry.
Dialling :
Press G to dial the selected number.
Ending a Call
Press G to end a call.
¡“¶¢ [
Müller, Hans
Neumann, Erwin
Peters, Max
OK ≤ Esc
* This menu item is only available if the appropriate user access rights have been configured in
the Configurator.
Page 15

Calls During a Conversation
Internal and/or external calls during
a conversation are signalled acoustically and optically.
Press
r to place the current call on
hold and accept the call waiting.
Press
G to end the current call.
The call waiting will ring as a normal call.
Press
Menu
to access the "Call wait-
ing" menu.
“Call” Menu
You receive an incoming call while in
the idle mode. Press the
Menu
soft-
key briefly and then select ..
Reject call:
You reject the call by
pressing the
OK
softkey.
Deflect call:
You deflect the call by
pressing the
OK
softkey, entering the
new destination number, and confirming with
OK
.
¡“¶¢ ≠ [
Call waiting Ext.
Sven Meyer
04311696503
Mute ˇ Menu
27
Telephoning
Accepting a Call
Door opener*:
This function acti-
vates the door opener.
“Call Waiting“ Menu
You receive an incoming call while in
conversation mode. Press the
Menu
softkey briefly and then select ..
Disconnect:
You disconnect the cur-
rent call and accept the call waiting.
Reject:
You reject the call waiting by
pressing the
OK
softkey.
Accept:
You accept the call waiting by
pressing the
OK
softkey. The current
call is put on hold.
Deflect call:
You deflect the call by
pressing the
OK
softkey, entering the
new destination number, and confirming with
OK
.
Door opener*: This function acti-
vates the door opener.
26
VIP Calls
These calls from authorised users
are signalled even when call-waiting protection, call protection or call
forwarding have been activated.
You hear the VIP signal. Press
G
to accept the call.
Telephoning
Accepting a Call
Accepting a Call
Normal Calls
When a call comes in, the calling
number will be displayed (if it is
transmitted). If this telephone number is listed in your telephone book,
you will see the name instead.
At the same time you see whether
the caller is internal or external.
In addition, you see whether the
caller's phone number is listed as a
mobile or private number in the
telephone book (marked with a
leading M or P).
To accept the call, press
G or take
the handset out of the charger (if
auto lift is activated, see p. 40).
Mute
switches the ringer off.
Menu
activates the menu.
¡“¶¢ ≠ [
External
Peters, Max
04311696500
Mute ˇ Menu
* This menu item is only available if the appropriate user access rights have been configured in
the Configurator.
Page 16

2928
Transferring an External
Call to an External Subscriber
The transfer of an external call to an
external subscriber is possible only
via the "Subscriber held" menu.
Press the
Menu
softkey briefly and
confirm
transfer with
OK
.
According to the settings of your
telecommunications system, the
external calls will be connected in
your PBX.
Note: If you connect two directly
dialled calls, the charges are billed
to your account. You have no control over the duration of the transferred call.
"Subscriber held" Menu
You have put a call on hold and are
now making an enquiry call. Press
the
Menu
softkey briefly and select
...
Disconnect: You disconnect the cur-
rent call and restore the dialling
mode
Transfer:* You connect the held
subscriber with the subscriber to
Telephoning
Consultation, Toggle, Transfer and Conference
whom you are currently connected.
Conference:* You initiate a 3-party
conference.
Toggle: You toggle between the cur-
rent and the previous subscriber to
whom you spoke.
Door opener*: This function activates
the door opener.
Internal/External 3-Party
Conference
You have made an internal or external consultation call.
If the subscriber accepts the call, you
announce the conference and select
the item
Conference from the Sub-
scriber held
menu. The conference is
initiated.
Press
G to end the conference.
Note: Connecting the two confer-
ence participants or disconnecting
them singly is possible only via the
corresponding menu item.
If you want to speak to one of the
participants in the conference alone,
or disconnect them singly, you select
the "Conference" menu. You can
then speak to this subscriber, while
the other one is held. You can then
toggle between them.
Consultation/Toggle via
the R-Key
During a call you can consult another subscriber.
r holds your first call. Then dial
the other telephone number. (You
see the display below.)
Press
r again to return to the first
call (press
r repeatedly to toggle
between the two calls).
G transfers your first call to the
consultation call subscriber.
Telephoning
Consultation, Toggle, Transfer and Conference
Transferring an
Internal/External Call to
an Internal Subscriber
You have made an internal consultation call (see Consultation/Toggle
via the
r-Key).
If the called subscriber accepts the
call, you announce the call transfer,
and press
G.
Or, if you do not wish to wait for the
called subscriber to answer:
Press
G, and the other subscriber
will be called.
If the called subscriber accepts, he is
connected to the original subscriber. If he does not accept within
45 seconds, you get an automatic
recall and are connected to the original subscriber when
G is pressed.
If the called subscriber is busy, press
the
Menu
softkey and confirm dis-
connection
with OK.
Consultation, Toggle, Transfer and
Conference
¡“¶¢ ≠ [
R:04012345
Erwin Neumann
47
Mute ˇ Menu
* This menu item is only available if the appropriate user access rights have been configured in
the Configurator.
Page 17

3130
Baby Call
You can use the Baby Call item in
the Protective Functions menu to
store an internal or external telephone number. If the menu item is
active, this programmed telephone
number is dialled five seconds after
G is pressed. If you begin dialling
a telephone number within five seconds, the baby call is deactivated.
Telephoning
Special Calls/Conversations
Doorbell, Entrance Intercom Call, Door Opener
"Door call" appears in the display.
In the idle state
Press G.
• If your system is connected to
an entrance intercom, you can
speak to the visitor.
• Otherwise you hear an special
door ringer signal when you lift
the handset.
To open the door, select the menu
item
Door opener from the menu
displayed.
During a call
If the doorbell is signalled during a
conversation, you will hear the callwaiting signal. Proceed as described
under "Calls During a Conversation".
To open the door you select the
menu item
Door opener from the
menu displayed.
Special Calls/Conversations
End the call with the menu item Dis-
connect: [telephone number]
and
then select the held subscriber.
Telephoning
Consultation, Toggle, Transfer and Conference
“Conference” Menu
You have initiated a 3-party conference. Press the
Menu
softkey briefly
and select ...
Disconnect: 034565483: You discon-
nect the subscriber with the phone
number 034565483 from the conference (in this example an external
subscriber).
Disconnect: 1234: You disconnect
the subscriber with the phone number 1234 from the conference (in
this example an internal subscriber).
Transfer:* You disconnect yourself
from the conference. The other participants remain connected.
End conference: You end the confer-
ence and return to the idle state (
G
also ends the conference).
Toggle: You terminate the confer-
ence and can now toggle between
the two subscribers.
Door opener*: This function acti-
vates the door opener.
* This menu item is only available if the appropriate user access rights have been configured in
the Configurator.
Page 18

3332
Making a Call from the Telephone Book
“Phone book” Menu
Press the
TelBook
softkey briefly,
then select ...
Look up name: Confirm selection
with
OK
. The first two entries in the
telephone book will appear. Below
these you can then enter the letter/name you are looking for. When
you enter a letter, the entries displayed will change to display the
first two starting with the given letter.
If you press
OK
without entering a
character, the list begins with the
first entry.
Select the preferred entry using the
arrow keys.
Press
G to dial the phone number
directly or press
OK
, and select
Office, Mobile or Private. You can
then dial the relevant number
directly with
G, or press
OK
and
then dial the number with
Dial, or
view the phone and speed-dial
number with
Info.
New preset: Here you can enter a
letter or name in a list. When you
open your telephone book, this
entry appears as a menu item. You
can thus jump straight to that specified section of your telephone book
(e.g. the telephone book entries for
a firm), and look for the desired
name there. Six search strings are
allowed.
Telephoning
Delete preset: here you can delete
the pre-setting again if required.
Speed Dialling
You can use speed-dialling codes to
dial all telephone book entries. The
central entries use the speeddialling codes 00 to 99.
To use speed dialling, press
Gand
then
± | ±, enter the tele-
phone book entry’s speed dialling
code and press
‘.
Note: If you have your telephone
book open, your can use the
±
key and the speed-dialling target
instead of the name to find the
entry.
Notes
The menu item Door opener does
not depend on an entrance intercom call.
The door-opener function activates
a relay in the system which can also
be connected to other devices.
Please ask your System Administrator for details.
Announcement
Announcement are only possible on
system telephones.
Press
G and select the menu item
Announcement from the Selections
sub-menu in the Connections menu.
Telephoning
Special Calls/Conversations
The called subscriber hears a special
information tone and your
announcement.
Answering Callbacks
A callback is carried out when the
other subscriber is free again. Your
telephone will then ring.
Press
G to call the other sub-
scriber.
Making a Call from the Telephone Book
The Telephone Book in
Your Communications
System
The telephone book in your communications system can store
approx. 2000 entries.
This figure includes the centrally
administered telephone book and
the personal entries in all telephones. You can use your own telephone to store and delete your per-
sonal entries (max. 40). The personal entries are automatically sorted
into the main register, but are visible only on your telephone and your
System Administrator’s PC. For
instructions on how to use the personal telephone book, see the
“
Phone Book Settings“ menu, p.
46ff.
Page 19

3534
Messages: This menu group deals
with the reception of messages and
e-mails, and the programming of
appointments.
Phone settings: This menu group
enables you to set your telephone
according to your personal requirements, e.g. ringer settings (melody
and volume), display language, etc.
Protection: Here you can activate
call protection or lock the telephone.
Connections: This menu group con-
tains all features concerning connections. These features are also
available in the state-dependent
menus displayed during a call.
Phone book: In this menu group you
can program your telephone book.
Voicebox: In this menu you can lis-
ten to the messages stored in your
voicebox and edit your voicebox
settings. This menu item is available
only if a voicebox has been set up!
Central settings: This menu is pro-
tected by a PIN. An authorised user
can edit settings for the system
here.
Features and Menus
“Main“ Menu
"Calls" Menu
First select the Call list, then...
•
Missed calls: You see the tele-
phone numbers of the last ten
callers who tried to contact you
(this is dependent on the transmission of the telephone number by the provider). If the caller
is listed in the system telephone
book, the name will appear
instead of the telephone number. To call back, you select the
entry. After pressing
OK
, you
can use
Dial to dial the tele-
phone number of that entry,
Delete to delete the entry, Info
to see the telephone number
(when the name is displayed),
the time of the call, or the number of calls, or
Del. all to delete
the entire list.
•
Accepted calls: You see the tele-
phone numbers of the last ten
callers with whom you spoke
(this is dependent on the transmission of the telephone number by the provider). If the caller
is listed in the system telephone
book, the name will appear
instead of the telephone number. To call back, select an entry.
After pressing
OK
, you can use
Dial to dial the telephone num-
ber of that entry,
Delete to
delete the entry,
Info to see the
telephone number (when the
There are two ways of setting the
features of your telephone and system:
Menus
Activate the menu with the corresponding softkey as described in
“
Display and Keys” above, p. 11ff,
and edit the settings.
Note: Press the softkey longer than
when telephoning. Only then will
the Main menu appear in the display.
Use the arrow keys
≤≥ and
the
OK
key to select items.
Star and Hash Keys
Many features can also be activated
by code digit input. Code digit input
is always done with the
± or ‘
key.
These inputs are designed for analogue telephones in your system.
The code digits can also be used on
system telephones, and are
described in the operating instruc-
Features and Menus
Features Settings
tions “OpenCom 100 – Operating
Terminals“ (supplied with the system).
“Main” Menu
This menu contains all the available
features. Some of the menu items
can also be found in other menus.
Features affecting the availability of
your telephone (e.g. call protection
activated) can be found in the
"Main" menu, which you can invoke
with a long press of the
Menu
soft-
key.
Calls: The most important features
concerning calls are grouped here.
Call forwarding: This menu group
comprises all types of call diversion.
Features and Menus
Feature Settings
Page 20

3736
Follow me: This type of call forward-
ing is configured on a destination
terminal to which calls for an original (source) terminal are forwarded.
The terminal PIN of the source telephone is required for this function
(see page 54). On the destination
terminal, select
3 Follow me from
the "Call forwarding" MenuCard. As
the Source, enter the internal telephone number for which calls are to
be forwarded from the source terminal to the destination terminal.
Then enter the
PIN: of the source.
Switch the follow me function on or
off with
On / Off. On the other tele-
phone (source), you can deactivate
the "follow me" function by switching off
Divert phone. If the “follow
me” function is active, all telephone
numbers of the other device are forwarded immediately (with the
exception of hunt group numbers).
"Messages" Menu
Short messages: You see the list of
all the short messages that have
been sent to you by other subscribers using the OpenCTI (with the
senders' names). Select an entry,
and a drop-down menu appears
enabling you to view the message
(content, sender, date sent), delete
the selected message, or delete the
entire list of messages.
Use the arrow keys to scroll in viewing mode.
Features and Menus
"Call forwarding" Menu
E-mail: You see the list (senders) of
e-mails received. Select an entry,
and a drop-down menu appears
enabling you to view the e-mail
(subject text, sender, date), delete
the selected e-mail, or delete the
entire list of e-mails.
Use the arrow keys to scroll in viewing mode.
Appointments: You see the status of
both appointments. To program an
appointment, select one with the
arrow keys and press
OK
. Under
Time you can enter the time the
appointment reminder is to be activated. Select
Reason to enter the
reason for the appointment. Select
Repeat to determine whether the
appointment reminder should be
activated once, only on weekdays,
only at the weekend or every day.
The appointment reminder is activated with
on and deactivated with
off.
name is displayed), the time of
the call, or the number of calls,
or
Del. all to delete the entire
list.
Voicebox msg.: The telephone num-
bers of callers who left messages in
your voicebox are displayed. If a
caller is listed in the telephone
book, the name will be displayed
instead of the telephone number.
Messages you haven’t listened to
yet are marked with a "+" in front of
the telephone number, while messages you have already listened to
are marked with a "-".
Select
Play to listen to the selected
message,
Dial to call the person
who left the message,
Delete to
delete the selected message,
Infos
to view the date and time at which
the message was received, or
Del.
all
to delete all messages.
Charges: You see the charge for the
last call and the total charges for
your telephone.
Hunt group: If your telephone is one
of a group of devices forming one or
more hunt groups, a drop-down
menu containing the various hunt
groups will appear. Using this, you
can join or leave a particular hunt
group or leave all of the hunt
groups at the same time. By excluding your telephone from a hunt
group, the device will not be able to
receive any more hunt group calls.
Features and Menus
“Calls“ Menu
"Call forwarding" Menu
Call diversion: Select "immediately",
"busy" or "after delay", then enter
the destination number. In the case
of external telephone numbers you
must always enter an initial
≠
(}). Internal telephone numbers
are entered without prefixes. You
must subsequently activate the
diversion.
Note: All calls to your telephone
number are diverted. If a telephone
number has been assigned to more
than one telephone, calls to that
telephone are also diverted.
You can activate all three types of
diversion simultaneously; call diversion immediately has priority.
Divert MSN: You will see a list of the
programmed MSNs. Select an entry,
then select "immediately", "busy"or
"after delay", then enter an external
number (without access code for
trunk line) as destination.
Note: All external calls to that MSN
are diverted.
You can activate all three types of
diversion simultaneously; call diversion immediately has priority.
Page 21

3938
DECT systems overlap). Press
OK
to skip this setting if it does
not apply.
Enter PIN: This code enrols your
handset.
Enter System Name: Enter a
name for the DECT system on
which you are enrolled. This
name will always appear in your
display in the idle state. Please
refer to “Text Input” on p. 15.
Enter Number: Some DECT sys-
tems transmit your reserved
telephone number. If this is not
the case, you can enter it here
(your System Administrator will
tell you the telephone number).
•
Subscriptions - Select: If you
have enrolled your handset on
more than one DECT system,
you can select here which one
your handset is to use. Use the
arrow keys to highlight the system before pressing
Select
.
•
Subscriptions - Delete: Here you
can delete the enrolment on a
DECT system from your handset. The handset can only be
operated in this system again
after a new enrolment. Use the
arrow keys to highlight the
DECT system before pressing
Delete.
Features and Menus
"Phone settings" Menu
• Subscriptions - Edit: Here you
can edit the name of the DECT
system and the telephone number displayed in the idle state
(usually the internal telephone
number) in the selected DECT
system.
•
Equipment ID: Here you can
read out the international handset identification code (IPEI).
You possibly require this code
for the enrolment procedure at
certain base stations.
Telephone Options: Use the arrow
keys to select the corresponding
menu item (or to switch the function
on and off).
•
Key Click: If you wish to hear a
sound every time you press a
key, switch the function
on by
pressing the arrow keys. (Pressing them again will switch the
sound
off.)
•
Automatic Hook: If you activate
this function, you automatically
accept incoming calls by picking
up the handset from the charging station while it is ringing.
•
Silent Charging: The handset
does not signal calls (or messages) as long as it is in the
charger. As soon as it is
removed from the charger, it
signals calls again.
"Phone Settings" Menu
You can select a different melody
for every type of call (Intern, Extern,
Messages and VIP messages).
Select
Ringer Settings and then ...
•
Melodies: Select the melody for
Intern Calls by pressing the dig-
its 0-9
and ...
select the melody for Extern
Calls by pressing the digits 0-9
and ...
select the melody for Messages
by pressing the digits 0-9
and ...
select the melody for VIP by
pressing the digits 0-9.
•
Level: You can change the vol-
ume of the Ringer Signal
Intern
by pressing the digits 1-7,
and ...
you can change the volume of
the Ringer Signal
Extern by
pressing the digits 1-7.
•
Type: You can use this setting
to switch the ringer signal off
(
Silence). The bell symbol }
appears in the display. To
switch on again, select Melody
or Chirp in the menu (see
below)
or ...
Melody:
This function signals
calls with the complete melody.
Features and Menus
"Phone settings" Menu
or ...
Chirp:
This function signals calls
with a short melody.
System: Your handset can be oper-
ated in up to ten other DECT systems. Before you can use the DECT
system to telephone, you must first
enrol the handset on the respective
system. For enrolment you possibly
require a system ID and an access
code. Ask the System Administrator
responsible for the code.
Select
System and then ...
•
Automatic Search: If you have
enrolled your handset on more
than one DECT system, your
handset will automatically
select one of the available DECT
systems, as long as it is
switched on. As soon as you
leave the range of the current
DECT system, your handset is
automatically checked in to
another DECT system.
•
Subscriptions - New: For New
enrolment you must complete
the following entries:
PARK: You must specify a PARK
only if your handset is to be
operated on a specific DECT system (e.g. at locations where the
radio coverage areas of two
Page 22

4140
"Protection" Menu
Call protect.: Switches call signalling
On/Off for all the telephone num-
bers of the handset. Callers still hear
the ringer tone.
Note: If a telephone number has
been assigned to more than one
telephone, call protection is also
active for the other telephones.
Telephone lock: Enter your PIN.
When the lock is active, your telephone has lower line access rights.
Under certain circumstances you
will not be able to make external
calls, or only be able to make
restricted external calls (you can still
call the emergency numbers
110/112). Consult your System
Administrator.
Baby call: Enter the destination and
activate or deactivate the baby call.
Change PIN: Enter your current PIN
and subsequently the new PIN
twice.
Availability: All active features (call
protection, call diversion, call-waiting protection) negatively affecting
your availability are deleted.
Call wait. prot.: Your telephone is
blocked for further callers wanting
to signal waiting calls during a conversation.
Features and Menus
"Protection" Menu
Note: If a telephone number has
been assigned to more than one
telephone, call-waiting protection is
also active for the other telephones.
• Opt. Charge ind.: The battery
charge level is shown by the
LED ring around the loudspeaker. You can switch this optical
charge level indicator
on or off.
•
Coverage Warning: If radio con-
tact is about to be lost, you hear
a warning signal. You can
switch this
on or off as required.
•
User Name: Here you can enter
a name which is then shown on
the display of your handset
while idling.
•
Language: Here you select the
desired display language.
Protection: This menu is itself pro-
tected by a PIN. Entering a PIN is
only necessary if Read Only is activated.
The factory setting of the PIN is
0000. The PIN entry is displayed as
****
for security reasons.
You can delete the digits entered
with
c. If you have forgotten your
PIN, please contact your system
administrator.
•
Read-Only (activate/deactivate):
If Read Only is active, you can
see and check all the features in
the "Phone settings" menu, but
not change them.
•
Change PIN:
For reasons of security you must
Features and Menus
"Phone settings" Menu
enter the new PIN twice.
The PIN digits are displayed as
****
. This PIN is valid
only for Read Only.
•
Reset:
All functions, features in the
"Phone settings" menu, PIN and
system enrolments are deleted
and reset to the factory settings
as soon as you confirm
Sure?
with the OKsoftkey. You can
use the
Esc
softkey to exit this
menu item without performing
a reset.
Page 23

4342
"Phone book" Menu
In this menu you can specify, edit
and delete your personal telephone
book entries. Editing the central
telephone book entries requires the
system PIN. In addition, editing the
central telephone book requires the
corresponding rights in the user
group.
If the system PIN is 0000, access to
all areas is enabled.
The settings for the “Local telephone book“ (available only if you
are
NOT operating your OpenPhone
21 on an OpenCom 100 system) differ from the procedures described
below. You will find the settings for
your handset in the chapter Setting
Variants in Other Communications
Systems (see p. 45).
New Entry: Select Personal or Cen-
tral
. If you select Central, you will
have to enter the system PIN. Enter
the surname and forename, as well
as the phone number and speeddial number for "Office", "Mobile"
and "Private" (name and Abbrev.
no. must previously have been
unassigned). You subsequently
select which number is to be the
default number (
default Office,
default Mobile or default Private)
and confirm with
OK
.
Features and Menus
"Phone book" Menu
Edit: Select Personal or Central. If
you select
Central, you will have to
enter the system PIN. Under
Name
you enter the initial letter of the
name. Now select the desired entry
from the list and confirm with
OK
.
Select
Delete or Edit. Under Edit you
can change the surname, forename
as well as the phone number and
speed-dial number for "Office",
"Mobile" and "Private". You subsequently select which number is to
be the default number (
default
Office
, default Mobile or default Pri-
vate
) and confirm with OK.
"Connections" Menu
Note: The following features are
only available if the current call
state of your telephone allows this.
These features can also be found in
the state-dependent menus.
Select
Call pick-up, then ...
•
Pick-up: You take a call to
another telephone in your hunting group.
•
Pick-up select.: Enter the tele-
phone number and subsequently pick up a call from any
other telephone. If the other
telephone is already in the call
state (e.g. an answerphone
making an announcement), you
pick up the call.
Select
Dial, then ...
•
Announcement: When you have
entered the telephone number,
you can initiate an announcement to another system telephone.
•
VIP call: Even if the called inter-
nal party (system telephone
only) has activated call-waiting
protection, call protection or
call forwarding, your call will
still be acoustically signalled.
Features and Menus
"Connections" Menu
• Door opener: Here you activate
the door opener.
•
Phone book: Here you open the
telephone book (see p. 33).
Page 24

45
"Voicebox" Menu
Note: This menu item is available
only if a voicebox has been set up!
In this menu you can listen to the
messages stored in your voicebox
and edit your voicebox settings.
Voicebox msg.: The telephone num-
bers of callers who left messages in
your voicebox are displayed. If a
caller is listed in the telephone
book, the name will be displayed
instead of the telephone number.
Messages you haven’t listened to
yet are marked with a "+" in front of
the telephone number, while messages you have already listened to
are marked with a "-".
Select
Play to listen to the selected
message,
Dial to call the person
who left the message,
Delete to
delete the selected message,
Infos
to view the date and time at which
the message was received, or
Del.
all
to delete all messages.
Call voicebox: Use this menu item to
listen to messages or edit your
voicebox settings using voice
prompts.
44
Features and Menus – Local Handset
Overall Menu – Handset
Setting Variants in Other Communications Systems
General
You can check your handset in to
other DECT systems, but not all features and setting variants will be
available. Commence all procedures
in the following chapters by pressing the
Menu
softkey. Then use the
arrow keys to select the corresponding menu item.
"Keypad lock on/off"
Menu
You can lock the keypad to prevent
accidental activation by selecting
the corresponding menu item.
To unlock the keypad (as shown in
the display), first press
¡ and then
‘.
When the keypad is locked you can
still accept calls. During the call you
can use all keys. When the call has
been completed, the keypad lock
becomes active again.
"Call list" Menu
You see the telephone numbers of
the last ten callers who tried to contact you (this is dependent on the
transmission of the telephone number by the provider). Use the hook
key to dial the number,
Delete
to
delete an entry from the list,
Tel-
Book
to copy a number to your
phone book, or
Del. all
to delete
the entire list.
"Ringer Settings" Menu
You can select a different melody
for every type of call (Intern, Extern,
Messages and VIP).
Melodies: Select the melody for
Intern Calls by pressing the digits
0-9
and
Select the melody for Extern
Calls
by pressing the digits 0-9
and
Select the melody for Messages
by pressing the digits 0-9
and
Select the melody for VIP by
pressing the digits 0-9.
"Central Settings" Menu
In this menu you can edit the system settings. The menu is protected
by the system PIN. If the system PIN
is 0000, access to all areas is
enabled.
If necessary, enter the PIN when you
have selected the menu item, then
select ...
Call variant: Subsequently select
Variant 1 or Variant 2. This changes
the call distribution in the system.
For example, in day mode (Variant
1), certain telephone numbers are
signalled on telephones other than
in night mode (Variant 2). Consult
your System Administrator about
call distribution.
Date / Time: Here you can set the
system time and date.
Features and Menus
"Voicebox" Menu
Page 25

4746
Features and Menus – Local Handset
Overall Menu – Handset
"System" Menu
Your handset can be operated on
up to ten other DECT systems.
Before you can use the DECT system
to telephone, you must first enrol
the handset on the selected system.
For enrolment you possibly require
a system ID and an access code. Ask
the System Administrator responsible for the code if necessary.
•
Automatic Search: If you have
enrolled your handset on more
than one DECT system, your
handset will automatically
select one of the available DECT
systems as long as it is switched
on. As soon as you leave the
range of the current DECT system, your handset is automatically checked in to another
DECT system.
•
Subscriptions – New: For
New
enrolment you must complete
the following entries:
PARK: You only need to specify
a PARK if your handset is to be
operated on a specific DECT system (e.g. at locations where the
radio coverage areas of two
DECT systems overlap). Press
OK
to skip this setting if it does
not apply.
Enter PIN: This code enrols your
handset.
Enter System Name: Enter a
name for the DECT system on
which you are enrolled. This
name will always appear in your
display in the idle state. Please
refer to "Text Input" on p. 15.
Enter Number: Some DECT sys-
tems transmit your reserved
telephone number. If this is not
the case, you can enter it here
(your System Administrator will
tell you the telephone number).
•
Subscriptions - Select: If you
have enrolled your handset on
more than one DECT system,
you can select which one your
handset is to use here. Use the
arrow keys to select the system
before pressing
Select
.
•
Subscriptions - Delete: Here you
can delete the enrolment on a
DECT system from your handset. The handset can only be
operated in this system again
after a new enrolment. Use the
arrow keys to highlight the
DECT system before pressing
Delete
.
• Subscriptions - Edit: Here you
can edit the name of the DECT
system and the telephone number displayed in the idle state
(usually the internal telephone
number) in the selected DECT
system.
Type: You can use this setting to
switch the ringer signal off (
Silence).
The bell symbol } appears in the
display. To switch on again, select
Melody or Chirp in the menu (see
below),
or ...
• Chirp: This function signals calls
with a short melody,
or ...
• Melody: This function signals
calls with the complete melody.
Level : You can change the volume
of the Ringer Signal
Intern by press-
ing the digits 1-7,
You can change the volume of the
Ringer Signal
Extern by pressing the
digits 1-7.
"Phone Book Settings"
Menu
The beginning and end of the telephone book list are indicated by
special lines.
If a caller is listed in the telephone
book and his telephone number* is
transmitted during the call, his
name will appear in the display**.
Look up entry: Press
Search
. You
can then enter the first letter of the
entry you are looking for, which will
appear after a few moments.
Create New Entry: Before pressing
New
, use the arrow keys to select a
position in the list. Your new entry
will be inserted immediately prior to
this. When you enter the name, the
keypad will automatically switch to
alphabetic entry (see p. 15). It is not
possible to store a telephone number without a name.
Edit Entry: Before pressing
Edit
, use
the arrow keys to select the entry to
edit. You can use the arrow keys to
move the cursor to the beginning or
the end of the entry to be edited.
Press
OK
when you do not wish to
edit a telephone number or a name.
Delete Entry: Before pressing
Delete
, use the arrow keys to
select the entry to be deleted.
Delete All Entries: Select
Del. all
to delete all entries.
Features and Menus – Local Handset
Overall Menu – Handset
* This function is not supported by all
providers.
** This function is not supported by all commu-
nications systems.
Page 26

49
Reset:
All functions, features in the "Telephone settings" menu, the PIN and
system enrolments are deleted and
reset to the factory settings as soon
as you confirm
Are you sure? with
the
OK
softkey. You can use the
Esc
softkey to exit this menu item
without performing a reset.
48
User Name: Here you can enter a
name which is then shown on the
display of your handset while idling.
Language: Here you select the
desired display language.
"Protection" Menu
This menu is itself protected by a
PIN. Entering a PIN is only necessary
when Read Only is activated.
The factory setting of the PIN is
0000. The PIN entry is displayed as
**** for security reasons. You
can delete digits entered with
c. If
you have forgotten your PIN, please
contact your system administrator.
Read-Only (activate/deactivate):
If Read Only is active, you can see
and check all the features in the
"Telephone settings" menu, but not
change them.
Change PIN:
For reasons of security you must
enter the new PIN twice.
The PIN digits are displayed as
****. This PIN is valid only for
Read Only.
Features and Menus – Local Handset
Overall Menu – Handset
"Telephone Options"
Menu
Use the arrow keys to select the corresponding menu item (or to switch
the function
on and off).
Key Click: If you wish to hear a
sound every time you press a key,
switch the function on by pressing
the arrow
Normal msg.: If your GAP system
supports text messages (LRMS), you
can set the display of received messages here.
Automatic Hook: If you activate this
function, you automatically accept
incoming calls by picking up the
handset from the charging station
while it is ringing.
Silent Charging: The handset does
not signal calls (or messages) as
long as it is in the charger. As soon
as it is removed from the charger, it
signals calls again.
Opt. Charge ind.: The battery charge
level is shown by the LED ring
around the loudspeaker. You can
switch this optical charge level indicator
on or off.
Coverage Warning: If radio contact
is about to be lost, you will hear a
warning signal. You can switch this
on or off as required.
• Configuration: On certain GAP
systems you can use this menu
item to access the "System"
menu.
• Equipment ID: Here you can
read out the international handset identification code (IPEI).
Features and Menus – Local Handset
Overall Menu – Handset
Page 27

5150
Technical Specifications
Appendix
Technical Specifications
OpenPhone 21
Standards:
Display:
Weight:
Dimensions:
Battery:
Standby:
Call time:
Charging time:
Colour:
DECT, GAP, CAP
5-line graphic display
Handset approx. 120 g
Handset 134 x 46 x 22 mm (H x W x D)
NiMH battery pack
up to 80 hours
up to 8 hours
approx. 6 - 7 hours (discharged battery to full capacity)
dark blue/metallic silver
exact description of the defect) to the following address:
DeTeWe Deutsche Telephonwerke AG & Co.
Service Center Berlin
Wendenschloßstr. 142, 12557 Berlin
A processing fee will be charged for any devices sent to us without prior contact
and found free of defect.
Care and Maintenance
Your telephone is a product meeting the highest standards of design
and manufacture. It should therefore be treated with care. Note the
advice below, and you will have
pleasure using this product for a
long time.
Please follow all the safety precautions mentioned on p. 3. These precautions are valid for the handset,
the charger, the rechargeable batteries (the entire telephone), as well
as for the accessories.
In order to clean the telephone, first
remove the charger adapter plug
from the mains socket. Wipe the
Appendix
devices with an anti-static cloth or
soft, damp leather, then with a dry
cloth.
Warning: Never spray your tele-
phone with cleansers or solvents.
Clean the handset and charger contacts with a lint-free cloth.
If your telephone or one of the
accessories fails to function correctly, contact your supplier’s customer
service.
Care and Maintenance
Service and Guarantee
The guarantee runs for 12 months from the date of purchase. In case of problems,
please contact our technical Hotline in Berlin,
Tel. +49 18 05 – DeTeWe (= +49 18 05 – 33 83 93)
Fax +49 18 05 – 33 83 94.
The Hotline can be contacted around the clock, seven days a week. Or send us an
e-mail:
Should the product have a defect our Hotline is not able to rectify, please send
the complete device (with adapter, cables and a copy of the invoice, as well as an
Page 28

Menu - Local Functions
53
Menu - Local Functions
Menu Structure – "Main" Menu
52
Menu Structure – "Main" Menu
AppendixAppendix
Calls Call lists
Charges
Voicebox msg.
Hunt Group
Call forwarding Call diversion
Divert MSN
Divert door
Follow me
Messages Short Messages
E-mail
Appointments
Phone settings Ringer Settings
System
Telephone Options
Protection Call protect.
Telephone lock
Baby call
Change PIN
Availability
Call wait. prot.
Connections Call pick-up
Dial
Telephone Book New entry
Edit
Voicebox Voicebox msg.
Call voicebox
Central Settings Call variant
Date / Time
Key Lock
Caller List
Ringer Settings Melodies
Level
Type
Phone Book Search
New
Edit
Delete
Del. All
Esc.
System Automatic Search
Subscriptions
Configuration
Equipment ID
Telephone Options Key Click
Normal Msg.
Automatic Hook
Silent Charging
Opt. Charge ind.
Coverage Warning
User Name
Language
Security Read-Only
Change PIN
Reset
Page 29

55
Index of Key Words
54
Index of Key Words
M
Main Menu . . . . . . . . . . . . . . . .22, 35
Making a Call . . . . . . . . . . . . . . . . .23
Melodies . . . . . . . . . . . . . . .38, 45, 46
Messages . . . . . . . . . . . . . . . . .35, 37
Multiple Connections . . . . . . . . . . 18
Muting . . . . . . . . . . . . . . . . . . . . . . .17
N
Name, Find . . . . . . . . . . . . . . . . . . .33
Notes . . . . . . . . . . . . . . . . . . . . . . . .22
O
Optical Call Indicator . . . . . . . . . . .17
Optical Indicators . . . . . . . . . . . . . .48
P
PARK . . . . . . . . . . . . . . . . . . . . . . . . .47
Pick-up . . . . . . . . . . . . . . . . .22, 25, 42
PIN . . . . . . . . . . . . . . . . . . . . . . . . . .49
Postdialling . . . . . . . . . . . . . . . . . . .18
Power Supply . . . . . . . . . . . . . . . . . .5
Pre-setting, New . . . . . . . . . . . . . .33
Protection . . . . . . . . . . . . . . . . .35, 49
Quick Switch . . . . . . . . . . . . . . . . . .16
R
R-Key . . . . . . . . . . . . . . . . . . . . . . . .14
Range Warning . . . . . . . . . . . . . . .48
Read Only . . . . . . . . . . . . . . . . . . . .49
Redial . . . . . . . . . . . . . . . . . . . . .18, 21
Reject . . . . . . . . . . . . . . . . . . . . . . . .27
Reset . . . . . . . . . . . . . . . . . . . . . . . .49
Restriction of Telephone Number .2 2
Ringer Settings . . . . . . . . . . . . .38, 45
S
Safety Precautions . . . . . . . . . . . . . .5
Selecting . . . . . . . . . . . . . . . . . . . . .47
Service . . . . . . . . . . . . . . . . . . . . . . .50
Short Messages . . . . . . . . . . . . .21, 37
Softkey Line . . . . . . . . . . . . . . . . . .12
Softkey: Arrow Keys . . . . . . . . . . . .13
Softkey: Esc . . . . . . . . . . . . . . . . . . .14
Appendix
Softkey: OK . . . . . . . . . . . . . . . . . . .14
Speed Dialling . . . . . . . . . . . . . . . .33
Star and Hash Keys . . . . . . . . . . . .34
Subscriber Held . . . . . . . . . . . . . . .29
Switching On/Off . . . . . . . . . . . . . .17
Symbol Line . . . . . . . . . . . . . . . . . .12
System Names . . . . . . . . . . . . . . . .47
System Settings . . . . . . . . . . . . . . .47
T
Technical Specifications . . . . . . . .51
Phone Book . . . . . .22, 35, 42, 43, 46
Telephone Options . . . . . . . . . . . .48
Telephone Settings . . . . . . . . .35, 38
Text Input . . . . . . . . . . . . . . . . . . . .15
Text Lines . . . . . . . . . . . . . . . . . . . .12
Time/Date . . . . . . . . . . . . . . . . . . . .44
Toggle . . . . . . . . . . . . . . . . . . . . . . .29
Transfer . . . . . . . . . . . . . . . . . . .28, 29
Transmission of Telephone
Number . . . . . . . . . . . . . . . . . . .19, 22
Type . . . . . . . . . . . . . . . . . . . . . . . . .38
U
Usage . . . . . . . . . . . . . . . . . . . . . . . . .5
User Name . . . . . . . . . . . . . . . . . . . .49
V
VIP Call . . . . . . . . . . . . . . . .22, 25, 42
Voicebox . . . . . . . . . . . . . . . . . . . . . .44
Volume . . . . . . . . . . . . . . . . . . .38, 46
A
Accept . . . . . . . . . . . . . . . . . . . . . . .27
Accepted Calls . . . . . . . . . . . . . . . .35
Announcement . . . . . . . . .22, 32, 42
Appointments . . . . . . . . . . . . . . . . .37
Automatic Find . . . . . . . . . . . . . . . .47
Automatic Hide . . . . . . . . . . . . . . .16
Automatic Lift . . . . . . . . . . . . . . . . .48
B
Baby Call . . . . . . . . . . . . . . . . . . . . .31
Battery . . . . . . . . . . . . . . . . . . . . . .7, 8
Black- and Whitelists . . . . . . . . . . .19
C
Call Duration Display . . . . . . . . . . .18
Call Forwarding . . . . . . . . . . . . . . . 36
Call List . . . . . . . . . . . . . . . . . . . . . .35
Call Pick-up . . . . . . . . . . . . . . . . 25, 42
Call Variant . . . . . . . . . . . . . . . . . . .44
Callback . . . . . . . . . . . . . . . . . . .25, 32
Calls . . . . . . . . . . . . . . . . . . . . . . . . .35
Cancel Key . . . . . . . . . . . . . . . . . . . .14
Care and Maintenance . . . . . . . . .50
Central Settings . . . . . . . . . . . .35, 44
Charge Display . . . . . . . . . . . . . . . .10
Charge Only . . . . . . . . . . . . . . . . . .48
Charge Warning . . . . . . . . . . . . . . .10
Charger . . . . . . . . . . . . . . . . . . . . . . . 8
Charges . . . . . . . . . . . . . . . . . . .22, 36
Charging and Operating Times . . .9
CLIP . . . . . . . . . . . . . . . . . . . . . . . . .19
CLIR . . . . . . . . . . . . . . . . . . . . . . . . .20
Commissioning . . . . . . . . . . . . . . . . .9
Conference . . . . . . . . . . . . . . . . . . .29
Connections . . . . . . . . . . . . . . .35, 42
Consultation/Toggle . . . . . . . . . . .28
Appendix
D
DECT and GAP . . . . . . . . . . . . . . . . . .6
Device ID . . . . . . . . . . . . . . . . . . . . .48
Dial . . . . . . . . . . . . . . . . . . . . . . . 21, 42
Disconnect . . . . . . . . . . . . . . . .25, 27
Door Opener . .22, 25, 27, 29, 31, 42
Doorbell . . . . . . . . . . . . . . . . . . . . . .31
E
E-Mail . . . . . . . . . . . . . . . . . . . . .21, 37
Enrolment . . . . . . . . . . . . . . . . . . . .47
Entrance Intercom Call . . . . . . . . .31
F
Follow me . . . . . . . . . . . . . . . . . . . .37
G
General . . . . . . . . . . . . . . . . . . . . .3, 5
Glossary . . . . . . . . . . . . . . . . . . . . . . .3
Guarantee . . . . . . . . . . . . . . . . . . . .50
H
Handset Enrolment . . . . . . . . . . . .10
Hunt Group . . . . . . . . . . . . . . . . . . .36
I
Illumination . . . . . . . . . . . . . . . . . .13
Installation Location . . . . . . . . . . . .7
Intercept . . . . . . . . . . . . . . . . . . . . .25
Internal and External Telephone
Numbers . . . . . . . . . . . . . . . . . . . . .18
K
Keypad Dialling . . . . . . . . . . . . . . .19
Keypad Lock . . . . . . . . . . . . . . .17, 45
L
Language . . . . . . . . . . . . . . . . . . . .49
Least Cost Routing . . . . . . . . .19, 22
Local Number . . . . . . . . . . . . . . . . .47
Loudspeaker Volume . . . . . . . . . .17
Page 30

57
Declaration of Conformity
56
Notes
Appendix
Declaration of Conformity
This telephone conforms to the requirements set down in the EU directive
99/5/EC.
The Declaration of Conformity can be viewed at the DeTeWe web site at
http://www.detewe.de.
Appendix
Page 31

In the UK:
DeTeWe Ltd
1 Frogmore Road, Hemel Hempstead,
Herts, HP3 9TG
Telephone 01442 282000
Telefax 01442 345677
Other countries:
DeTeWe AG & Co.,
Zeughofstrasse 1, D-10997 Berlin, Germany
Service telephone (+49 18 05) 33 83 93
(EUR 0.12/minute, 24 hours a day, 7 days a week) Subject to changes
Telefax (+49 18 05) 33 83 94
E-Mail: [email protected] As of: 07.02
WWW: http://www.detewe.de/ Item No.: 72560.030
 Loading...