

Page 1

Quick Installation Guide
POE Outdoor Bullet IP Camera
Model: B-xE Series
Page 2
Shenzhen Dericam Technology Co., Ltd. Quick Start Guide-V 1.0.2
1
www.dericam.com Tech support email [email protected]
Package Contents
POE Outdoor Bullet IP Camera x1
Power Adapter DC 12V x1
Mounting Bracket x1
Ethernet Cable x1
Quick Installation Guide x1
Warranty Card x1
CD-ROM x1
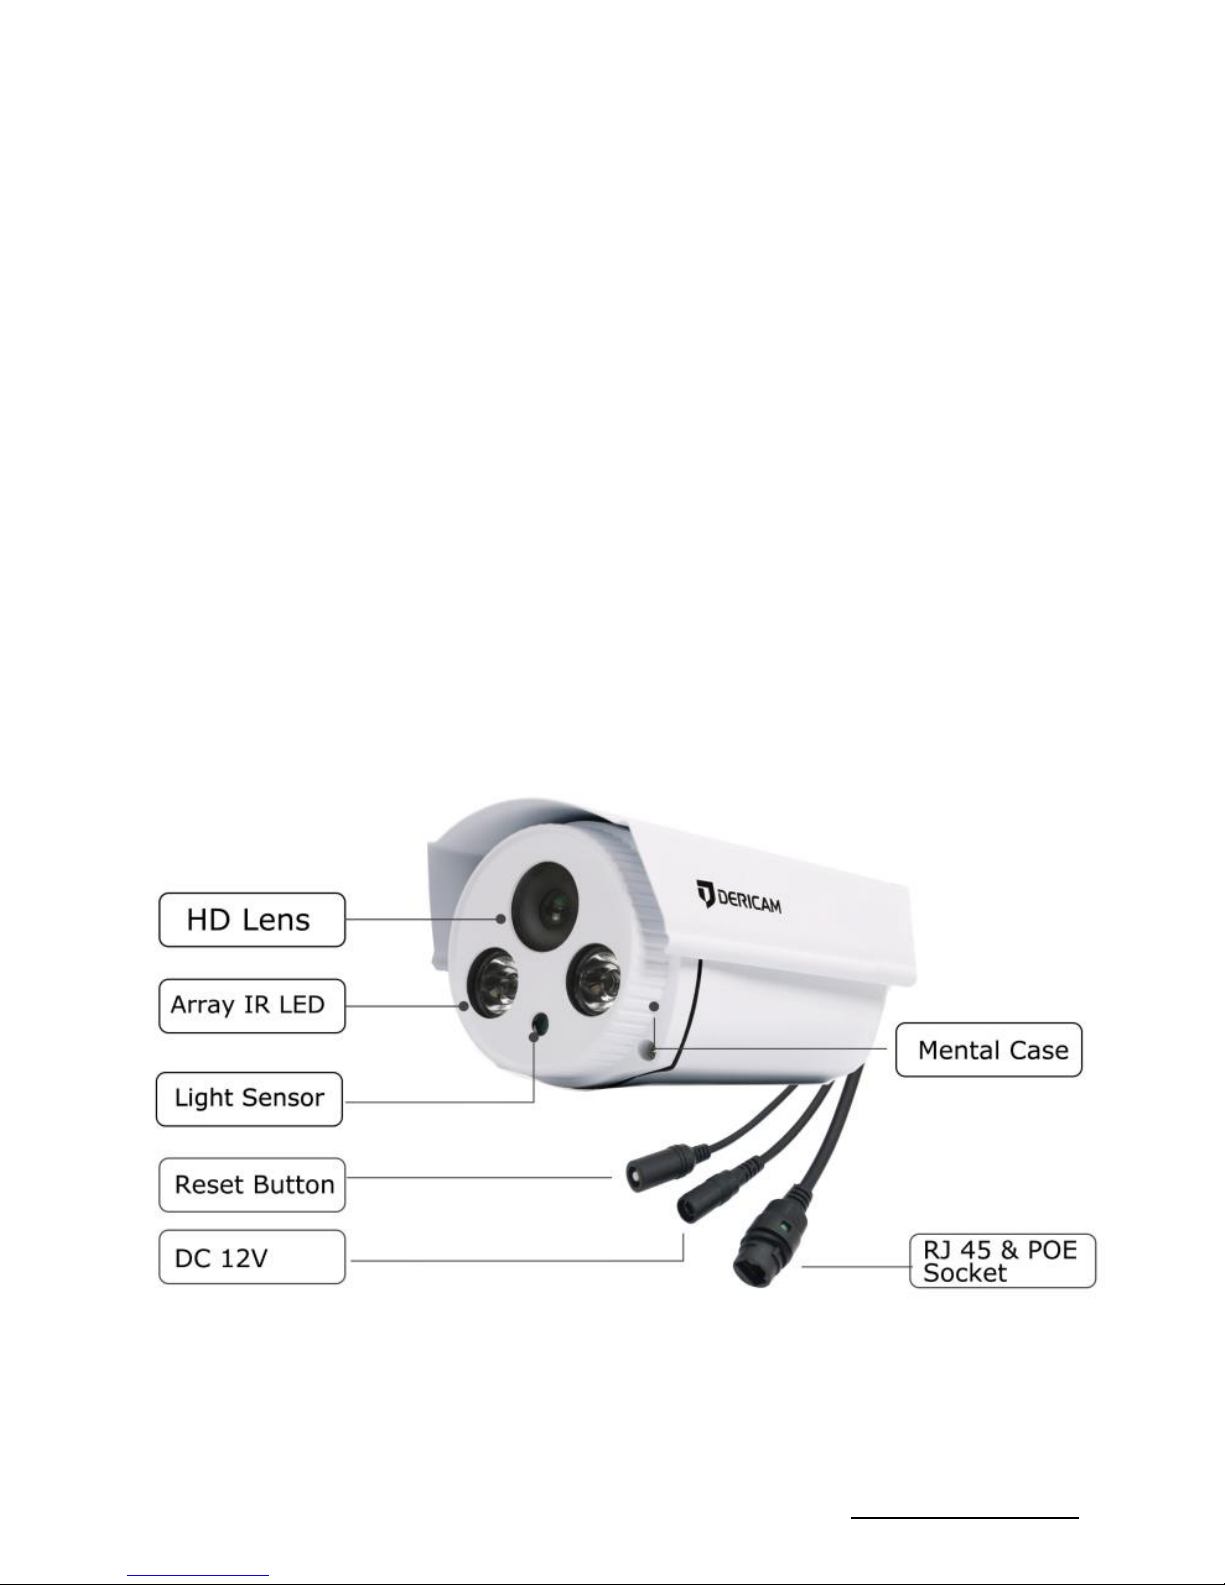
Physical Description
Page 3
Shenzhen Dericam Technology Co., Ltd. Quick Start Guide-V 1.0.2
2
www.dericam.com Tech support email [email protected]
Start Installation of the Camera
You can install the camera on a smartphone/tablet (Android
or iOS) as our priority recommendation, or on a PC
(Windows or Mac OS). Please refer to the guide for
smartphone/tablet installation on page 3, or PC installation
on page 9 after completing first step on hardware
installation.
1. Hardware installation
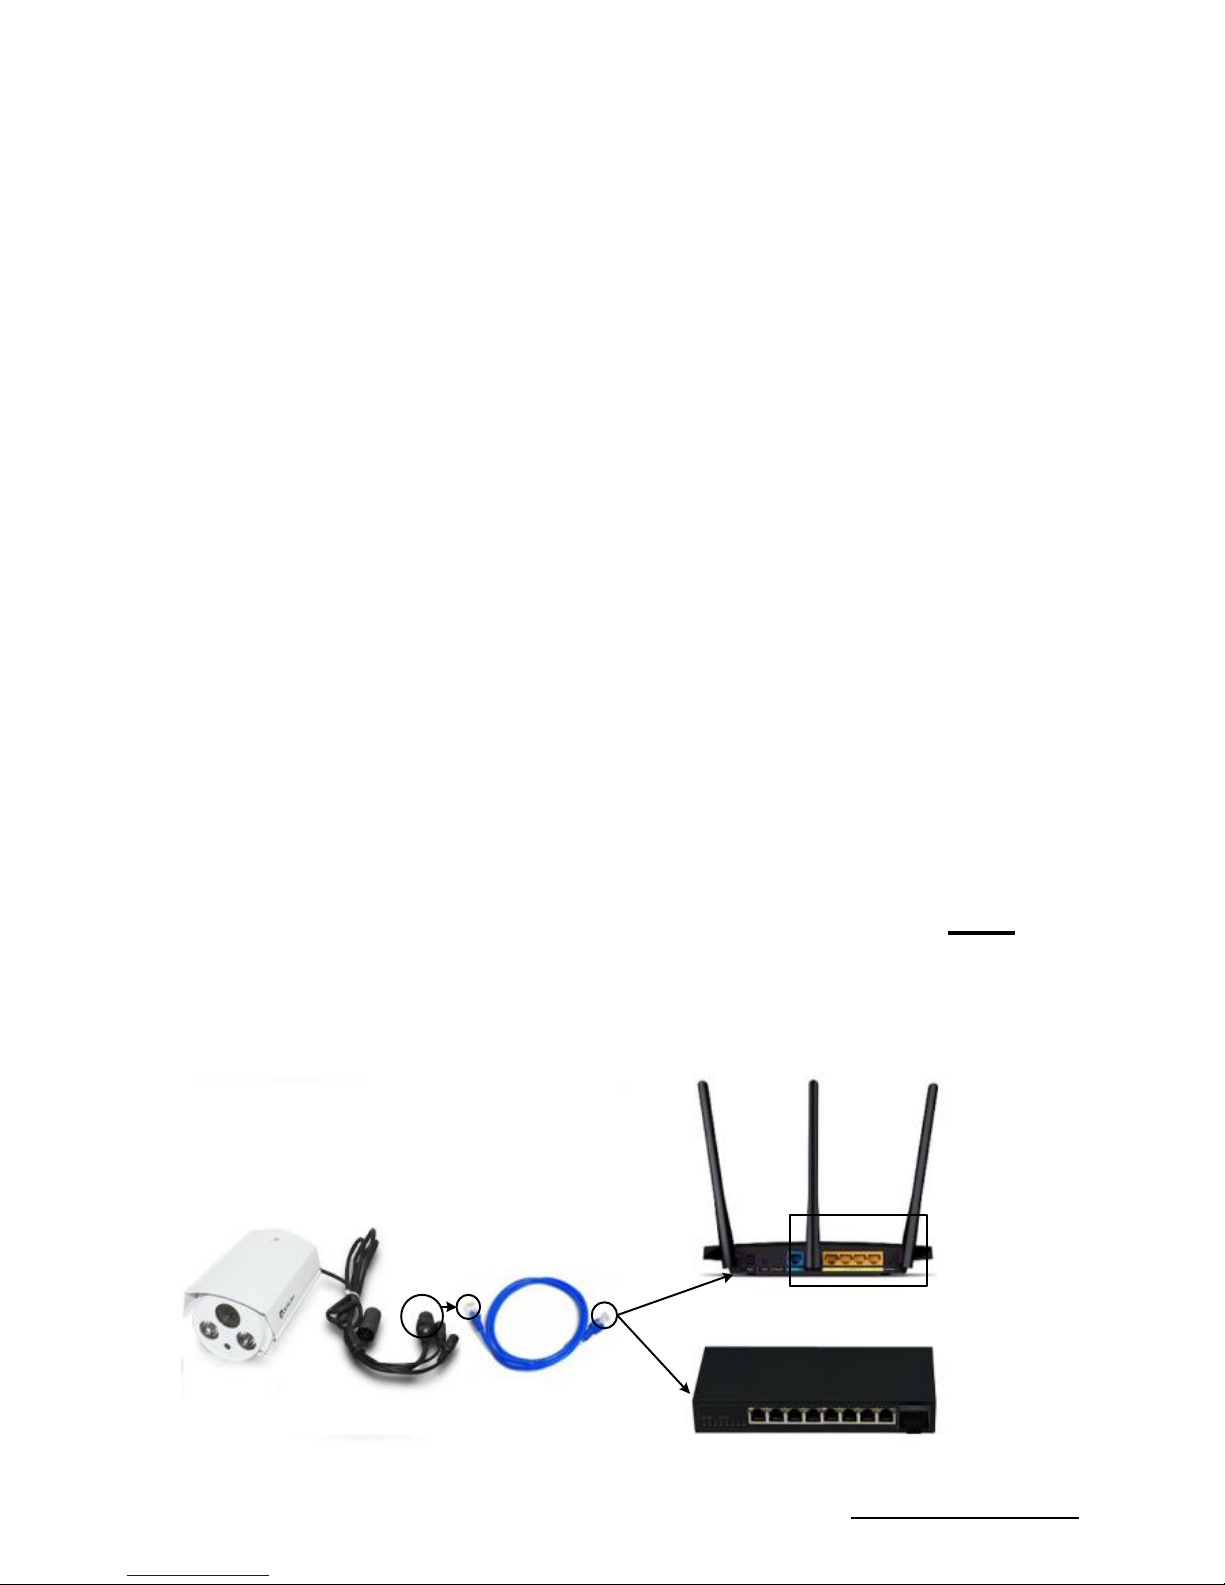
1.1 For working at POE mode, only need to connect the
Ethernet & POE port with a POE Switch via an
Ethernet cable for power up and network connection.
1.2 If there is no POE Switch, connect the camera’s DC
socket with the power adapter for power up, and
connect its Ethernet & POE port directly with your
router via an Ethernet cable.
LAN Port
Ethernet &
POE Port
Router or Switch
POE Switch
Or
1
2
(Please power up the camera by
DC power adapter firstly.)
Page 4
Shenzhen Dericam Technology Co., Ltd. Quick Start Guide-V 1.0.2
3
www.dericam.com Tech support email [email protected]
Notes, the B1E is not Wi-Fi supported.
2. Smartphone/Tablet Installation
This camera can only connect to 2.4 GHz Wi-Fi networks,
so please ensure that your phone is connected to a
compatible network, if the router is dual-band.
2.1 Download and Install Dericam App.
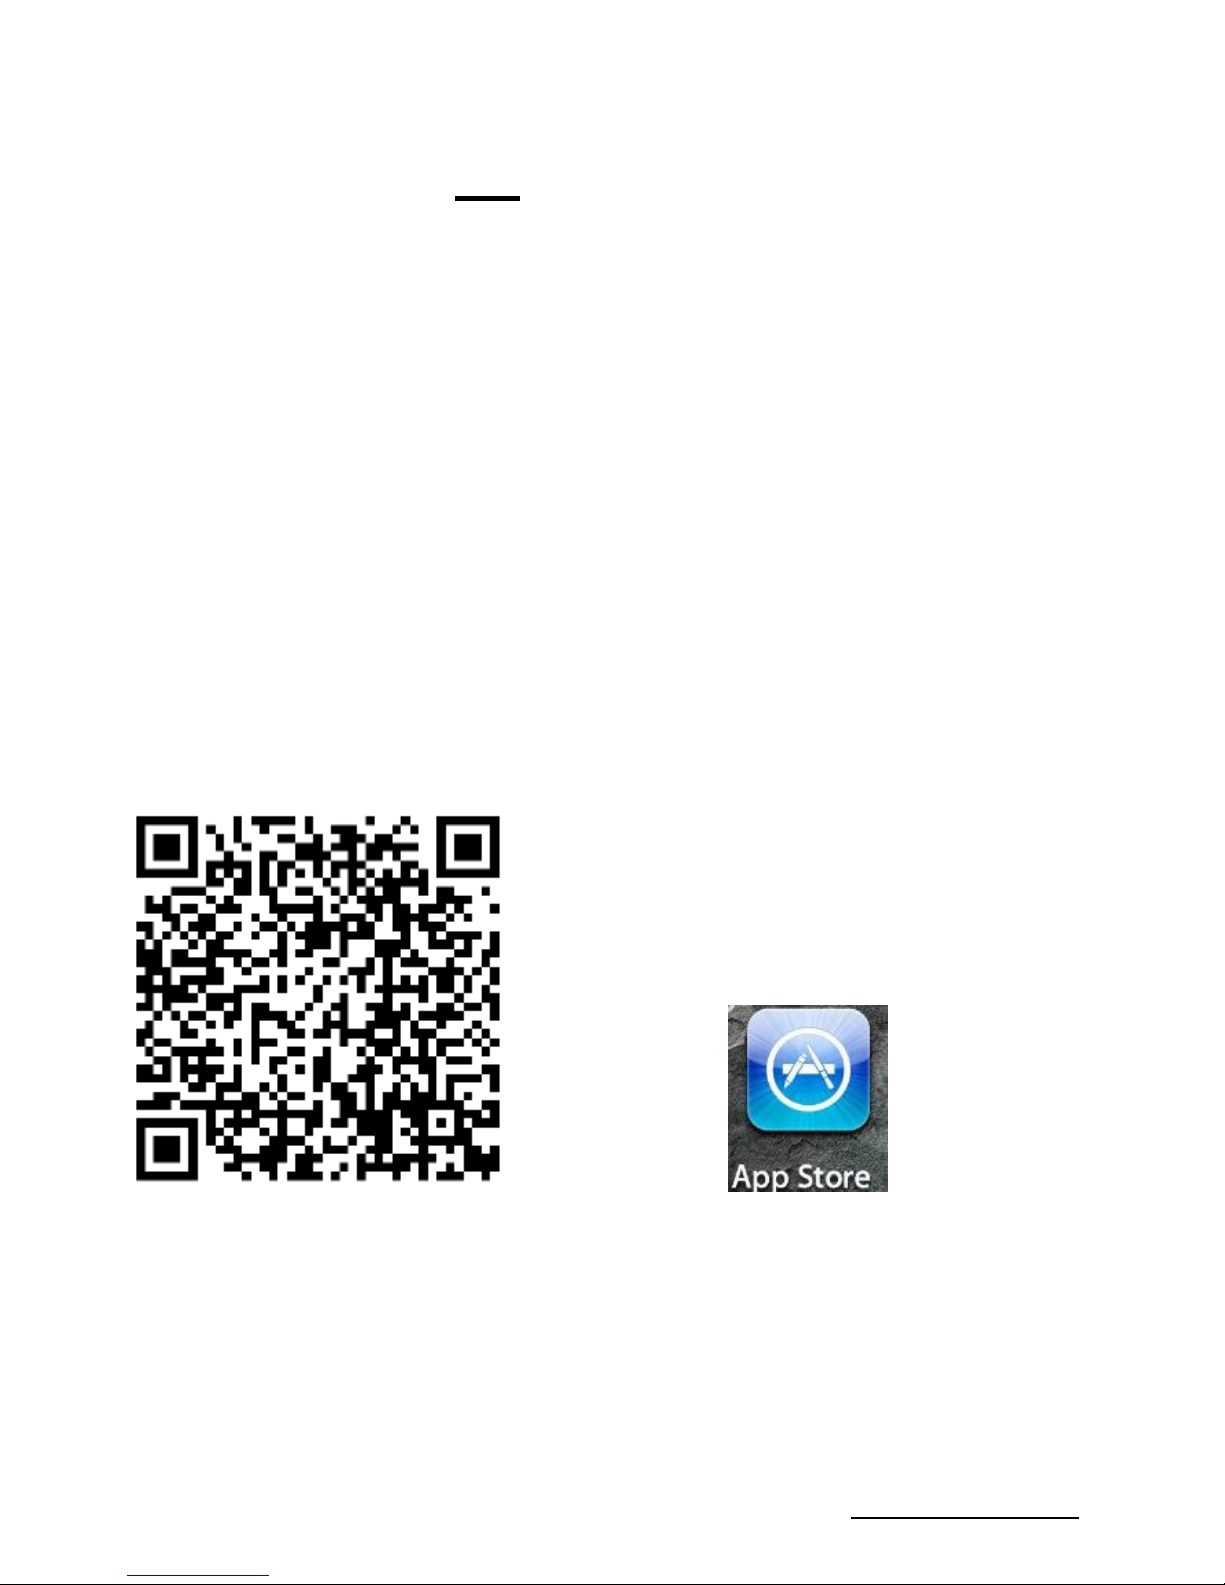
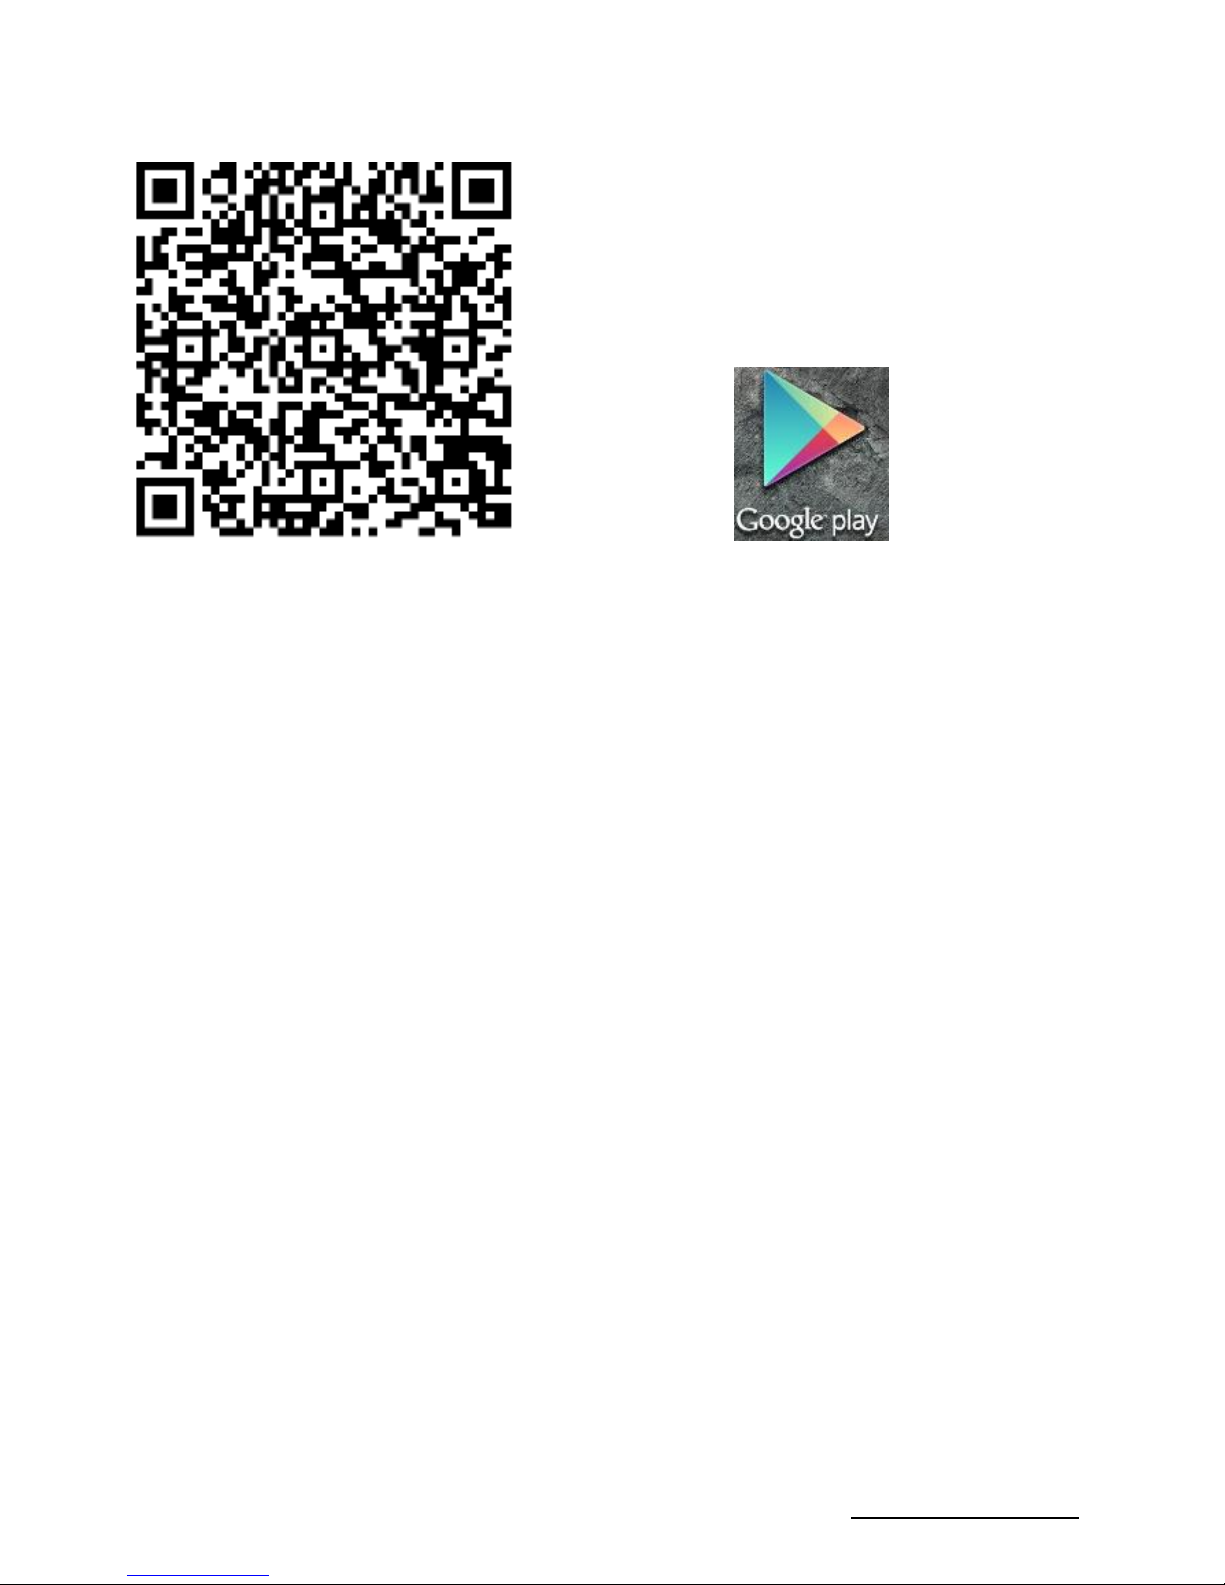
Search “Dericam” on App Store/Google Play, or scan the
QR code to download Dericam App and install it on your
phone/tablet.
Scan the left QR code to directly
download the iOS App from App
Store
Page 5
Shenzhen Dericam Technology Co., Ltd. Quick Start Guide-V 1.0.2
4
www.dericam.com Tech support email [email protected]
2.2 Add Camera to Your Phone and Login the
Camera.
Run the Dericam App on phone. Click “Add Camera”.
-If it is for the first installation, go to “Setup a new camera”
then click “Next” (Step 1).
-If the camera has been added successfully before, go to
“Setup an existing camera”.
Click “Scan for your camera” (Step 2). The camera on the
LAN will be found and listed with UID code and IP address.
Scan the left QR code to directly
download the Android App from
Google Play
Page 6
Shenzhen Dericam Technology Co., Ltd. Quick Start Guide-V 1.0.2
5
www.dericam.com Tech support email [email protected]
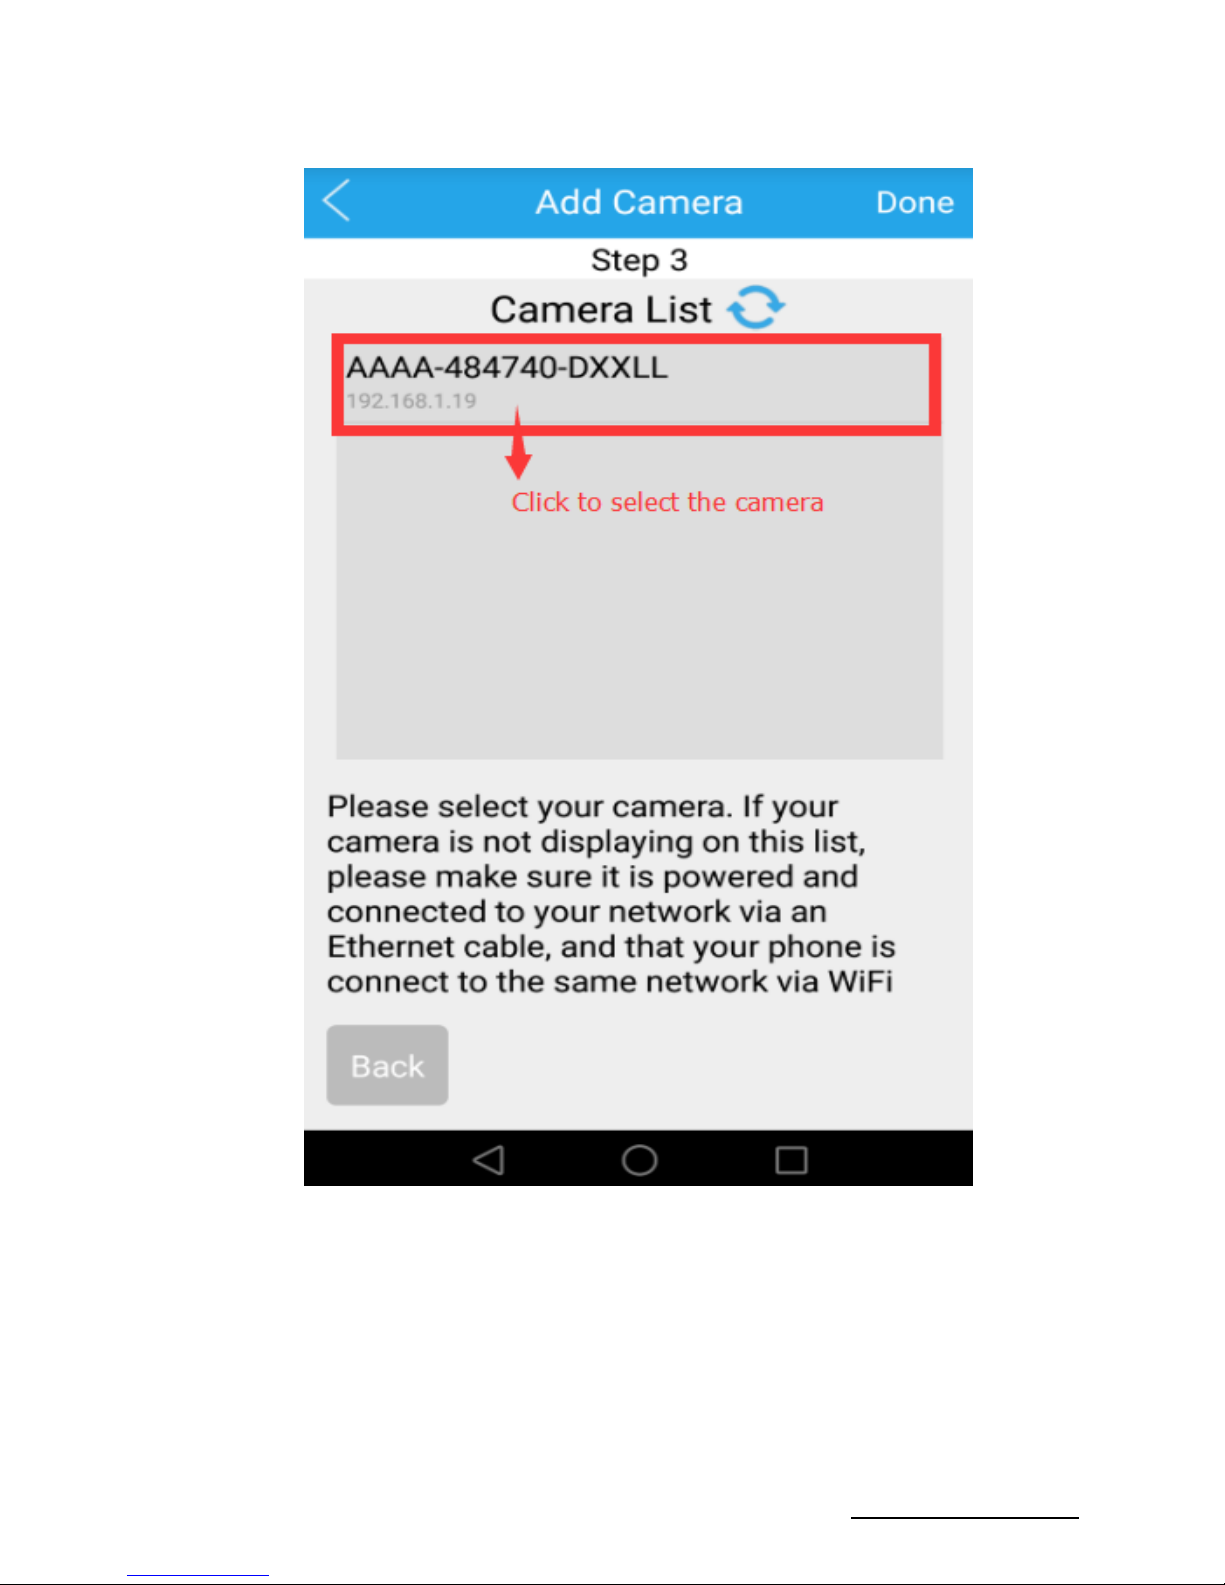
Select your camera by clicking the UID code displayed on
the list (Step 3) for going to the interface of camera
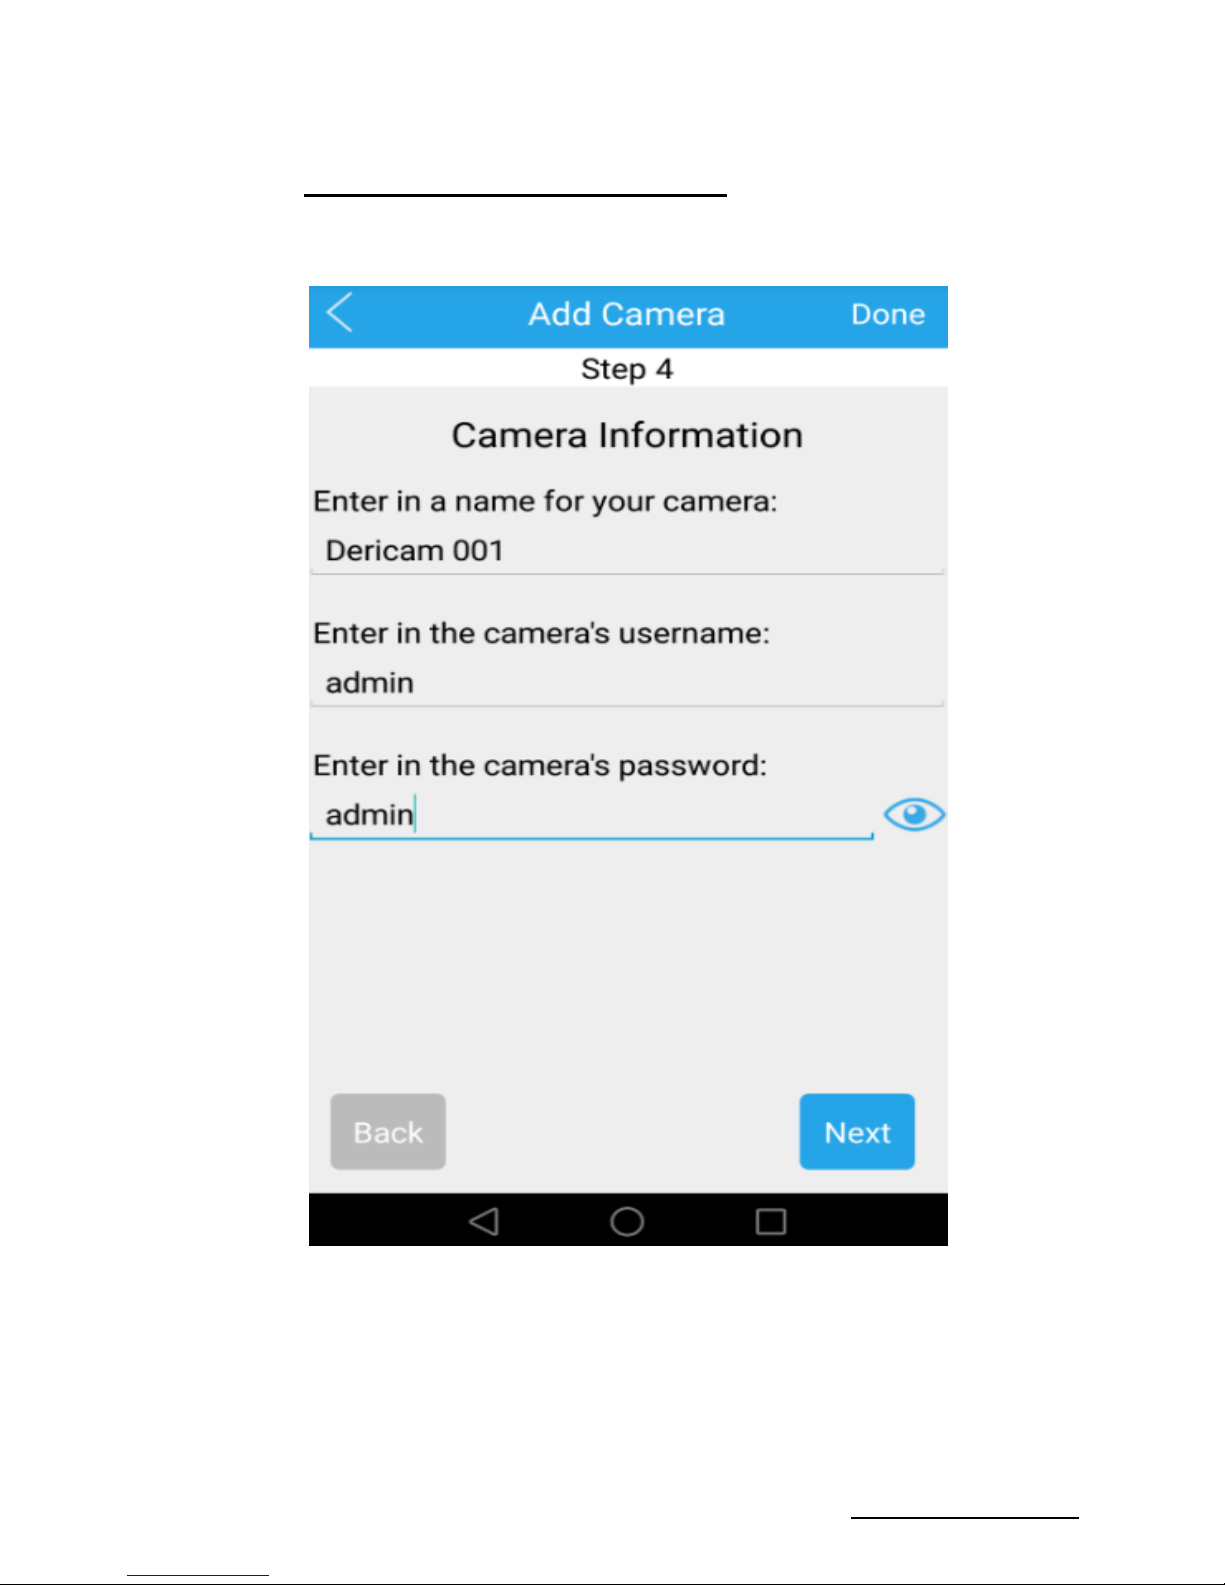
information (Step 4). Give a name for your camera, and
Page 7
Shenzhen Dericam Technology Co., Ltd. Quick Start Guide-V 1.0.2
6
www.dericam.com Tech support email [email protected]
enter the username and password (Both are “admin” for
factory default setting). Then click “Next”.
Notes: The password is case sensitive.
2.3 Change the default Password of the Camera
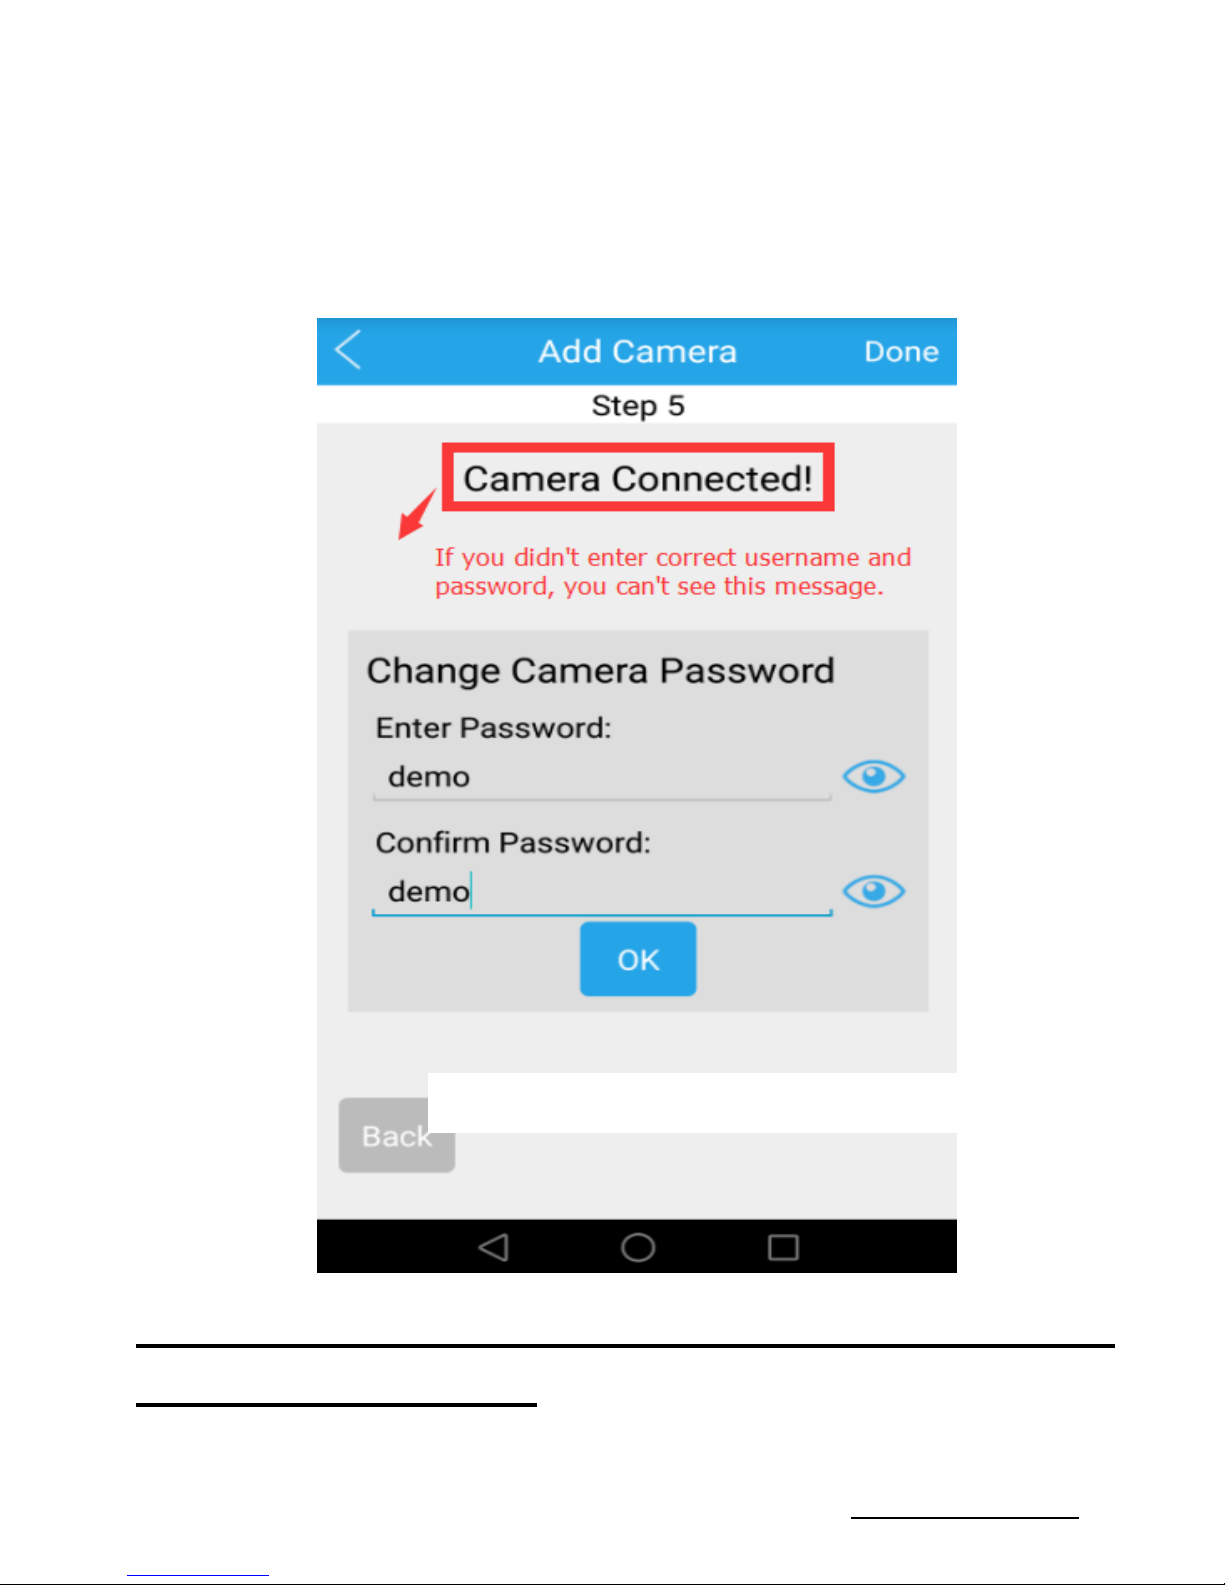
For security, it is required to change new password. It is not
Page 8
Shenzhen Dericam Technology Co., Ltd. Quick Start Guide-V 1.0.2
7
www.dericam.com Tech support email [email protected]
available to change username in App on phone but you can
change it after login on computer.
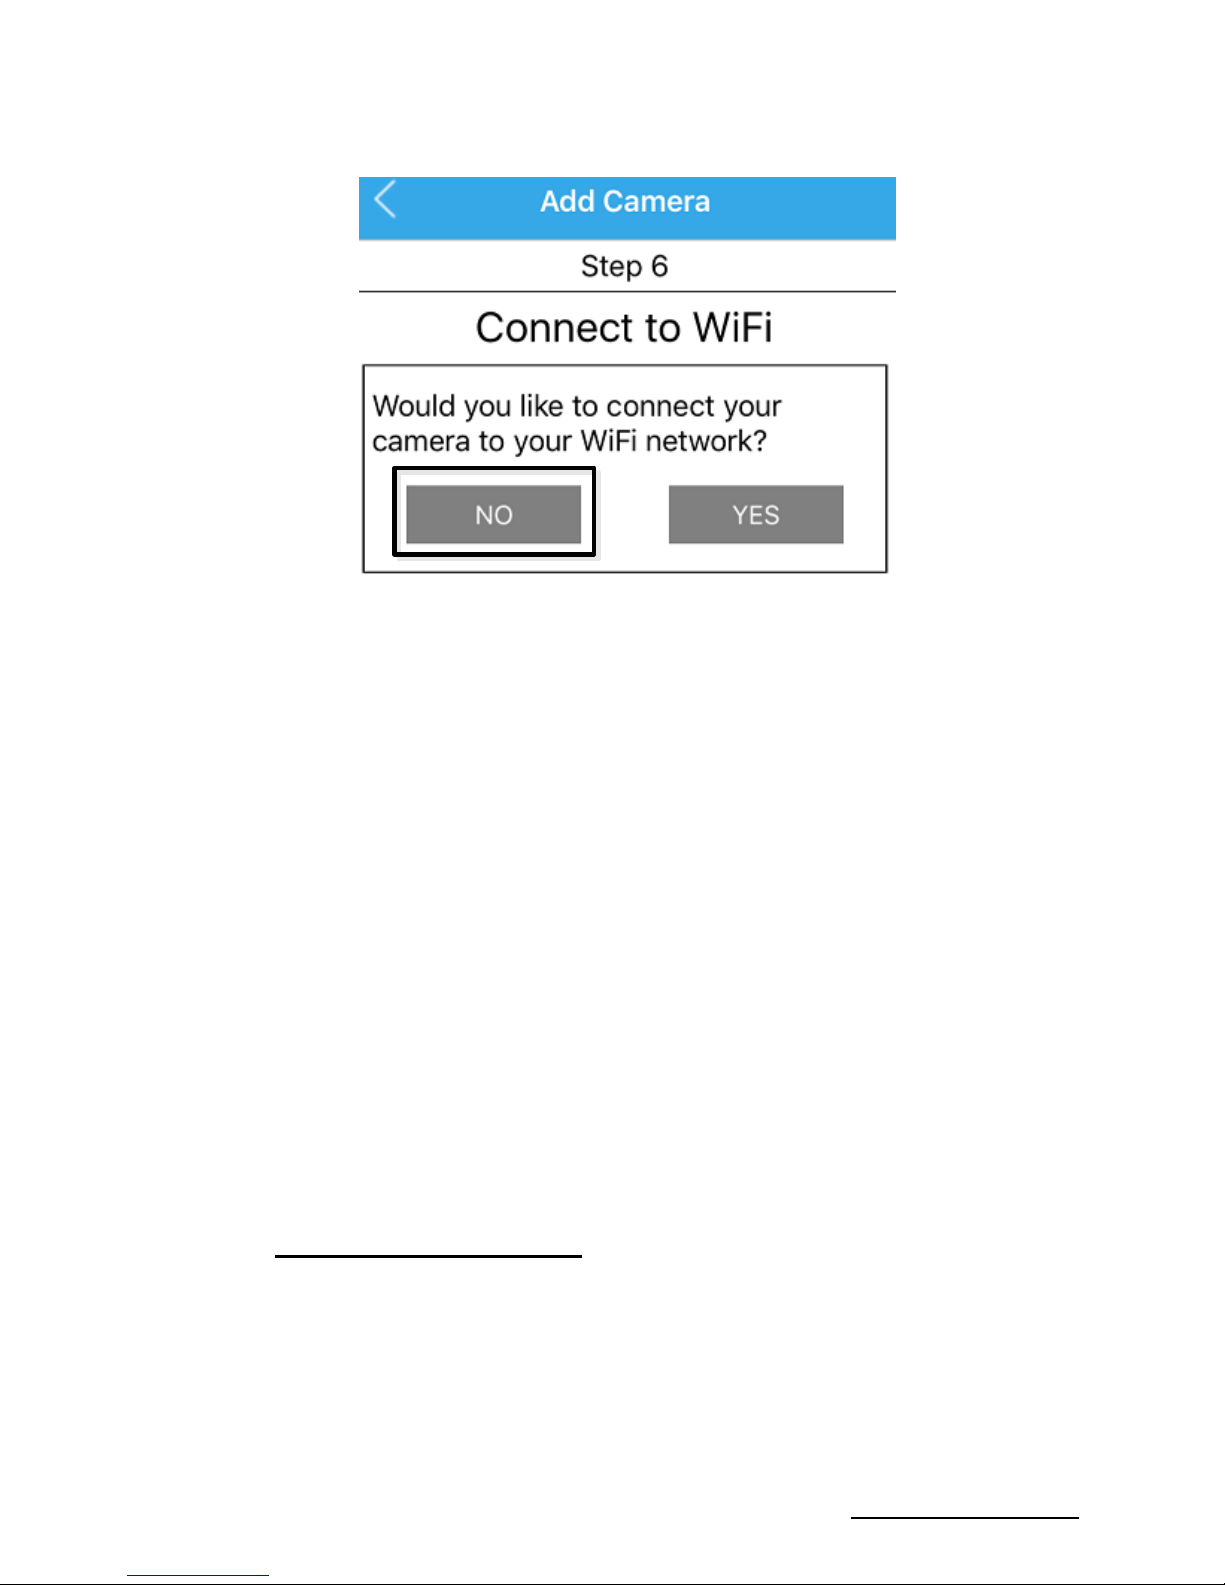
Ignore the prompt about Wi-Fi setup and click "No" or
“Done” to finish setup because this POE camera does
not support wireless connection.
Note, the username is still “admin”.
Page 9
Shenzhen Dericam Technology Co., Ltd. Quick Start Guide-V 1.0.2
8
www.dericam.com Tech support email [email protected]
Congratulations!
Now you have successfully completed the installation of
the camera on your smartphone/tablet.
You can take time to view the camera immediately. For
other advanced software settings, such as motion
detection Alarm Settings, Email Settings, Video Settings,
please refer to the user manual in the CD-ROM, or review
related subjects in the area of Support -> FAQ on our
website www.dericam.com for details.
Page 10

Shenzhen Dericam Technology Co., Ltd. Quick Start Guide-V 1.0.2
9
www.dericam.com Tech support email [email protected]
3. Computer Installation
If you want to install the camera on computer for the first
time, please follow the below instructions after you have
finished the hardware installation.
3.1 Install Search Tool on the computer
Install “Dericam Search Tool” from the software CD or
downloaded from “Support” ->”Download Center” from
www.dericam.com.There will be a shortcut on the desktop
after installation.
3.2 Login the Camera and Change the default
Password
1. Run “Dericam Search Tool”, and then click “Next”, the
camera which is connected on the network will be
detected and listed in the window automatically along
with its UID, IP and MAC addresses.
2. Double click the camera on the list to view in Internet
Explorer (IE11, IE10 or other browsers) on computer.
If Microsoft Edge pops up as default browser, go to
“More”->”Open with Internet Explorer”.
3. Enter default username “admin” and default password
Page 11

Shenzhen Dericam Technology Co., Ltd. Quick Start Guide-V 1.0.2
10
www.dericam.com Tech support email [email protected]
“admin” to login the camera. Usually a message
about installing plugin will prompt. Click the button
“install” following the message for plugin installation.
4. After successfully installing the plugin, you will back to
login window again. Please re-enter the username and
password for login.
5. For security, the camera will ask for changing new
password. Please input a new password to login the
camera. Then you will see the live view window of the
camera in the browser.
Now you have succeeded in accessing in the camera by
wired connection via PC. Just leave all the menus alone
before you finish the Wi-Fi Setup.
Notes: The password is case sensitive.
3.3 Remote Access Settings via Web Browser
You needn’t do any additional setup on smartphone/tablet
because the App is integrated with P2P technology which
allows remotely accessing to the camera automatically
using the UID of the camera.
If you want to access to the camera remotely in browser on
Page 12

Shenzhen Dericam Technology Co., Ltd. Quick Start Guide-V 1.0.2
11
www.dericam.com Tech support email [email protected]
computer outside the LAN, you have to do Remote Access
Settings via browser. Here are additional instructions on
how to do Remote Access Settings.
1. Enable UPNP in Camera Configuration.
Go to the menu CONFIG on the top of the live view
window, and go to Network->DDNS->UPNP. Select
enable, and then click Apply button to save and apply.
Note: Please make sure your router enabled the UPNP
firstly.
2. Get the WAN IP Address of the Camera.
Go to the option DDNS, then click Query, then it will
show the WAN IP address of the camera (which is the
WAN IP of the router too).
3. Access the camera by WAN IP Address + Camera
Port via Browser.
Take WAN IP 14.127.65.238 for example:
If the HTTP port number of the camera is 80, the accessing
link of the camera via internet would be
http://14.127.65.238 or http://14.127.65.238:80
If the HTTP port of the camera is 88, the link of the camera
via internet would be http://14.127.65.238:88.
Page 13

Shenzhen Dericam Technology Co., Ltd. Quick Start Guide-V 1.0.2
12
www.dericam.com Tech support email [email protected]
Note: If the WAN IP + Camera port link of the camera does
not work, it is probably caused the UPNP settings. You
should access to your router management and setup port
forwarding first.
Congratulations!
Now you have successfully completed the installation of
the camera on your computer.
You can take time to view the camera immediately. For
other advanced software settings, such as motion
detection Alarm Settings, Email Settings, Video Settings,
please refer to the user manual in the CD-ROM, or review
related subjects in the area of Support -> FAQ on our
website www.dericam.com for details.
Page 14

Shenzhen Dericam Technology Co., Ltd. Quick Start Guide-V 1.0.2
13
www.dericam.com Tech support email [email protected]
Frequently Asked Questions
Q1: Why does the program prompt me “wrong
password” even I tried different usernames and
password several times?
A1: The original username and password are both "admin"
(lowercase, no capital letters) as factory default setting.
If the camera has been installed before, enter new
username and password changed. As some iOS phones
may automatically change the initial letter as capital, make
sure to disable this function before entering.
Only the password has been changed after the first
installation, the username is still remained as “admin” as it
is not available to change username in App.
Q2: If I forget my username/password, how can I reset
the camera to resume factory defaults?
A2: For Dericam BxE series cameras, you should press the
white reset button on the 3-to-1 cable and hold on for 5-8
seconds for reset. The power should be on during reset
operation.
 Loading...