

Page 1

TFD-2213
22" TFT LCD TV+DVD COMBO
Operating Instructions
PAL/SECAM B/G,D/K, I,
AC 110-240V 50/60Hz
SCART IN, PC IN
TELETEXT
NTSC PLAYBACK
INSIDE DVD
SUPPORT FORMAT: SVCD, VCD, WMA, HDCD,
KODAK PICTURE CD, DVD
MPEG4
Page 2

Page 3

TABLE OF CONTENTS
Table of Contents
Specifications
Installation
Warnings and Cautions
Setup
Functional Parts(TV)
Functional Parts(DVD)
Rear view of TV set
Remote Control unit
TELETEXT Operations
Remote Control Operation(DVD)
MENU Screens
4-5
8-9
10
11-12
13-14
1
Inital Settings(DVD)
2
Troubleshooting Tips
3
The Causes of interference
6
6
7
7
15-16
17
18
1
Page 4

SPECIFICATIONS
Receiving System:
Colour System:
LCD Panel:
Ext.Antenna:
Ext. In/Out:
Speaker:
Audio Output:
Power consumption:
Standby power consumption:
Power Supply:
B/G,D/K,l,L/L , ,
,
(Optional)
PAL,SECAM,(optional)
558.8mm(22 inch) diagonal
75 Ohm Coaxial Cable
HDMI,YPbPr,AV,PC Input, SCART IN,Earphone
8 Ohm
3W x 2
60W
3W
AC 110-240V 50/60Hz
Dimension:
Net Weight:
W530 xD196 xH435(mm)
5.4KG
Note:Design and specifications are subject to change without prior notice.
OPEN/CLOSE POWER
REMOTE CONTROL
Transmitting System :Infrared
Power Supply :DC 3V
Q.
Q.
-/---/--
VIEW
VIEW
REPEAT
MUTE SOURCE
PROG+
MENU
VOL-
ASPECT S.M
PROG-
STOP
REVEAL SIZE
TEXT
INDEX
ANGLE SLOW
TITLE
DVD MENU PROGRAMSUBTITLE
ENTER
DVD SETUP
GOTO
P.PP.P
SWAPSWAP
VOL+
MIX
SUB.PAGE
ZOOM
AUDIO
DISPLAY
2
Page 5
INSTALLATION
Thank you very much for your purchase of this product, the most natural Colour Television Receiver.
To enjoy your set to the full from the very beginning, read this manual carefully and keep it handy for ready
reference.
INSTALLATION
Locate the receiver in the room where direct light does not strike the screen.
Total darkness or a reflection on the picture screen can cause eyestrain. Soft and indirect lighting is
recommended for comfortable viewing.
Allow enough space between the receiver and the wall to permit ventilation.
Avoid excessively warm locations to prevent possible damage to the cabinet or premature component
failure.
This TV operates on a DC supply provided by the AC-DC adaptor. The voltage is as Indicated on the label
on the back cover.Only use the AC-DC adaptor supplied with the TV and never apply an AC mains to the TV
directly. The AC-DC adaptor operates on and AC mains supply, the voltage is as indicated on the label of
the AC-DC adaptor. Connect the DC plug of the AC-DC adaptor to the DC 12V socket at the back of the TV.
Connect the AC-DC adaptor and its mains cord. Insert the mains plug in the wall socket having a mains
voltage of 110-240V.
Do not install the receiver in a location near heat sources such as radiator, air ducts, direct sunlight ,or
in a place somewhere like close compartment and close area.
Do not cover the ventilation openings when using the set.
CAUTION
Never tamper with any components inside your set, or any other adjustment controls not mentioned in
this manual. The LCD panel used in this product is made of glass. Therefore,it can break When the product
is dropped or applied with impact. Be careful not to be injured by broken glass pieces in case the LCD panel
breaks.When you clean up dust or stick of a water drop on the LCD panel. The power cord should be pulled
out from the plug receptacle, then wipe the receiver with dried soft cloth .During thunder and lighting ,
unplug the power cord and antenna cord to prevent your TV set from damage. All television receivers are
high voltage instruments. All "inside work" on your receiver should be performed only by the TV service
personnel.
If some abnormal phenomena happens , may be you have some mis-opertion,please take off power and
restart your TV set .
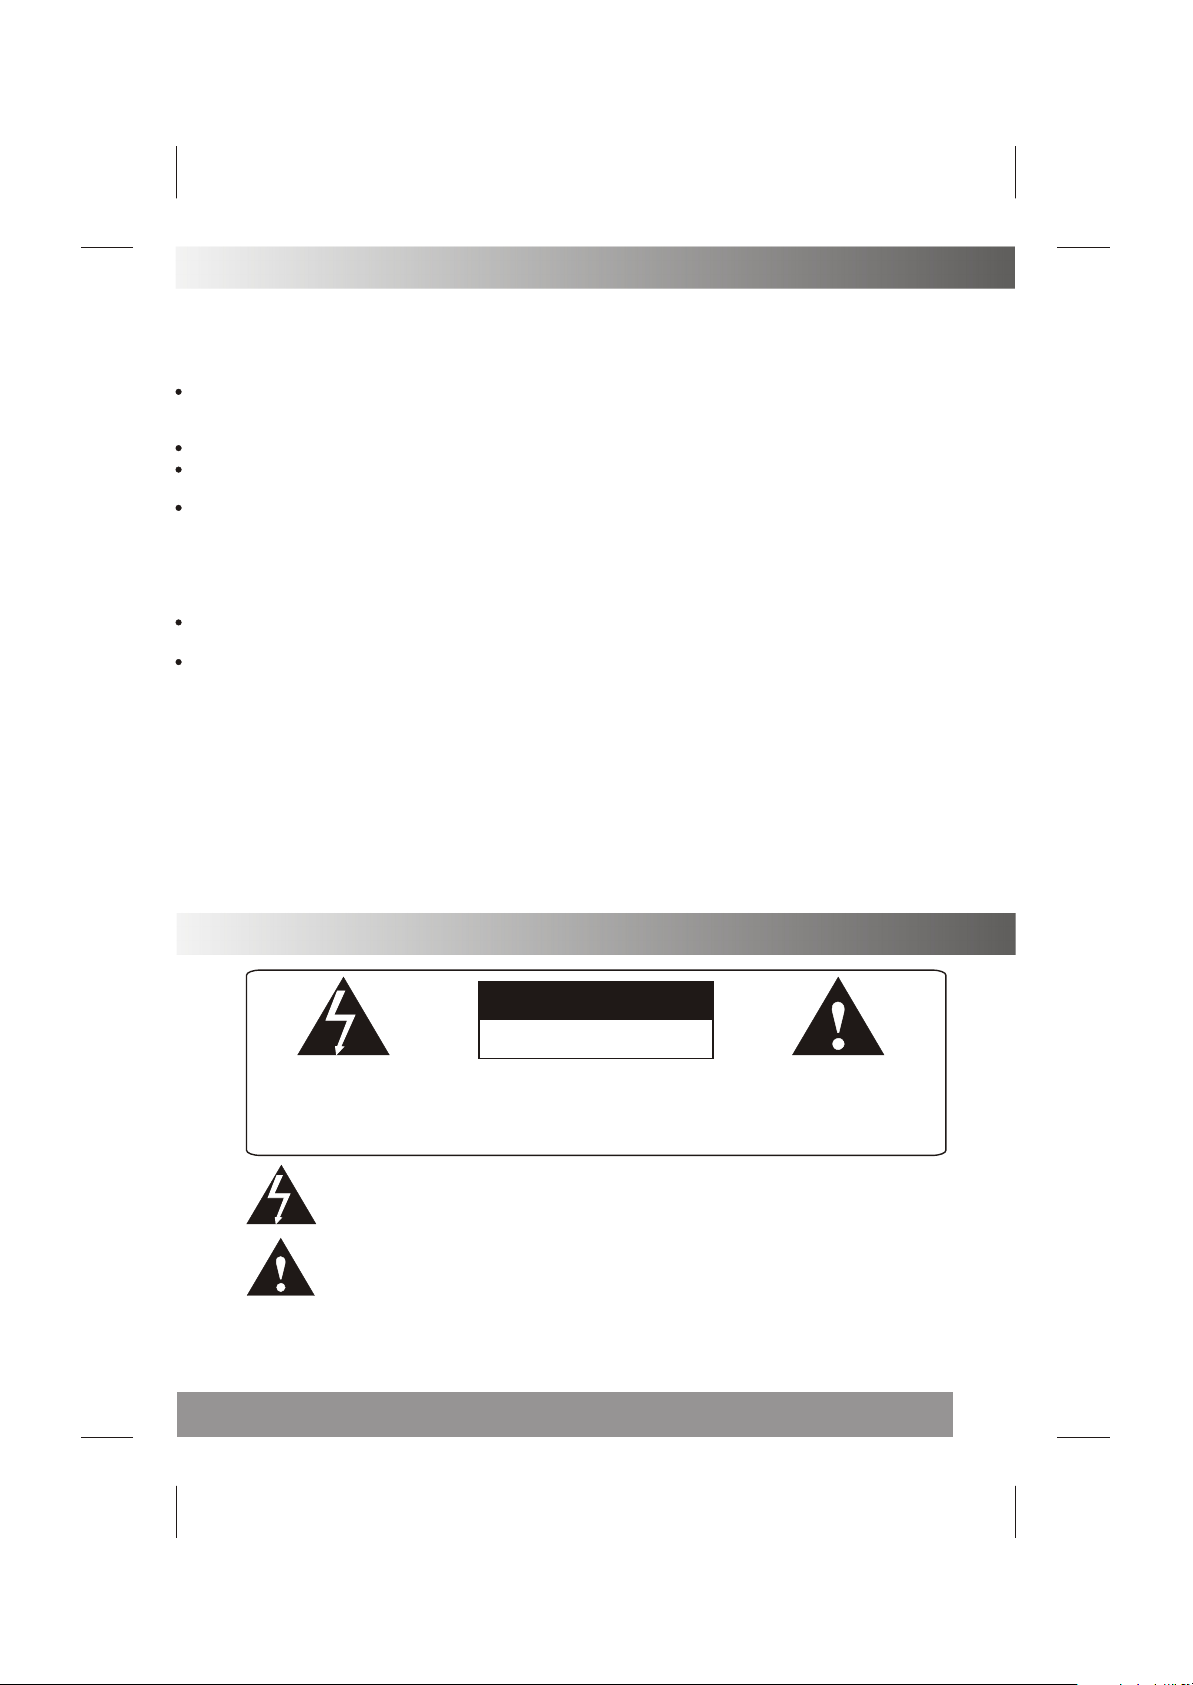
IMPORTANT SAFETY INSTRUCTION
WARNING
RISK OF ELECTRIC SHOCK
DO NOT OPEN
WARNING: TO REDUCE THE RISK OF ELECTRIC SHOCK DO NOT
REMOVE COVER OR BACK. NO USER-SERVICEABLE PARTS INSIDE.
REFER SERVICING TO QUALIFIED SERVICE PERSONNEL.
The lighting flash with arrow head within a triangle is intended to tell the user that
parts inside the product are a risk of electric shock to persons.
The exclamation point within a triangle is intended to tell the user that important
operating and servicing instructions are in the papers with the appliance.
WARNING: TO REDUCE THE RISK OF ELECTRIC SHOCK DO NOT EXPOSE THIS
APPARATUS TO RAIN OR MOISTURE AND OBJECTS FILLED WITH LIQUIDS,
SUCH AS VASES, SHOULD NOT BE PLACED ON THIS APPARATUS.
3
Page 6
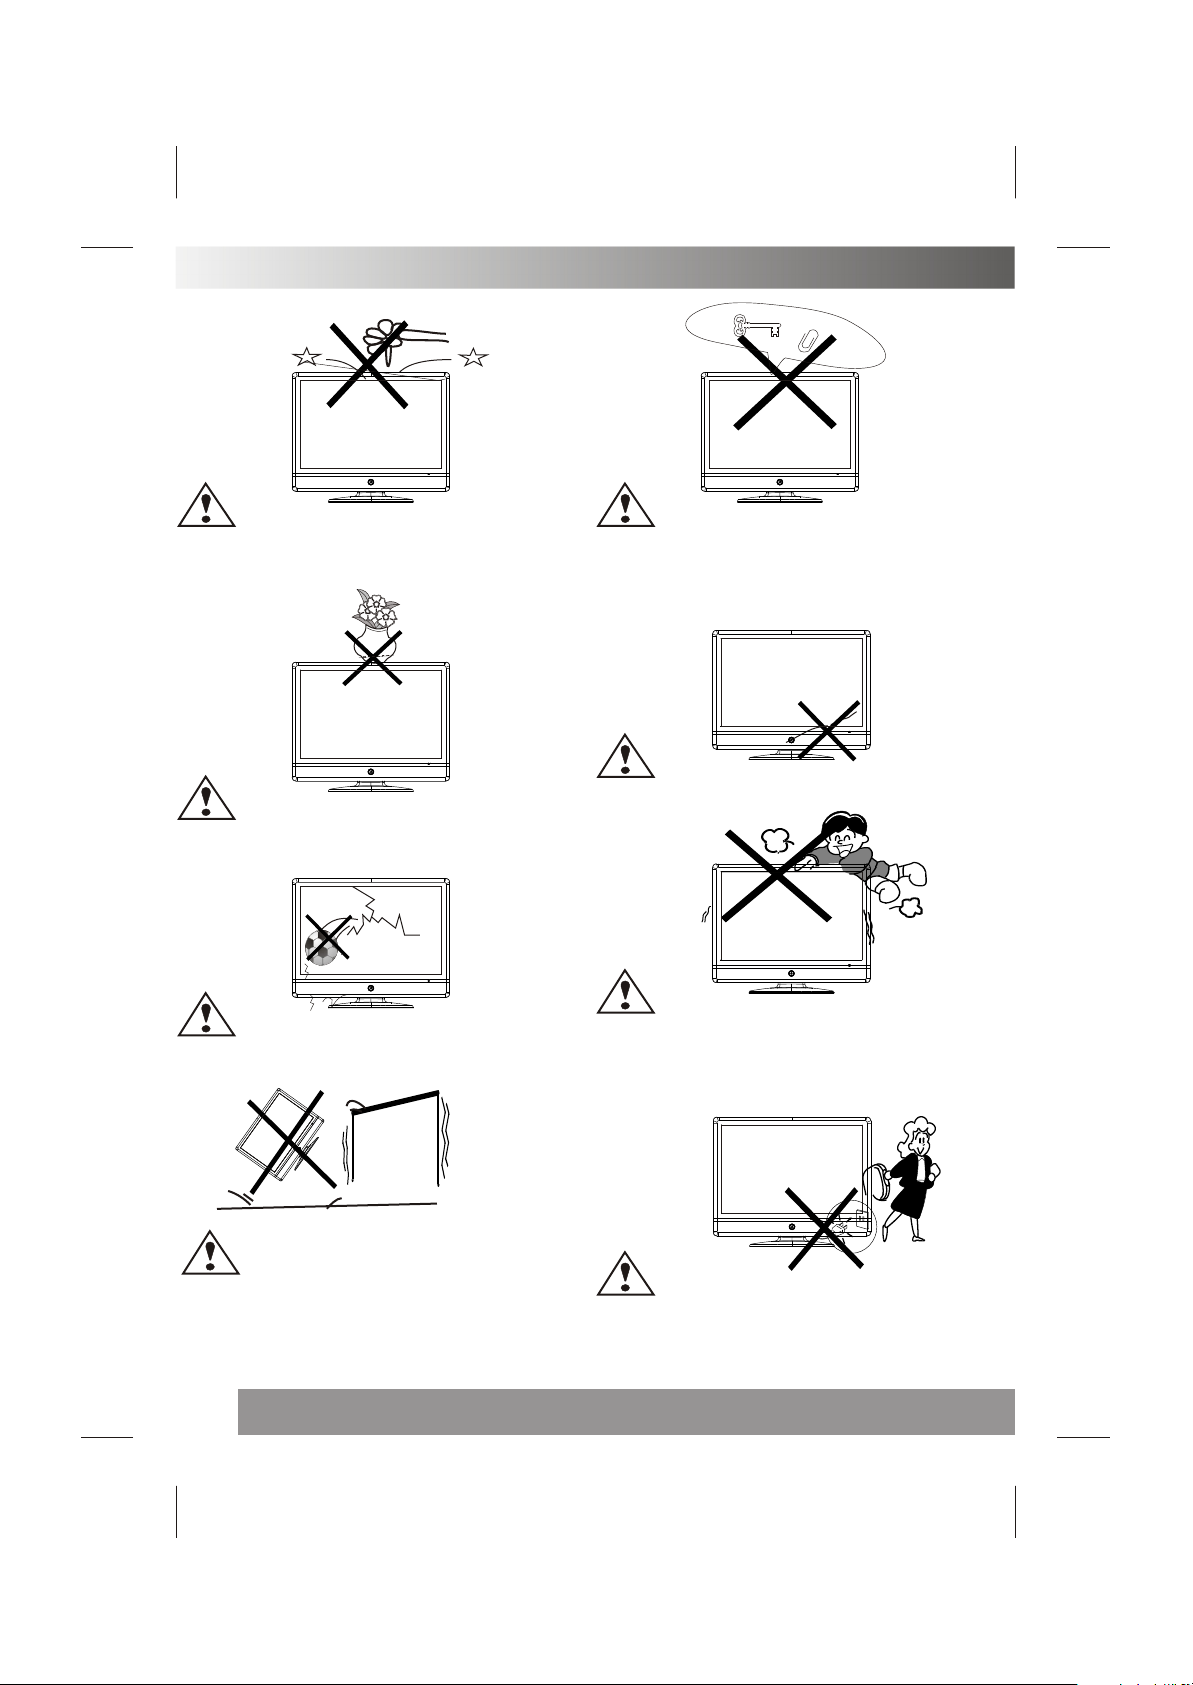
WARNINGS AND CAUTIONS
Caution
Do not drop or push objects into the television
cabinet slots or openings. Never spill any kind
of liquid on the television receiver.
Caution
Do not place objects on this unit, it
may damage the screen surface.
Caution
Do not throw anything at the set. The screen glass
may explode by impact and cause serious injury.
Caution
Do not insert anything in the ventilation holes. If
metal or something flammable enters, it may result in
fire or electric shock.
Caution
Do not squash power supply cord under the
television receiver.
Caution
Never stand on, lean on, or suddenly push the
television or its stand. You should pay special
attention to children. Serious injury may result if it
should fall.
Caution
Do not place your television on an unstable
cart , stand , shelf or table. Serious injury to
an individual, and damage to the television,
may result if it should fall.
4
Caution
When the television receiver is not used for an
extended period of time, it is advisable to disconnect
the AC power cord from the AC outlet .
Page 7
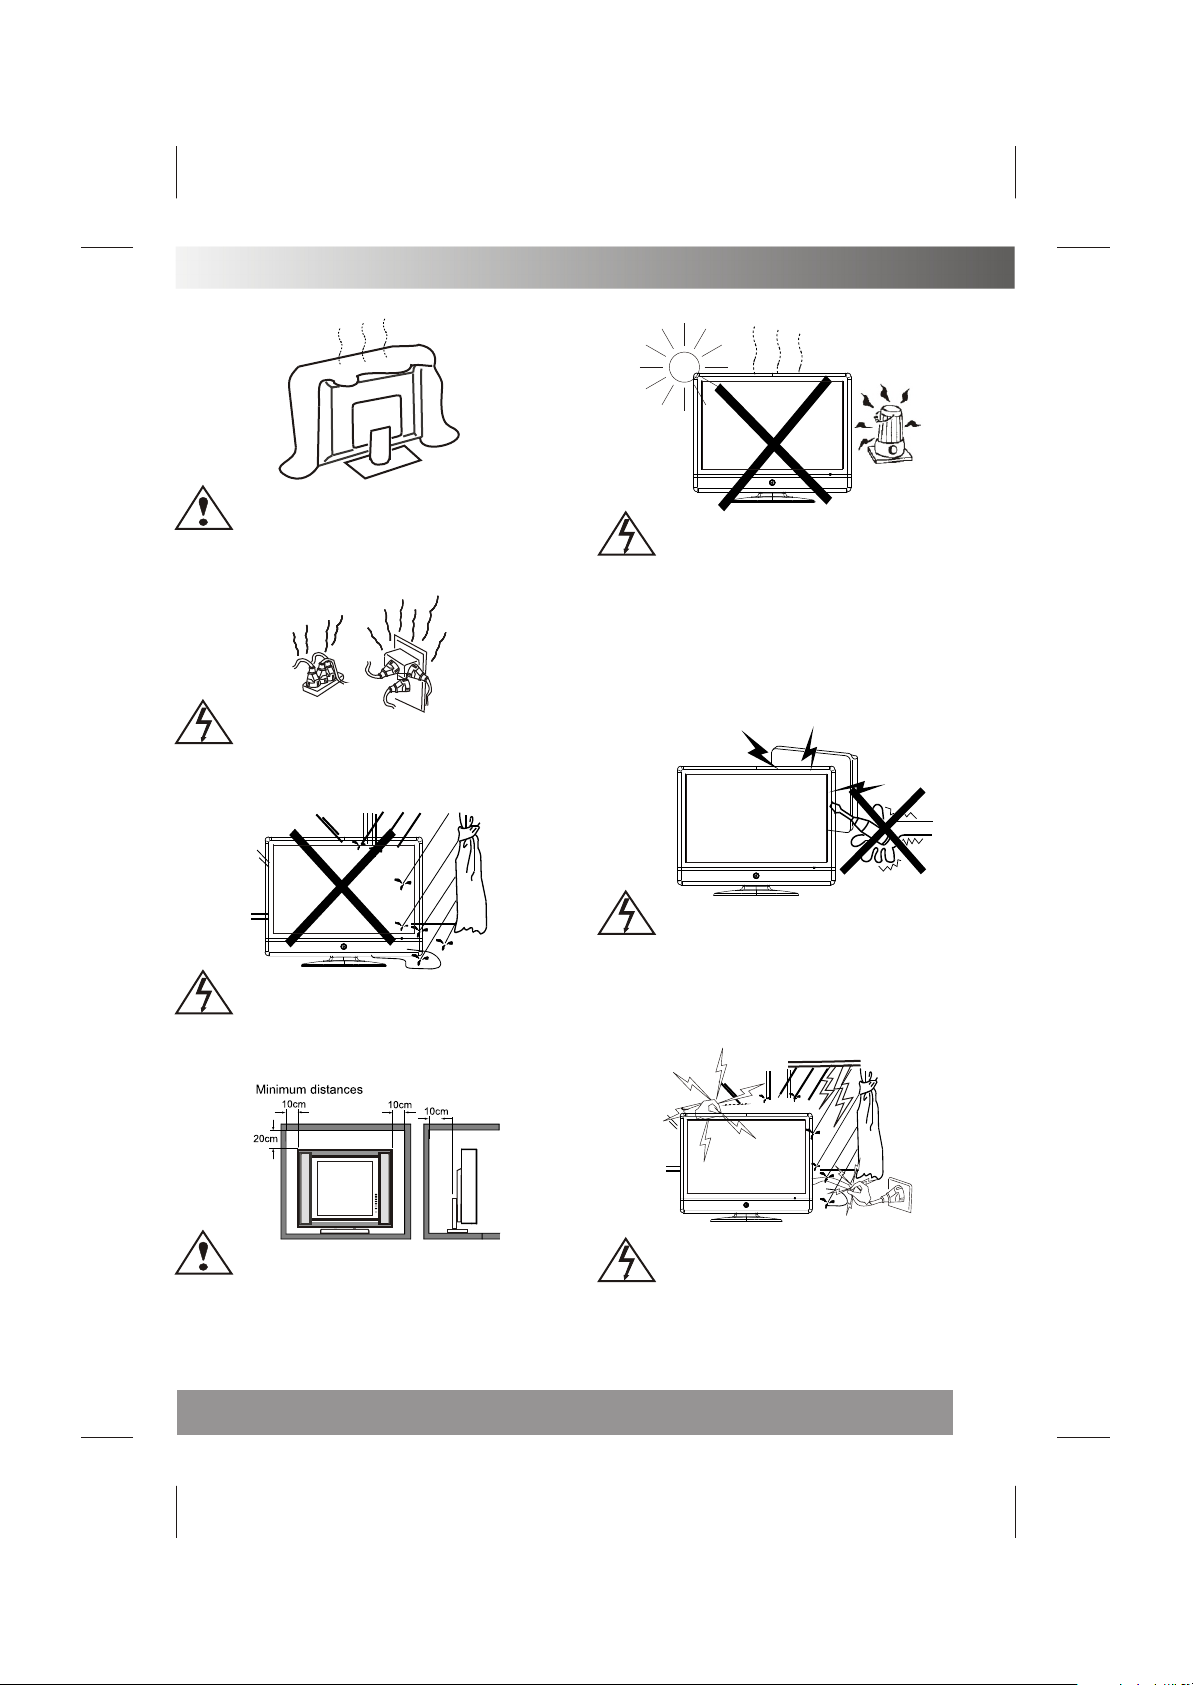
WARNINGS AND CAUTIONS
Caution
Do not block the ventilation holes in the back
cover. Adequate ventilation is essential to
prevent failure of electrical component.
Warning
Take care not to connect many appliances to the
same mains socket as this could result in fire or
electric shock.
Warning
Avoid exposing the television receiver to direct
sunlight and other source of the heat. Do not stand
the television receiver directly on other produces
which give off heat .E.g.video cassette players.
Audio amplifiers. Do not place naked flame sources,
such as lighted candle on the television. Do not
expose the LCD screen surface to the sun, it may
damage the screen surface.
Warning
To prevent fire or electrical shock hazard, Do not
expose the television receiver to rain or moisture.
Caution
If the television is to be built into a Compartment or
similarly enclosed, the minimum distances must be
maintained. Heat build-up can reduce the service
life of your television, and can also be dangerous.
Warning
High voltages are used in the operation of this
television receiver.Do not remove the cabinet
back from your set. Refer servicing to qualified
service personnel.
Warning
For you own safety, Do not touch any part of the set,
main lead or aerial lead during lighting storms.
5
Page 8

¼ò ½é¼ò ½é
SETUP
Remote Control Battery Installation
Requires two AAA batteries(supplied).
Procedure
1. Turn the remote control face down. Remove battery cover by pressing down on the marking on the
cover and sliding it off in the direction indicated.
2. Install batteries matching(+) and(-) polarity signs.
3. Replace the battery cover by sliding in reverse until the lock snaps.
Note: Incorrect installation can cause battery leakage and corrosion that will damage the Remote control.
Precautions
Replace batteries in pair.
Do not mix battery types(zinc carbon with alkaline).
Do not recharge, heat, short-circuit, disassemble, or burn batteries.
4. If you cause a static discharge when touching the unit, and the unit fails to function, simply unplug the
unit from the AC outlet, wait a few minutes, and plug it back in. The unit should return to normal operation.
FUNCTIONAL PARTS(TV)
Front View of LCD Set
To turn the TV power ON
Put the TV set on the correct place, then connect the DC plug of the AC-DC adaptor to the DC 12V socket
at the back of the TV set. Connect the adaptor main cord to the wall outlet ,then the LED indicator lamp
turns red/green and the TV set is at Standby/work Mode. At Standby Mode, if Standby Button is pressed
the power indicator will change to green. It takes a few seconds before the picture appears.
To turn the TV power OFF
Press the Standby Button to make the TV set in Standby Mode, then disconnect the power plug from the
wall outlet.
9 8 7 6 5 4
1
3 2
1. LED indicator lamp
2. Remote Sensor
3. Standby Button
4. SOURCE Button
5. MENU Button
6. P+ Button
7. P- Button
8. V+Button
9. V- Button
NOTE
If TV is the selected input without
signal received and NO operation
is performed for about 5 minutes
continuously, the TV set will enter
standby mode. For any inputs other
than TV, the TV set will not enter
standby mode automatically without
users instruction. If you are not
going to use this TV set for a long
time, switch off the set and
disconnect the power plug from
the wall outlet.
6
Page 9

FUNCTIONAL PARTS(DVD)
3
2
1
Once you insert the disk to DVDslot, the player will suck it in, and the current source will be switched
to DVD status automatically.
Notes:
1.Do not attach any seal or label to either side (the labeled side or the recorded side) of a disc.
2.Do not use irregularly shaped CDs (e.g., Heartshaped or octagonal)since they may result in
malfunctions.
3.Some playback operations of DVDs and Video CDs may be intentionally programmed by software
manufacturers. This unit plays DVDS and Video CDs according to disc content designed by the
software manufacturer, therefore some playback features may not be available or other functions
may be added.
4
1. DVD Slot
2. Play/Pause
3. Stop
4. Open/Close
REAR VIEW OF TV SET
TO DC IN 12V
TO POWER SOURCE
ANT. VGAPC-A IN
SCART
Y Pb
VIDEO
L R
Pr
DC-12V
HDMI
NOTE
Precautions when connecting to other equipment
When using external equipment with this TV set, please read the instruction manual of the external equipment.
Switch off all power supplies to the equipment and TV set before connection.
Always ensure that the input and output terminals are correctly connected.
7
Page 10

REMOTE CONTROL UNIT
POWER ON/STANDBY button
OPEN/CLOSE POWER
P.PP.P
Q.
Q.
-/---/--
REPEAT
VIEW
VIEW
SWAPSWAP
Press this button to switch on the TV when at standby mode or enter
standby mode.
MUTE button
Press this button to mute or restore sound.
P.P Button
Press this button to select the desired picture mode:
NORMAL/SOFT/DYNAMIC/CUSTOM
DISPLAY Button
Press this button to display the setting on the screen.
SLEEP Button
Press this button to set the sleep timer, the order
shown below(minutes):
OFF - 15 - 30 - 45 - 60-120
P.PP.P
MUTE SOURCE
PROG+
TEXT
ENTER
MENU
PROG-
STOP
TITLE
GOTO
VOL+
MIX
SUB.PAGE
ZOOM
AUDIO
DISPLAY
VOL-
ASPECT S.M
REVEAL SIZE
INDEX
ANGLE SLOW
DVD MENU PROGRAM SUBTITLE
DVD SETUP
When the preset length of time has passed, the TV set
enters standby mode.
SOURCE Button
Press ¡°SOURCE¡± button,there will be some word show on the right
top of the screen, press ¡°PROG+/-¡± to select the AV source, and then
press ¡°VOL+/-¡±to enter AV mode.
TV
AV
DVD
YPBPR
PC
HDMI
SCART
DIGIT Button(0-9)
This TV allows you to select channels from 1 to 254.
Press this button to select one-digit,two digit or three -digital channels
input options.
To select a one-digit channel(e.g. Channel 8),press this ¡°-/--¡±button
to change channel selection to ¡°-¡±on screen display and press the
¡°8¡±button only.
To select a two-digit channel(e.g. Channel 28),press this ¡°-/--¡±button
to change channel selection to ¡°--¡±on screen display and press¡°2¡±
and ¡°8 ¡± buttons. To select a three-digit channel(e.g. Channel 128),
press this¡°-/--¡±button to change channel selection to ¡°---¡±on screen
display and press¡°1¡±,¡°2¡±and ¡°8 ¡± buttons.
8
Page 11

REMOTE CONTROL UNIT
MENU Button
OPEN/CLOSE POWER
P.PP.P
Q.
Q.
-/---/--
REPEAT
MUTE SOURCE
PROG+
VIEW
VIEW
SWAPSWAP
Press this button to enter the menu screens for various optional
adjustable settings.
PROG+/- Button
Press the program up button to select the program forwards. Press
the program Down button to select the program Backwards.
VOL+/- Button
Press volume up/down buttons to adjust sound level.
Q.VIEW Button
Press this button to return to the previously viewed program.
SWAP Button
You can adjust your TV program list order, press this button, the
program swap menu will displayed, as shown below. E.g. to swap
channel 1 and 7 , press ¡°SWAP¡± button, press¡°PROG+/-¡± to
choose .FROM and press ¡°VOL+/-¡± to set the channel number as
¡°0¡±,and as the same way to set the TO as¡°7¡±,last to do choose
the¡°SAVE¡± and press ¡°VOL+/-¡± to implement this fuction.
TEXT
ENTER
MENU
PROG-
STOP
TITLE
GOTO
VOL+
MIX
SUB.PAGE
ZOOM
AUDIO
DISPLAY
VOL-
ASPECT S.M
REVEAL SIZE
INDEX
ANGLE SLOW
DVD MENU PROGRAM SUBTITLE
DVD SETUP
FROM CH 1
TO CH 7
SAVE
ASPECT Button:
Press this button to select scaler mode:
16:9 4:3 ZOOM 16:9FS PANORAMA
S.M Button:
Press this button to select the sound mode:
NORMAL/NEWS/MUSIC/CUSTOM
9
Page 12

TELETEXT OPERATIONS (OPTIONAL)
For models with Teletext function only.
OPEN/CLOSE POWER
P.PP.P
Q.
Q.
-/---/--
REPEAT
MUTE SOURCE
PROG+
VOL-
ASPECT S.M
MENU
PROG-
VIEW
VIEW
SWAPSWAP
VOL+
TEXT Button
Press this button to enter or exit the teletext mode.
INDEX Button
Press the button to go to the index page.
REVEAL Button
Press this button to reveal the hidden information for
some Teletext pages(e.g. answers to puzzles or riddles).
Press again to hide the information.
MIX Button
Press this button enter to mix mode.(For SUBTITLE or
NEWSFLASH page, please use mix mode).
Press this button again to exit.
SIZE Button
Press this button to change the Teletext screen display
mode among the following:
- Upper half screen enlarged
- Lower half screen enlarged
- Normal screen state
STOP Button
Press this button to hold the Teletext page on display to prevent the
page from changing. Press again to release the hold state.
SUB.PAGE (Optional)
Press this button to display subpage.
REVEAL SIZE
TEXT
INDEX
ANGLE SLOW
DVD MENU PROGRAM SUBTITLE
ENTER
DVD SETUP
10
STOP
TITLE
GOTO
MIX
SUB.PAGE
ZOOM
AUDIO
DISPLAY
NO SILK BUTTONS:
Have no function£¡
Page 13

REMOTE CONTROL OPERATION(DVD)
DVD Mode:
OPEN/CLOSE POWER
OPEN/CLOSE Button
Press OPEN/CLOSE button to load disc on disc tray.
P.PP.P
Q.
Q.
-/---/--
REPEAT
MUTE SOURCE
PROG+
VOL-
ASPECT S.M
REVEAL SIZE
INDEX
ANGLE SLOW
DVD MENU PROGRAM SUBTITLE
DVD SETUP
MENU
PROG-
TEXT
ENTER
VIEW
VIEW
STOP
TITLE
GOTO
SWAPSWAP
VOL+
MIX
SUB.PAGE
ZOOM
AUDIO
DISPLAY
PREV/NEXT Button
Press these button to go to the previous/next chapter(DVD).
FR/FF Button
These buttons allow skipping ahead/back at 5-level speed. Press
¡°PLAY¡±button to return to normal playback.
REPEAT Button
To press this button you can repeatedly play a title(DVD) or all
tracks(CD) .
PLAY/PAUSE Button
Press this button to start playback. Press this button again to
pause playback.
STOP Button
Press this button to stop DVD player.
TITLE button
DVD disc:
Press TITLE button, then you can use " " and ENTER button to
select programs.
VCD disc:
Press TITLE button,you can switch PBC on/off.
ZOOM button
Press ZOOM during playback or still playback to activate the Zoom
function.
Note:Zoom may not work on some DVDs.
ANGLE button
If the disc contains scenes recorded at different camera angles,
you can change to a different camera angle during playback.
Note:The angle indicator will blink on the TV screen during
scenesrecorded at different angles as an indication that angle
11
Page 14

REMOTE CONTROL OPERATION(DVD)
OPEN/CLOSE POWER
P.PP.P
Q.
Q.
-/---/--
REPEAT
MUTE SOURCE
PROG+
VOL-
ASPECT S.M
MENU
PROG-
VIEW
VIEW
SWAPSWAP
VOL+
DVD Mode:
SLOW Button
Press this button during playback to activate the slow function.
DVD MENU Button
If play some DVD discs, press this button back to root menu screen.
PROGRAM Button
Place a track on the program list.
SUBTITLE Button
To press this button, you can change the subtitle language from
one selected to the initial settings to a different language, if
available.
AUDIO Button
To press this button, you can change the audio language from the
one selected at settings to a different language, if available.
DVD SETUP Button
Accesses or removes setup menu.
DISPLAY Button
To display player OSD.
GOTO Button
Press this button to go to desired position.
REVEAL SIZE
TEXT
INDEX
ANGLE SLOW
DVD MENU PROGRAM SUBTITLE
ENTER
DVD SETUP
12
STOP
TITLE
GOTO
MIX
SUB.PAGE
ZOOM
AUDIO
DISPLAY
Page 15

MENU SCREENS
This TV allows you to adjust any setting from the menu screens using ¡°MENU¡±,¡°VOL+/-¡±and ¡°PROG+/-¡±
buttons.
Press ¡°MENU¡±button to display the menu, press¡°PROG+/-¡±to change menu from one to another, ¡°VOL+/-¡±
to enter the chosen menu, press¡°PROG+/-¡±to select the item, and then press ¡°VOL+/-¡±to adjust each
item.
Press ¡°MENU¡± again to exit the menu mode.
PC
PC
16:9
PICTURE
CONTRAST
BRIGHTNESS
HUE
COLOUR
SHARPNESS
COLOUR TEMP NORMAL
PC
PC
PICTURE
ASPECT
PICTURE MODE NORMAL
MOVE
SELECT
EXIT
MOVE
PICTURE MENU
You can adjust the contrast, brightness, tint(NTSC only) colour,sharpness.
COLOUR TEMP: NORMAL / WARM / COOL
APPECT: 16:9/4:3/ZOOM/16:9FS/PANORAMA
PICTURE MODE: NORMAL/SOFT/DYNAMIC/CUSTOM
TUNE MENU
PC
PC
TUNE
COUNTRY: Select correct before auto searching,then
you can get right program order.
AUTO SCAN: Press¡°VOL+/-¡±to begin auto search
COUNTRY FRANCE
AUTO SCAN
MANUAL PROGRAM
PROGRAM LIST
program, and press menu to exit auto search.
MANUAL PROGRAM: To enter manual setting
sub menu.
PROGRAM LIST: To edit program.
CHANNEL: The number is the current channel, and you
can also change channel from one to another.
COLOUR SYS. AUTO/PAL/SECAM (optional)
SOUND SYS. B/G,D/K,I,L,L¡¯(optional)
MOVE
SELECT
EXIT
SKIP: Set this item on to skip the channel which you
are Watching.
Fine Tune: Frequency data can be fine-tuned in upward
PC
PC
SOUND
SOUND MODE NORMAL
BASS
TREBLE
BALANCE
or downward by the VOL+/- buttons.
SOUND MENU
Enter sound menu, you can adjust.
SOUND BASS/TREBLE/BALANCE/SOUND MODE:
NORMAL/NEWS/MUSIC/CUSTOM
SELECT
EXIT
MOVE
SELECT
EXIT
13
Page 16

MENU SCREENS
PC
PC
SETUP
TXT LANGUAGE WEST
NOISE REDUCE
BLUE SCREEN
MOVE
SETUP MENU
TXT LANGUAGE.You can choose the supported
teletext fonts among AUTO,WEST,EAST,RUSSIAN,
SELECT
ON
OFF
EXIT
OSD MENU
You can choose the language, adjust the H-position,
V-position, duration 1 halftone and size..
ARABIC and FARSI.
NOISE REDUCE: You can set the noirse filter to ON or OFF.
BULE SCREEN: You can set background ON or OFF.
You can set the picture display mode 16:9,
4:3 ,ZOOM,and 16:9FS,PANORAMA.
PC
PC
PC
CONTRAST
BRIGHTNESS
H-POSITION
V-POSITION
CLOCK
PHASE
MOVE
SELECT
EXIT
OSD
LANGUAGE ENGLISH
H-POSITION
V-POSITION
DURATION
HALFTONE
OSD SIZE 2 TIMES
MOVE
COLOUR TEMP
AUTO CONFIG
MOVE
SELECT
PC
SELECT
PC
PC
EXIT
PC
PC
EXIT
PC MENU(under PC mode only)
You can adjust the CONTRAST, BRIGHTNESS
H-POSITION/V-POSITION: Press the VOL+/- buttons to adjust the picture Horizontal and Vertical position.
CLOCK : Press the VOL+/- to minimize any vertical bars or stripes visible on the screen background.
PHASE : When necessary, adjust the pixel phase of the picture to avoid picture interference.
AUTO CONFIG : To adjust the screen position automatically. It will take a few seconds and during this
process the screen will be black.
COLOUR TEMP: To ADJUST the PC mode color temperature.
NOTE:
If the set is cold ,there may be a small¡°flicker¡± when the set is switched on. It is normal, There is nothing
wrong with the set.
If possible, use the VESA 1024X768@60HZ video mode to obtain the best image quality for your LCD monitor.
Under other resolutions some scaled or processed pictures may appear on the screen.
Some dot defects may appear on the screen, like red, green or blue Spots, However,this will have no impact
or effect on the monitor performance.
Do not press the LCD screen with your finger for a long time as it may incur some damage to the screen.
14
Page 17

INITAL SETTINGS(DVD)
COMMON PROCEDURES OF INITIAL SETTINGS
Press SETUP button to get the setup menu. Use
direction buttons " " to select the preferred item .
After finishing settings, press SETUP again to TV
display.
The following menu items can be changed:
GENERAL: Selects the GENERAL SETUP PAGE menu.
AUDIO : Selects the AUDIO SETUP PAGE menu.
DOLBY : Selects the DOLBY DIGITAL SETUP PAGE
menu.
PREFERENCE: Selects the PREFERENCE SETUP PAGE
menu.
PASSWORD: Selects the PASSWORD SETUP PAGE
menu.
GENERAL SETUP PAGE
-- --
General Setup Page
TV Display
Angle Mark
Osd Lang Eng
Closed Captions On
Screen Saver
Go To General Setup Page
Ps
On
On
The following me u items can be changed:
Dolby
4:3 PanScan
4:3 LetterBox
On
English
On
On
Off
Off
French
German
Italian
Spanish
Portuguese
16:9
Off
n
TV DISPLAY: Selects the aspect ratio of the playback
picture.
4:3 PanScan: Pan Scan display.
&
4:3 LetterBox: LetterBox display.
16:9
: widescreen display.
ANGLE MARK: Viewing angles change option
(if available).
CLOSED CAPTIONS:Closed captions are data that are
hidden in the video signal of some discs.Before you
select this function,please ensure that the disc contains
closed captions information and your TV set also has
this function.
SCREEN SAVER: This is to turn on/off screen saver.
AUDIO SETUP PAGE
Dolby
-- --
Analog Audio Setup Page
Downmix
Go To Speaker Setup Page
Stereo
LT/RT
Stereo
This page is for setup speaker output.
DOWNMIX Stereo
LT/RT: 2ch output, main channel with surround.
STEREO: 2ch output, main right channel with right
surround; main left channel with left surround.
DOLBY DIGITALSETUP PAGE
Dolby
-- --
Dolby Digital Setup
Dual Mono
Dynamic
Go To Dolby Digital Setup
FULL
3/4
1/2
1/4
OFF
Stereo
L-Mono
R-Mono
Mix-Mono
The following menu items can be changed:
DUAL MONO: Reproduction mode, used only when the
input consists of two independent audio
channels(1/1 mode). Possible selections
are:
STEREO: Reproduce both channels as is.
L-MONO: Reproduce the left channel only.
R-MONO: Reproduce the right channel only.
The default is STEREO.
DYNAMIC: Dynamic range compression.
15
Page 18

INITAL SETTINGS(DVD)
PREFERENCE SETUP PAGE
Dolby
-- --
Preference Page
Audio Eng
Subtitle
Disc Menu Eng
Parental
Default
Go To Preference Page
Eng
Reset
1 Kid
2 G
3 Pg
4 Pg 13
5 Pgr
6 R
7 Nc17
8 Adult
English
French
Spanish
Chinese
Japanese
Korean
Russian
The following menu items can be changed:
AUDIO: Selects a language for audio(if available).
SUBTITLE: Selects a language for subtitles(if available).
DISC MENU: Selects a language for DISC menus (if available).
PARENTAL[DVD only]: This is to disable the playing of specified DVDs which are unsuitable for children. Some
DVDs are encoded with specific rating level. If the rating level of the disc is higher than that preset in the setup
operation, playback of the disc will be prohibited. After selecting one of the PARENTAL items the screen will
change to the PASSWORD page, and password is required , The factory initial setting is 1369.
DEFAULT:Back to the factory setting.
PASSWORD SETUP PAGE
Dolby
- - Password Setup Page - -
PASSWORD MODE ON
PASSWORD
ON
OFF
English
French
Spanish
Chinese
Japanese
Korean
Russian
English
French
Spanish
Chinese
Japanese
Korean
Russian
Go To Password Setup Page
PASSWORD MODE: Set password mode on/off. If set to off, change parental level will not check password.
PASSWORD: Select the menu password change page.
Dolby
OLD PASSWORD
NEW PASSWORD
CONFIRM PWD
OK
OLD PASSWORD: Enter the OLD password, (Factory setting is 1369), and the cursor will jump
automatically to NEW PASSWORD
NEW PASSWORD: Enter the NEW password. Enter 4 digits from the remote control unit numeric buttons,
and the cursor will automatically jump to CONFIRM PASSWORD.
CONFIRM PASSWORD: Confirm the NEW password by entering it again. If the confirmation is incorrect,
the cursor will stay in this column. After entering, the correct new password again, the cursor will jump
automatically to OK.
OK: When cursor is on this button, press ENTER key to confirm setting.
Note: If the password has been changed, the parentaland disc lock code will also be changed.
N
The default password(1369)is always active even the password has been changed.
16
Page 19

TROUBLESHOOTING TIPS
Before calling for service, you can check the following items on symptoms and solutions.
No picture:
Check other channel, maybe station problem.
Adjust the tuning control.
Ensure that the input setting is at TV state.
Ensure that the LCD is on.
Ensure that the equipment is connected properly.
No sound and distorted sound:
Ensure that the input settings for the TV and sound are proper.
Adjust the tuning control.
Probably local interference, such as an appliance.
Re-orient aerial(if indoor type).
Ensure that the equipment is connected properly.
No remote Control:
Check the battery are installed with the correct polarity.
Point the remote control unit at the remote control sensor and operate.
Remove the obstacles between the remote control and the remote control sensor.
Operate the remote control unit at a distance of not more than 8 meters from the remote control sensor.
Troubleshooting tips(PC mode):
¡°NO SIGNAL¡±displayed
Check if the wire is connected correctly.
Ensure the computer or other equipments are at power on mode.
Ensure the computer is not at power save mode.
Ensure the TV input setting is at pc mode.
¡°UNSUPPORTED¡±displayed
Check if the input setting is compatible to the monitor specification.
Check if the wire is connected correctly.
Led lamp indicator on but no picture
Check the monitor setting :contrast ,brightness.
Check if the wire is connected correctly.
Some unusual spots on screen:
Some dot defects may appear on the screen, like red, green or blue, Spots, However, this will have no
impact or effect on the monitor performance.
17
Page 20

THE CAUSES OF INTERFERENCE
Incorporated in your TV receiver are the most up-to-date devices to eliminate interference.Local radiation
however, can create disturbances which visibly affect your picture. Proper installation, a good aerial are
your best safe-guards against these disturbances.
RF INTERFERENCE
Moving ripples across the screen are caused by nearby transmitting or receiving short-wave radio
equipment.
DIATHERMY
Herringbone pattern and partial picture loss can result from the operation of diathermy equipment from a
nearby doctor's surgery or hospital.
SNOW
Weak TV signals from long distant stations result in an instead picture and give the effect of falling snow.
An antenna adjustment or antenna amplifier may be needed.
GHOST
Multiple image caused by TV signals reflected back from surrounding buildings, hills, aircraft, ect. Is
minimized by correct aerial positioning.
CAR IGNITION
Nearby cars and electrical motors can cause small streaks across the picture or make the picture roll.
18
Page 21

 Loading...