

Denver MCR-50MK3 User manual
USER MANUAL
MCR-50MK3
WWW.DENVER-ELECTRONICS.COM
Please read this user manual carefully before start using the product.
CLEANING THE CABINET
If the wooden cabinet becomes dusty please wipe it with a soft, non-abrasive dust cloth. Also
don’t use water or spray cleaners as this can damage the cabinet and the plastic/metal parts of the
unit.
TECHNICAL SPECIFICATION
• Turntable speed: 33/45/78 RPM (Disc size 17.5/25/30cm)
• CD can play CD/CD-R/CD-RW/MP3
• USB can play MP3
• Cassette: C60 & C90 (C120 cassette is not recommended)
• Output power: 2x2.5W
PREPARATION FOR USE
IMPORTANT: RAISING AN LOWERING THE TURNTABLE LID
To open the lid. Raise it as far as it can go until the lid support bracket locks in the position.
To close the lid. Pull forward the lid support bracket to release and then gently lower the lid.
TO AVOID DAMAGING THE CABINET OR THE LID, NEVER FORCE THE LID CLOSED. ALWAYS RAISE
THE LID TO RELEASE THE LID SUPPORT BRACKET.
• Carefully remove the unit from the carton and remove all
packing material from the unit.
• Unwind the FM Antenna wire and extend to it to its full length.
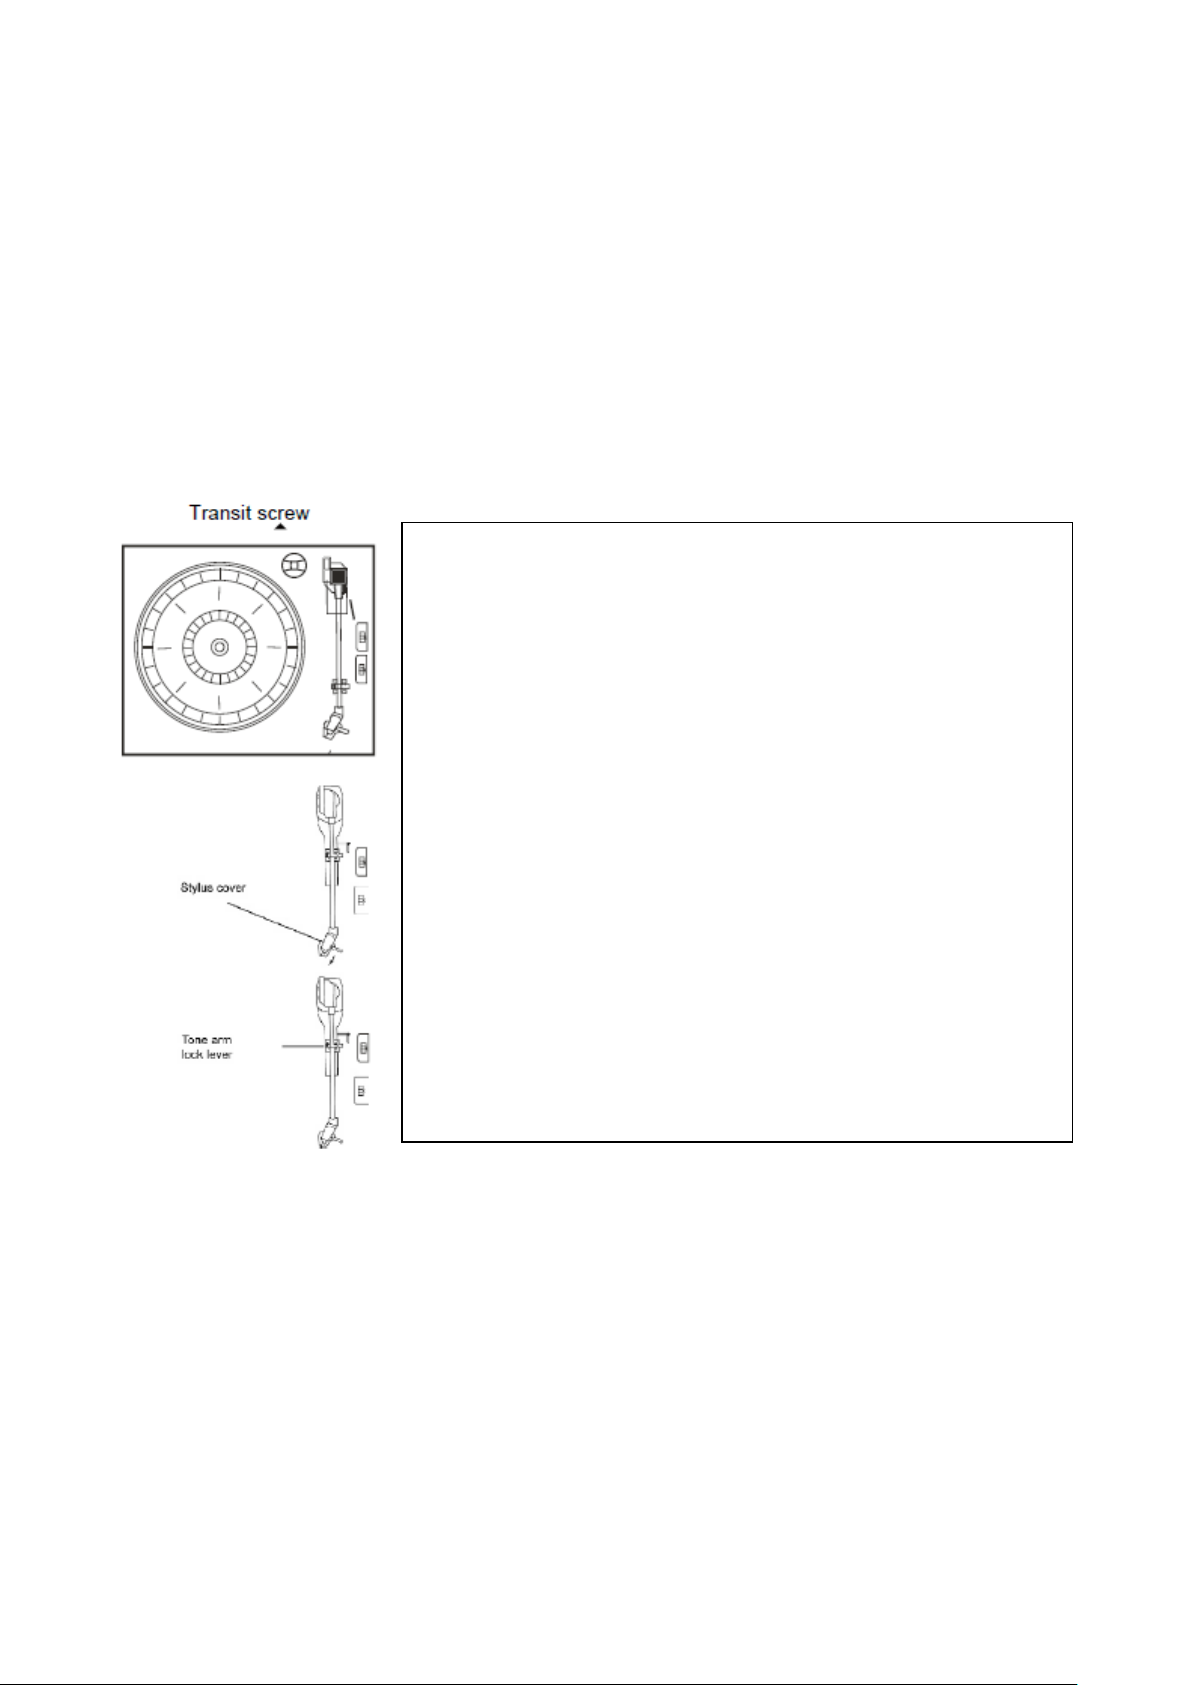
• Raise the lid to expose the turntable. The turntable has been
secured for shipment with a transit screw. Use a coin or a
screwdriver to turn the transit screw clockwise. This will allow
the turntable to “float”.
• Remove the opaque white plastic stylus cover from the
phonograph stylus by sliding it in the direction of the arrow.
• Please pay attention to the stylus during operation because
stylus damage is not covered by the warranty.
• Remove the the twist-tie that was used to secure the tone arm
during shipment.
• Release the tone arm lock lever.
• Connect the power plug to your DC 12V,5A outlet.

LOCATIONS OF CONTROLS AND INDICATORS
Locations of Controls:
1. TURNTABLE LID
2. TURNTABLE LID SUPPORT BRACKET
3. SPEAKERS
4. USB
5. AUX IN
6. RECORD/DELETE BUTTON
7. FUNCTION BUTTON
8. VOLUME CONTROL
9. TUNER BACKLIGHT
10. LCD DISPLAY
11. REMOTE CONTROL SENSOR
12. POWER INDICATOR
13. FM ST./REC INDICATOR
14. FM DIAL SCALE
15. AM DIAL SCALE
16. TUNING POINTER
17. AM BUTTON (MW)
18. FM BUTON (UKW)
19. CD/USB BUTTON
20. TAPE BUTTON
21. PHONO/AUX IN BUTTON
22. CD DRAWER
23. TUNING CONTROL
24. PLAY/PAUSE BUTTON
25. STOP BUTTON
26. DN/F.R BUTTON
27. UP/F.F BUTTON
28. PLAY MODE BUTTON
29. OP/CL BUTTON
(CD OPEN/CLOSE BUTTON)
30. CASSETTE EJ/F.F BUTTON
(EJECT/FAST FORWARD)
31. CASSETTE PLAYER SLOT
32. HEADPHONE CONNECTOR
 Loading...