

Page 1
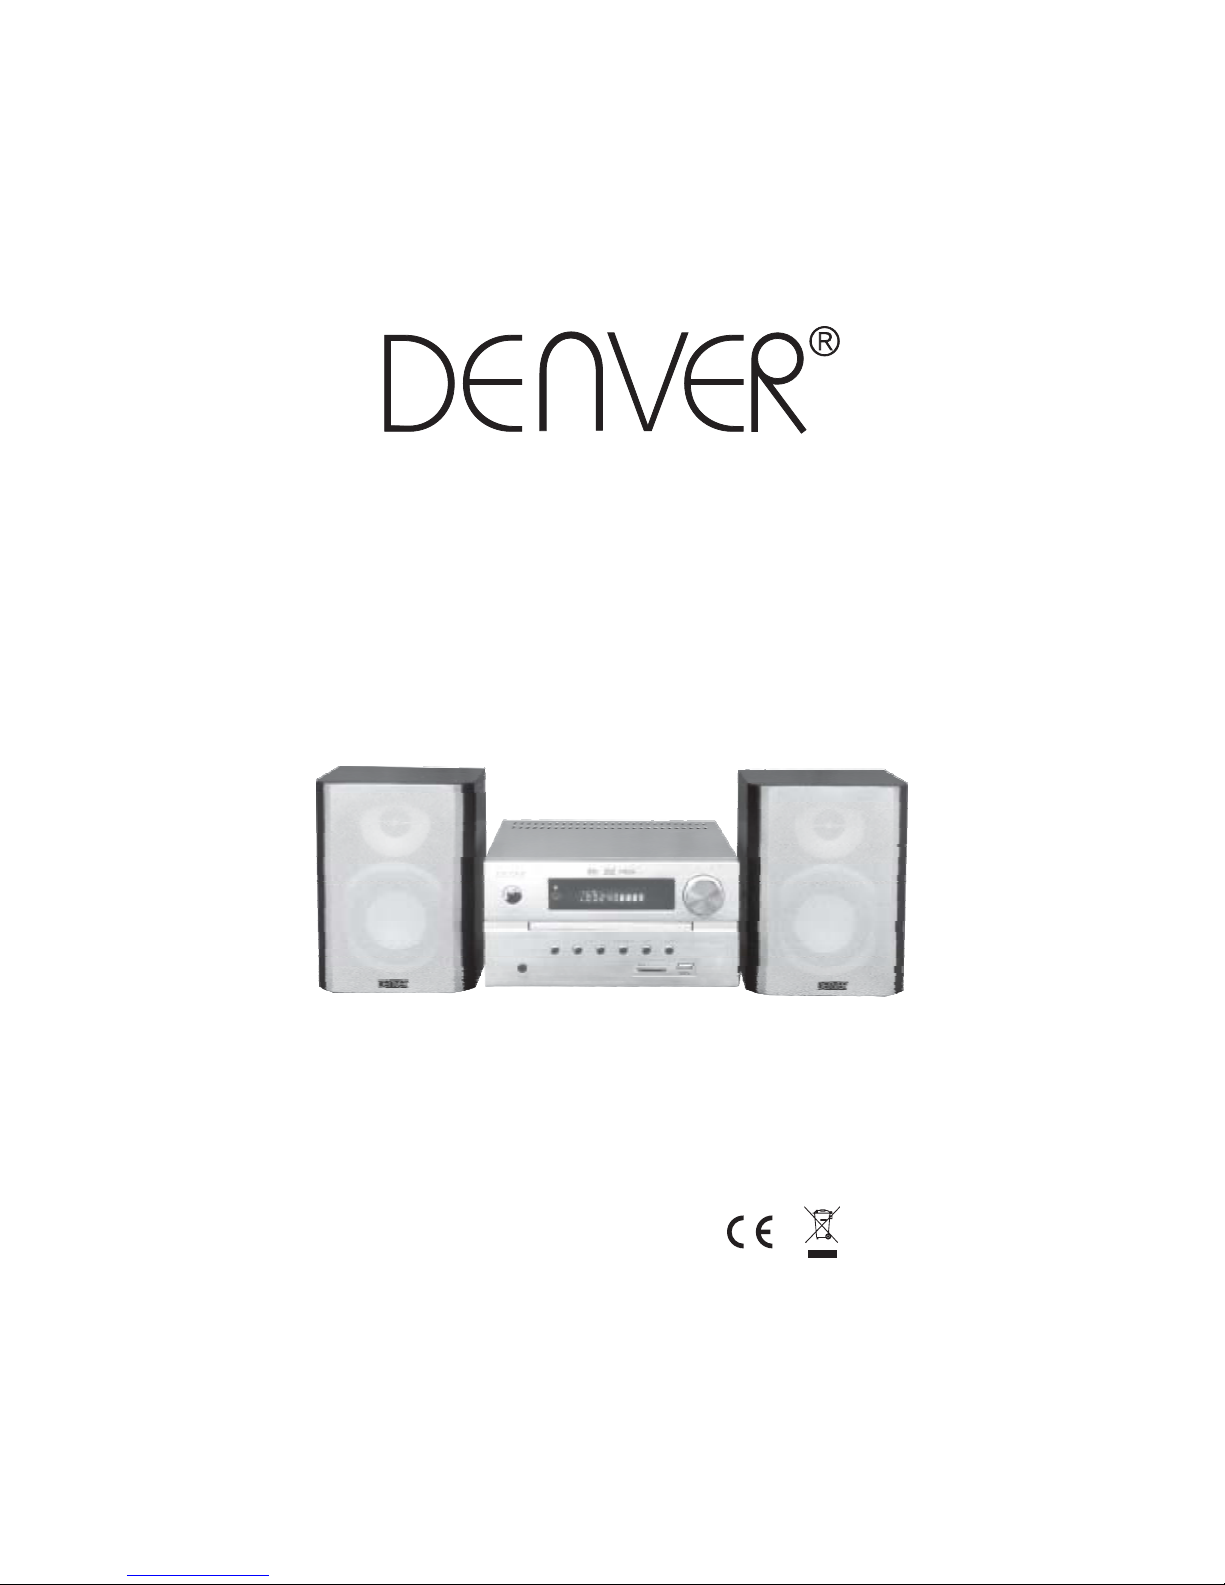
MCD-50 MPEG4
SILVER
INSTRUCTION MANUAL
AC230V 50Hz 35W
Page 2
Compatible withDVD/CD/MP3/WMA/CD-R/CD-RW/MPEG4/USB/SD
Picture CDreadable,digital album browseplaying function
Multi-caption,angle screenpicture selection function
High sensitivitydigital FM /AMradio
Build-in AC-3 &HDCD decoder
Intelligent upgrade,age lock andautomatic screen protection function
Digital beam,coaxial and mix-audio(left/right)output
Stereo earphoneoutput
Standby clock/timer setting
2.0 trackpower output(2*10W RMS)
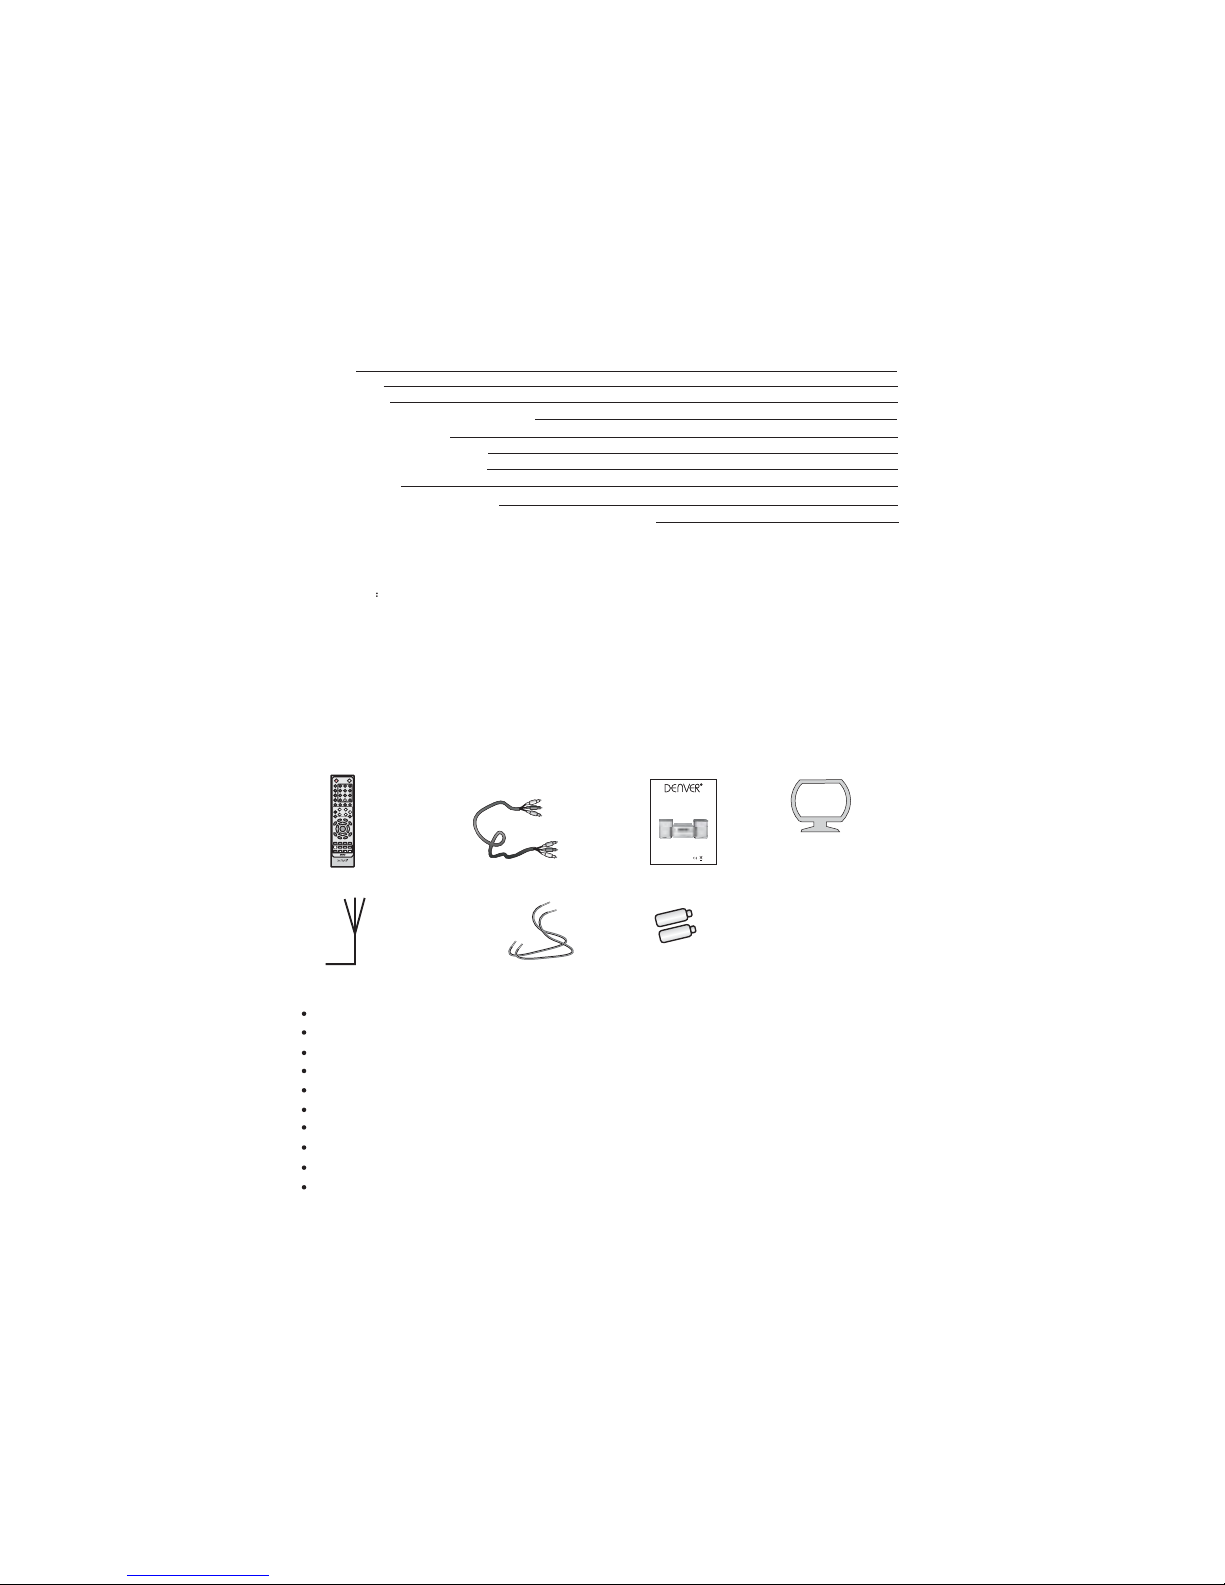
Please checkthat the following accessories are enclosed in the package.
1.Remote Control 2.AV cable 3.User's manual
To customers
Thank you for buying this component player! We suggest that you should read the manual before
connecting the system to a power supply so as to guarantee the best features of the product and your
video and audio enjoyment.
Please keep the manual and packaging carefully for later reference..
If there is problem during using the system,please contact our customer service department.
Contents
Preface
Accessories
Main features
4.AM antenna
5.FM antenna 6.Speaker cable2 pcs
Catalogue/Preface/Attachment
Before attempting to connect,operate or adjust this product,please read
the instructions completely,please save this manual.
1
Main features
Safety affairs/remote controller/discs
Remote control function
Panel/Back board illustration
System connection illustration
Basic operation
JPEG/MPEG-4/USB/SD/FM,AM
1
1
1
2
3-5
6
6-7
8-9
10
Accessories
Preface
Trouble shooting guide/Technical specifications/Remarks
11
7. Batteries
STANDBY OPEN/CLOSE
123
456
789
10+
GOTO
OSD
PROG
A-B
REPEAT
ST/MO P/N
AUDIO
SUBTITLE
MEM
L/R
INPUT
VOL
DVD/USB/CARD
EQ
FM/AM
-STATION+
-SEARCH+
ENTER
A
N
G
L
E
SETUP
CLOCK
Z
O
O
M
T
I
T
L
E
T
V
-
M
O
D
E
VFD
SLOW STEP
R
E
T
U
R
N
M
E
N
U
BASSTREB
PBC
P
R
E
V
I
E
W
MCD-50MPEG4SILVER
MCD-50MPEG4
SILVER
INSTRUCTIONMANUAL
AC230V 50Hz 35W
Page 3
Standard Demand
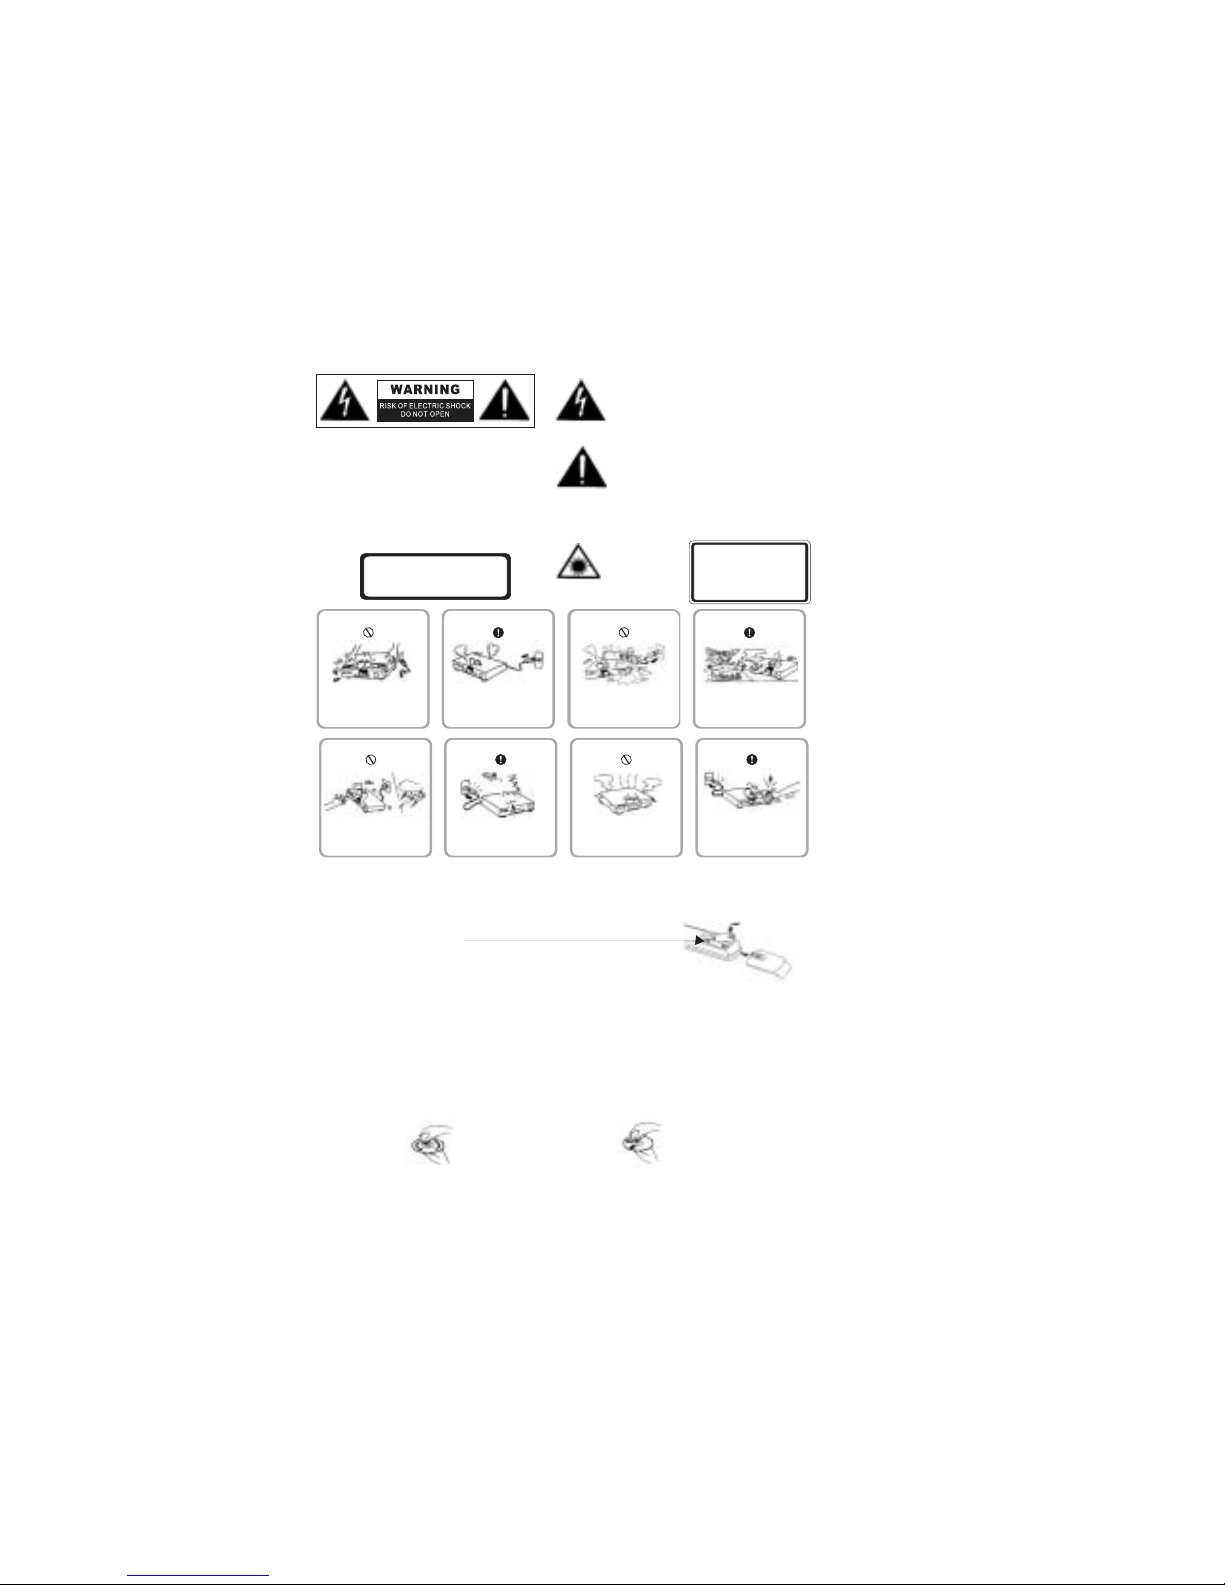
Caution
Keep themachine away from
containers holdingliquid.If the
liquid entersinto the machine,
it maybe damaged.
Do notexpose the machineto
dust, ordamp. Do notplace it
near alamp.
Warning
Warning
Caution
When usingthe machine, ifsmoke
appears, orif there isa peculiar smell,
please turnoff thepower, pull out
the socket,and ask aprofessional to
repair it.
Caution
Put themachine in awell-ventilated
place, inorder to reduceheat.
Pull outthe plug beforecleaning the
surface ofthe machine. Itcan be
cleaned witha damp clothand soap.
Warni ng
Warni ng
Caution
When thereare thunderstorms,
please turnoffthe machineto avoid
an accident.
If themachine will notbe used
for along time, pleaseunplug
the power.
2. Remotecontrol maintenance
A. Keepthe surface ofthe remote controland keys clean,because accumulated dustcan alter the
function ofthe keys.
B. Donot place theremote control ina damp orrainy place.
C. The batteries of the remotecontrol need tobe replaced underthe following conditions.
1 Continuoususe for morethan three months.
2 The distance capacity of the remote control appears to be shortened.
3 The power amplifier responds slowlyor has noresponse when pressed.
Safety Precautions
Batteries shouldbe inserted withthe correct polarity
Incorrect cleaning
Correct cleaning
Note:
1 Pleaseuse a specialsolution to cleanthe discs. Donot use anyvolatile solutions forcleaning, ie, petrol,alcohol, etc.
2 Donot expose discsto high temperatures,direct sunlight ordamp as itmay cause damageto discs.
3 Protectthe discs fromfingerprints. Do notuse a productwhich may damagediscs.
4 Whendiscs are notin use, alwaysstore them intheir cases..
3.Disc maintenance& cleaning
After acertain time, thedisc will becovered with dustand may becomedamaged . Itis very importantto keep
discs clean,so please usea cleaning clothto clean thediscs before playing.
1. RemoteControl functions andoperation.
Open theback cover inthe back, puttwo batteries in(check that theyare inserted withthe correct polarity)
then putthe cover on.Aim at the front end of the reception window of thepower amplifier, after that, you can
operate thesystem easily withthe remote control.
The lightingflash with anarrowhead symbol, withinthe
equilateral triangle,is intended toalert the userto the
presence ofun-insulated angerous voltage within the
product's enclosurethat may beof sufficient magnitude
to causean electric shock
“d ”
The exclamationmark within theequilateral triangle is
intended toalert the userto the presenceof important
operating andmaintenance (servicing) instructionsin this
user manual.
WARNING: TOREDUCE THE RISKOF ELECTRIC
SHOCK, DONOT REMOVE COVER(OR BACK).
NO USER-SERVICABLE PARTS INSIDE. REFER
SERVICING TO QUALIFIEDSERVICE PERSONNEL.
WARNING: TO PREVENT FIRE OR SHOCKHAZARD, DO NOTEXPOSE THIS APPLIANCE TO RAIN OR MOISTURE.
CAUTION: TO PREVENT ELECTRIC SHOCK, MATCH WIDE BLADE OF PLUGTO WIDE SLOT,FULLY INSERT.
DANGER OFEXPLOSION IF BATTERY IS INCORRECTLYREPLACED. REPLACE ONLY WITH THE SAME
OR EQUIVALENT TYPE.
CAUTION
INVISIBLE LASERRADIATION WHEN
OPEN OR WHEN SYSTEMIS NOT
PROPERLYCLOSED.
AVOIDEXPOSURE TO BEAM
This productcontains a
low powerlaser device.
CLASS 1LASER PRODUCT
In orderto avoid accidents,do
not openthe cover,and refer to
a professionalwhen the system
needs servicing.
Safety affairs/remote controller/discs
2
Page 4
OSD-SCREEN DISPLAY
Press OSD key, the screen will showcurrent situation, time, remaining time and other functions.
2
PROG
Press the STOP key first, then press PROG, the screen will show the programme menu. The machinecan
program a sequence of twelve tracks (CD/VCD) or chapters (DVD).After entering the PROG menu, the
green cursor will stay at No.1 place, input the track (CD/VCD) or chapter (DVD) number that you want to
play first by pressing the numeric Key (0-9).Then press the direction key to move cursor to the place of
No.2, the operation is the same as above. If you make a mistake or if you want to change the order of the
programme, you can move the cursor to the place that you want to revise by pressing the direction key
and then press clear key and input new numbers. After setting,press ENTER key to start playing.
Press PROG and exit the PROG picture,then press play key to play normally.
Note:1 .In the program playing state, DVD discs do not have the repeat andA-B repeat functions
2.Some discs do not have the programme-playing function.
3
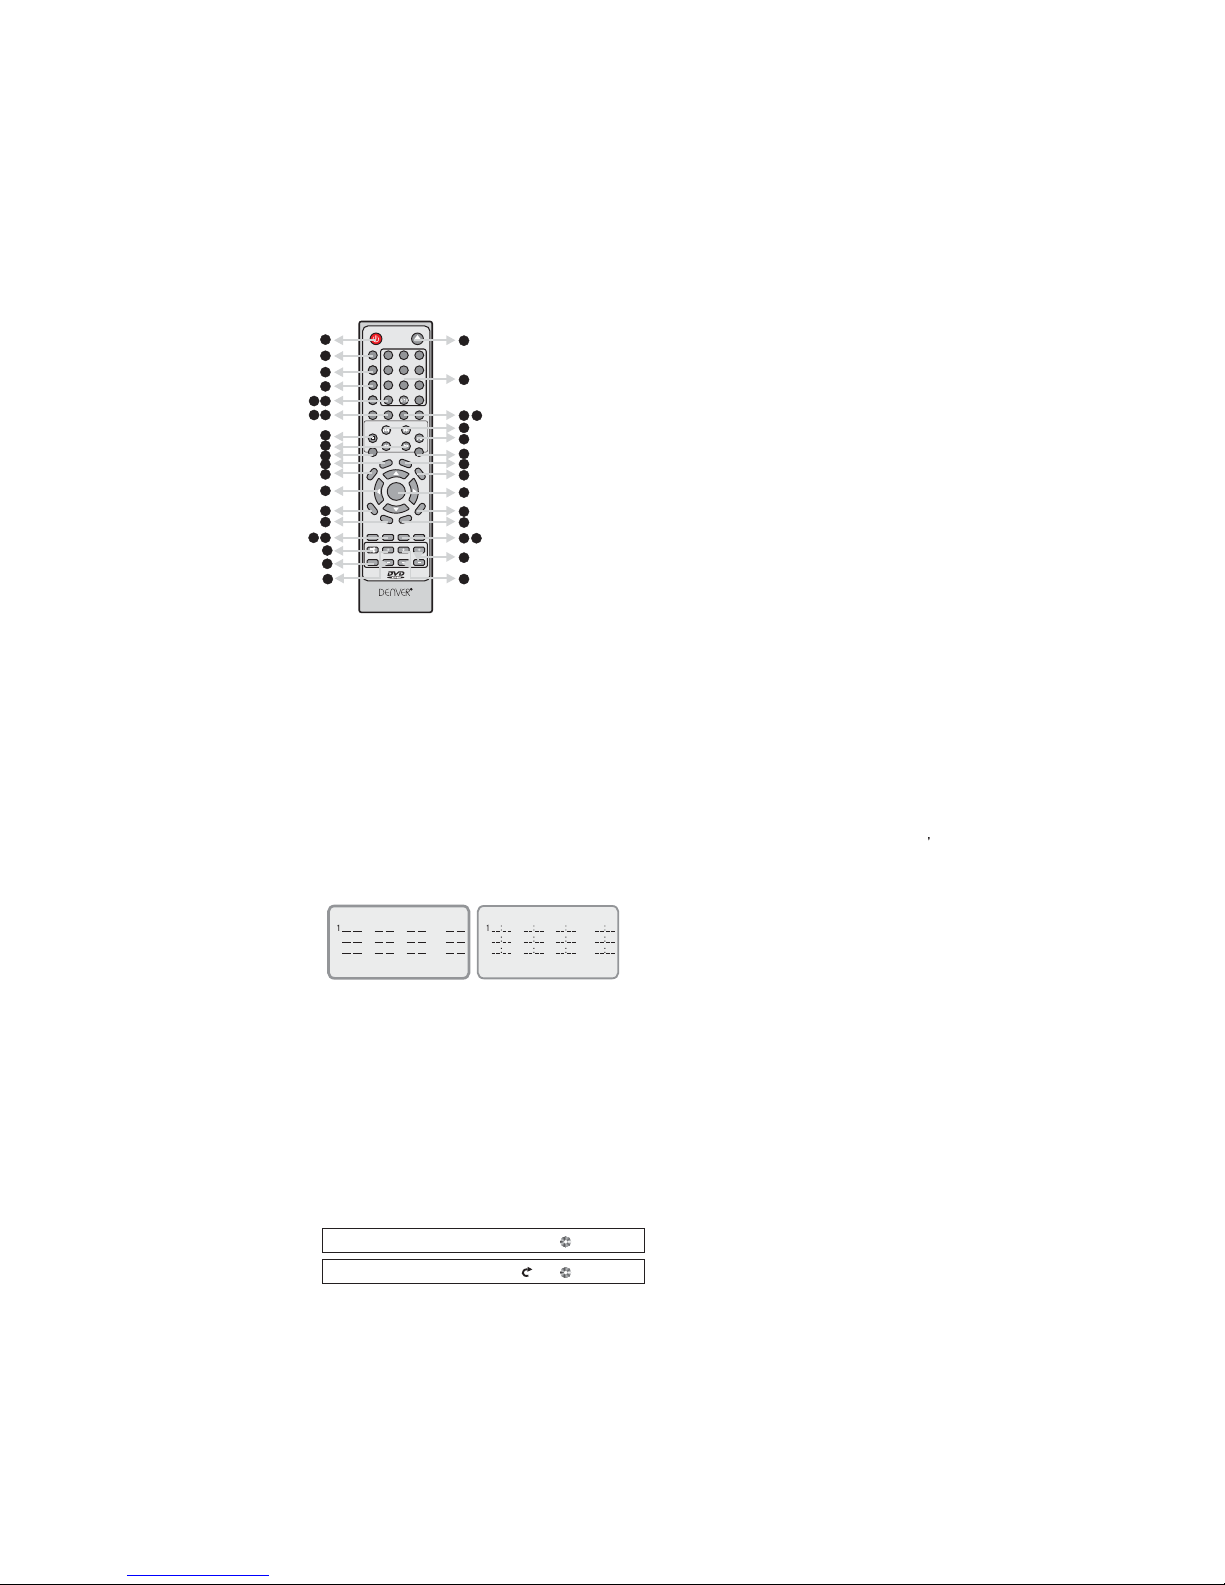
1. STANDBY
2. OSD
3. PROGRAMME
4. A-B REPEAT
5. REPEAT
6. GOTO
7. ST/MOL/R
8. P/N
9. MEMORY/STOP
10.
11. S LOW
12. MENU
13. ANGLE
14. DIRECTIONKEYS
15. CLOCK/TV-MODE
16. PREVIEW
17. DVD/USB/CARD
18. PBC
19. MUTE
FORWARD/BACKWARD SEARCH
/ QUICKFORWARD/BACKWARD
20. INPUT
21. TREB"+"/TREB"-"
22. OPEN/CLOSE
23. NUMERICKEYS
24. AUDIO
25. SUBTITLE
26.
27. FM/AMCHANNEL AND
PLAY/PAUSE
PREVIOUS/NEXT STATION
PREVIOUS/NEXT TRACK
28. STEP
29. RETURN
30. SETUP
31. ENTER
32. TITLE
33. ZOOM
34. VFD
35. EQ
36. MAINVOLUME
37. BASSEFFECT
A-B REPEAT
A-B repeat function that lets you set your favourite scenes for instant repeat:
1. Press the key at the point where you want the repeat to start;
2. Press the key again at the point you want to repeat, then the function will be activated;
3. Under A-Brepeat function, press this key again, the function will be cancelled.
4
PROG INPUT
2
3
4
5
6
7
8
9
10
11
12
PROG PLAY CLEAR
Figure1 CD/VCD
2
3
4
5
6
7
8
9
10
11
12
Figure2 DVD
PROG PLAY CLEAR
PROG INPUT
STANDBY
Press the key when you are not using the machine, in order to save energy.
1
Remote control function
3
5
REPEAT
If the REPEAT key is pressed when the machine is playing, the track will repeat, if you want the whole
program to repeat, press the REPEAT key again.
6
GOTO
The GOTO button allows you to move to the place of your choice. After pressing the GOTO button,
enter the track, title of chapter of your choice using the number keypad, or enter the exact hours,
minutes and seconds corresponding to the place where you wish to start playback.
DVD TT 01/04 CH 019/02 00:00:00
CD TRK 08/18 00:00:00
STANDBY OPEN/CLOSE
123
456
789
10+
GOTO
OSD
PROG
A-B
REPEAT
ST/MO P/N
AUDIO
SUBTITLE
MEM
L/R
INPUT
VOL
DVD/USB/CARD
EQ
FM/AM
-STATION+
-SEARCH +
ENTER
A
N
G
L
E
SETUP
CLOCK
Z
O
O
M
T
I
T
L
E
T
V
-
M
O
D
E
VFD
SLOW STEP
R
E
T
U
R
N
M
E
N
U
BASSTREB
PBC
P
R
E
V
I
E
W
MCD-50MPEG4 SILVER
1
2
3
4
65
87
9
10
11
12
13
14
15
16
18
20
36
341735
33
32
31
30
29
28
27
26
24
23
22
25
19
3721
Page 5

8
P/N-MODE SELECT
Press the key to select the PAL, PAL60, AUTO, NTSC.
9
10
11
SLOW
Press this key when playing a DVD/VCD disc, it will play at 1/2,1/3,1/4,1/5,1/6,1/7 of the normal speed.
Then press the PAUSE key to return to normal playback.
12
13
ANGLE
Some DVD discs can be played at different angles, please use this key to select any angle to enjoy the
program.
14
DIRECTION KEYS(UP/DOWN/LEFT/RIGHT)
Being in Subtitle / Menu/Setup states, press these keys to select the program or items what you need.
MEMORY-STORAGE STATION/STOP
After searching for a station, press this button to memorise it. You can choose the pre-selection number
using the numeric keypad..
FORWARD/BACKWARD SEARCH / QUICK FORWARD/BACKWARD
Press the key without stop for three seconds to search channel forward and backward.
Press the key,you can choose X2,X4,X8,X20 four kinds of speed to play(no sound) ,press pause key
to recover the normal speed.
15
16
MENU
Press this key (only available during DVD playback) and the main menu will appear. Press the direction
keys to choose a program and then confirm.
CLOCK/TV-MODE
When the machine is in stand-by mode, use the direction keys to adjust the time.
During DVD playback, press this key to choose among the following options: INTERLACE-YUV,
TV-RGB,P-SCANYPBPR,PC-VGA.
PREVIEW
Remote control function
Press this key while playing discs,it will choose the chapter of the disc and play one after
another browsely.
4
7
ST/MO L/R
When playing radio, you can press this button to choose stereo output;When playing disc,press this
button to choose stereo/Left/Right output;When playing Karaoke, press this button to cancel or resume
primary sound; When playing bilingual disc, press this button to choose output language.
21
Press the key when the machine is turned on, to change the input: RADIO/DVD
22
OPEN/CLOSE
Press this key to open or close the CD tray.
Note: The printed side of the disc should face up. The machine will play after the tray is closed.
19
MUTE
When playing a disc, press mute key to cancel audio output, press it again to cancel the function.
20
INPUT
17
DVD/USB/CARD
Being in DVD mode, you can switch to DVD/USB/CARD mode by pressing DVD/USB/CARD key ,
TV Shows: READ CARD, and turns to play automatically after one or two seconds.
18
PBC
During playback of a disc that is more advanced than the VCD1.1 format, press this key to
display the PBC menu on the screen. You can then choose the play mode. Press it again to cancel
the function. You can only choose the programusing the number keys or with the skip forward/
backward keys.
Press the keys to strengthen or weaken the treble effect.(0-14)
TREB"+"/TREB"-"
Page 6

24
AUDIO
Press the key repeatedly to choose different languages that are recorded on the disc.
25
SUBTITLE
The machine supports many languages, press the key repeatedly to select different one of them.
23
NUMERIC KEYPAD(0-9)
Press the number 0-9 to directly select a program up to 10 inclusive; if the number of the program
exceeds 10, you can press 10+ key , then press the other numbers.
26
PREVIOUS/NEXT STATION / PREVIOUS/NEXT TRACK
Press the key after pressing memory station,press the memory station again to memorize the
current frequency as chosen stations,or press - or+ to alter numbers(or press numeric key directly),
Press the memory station again,namely the current frequency as chosen channel,press the key to
select previous or next station.
Press them when the machine is playing disc, it will stop the current program and switch to previous/
next program.
27
FM/AM CHANNELAND PLAY/PAUSE
28
STEP
Press this key to view a sequence image by image.
29
RETURN
Press this key when playing disc to return to the title menu.
Remote control function
5
When the radio is on, press the key to change from FM toAM . In play back mode, press this key to
change to play or pause mode. When the disc is playing,press the key to play or pause.
30
SETUP
This key is used to set up the system language, TV mode, screen display, video output and audio
output of the disc. Follow these step by step instructions for use:
Press setup key during playback, and use the direction keys to navigate within the menu and the
screen will display the different menus which enable youto program the machine.
After you have made the adjustments, press the setup key to exit this menu, or choos
and confirm.
Note: You can also set up the system while the disc is not playing.
e “exit setting”
31
ENTER
Press this key to confirm selections in the menu displayed on the screen.
32
TITLE
Press this key to return to the title menu of the DVD disc.
33
ZOOM
Press this key when playing a DVD/VCD, the original picture will be increased by 2x,3x,4x,1/2x,1/3x,
1/4x.
34
VFD
Press this key to adjust the balance (up or down).
35
EQ
When the machine is switched on, press EQ key to change the balance mode.
Options: HALL, CLASSIC, POPS, DISCO.
36
MAIN VOLUME UP/DOWN
Press this key to adjust the volume.
37
BASS +/-
Press the keys to strengthen or weaken the bass effect.
Page 7
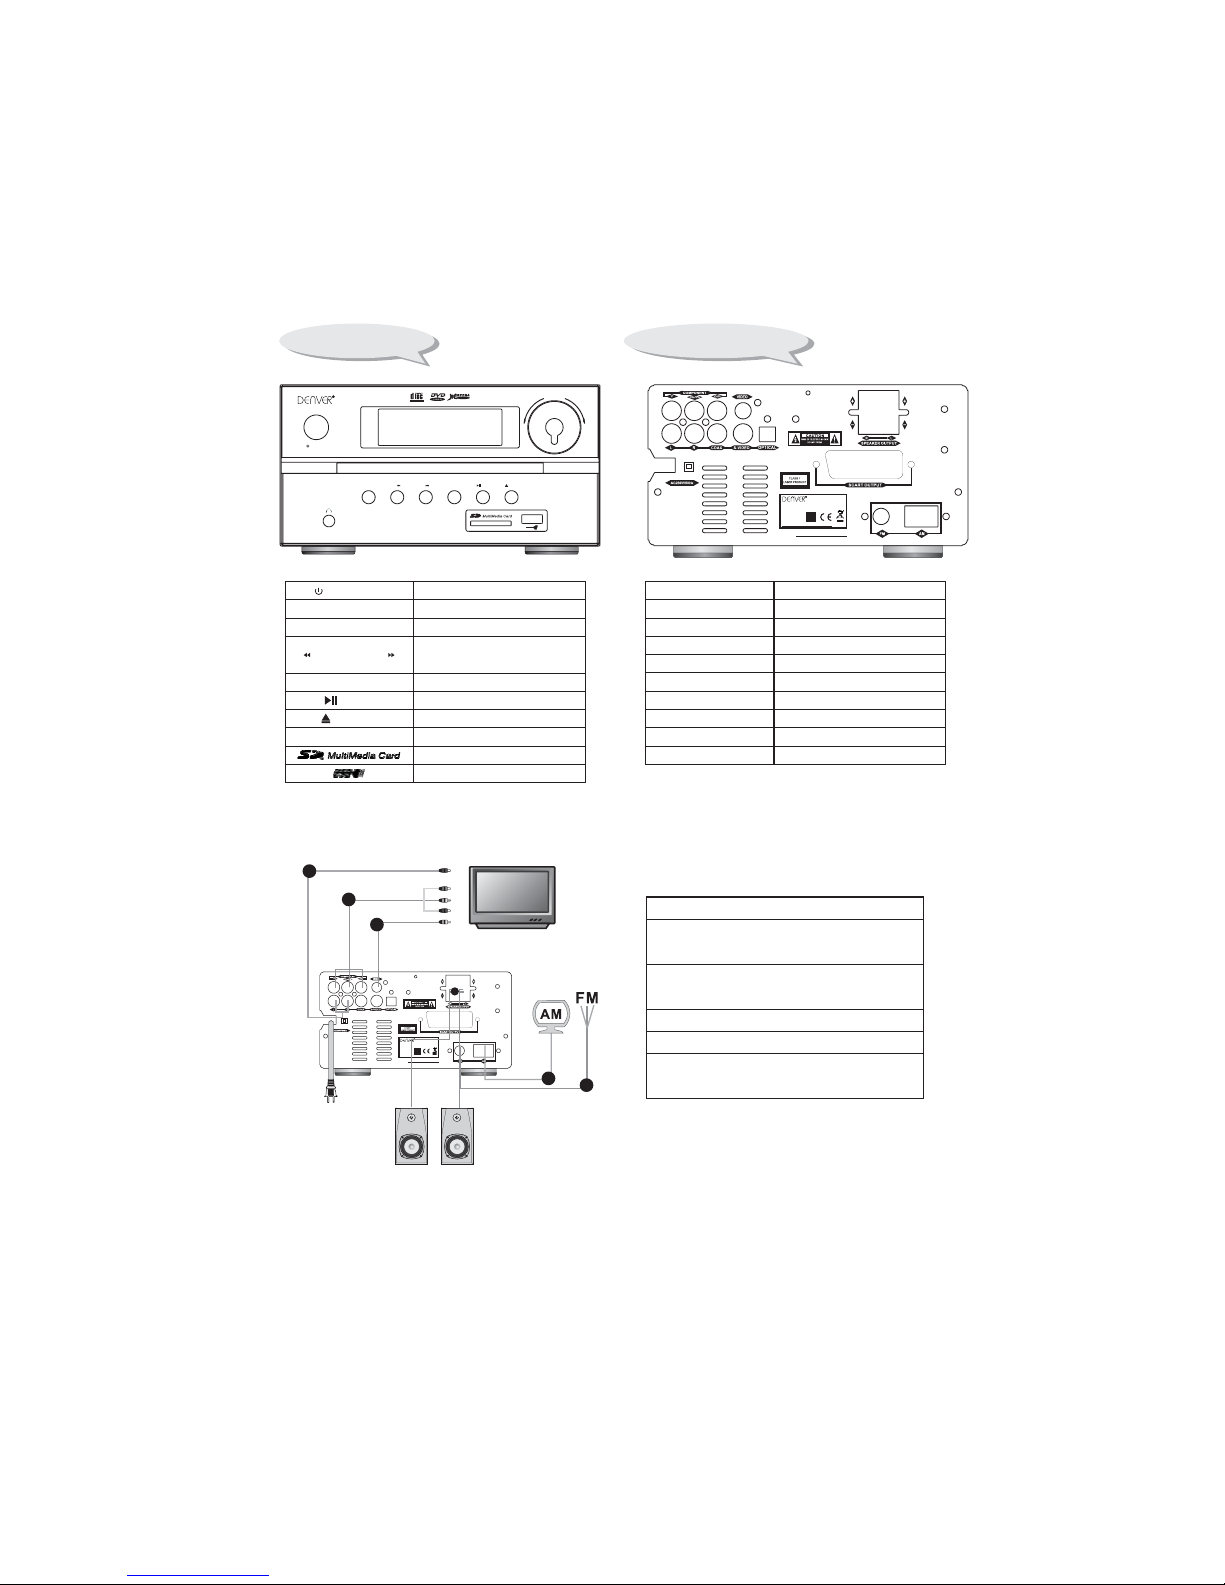
6
AC230V/50Hz 35W
Model:MCD-50MPEG4
www.denver-electronics.com
SerialNo.:
VOLUME
STANDBY
INPUT
- SEARCH +
DVD/USB/CARD
/MEM
PHONE
/BAND
USB
II
WITHMULTIAUDIO
Panel function illustration
Back board function illustration
Panel/Back board illustration
STANDBY Standby
INPUT
Channel conversion
Play/Pause/Mem
USB input
VOLUME
DVD/USB/CARD DVD/USB/CARD
-SEARCH+
/BAND
SD/MMC input
DVD: Quick backward/forward
Radio: Forward/backward search
Open/Close/Band
Main Volume
PHONE
Stereo earphones
/MEM
Y,Cb,Cr video output socket
Video output socket
Left/right mix audio output socket
Digital audio coaxial output
S-video video output socket
SPEAKER OUTPUT
SCART OUTPUT
Left and right sound output socket
YCbCr
VIDEO
ML/MR
COAXIAL
S-VIDEO
OPTICAL
FM/AM
AC230V/50Hz
FM/AM antenna
Power
Digital audio optical output socket
Scart output
System connection illustration
AC230V/50Hz 35W
Model:MCD-50MPEG4
www.denver-electronics.com
SerialNo.:
TV
Power inputAC230V/50Hz
4
5
1
2
3
6
Frontright speaker
Frontleft speaker
1.Connect withY,Cb,Cr video input socket
2.Connect withvideo signal inputsocket
(video component)
3
4.Connect withFM antenna
5.Connect withAM antenna
6.Connect withleft/right front
speaker socket
.Connect withAudio signal input socket
(Audio component)
WARNING:DO NOT PLACE SPEAKERS CLOSE TO TV,PLEASE ENSURE TO KEEP
AT LEAST 20cm BETWEEN TV AND SPEAKERS.
Page 8
7
1.Connection with TV
1.1
1.2
1.3
1.4
If your TV only has a VIDEO input socket (yellow socket), please connect the system's VIDEO
output socket and the TV's VIDEO input socket with video cable.
If your TV has an S-VIDEO output socket, Please use an S-video cable to connect with this
system's S-VIDEO output socket, and the pictures will be much better. When setting the
system, please set the Video output as S-VIDEO output.
If your TV has aY, Cb, Cr input socket, please use Y, Cb, Cr port cable to connect this system's
Y, Cb, Cr output socket with the TV's Y, Cb, Cr input socket to get a high quality picture. When
setting the system, please set the Video output method as Y, Cb, Cr output.
Use the Audio cable to connect the left and right sound channel of TV,then the TV's speaker
can be used for audio output.
2. Connection with amplifier
Connection with left/right speakers
Use speaker cables to connect the left and right speakers with the left and right mix audio output
socket of this system to enjoy stereo music.
3.Operation steps
3.1
3.2
3.3
3.4
Connect the system as in the above illustration
Turn on the TV, adjust the TV to the AV channel, then press the Power key on the machine to
switch on the power. The display screen of the system lights up, and the opening machine
picture appears on the TV.
Variety of system function. Carry out the basic settings. After setup, press the disc
in/out key, and the disc tray will open automatically. Put a disc in, press this key to close the
disc tray, and the machine will play the programmes automatically.
When the main machine is on, all functions can be operated with the keys on the
remote control and the front panel.
In normal playback mode, press the STANDBY key on the remote control . The
machine enters standby mode, and the time is displayed.
System Setting
Press Setupkey to opensetting navigational system,the following picture
appears onthe TV screen.
SYSTEMSETUP
TVSYSTEM
SCREENSAVER
VIDEO
EXITSETUP
TVTYPE
PASSWORD
RATING
DEFAULT
Via the setting navigational systems menu, you can adjust system setup,
language setup, audio setup, video setup, speaker setup and digital setup.
To navigate within these 6 setting sub-menus, use the left and right direction
keys to move between the sub-menus. When the cursor is moved to the chosen
setting symbols, the setting menu will appear. Move the up/down direction key
to choose among the setting items.
Selec to exit setting mode.t “exit setting”, and confirm
System connection illustration
1. System Setting
1).TV mode
System setting is used toset the TV mode, screen saver, video output,
TV screen display, code, level, rating and default.
Different disc formats suit different TV standards. According to the
different disc formats, select the TV signal mode of the system output
by using TV mode.
Options:NTSC,PAL60,PAL, Auto.
If your TV is in NTSC or PAL mode, if you choose the wrong TV
mode by mistake, the picturewill appear onthe TV screen in
black and white or itwill blink. Press "Mode" key on the remote
control, the screen will returnto normal status .
Note:
SYSTEMSETUP
TV SYSTEM
SCREEN SAVER
VIDEO
EXITSETUP
TVTYPE
PASSWORD
RATING
DEFAULT
NTSC
PAL 60
PAL
AUTO
2).Screen Saver
Using screen saver option to open or close screen saver programme.
Options: ON/OFF.
On: After a certain time (about 3 min), the screen saver program will open
automatically. Press any key to cancel the screen protection mode .
Off: When the close function is selected, the system's screen saver will not open.
SYSTEMSETUP
TV SYSTEM
SCREEN SAVER
VIDEO
EXITSETUP
TVTYPE
PASSWORD
RATING
ON
OFF
DEFAULT
Page 9
8
Basic operation
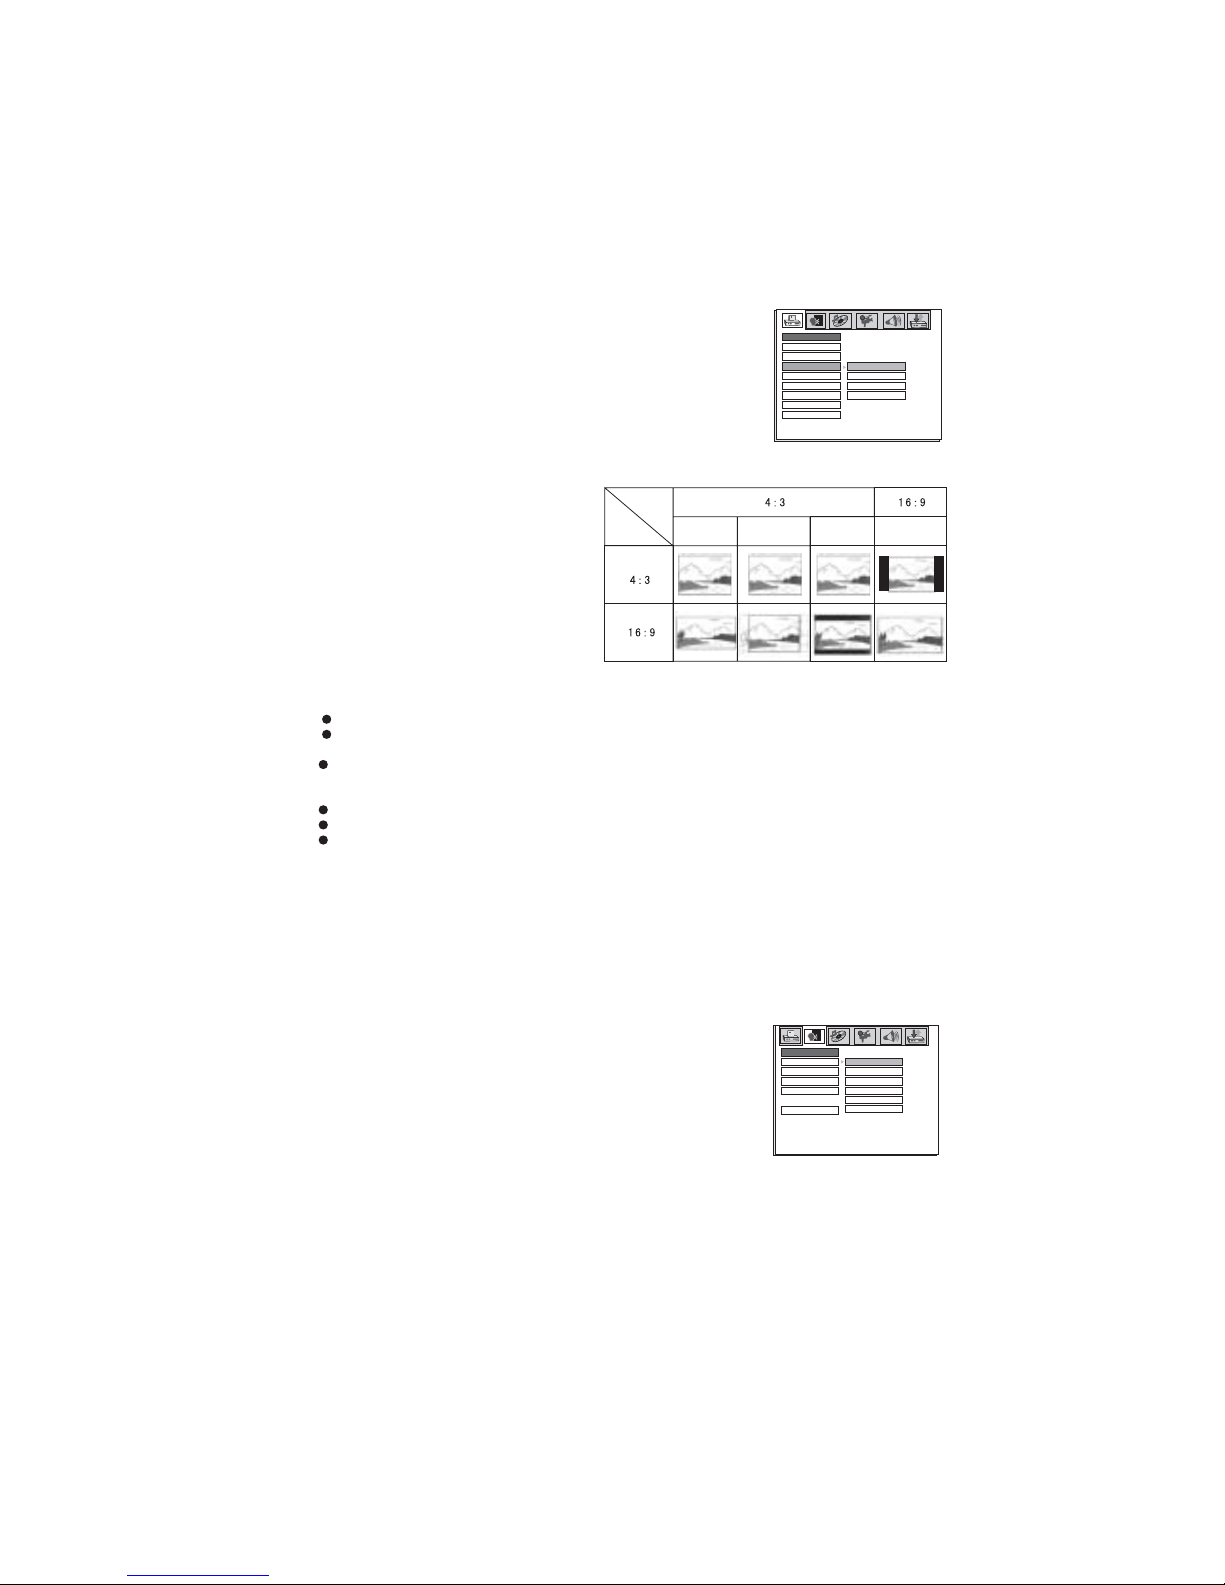
3). Video output
Video output offers different image quality. Options: INTERLACE-YUV,
TV-RGB,P-SCAN YPBPR, S-VIDEO (Picture A)
4) .Screen menu rate
Depending on the type of television you have, you may want to adjust
the screen setting(aspect ratio) .
Options: 4:3 PS, 4:3 LB, 16:9.
4:3 PS: The use of a non-wide screenTV.When playing wide screen
pictures, the extreme left and right sides of pictures will be cut off.
4:3 LB: The use of a non-wide screenTV.
When playing the width screen pictures,
the screen will appear black bars at the
top and bottom of the screen.
16:9: Connect to a wide screen TV.
1). No matter what kind of TV is used, if you
choose a 4:3 display the pictures will
appear with 4:3 rate.
2). If the screen uses 4:3 to display, and
the DVD is in 16:9 display format,
the pictures will be squeezed.
3).DVD can only be set in stop mode.
Note
TV
screen
Film
Format
Normal mode
Whole screen
Mailbox mode
Wide screen
5).Password
Through code and level setting, children can be prevented from watching unsuitable DVD discs.
Setting instructions:
Unlock the system by entering the code: the lock will open.
Use the direction keys to select the desired level from the following options: NOADULT, KID SAFE,
VIEW ALL and press enter to confirm.
Move curso and press enter key to confirm.When finished level limited setting, you
cannot play DVD discs which exceed the level you set unless you input the right code.
How to change the code:
Input the 4 bit presetting code.
Input the 4 bit new code again.
r to “exit setting menu”
The new code will be the last code inputted (4 numbers). It will be valid immediately after exiting the
setting menu.
SYSTEMSETUP
TV SYSTEM
SCREEN SAVER
VIDEO
EXITSETUP
TVTYPE
PASSWORD
RATING
DEFAULT
Picture A
INTERLACE-YUV
TV-RGB
P-SCANYPBPR
S-VIDEO
6).Default setting
It cancels all system settings and menu settings,and returns to the original setting.
Note:The function does not work for code and password items.
7).Picture options
Options:Recover original image or select a specific picture.
With this setting you can choose either the original logo or the picture obtained via the PREVIEW option.
2.Language Setting
This setting allows you toadjust the language of the DVD disc, the caption
language, the OSD language andthe menu language.
Note: The original code of the system is9999. In order to determine the level of lock function, there must be
a disc in the machine.
1).OSD language
Press OSD language key. to select the desired language on the screen.
There are six options: ENGLISH, GERMAN, SPANISH, DENISH, SWEDISH
POLISH.
LANGUAGESETUP
OSD LANG
AUDIO LANG
SUBTITLE LANG
MENU LANG
EXIT SETUP
ENGLISH
GERMAN
SPANISH
DENISH
SWEDISH
POLISH
2).Audio Language
DVD discs can be recordedin several languages. Select the desired language for DVD playback with the
AUDIO key on the remotecontrol.
3). Subtitle Language
DVD discs can contain severalcaption languages. When playing DVD discs, the captions are shown in the
language chosen in the settingmenu. During playback, select the desired language with the SUBTITLE
key on the remote control.
Page 10
9
Basic operation
4).Menu Language
DVD discs can contain several menu languages. There are 8 options for menu language when playing DVD
discs.
Chinese, English, Japanese, French, Spanish, Portuguese, German, Polish. When playing DVD discs,
the machine will automatically play the preset menu language. If you need to choose another language,
press the SETUP key to enter this menu , then press up/down key to choose the desired menu language.
And press enter key to confirm it (this setup depends on your disc).
When setting language, if the chosen language is not recorded on the DVD disc you are playing, the
machine will show the language options available on the disc.
Options:
Note:
3. Audio Setting
Used to set the audiooutput mode and the tone
.
1).Audio output
SPDIF/OFF analog output audio signal.
SPDIF/RAW digital decoder/amplifier audio signal output.
SPDIF/PCM digital audio signal outputfor use with digital stereo amplifier.
Used to set the machine'saudio output. Options: SPDIF/OFF,SPDIF/RAW,SPDIF/PCM.
2).Key
This setting setup is used to adjust the pitch.
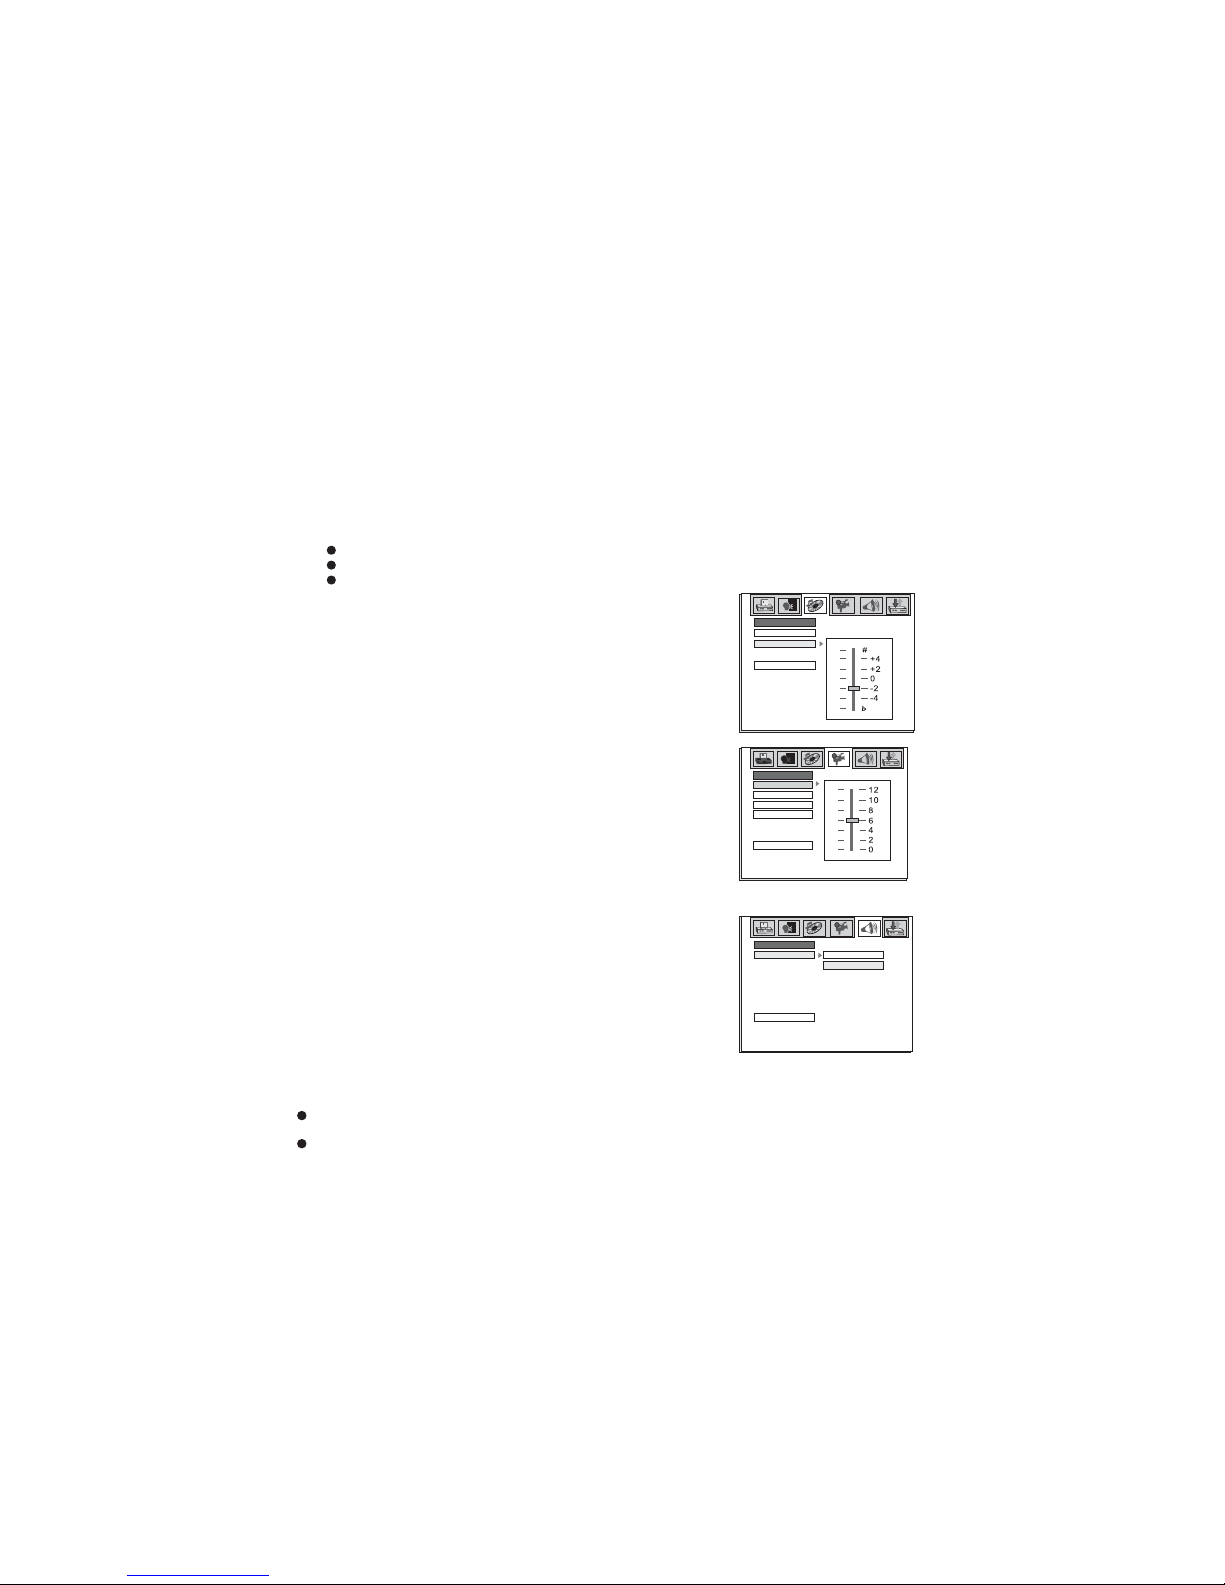
4.Video Setting
Used to set the brightness, contrast, hue and
saturation of the system's video signal.
1).Brightness setting
Used to set brightness of this system's video output signal.
When setting, use direction key to move cursor to this item,
press enter key, the brightness setting menu shows on TV
screen, now you can use the direction key of the remote
control to adjust the brightness. Press the enter key to
confirm your choice.
KEY
AUDIOSETUP
AUDIOOUT
EXITSETUP
BRIGHTNESS
CONTRAST
HUE
SATURATION
VIDEOSETUP
EXITSETUP
2).Contrast Setting
This item is used to select the contrast of the system's video signal
output. The setting can be carried out in
the way the same as the
brightness setting.
3).Hue setting
Used to change colour tones of the system video signal output.
The setting can be carried out in the way the same as the brightness
setting.
4).Saturation setting
Used to set colour saturation of the system's video signal output.
The setting can be carried out in the way the same as the brightness
setting.
5.Mix mode
Stereo Two channels output, stereo audio output.
LT/RT
Stereo
SPEAKERSETUP
EXITSETUP
MIXMODE
Output mode
Used to set output video signal compressing mode of the machine. Options: line output, RF adjust.
Line output: Compresses the output audio signal, this can be used at night when watching a film with
significant variations in sound level .
RF adjust: This high volume output mode can be used during daytime.
Dynamic range setting
Set it off: low range audio signals will be amplified so that the audible volume will be increased.
Note: The mix channel output mode of L+R setting must be turned OFF when setting the dynamic range.
L+R setting
Used to set L/R channel audio output mode. Options: Stereo, left channel, rightchannel, mix channel.
It effects to play DVD karaoke discs withAC-3.
Page 11
10
mall amountof data andis easy touse.
The systemcan read JPEGformat picture CDdiscs. When playingJPEG, the system has “pause” and
“browse” functions.
ode, inorder to movefrom photo tophoto, press the “skip
track”
The JPEGformat adopts themost efficient compression which is widely used as reduce the size of pictures
for storage.
Even ifpictures are compressed15-20 times,the effect is still good. It is supported by most picture
processing software,is suitable forpicture storage, itcontains a s
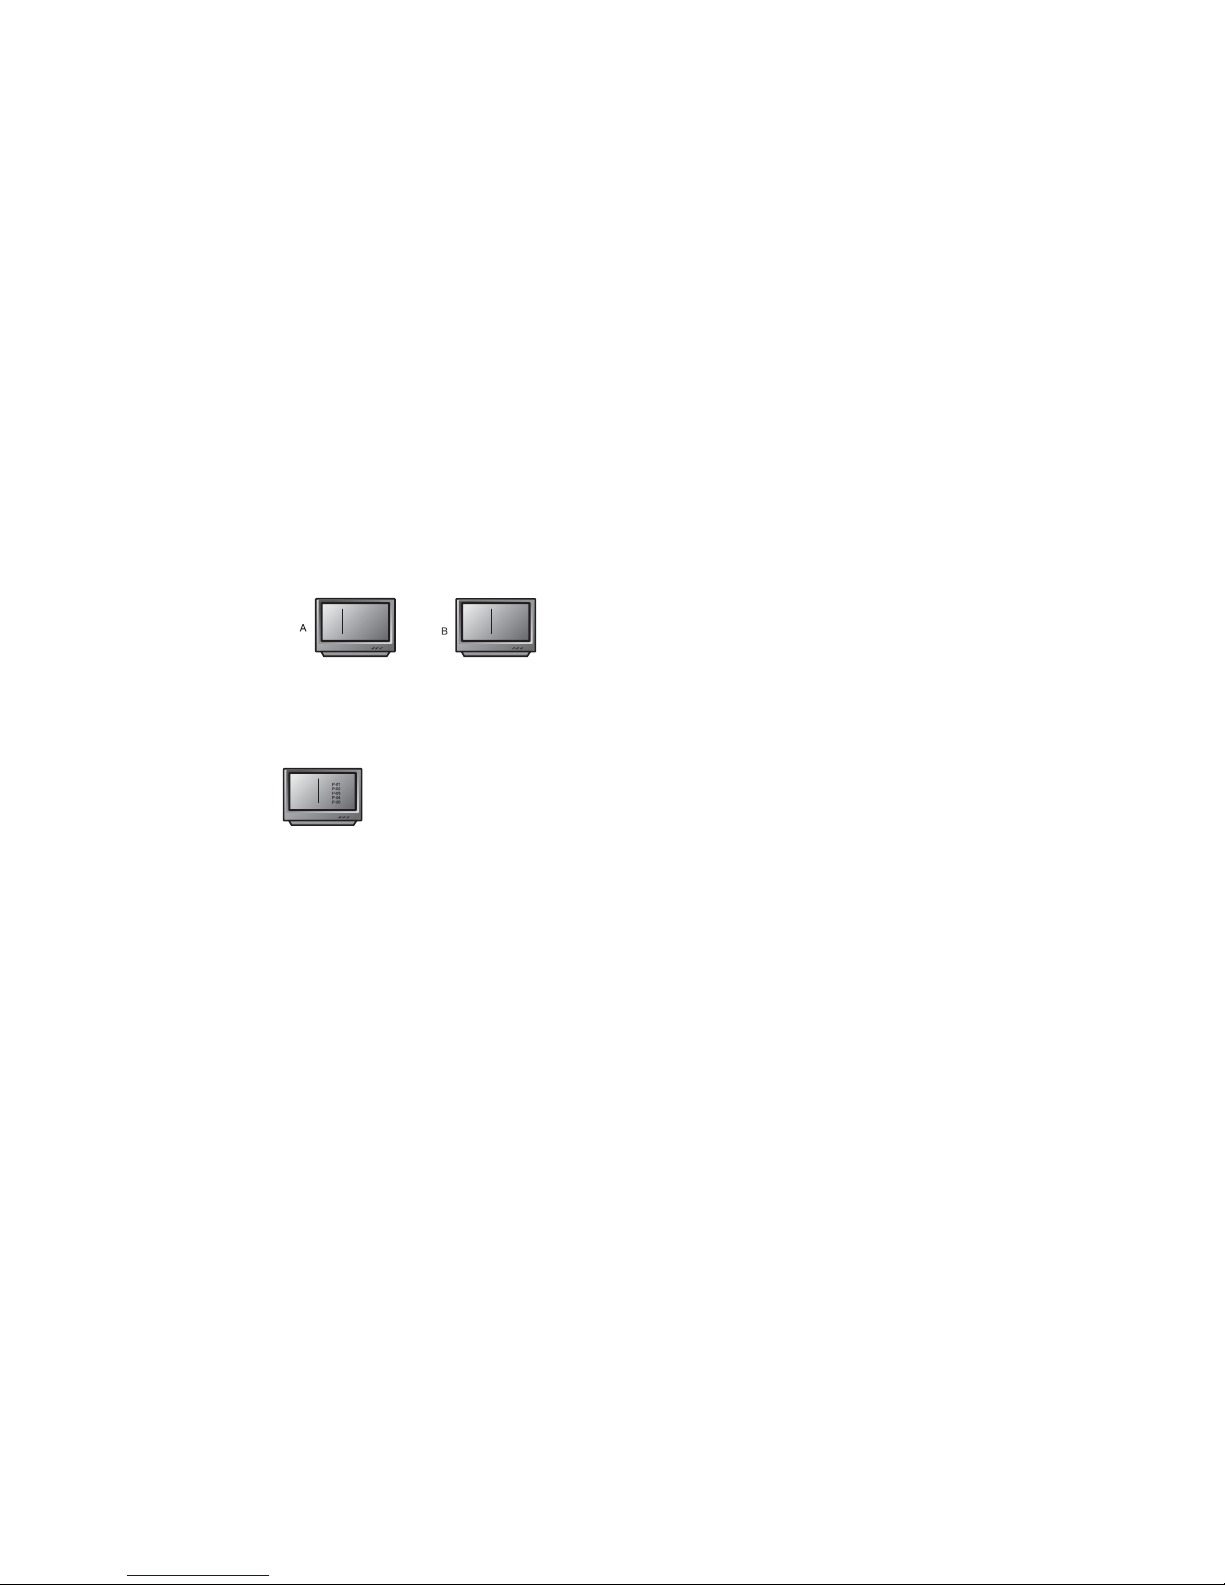
1. Insertthe disc. The machine will begin to search disc information and the main menu will be displayed on
the screen.The indexes are displayed at the left of the screen and their contents on the right. Navigate
within themenu using thedirection keys tounderline the requiredindex, then move to the right to select the
first file.A previewof the photowill appear onthe left. You can choose to display this photo by pressing
ENTER orby moving frompicture to pictureusing the directionkeys or directly, by entering the photo
number usingthe numeric keypad.In playback m
key. Press the stop key to return to the menu.
About JPEG
Displaying a picture
MENV
ROOT
ROOT 0
PHOTO 1
PHOTO 2
PHOTO 3
PHOTO 4
PHOTO 5
P-01
P-02
P-03
P-04
P-05
Other functions
1.When playingJPEG files, thesystem has functions“pause”, “play”, “repeat” and “browse” functions.
2.You can enlarge a picture by pressing the “zoom” key. Press the key continuously to obtain an enlargement
or reductionof the image(x2 x3 x4;x1/2,1/3,1/4).Pressthe“zoom”keyagain to return to normal play mode.
3.When thezoom is notactivated, use thedirection keys torotate the image.
ROOT
PHOTO 1
PHOTO 2
PHOTO 3
PHOTO 4
PHOTO 5
MENV
MENV
ROOT
PHOTO 1
PHOTO 2
PHOTO 3
PHOTO 4
PHOTO 5
MPEG-4
USB/SD function
MPEG 4is a newmulti-media standard whichcan record DVD-qualitydata onto CDs, whilst preserving
image quality.
1.Put anMPEG-4 disc inthe CD tray, press play key. The content will appear on the TV screen.You can
now selectthe file ofyour choice withthe direction key or the numeric keypad.
2.The abovementioned operation stepswork when playingmost MPEG-4 discs.
In DVDmode,
1) Ifthere is nodisc, the USB/SDwill play automaticallywhen the USB/SDis inserted. Ifpress the OPENkey, it will
change tothe disc playingsituation.
2)Inserting theUSB in thecondition of discplaying situation, press the DVD/USB/SD key once turns to USB playing,
press itagain turns toSD card playing,and turns to DVD disc playing by pressing at the third time.
Using FM/AM functions
1.Connect theFM/AM antenna toa FM/AM antennasocket.
2.Pres
key tosearch for therequired frequency, press the SEARCH+ or SEARCH- key
continuously inorder to startautomatic searching.
5.The screenwill display thestations frequency whenit receives thesignal. Press the memory key,
to memorisethe radio stationand the screen will display the frequency of the radio station, ifyou want to
store thestation under serialnumber, press the button again; if you want to store the stations in order of
frequency, press the memory key again. If you want to store the station under another number, press the
memory keythen choose anothernumber using thenumeric keypad. Pressup/down key to select desired serial
number, then press the memory key again .
6.By followingsteps 3 to5, the machinecan store up to 40 channels.
s the“INPUT” key onthe remote controlor front panel to enter radio mode.
3.Press the“FM/AM” key toselect required waveband.
4.Press theup/down
JPEG/MPEG-4/USB/SD/FM,AM
Page 12
11
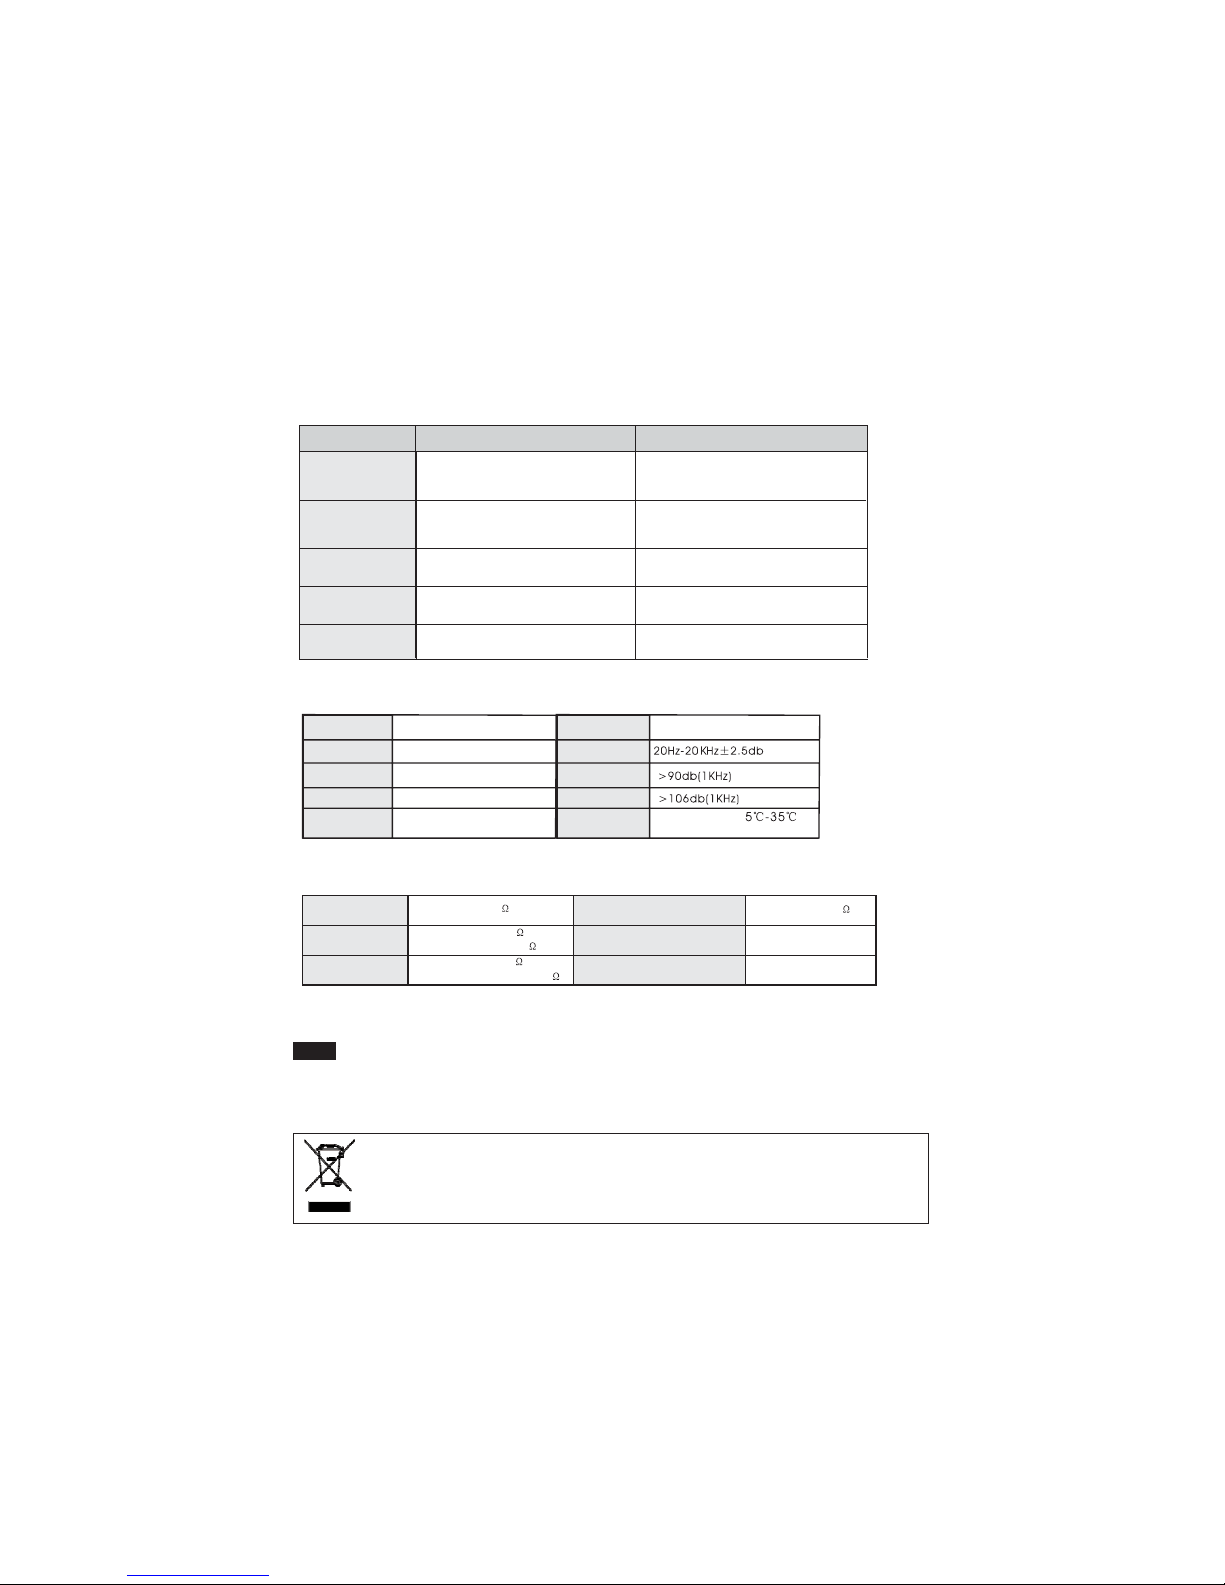
Digital audiooutput
(BISTREAM/PCM COAXAL)
Audio output
0.5V(P-P) 75
2.0V(P-P)
Europe videosocket
Trouble shooting guide /Technical specifications/Remarks
No powerdisplay
Disc cannot
display
PROBLEM
PROBLEM CAUSE
REMEDY
The standard of the disc is unsuitable; disc
scratched /dirty; disc loaded upside down
The jackmust be electrical,press the
plug,turn onthe power.
Power plugnot inserted properly; there
is nopower in the socket; thepower is
not switchedon.
Connect the video output line correctly; set the
TV into the AV channel; select a suitable mode
(N/P).
Video line not properly connected; TV
not properly set up; N/P is not selected
correctly.
Use suitable discs,make sure discs are clean;
make sure discs are loaded correctly.
Audio line not properly connected; the
volume is too low.
Connect the audio line correctly; adjust the
volume.
Bad image definition
and no colour
The qualityof the discis bad.
Use abetter quality disc.
No picture
No sound
N.W
G.W
Temperature:
Position: Horizontal
Size
Power supply
Power
DVD video
Output
AC230V/50Hz
Common problems and their solutions
Because of the incorrect use, the machine may become damaged or may break. In these cases, please
refer to the following solutions. If these are of no help, please refer to your retailer.
35W
4.75 KG
5.75 KG
Video output
Y/Cb/Cr output
S-VIDEO
1.0V(P-P) 75
(Y)1.0V(P-P) 75
(C)0.286V(P-P)75
(Y)1.0V(P-P) 75
(Pb)/(Pr) 0.7V(P-P)75
Signal mode
Frequency
S/N
Audio scope
Conditions
for use
NOTE:
***The quality of JPEG photos and the speed with which they can be opened depend on the resolution & the
compression ratio of the photos.
Some JPEG photos may not be played due to disc quality and formats.
***Some DVD+R/RW, DVD-R/RW discs may not be played due to the qualityor burning conditions.
If at any time in the future you should need to dispose of this product, please note that waste
electrical products should not be disposed of with household waste. Please recycle where
facilities exist. Check with your Local Authority or retailer for recycling advice.(Waste
Electrical and Electronic Equipment Directive)
Remarks
332x288x255mm
Scart output
NTSC/PAL
 Loading...