

Page 1
Digital Clock Radio
User manual
CRD-510
Importer: xxxxxx
Address: xxxxxx
Page 2
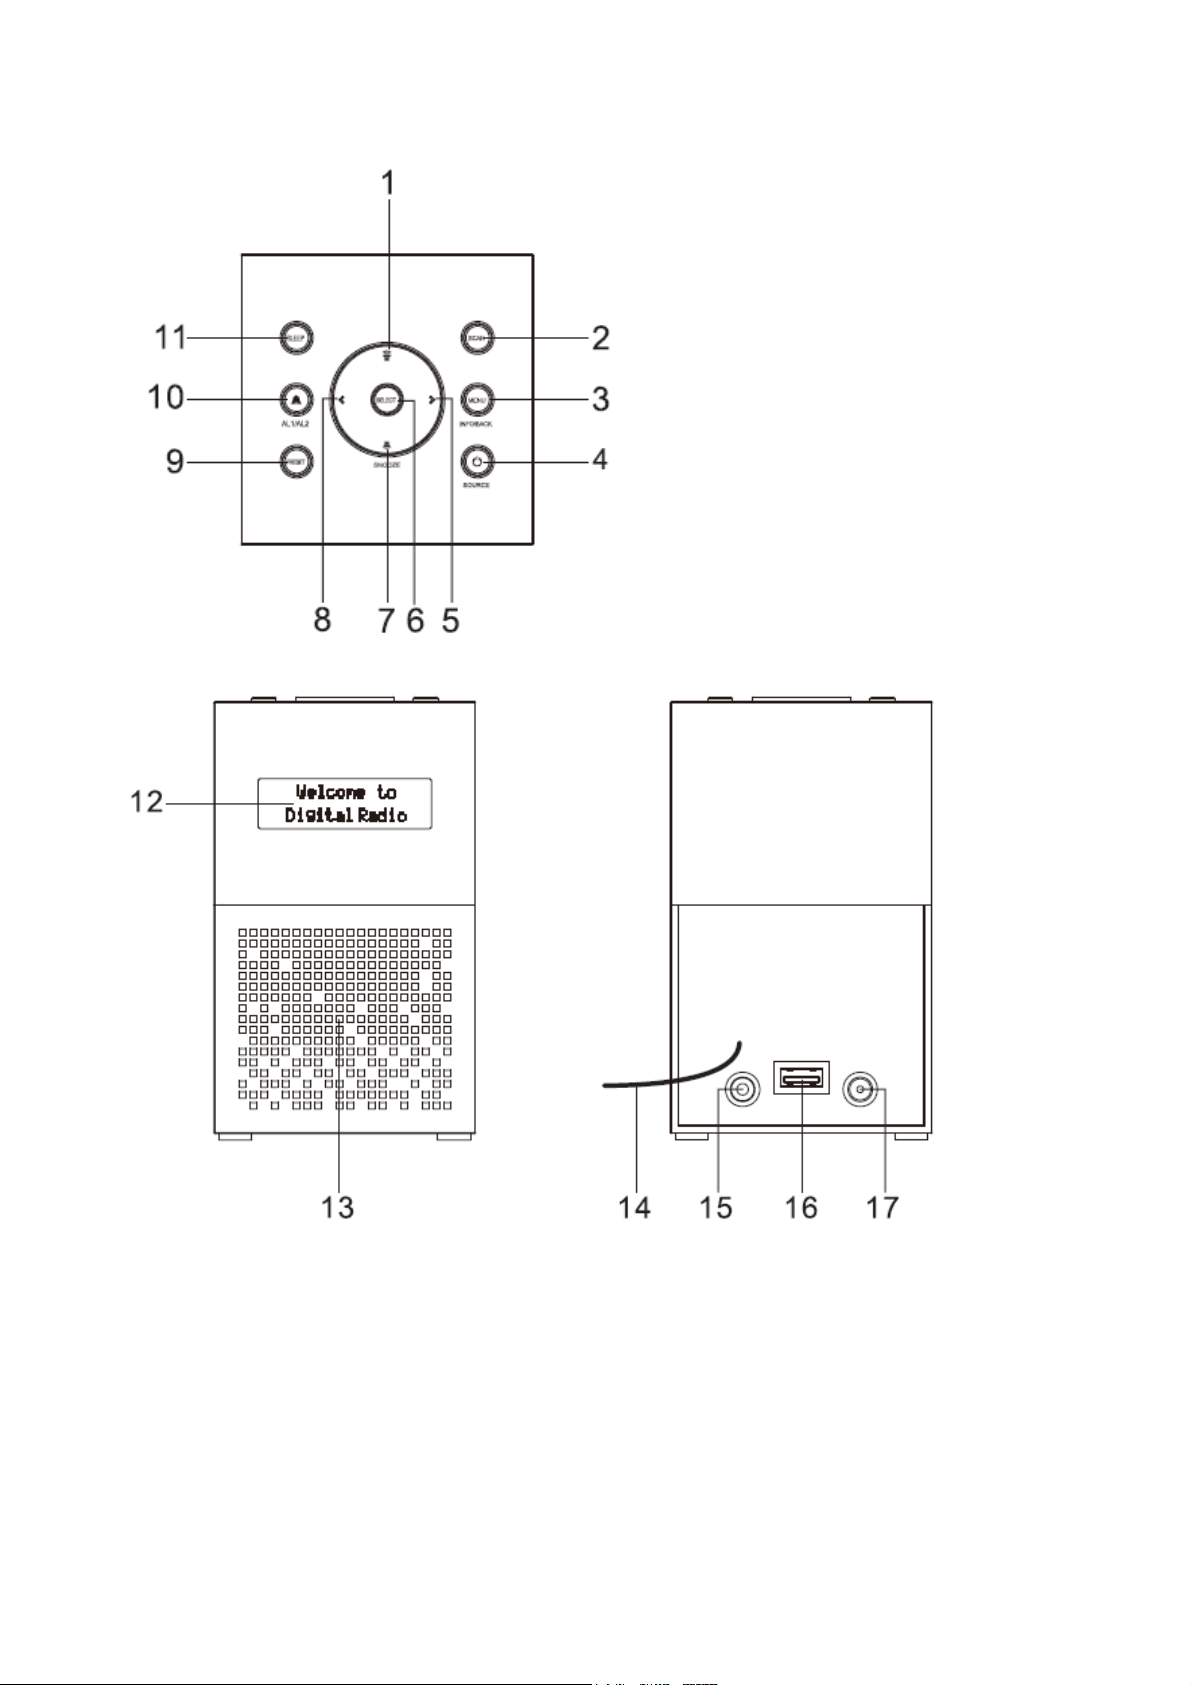
Overview of the product
1. VOL UP button
2. SCAN button
3. MENU button/INFO button/BACK button
4. POWER button/SOURCE button
5. FORWARD button
6. SELECT button
7. VOL DOWN button
8. BACKWARD button
9. PRESET button
10. ALARM button (AL1/AL2)
Page 3

11. SLEEP button
12. Display
13. Speaker
14. Antenna
15. Headphone jack
16. USB jack (for charging external devices)
17. DC IN jack
Connecting to power
1. Connect the cord of the power adapter to the DC IN jack of the radio.
2. Connect the plug of the power adapter to a wall socket.
The radio is powered and in standby mode when you see the display is switched on.
Turning on or off
1. Press the POWER button in standby mode to turn the radio on.
2. Press and hold the POWER button when the radio is turned on to switch it to standby
mode. The time show on the display in standby mode.
To completely disconnect the radio from power, remove the plug of the power adapter
from the wall socket.
Setting the clock
The date and time of the radio is automatically set once it receives radio broadcast signals
(and when such info is available). You may also set the date and time through the setting
menu. To do so:
1. Press the POWER button to turn the radio on.
2. Press and hold the MENU button.
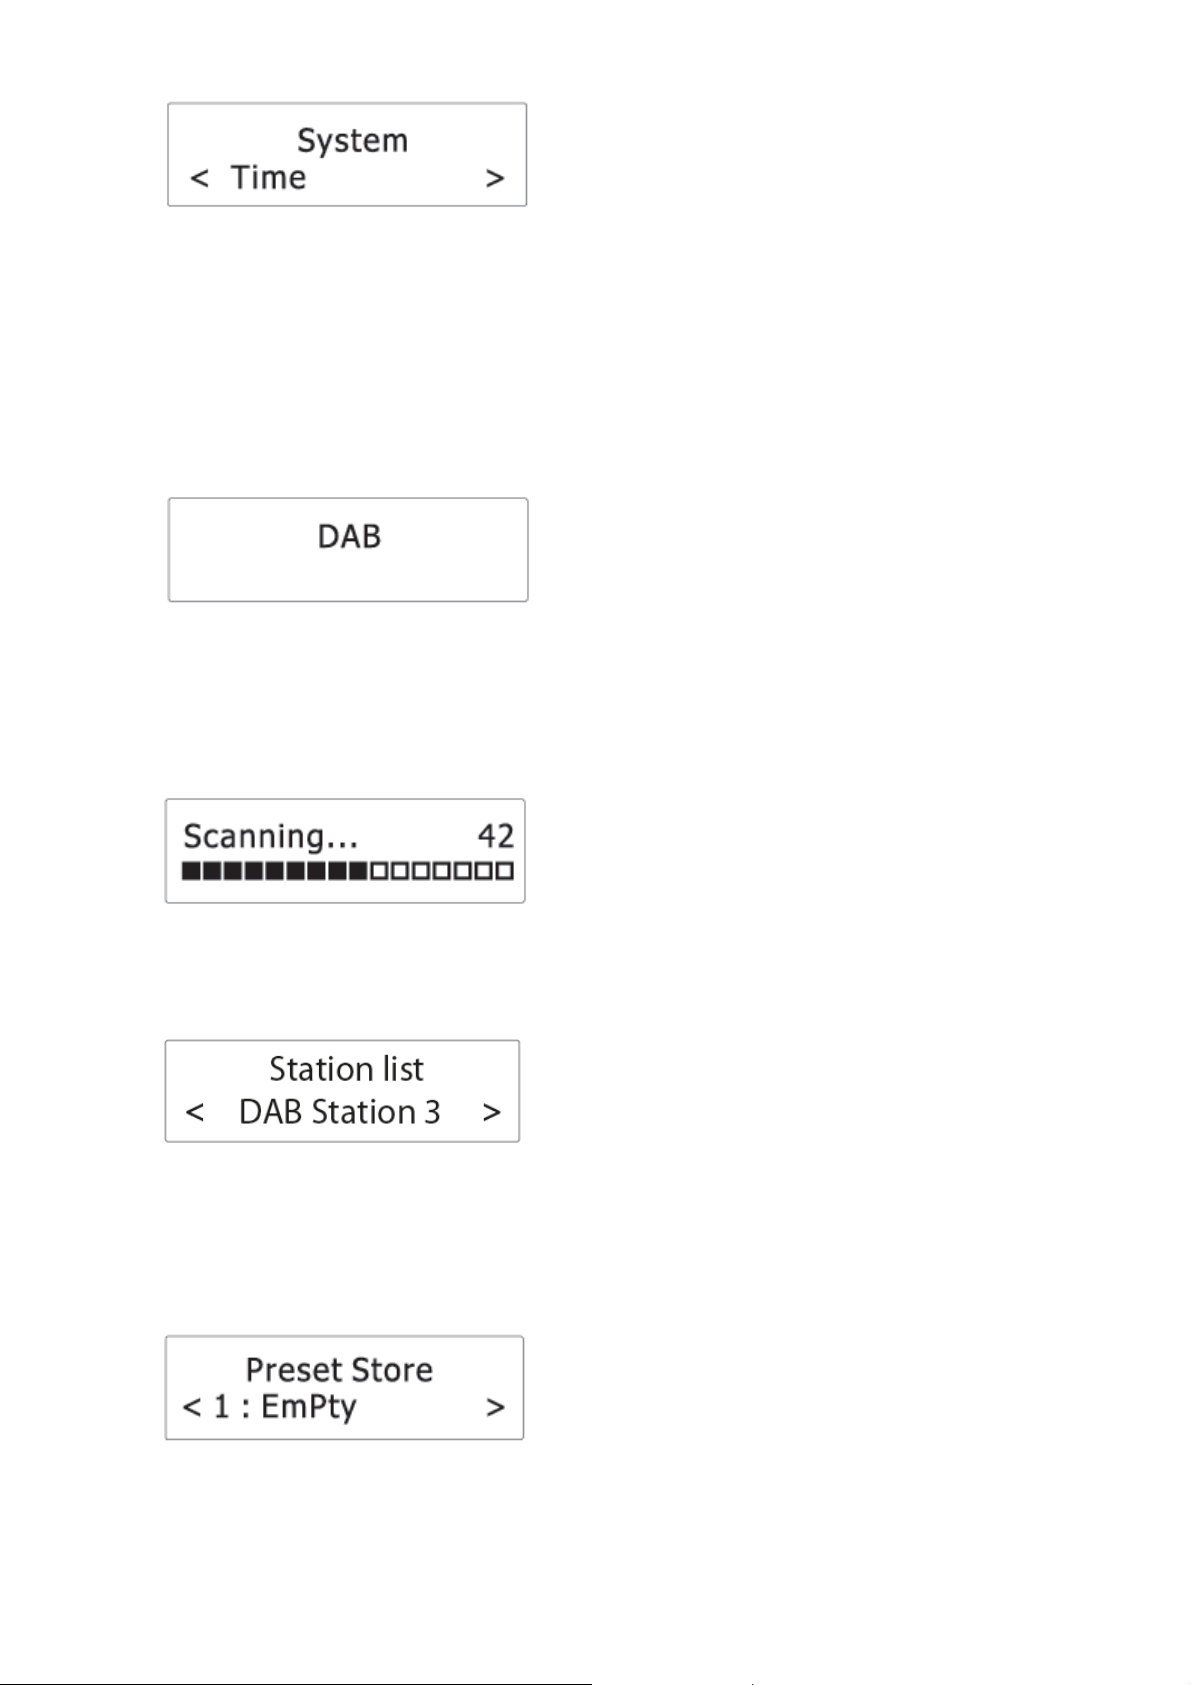
3. Press the BACKWARD or FORWARD button until you see “System” on the display and
then press the SELECT button.
4. Press the BACKWARD or FORWARD button until you see “Time” on the display and
then press the SELECT button.
Page 4
5. Press the BACKWARD or FORWARD button until you see “Set Time/Date” on the
display and then press the SELECT button.
6. Press the BACKWARD or FORWARD button to set hour time and then press the
SELECT button to confirm.
7. Repeat step 6 to continue setting minute time, date, month and year.
** For more date and time settings, see chapter “Time”.
Listening to DAB broadcasts
1. Press the POWER button to turn the radio on.
2. Press the SOURCE button to select DAB mode.
Scanning for DAB stations
The first time you use the radio, or if the station list is empty, the radio automatically
performs a station search. You may also perform a station search manually. To do so:
• In DAB mode, press the SCAN button to activate the automatic station search.
The radio automatically stores radio stations with sufficient signal strength.
After the search is complete, the first stored station is broadcast automatically.
Tuning to a DAB station
1. In DAB mode, the BACKWARD or FORWARD button to cycle through the DAB
stations in the station list.
2. Press the SELECT button to tune to the selected DAB station.
Storing preset stations
You can store up to 10 DAB stations as preset stations.
1. Tune to a DAB station.
2. Press and hold the PRESET button until “Preset Store” shows on the display.
3. Press the BACKWARD or FORWARD button to select a preset number.
4. Press the SELECT button to confirm.
The DAB station is stored with the selected preset number.
Repeat steps 1-4 to store more preset stations.
Page 5

5. To tune to a preset station, press the PRESET button once, then press the
BACKWARD or FORWARD button to cycle through the list of preset stations and then
press the SELECT button to confirm the selection.
To change the DAB station assigned to a preset number, repeat steps 1 to 4 above to
overwrite the existing DAB station.
Displaying DAB information
Press the INFO button repeatedly to cycle through the following information (if available).
• Dynamic label segment (DLS)
• Signal strength
• Program type (PTY)
• Ensemble name
• Frequency
• Signal error rate
• Bitrate codec
• Time
• Date
Using the DAB menus
1. In DAB mode, press and hold the MENU button to access the DAB menus.
2. Press the BACKWARD or FORWARD button to cycle through the below options.
• Full scan
• Manual tune
• DRC
• Prune
• System
See below for details of each option.
Full scan
Full scan is used to perform a wide range search for DAB stations.
• Press the SELECT button to start scanning for available DAB stations. After the
scanning is complete, the first detected station is broadcast automatically.
Manual tune
1. Press the SELECT button to confirm the selection “Manual tune”.
2. Press the BACKWARD or FORWARD button to tune the frequency manually.
DRC (Dynamic Range Control)
DRC adds or removes a degree of compensation for the differences in the dynamic
range between radio stations.
Page 6

System
See chapter “System menu” for details.
Selecting FM mode
1. Press the POWER button to turn the radio on.
2. Press the SOURCE button to select the FM mode.
Scanning for FM stations
• In FM mode, press the SCAN or SELECT button to activate the automatic search for
the next available FM station.
• After a strong FM radio station is detected, the search stops. The FM radio station is
broadcast.
Tuning the FM frequency
• In FM mode, press the BACKWARD or FORWARD button to tune down or up the
frequency.
• Once you have tuned up or down the frequency, press the SCAN or SELECT button to
activate the automatic search for the next available FM station in the selected tune up
or down direction.
**Unroll and extend the antenna to improve FM signal reception.
Storing preset stations
You can store up to 10 FM stations as preset stations.
1. Tune to an FM station.
2. Press and hold the PRESET button until “Preset Store” shows on the display.
3. Press the BACKWARD or FORWARD button to select a preset number.
4. Press the SELECT button to confirm.
The FM station is stored with the selected preset number.
Repeat steps 1-4 to store more preset stations.
5. To tune to a preset station, press the PRESET button once, then press the
BACKWARD or FORWARD button to cycle through the list of preset stations and then
press the SELECT button to confirm the selection.
To change the FM station assigned to a preset number, repeat steps 1 to 4 above to
overwrite the existing FM station.
Page 7

Displaying RDS information
Radio Data System (RDS) is a service that allows FM stations to transmit additional
information. When you tune to an FM radio station that transmits RDS signals, the station
name is displayed.
Press the INFO button repeatedly to cycle through the following RDS information (if
available).
• Radio text
• Program type (such as NEWS, SPORT, POP M)
• Program service
• Time
• Date
Using the FM menu
1. In FM mode, press and hold the MENU button to access the FM menus.
2. Press the BACKWARD or FORWARD button to cycle through the below options.
• Scan setting
• System
See below for details of each option.
Scan setting
1. Press the SELECT button to confirm the selection “Scan setting”.
2. Press the BACKWARD or FORWARD button to cycle through the below options.
The asterisk behind the option indicates the current setting.
• Strong stations only: Search for strong stations only.
• All stations: Search for all stations regardless of the signal strength.
3. Press the SELECT button to confirm the selected option.
System
See chapter “System menu” for details.
Alarm setting
The radio lets you have 2 alarm settings.
To set the alarm:
1. While in radio mode, Press the ALARM button to select between Alarm 1 and Alarm 2
and then press the SELECT button to confirm the selection.
2. Press the BACKWARD or FORWARD button to set the hour time of the alarm and then
press the SELECT button.
Page 8

3. Press the BACKWARD or FORWARD button to set the minute time of the alarm and
then press the SELECT button.
4. Press the BACKWARD or FORWARD button to cycle through the duration options and
then press the SELECT button to confirm the selection.
The duration defines the time before the radio returns to standby mode if the alarm is
not deactivated.
Duration options: 15, 30, 45, 60, 90 and 120 minutes.
5. Press the BACKWARD or FORWARD button to cycle through the source options and
then press the SELECT button to confirm the selection.
The source defines the sound source of the alarm.
Source options: DAB, FM and Buzzer.
If DAB or FM is selected, you will also be prompted to select the last played station or
one of the preset stations (if set) as the alarm.
6. Press the BACKWARD or FORWARD button to cycle through the interval options and
then press the SELECT button to confirm the selection.
The interval defines on which days the alarm is active.
Interval options: Daily, Once, Weekends and Weekdays.
If “Once” is selected, you will also be prompted to set a specific date.
7. Press the BACKWARD or FORWARD button to adjust the volume level and then press
the SELECT button.
This setting defines the sound volume of the alarm.
8. Press the BACKWARD or FORWARD button to select alarm on or off and then press
the SELECT button to confirm the selection.
When the alarm setting is active, the corresponding alarm icon (A1) for alarm 1 and (A2)
for alarm 2) will show on the display.
At the set time, the alarm will sound. The volume will increase gradually until it reaches
the set volume level. The corresponding alarm icon will also flash on the display.
Page 9

Turning the alarms on or off in standby mode
Pressing ALARM
Alarm 1
Alarm 2
1×
Off
Off
2×
On
Off
3×
Off
On
4×
On
On
1. In standby mode, press the ALARM button repeatedly to cycle through the alarm on or
off settings. See the table below for details.
2. Press the SELECT button to confirm the setting.
When the alarm setting is active, the corresponding alarm icon (A1) for alarm 1 and (A2)
for alarm 2 will show on the display.
Deactivating a sounding alarm
Press the POWER button or ALARM button to switch the radio to standby mode.
Snooze
• Snooze buttons: VOL UP, VOL DOWN, BACKWARD, FORWARD and SELECT.
• To temporarily silence a sounding alarm, press one of the SNOOZE buttons. To
change the snooze period, press one of the SNOOZE buttons repeatedly (options: 5,
10, 15 or 30 minutes).
• The radio will return to standby mode during the snooze period. The alarm will sound
again when the snooze period is over.
• To cancel the snooze period and the alarm, press the POWER button.
Sleep
This sleep function defines the duration of time before the radio switches itself off
automatically.
1. When the radio is switched on, press the SLEEP button repeatedly to select a sleep
period (Options: Off, 15, 30, 45, 60 and 90 minutes).
2. Press the SELECT button to confirm the selection.
Once a sleep period is set, the sleep icon ( ) will show on the display. The radio will
automatically switch off when the sleep period is over.
System menu
To access the system menu:
1. Press and hold the MENU button in DAB or FM mode.
2. Press the BACKWARD or FORWARD button to cycle through the options until you see
“System”.
3. Press the SELECT button to confirm the selection “System”.
4. Press the BACKWARD or FORWARD button to cycle through the below options.
• Time
Page 10

• Backlight
• Inactive Standby
• Language
• Factory Reset
• Software Version
See below for details of each option.
Time
1. Press the SELECT button to confirm the selection “Time”.
2. Press the BACKWARD or FORWARD button to cycle through the below options. The
asterisk behind the option indicates the current setting.
• Set Time/Date
• Auto Update
• Set 12/24 hour
• Set date format
See below for details of each option.
Auto Update
This setting defines how the radio updates the time and date information.
1. Press the SELECT button to confirm the selection “Auto Update”.
2. Press the BACKWARD or FORWARD button to cycle through the below options.
The asterisk behind the option indicates the current setting.
• Update from Any: Update the time and date from any available signals.
• Update from DAB: Update the time and date from DAB signals.
• Update from FM: Update the time and date from FM signals.
• No update: Do not update the time and date.
3. Press the SELECT button to confirm the selected option.
Set 12/24 hour
1. Press the SELECT button to confirm the selection “Set 12/24 hour”.
2. Press the BACKWARD or FORWARD button to cycle through the below time format
options. The asterisk behind the option indicates the current setting.
• 12: Show the time in 12-hour format.
• 24: Show the time in 24-hour format.
3. Press the SELECT button to confirm the selected option.
Set date format
1. Press the SELECT button to confirm the selection “Set date format”.
2. Press the BACKWARD or FORWARD button to cycle through the below date
format options. The asterisk behind the option indicates the current setting.
• DD-MM-YYYY
• MM-DD-YYYY
3. Press the SELECT button to confirm the selected option.
Page 11

Backlight
1. Press the SELECT button to confirm the selection “Backlight”.
2. Press the BACKWARD or FORWARD button to cycle through the below options. The
asterisk behind the option indicates the current setting.
• Timeout
• On level
• Dim level
See below for details of each option.
Timeout
This setting defines the duration of the backlight before it is dimmed.
1. Press the SELECT button to confirm the selection “Timeout”.
2. Press the BACKWARD or FORWARD button to cycle through the below timeout
options (in seconds). The asterisk behind the option indicates the current setting.
• On (the backlight does not dim)
• 10 sec
• 20 sec
• 30 sec
• 45 sec
• 60 sec
• 90 sec
• 120 sec
• 180 sec
3. Press the SELECT button to confirm the selected option.
On level
This setting defines the brightness level when the backlight is switched on.
1. Press the SELECT button to confirm the selection “On level”.
2. Press the BACKWARD or FORWARD button to cycle through the below brightness
levels. The asterisk behind the option indicates the current setting.
• Low
• Mid
• High
3. Press the SELECT button to confirm the selected option.
Dim level
This setting defines the brightness level when the backlight is dimmed.
1. Press the SELECT button to confirm the selection “Dim level”.
2. Press the BACKWARD or FORWARD button to cycle through the below brightness
levels. The asterisk behind the option indicates the current setting.
• Low
• Mid
• High
3. Press the SELECT button to confirm the selected option.
Page 12

Inactive Standby
This setting defines the duration of time before the radio switches itself off automatically.
1. Press the SELECT button to confirm the selection “Inactive Standby”.
2. Press the BACKWARD or FORWARD button to cycle through the below time options.
The asterisk behind the option indicates the current setting.
• Off
• 2 hour
• 4 hour
• 5 hour
• 6 hour
3. Press the SELECT button to confirm the selected option.
Language
This setting defines the language used in the menus.
1. Press the SELECT button to confirm the selection “Language”.
2. Press the BACKWARD or FORWARD button to cycle through the below language
options. The asterisk behind the option indicates the current setting.
• English
• Français (French)
• Deutsch (German)
• Italiano (Italian)
3. Press the SELECT button to confirm the selected option.
Factory Reset
This setting clears all user-defined settings and replaces them with the original default
settings.
1. Press the SELECT button to confirm the selection “Factory Reset”.
2. Press the BACKWARD or FORWARD button to select “Yes” and then press the
SELECT button to confirm factory reset.
Software Version
This option displays the current software version.
Page 13

Charging external device
DAB Menus
System
(See “System menus”)
FM Menus
System
(See “System menus”)
System Menus
SW version
Time menus
Set date format
DD/MM/YYYY | MM/DD/YYYY
Backlight menus
Dim level
Low | Mid | High
Alarm menus
Source
DAB | FM | Buzzer
Connect an external device (e.g. smartphone, mp3 player) via a USB cable (not provided)
to the USB jack on the back of the radio for charging. The radio cannot access the
contents in the connected external device.
Overview of menus
• To cycle through the options a menu, press the BACKWARD or FORWARD button.
• To confirm a selection, press the SELECT button.
• To go back to the previous menu/screen, press the BACK button.
Full scan
Manual scan
DRC
Prune
Scan setting
Time
Backlight
Inactive standby
Language
Factory reset
Off | Low | High
No | Yes
All stations | Strong stations only
(See “Time menus”)
(See “Backlight menus”)
Off | 2 hour | 4 hour | 5 hour | 6 hour
English | Français | Deutsch | Italiano
No | Yes
Set Time/Date
Auto update
Set 12/24 hour
Timeout
On level
On time
Duration
hh > mm > dd > mm > yyyy
Update from any | Update from DAB | Update from FM |
No update
12 | 24
On | 10 | 20 | 30 | 45 | 60 | 90 | 120 | 180
Low | Mid | High
hh:mm
15 | 30 | 45 | 60 | 90 | 120
Page 14

Interval
Volume
On/Off
Daily | Once | Weekends | Weekdays
On | Off
Sleep menu
Sleep
Off | 15 | 30 | 45 | 60 | 90
Tuner Range:
FM: 87.5 - 108 MHz
DAB: 174.928 - 239.200 MHz
Amplifier Rated Output Power:
W RMS
Number of preset radio stations:
10 (FM), 10 (DAB)
AC power adaptor:
Input: AC 100-240V, 50/60Hz
Output: DC 5V 1.5A
Specifications
Adaptor Manufacturer’s name: Dongguan Huapan Electronic Technology Co., Ltd.
Adaptor Model number: PS07-050150-ABC
Page 15

ALL RIGHTS RESERVED, COPYRIGHT DENVER ELECTRONICS A/S
Electric and electronic equipment contains materials, components and substances that
can be hazardous to your health and the environment, if the waste material (discarded
electric and electronic equipment) is not handled correctly.
Electric and electronic equipment is marked with the crossed out trash can symbol, seen
above. This symbol signifies that electric and electronic equipment should not be disposed
of with other household waste, but should be disposed of separately.
All cities have established collection points, where electric and electronic equipment can
either be submitted free of charge at recycling stations and other collection sites, or be
collected from the households. Additional information is available at the technical
department of your city.
Hereby, Inter Sales A/S declares that the radio equipment type CRD-510 is in compliance
with Directive 2014/53/EU. The full text of the EU declaration of conformity is available at
the following internet address: http://www.denver-electronics.com/denver-crd-510/
Operating Frequency Range:
Max Output Power:
Imported by:
DENVER ELECTRONICS A/S
Omega 5A, Soeften
DK-8382 Hinnerup
Denmark
www.facebook.com/denverelectronics
 Loading...