

Page 1

Wir e less PCMCIA card
Installation Guide
For OEM integrator
Federal Communications Commission (FCC) Compliance
Notice: Radio Frequen cy Notice
This device, Wireless PCMCIA Card (LM-WP210RB), must
be installed and used in strict accordance with the
manufacture’s instructions as described in the user
documentation that comes with the product.
This device complies with part 15 of the FCC Rules. Operation
is subject to the following two conditions:
1. This device may not cause harmful interference.
2. This device must accept any interference receive d,
including interference that may cause undesired operation.
Note: This equipment has been tested and found to comply
with the limits for a Class B digital device, pursuant to part 15
of the FCC Rules. These limits are designed to pr ov ide
reasonable protection against harmful interference in a
residential installation. This equipment generates, uses, and can
radiate radio frequency energy and, if not installed and used in
accordance with the instructions, may cause harmful
interference to radio communications. However, there is no
guarantee that interference will no t occu r in a particular
installation. If this equipment does cause harmful interference
to radio or television reception, which can be determined by
turning the equipment off and on, the user is encouraged to try
to correct the interference by one or more of the following
measures: (1) Reorient or relocate the receiving antenna, (2)
Increase the separation between the equipment and receiver, (3)
Connect the equipment into an outlet on a circuit different from
that to which the receiver is connected, (4) Consult the dealer
or an experienced radio/TV technician for help.
Page 2

Wireless PCMCIA card
Warnin g:
Changes or modifi cations t o this unit not ex pressly
approved by the party responsible for co m pliance cou ld voi d the
user authority to operate the equipm ent.
CAUTION:
This device is intended only for OEM integrators under the
following conditions:
1. This equipment complies with FCC radiation exposure
limits set forth for an uncontrolled environment. In order to
avoid the possibility of exceeding the FCC radio frequency
exposure limits, human proximity to the anten na (installed to
end product) shall not be less than 20 cm (8 inches) during
normal operation.
2. This Transmitter must not be co-located or operating in
conjunction with any other antenna or transmitter
As long as the 2 conditions above are met, further transmitter
testing will not be required. However, the OEM integrator is
still responsible for testing their end- p roduct for any additional
compliance requirements required with this module installed
(for example, digital device emission, PC peripheral
requirements, etc.).
Additional Information that Must be Provided to OEM
Integrators:
The end user should NOT be provided any instructions on how
to remove or install the device.
Wireless PCMCIA card
IMPORTANT NOTE.
1) In the event that these conditions can not be met (for
example certain laptop configurations or co-location with
another transmitter), then the FCC authorization is no longer
considered valid and the FCC ID can not be used on the final
product. In these circumstances, the OEM integrator will be
responsible for re-evaluating the end product (including the
transmitter) and obtaining a separate FCC authorization.
2) To comply with FCC RF exposure compliance requirements,
the antenna used for this transmitter must be installed to
provide a separation distance of at least 20 cm from all persons
and must not be co-located or operating in conjunction with
any other antenna or transmitter."
End Product Labeling
This transmitter module is authorized only for use in devices
where the antenna may be installed such that 20 cm may be
maintained between the antenna and users (for example access
points, routers, wireless ASDL modems, and similar
equipment). The final end product must be labeled in a
visible area with the following: "Contains TX FCC ID:
PD5LMWP210RB
Technical Support
DELTA PRODUCTS CORPORATION
5105 Davis Dr. y P.O. Box 12173
Research Triangle Pa rk, NC 27709
Internet: http://www.deltaww.com
Tel: 919-767-3905
Fax: 919-767-2405
E-mail: yjhuang@deltartp.com
iii
iv
Page 3

Wireless PCMCIA card
TABLE OF CONTENT
Introduction 1
Driver Installation 2
Install Driver Under Windows XP 2
Install Driver Under Windows 98 6
Install Driver Under Windows ME 10
Install Driver Under Windows 2000 12
Install Driver Under Windows CE 18
Configure the Configuration Utility 21
Wireless PCMCIA card
Introduction
The Wireless PC card helps you create a wireless network for sharing
your broadband cable or DLS internet access among multiple PCs in
and around your home of office. It is designed for notebook
computers running Microsoft Windows 98, 2000, NT, Millennium
and XP. It is 16-bit PCMCIA and 32-bit CardBus compatible and
works in any available PCMCIA or CardBus slot. Its auto-sensing
capability allows packet transfer in 11Mbps for maximum throughput,
or speed reduction to the lower 1Mbps speed for distance or working
in a noisy environment.
Features
11 Mbps High-Speed Transfer Rate
Interoperable with IEEE 802.11b(DSSS) 2.4GHz-compliant
Equipment
Plug-and Play Operation Provides Easy Setup
Utilizes Intersil Prism2.5 chip sets
Advanced Power Management Features Conserve Valuable
Notebook PC Battery Life
Direct Sequence Spread Spectrum Compatible to Prevent Lost
Connections
Rugged Metal Design with Integrated Antenna
Wired Equivalent Privacy (WEP) 64/128-bit data encryption
Driver Supports Windows 98, Millennium, NT v.4, 2000 and XP
v
1
Page 4
Wireless PCMCIA card
Driver Installation
Install Driver Under Windows XP
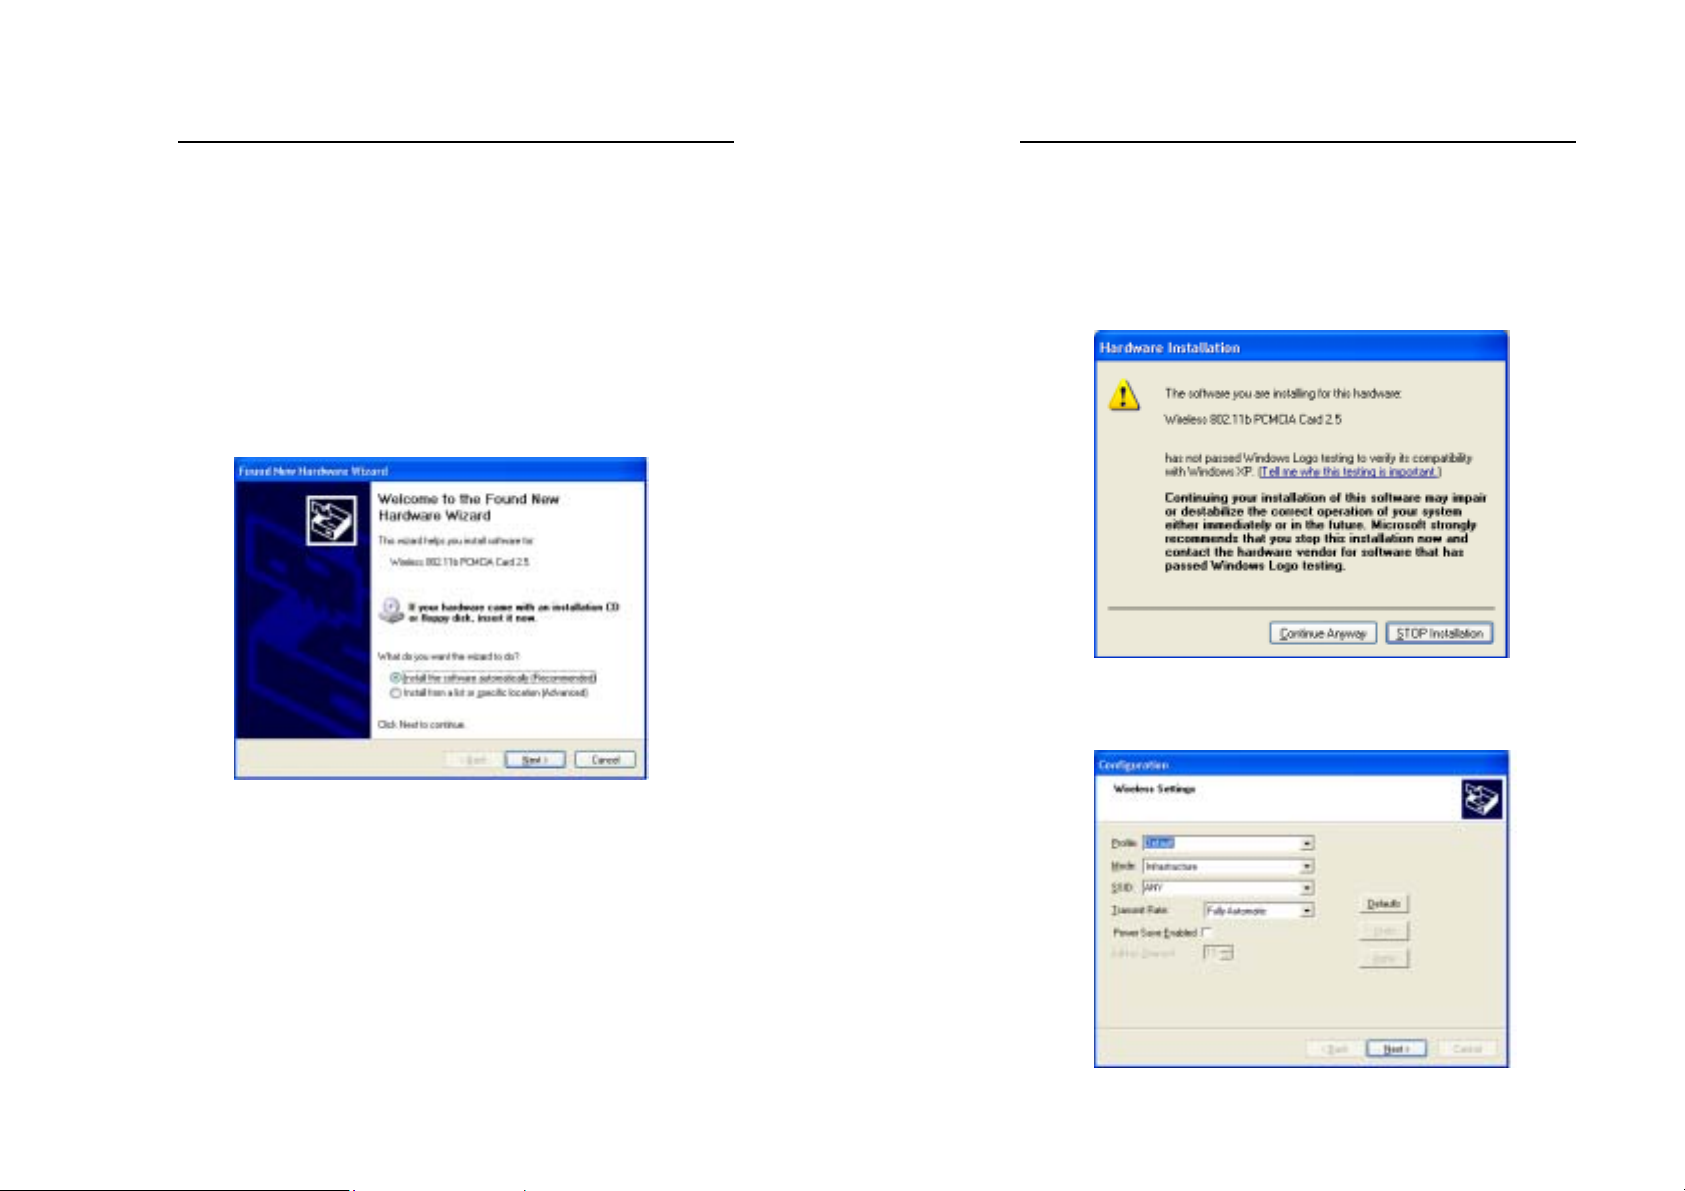
1. Connect the Wireless PC card into your Notebook PC. Windows
XP will automatically recognize a new Wireless 802.11b
PCMCIA Card 2.5
[Recommended] and click the Next button to proceed.
. Select
Install the software automatically
Wireless PCMCIA card
2. Windows will notify you that it has not passed Windows Logo
testing to verify its compatibility with Whistler. Click the
Continue Anyway button to continue.
3. At this point, the Configuration screen appears. Configure the
PCMCIA card and then click the OK button.
2
3
Page 5

Wireless PCMCIA card
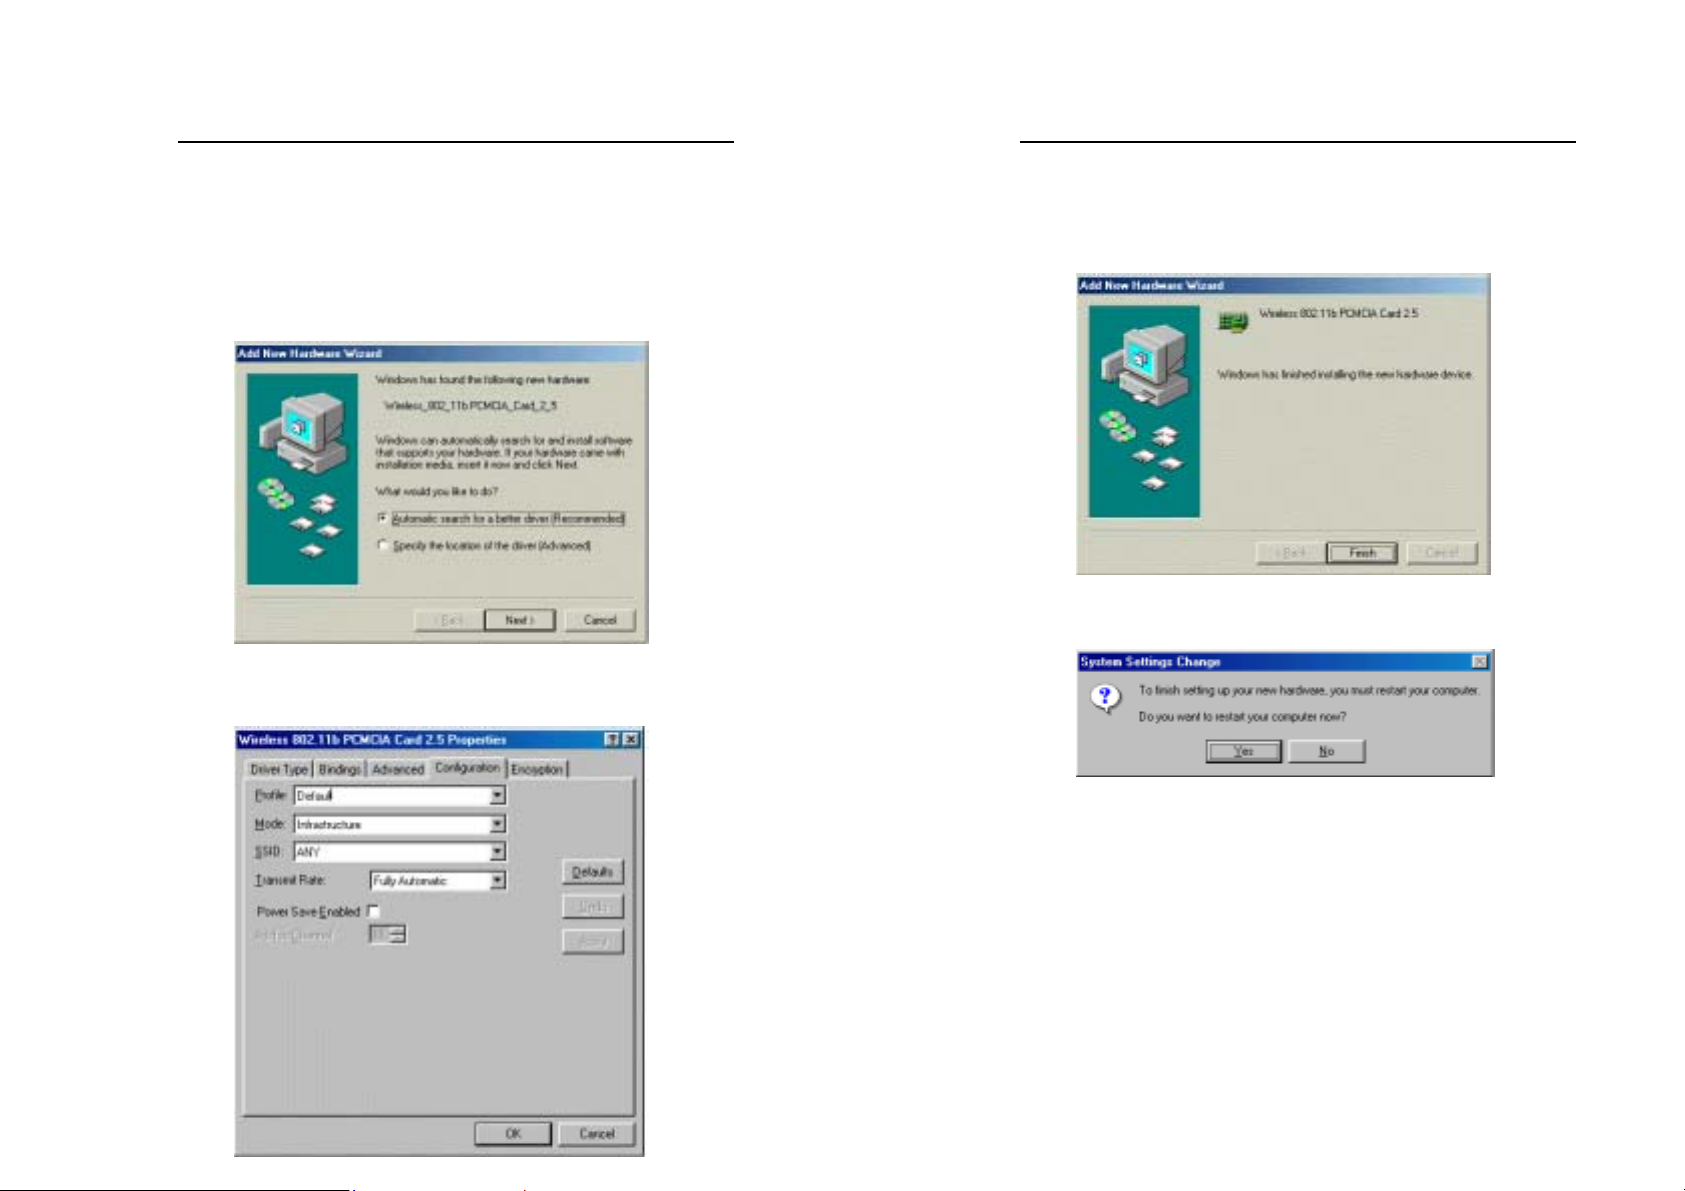
4. On the Encryption screen, set the WEP. Windows has now
completed installing the network. Click the Finish button to
continue.
Wireless PCMCIA card
5. Click right on My computer and select properties. Select
Device Manager and click on the Network adapters. You will
find the Wireless 802.11b PCMCIA Card 2.5 if it is installed
successfully. The PC card adapter driver installation is finished.
4
5
Page 6

Wireless PCMCIA card
Install Driver Under Windows 98
1. Connect the Wireless PC card into your Notebook PC. Windows
98 will automatically recognize a new Wireless 802_11b-
PCMCIA Card 2_5
2. Make sure Search for the best driver for your device is
selected and click the
. Click the
button.
Next
button to proceed.
Next
Wireless PCMCIA card
3. Make sure the Specify a location is selected and click the
Browse button. At this point, Windows will ask you to browse
for the folder. Simply select the folder in which the driver is
located and click the OK button.
4. Windows is now ready to install the driver. Click the Next button
to continue.
6
7
Page 7

Wireless PCMCIA card
5. At this point, the Properties screen appears. Configure the
PCMCIA card and then click the OK button.
Wireless PCMCIA card
7. After installing the drivers, the System Sett ing Change screen
will show you that installation is complete. Click the Yes button
to finish.
8. Click right on My computer and select properties. Select
Device Manager and click on the Network adapters. You will
find the Wireless 802.11b PCMCIA Card 2.5 if it is installed
successfully. The PC card adapter driver installation is finished.
6. Windows has now completed installing the network. Click the
Finish button to continue.
8
9
Page 8
Wireless PCMCIA card
Install Driver Under Windows ME
1. Windows automatically recognizes a new PC Card added. Select
Automatic search for a better driver [Recommended] and
click the
2. At this point, the Properties screen appears. Configure the
PCMCIA card and then click the OK button.
button to proceed.
Next
Wireless PCMCIA card
3. Windows will notify that installing has been completed. Click
the Finish button to continue.
4. Windows will now ask you to restart your computer. Click the
Yes button to restart.
10
11
Page 9

Wireless PCMCIA card
5. To verify the driver installation, Move cursor on “My
computer” icon and click the right button of the mouse. Select
the properties. The System Properties windows shows. Click the
Network adapters on the Device Manager folder. Wireless
802.11b PCMCIA Card 2.5 will be found if the driver
installation is successful.
Wireless PCMCIA card
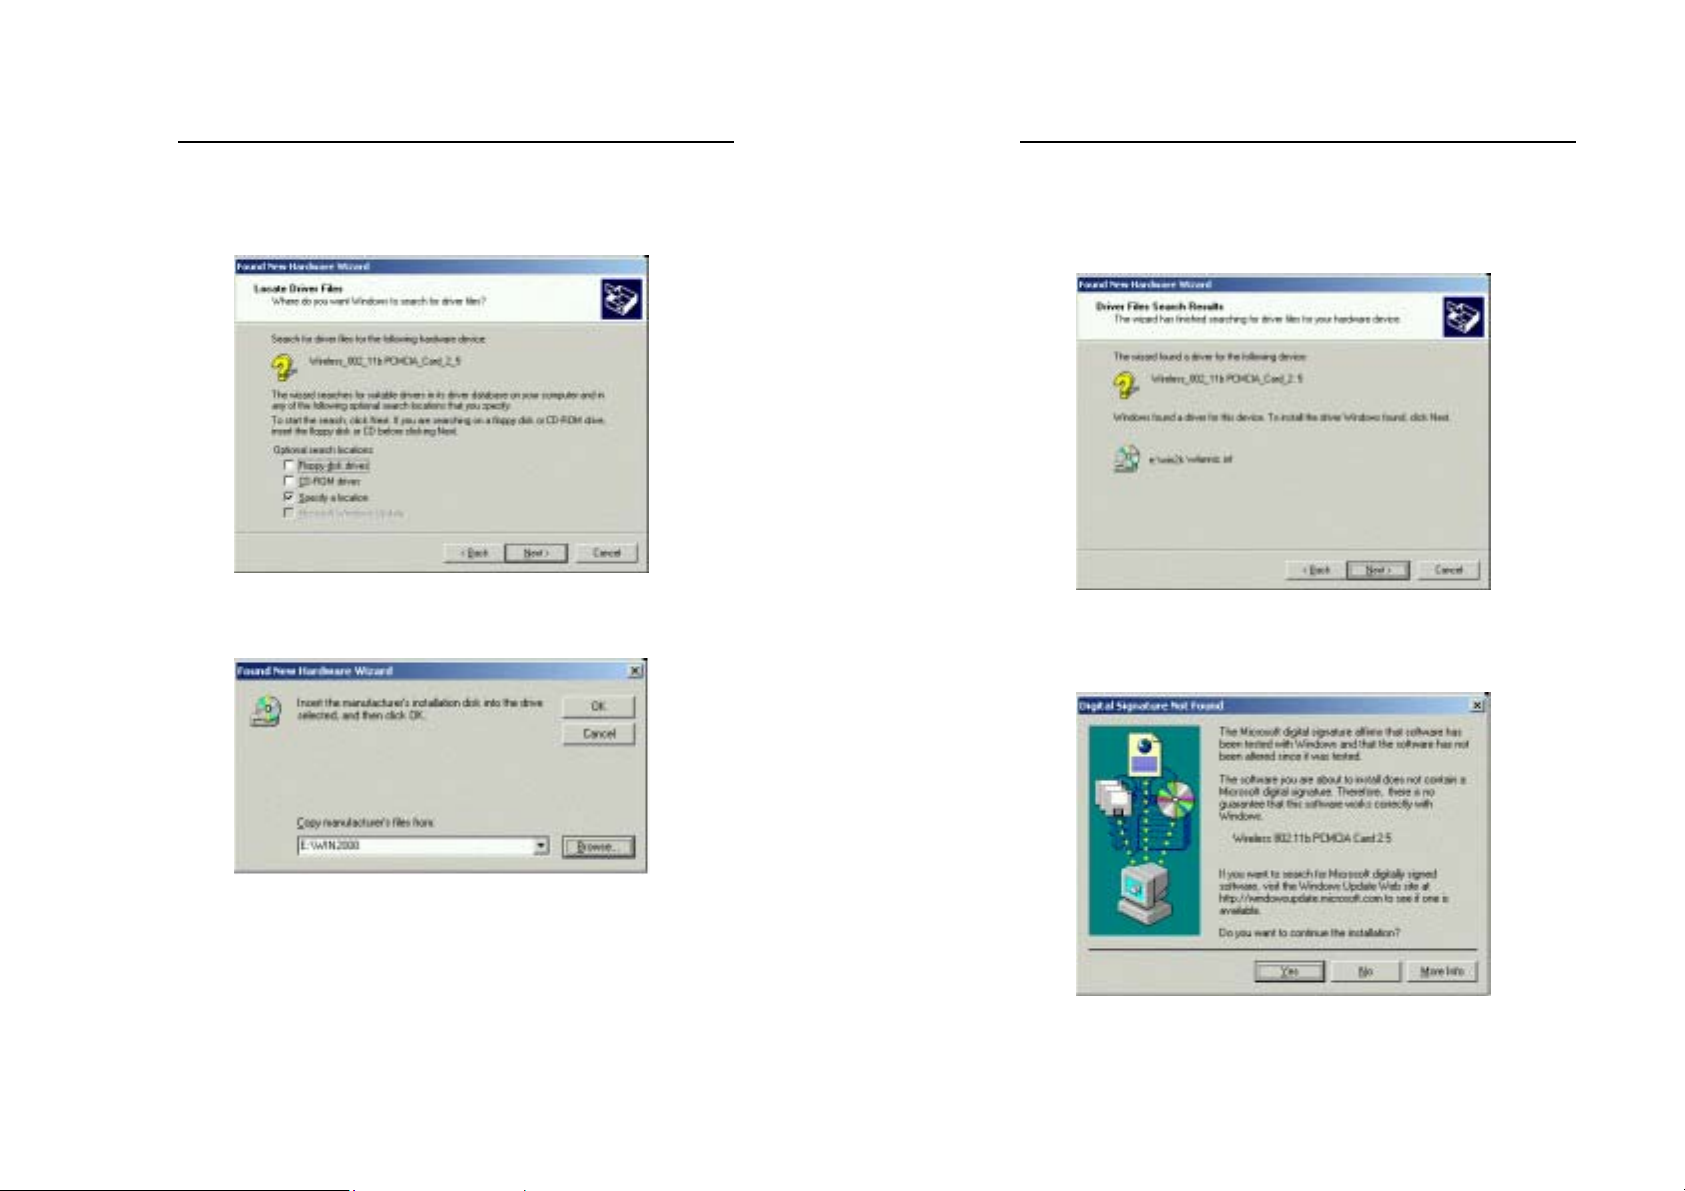
1. Windows 2000 will automatically recognize the PC Card, once it
is connected to the PC, and prompt you to install the necessary
driver. Click the Next button to proceed.
2. Select Search for a suitable drive and click the Next button.
This will search for the Windows 2000 driver.
Install Driver Under Windows 2000
12
13
Page 10
Wireless PCMCIA card
3. Select Specify a location and click the Next button.
4. In the field, type the folder in which the driver files are located
and then click the
Next
button.
Wireless PCMCIA card
5. Windows will now search for the driver. After Windows
acknowledges finding the driver, click the Next button.
6. The Digital Signature Not Found screen is a notification by
Windows 2000. However, this does not mean that there is a
problem. Click the Yes button to continue.
14
15
Page 11
Wireless PCMCIA card
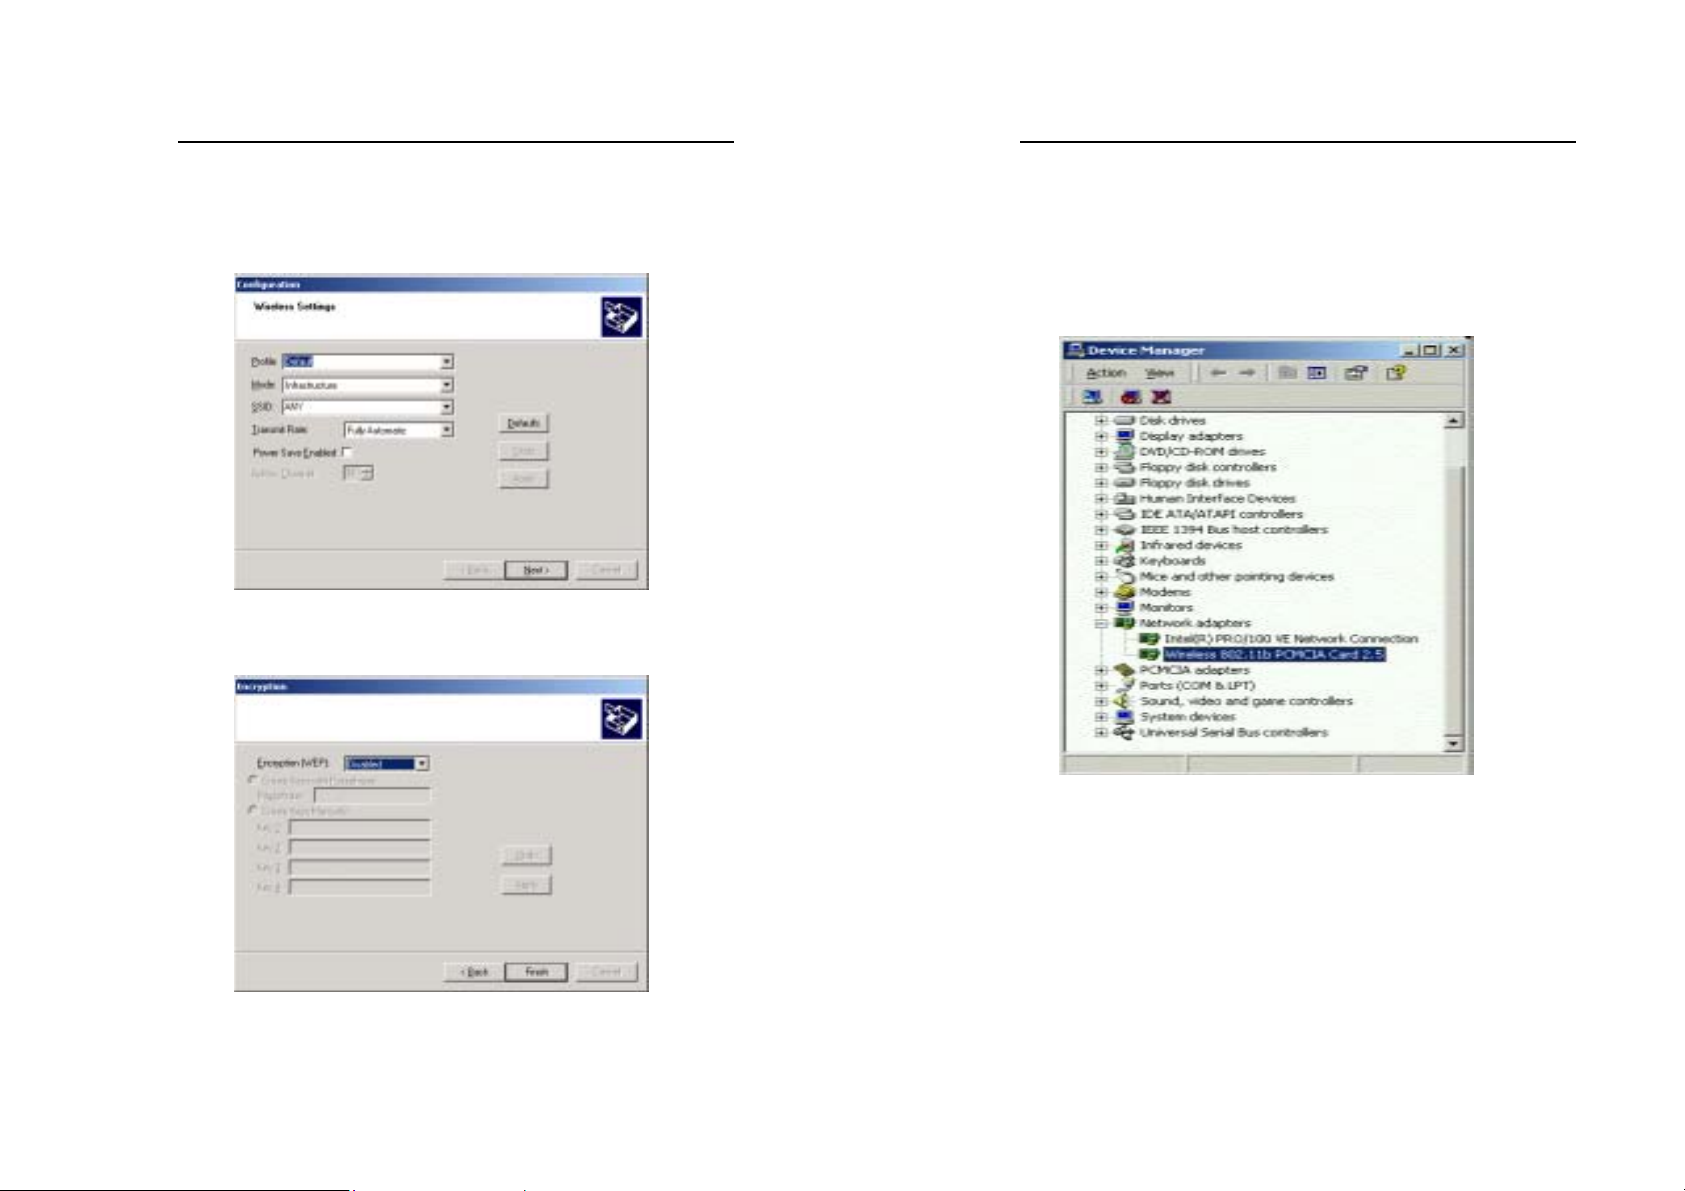
6. The Configuration screen appears. Configure the PCMCIA card
and then click the OK button.
7. Set the WEP on the Encryption screen. Windows will now install
the driver files. Click the Finish button when completed.
Wireless PCMCIA card
8. Click right on My computer and select properties. Select
Hardware and select Device Manager and click on the
Network adapters. You will find the Wireless 802.11b
PCMCIA Card 2.5 if it is installed successfully. The PC card
adapter driver installation is finished.
16
17
Page 12

Wireless PCMCIA card
Install Driver Under Windows CE
The PCMCIA card driver is installed with configuration utility
automatically while the PCMCIA card is installed on your PDA.
1. With the PCMCIA card inserted into your PDA while your
PDA is connected to your PC, insert the Setup CD into your
CD-ROM drive. Execute the Setup.exe file of the CD-ROM
drive. Wireless 802.11b Network Adapter Driver for Windows
CE 3.00 – InstallShield Wizard screen appears. Click the Next
button to proceed.
Wireless PCMCIA card
3. Software License Agreement screen appears. Read the entire
agreement by clicking the Page Down button on your keyboard.
Click the Yes button if you agree, or No if you disagree.
Clicking No will terminate the installation. If you click Yes, the
installation will continue.
2. The following screen will indicate that Windows is ready to
continue the installation. Click the Next button.
18
4. Click the Yes button to use the default application install
directory.
5. Check your PDA and then click the Yes button.
19
Page 13

Wireless PCMCIA card
6. Once the installation wizard is complete, click the Finish
button.
Wireless PCMCIA card
Configure the Configuration Utility
STATUS
The Status screen provides information about the current link
between the PC Card and the wireless Access Point.
The Current Channel field shows to what channel the PC Card is
set.
The Current Tx Rate field shows the transfe r rate in megabits per
second.
The Throughput fields show the rate at which data is transferred and
received in Bytes per second.
The Link Quality and Signal Stren gth fields will be displayed by
the strength of the block when applicable.
The Disable Radio button is to disable the Radio signal.
20
21
Page 14

Wireless PCMCIA card
CONFIGURATION
The Configuration screen allows you to customize the setting for the
PC Card and your wireless network.
The Network Type setting determines the architecture of your
wireless network. Select Peer-to-Peer or Access Point mode
depending on your network type. The Peer-to-Peer mode is used for
a simple Ad-hoc network and allows the sharing of local resources
only between PC Cards without needing a wireless Access Point. The
Access Point mode allows a wireless network to be integrated into an
existed, wired network through an Access Point. Infrastructure
networks permit roaming between Access Points while maintaining a
connection to all network resources and provide additional features,
such as WEP security, power saving and extended range.
The Network Name is the unique name shared among all points in a
wireless network. The Network Name must be identical for all points
in the network. It is case sensitive and must not exceed 32 characters.
Wireless PCMCIA card
The Tr a ns m it Ra t e field shows the current transfer rate for the PC
Card. To optimize performance and range, the Transmit Rate should
be set to Fully automatic, which will automatically adjust the
transfer speed for best performance and longest range.
Power Saving Enabled, enables or disables the power saving
features of your PC Card. This setting can only be enabled or
disabled in Infrastructure mode.
The Peer-to-Peer Channel setting specifies the channel used in
wireless communication in AdHoc mode and should be set to the
same channel as the other points in the wireless network.
ENCRYPTION
The 64/128-bit WEP keys can be generated from a user-defined
passphrase.
The Passphrase can be any text string with a maximum of 127
22
23
Page 15

Wireless PCMCIA card
characters.
WEP must be enabled from the Configuration screen in order to set
the 64/128-bit key. To generate an encryption key:
1. Type exactly the same case sensitive PassPhrase in the
PassPhrase field.
2. Alphanumeric will transfer the 5 characters to ASCII code.
3. Click the Apply button to create the encryption key. Te
Passphrase generates four unique keys.
4. Make sure that the Default Key is the same for each point on the
network.
ABOUT
The About screen shows the release information for the
Configuration Utility.
Wireless PCMCIA card
Installation for Access Point Manufacturer
Align the wireless LAN card toward the PCMCIA slot of Access
Point. Push evenly and steadily until it is seated.
24
25
 Loading...