

Page 1
3
DELTA
R31 & R40 ThinkPads
User Manual
Academic 2003 - 2004
Version 2
User Handbook
1
Page 2

Contents
Introduction ............................................................................................................ 4
Getting Help ........................................................................................................... 4
First-time Setup of Your Username & Password ........................................................... 5
ThinkPad Models & Features ....................................................................... 6
R31 ThinkPad ................................................................................................................... 6
R40 ThinkPad .................................................................................................................. 7
ThinkPad General Tip s .................................................................................................... 8
Software ......................................................................................................... 9
Key procedures ................................................................................................................ 9
Shortcuts ........................................................................................................................ 10
Clipboard Shortcuts............................................................................................. 10
Windows Shortcuts.............................................................................................. 10
Windows Explorer Shortcuts .............................................................................. 10
Installing Software through Portal ................................................................................ 11
Removing Programs ...................................................................................................... 12
Mapping your Network Drive ........................................................................................ 13
IBM Record Now ............................................................................................................ 14
IBM DLA .......................................................................................................................... 15
Rapid Restore................................................................................................................. 16
Base backup image.............................................................................................. 16
Cumulative backup .............................................................................................. 16
Most recent/incremental backup ........................................................................ 16
Backing up your system................................................................................................ 17
Archiving data to CD-R .................................................................................................. 17
Restoring Y our System.................................................................................................. 17
Restoring files:..................................................................................................... 17
Restoring your system ........................................................................................ 18
Command Antivirus ....................................................................................................... 19
Wireless ....................................................................................................... 20
R31 Wireless Cards........................................................................................................ 20
Using the Wireless Card...................................................................................... 20
IBM Access Connections............................................................................................... 21
How to start IBM Access Connections............................................................... 21
Using IBM Access Connections at Sheridan - Wired & Wireless Profiles ....... 21
Using IBM Access Connections at Home........................................................... 22
Battery & Power Management ................................................................... 29
Battery Management...................................................................................................... 29
Charging the battery ............................................................................................ 29
For a brand new battery ...................................................................................... 29
For a stored battery ............................................................................................. 29
Battery Fuel Gauge .............................................................................................. 29
Power Management ....................................................................................................... 30
Power Saving Modes ........................................................................................... 30
System Status Indicators............................................................................................... 31
Printing at Sheridan .................................................................................... 33
Networked Printers ........................................................................................................ 33
How Printers are named ...................................................................................... 33
User Handbook
2
Page 3

Setting Up a Network Printer .............................................................................. 33
Connecting at home.................................................................................... 38
Using your modem & cable modem ............................................................................. 38
Getting Connected............................................................................................... 38
Dial-up Account Creation .................................................................................... 38
Configuring the Connection................................................................................ 38
Changing the Default Connection ...................................................................... 42
Creating a Dial-up Shortcut................................................................................. 43
Cable/DSL Setup Instructions ....................................................................................... 44
Sympatico Setup .................................................................................................. 44
Rogers@home Setup........................................................................................... 44
Index.................................................................................................................... 45
User Handbook
3
Page 4

Introduction
This manual is designed to provide you with a short reference guide to the major
features and functions of your assigned laptop. We are always happy to receive
suggestions about topics you feel should be included in future versions.
The manual is available as a pdf [ portable document format ] file on the DELTA
website at http://www.sheridanc.on.ca/mobile/students. All of the manuals
relating to laptop use at Sheridan can be found at this site.
Another useful link particularly for information on mail setup is the website maintained by Sheridan’s IT department - see screen capture at the left. The link is
http://www.sheridanc.on.ca/~it. As you can see from the screen capture, there is
documentation as well as News and Service descriptions.
3
Getting Help
Support is available.
♦ If your laptop is not
functioning correctly,
please take it to the
ITSC at either campus. At Davis room
B195 and at Trafalgar
room A125.
♦ If you are having
difficulty with any of
the procedures described in this manual
and are a student
please visit one of the
drop-in rooms where a
Tech Tutor may be
able to assist you one
to one. The drop-in
rooms are C110 at
Trafalgar and B128 at
Davis. The schedule
which describes the
hours of operation is
listed on the mobile student website. If your problem occurs at a time when the
drop-in centres are not staffed then visit either ITSC. Hours of operation are from 8
a.m. until 11 p.m Monday to Friday and 8 a.m. until 5 p.m. on Saturday and Sunday.
User Handbook
4
Page 5
First-time Setup of Your Username & Password
These instructions on the first-time set-up must be followed very carefully
you will have to return to the ITSC to have your laptop re-imaged. Please ask for
assistance if you are unclear about the steps to follow.
Press the power on button to turn on the laptop. Wait until you see the dialog box
shown below.
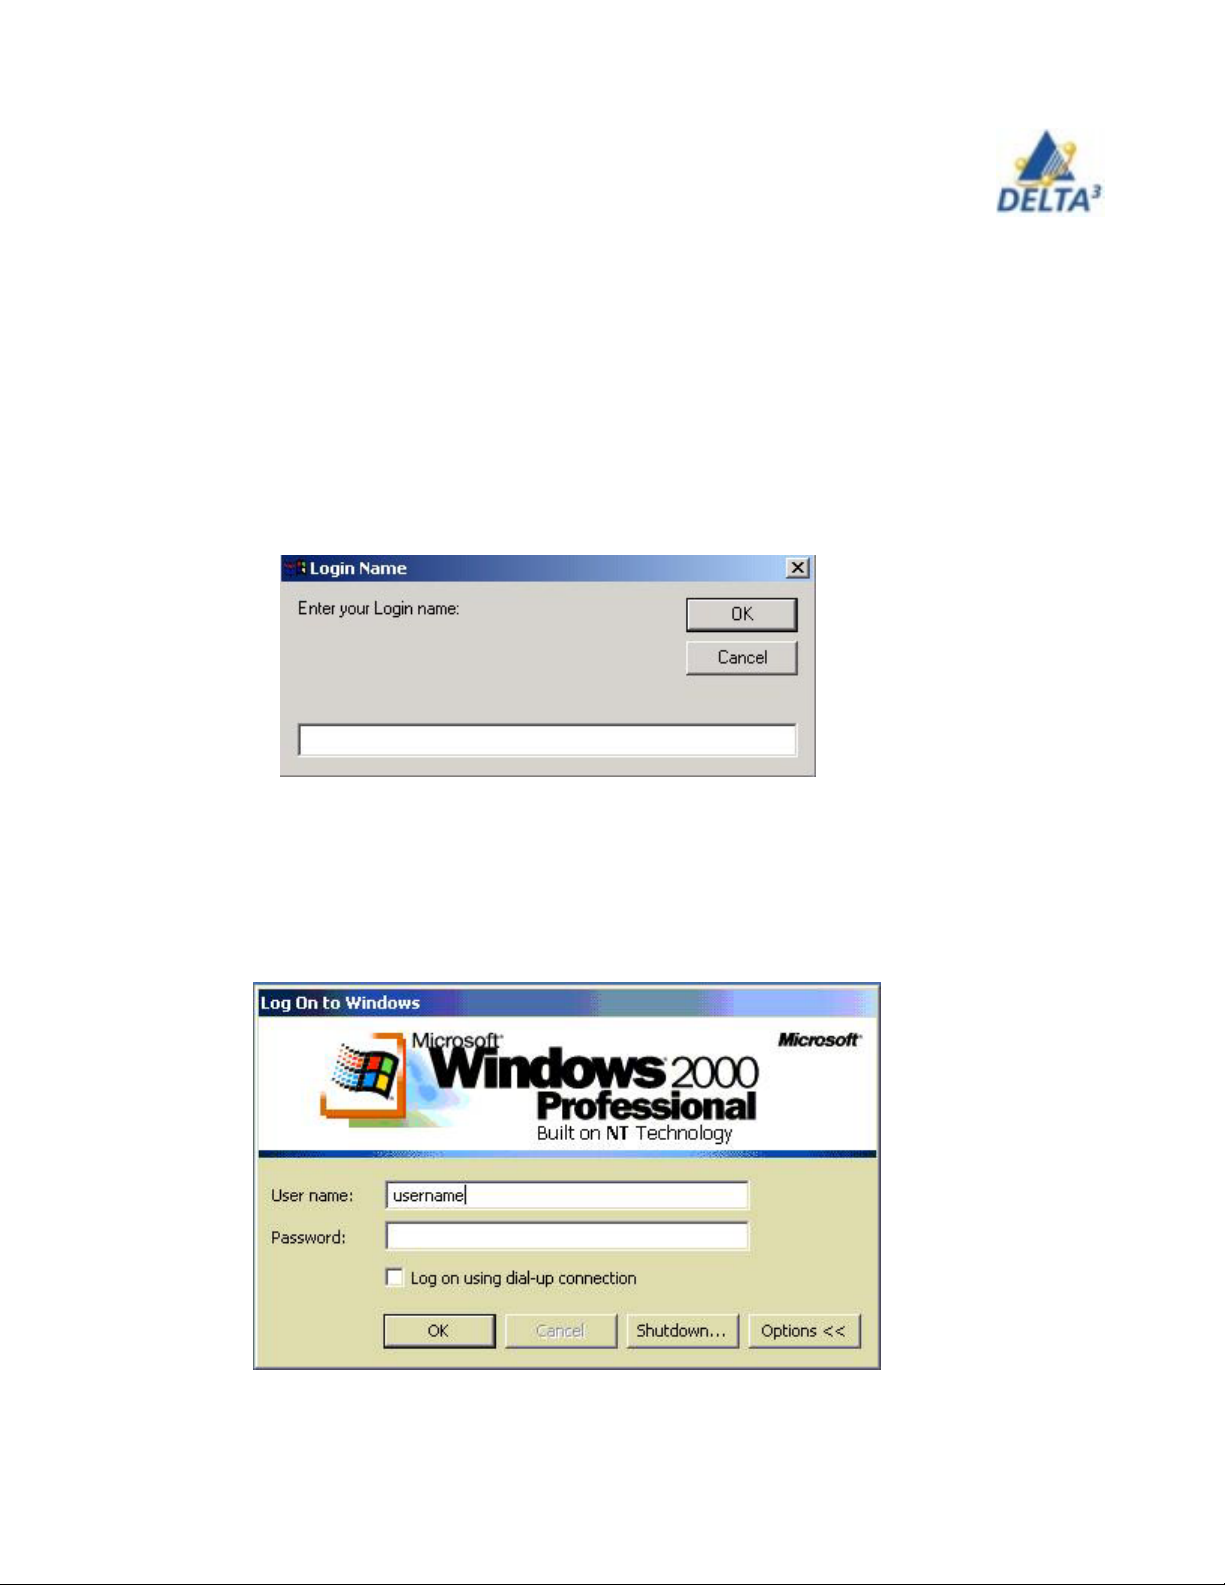
Initial setup goes through multiple reboots and hardware configurations. On the final
boot you will be presented with a window asking you for your login name.
♦ Enter your network login name in lowercase and click OK.
[ A local account in the administrator group is created with your login name. ]
♦ When you are presented with the next dialog box, remove the word username
and key in your Sheridan network login name that you just keyed in the previous
step. Do not enter anything on the password line, just click OK.
, or
User Handbook
5
Page 6
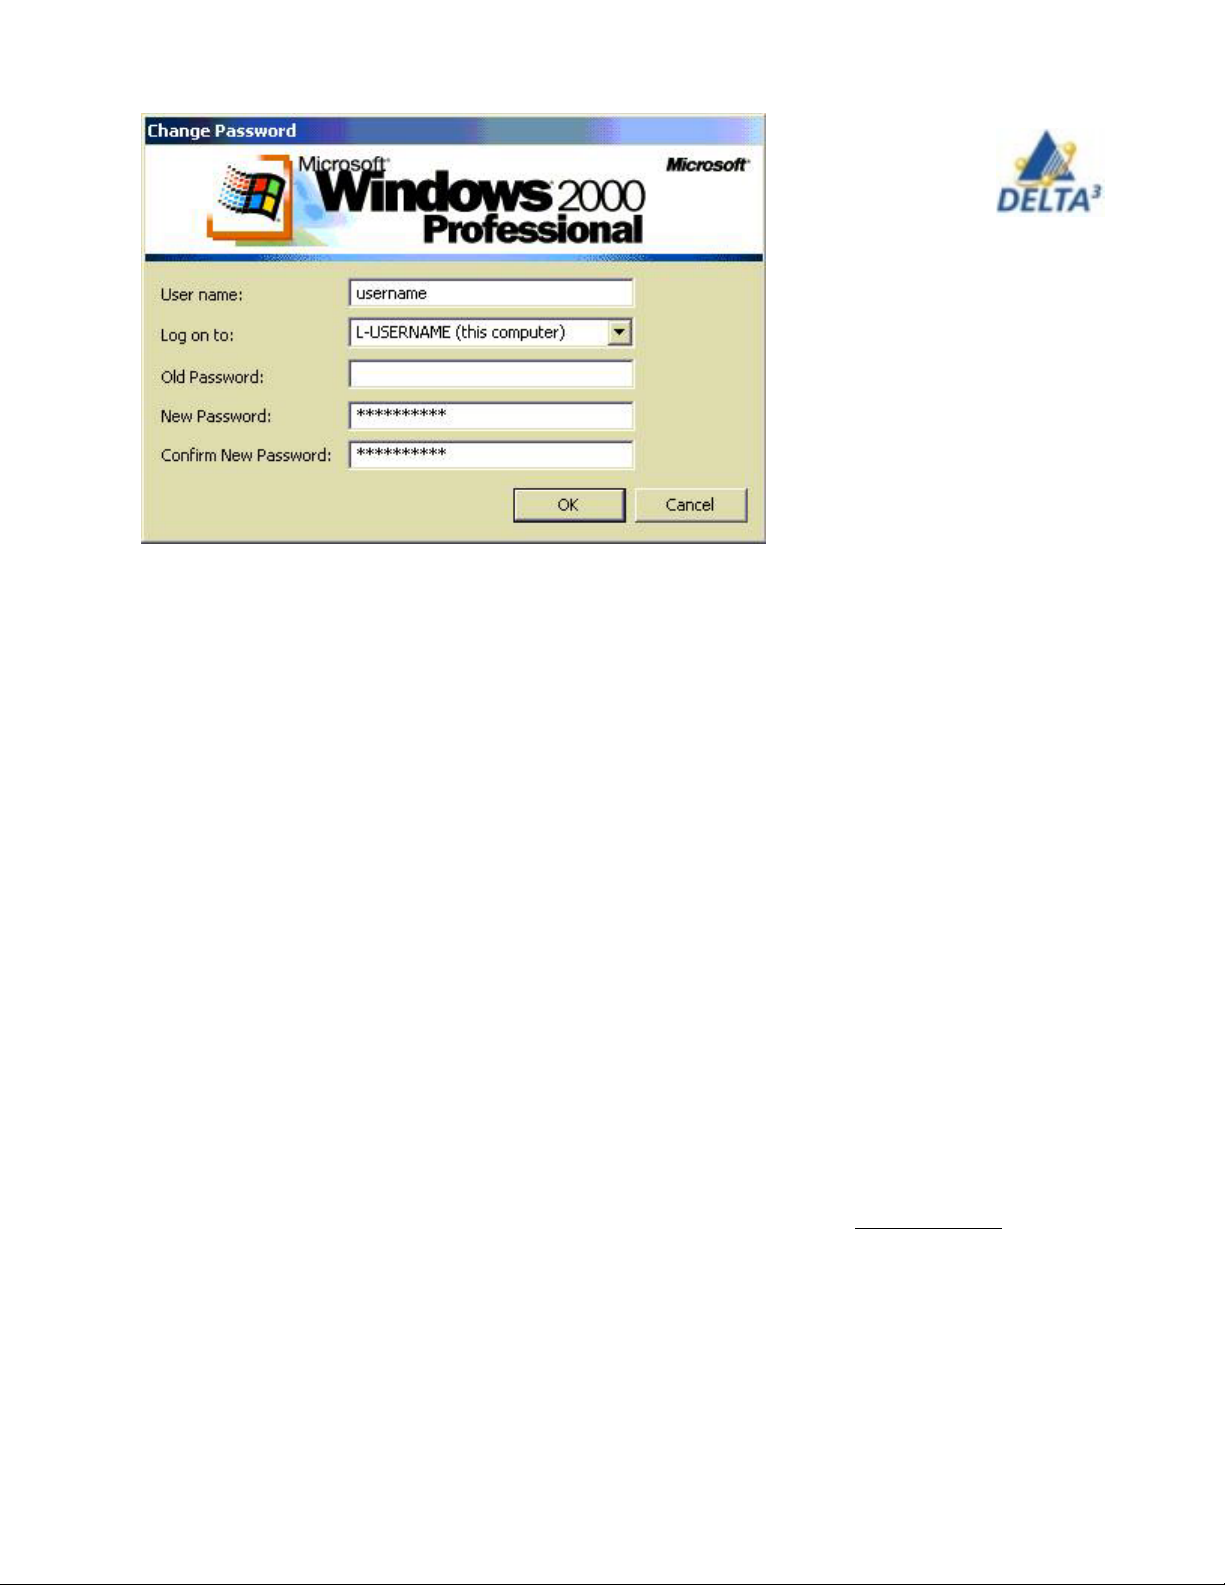
This dialogue box
will ask you to
change your
password
Leave the Old password
blank.
Key in your new password.
Press tab
Key in the same password
where it says Confirm New
Password.
Click OK.
Windows 2000 will then take a few minutes to create your new user profile. This
delay will only happen during this first setup of your account.
ThinkPad Models & Features
There are now 2 ThinkPad models on campus - R31and R40 You have been issued
the model corresponding to your program requirements.
R31 ThinkPad
This laptop is slightly smaller, faster (Mobile Celeron 1.13GHz (256)) and physically
lighter with more hard disk space (20 GB) for storage and 128 MB RAM. It is compatible with the existing ThinkPad port replicators on the lecterns. The R31 has a a
13.1 inch screen with a resolution of 1024 X 768. It also has an Intel 82830M Graphics Controller and an S-video out connection.
1.1.1 Two fully supported USB ports
The USB drivers are included in our software image and the ports are fully
supported under Windows 2000. The industry is moving away from other
types of connectors and most peripherals (keyboard, mouse, digital cameras
and other devices) now available on the market use a USB port. If you need to
purchase a new mouse, be sure to purchase one with a USB connector.
1.1.2 Infrared port
An infrared port is present in this ThinkPad model.
1.1.3 No internal floppy disk drive
Following the industry trend to retire floppy disks, the R31 does not come with
User Handbook
6
Page 7

an internal floppy disk drive. You may use an external floppy drive available in
the ITSC if you need to transfer data from a floppy drive onto your new
laptop. However, the R31 is equipped with a 8x4x24x CD-RW so you can
backup your data to CDs.
1.1.3 Wireless card
A wireless card is provided with this model which uses the PCMCIA slot.
Please see the section on IBM Access Connections for operating instructions.
1.3.4 8 X 4 X 24 CD-RW
This laptop has a built-in CD player and burner.
R40 ThinkPad
This laptop is slightly smaller, faster (Mobile Celeron 2.0GHz (256)) and physically lighter with
more hard disk space (30 GB after Rapid Restore Install ] for storage and 256 MB RAM. It is
compatible with the existing ThinkPad port replicators on the lecterns. The R40 has a a 13.1
inch screen with a resolution of 1024 X 768. It also has an Ati Mobility Radeon Graphics Controller and an S-video out connection.
1.2.1 Two fully supported USB ports
The USB drivers are included in our software image and the ports are fully supported
under Windows 2000. The industry is moving away from other types of connectors and
most peripherals (keyboard, mouse, digital cameras and other devices) now available on
the market use a USB port. If you need to purchase a new mouse, be sure to purchase
one with a USB connector.
1.2.2 Infrared port
An infrared port is present in this ThinkPad model.
1.2.3 No internal floppy disk drive
Following the industry trend to retire floppy disks, the R31 does not come with an internal
floppy disk drive. You may use an external floppy drive available in the ITSC if you need
to transfer data from a floppy drive onto your new laptop. However, the R40 is equipped
with a 8x4x24x CD-RW so you can backup your data to CDs.
1.2.4 Trackpoint and touch pad
In addition to the familiar trackpoint this model has a touch pad as well. The touch pad
can be configured via "UltraNav Wizard".
1.2.5 DVD/CD-RW drive 16 X
This unit will permit you to play DVDs but not write DVDs. Or you can both play CDs and
write both CD-R [ read only ] and CD-RW [read/write ] CDs.
1.2.6 Built-in wireless
The R40 has a built in wireless capability. Please see the section on IBM Access Connections for operating instructions.
User Handbook
7
Page 8

ThinkPad General Tips
1 CD ROM drive door
When closing the CD-ROM drive door, push in at the centre. You may use a paper
clip in the small hole beside the eject button as an emergency eject. If you did not
engage the bearings on the hub of the CD when you inserted it, it may have become jammed in the drive. Do not force the door open.
Instructional Technology Support Centre. 2 Shut down
To shut down the notebook, first select Shut Down from the Start menu, and then
when the notebook completes shutting down, it will automatically turn itself off. If it
does not, wait a few minutes before using the switch to turn it off.
3 Track Point
The red cap on the track point will eventually wear out. A new one may be purchased from the Bookstore. Avoid using the track point to play games. It was
designed to provide mouse functionality without the inconvenience of carrying
around a mouse. We suggest the purchase of a mouse for use at home.
4 Cursor Drift
If you notice your cursor is drifting, let the cursor continue until it stops. Do not fight
it, you will not win! This is simply a sign that it is recalibrating. It can take up to one
minute to recalibrate. If it does a lot of drifting, you may be pressing too hard or too
softly on the track point.
Take your machine to the
User Handbook
8
Page 9
Software
Key procedures
Base image
Laptops are loaded with an image for an academic year. When problems occur subsequent to an image creation, fixes are provided through updates called Service
Packs. You should check Portal from time to time to see if there are any updates for
you to install http://portal.sheridanc.on.ca .
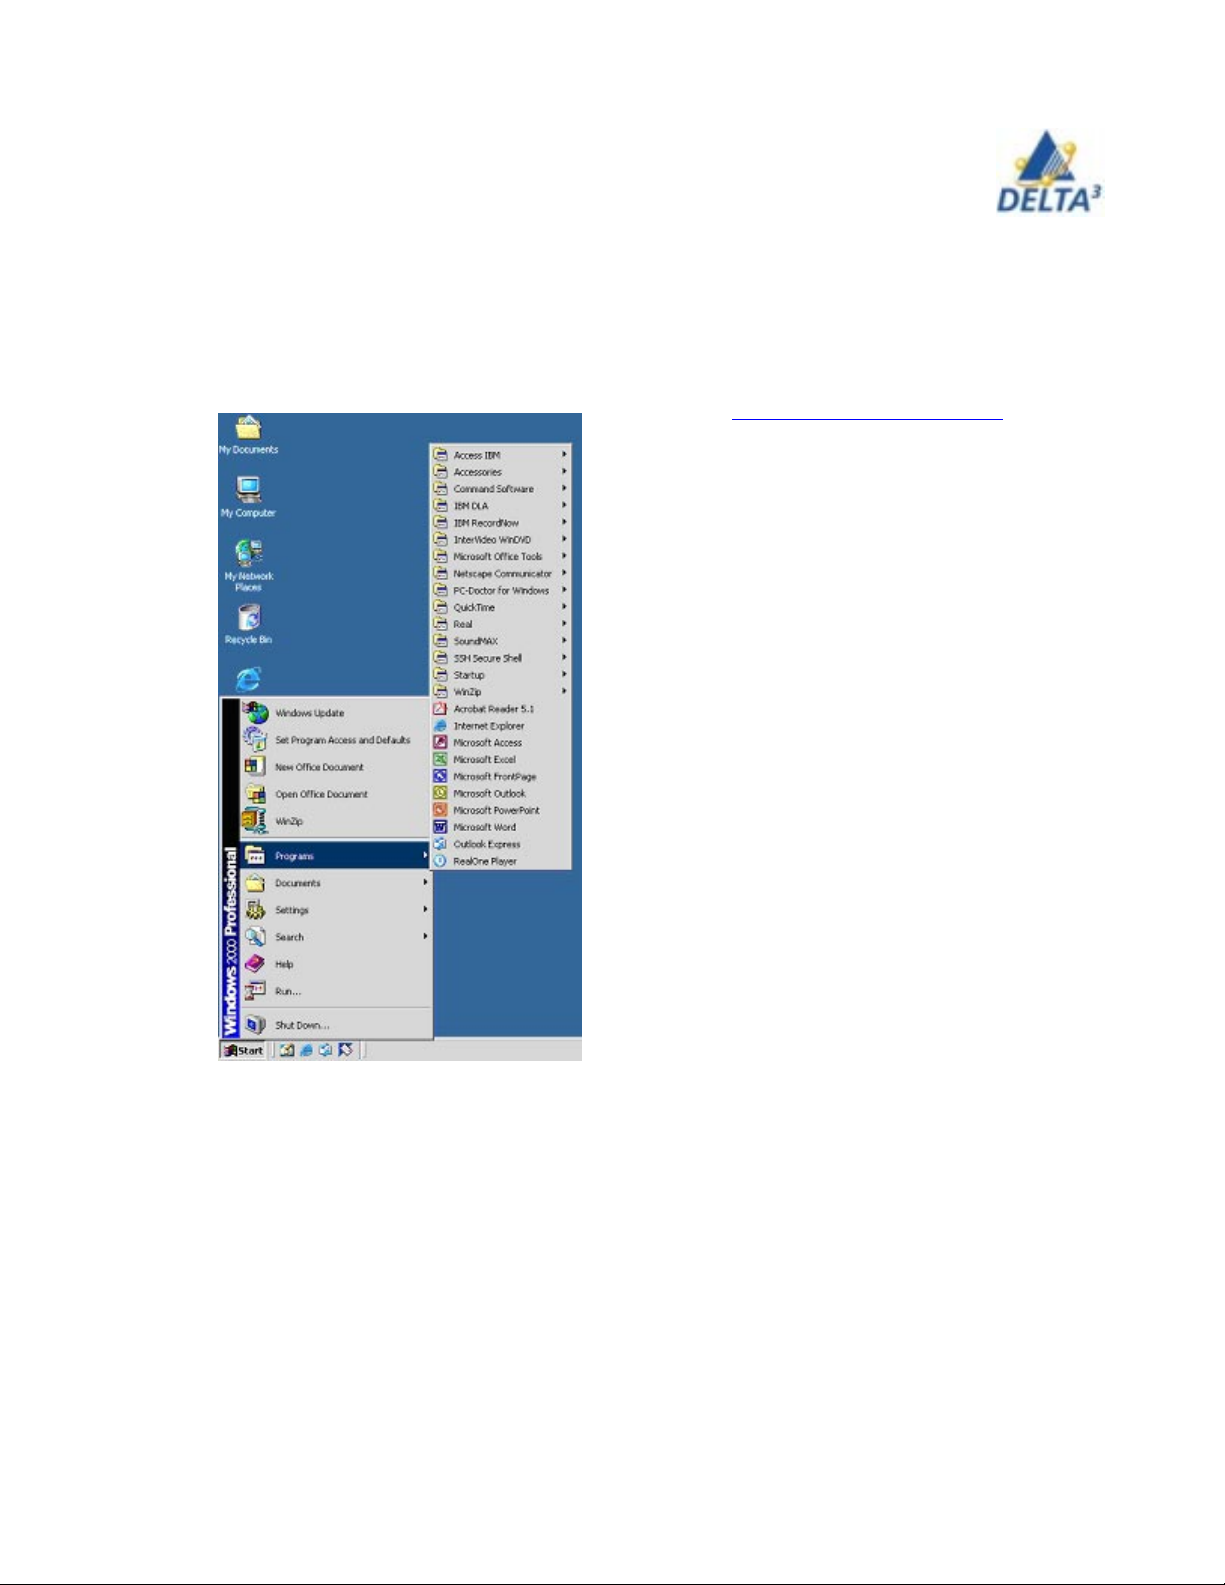
Windows 2000 Operating System
All ThinkPad laptops come with Windows 2000
Professional operating system. MS Office XP,
Netscape and Internet Explorer, Command
Anti-virus, WinZip etc.) are on the base image
as you can see in this screen capture.
Some students and faculty will have to install
additional program related software via Portal.
As Windows 2000 was designed to be primarily
a professional work environment, it does not
support some games or home-based types of
software.
Users have more control of their computer
under Windows 2000, which means you can
more easily affect the machine’s operation; for
example, you must maintain your own local
password. Further details are provided in some
of the points below and other sections of this
manual.
Command Anti-Virus
Just a note that anti-virus software is supplied
as part of the software image on every laptop and automatically updates the definition
files.
Local Password
When you receive your new laptop, and first log in, it will prompt you to enter a password. This is a “local” password and should be the same as your network [LDAP]
password so that you have fewer passwords to memorize. If you change your network
password through Portal, the local password will not automatically change at the
same time. To change the local password to match your new network password,
press Ctrl+Alt+Delete and then click Change Password. Follow the on-screen
prompts.
User Handbook
9
Page 10

Shortcuts
One way to guard against wrist strain is to use short cut keys rather than using the
TrackPoint on the IBM ThinkPad. For example, you could press Alt plus Tab to switch
between programs instead of using the TrackPoint to restore minimized applications.
The table below shows the common Windows shortcuts that are great time savers.
Clipboard Shortcuts
Ctrl + C Copy the current selection to the clipboard
Ctrl + X Cut the current selection to the clipboard
Ctrl + V Paste the current selection from the clipboard
Windows Shortcuts
Alt + F4 Close the current window or program
Alt + Tab Switch between running programs
Ctrl + Tab Switch between windows inside a program
Alt + Enter Changes a DOS box from a window to a full screen
Windows Explorer Shortcuts
F2 Rename the currently selected file
F5 Refresh the list of files
Backspace Go back a directory
Enter Open or run the currently selected file
User Handbook
10
Page 11

Installing Software through Portal
When you get your laptop, it will come with several applications pre-installed in
the base image. These include Command Anti-Virus, MS Office XP, Netscape
4.77, and Winzip applications. The remainder of applications needed for your
course will be available though a web interface.
[Using a secure browser either go to www.sheridanc.on.ca and follow the links to
Portal or in the address bar of your browser enter the URL https://
www.portal.sheridanc.on.ca to go directly to the portal site.]
How to install software
To install new programs to your Sheridan authorized laptop you should select the
link labeled “Windows 2000 Applications” you will be presented with a screen
and a list of applications available to you based on your blockcode. (You should
contact your teacher or program coordinator to have your list corrected)
User Handbook
Select the program
to install by left
clicking on the
Hyper Link.
[You will repeat this
for all the programs in the list
you are offered but
you can only install
one at a time. ]
11
Page 12
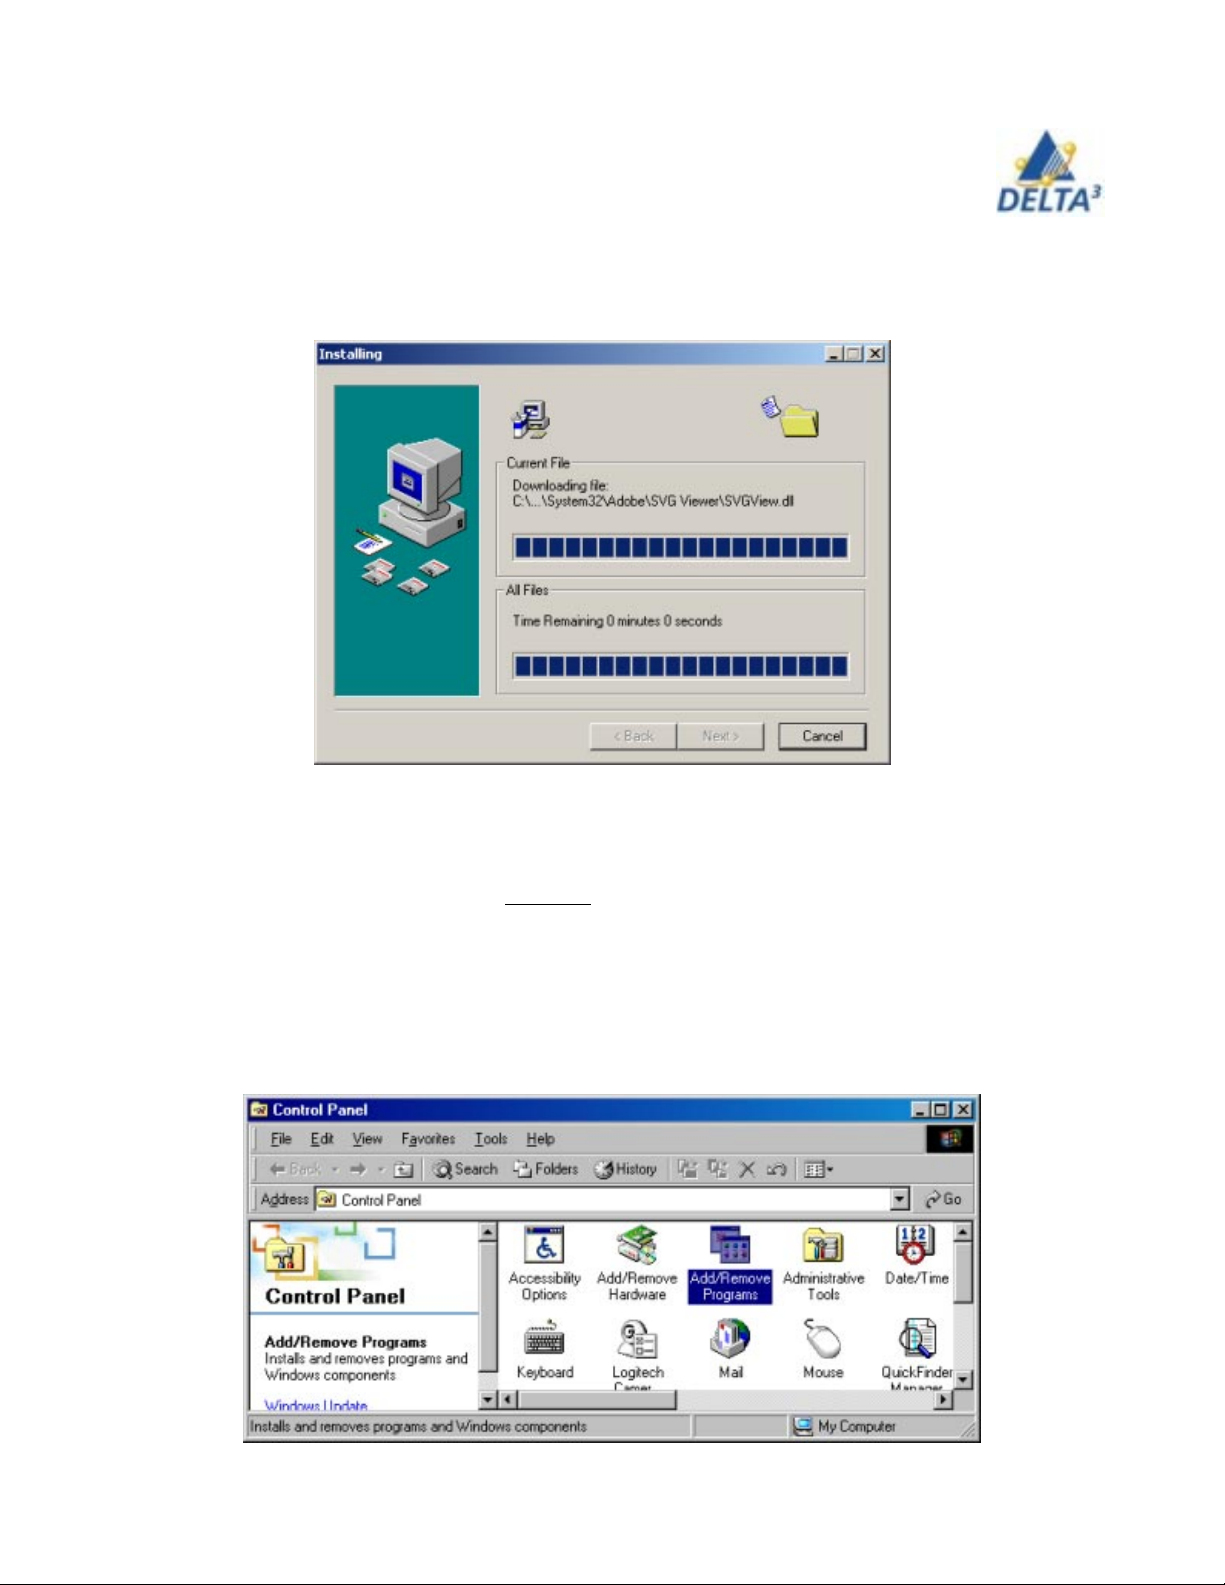
Your computer will receive a small file and begin to download the program to your
laptop.
• Ignore the download times and file sizes presented and be patient.
• Some programs may require a restart of your computer to function properly.
Removing Programs
When you install a program, files are installed in numerous places on the computer.
In order to remove a program, DO NOT just delete the main folder where it was
installed to. This will cause the Windows operating system to slow down considerably. Instead follow this short procedure to safely remove unwanted programs from
your computer.
1. From the Start menu, select Settings, and click on Control Panel
2. The following window opens, select Add/Remove Programs and double click on
it.
User Handbook
12
Page 13
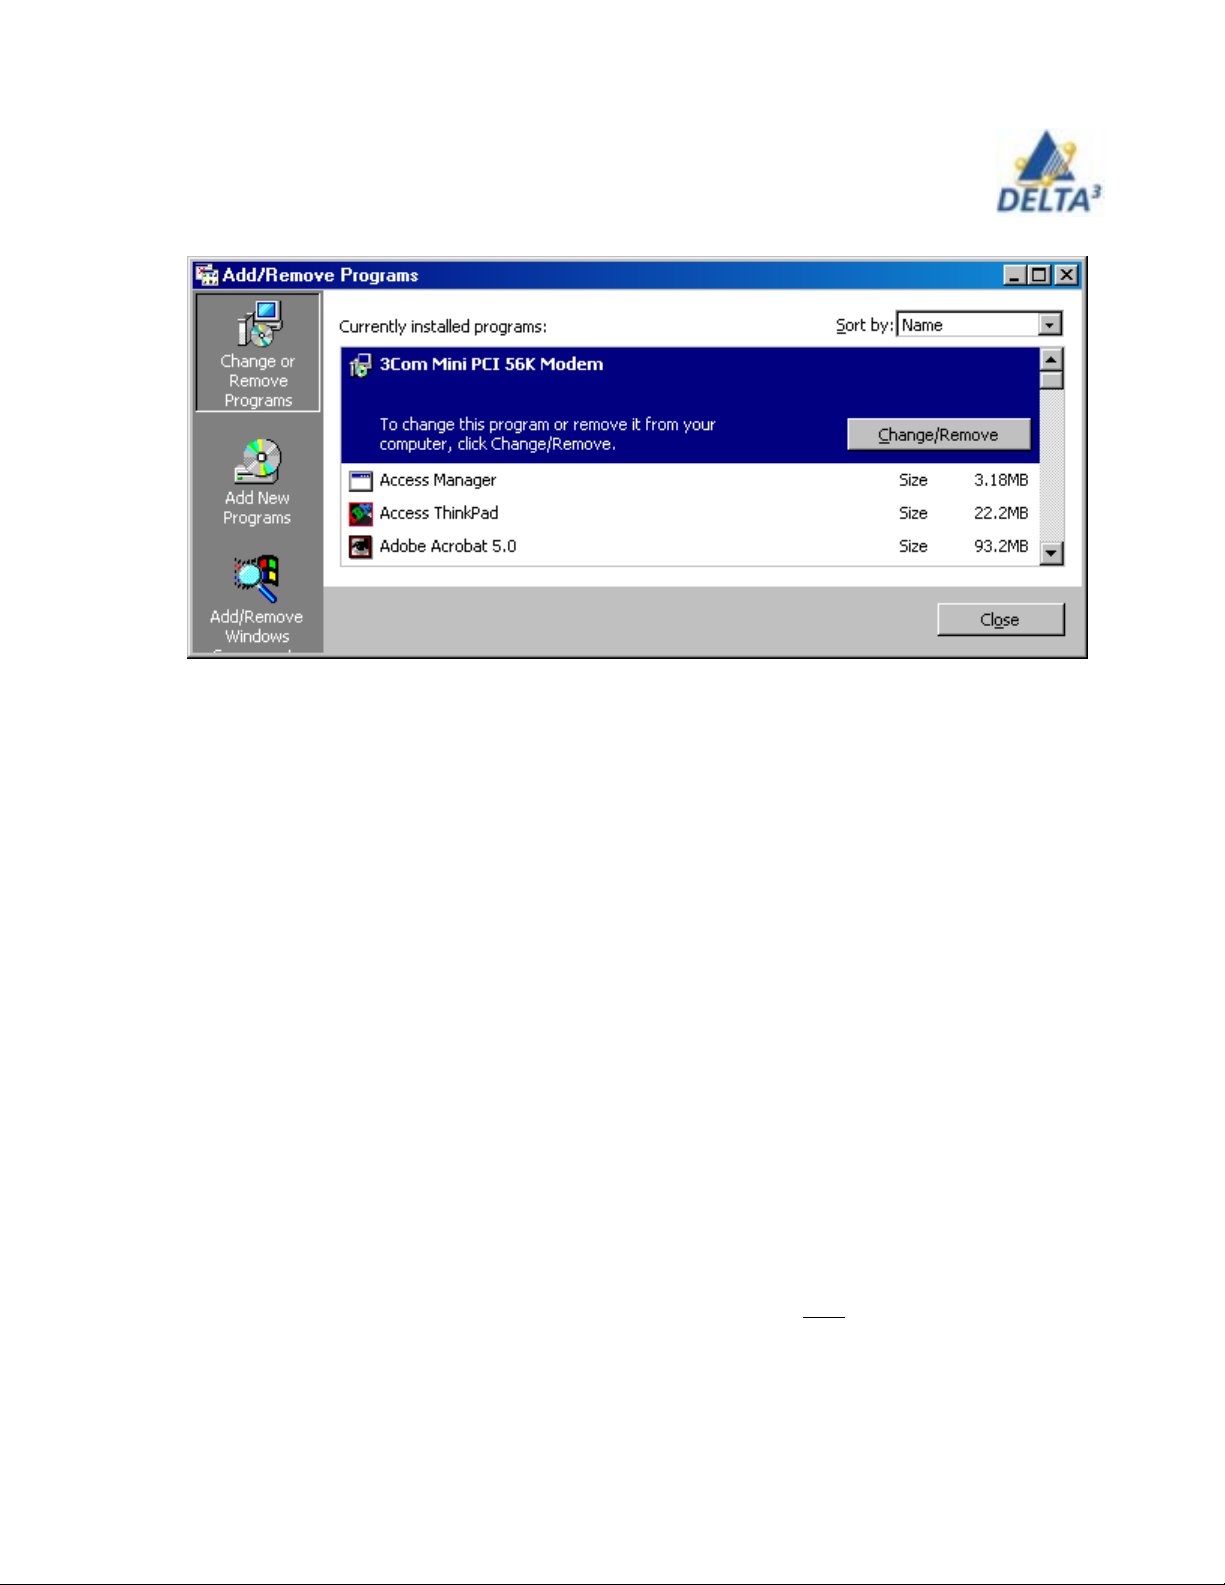
3. The Add/Remove programs window will open, select the program you wish to
remove clicking on it. It will highlight, and a button will appear giving you the
option to remove the program. Press the remove button, and follow the
onscreen instructions to remove the program.
4. Some programs will require you to restart your computer after being removed. A dialogue box will let you know if you need to restart the computer. It
is usually a good idea to restart the computer after removing programs, even if
it’s not required
Mapping your Network Drive
Home directories (e.g. networked g: drive) are not set up automatically.
Every student automatically receives 30 MB of network file storage which is
useful for keeping copies of important files as it is automatically backed-up by
Information Technology. It is like having another hard drive to use except that
this hard drive is not on your laptop but instead is on the Sheridan server. All
drives are identified by an alphabetic character. The character that you should
use is for your network drive is g. In order to tell the system that you want to
use your allocated network file storage space, you have to make this link [ a
process called mapping ] yourself using the steps listed below.
From the desktop
Right click on My Computer
Select Map Network Drive
Select g and type the following in the space beside where it says Folder:.
If you are a student your folder is
\\oa-acadhome1\<user> Where <user> is replaced by your Sheridan
username
User Handbook
13
Page 14
If you are faculty or staff, please call the helpdesk to find out the name of your home server
[ folder name].
Make sure the Reconnect at logon button is checked
Click Finished.
It will prompt you to enter a username and password. Use your Sheridan
login, and network password, and press OK
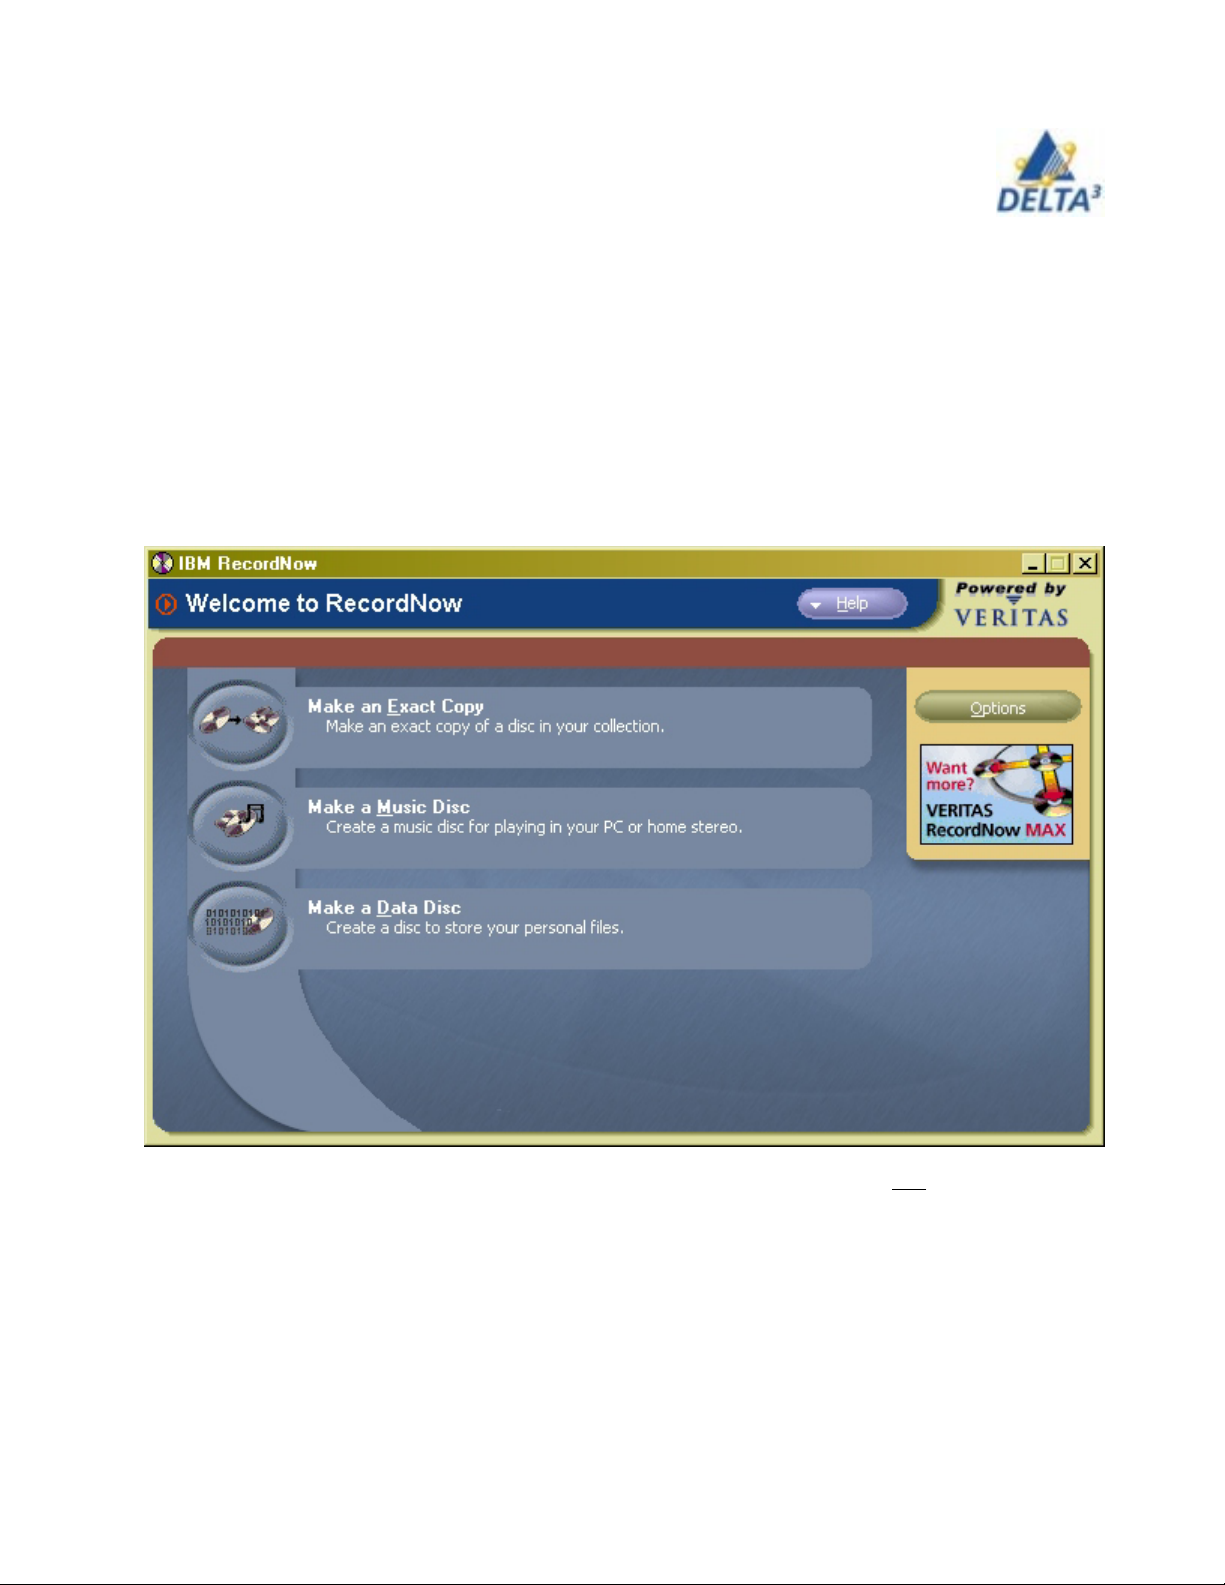
IBM Record Now
This software package is already on your laptop and will permit you to make music CDs
and data CDs using your CD RW drive. For example, you may have a project which contains images and graphics and is large. You can burn a CD of this project or create a
porfolio of some of your school work to use when job hunting. Here is what the interface
looks like.
Students and faculty who use laptops with Linux on the base image do not have the program called Rapid Restore which is described in this manual. The Rapid Restore program
provides an easy way to make backups of the contents of the laptop. If you have the Linux
image on your laptop, then you will probably find Record Now an easy way to make periodic backups of your school work by burning a CD on a regular basis.
User Handbook
14
Page 15

IBM DLA
Another useful program loaded on your laptop is IBM DLA. DLA stands for Drive
Letter Access. It permits you to drag and drop files directly from My Computer or
Windows Explorer onto a blank CD. It is an alternative to using Record Now
though each program has its own value. If for example, you had a folder on your
computer called Portfolio which contained samples of your best work, you could periodically burn a CD using DLA by simply dragging the folder name onto the drive letter of your CD drive. And for backup purposes, if you do not have the Rapid Restore program, this is a great alternative. The instructions are straightforward and easy to follow but you do need to read them and work step by step.
User Handbook
15
Page 16

Rapid Restore
This program is available to users of laptops with the base image that does not include Linux.
Its purpose is to permit users to efficiently manage backups of their laptop contents. The description here is brief. More detailed information can be found on the Self Help link at http://
www.sheridanc.on.ca/mobile/students/.
Essentially what you are doing is taking a snapshot of your laptop contents as they are when
you receive your laptop. Then every time you make a major change the contents such as when
you add a piece of software you add those changes to the backup file. Then on a scheduled
basis you simply add to that file.
How does this help you? If you use Rapid Restore it will assist in the recovery of your data in
the event of a problem. Your data files are always protected from inadvertant mistakes or big
disasters. You have the ability to restore your computer to the state it was in before the mistake
or disaster occurred. There are 3 types of backups which are described here.
Base backup image
Double click “Install IBM Rapid Restore Ultra” icon on your desktop to
create the initial image backup of your system. This process will take up to
one hour, but should be completed before you do too many changes to your
system. The icon is located just above the Start icon on your taskbar.
We recommend that you do this when you get home soon after you receive
your laptop. Usually, you would get organized at home, perhaps install your
ISP connection or local home printer. If you do the base backup image before
you do these types of changes to your system, if anything goes wrong when
you are installing software, you can restore your image to its original state at
home. You would not have to go to the ITSC the next day and have your
machine re-imaged.
Once the initial Base backup has been created, you need to do:
Cumulative backup
A Cumulative backup should be completed whenever there is a
on your system. Snapshots should be performed when software is updated, a
new database or application is installed, or whenever a significant change
occurs.
major
change
Most recent/incremental backup
Most recent backups should be created automatically using the Schedule
feature. This will ensure that your data is backed up in case you experience a
system problem.
User Handbook
16
Page 17

Backing up your system
Weekly backups are automatically scheduled for you. To access Rapid Restore’s
main console use the Start - Programs - Access IBM – IBM Rapid Restore
Ultra menu sequence.
1. Click Backup
2. Select Schedule your backups.
3. Select your options e.g. the default is set to Weekly on Monday at 8 pm.
Archiving data to CD-R
1. Access Rapid Restore’s main console.
2. Click Backup.
3. Click Archive your backups.
4. You are prompted to insert a blank CD-R into your CD-R(W) drive. After
inserting the CD-R, click OK.
Restoring Your System
Restoring files:
To recover one or more damaged or lost files, follow the steps below:
1. Access Rapid Restore’s main console. (Start - Programs - Access IBM
– IBM Rapid Restore Ultra menu sequence).
Click the Restore button.
2. Click the Restore Files button to open the single file folder within
Windows Explorer.
· From the Windows desktop, double-click the My Computer icon, and
then click Single File Restore. The Windows Explorer program opens.
User Handbook
17
Page 18

In Windows Explorer, click the Single_File_Restore folder. Within the folder
there are two subfolders:
i. Drive[C]_Cumulative_Backup_date_at_time (where date and time refer to
the date and time of the backup, respectively)
ii. Drive[C]_Most_Recent_Backup_date_at_time (where date and time refer
to the date and time of the backup, respectively)
You might need to open additional subfolders beneath the root single file restore
folder to locate the file you want to restore.
· Note: Only files created or modified since Rapid Restore was installed are
listed in the single file restore folders. If the file you want to restore is not in
either folder, you cannot restore it using this method; you will have to perform a
complete recovery.
3. When you locate the file, either double-click or right-click the file to access
the single file restore shortcut menu and select one of the following options:
· Restore - Restores file to its original location
· Restore to - Enables you to specify the folder to which you want to
restore the file.
4. A message confirms the successful completion of the file’s restoration.
Click the OK button.
Restoring your system
To restore the entire contents of your hard disk from the Windows interface,
follow the steps below.
1. Close all open application programs.
2. Access Rapid Restore’s main console.
3. Click Restore.
4. Click Restore your system.
5. Select your desired Backup to restore.
6. Click the OK button to continue.
7. You are prompted that your computer is about to reboot. Click the OK
button to continue.
8. Upon rebooting, Rapid Restore begins the restoration process. You can
view the restoration’s completion percentage by viewing the onscreen
progress bar.
User Handbook
18
Page 19

Command Antivirus
Command Antivirus software is part of the image on your laptop. However, for
Command to detect new viruses you must keep the virus definition (def) files up
to date. As updated files are placed on the college network, your system will
automatically update your files as long as your password on the laptop is the
same as your network password. If you change your password via portal then
you need to change your local laptop password to match to ensure your virus
definition files are kept current.
To check the date of your definition files do the following:
Start / Programs/ Command AntiVirus
Select Help
Select About Command
AntiVirus
Check the date of the
Sign.DEF and
Macro.DEF files
As of August 26, 2003
the dates are:
Sign.DEF 08/22/2003
Macro.DEF 08/18/2003
Please note that this
date will change often.
However, if the date on
your files is older than
the above, please go to
the ITSC or call the Help
Desk.
User Handbook
19
Page 20

Wireless
New in September 2003 is the provision of wireless connectivity on the Trafalgar and Davis
campuses. All ThinkPads will have wireless capability. The R40 has it built in and the R31
uses an external card. Wireless will greatly improve the ability of students to find a place to
work on assignments at Sheridan as it will be available in many casual areas.
R31 Wireless Cards
Using the Wireless Card
Inserting the Card Into the Laptop
At the left side of your R31 laptop, you will see the
PCMCIA card slot with a blue button.
Remove the plastic sheath covering the wireless card
and insert it into this slot face up.
Once you have the card properly inserted, a small screen pops up on your laptop that
reads “Found New Hardware”. This indicates that Windows recognized the new device
and is installing the driver for it into memory.
Once the “Found New Hardware” box is gone,
you should see an icon in the bottom right on
the Windows taskbar that looks like a wafer with
a green arrow pointing south-west like this: *This icon is what you use to safely remove
your wireless card to ensure that you do not lose any data that you is being sent or received.
Removing the Wireless Card:
In order to safely remove your card you should follow the following steps.
1. Click on the aforementioned wafer icon at the bottom-right of your Windows taskbar,
and follow the instructions on the EasyEject Utility.
2. When you see the following screen, you may now press the blue eject button and
carefully and safely remove the wireless card from the side of your laptop and replace it in
its plastic sheath.
User Handbook
20
Page 21

IBM Access Connections
IBM Access Connections is software that is included in the Sheridan Image
that assists with the management of locations and networking connections.
How to start IBM Access Connections
You can start this program in one of two ways. Either
1. click on the icon on the task bar which looks like this or
2. start it via the usual steps to start a program.
Using IBM Access Connections at Sheridan - Wired & Wireless Profiles
There are two IBM Access Connections profiles created for the user with the latest
Sheridan Image - Sheridan wired and Sheridan wireless. By default when one
connection is selected the other is DISABLED. When the wireless connection is
selected IBM’s lighted display icon will show the Wireless radio is active [ on R40s
only it looks like this
To change from wired to wireless or vice versa
Left click on the task bar icon
or Sheridan Wireless).
User Handbook
and select the desired profile (Sheridan Wired
]
21
Page 22

Using IBM Access Connections at Home
You can use IBM Access Connections for your home ISPs and Networks by following the
instructions below and modifying any settings needed for your home (i.e. printers, modems, static IPs etc.) or by using the HELP menu within IBM Access Connections.
Creating a Profile
Launch IBM Access Connections. Select “Create” to make a new location profile.
User Handbook
22
Page 23

The location profile must have a descriptive name and a desired connection type.
In the example shown here for a profile for someone who uses Rogers cable, the
profile name is My Home and LAN connection is selected.
During the profile creation you will be prompted to define the details of the profile.
Note: you should choose the option
other location profile
this profile from interfering with the functioning of other selected profiles.
User Handbook
to prevent hard coded information that may be required by
disable this adapter when I switch to an-
23
Page 24

This information is not required to connect to Sheridan’s network but may be necessary if users wish to define static IPs and DNS for home or other networks.
User Handbook
24
Page 25

This information is not required to connect to Sheridan’s network but you may wish
to change your default page for your new profile as a visual indicator that the
profile has changed locations.
User Handbook
This information is not required to connect to Sheridan’s
network. For this profile you may wish to define connection
sharing to allow gateway access networked computers in
your home.
25
Page 26

You can assign a default printer to a specific profile. For example if
you have a colour bubble jet printer at home, you could make it the
default printer for your home profile.
When LEAP PEAP WEP are determined or when there are multiple
wireless profiles, third party applications can be launched such as you
might wish to have a particular browser open automatically. You can
add the program to the list using this screen.
User Handbook
26
Page 27

You will now be asked to save your profile and whether or not you want to
immediately use it.
If you click on Yes, you will see that your new profile has been added to the list.
User Handbook
27
Page 28

My Home
And you can see when you are connected.
My Home
User Handbook
My Home
28
Page 29

The following instructions provide tips on how to obtain best battery
condition to extend the battery rundown time. If proper battery care is
not exercised, it is possible to make the battery completely unusable.
Battery & Power Management
Battery Management
Charging the battery
• You should use your computer until the battery is low before charging it. The
computer will give you an audio warning signal and you can also monitor the
amount of power left using the fuel gauge (see below). At this time, you may
continue to work by plugging in the power adapter. You must fully charge the
machine before using only battery power again.
• Once you have started charging the battery pack, do not stop it charging until
it is
fully charged. Partial charge or discharge causes a lack of uniformity of
activated chemicals in the cell, and may cause performance degradation.
For a brand new battery
• If your battery is brand new, and you are charging it for the first time, cycle the
battery (fully charge, then fully discharge) three to five times to activate all
chemicals in the battery properly.
For a stored battery
• Cycling the battery three times is also recommended if you have stored the
battery for a few months.
Battery Fuel Gauge
• Battery life is approximately 3 hours. This will vary according to the power
mode settings, environment, etc. See tips below for more detail about power
management. The remaining battery capacity information is displayed
through the fuel gauge which is located on the task bar.
The battery status indicator, located on the indicator panel, also shows the current
status of the battery pack.
A green status light indicates there is enough power for operation.
An orange status indicator shows the battery pack is being charged.
A blinking orange light indicates low battery. When this happens, you have
about 30 seconds to connect the AC adapter to the laptop or the laptop will
enter suspend mode.
User Handbook
29
Page 30

The battery icon, located on the task bar at the lower right-
Did you know?
In general, rechargeable batteries store electrical energy through chemical
reaction - therefore, capacity will change by temperature, unused storage
period, load condition and number of cycles used.
hand side of your screen, provides useful information. Double click to get battery information.
Tips
þ Decrease LCD brightness to conserve battery power.
þ Put the computer into suspend mode [ close lid ] if you need to take
a quick break.
Power Management
Power Saving Modes
The ThinkPad provides three power saving modes which are recommended for when the system is not in use. The system enters standby or
suspend automatically when the system is not used for the time set by the
timer.
Standby
• to use standby, press Fn + F3 keys
• press the spacebar to resume
normal operation
Suspend
Use suspend when you are not using the laptop for a short
period of time such as a 10 minute break.
• to use suspend, press Fn + F4
OR
• close LCD panel
• if modem card detects an incoming call
while in suspend mode, the laptop automatically resumes normal operation
LCD, HDD and audio are turned off.
This stops all tasks
and stores them in
memory. Then all
devices except
memory are turned off.
User Handbook
30
Page 31

• if connected to the network under battery power, the computer may turn
power off to the PC card and stop communication with the PC card.
• if connected to the network under AC power, the computer enters suspend
mode and all application programs stop.
• press the power button for a couple of seconds to resume normal
operation. You will be prompted to re-enter your password.
Hibernation
Use hibernation when you are not using the laptop for a long period of time.
• to use hibernation, press Fn + F12
OR
• click the hibernation icon in battery meter
• do not do this when connected to the
network
• turn on power to resume
normal operation. It
takes a moment to restore from
the hard disk and resume
operation where you left off.
This stops all tasks,
stores memory data
and current status of
computer in HDD.
Then power is turned
off
System Status Indicators
The system status indicators are located immediately below the LCD screen and
show the current status of the computer by their colour or on/off state. They are
explained on the next page in order from left to right.
Drive in Use
User Handbook
Numeric
Lock
Caps
Lock
Scroll Lock
only on R31
Power on
31
Page 32

SYMBOL
COLOUR
MEANING
1. Drive in use
2. Numeric lock
1
3. Caps lock
A
4. Scroll lock
Green
Green
Green
Green
Data is being read from or written to the hard
disk, the diskette drive or the CD-ROM drive.
Do not enter suspend mode or turn off the
computer when this indicator is on.
The numeric keypad on the keyboard is
enabled. You enable or disable it by pressing
and holding the Shift key and pressing the
Num Lk key
The Caps Lock mode is enabled. In that
mode you can enter all alphabetic characters
[A-Z] without using the Shift key. You enable
or disable it by pressing the Caps Lock key.
In some applications, the arrow keys can be
used as a screen-scroll function key, and the
cursor cannot be moved with the arrow keys.
Not all programs support this function. [ You
enable or disable this function by pressing the
ScrLk key.]
5. Power on
User Handbook
Green
The computer is operational. This indicator is
on when the computer is on and is not in
suspend mode.
32
Page 33

Printing at Sheridan
Networked Printers
Because each mobile classroom has a printer, you will have access to different
printers. You will have to tell your computer which printers you will use by identifying
the printer manufacturer, the printer model, and the name of the print queue that the
output will be sent to. You will need 3 pieces of information:
1. Your timetable -This will tell you what rooms to setup printers for.
2. Type of printer in each of your classrooms
Because there are so many printers available at Sheridan, you will find the current list of manufacturers and models for each room on the IT website at
http://www.sheridanc.on.ca/~it/help/printerqueues.htm
3. Printer drivers
Each printer make and model comes with a set of instructions called drivers
which tell the computer key information about how it works. The drivers for the
printers are already pre-installed on your laptop. If there are new printers in the
future, you will be able to download them via the web just as you would perform
application installs.
How Printers are named
Sheridan printers have names. You will find it faster to locate specific printers for
the rooms that your classes are in if you know how the name is assigned.
Example:
oa-e207a-e1
♦ the first two digits are either oa - if the printer is at the Trafalgar campus, or
br – if the printer is at the Davis campus
♦ the next digit series identifies the room number e207a - is room E207a
♦ the next two digits identify the printer number e1 - printer number one in that
room (If a room has multiple printers, they would be numbered e1, e2, e3 etc.)
So the printer oa-e207a-e1 refers to printer 1 in room e207a at the Trafalgar campus.
Setting Up a Network Printer
You must be connected to the Sheridan network to install a network printer.
**These instructions are to assist the user in installing NETWORK printers, those
that you will use at Sheridan.Though you will select a local printer in the setup it is
really a networked printer, just that it is local to the server you are connecting to e.g.
acadprint
**To reinstall your printer you need to remove the printer port created by this process. (from the printers window select file/server properties and delete the port)
User Handbook
33
Page 34

1. Select Start/Settings/Printers
Select Add Printer
2. Select Next
3. Verify that Local printer is checked.
Uncheck “Automatically detect and install
Plug and Play Printer”.
Select Next
User Handbook
34
Page 35

4. Select “Create a new port” and change to the LPR Port option. Select Next
5. Type the name of your print server which is oaprintserv.
In the top box where it asks for the Name or address of the server providing lpd, type
acadprint for both Trafalgar or Davis.
acadprint
oa-e207a-e1
In the lower box where it asks for the name printer or print queue on that server, type in the
name of the printer in one of your classrooms. This is why you needed your timetable since all
printers have the name of the room as part of their name.. Remember that you can get the
name of the printers from
The model and manufacturer of the printer are also listed there and you will need that information for the next step.
So in the example shown above, this person is installing a printer for room E207a at the
Trafalgar campus.
When you have typed the required information in both boxes, press OK
http://www.sheridanc.on.ca/~it/help/printerqueues.htm.
User Handbook
35
Page 36

6. When you looked up the printer for the room on the web site, the
manufuacturer and model were listed of that printer were listed. This screen wants
you to identify those items. Select the printer manufacturer e.g. Lexmark from
the left hand column and
the model from the right
hand coloumn. Click on
Next.
If prompted, always keep
existing driver.
7. Type the desired name for your printer. Select Next
Trafalgar E207a
8. DO NOT share your printer. Select Next
User Handbook
36
Page 37

9. Select No. Select Next
10. Select Finish
11. Select Yes. Your new printer should now be installed.
User Handbook
37
Page 38

Connecting at home
Do not, under any circumstances, plug the modem into a digital
telephone jack at the College. Using one of these jacks will destroy the
modem. You should use the Ethernet port and cable to attach your
computer to the College’s network. Internet access is available from the
network.
Using your modem & cable modem
Each laptop comes with a built-in 56K V90 internal modem and a telephone cord. This
will allow you to connect your computer to a telephone jack so that you communicate
with computers elsewhere and fax machines.
ISP
You will need to subscribe to an Internet Service Provider [ISP] to make the most use of
your modem. This will allow you to access the Internet from home. You will have access
to the World Wide Web and email, and be able to connect to other computers, including
the Sheridan server that contains your home directory using telnet and ftp protocols
(allowing you to fetch files in your g: directory, for example). Please do not sign up with
AOL or Compuserve.
Getting Connected
Dial-up Account Creation
To get connected to your ISP, the ISP provider may advise you to check and or change
some setting in the Network Properties window. This is not necessary with the way we
have configured Windows, and if you attempt to do so you will get an error message. Do
not attempt to reinstall Windows. You will have to wipe your hard drive clean and reinstall the base image at the College if you attempt to install a personal version of Windows. The ISP provider may want you to ensure that you have the “Obtain an IP address automatically” button selected. Your computer is already configured this way.
This documentation has been provided to help configure your Internet Dial-up account.
You will need to know your ISP’s access number and your username and password for
their service. If you do not know this information, you will need to contact your ISP for
support (tip: often your username, password, and all required connection settings are
written down in a welcoming booklet from the ISP).
Configuring the Connection
1. From the Start menu, choose Settings and Network and Dial-up Connections.
User Handbook
38
Page 39

The first dialog (right)
simply welcomes you
to the wizard. Click
next.
2. Double click the Make New
Connections. The connection
wizard will start.
User Handbook
3. Choose D
and click next
ial-up to the Internet
39
Page 40

4. Choose “I want to set up my Internet…” and click next
5. Choose I connect through a phone line and a modem and click next
6. Enter your ISP’s phone number and click next
User Handbook
40
Page 41

7.
Enter your username
and password and click
next
8.
Rename the connection
name to something
meaningful – such as
“My ISP Connection”
9.
If you have already setup your e-mail, choose
No and click Next. If
you want to set-up your
e-mail now, click Yes.
Even if you choose no
now, you will still be able
to configure your e-mail
settings later.
10.
If you want to connect to
your ISP now, leave the
checkbox checked and
click Finish.
Removing the check
and clicking finish will
return you to the desktop.
User Handbook
41
Page 42

Changing the Default Connection
Now that you have setup a dial-up connection, the computer needs to be told when it
should use it. This will stop the computer from trying to dial-up to access the internet
while it is on the Sheridan Network.
1. From the Start menu, choose Settings and click Control Panel
2. In the control panel, select the Internet Options icon, and double click on it.
User Handbook
42
Page 43

3. On the screen that gets displayed, select the
Connections tab along the top.
4. Select Dial whenever a
network connection is not
present. When selected it
will have a black dot in the
white circle.
Click on OK to close the
window.
Creating a Dial-up Shortcut
At this point, a new network dial-up icon has been
created in the Network and Dial-up Connections
control panel. To create a short-cut to this icon on
your desktop, follow the following procedure.
From the Start menu, choose Settings and click
Network and Dial-up Connections.
Select your dial-up account icon.
From the File menu, click Create Shortcut
A dialog will prompt you to create a shortcut on the
desktop. Choose Yes
User Handbook
43
Page 44

Cable/DSL Setup Instructions
***Note you are the “administrator” of your own computer. If you make an
irreversible mistake you may need to have your computer re-imaged.
***Default settings are fine to connect to services such as Rogers@home, Shaw,
Cogeco, etc. the only change that MAY be necessary is rename your computer’s
hostname.
Sympatico Setup
If you have Sympatico HSE, you must use the CD’s provided by HSE. Install ONLY the
access manager portion of HSE. Do not install any other components or you may be
required to re-image before you can again connect to the College’s network. You do not
need to rename your computer.
Rogers@home Setup
For most users Rogers is a plug and play setup. If you have an already connected
desktop and are having difficulty please try the following.
You must first release the IP from your desktop before you plug in your laptop to the
cable modem. This is how you do it.
1. On your desktop computer
Click on Start
Click on Run
Key cmd
2. You are now in command prompt
Key ipconfig/release
Your desktop now has its IP released.
3. Connect your laptop to your cable modem
4. Once Windows 2000 starts on your laptop
Click on Start
Click on Run
Key cmd
5. You are now in command prompt
Key ipconfig/renew
You are done.
In the event that this doesn’t work, please contact @Rogers at 416 448 7333
User Handbook
44
Page 45

Index
B
Base backup image 16
battery fuel gauge 29
battery management - ThinkPads 29
C
Cable/DSL Setup 44
CD-R 17
Clipboard Shortcuts 10
Command Anti-Virus 9, 11
Command Antivirus 19
Control Panel 12, 42
Cumulative backup 16
F
fax/modem 38
FTP 38
G
g: drive 13
H
hibernation 31
I
IBM DLA 15
IBM Record Now 14
Internet Service Provider 38
P
password 9
Portal 11
printer drivers 33
printer queues 33
printing
ThinkPad 33
R
Rapid Restore 15
Rogers@home 44
S
shut down 8
software installation - ThinkPad 11
standby 30
Sympatico 44
T
telnet 38
U
USB 6, 7, 20
W
Windows Explorer Shortcuts 10
Windows shortcuts 10
Winzip 11
World Wide Web 38
L
LCD 30
M
mapping 13
memory key 20
modem 30, 38
MS Office 2000 9, 11
N
Netscape 11
Network Drive 13
Network Properties 38
O
OASIS 11
User Handbook
45
 Loading...