

Page 1
LX PLAYARD
26201-XXX PYV6
ASSEMBLY INSTRUCTIONS
ADULT ASSEMBLY REQUIRED
Styles and colors may vary
IMPORTANT: READ ALL INSTRUCTIONS BEFORE ASSEMBLY AND USE OF THE PRODUCT.
KEEP THE INSTRUCTIONS FOR FUTURE REFERENCE.
Customer Care Tel. 1-(800)-377-3777
(F)
www.DeltaChildrensProducts.com
DCP Cat # 03-19-13-V6
Page 2

Consumer Information
WARNING
WARNING: Failure to follow these warnings and the instructions could result
in serious injury or death (keep the instructions for future reference).
Before assembling this playard read and understand the instructions,
incorrect assembly may make the playard unsafe.
• Never leave infant in product with sides down. Infant may roll into spaces
between pad and loose mesh side causing suffocation.
• Strings can cause strangulation! Never place items with a string around a child’s neck such as
hood strings or pacifier cords. Never suspend strings over product or attach strings to toys.
• The product, including side rails, must be fully erected prior to use. Make sure latches are secure.
• Never leave infant in the product with the top rail latches unlatched in the unlocked position.
Be sure top rail latches are raised and latched into the locked position whenever the child is
in the product.
• Discontinue use of the product when child is able to climb out or reaches the height of
35 in (890 mm).
• Never place product near a window where cords from blinds or drapes can strangle a child.
DO NOT place the playard near trailing cables or hanging cords.
• Always provide the supervision necessary for the continued safety of your child. When used for
playing, never leave child unattended.
• DO NOT use the playard if the fabric on the side rail or end rails has been ripped or torn through.
• Use only the pad provided by the manufacturer. Playard pad dimensions are 38.5 in
(978mm) long by 27.5 in (699mm) wide.
• To reduce the risk of Sudden Infant Death Syndrome (SIDS), pediatricians recommend
healthy infants be placed on their backs to sleep, unless otherwise advised by your physician.
• Never use plastic shipping bags or other plastic film as mattress covers not sold and intended
for that purpose. They can cause suffocation.
• Never use a water mattress with this product.
• Keep medication and small items that a child could choke on away from the playard.
Customer Service Tel. (800) 377-3777
2
www.DeltaChildrensProducts.com
Page 3
Consumer Information
WARNING
• Use this product with only one child at a time.
• Maximum weight limit for the changer is 25 lb (11kg)
• Maximum weight limit for the bassinet is 15 lb (6.8kg)
• Child can become entrapped and die when improvised netting or covers are placed on top of a
play yard. Never add such items to confine child in play yard.
• When child is able to pull to standing position, remove bumper pads, large toys, and other
objects that could serve as steps for climbing out.
INFORMATION
IMPORTANT! Never use this product if there are any loose or missing fasteners, loose joints,
broken parts, or torn mesh/fabric. Check before assembly and periodically during use. Contact Delta
Children’s Products for replacement parts. Never substitute parts.
Customer Service Tel. (800) 377-3777
Manufactured for and distributed by:
114 West 26th Street, New York, NY 10001
3
www.DeltaChildrensProducts.com
Page 4
Playard
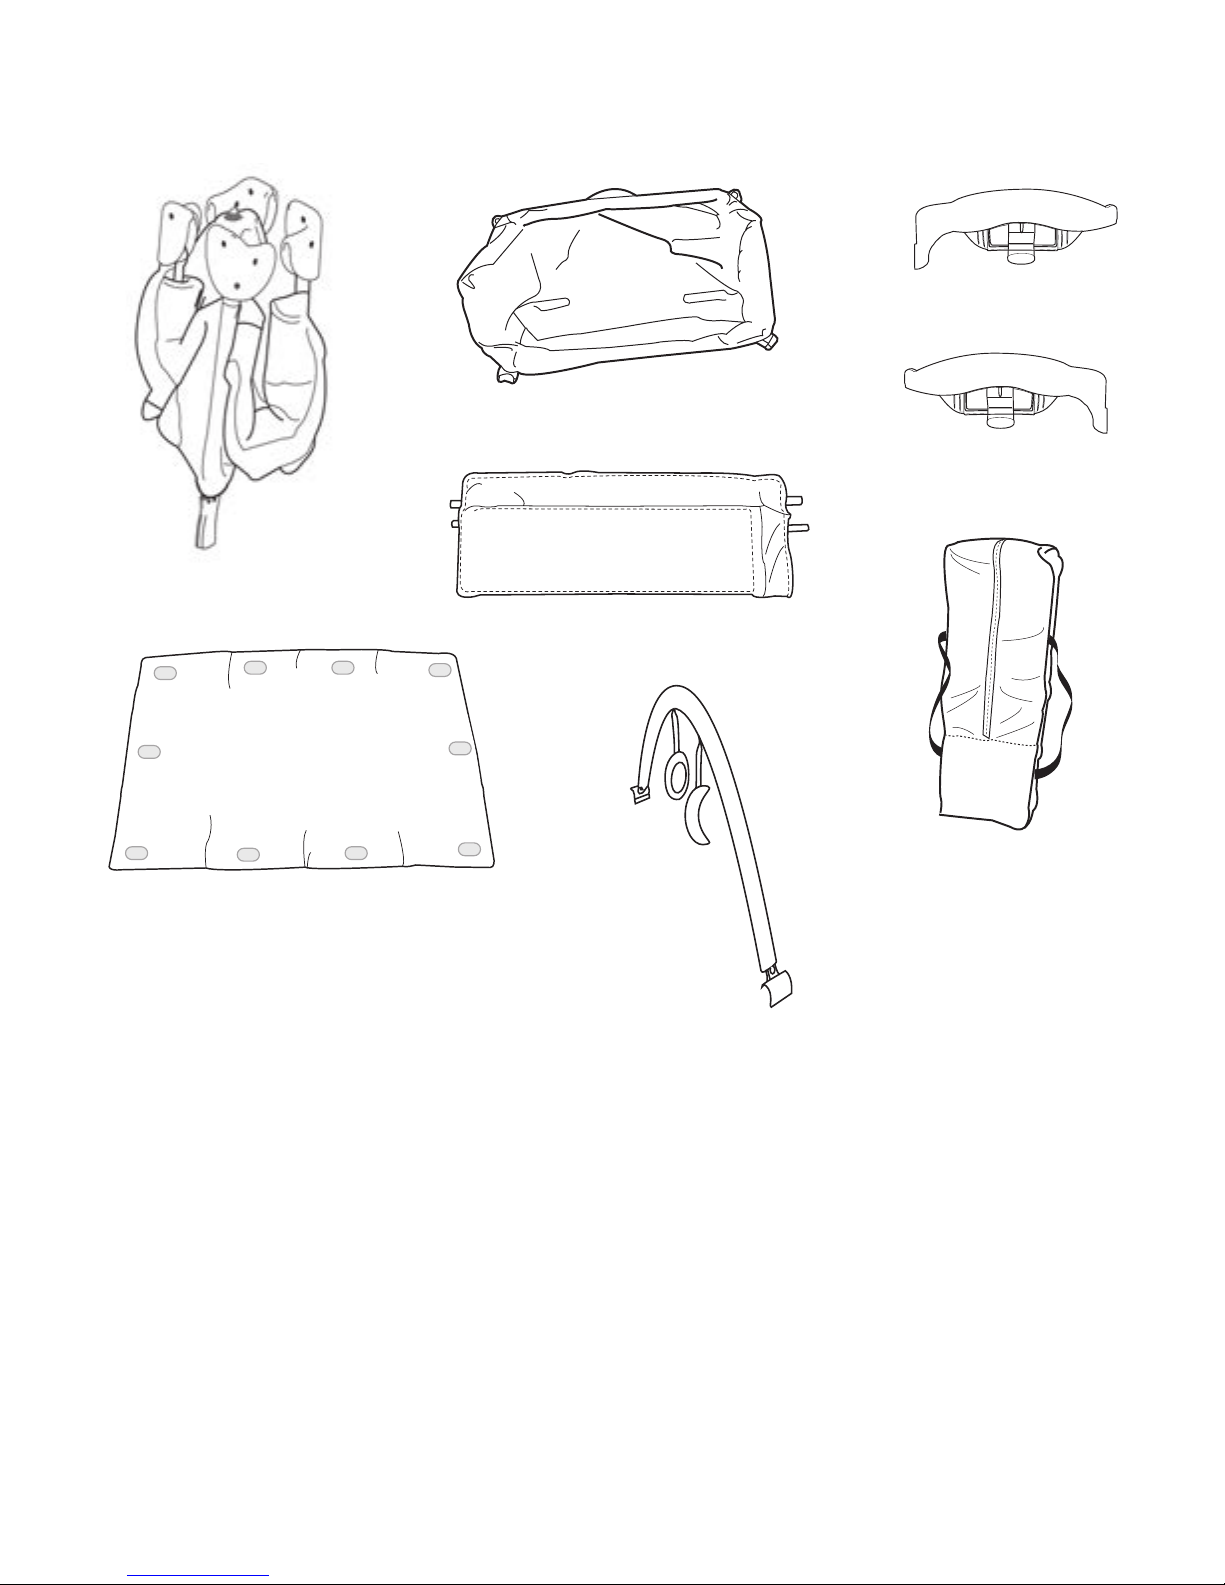
Parts
IMPORTANT! Please remove all parts from the package and idventify them before assembly.
Changing Table Retainer
(Right)
Bassinet
Changing Table Retainer (Left)
Changing Table
Mattress Pad
Travel and Storage Bag
Toy Bar
Customer Service Tel. (800) 377-3777
4
www.DeltaChildrensProducts.com
Page 5
Playard Assembly and Use
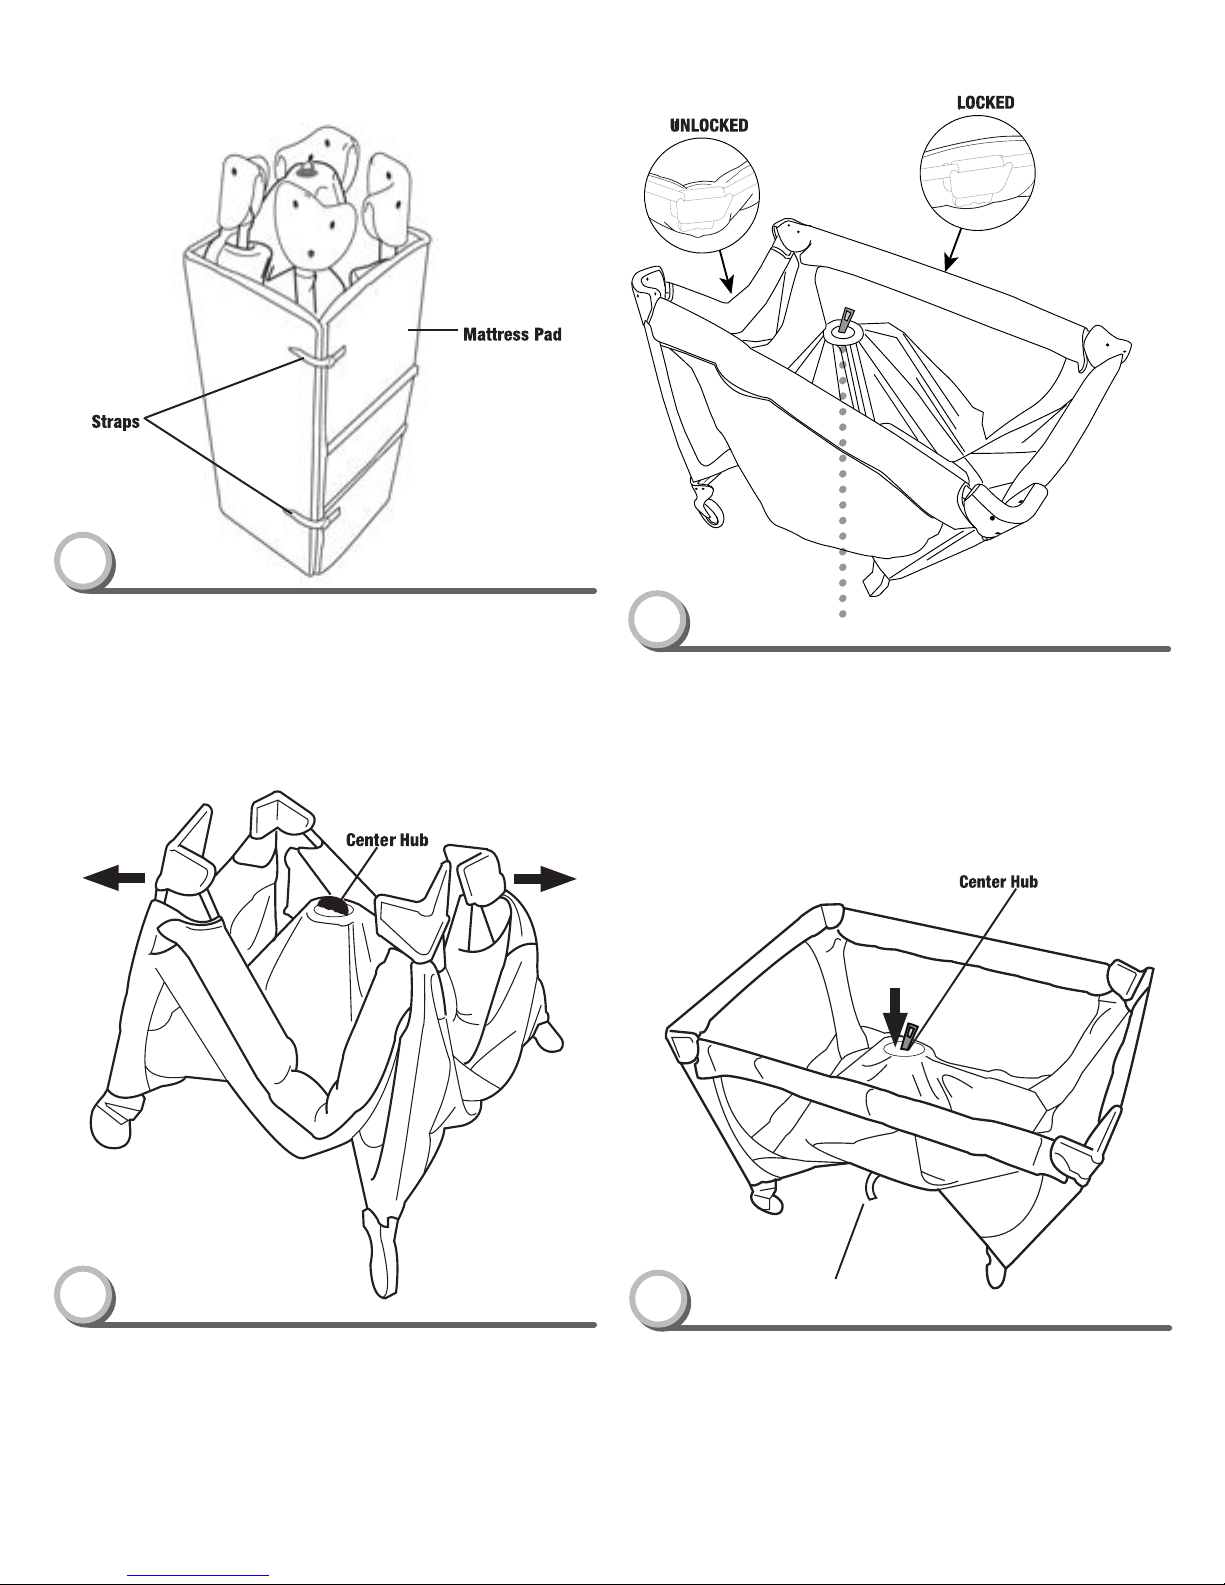
1
• Unfasten the straps on the mattress pad.
• Remove the bassinet, toy bar, and the playard from inside the
mattress pad.
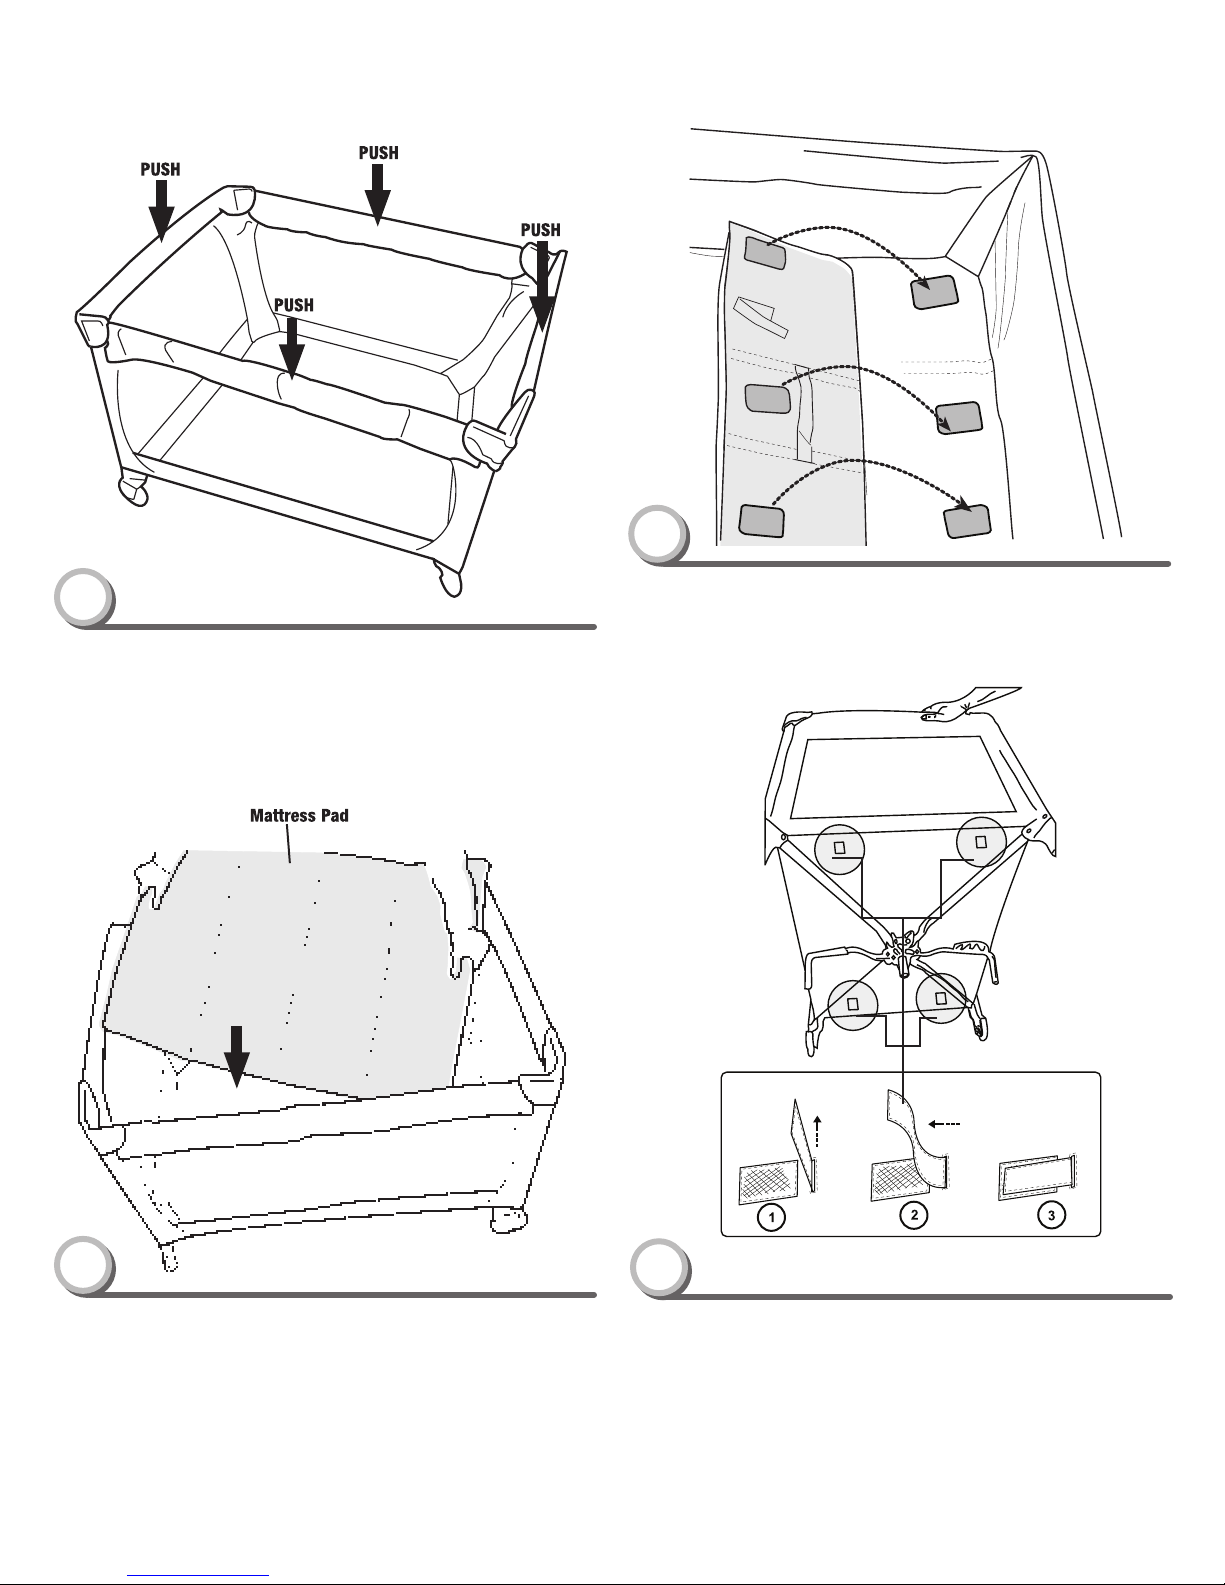
3
• Make sure the center hub is raised at least 18 inches.
• Grasp the center of each side rail and end rail then lift to “SNAP”
into the locked position.
• If “snapping” of the side rail and end rail locks does not occur
easily, recheck that the center hub is up to recommended height
before proceeding.
Minimum Distance: 18 inches from the floor
2
• Carefully pull the end rails out.
IMPORTANT! Do not push down on the center hub.
you will do this in step 4.
Customer Service Tel. (800) 377-3777
4
IMPORTANT! Before pushing down the center hub into a locked
position, check that the support legs are positioned flat on the
floor to successfully lock down the center hub.
• Press down on the center hub to lock it into the use position.
5
Support Legs
www.DeltaChildrensProducts.com
Page 6
Playard Assembly and Use
7
5
IMPORTANT! Check to be sure the playard frame is secure.
Push down on the sides and end rails.
• Fit all four corners of the mattress pad into the corner in the base
of the playard.
• Push down on the mattress pad to attach all fabric fasteners.
6
• Place mattress pad in the playard.
Customer Service Tel. (800) 377-3777
8
•Pullthroughhookandloopstrapsthroughtheslotsatthe
bottomofthepalyard.Fastenstrapsasshowninillustration.
WARNING:Makesurebothhookandloopstrapsarefirmly
attached.
6
www.DeltaChildrensProducts.com
Page 7
Bassinet Assembly and Use
WARNING
WARNING: Failure to follow these warnings and instructions could result in serious injury or death.
• FALL HAZARD -To help prevent falls, do not use the bassinet feature of this product when
the infant begins to push up on hands and knees or has reached manufacturer’s recommended
maximum weight of 15 lbs (6.8kg), or can roll over, whichever comes first.
STRANGULATION HAZARD -Never leave bassinet attachment in place when child is in
•
playard.
• If using a mattress sheet use only one specifically designed to fit the dimensions of the bassinet
mattress pad provided by the manufacturer.
• Use only the pad provided by the manufacturer. Playard pad dimensions are 38.5 in (978mm)
long by 27.5 in (699mm) wide.
• Side rails must be erect and latched prior to use. Failure to latch may result in child falling out
of bassinet or becoming entrapped.
• To reduce the risk of Sudden Infant Death Syndrome (SIDS), pediatricians recommend healthy
infants be placed on their back to sleep, unless otherwise advised by your physician.
• Use bassinet with only one child at a time.
• DO NOT store the bassinet in the playard while in use.
• To help prevent heat build-up inside the playard and to avoid overheating your child when
using the bassinet, do not use as an outdoor canopy.
• The bassinet must be fully assembled and installed, including four metal tubes, corner clips,
and mattress pad before using. Make sure the bassinet clips are fully engaged underneath
each corner of the playard.
• Strings can cause strangulation! DO NOT place items with a string around a child’s neck,
such as hood strings or pacifiers cords. DO NOT suspend strings over a product or attach
strings or toys.
• DO NOT place the playard near trailing cables or hanging cords.
Customer Service Tel. (800) 377-3777
7
www.DeltaChildrensProducts.com
Page 8

Bassinet Assembly and Use
1
NOTE: Remove the mattress pad used in the playard for use in
the bassinet.
• Lift to unfasten the fabric fasteners on the underside of the
mattress pad and remove.
Metal Button
3
• With the bassinet support tubes facing down, place the bassinet
over the top of an end rail on the playard.
Playard
2 4
• Place bassinet on a flat surface with the bottom facing up.
• Pull out the support tube till the button “CLICKS” into its locked
position.
• Repeat above step to extend and lock the other support tube.
Customer Service Tel. (800) 377-3777
• Fit four (x4) bassinet side clips over the playard side rails and fit
other four (x4) bassinet side clips over the playard end rails.
8
www.DeltaChildrensProducts.com
Page 9

Bassinet Assembly and Use
Playard
5
•Pull a bassinet corner clip down and “SNAP” it onto a playard.
post tube.
• Make sure the bassinet corner clip is firmly attached to the
playard post tube and it is pushing up against the bottom edge
of the plastic corner.
• Repeat this step to attach the bassinet corner clip to the other
side of the playard post tube.
7
•Place the mattress pad into the bassinet.
6
•Stretch to fit the other end of the bassinet over the other end
rail on the playard.
• Repeat step 5 to attach the remaining two bassinet corners
clips to the playard.
Customer Service Tel. (800) 377-3777
8
•Push down on the mattress pad to attach all the fasteners.
9
www.DeltaChildrensProducts.com
Page 10

Changing Table Assembly and Use
WARNING
Failure to follow these warnings and the
assembly instructions could result in
serious injury or death. Please save manual for future use as it contains important
information. Please read these instructions before use of this product.
• FALL HAZARD - To prevent death or
serious injury, always keep child within
arm’s reach.
• Never leave child unattended.
• The changing table is designed for use only
with this playard. DO NOT use on the floor,
bed, counter or other surfaces. Before each
use make sure the changing table is
properly secured to the playard by pushing
down firmly in the middle of the changing
table.
• DO NOT use the changing table if it is
damaged or broken.
1
•Open the changing table and place on a flat surface.
Socket
Tube
• DO NOT use bassinet when using changing
table.
• IMPORTANT - DO NOT remove the
changing table from the playard with your
child in it.
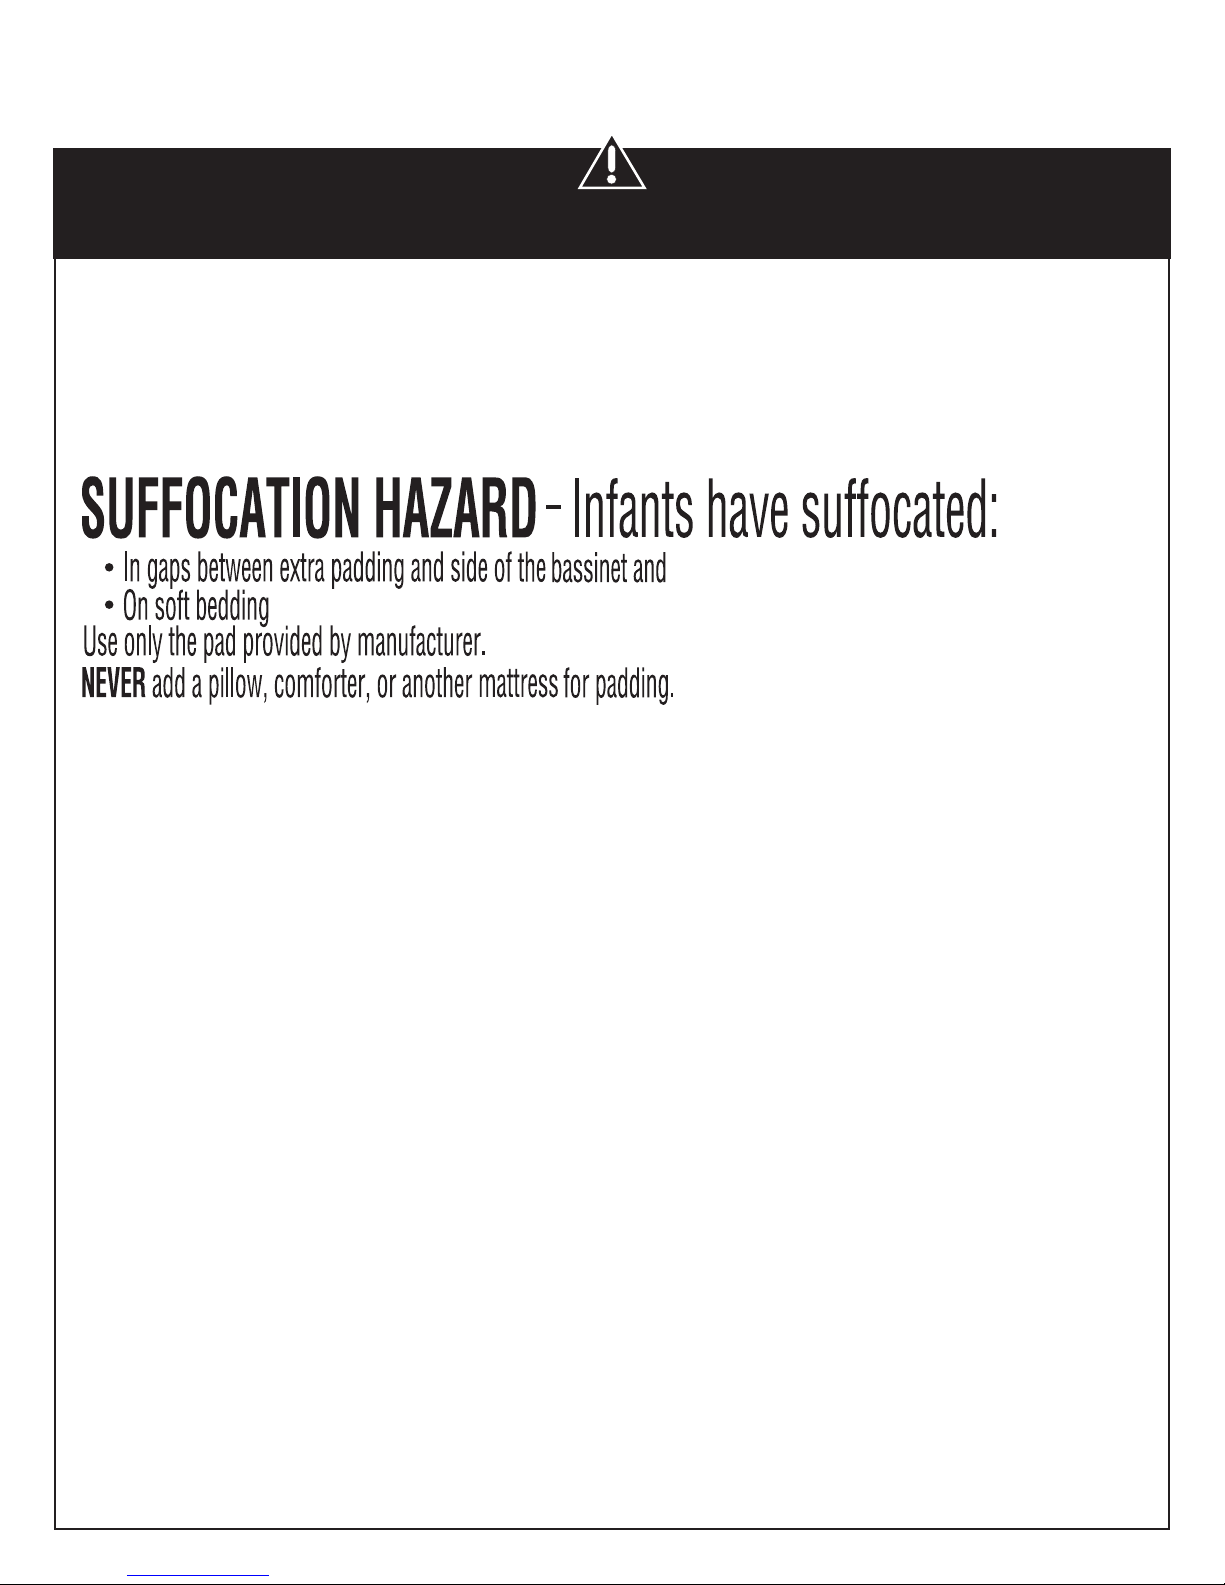
STRANGULATION HAZARD
•
– Infants can suffocate:
• REMOVE changing table after each use.
• Always attach changing table securely. If
changing table is not secured, child in
playard/ non-full size crib can lift or shift
changing table and get neck trapped
between changing table and non-full size
crib/playard frame.
ENTRAPMENT HAZARD
•
• Never leave the changing table in place
when child is in playard.
• Weight limit for the changing table is
25 lbs. (11kg).
• NEVER use changing table as a sleeping
or play area.
• DO NOT use the changing table as extra
storage.
2
•Fit the tubes on one side of the changing table into the sockets
on a changing table retainer. Push together until they “CLICK”
into place.
• Pull on the changing table retainer to make sure they are securely attached.
Customer Service Tel. (800) 377-3777
10
www.DeltaChildrensProducts.com
Page 11
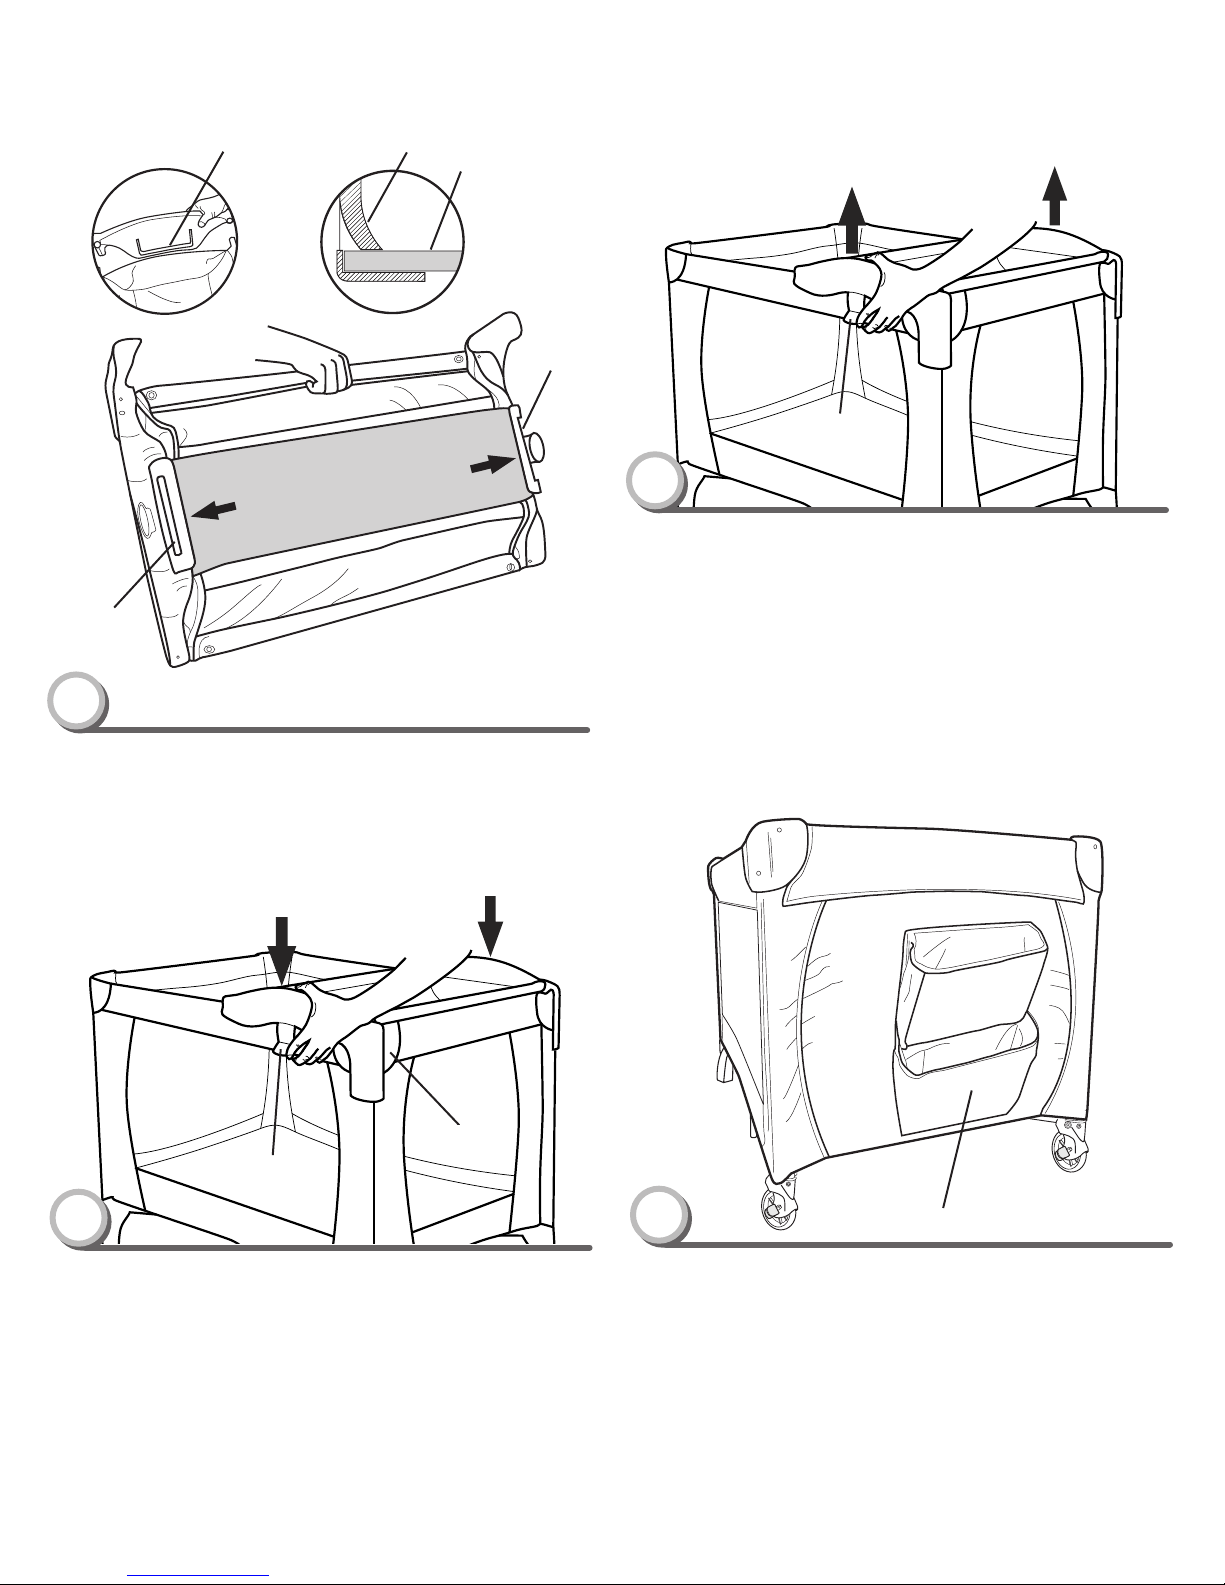
Changing Table Assembly and Use
Changing table
slot and tab
Tab
Changer bottom
board inserted
into the slot and
under the tab
Tab
Latch
5
To remove the changing table from the playard.
• Pull out the latch on the side of the changing table.
• Lift the changing table off the playard.
Tab
• Store the changing table away from the playard when not
in use.
3
•
Turn the changing table over.
•Insert the changer bottom board into the slot and under the tab
on the changing table restraints.
Plastic
Latch
Corner
4
•Turn the changing table upright.
•Place the changing table over both plastic corners on one end
of the playard.
•Push down on the changing table to attach the latch on the
sides of the changing table to the brackets beneath the top rail
fabric. You will hear a “CLICK”
•Pull up on the changing table to make sure it is securely
attached.
NOTE: Before each use, make sure the latch on the changing
table is securely fastened.
Customer Service Tel. (800) 377-3777
Parent Organizer Use
6
•Maximum weight limit of parent organizer is 8 lbs (3.6kg).
11
Parent Organizer
www.DeltaChildrensProducts.com
Page 12

Mobile Assembly
WARNING
PREVENT ENTANGLEMENT INJURY
• Keep out of baby’s reach.
• Remove mobile from playard when baby
begins to push up on hands and knees.
• This mobile may not attach to all crib or
playard designs, do not add additional
strings or straps to a crib or playard.
• From birth to 5 months.
• The mobile is intended for visual
stimulation and is not intended to be
grasped by the child.
• Always attach all provided fasteners
(strings, straps, clamps, etc.) tightly to
the playard according to the instructions.
Check frequently.
2
To Remove the Mobile Arm Assembly
• Pull up on the base of the toy bar and lift the toy bar off the top
side rail.
1
•Locate the toy bar and place anywhere on top side rail.
• Repeat above step to attach the other end of toy bar.
Customer Service Tel. (800) 377-3777
12
www.DeltaChildrensProducts.com
Page 13

Folding the Playard
Note: You must remove the toy bar, changing table and bassinet
before folding the playard.
1
• Remove the mattress pad from the playard.
• Lift to unfasten the fasteners on the underside of the mattress
pad and remove.
3
Minimum Distance: 18 inches from the floor
• Lift the center hub.
Minimum Distance:
18 inches from the floor
2
•Locate the center hub inside the playard.
• Pull up on hub cord to release the center hub lock.
Customer Service Tel. (800) 377-3777
4
•Make sure the center hub is raised at least 18 inches.
•Lift the latch . Squeeze the button on the center of a side or
end rail . Gently push down .
Note: Latches will not release unless you lift up rail center and
squeeze the button at the same time.
• Repeat this procedure to release latches on the remaining
three rail centers.
13
www.DeltaChildrensProducts.com
Page 14

Folding the Playard
5
• Push all sides of playard in toward the center hub.
6
• Place the mattress pad on a flat surface with the soft side up.
• Place folded playard on the mattress pad.
• Place the folded bassinet and toy bar on top of
the playard.
• Wrap the mattress around the playard.
• Fasten the straps on the mattress pad.
Customer Service Tel. (800) 377-3777
14
www.DeltaChildrensProducts.com
Page 15
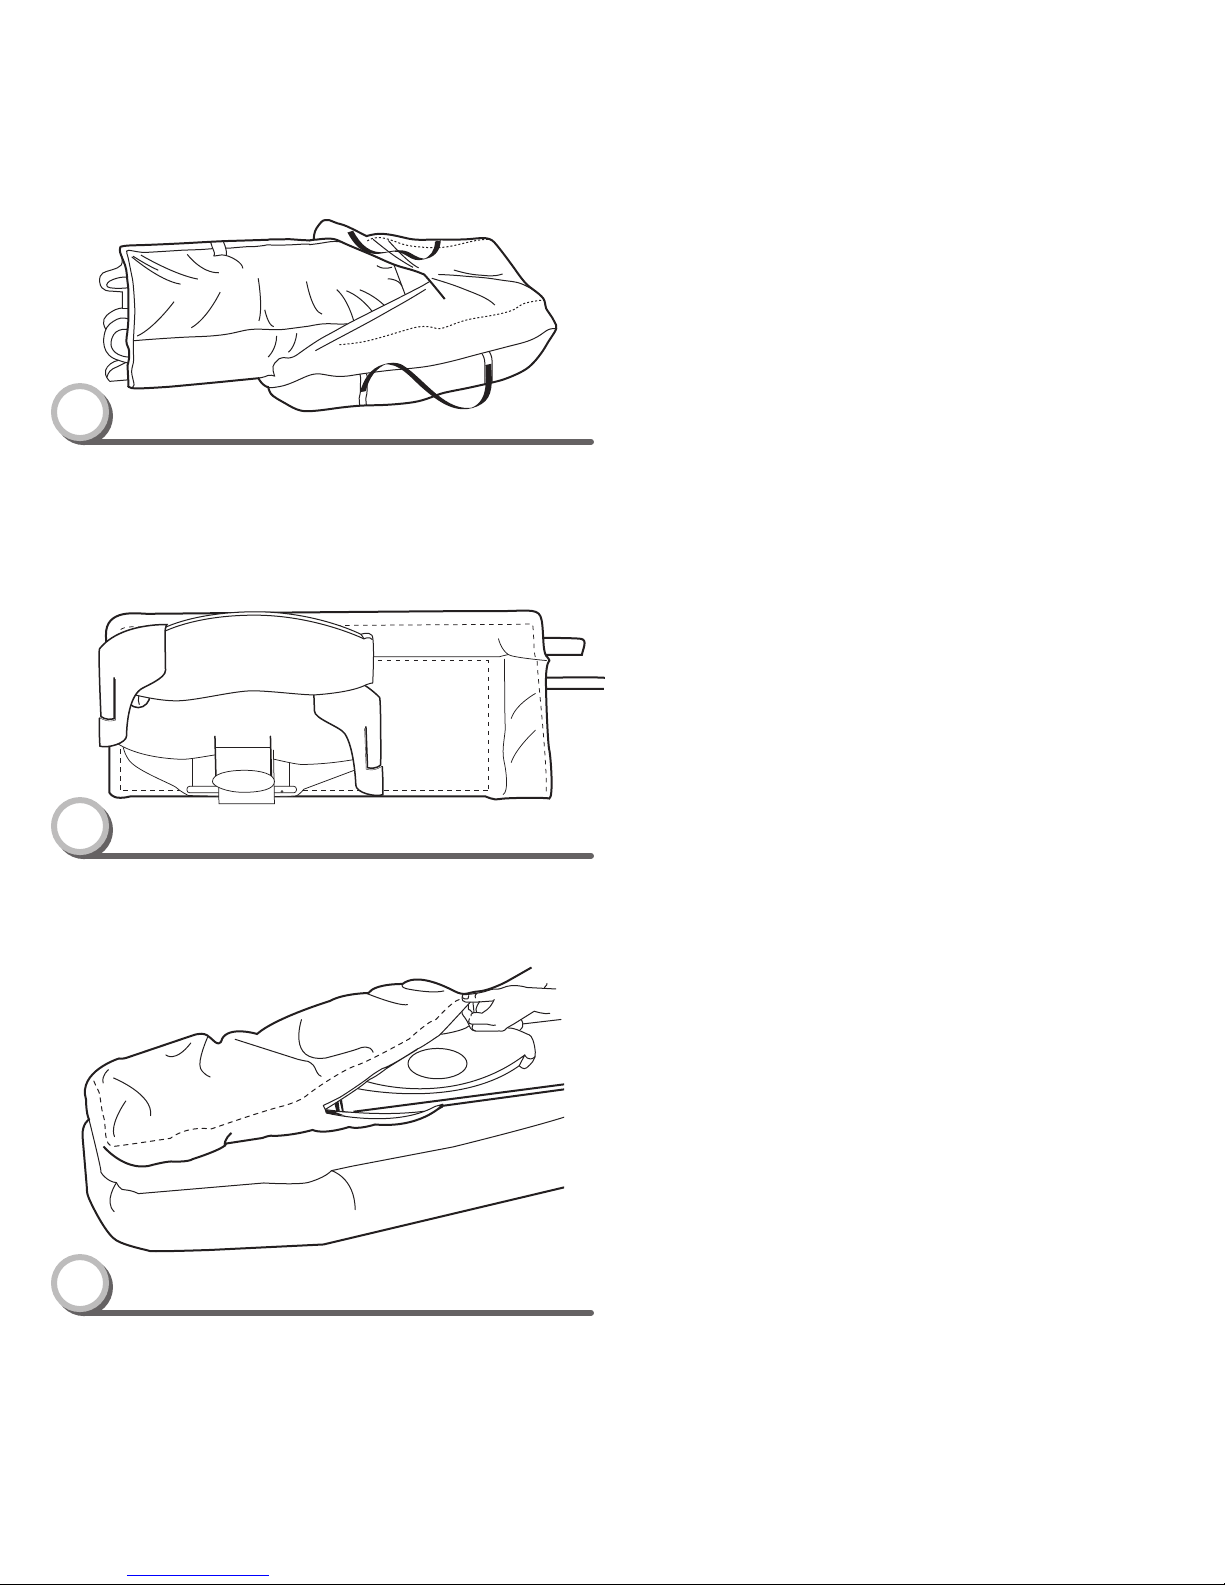
Storage/Travel Bag
1
• Locate opening in storage bag.
• Slide the folded playard and mattress pad into the opening in
the storage/travel bag.
• Close the zipper.
Care
• The frame, mattress pad, changing table, mobile, mobile arm and
storage bag may be wiped clean using a mild cleaning solution
and a damp cloth.
• Do not use bleach.
• Do not use harsh or abrasive cleaners.
• Rinse clean with water to remove residue.
• Do not immerse the product.
• The bassinet may be hand washed in cold water using a mild
cleaning solution.
• Do not use bleach.
• Do not use harsh or abrasive cleaners.
• Drip dry.
2
• Disassemble the changing table.
3
• Slide changing table into travel bag next to folded playard.
Customer Service Tel. (800) 377-3777
15
www.DeltaChildrensProducts.com
Page 16

Manufactured for and distributed by:
114 West 26th Street, New York, NY 10001
customerservice@DeltaChildrensProducts.com
Customer Service
Tel. 1-(800)-377-3777
www.DeltaChildrensProducts.com
MADE IN CHINA
16
 Loading...