

Page 1
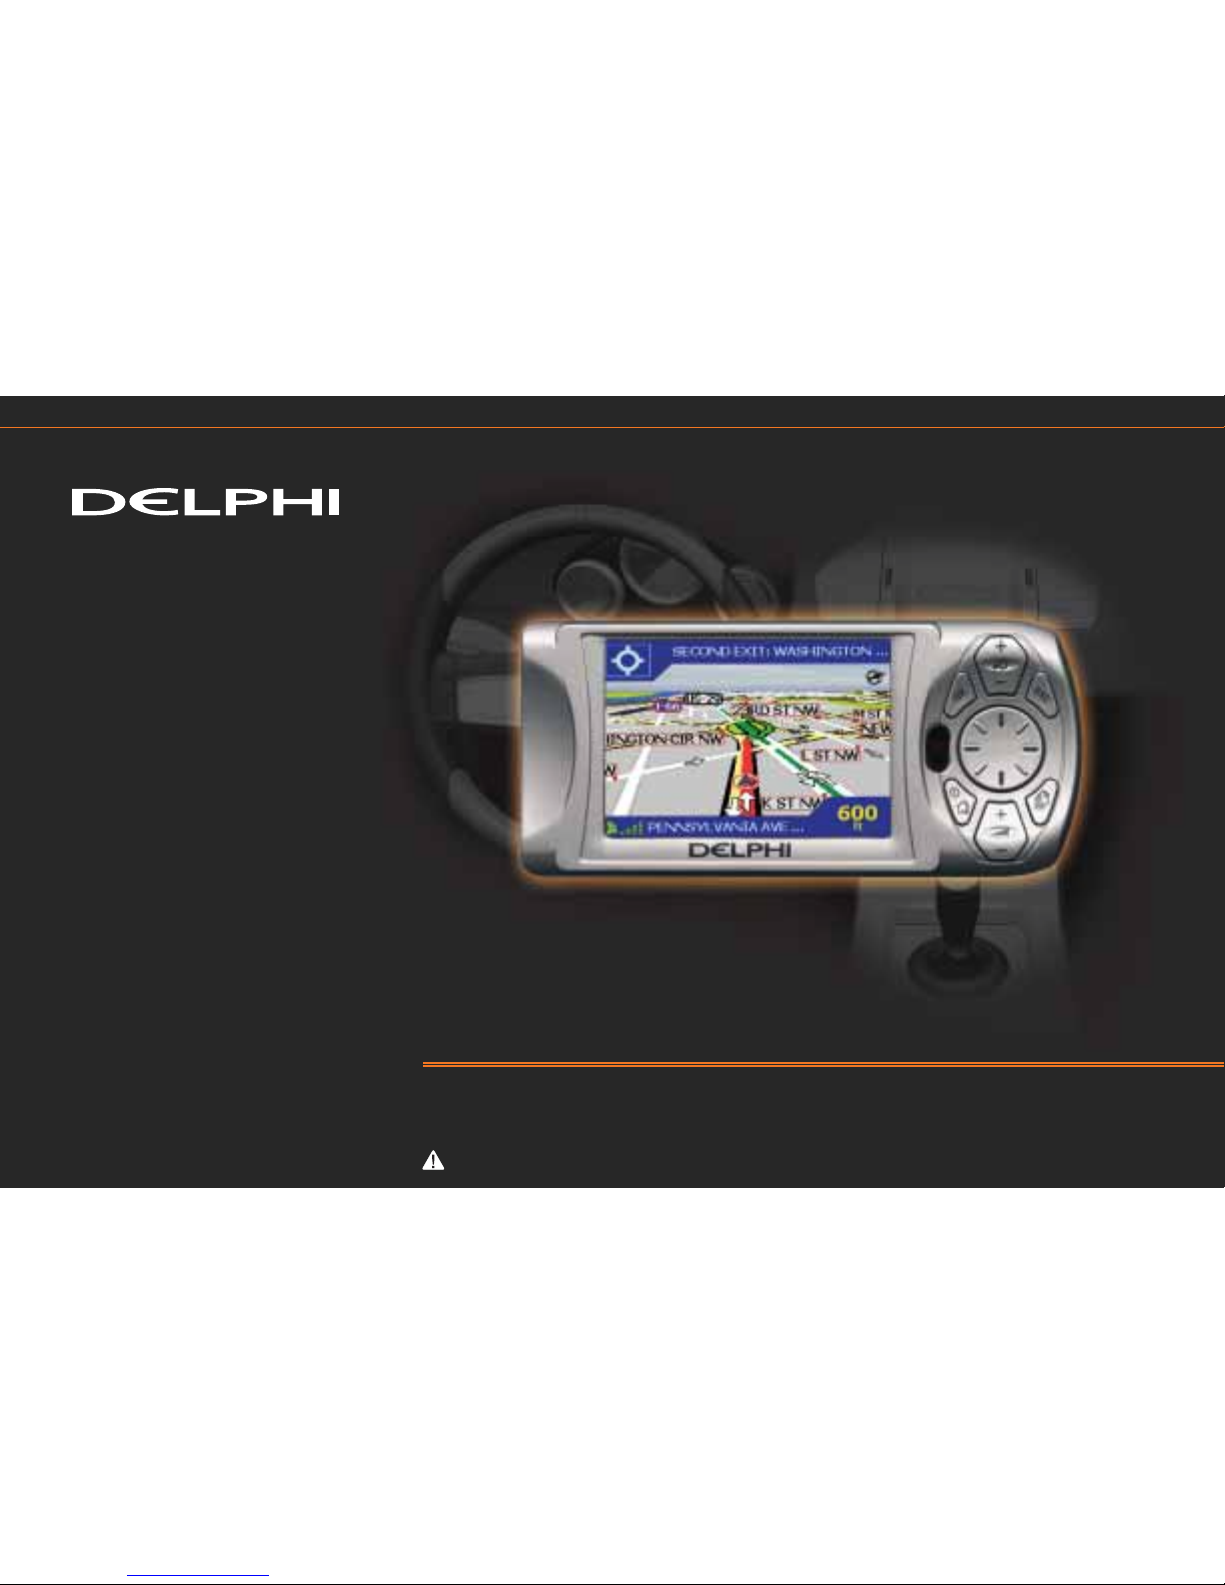
DELPHI MOBILE NAVIGATION
QUICK START GUIDE
Important: This guide and the Delphi Mobile Navigation User Manual contain important safety and operating information. Please read and follow the
instructions in these manuals. Failure to do so could result in personal injury, death, and/or damage to your Delphi Mobile Navigation and/or to your vehicle.
Page 2
2
UNPACKING YOUR DELPHI
MOBILE NAVIGATION
Congratulations on the purchase of your Delphi Mobile
Navigation. This guide will help you set up the Delphi
Mobile Navigation and use it for the first time. It is
recommended that you also read the Delphi Mobile
Navigation User Manual in order to get the best results
from your new Delphi Mobile Navigation.
Warning: When using your Delphi Mobile Navigation in a vehicle, it is
your sole responsibility to install, secure, and use the device in a manner
that will not cause accidents, personal injury or property damage, or in any manner obstruct your view or interfere with operation of vehicle safety equipment.
The user of this product is solely responsible for observing safe driving practices. Do not operate your Delphi Mobile Navigation while driving. Park the
vehicle first. It is your sole responsibility that the operating and vehicle mount
instructions are read carefully, understood, used with common sense, and
used consistent with the laws of operation for any country in which you use the
device. Failure to do so could result in personal injury, death, and/or damage
to your Delphi Mobile Navigation and/or to your vehicle.
DELPHI DISCLAIMS ALL LIABILITY FOR ANY USE OF THIS PRODUCT IN A WAY
THAT MAY CAUSE ACCIDENTS, DAMAGE, OR THAT MAY VIOLATE THE LAW.
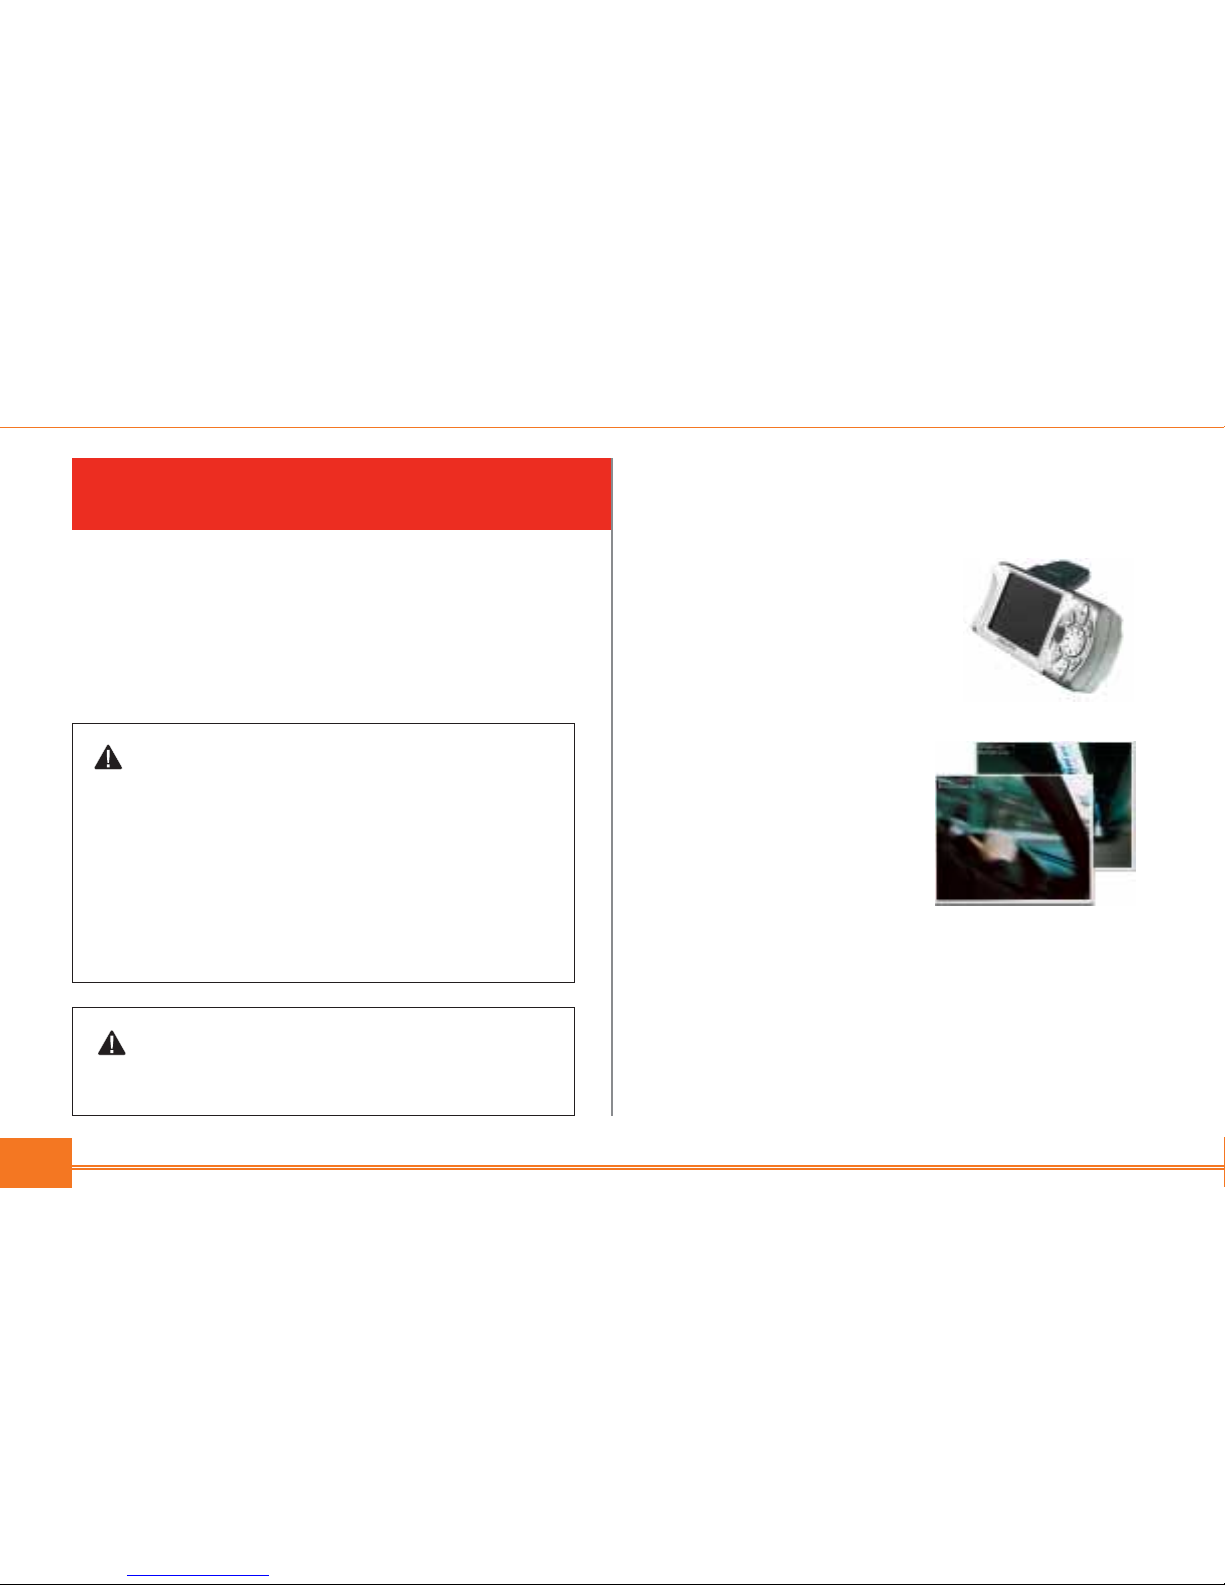
Caution: To avoid overheating of the unit, do not leave your Delphi Mobile
Navigation on the dash or windshield while your vehicle is unattended,
especially in strong sunlight. Do not use or handle Delphi Mobile Navigation
while it is hot. Let it cool away from heat sources before handling it.
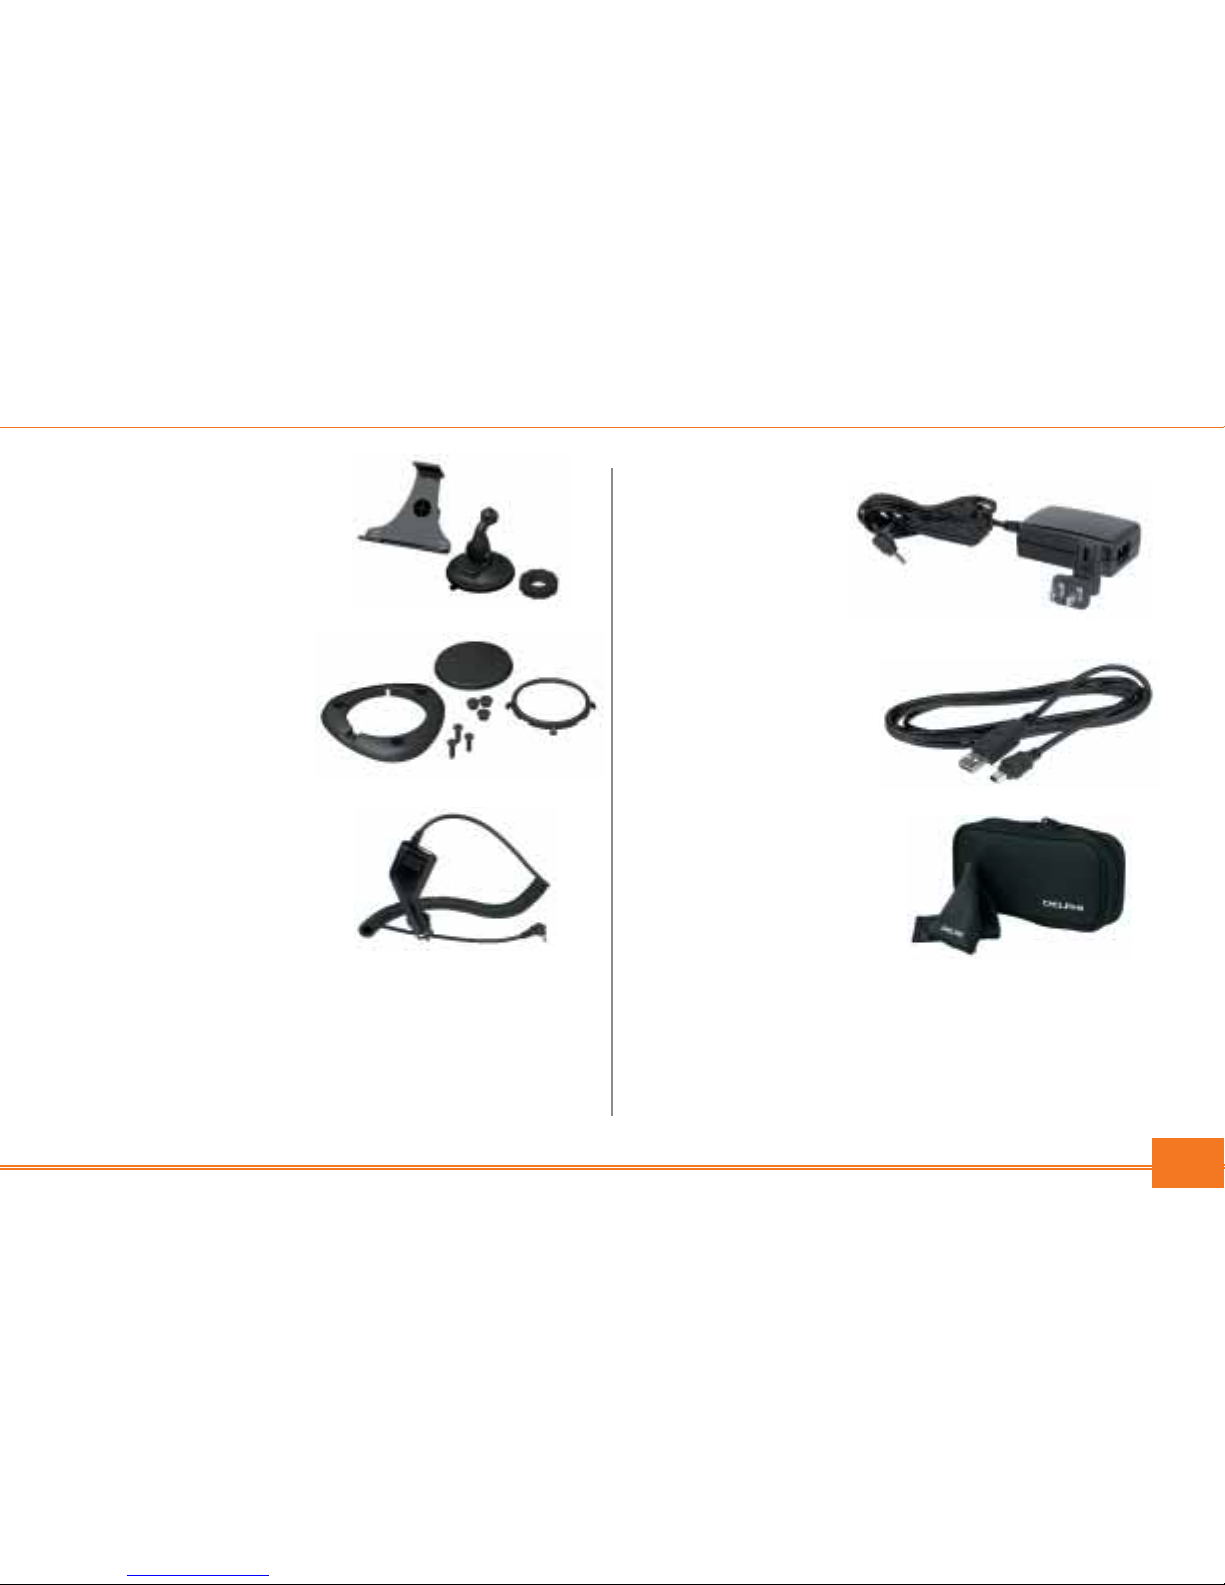
Box Contents
In addition to this Delphi Mobile Navigation Quick Start
Guide, your Delphi Mobile Navigation package includes:
1. Delphi Mobile Navigation
with integral GPS receiver
2. CD-ROMs with:
• Delphi Mobile Navigation
desktop software
• SmartST™ software
• U.S. maps
• User manual in Adobe
Acrobat PDF format
• Adobe Acrobat Reader
Page 3
3
3. Mounting materials
(a) Suction cup mount
- Ball foot
- Locking nut
- Mounting clip
(b) Dash mount
- Retainer ring
- Screw plate
- Screws (3)
- Screw caps (3)
- Suction pad
- Adhesive tape
- Alcohol pad
4. 12/24V Vehicle power
adaptor
5. Power adaptor
6. USB cable
7. Protective carrying case
and screen cleaner
Page 4
4
Installing Desktop Application
Before you can begin using your Delphi Mobile Navigation,
the SmartST software and maps must be installed.
Note: SmartST comes preinstalled on your Delphi Mobile Navigation.
1. Install Delphi Mobile Navigation desktop
• Place the application installer CD-ROM into your PC.
The installation wizard will start automatically.
• Follow the screen prompts.
• Once the installation is complete, Delphi Mobile
Navigation desktop will start automatically.
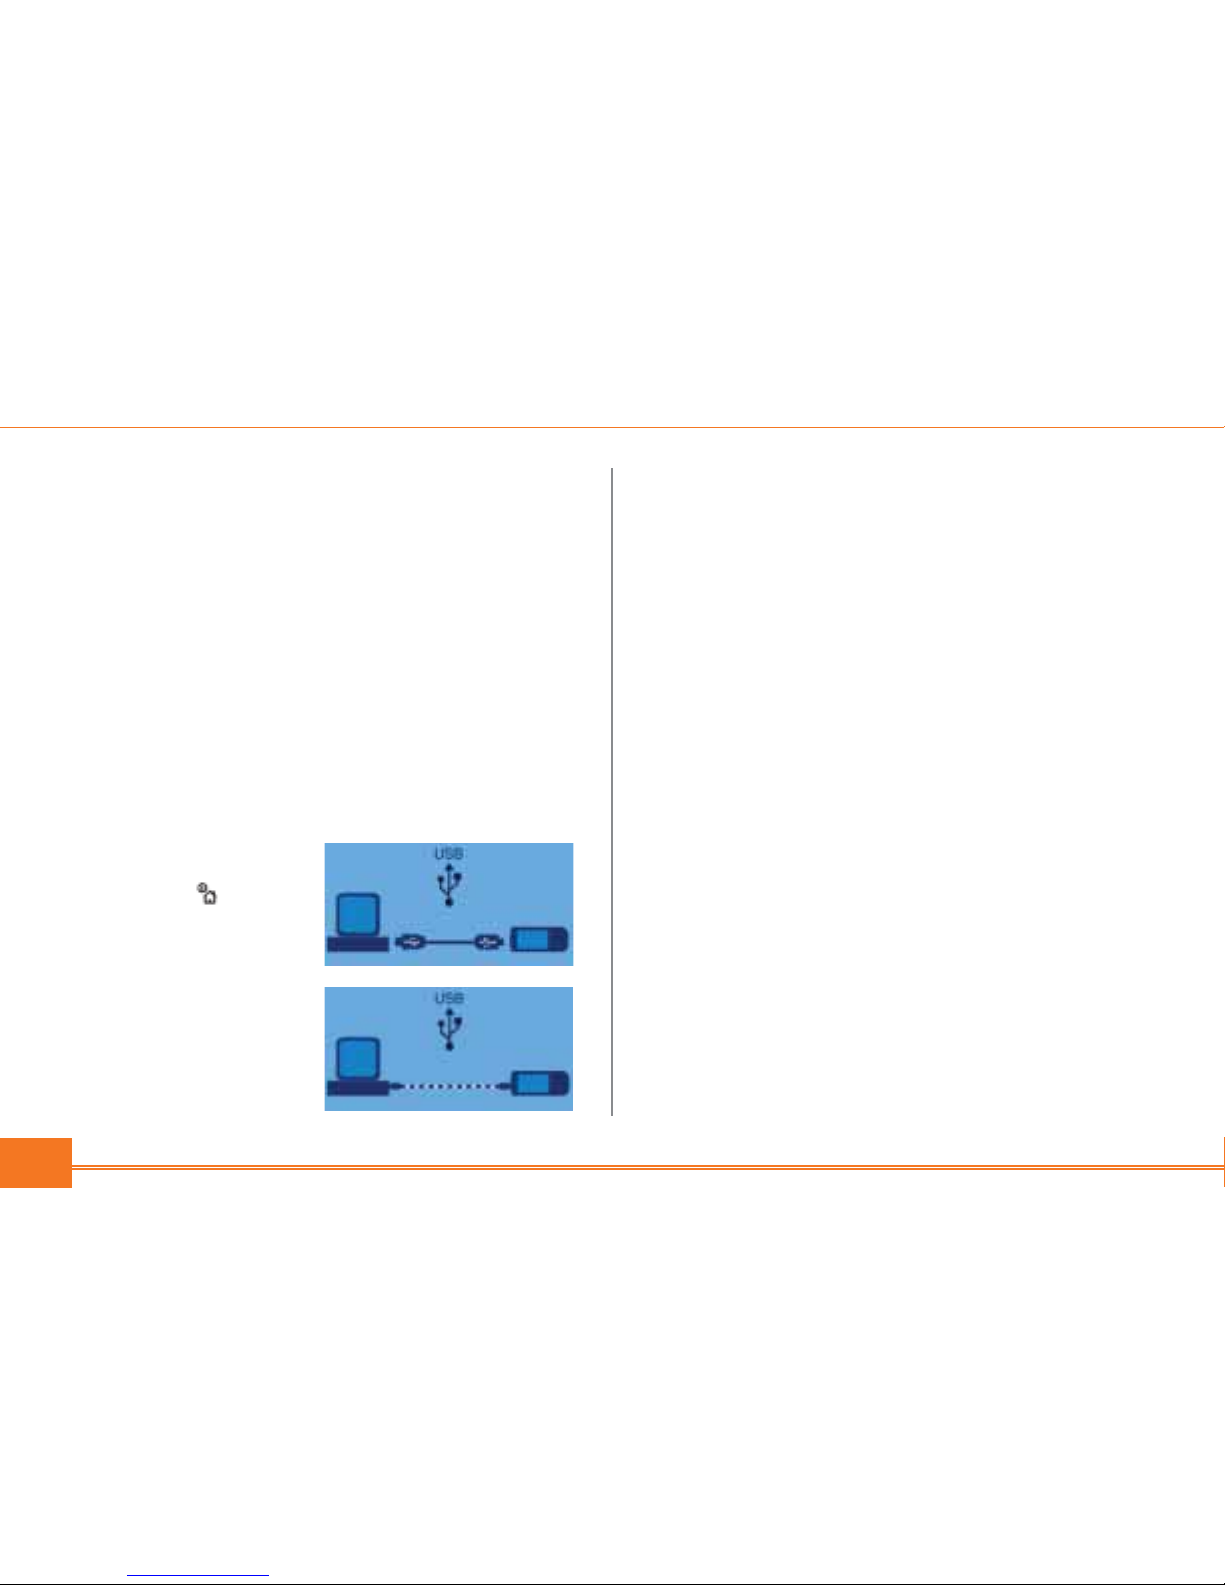
2. Connect the Delphi Mobile Navigation unit to your PC
• Use the power adaptor to plug the Delphi Mobile
Navigation into a power socket.
•Turn Delphi Mobile
Navigation on by
pressing for 1
second. This display
will appear:
• Connect Delphi
Mobile Navigation to a
USB port on the PC
using the USB cable
provided. This display
will appear:
Proceed to step 4 unless you need to reinstall
SmartST software for any reason.
3. Install SmartST software
Use Delphi Mobile Navigation desktop to install the
SmartST application onto the Delphi Mobile
Navigation unit. This requires an Internet connection.
•From the desktop main menu, select “Install
Application.”
• Select “Install Software.”
• Do not open other applications on your computer
during this installation.
• After you have completed the software application,
you are ready to install maps.
Note: The product key codes are located on the back of the SmartST CD
sleeve. These codes are required every time you install and register the
SmartST software and Map Data. Keep them in a safe place.
Page 5

5
4. Install maps
Maps are available as separate regions of varying
sizes, which can be stored in the Delphi Mobile
Navigation unit’s internal memory and also on memory
cards that plug into Delphi Mobile Navigation.
• Select “Install Maps”
from the main menu.
• Using the mouse tool,
highlight the map area
you want and drag it
across to one of the
windows on the right.
Or, you can click on the
required map area and
it will be displayed in the
lower left corner of the
screen.
• Choose one of the
“Add to” buttons to
download the map.
5. Remove the USB cable
The USB cable must be
disconnected from the
unit for the installation
to complete.
GETTING STARTED WITH DELPHI
MOBILE NAVIGATION CONTROLS
Powering up
Press for 1 second. The
main menu is displayed after
accepting the warning screen.
A brief tutorial is available to show you how to use
Delphi Mobile Navigation. Press to scroll through
the instructions.
Main menu
The main menu provides access to all of the setup and
viewing modes of Delphi Mobile Navigation.
1. Use the eight-way toggle button to navigate through
the main menu.
2. Make your selection by pressing .
3. Return to the main menu at any time by pressing .
4. Press to cancel your current entry or mode, and
return you to the previous screen.
Warning: For your safety, program your Delphi Mobile Navigation and
enter information about your destination BEFORE you start your journey.
Do not operate Delphi Mobile Navigation while driving.
Page 6

6
Zoom/Brightness
Change the amount of
map that is shown, or
hold down to adjust the
screen brightness.
OK
Select the highlighted
menu option, text, or
command.
Volume
Press to hear the next
instruction, or hold down
to turn the volume of the
voice guidance instructions up or down.
ESC
Cancel what you are doing,
delete the last text character you typed, or return to
the previous screen. Hold
down to delete an entire
line at once.
Eight-way Toggle
Scroll up and down
through menus. Move
across the map as you
select your destination.
Page
Jump between different
map views or pages
when a list of options is
spread across several
pages.
Menu/Power
Press to return to the
main menu at any time,
or hold down to power
Delphi Mobile Navigation
on or off.
Page 7

7
INSTALLING DELPHI MOBILE
NAVIGATION INTO YOUR VEHICLE
The Delphi Mobile Navigation unit can be mounted three
different ways:
1. Suction onto the windshield
2. To the dash by suction or adhesive tape
3. Screw onto the dash
For detailed information on using options 2 and 3, refer to
pages 12-15 in the Delphi Mobile Navigation User Manual.
Suction mount to windshield
1. Choose a position on the windshield where Delphi
Mobile Navigation will be clearly visible to the driver
without obstructing the driver’s view. Mount low on
windshield, as close to the dash as possible.
2. Thoroughly clean and dry the suction cup and the
mounting area of the windshield.
Warning: To avoid personal injury, follow the safety guidelines and
installation instructions provided so that Delphi Mobile Navigation does
not obstruct the view of the driver, interfere with the operation of any airbags
and safety features in the vehicle, or become airborne in the case of an accident. Do not attempt to install Delphi Mobile Navigation while driving.
3. Hold the suction cup firmly against the windshield and
press the lever down until it snaps shut.
4. The ball foot should now be
securely fixed on the windshield. Slip the locking nut
loosely over the ball foot,
with the flat side
facing upward.
5. Push the socket clip onto the
ball foot until it clicks. Make
sure the short end of the
socket clip is at the top.
6. Adjust the position of the socket clip so that Delphi
Mobile Navigation will be clearly visible to the driver.
Page 8

8
7. Turn the locking nut clockwise
until tight.
8. Snap the Delphi Mobile Navigation unit onto the
socket clip. First, position the two locating tabs
(found on the bottom of the unit) into the
corresponding slots on the socket clip. Then, snap
the top side of Delphi Mobile Navigation onto the clip.
9. Flip the GPS antenna
outward so that the
antenna points horizontally.
10. Plug the 12/24V power
adaptor into the cigarette lighter socket.
11. Plug the other end of the power cable into the socket on
the left side of the Delphi Mobile Navigation unit.
12. Verify that Delphi Mobile Navigation is positioned
such that the GPS antenna has a clear view of the sky.
You are now ready to enter in your destination and start
navigating.
SETTING YOUR DESTINATION
Getting a GPS fix
After you have entered your destination, Delphi Mobile
Navigation uses a “GPS fix” to determine your current
location. Based on the maps in its memory, Delphi Mobile
Navigation calculates the best way from your current
location to the destination you have entered.
In order for the GPS antenna to receive signals, ensure that:
• Delphi Mobile Navigation is outside or in a vehicle
parked outside.
• The GPS antenna is pointing outward horizontally,
with a clear view of the sky.
It initially may take several minutes to get a GPS fix.
Minimize this time by remaining stationary until Delphi
Mobile Navigation has a fix.
Page 9

9
To confirm you have a GPS fix, select “Map” from the
main menu. If you have a GPS fix, the map screen will
show your current location. The GPS fix is displayed in
the lower left corner of the screen.
No GPS fix:
The satellite icon is
red. (The strength
indicators are not
displayed.)
GPS fix:
The satellite icon and
strength indicators
are green.
Setting a destination
There are three ways you can program your destination:
• Use the “Favorites” menu option to store
destinations used on a regular basis.
• Select the “Destination” menu option to enter an
address, intersection, point of interest, settlement,
ZIP code, or recently visited location.
• Program your destination directly on the map screen.
Do not attempt to program while driving.
Note: Refer to the Delphi Mobile Navigation User Manual for information
on the first two methods.
Directly on the map screen
Delphi Mobile Navigation lets you scroll across a map and
pick a destination point on the map.
1. From the main menu, select “Map.” You are now in
automatic map browser mode.
2. Navigate around the map
using the button. Zoom
in and out as required
using and .
3. Press to display grid lines. You are now in manual
map browser mode.
4. Use the button to position the intersection of the
grid lines over the destination you want.
5. Press to select a point as your destination.
Press again to bring up the map context menu.
Select “Show Details.”
6. Select “Go” to calculate the route and display the
address on the navigation screens.
7. Select “Save” to record the destination as a shortcut
or favorite.
Page 10

10
2. Map browser
This two-dimensional view is
always oriented to the north,
and shows your current position and surrounding street
names. If you have already programmed a route, the route and all turns are highlighted.
Zoom in and out as required using and .
Pressing brings up the map context menu with
more options.
3. Next instruction
The information that you need
for the next turn—the direction
of the turn and the distance to
the turn—is displayed clearly in
this view.
4. Next four instructions
The next four turns are
described by the direction of
the turn, the next street name,
and the distance to the turn.
The next turn is highlighted,
and is always at the top of the list.
DRIVING WITH YOUR DELPHI
MOBILE NAVIGATION
Now that you have programmed your destination, it’s time
to use Delphi Mobile Navigation on your drive.
Viewing your route
There are four ways you can view instructions along your
route. From the main menu, select “Map.” Cycle through
the four navigation screens by pressing .
1. 3D Navigation map
In this view, the three-dimensional
map is always oriented to the
direction in which your vehicle is
traveling with an adjustable
horizon. Use the eight-way toggle
button to adjust the viewing angle. Zoom in and out as
required using and .
Warning: For your safety, program your Delphi Mobile Navigation and
enter information about your destination BEFORE you start your journey.
Do not operate Delphi Mobile Navigation while driving.
Page 11

11
Back-On-Track™feature
Delphi Mobile Navigation is designed to replan your route
automatically if you take a wrong turn or are detoured.
When Delphi Mobile Navigation is recalculating a route,
“Back-On-Track” will appear on the lower bar of the map
screens.
Automatic restart feature
When you arrive at your destination, the route is canceled automatically. If you turn Delphi Mobile Navigation
off before reaching your destination (for example, stopping
for gasoline), the destination is saved and your route is
automatically restarted from your current position when
Delphi Mobile Navigation is powered on again.
CONTACTING TECHNICAL
SERVICE SUPPORT
For additional information in solving problems with your
Delphi Mobile Navigation unit, contact Delphi at
1.877.667.8700 Monday—Friday, 8:00 am—4:30 pm
Eastern Standard Time, or visit www.delphi.com.
Page 12

Delphi Corporation
1441 West Long Lake Road
Troy, Michigan 48098-5090
U.S.A.
Technical Service Support: [1] 877.667.8700
www.delphi.com
Printed on Recycled Paper
©2004 Delphi Corporation. All rights reserved.
DPSS-04-E-017
SmartST and Back-On-Track are trademarks of NAVMAN Mobile Limited.
 Loading...