

DeLonghi WF1300ES, WF1500E Instruction Manual

4
ENGLISH
Dear Customer,
congratulations and thank you for having placed your trusted in us.
All our products are the result of accurate design and meticulous technical testing.
We have prepared this manual to help you make the most of your appliance and to fully appreciate its superb
quality.
We are certain that, if you follow our suggestions, this appliance will give you maximum satisfaction and
many years of service
The product you have purchased is a “Wet & Dry” appliance, featuring the “Bagless” system (that is, no
dustbags) that uses water to trap the dust and as the first stage of filtering.
It introduces a new functional concept that makes it unique, extremely simple to use, and very compact in
relation to its cleaning capacity, with excellent performance.
Description
A ON-OFF button
B Suction power control (-)
C Suction power control (+)
D Air purification button and, WF1300ES models only, “autoclean” function
E Inlet port
F Motor head
G Flexible hose
H Removable wet/dry tank
I Manual suction power control
J Removable suction conveyer
K Telescopic extension tube
L Crevice tool
M “T”-shaped nozzle
N Round dusting attachment
O Wet cleaning brush
P Carpet/floor brush (according to the model)
P1 “Explora” carpet/floor brush (according to the model)
P2 Accessory for delicate floors of the “Explora” brush (according to the model)
Q Trolley
R Cord winder
S Accessory holders
T Motor head fastening handle
U Foam filter with safety float
V Tank handle
W Air outlet grid with high efficiency filter
X Intake nozzle
Z Motor cooling air outlet grid
Z1 Shampoo for “Autoclean” function (according to the model)
GB 26-11-2002 11:31 Pagina 4
5
WARNINGS
• Carefully read the instruction booklet.
• This appliance must be only used in the home.
It must not be used for any other purpose, nor
modified or tampered with in any way.
• Before using, check that the mains voltage
corresponds to the voltage indicated on the appliance
rating plate located under the motor head.
• Connect the appliance only to power outlets
with a minimum rating of 10A. Make sure the
outlet is earthed. In the case of appliances with
double insulation (see the symbol on the
specifications label) earthing is not required.
• Always unplug the appliance from the power
socket when not in use or before performing
any maintenance or cleaning operations on
the appliance.
• DO NOT clean the appliance with
trichloroethylene or other solvents.
• DO NOT tug on the power cord to disconnect
the appliance from the mains outlet.
• The appliance is not intended for use by young
children or infirm persons without supervision.
•Young children should be supervised to ensure
that they do not play with the appliance.
• DO NOT run the appliance over the power
cord, to avoid damaging the insulation
• DO NOT vacuum up inflammable or corrosive
liquids.
• DO NOT vacuum up matches, ash or cigarette
butts when still alight.
•Vacuuming up large quantities of fine ash and
dust may compromise the proper operation of
the filtering system.
• DO NOT use the appliance if it appears to be
faulty.
• Special care must be taken when using the
appliance to clean stairs
• For repairs or the purchase of accessories,
contact an authorised Service Centre only.
The manufacturer reserves the right to modify the
appliances and the accessories supplied without
prior notice.
Only use original spare parts and accessories so
as to maintain the appliance in good working
order and NOT invalidate the guarantee
This appliance complies with the EEC
ELECTROMAGNETIC COMPATIBILITY directive
89/336 and the EEC LOW VOLTAGE directive 72/23.
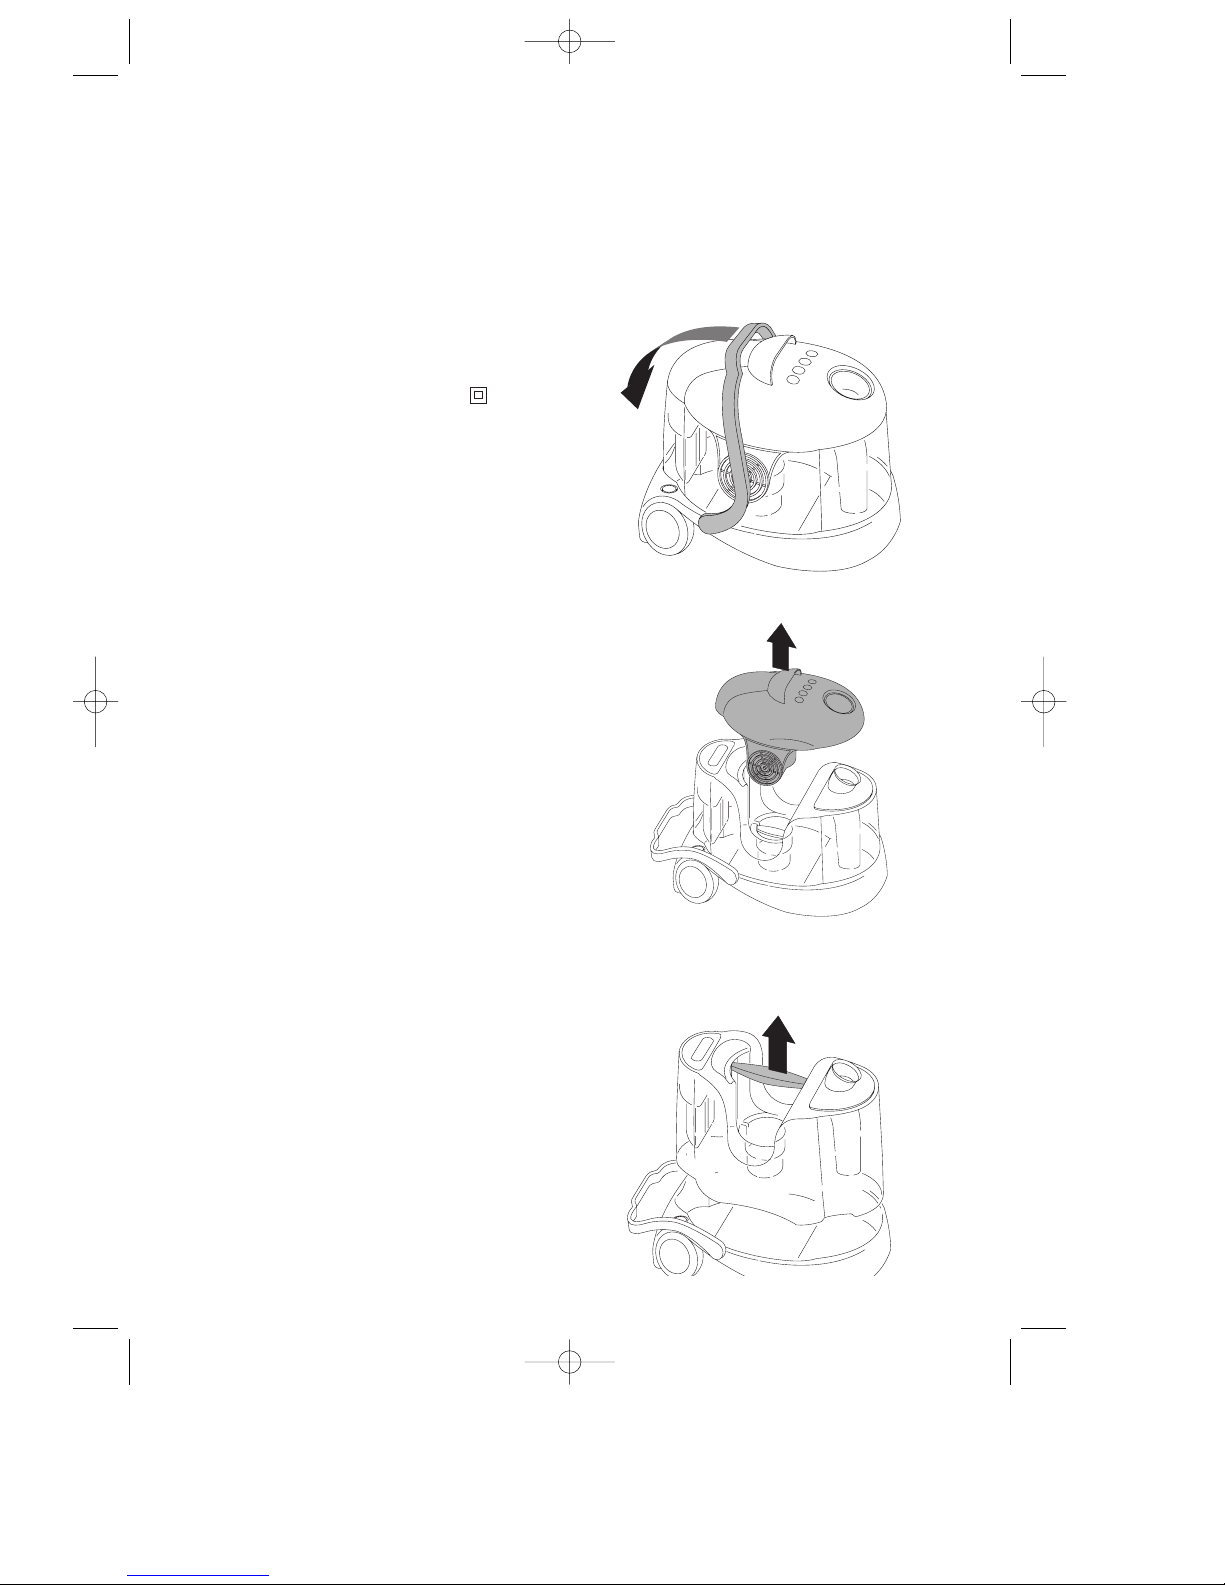
ASSEMBLY AND PREPARING FOR USE AS A
WET/DRY VACUUM CLEANER
Note: when assembling and preparing for use,
make sure that the appliance is NOT plugged into
the power outlet.
• Completely lower the handle that blocks the
motor head
T (Fig. 1).
• Remove the motor head F (Fig. 2).
• Remove the wet/dry tank
H using the handle
on the tank (Fig. 3).
fig. 1
fig. 2
fig. 3
GB 26-11-2002 11:31 Pagina 5
Vacuum cleaner operation
Mod. WF1500E
•To use the appliance as a vacuum cleaner, a
minimum of 2.5 litres of water should be
poured into the tank; do not exceed the
maximum level of 4 litres marked on the tank.
Mod. WF1300ES
•To use the appliance as a vacuum cleaner,
pour 2.5 litres of water into the tank,
corresponding to the MAX level marked on the
tank.
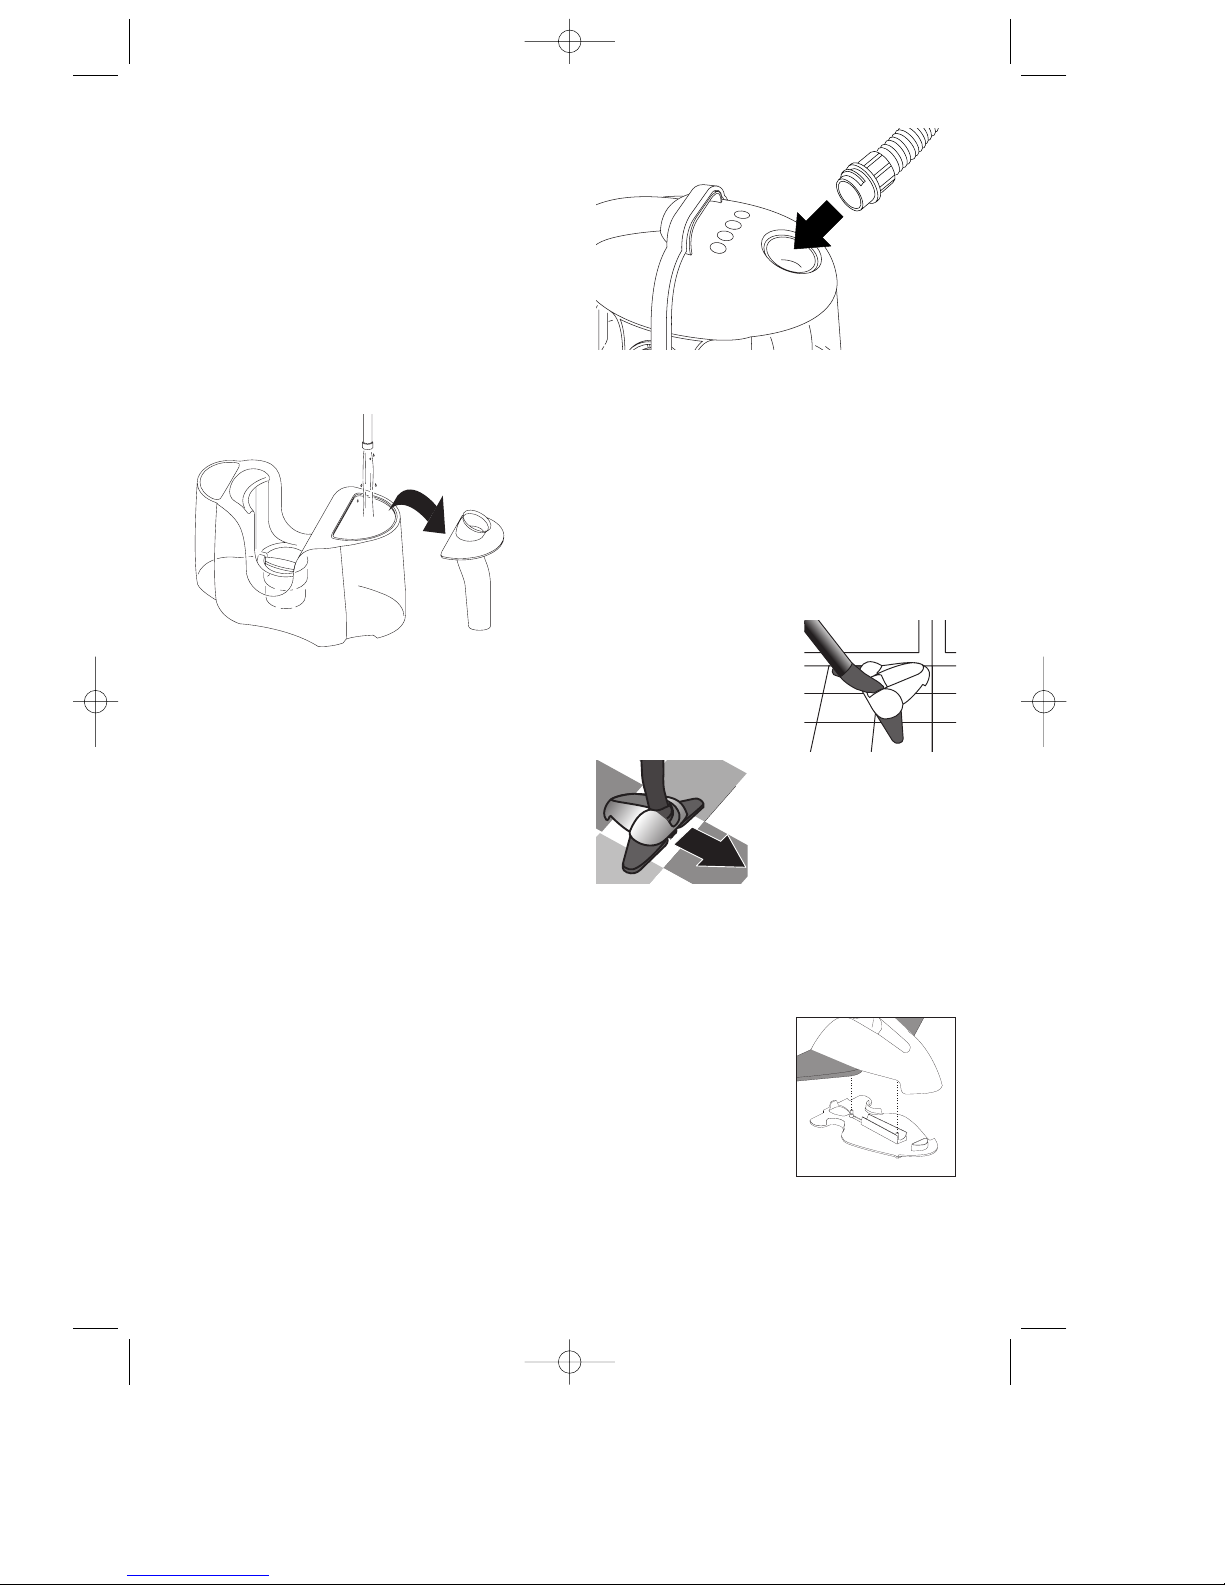
The suction conveyor
J can be removed to
simplify filling the tank, (Fig. 4).
The water has the function of filtering the dust,
and stopping it from spreading in the
environment.
Wet vacuuming operation
When using the appliance as a wet vacuum
cleaner, up to 9 litres of water can be held in the
tank for the WF1500E models, and up to 6 litres
for the WF1300ES models.
If this maximum limit is exceeded, the safety float
U is activated and the appliance will stop
vacuuming. In this case, empty the tank, remove
the filter from the float, dry it and then put it back
in place.
Please note: To use the appliance as a wet vacuum
cleaner after having used it as a vacuum cleaner,
the tank does not need to be emptied, even if this
operation can be performed without water.
• Replace the tank on the trolley Q, position the
motor head in place and raise the handle that
blocks the motor head, until it clicks into place.
• Fit the hose
G to the appliance, inserting the
end with the bayonet into the inlet port
E and
then turning it clockwise (Fig. 5).
To remove it, simply turn it anticlockwise.
• Fit the telescopic tube
K onto the hose grip,
pushing it fully into place.
• Fit the accessory required for the operation
being performed to the telescopic tube K or
directly to the hose grip
G.
ACCESSORIES
“Explora”
carpet/floor brush (some models
only):
Cleans dust efficiently from both hard
floors or mats and carpet.
Thanks to the articulated
fins, this model is
particularly suited to
cleaning right up close to
furniture and into corners.
For cleaning wider areas,
simply rotate the brush to
use the total width.
Accessory for delicate floors of the “Explora”
brush (some models only)
The accessory features
felt strips for using the brush on delicate surfaces
such as parquetry and treated marble.
To fit the accessory to the
base of the “EXPLORA”
brush, line up the two pins
on the accessory with the
two holes on the bottom of
the brush and press until it
clicks into place.
6
fig. 4
fig. 5
GB 26-11-2002 11:31 Pagina 6
 Loading...