

DèLonghi DSC 95 E, DTC 95 E User Operating Instructions Manual
DSC 95 E
Ceramic Cooker
Users Operating Instructions
Before operating this cooker,
please read these instructions carefully

2
Congratulations on your purchase of this Delonghi ceramic cooker which has been
carefully designed and produced to give you many years of satisfactory use.
Before using this appliance it is essential that the following instructions are carefully
read and fully understood.
We would emphasise that the installation section must be fully complied with for your
safety to ensure that you obtain the maximum benefits from your appliance.
Important:
This appliance is designed and manufactured solely for the cooking of domestic
(household) food and is not suitable for any non domestic application and therefore should not be used in a commercial environment.
The appliance guarantee will be void if the appliance is used within a non domestic environment i.e. a semi commercial, commercial or communal environment.
Introduction
3
IMPORTANT INFORMATION FOR CORRECT DISPOSAL OF THE
PRODUCT IN ACCORDANCE WITH EC DIRECTIVE 2002/96/EC.
At the end of its working life, the product must not be disposed of as
urban waste. It must be taken to a special local authority differentiated waste collection centre or to a dealer providing this service.
Disposing of a household appliance separately avoids possible negative consequences for the environment and health deriving from inappropriate disposal and enables the constituent materials to be recovered to obtain significant savings in energy and resources. As a
reminder of the need to dispose of household appliances separately,
the product is marked with a crossed-out wheeled dustbin.
Declaration of CE conformity
✓
This cooker has been designed, constructed and marketed in compliance with:
- Safety requirements of EU Directive "Low Voltage" 2006/95/EC;
- Protection requirements of EU Directive "EMC" 89/336/EEC;
- Requirements of EU Directive 93/68/EEC.
IMPORTANT INSTRUCTIONS AND ADVICE FOR THE USE OF
ELECTRICAL APPLIANCES
The use of any electrical appliance requires the compliance with some basic rules,
namely:
– do not touch the appliance with wet or damp hands (or feet)
– do not use the appliance whilst in bare feet
– do not allow the appliance to be operated by children or unqualified persons
without supervision.
The manufacturer cannot be deemed responsible for damages caused by wrong or
incorrect use.

4
IMPORTANT SAFEGUARDS AND RECOMMENDATIONS
After having unpacked the appliance, check to ensure that it is not damaged.
In case of doubt, do not use it and consult your supplier or a professionally qualified
technician.
Packing elements (i.e. plastic bags, polystyrene foam, nails, packing straps, etc.) should
not be left around within easy reach of children, as these may cause serious injuries.
■ ATTENTION: please peel plastic cover off both sides and front of the cooker
before use.
■ Do not attempt to modify the technical characteristics of the appliance as this may
cause danger to users.
■ Do not carry out any cleaning or maintenance operations on the appliance without
first disconnecting it from the electric power supply.
■ If you should decide not to use this appliance any longer (or decide to substitute an
older model), before disposing of it, it is recommended that it is made inoperative in
an appropriate manner in accor dance to health and environmental protection regulations, ensuring in particular that all potentially hazardous parts be made harmless,
especially in relation to childr en who could play with unused appliances.
■ After use, always ensure that the contr ol knobs ar e in the off position.
■ The appliance is not intended for use by young children or infirm persons unless they
have been adequately supervised by a responsible person to ensure that they can use
the appliance safely .
■ During and after use of the cooker, certain parts will become very hot. Do not touch
hot parts.
■ Young children should be supervised to ensure that they do not play with the appli-
ance.
■ Some appliances are supplied with a protective film on steel and aluminium parts.
This film must be removed before using the appliance.
■ WARNING
When correctly installed, your product meets all safety requirements laid down
for this type of product category. However special care should be taken around
the rear or the underneath of the appliance as these areas are not designed or
intended to be touched and may contain sharp or rough edges, that may cause
injury.
■ Fire risk! Do not store flammable material in the oven or in the storage com-
partment.
■ Make sure that electrical cords connecting other appliances in the proximity of
the cooker cannot come into contact with the hob or become entrapped in the
oven door.
■ Do not line the oven walls with aluminium foil. Do not place baking trays or the
drip tray on the base of the oven chamber.
■ The manufacturer declines all liability for injury to persons or damage to proper-
ty caused by incorrect or improper use of the appliance.

5
■ The various components of the appliance are recyclable. Dispose of them in
accordance with the regulations in force in your country. If the appliance is to
be scrapped, remove the power cord.
■ Always use oven gloves when removing the shelves and food trays from the
oven whilst hot.
■ Do not hang towels, dishcloths or other items on the cooker or its handle – as
this could be a fire hazard.
■ Clean the oven regularly and do not allow fat or oils to build up in the oven
base or trays. Remove spillages as soon as they occur.
■ Do not stand on the cooker or on the open oven door.
■ Always stand back from the cooker when opening the oven door to allow
steam and hot air to escape before removing the food.
■ This appliance is for domestic use only.
■ WARNING: Taking care NOT to lift the cooker by the door handle.
■ Safe food handling: leave food in the oven for as short a time as possible
before and after cooking. This is to avoid contamination by organisms which
may cause food poisoning. Take particular care during warmer weather.
■ Do not allow heavy or sharp objects to drop on the glass ceramic hob. If the
hob is cracked or otherwise damaged by falling objects etc., disconnect the
electrical power cord and call Customer Service.
■ Do not scratch the hob with sharp objects. Don’t use the hob as a work sur-
face.

6
Cooking hob
1
1
VITROCERAMIC COOKING HOB
1. 3 circuits cooking zone Ø 180 1700 W
2. 3 circuits cooking zone Ø 145 1200 W
3. Oval double cooking zone Ø 145 x 250 1800/1000 W
4. Double cooking zone Ø 210/120 2100/700 W
5. 3 circuits cooking zone Ø 145 1200 W
6. Cooking zone residual heat indicators
NOTE
When the hob temperature is above 60 °C, the corresponding indicator light 6 (Fig.
1.1) will come on to indicate that the hob is hot.
Attention:
Do not use the
ceramic hob
if the glass surface is broken or cracked in any
way. Please disconnect the appliance from the mains and contact the
After-Sales service.
2
1
3
4
6
5
Fig. 1.1

7
A
U
T
O
P
12 45 78
CONTROL PANEL - Controls description
1. Electronic programmer
2. Multifunction oven switch knob
3. Multifunction oven thermostat knob
4. Front left cooking zone control knob
5. Rear left cooking zone control knob
6. Central cooking zone control knob
7. Rear right cooking zone control knob
8. Front right cooking zone control knob
Pilot lamps:
9. Oven thermostat indicator light
10. Ceramic hob ON indicator light
3
9
Fig. 2.1
6
Control panel
2
2
Please note: This appliance incorporates a safety cooling fan which you will hear
operating whenever the oven or grill are in use. This fan is to reduce the external
temperature of the appliance and cool the internal components.
10

8
Electronic programmer
3
3
A
U
T
O
Fig. 3.2
Fig. 3.1
Description of the buttons:
Timer
Cooking time
End of cooking time
Manual position and cancellation of the inserted cooking
programme
Advancement of the numbers
of all programs
Turning back of the numbers of
all programs and changing the
frequency of the audible signal.
Description of the lighted symbols:
AUTO -
flashing
- Programmer in automatic position but not programmed
AUTO -
always lighted
- Programmer in
automatic position with programme inserted.
The electronic programmer is a device that groups together the following functions:
– 24 hour clock with illuminated display
– Timer (up to 23 hours and 59 minutes)
– Programme for automatic oven cooking
– Programme for semi-automatic oven cooking.
Automatic cooking taking place
Timer in operation
and AUTO - flashing - Programme
error.
(The time of day lies between the
calculated cooking start and end
time).
Note: Select a function by the
respective button and, in 5 seconds, set
the required time with the /
buttons (“one-hand” operation).
A power cut zeroes the clock and
cancels the set programmes.
9
Fig. 3.3
Fig. 3.4
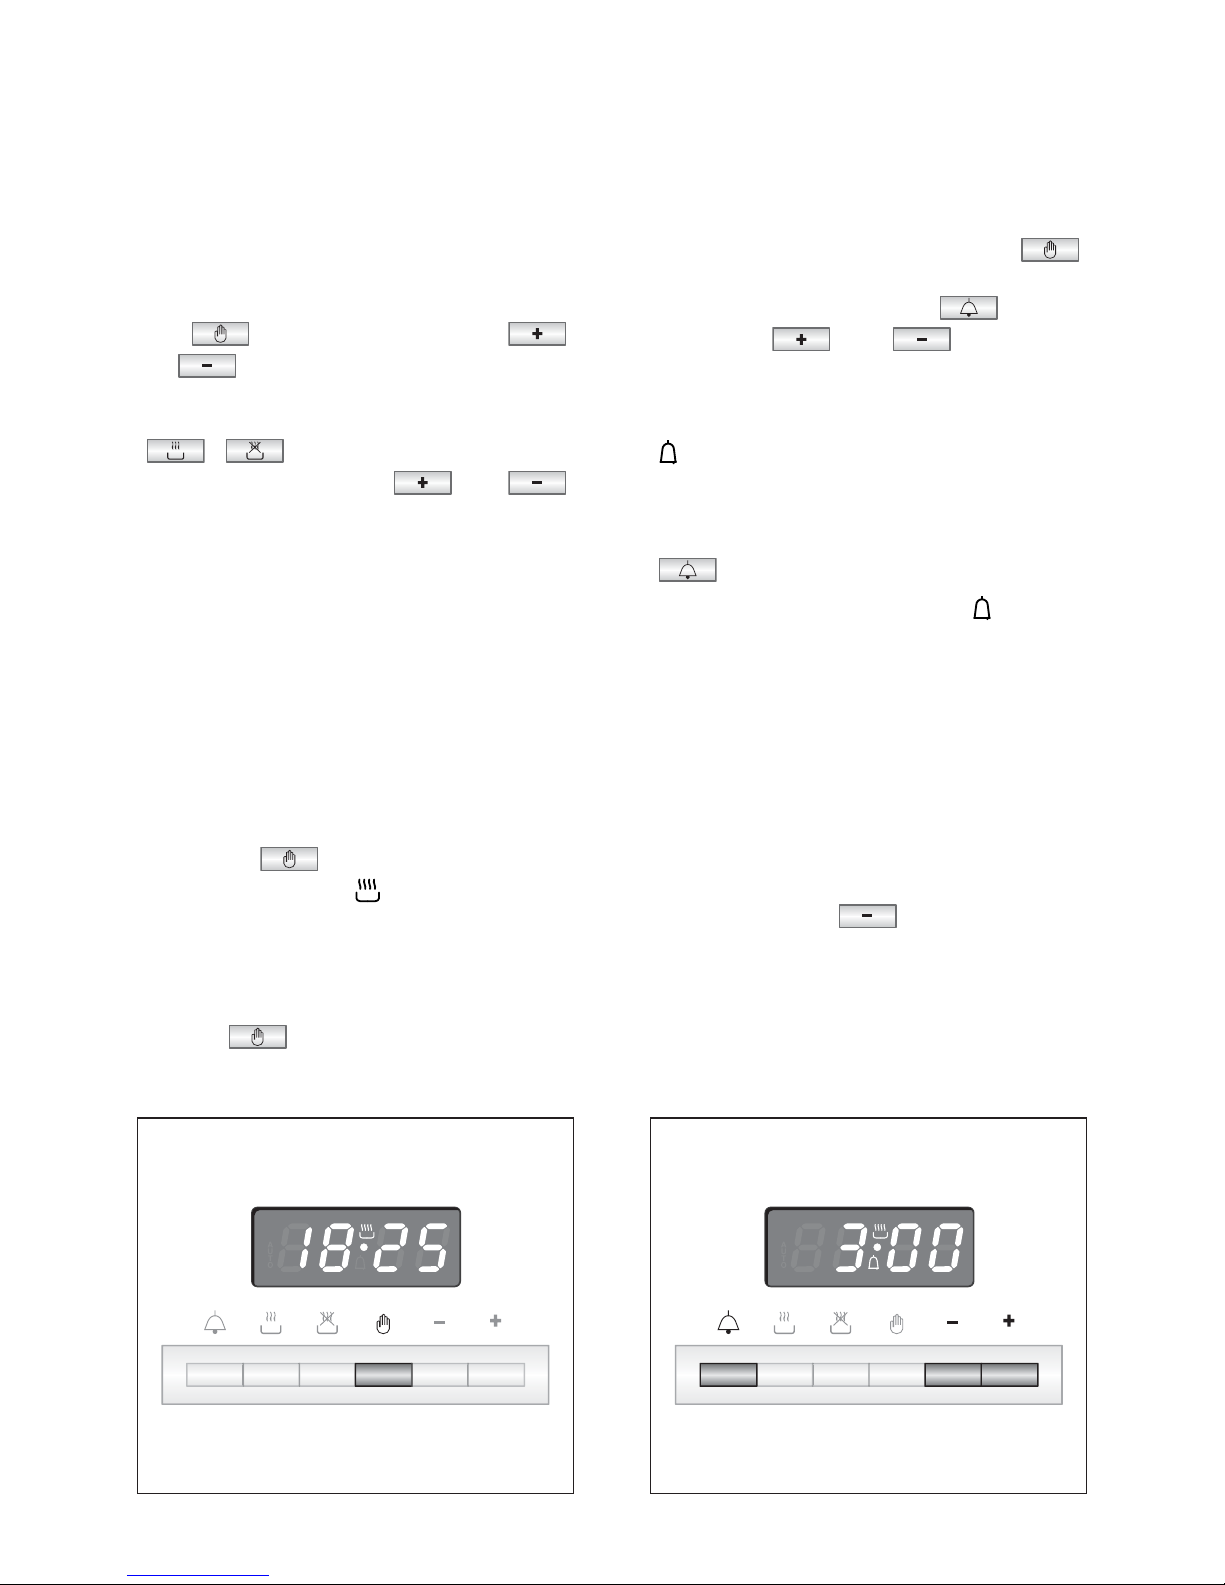
ELECTRONIC CLOCK (fig. 3.2)
The programmer is equipped with an
electronic clock with lighted numbers
which indicate hours and minutes.
Upon immediate connection of the
oven or after a blackout, three zeroes
will flash on the programmer panel.
To set the hour it is necessary to push
the button and then the
or button until you have set the
exact hour (fig. 3.2).
Alternatively, simultaneously push the
two buttons and at the
same time push the or
button.
Note: Setting the clock deletes any
programme.
ELECTRONIC TIMER
The timer programme consists only of a
buzzer which may be set for a
maximum period of 23 hours and 59
minutes.
If the AUTO is flashing push the
button.
To set the time, push the button
and the or until you
obtain the desired time (fig. 3.4).
Having finished the setting, the normal
time will appear on the panel and the
symbol will appear.
The countdown will start immediately
and may be seen at any moment on
the panel by simply pressing the button
.
At the end of the time, the symbol
will be switched off and an intermittent
buzzer will go off; this can be stopped
by pressing any one of the buttons.
ALTERING THE AUDIBLE
SIGNAL
By pressing the button you can
choose from three variations.
NORMAL COOKING
WITHOUT THE USE OF THE
PROGRAMMER
To manually use the oven, that is, without
the aid of the programmer, it is necessary
to cancel the flashing AUTO by pushing
the button (AUTO will be switched
off and the symbol will go on - Fig.
3.3).
Attention: If the AUTO is not flashing
(which means a cooking programme has
already been inserted), by pushing the
button you have cancelled the
programme and switched to manual.
10
Fig. 3.6
Fig. 3.5
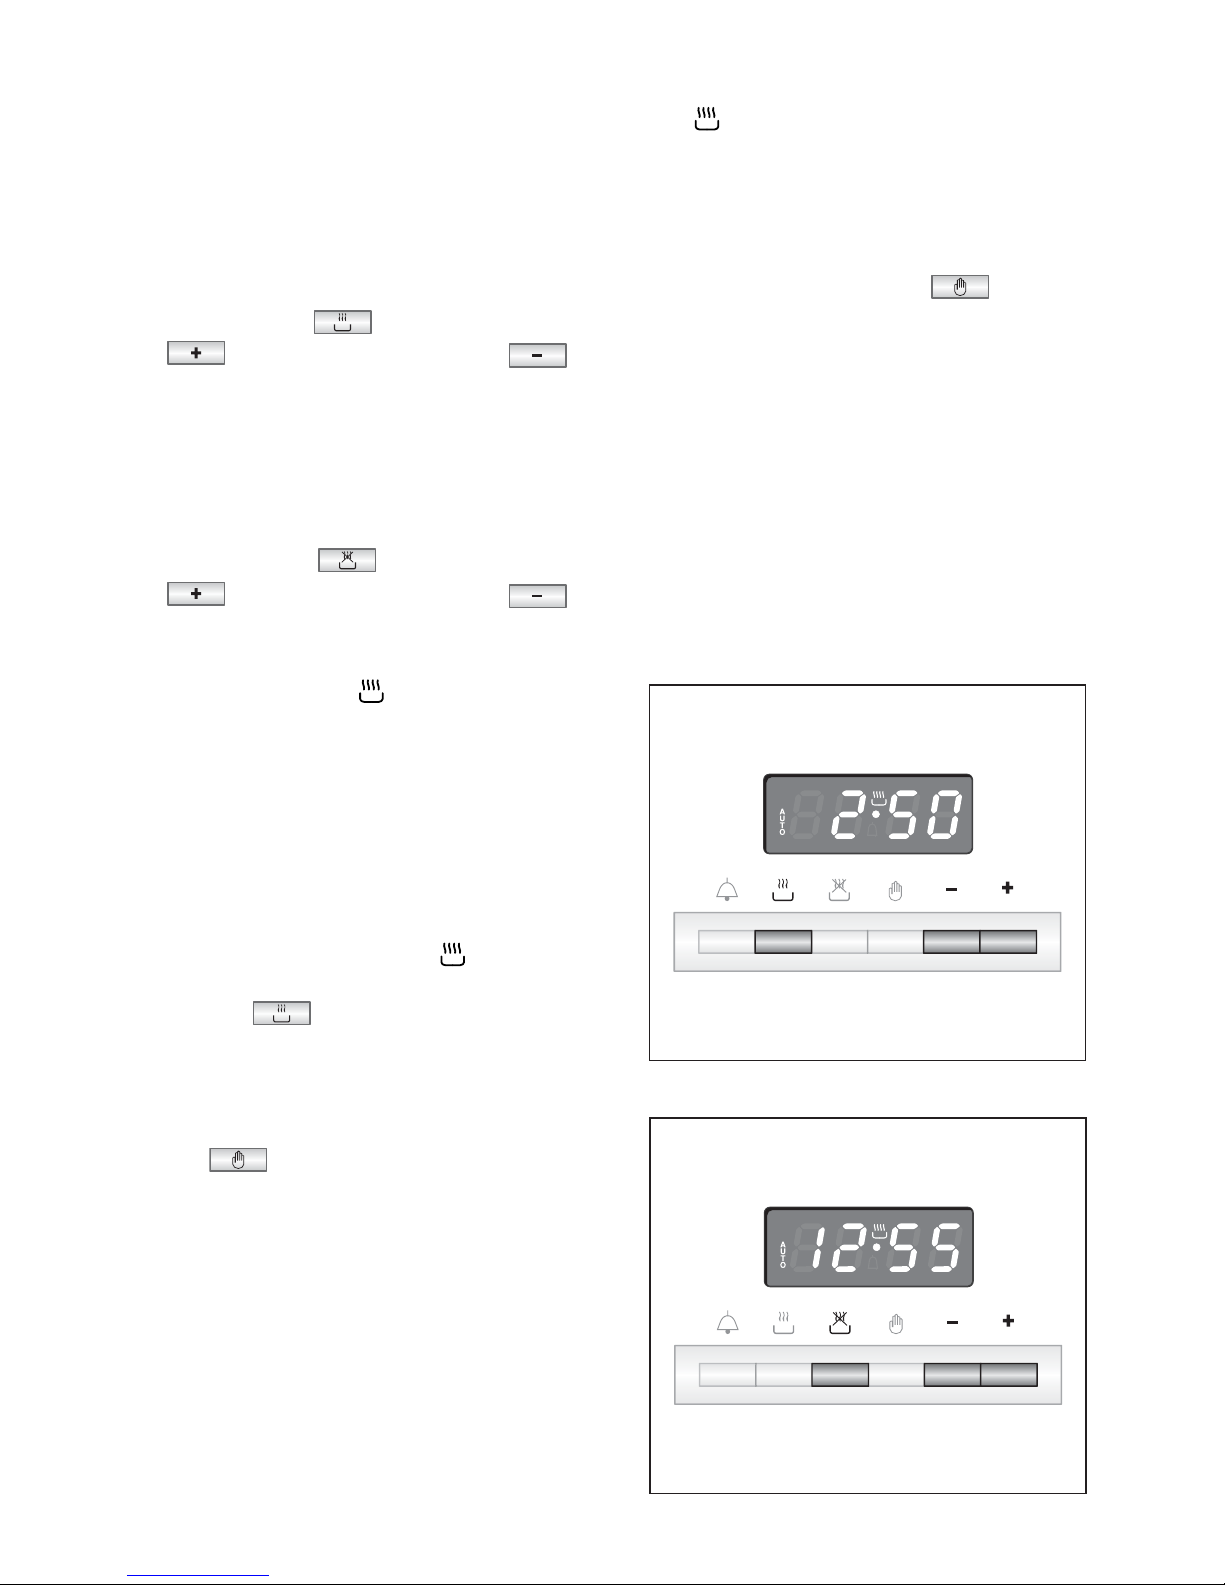
AUTOMATIC OVEN
COOKING
To cook food automatically in the oven,
it is necessary to:
1.Set the length of the cooking time
2.Set the end of the cooking time
3.Set the temperature and the oven
cooking programme.
These operations are done in the
following way:
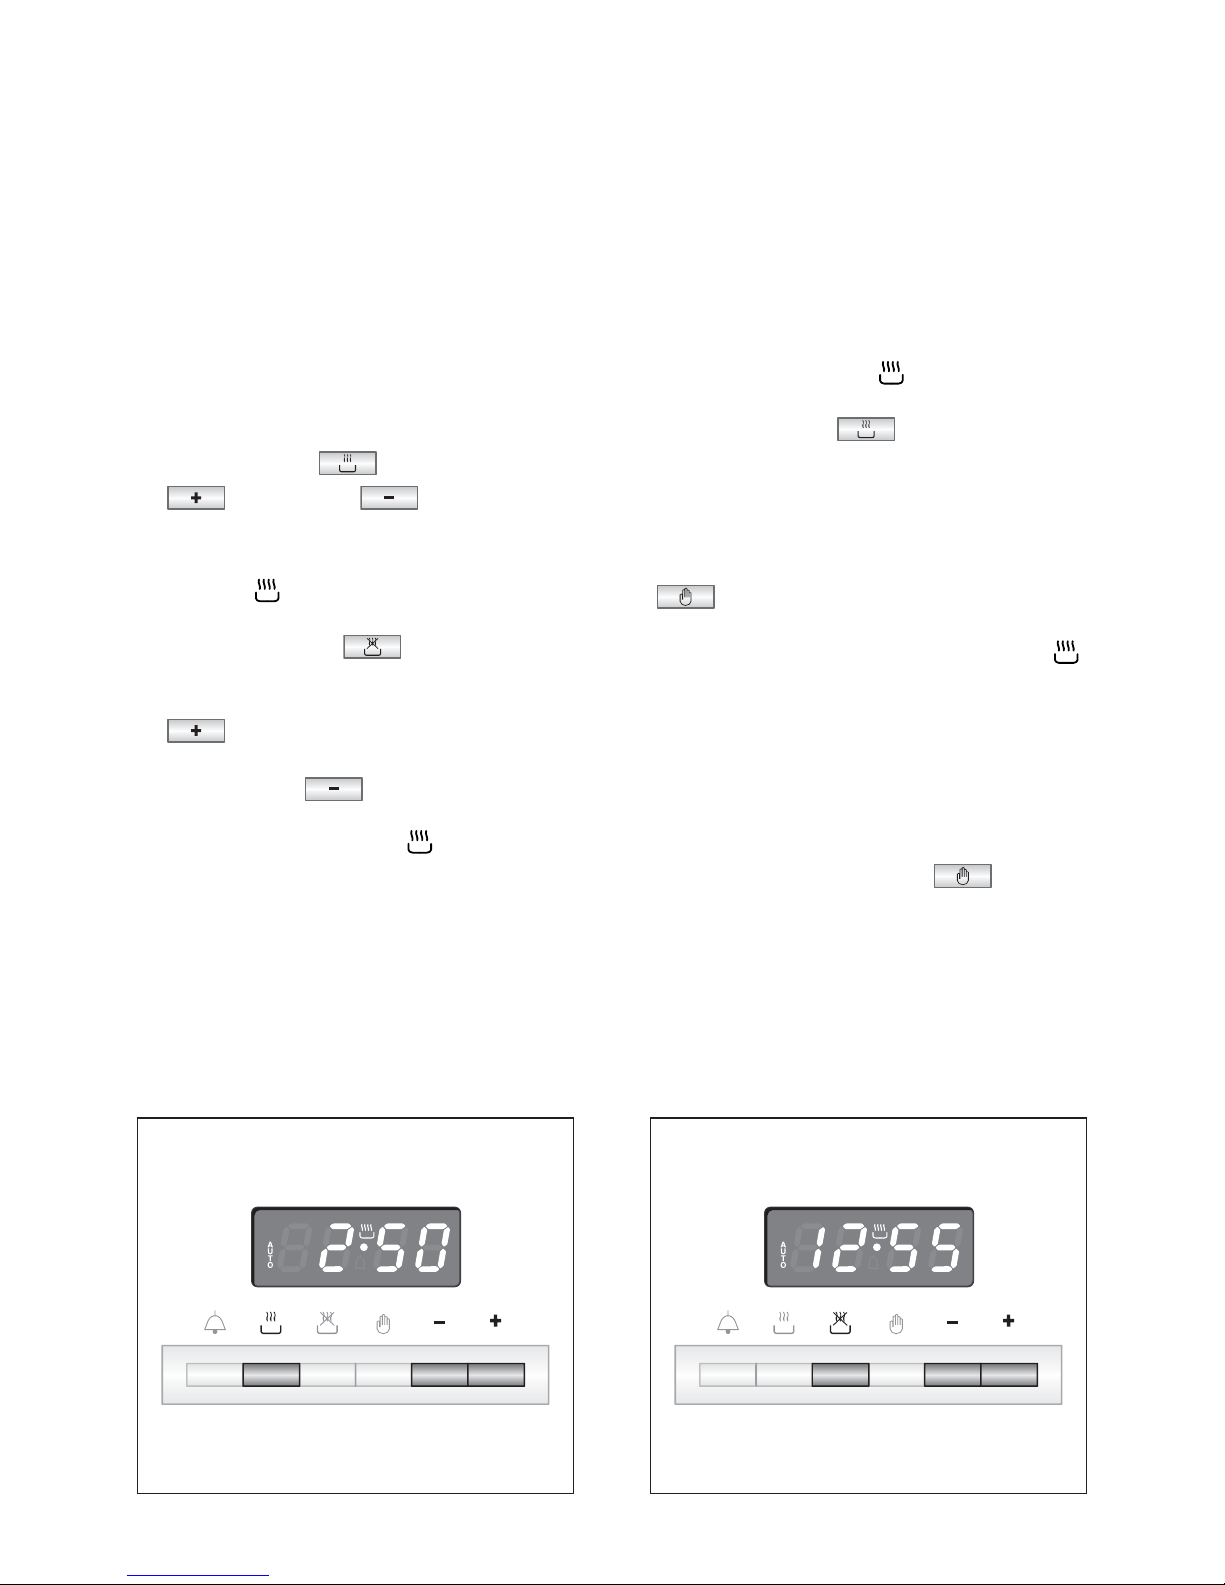
1. Set the length of the cooking time by
pushing the button and the
button to
advance, or
to go back if you have passed the
desired time (fig. 3.5). The AUTO
and the symbol will be on.
2.Set the end of the cooking time by
pressing the button (the
cooking time already added to the
clock time will appear), and the
button (fig. 3.6); if you pass
the desired time you may get back by
pushing the button.
After this setting, the symbol will
go off. If after this setting, the AUTO
flashes on the panel and a buzzer
goes off, it means there was an error
in the programming.
In this case, modify the end of
cooking time or the cooking time
itself by following the above
instructions again.
3.Set the temperature and the cooking
programme by using the switch and
thermostat knobs of the oven (see
specific chapters).
Now the oven is programmed and
everything will work automatically, that
is the oven will turn on at the right
moment to end the cooking at the
established time.
During cooking, the symbol remains
on.
By pushing the button you can
see the time that remains until the end
of cooking.
The cooking programme may be
cancelled in any moment by pushing
.
At the end of the cooking time the
oven will turn off automatically, the
symbol will turn off, AUTO will flash
and a buzzer will sound, which can be
turned off by pushing any of the buttons.
Turn the switch and thermostat knobs
to zero and put the programmer onto
“manual” by pressing the button.
Attention: A power cut makes the
clock go to zero and cancels the set
programmes.
After a power cut three zeroes will flash
on the panel.
11
Fig. 3.7
Fig. 3.8
SEMI-AUTOMATIC
COOKING
This is used to automatically switch off
the oven after the desired cooking time
has elapsed.
There are two ways to set your oven:
1. Set the length of the cooking time by
pushing the button and the
button to advance, or
to go backwards if you have passed
the desired time (Fig. 3.7).
or
2. Set the end of the cooking time by
pushing the button and the
button to advance, or
to go backwards if you have passed
the desired time (Fig. 3.8).
AUTO and the symbol will be
on.
Then set the temperature and the
cooking programme using the oven
switch and thermostat knobs (see
specific chapters).
The oven is switched on and it will
be switched off automatically at the
end of the desired time.
During cooking, the symbol
remains on and by pressing the
button you can see the time
that remains till the end of the
cooking.
The cooking programme can be
cancelled at any moment by pushing
the button.
At the end of cooking, the oven and
the symbol will turn off, the AUTO
will flash and a buzzer will sound; that
can be stopped by pushing any of the
buttons.
Turn the switch and thermostat knobs
to zero and put the programmer onto
“manual” by pressing the button.
12
How to use the vitroceramic hob
4
4
The ceramic surface of the hob allows a
fast transmission of heat in the vertical
direction, from the heating elements
underneath the ceramic glass to the
pans sat on it.
The heat does not spread in the horizontal direction, so that the glass stays
“cool” at only a few centimeters from
the cooking plate.
The 5 cooking plates are shown by
painted disks on the ceramic surface.
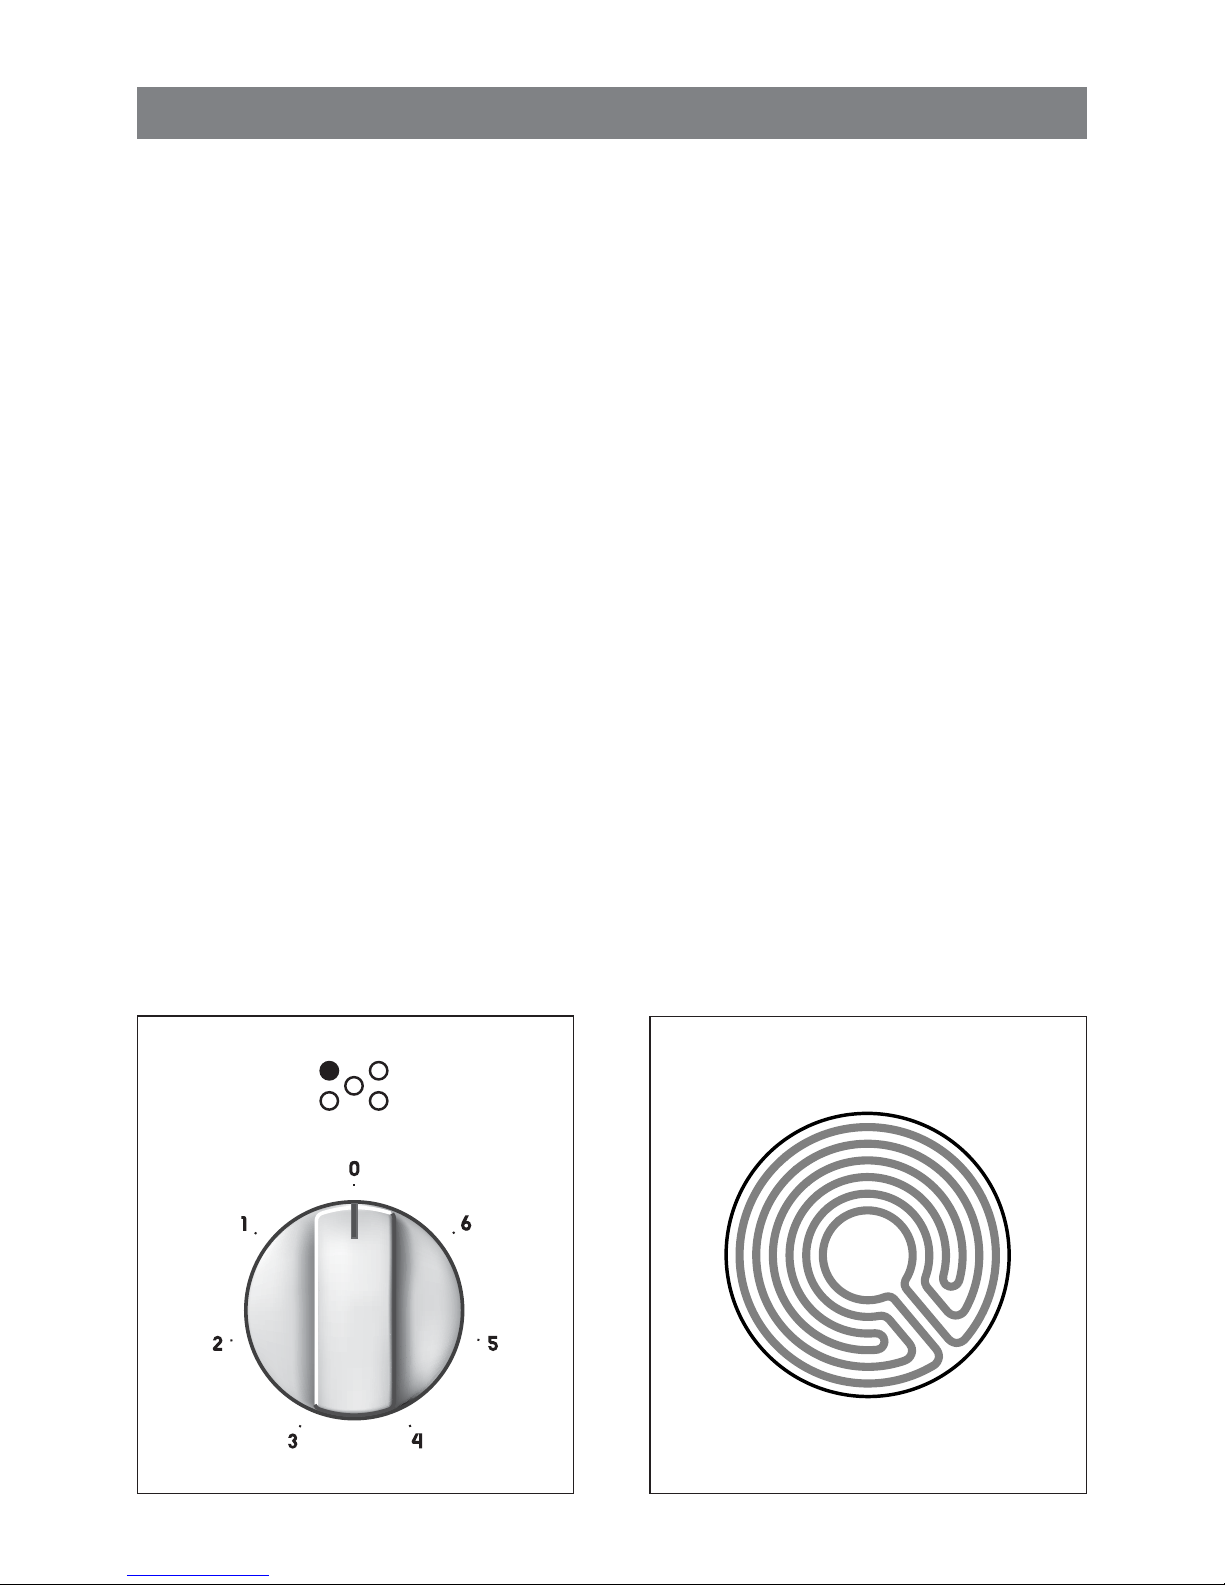
3 CIRCUIT RADIANT ZONES
Incorporating 3 heating elements (fig.
4.2) you can control and light up all 3
together or separately by selecting from
the 6 positions on the control knob (fig.
4.1).
The working temperature required is
reached in a very short time.
IMPORTANT NOTE:
The heating elements incorporate a
thermolimiter that switches the element
ON/OFF during all the settings to protect the ceramic glass from overheating.
The use of incorrect pans and/or
wrong pan positioning will cause the
temperature limiter to operate more frequently, resulting in a reduction of
cooking performance.
Fig. 4.2
Fig. 4.1
 Loading...