

Page 1
Page 1 of 8Spares - MX270 Disassembly & re-assembly instructions
MX270
The following procedures are aimed to help with dismantling and service repairs.
Always disconnect the appliance from mains supply prior to removal of the covers and suitably protect the finish on the
casings.
Click on the pictures to open a larger version in a seperate wind ow.
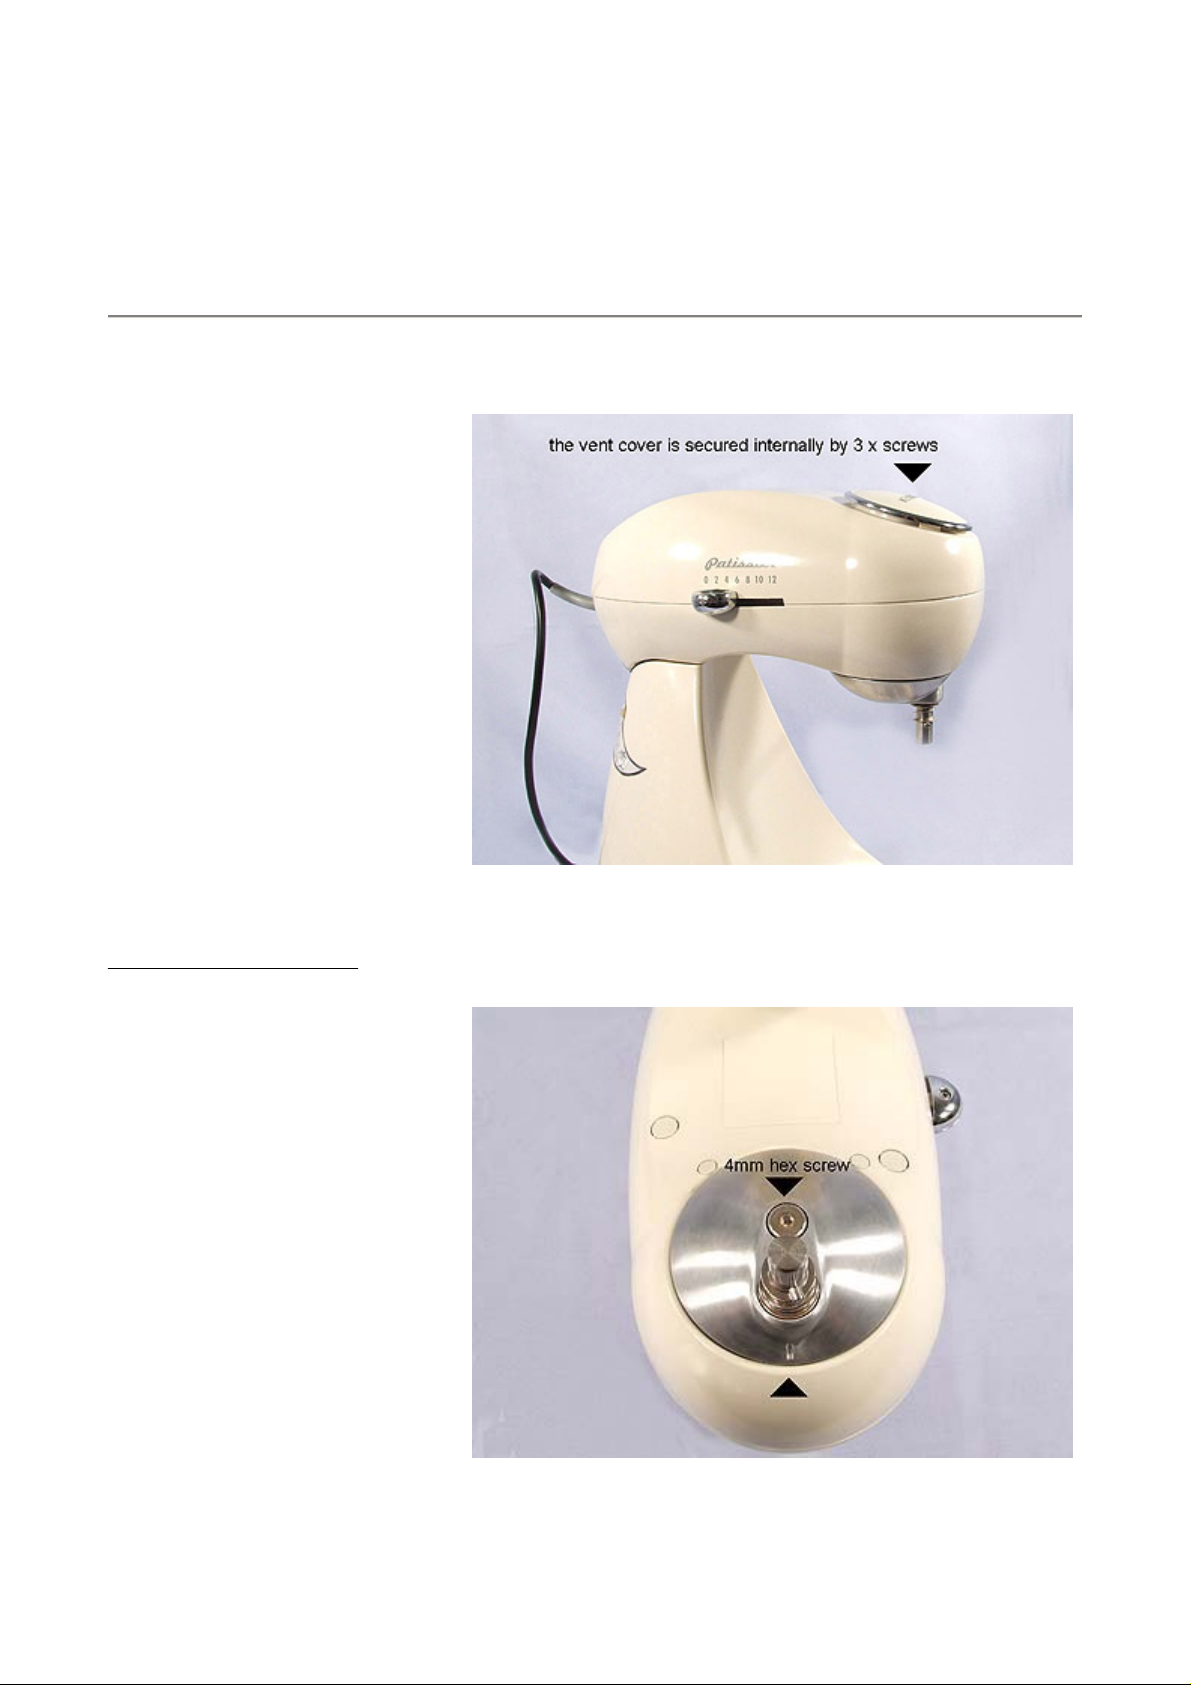
The vent cover is secured internally by
3 screws.
To remove the planet hub:
Align the hub as shown.
30/04/2009http://www.kenwoodservice.co.uk/product-files-kar/guide_MX270.htm
Page 2
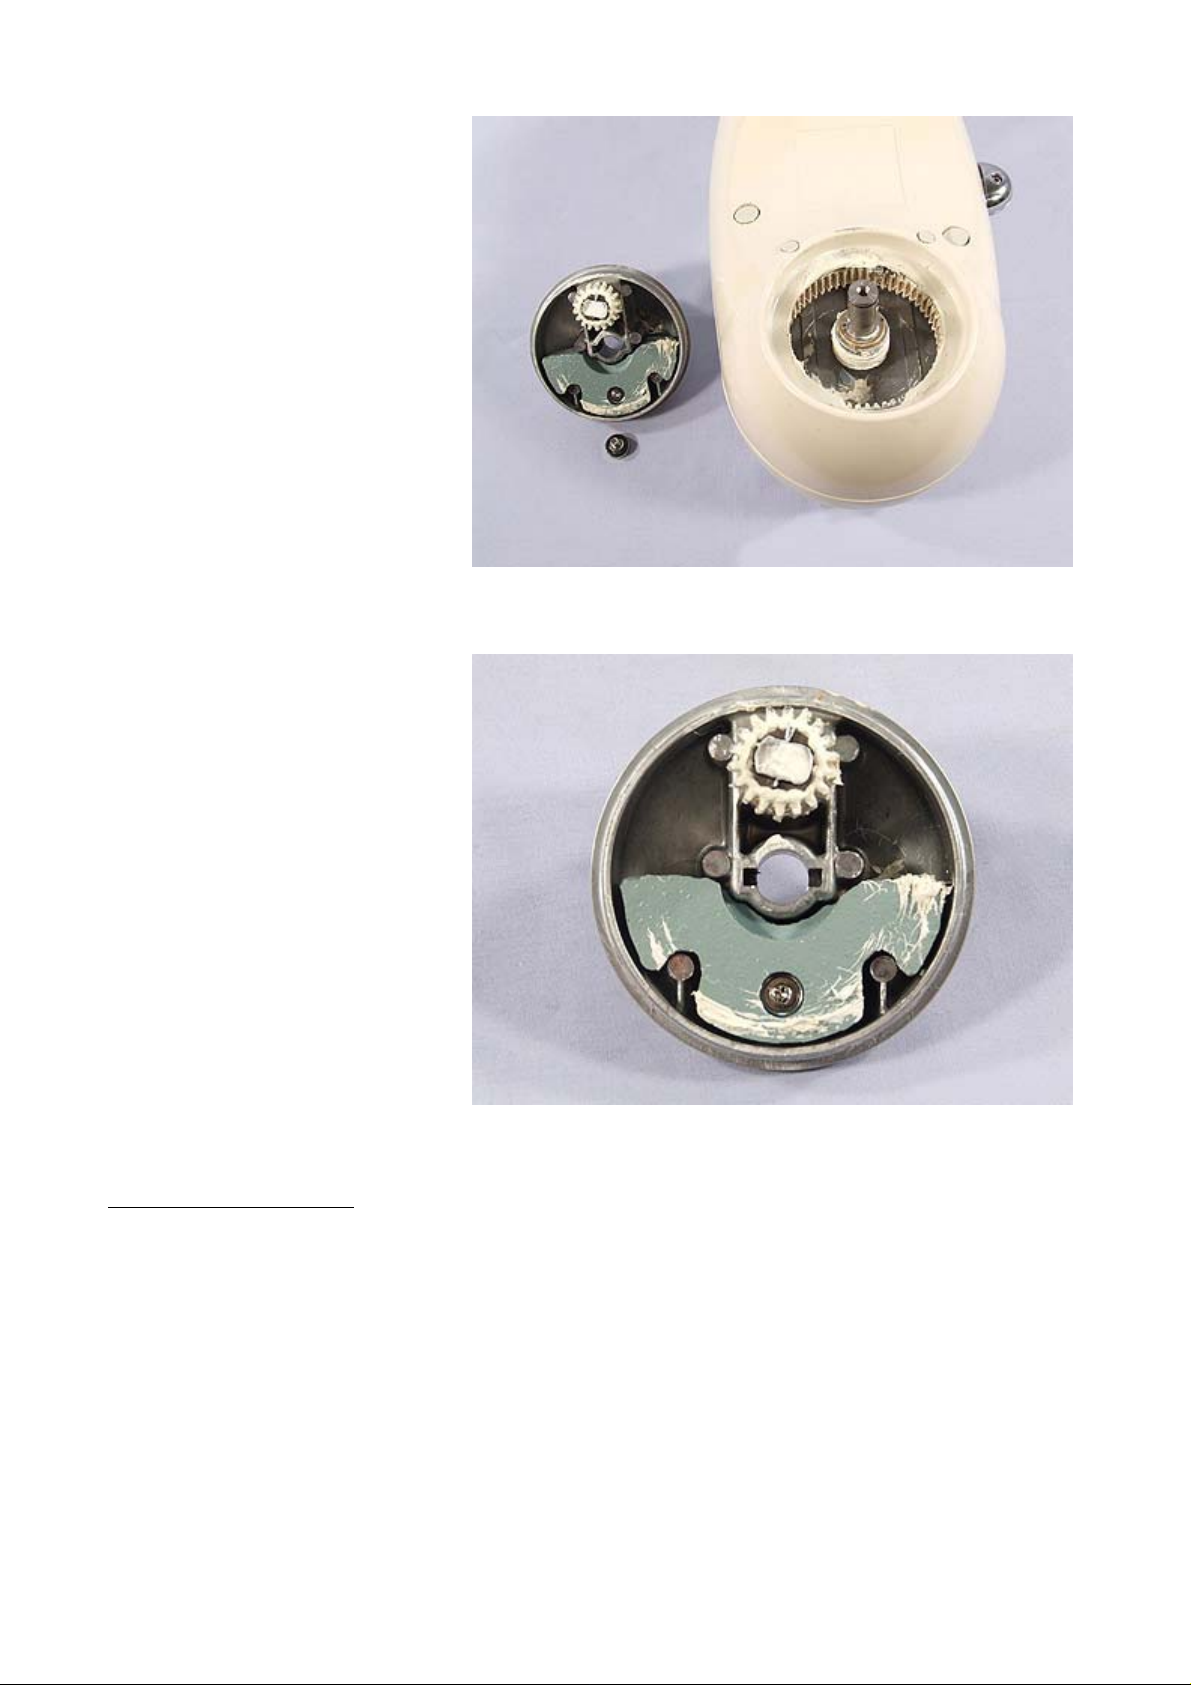
Remove the hex screw, and lift the
hub straight off.
Page 2 of 8Spares - MX270 Disassembly & re-assembly instructions
Internal view of hub assembly.
To access the power unit:
*it will be necessary to remove the pedestal assembly to gain access to the power unit
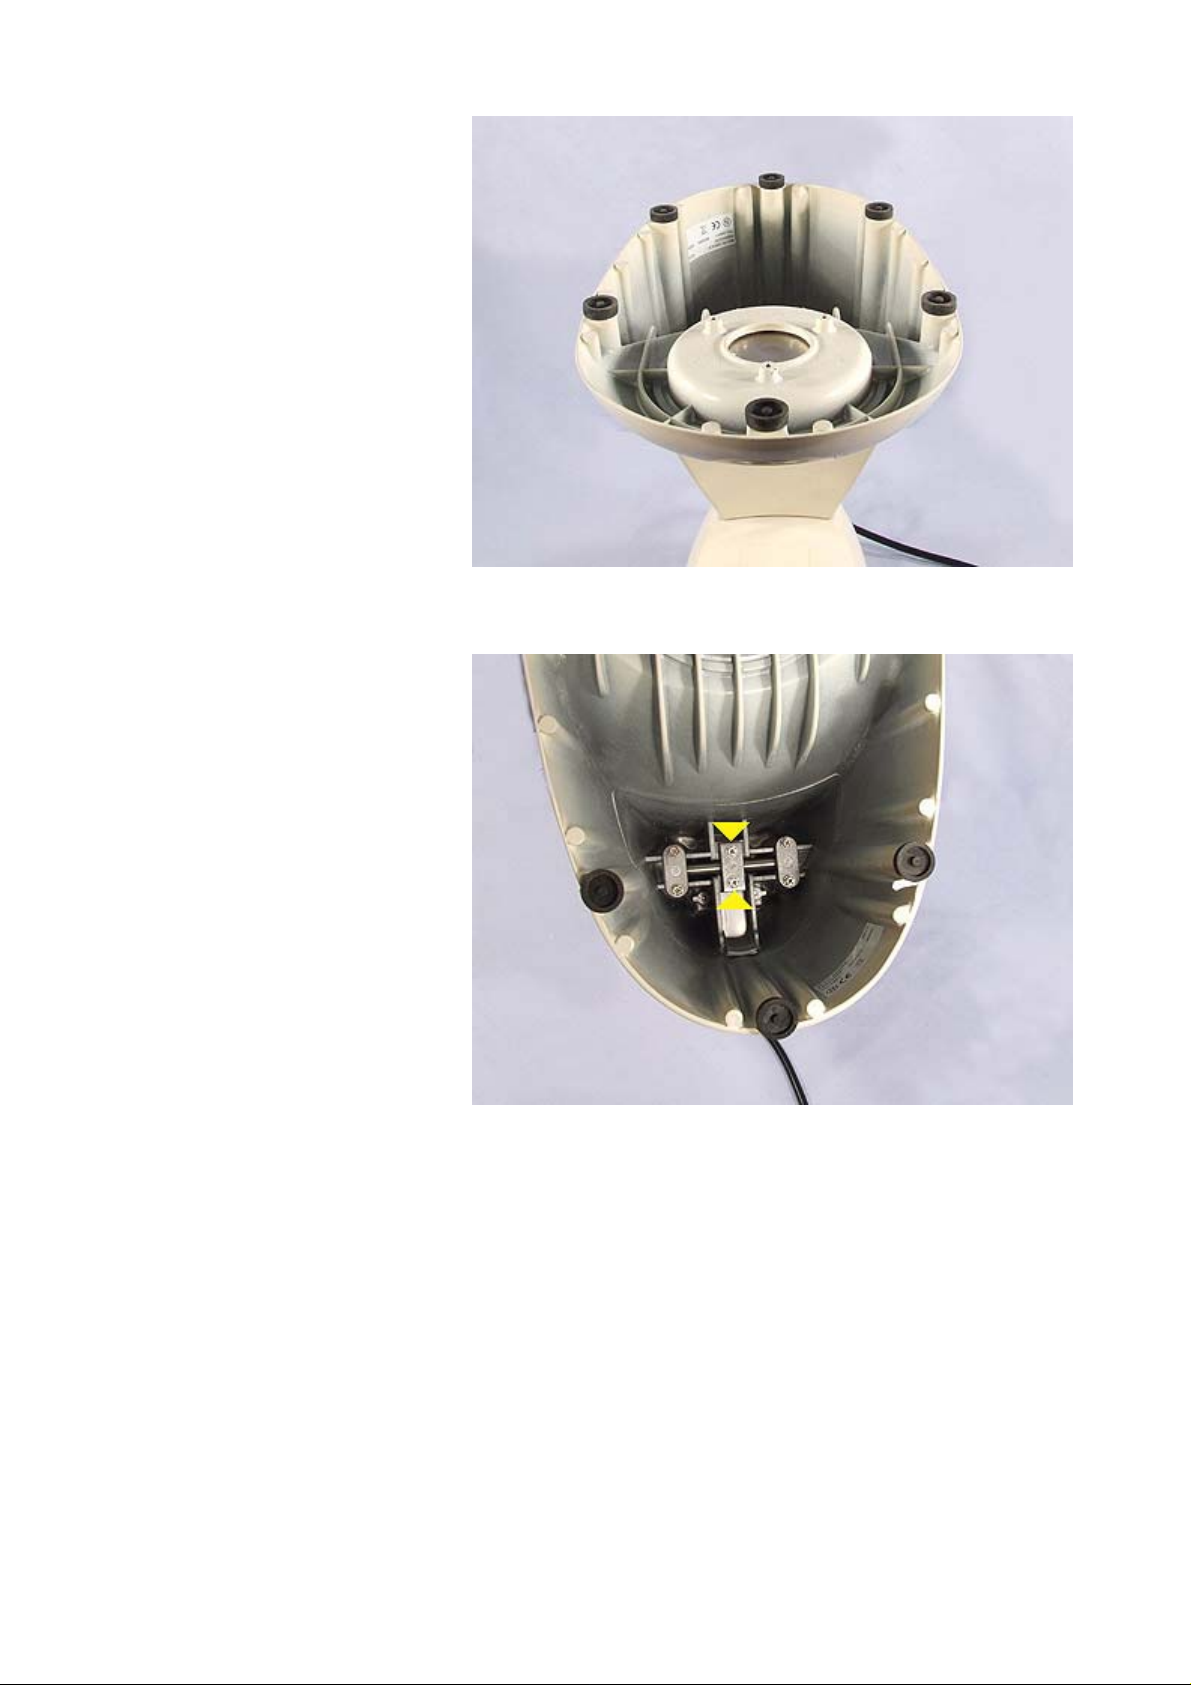
Turn machine upside down.
30/04/2009http://www.kenwoodservice.co.uk/product-files-kar/guide_MX270.htm
Page 3
Page 3 of 8Spares - MX270 Disassembly & re-assembly instructions
Remove the 2 screws highlighted by
the arrows.
Lift off the pedestal assembly.
30/04/2009http://www.kenwoodservice.co.uk/product-files-kar/guide_MX270.htm
Page 4
Page 4 of 8Spares - MX270 Disassembly & re-assembly instructions
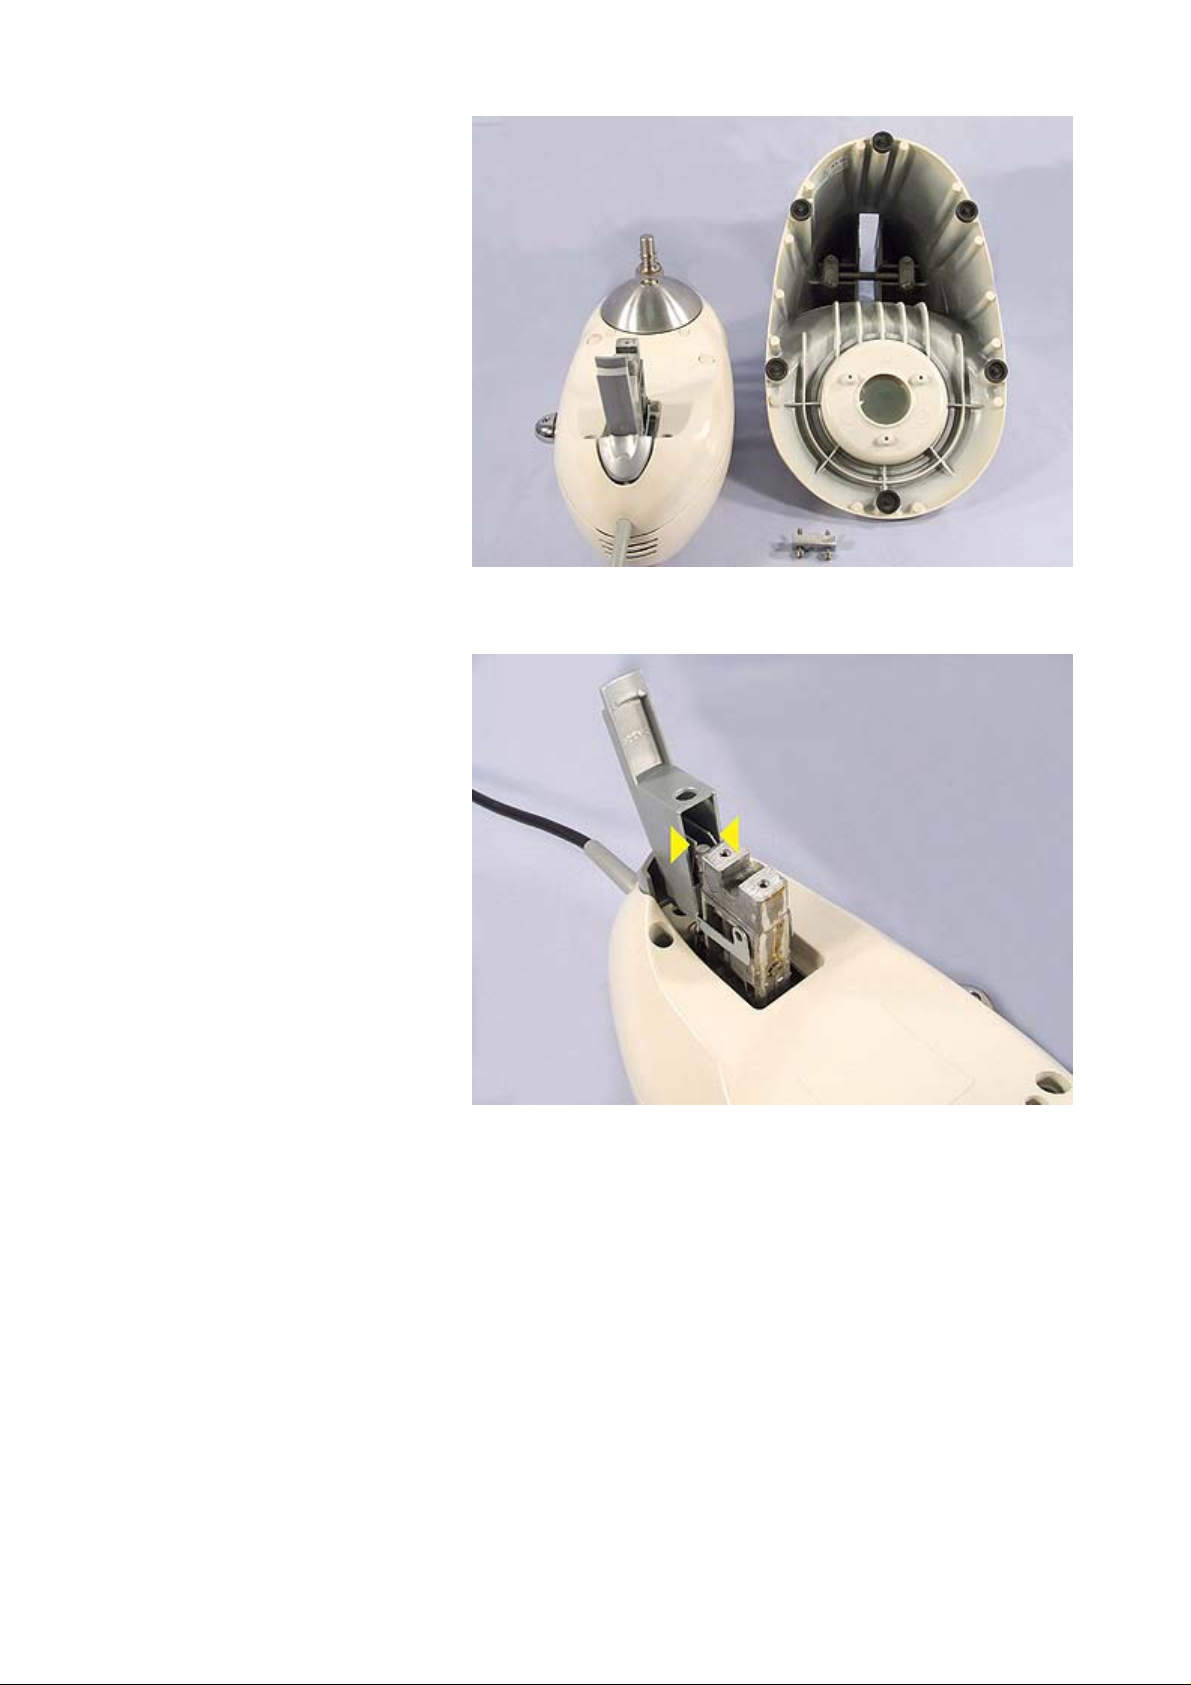
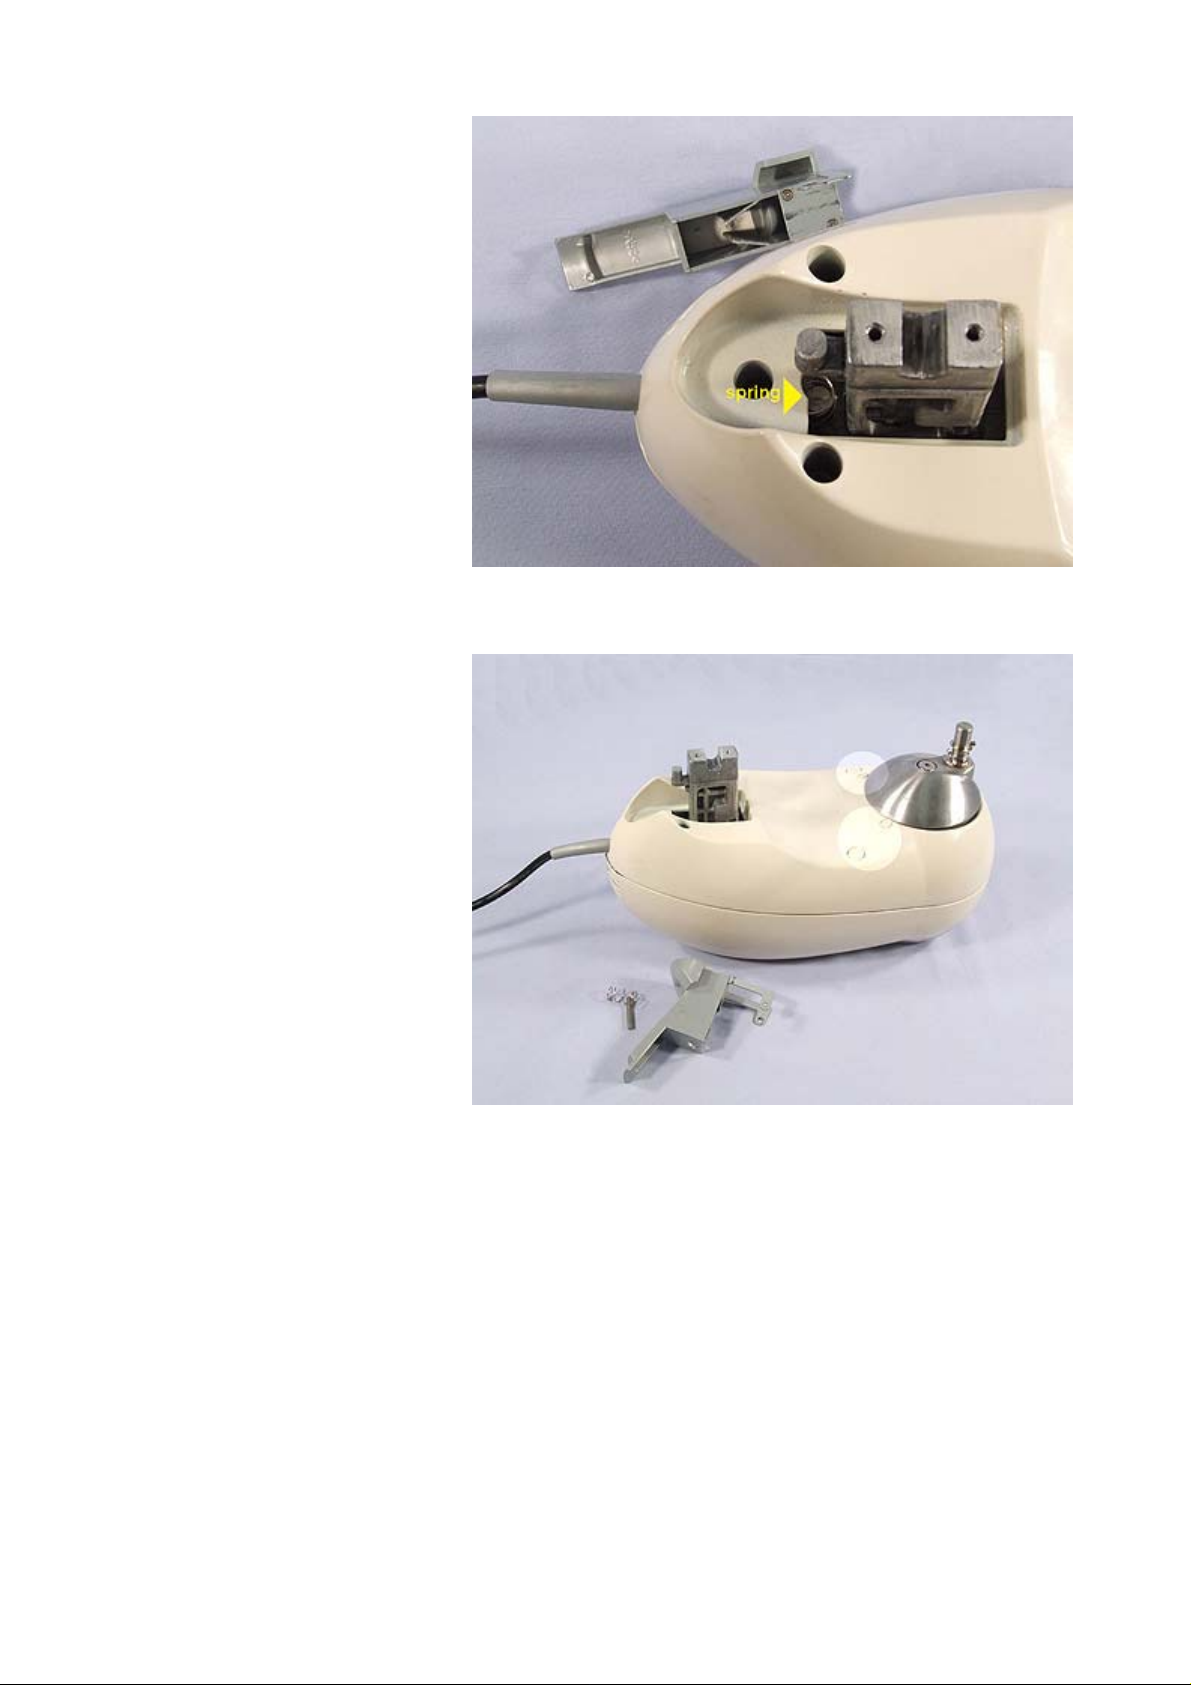
Remove the locating pin, then use a
small flat screwdriver to dislocate the
lugs of the headlift latch.
Please note the correct position of the
spring prior to removal. Then remove
the 3 screws at the rear of the power
unit.
30/04/2009http://www.kenwoodservice.co.uk/product-files-kar/guide_MX270.htm
Page 5
Page 5 of 8Spares - MX270 Disassembly & re-assembly instructions
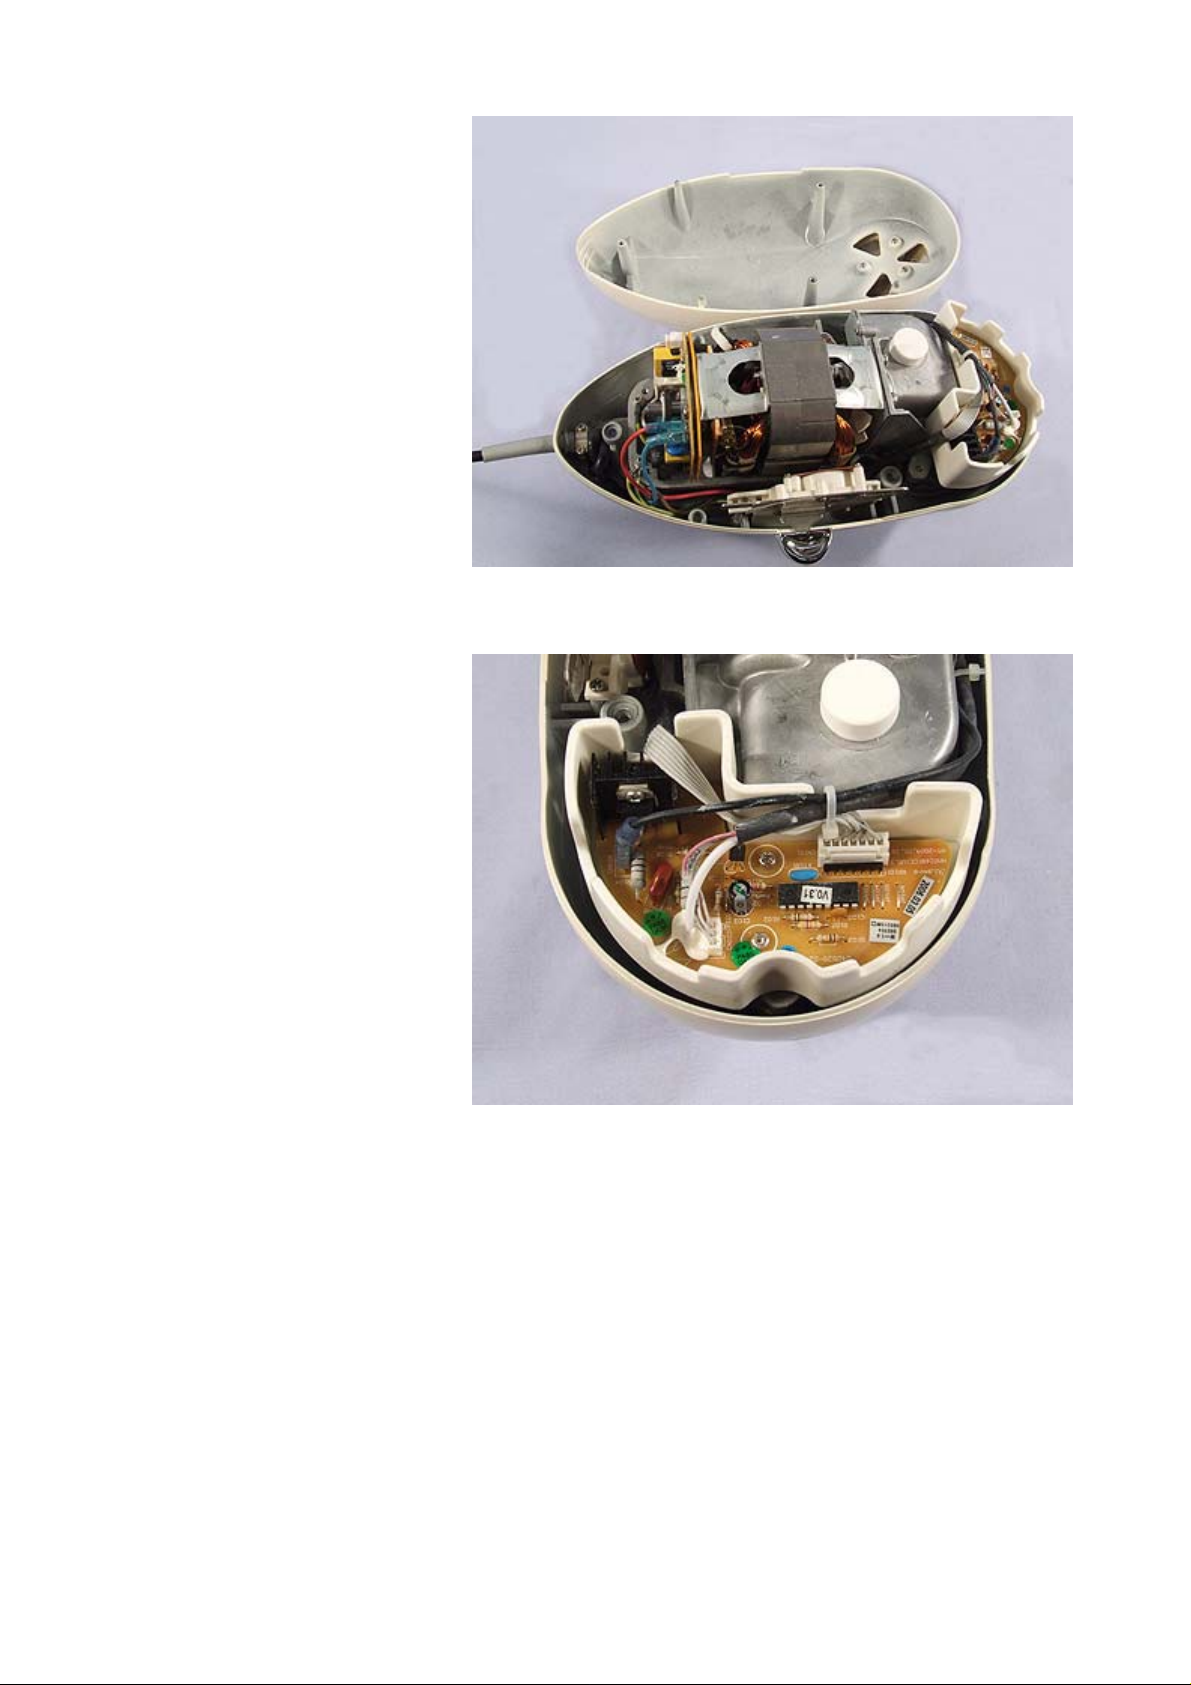
Remove the four screw caps and
screws beneath.
*it is not necessary to remove the hub
at this stage
Turn the power unit upright and lift off
the top cover.
30/04/2009http://www.kenwoodservice.co.uk/product-files-kar/guide_MX270.htm
Page 6
Page 6 of 8Spares - MX270 Disassembly & re-assembly instructions
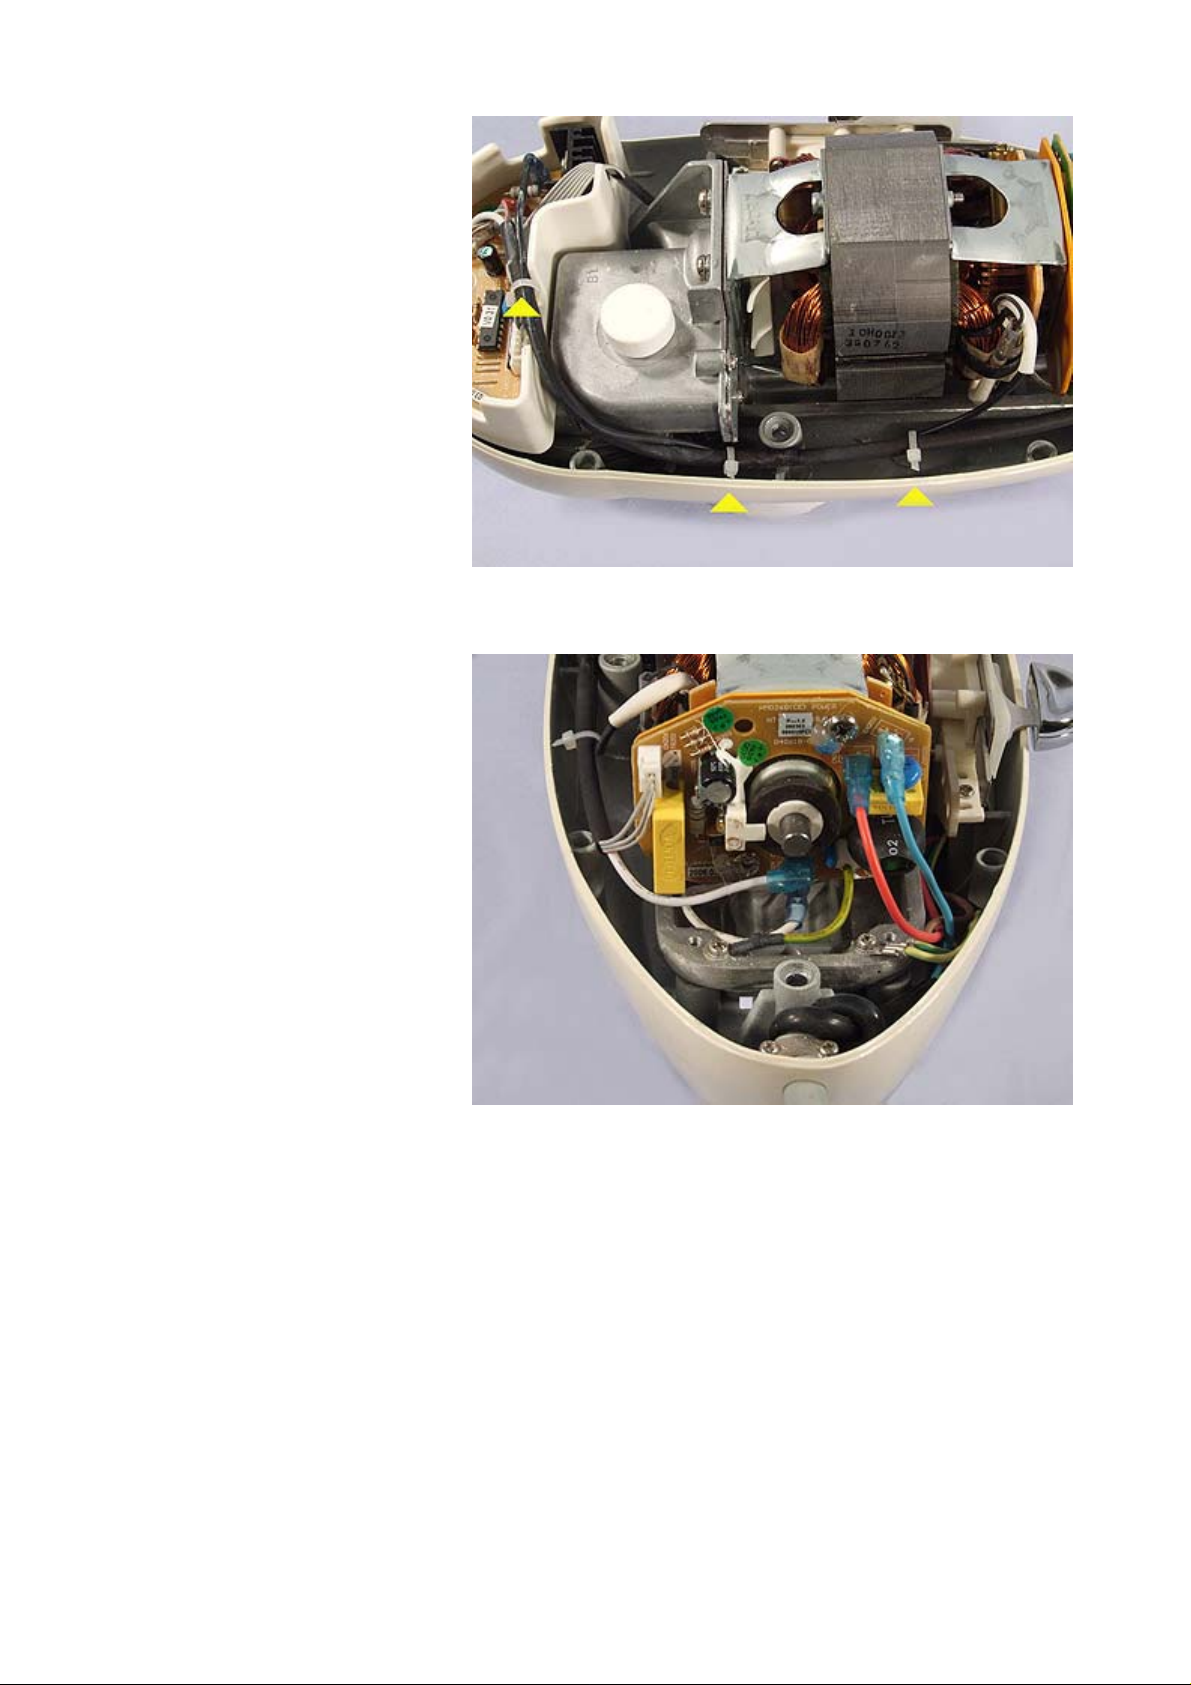
Speed control PCB wiring.
Please note the correct position of the
3 tie wraps.
30/04/2009http://www.kenwoodservice.co.uk/product-files-kar/guide_MX270.htm
Page 7
Page 7 of 8Spares - MX270 Disassembly & re-assembly instructions
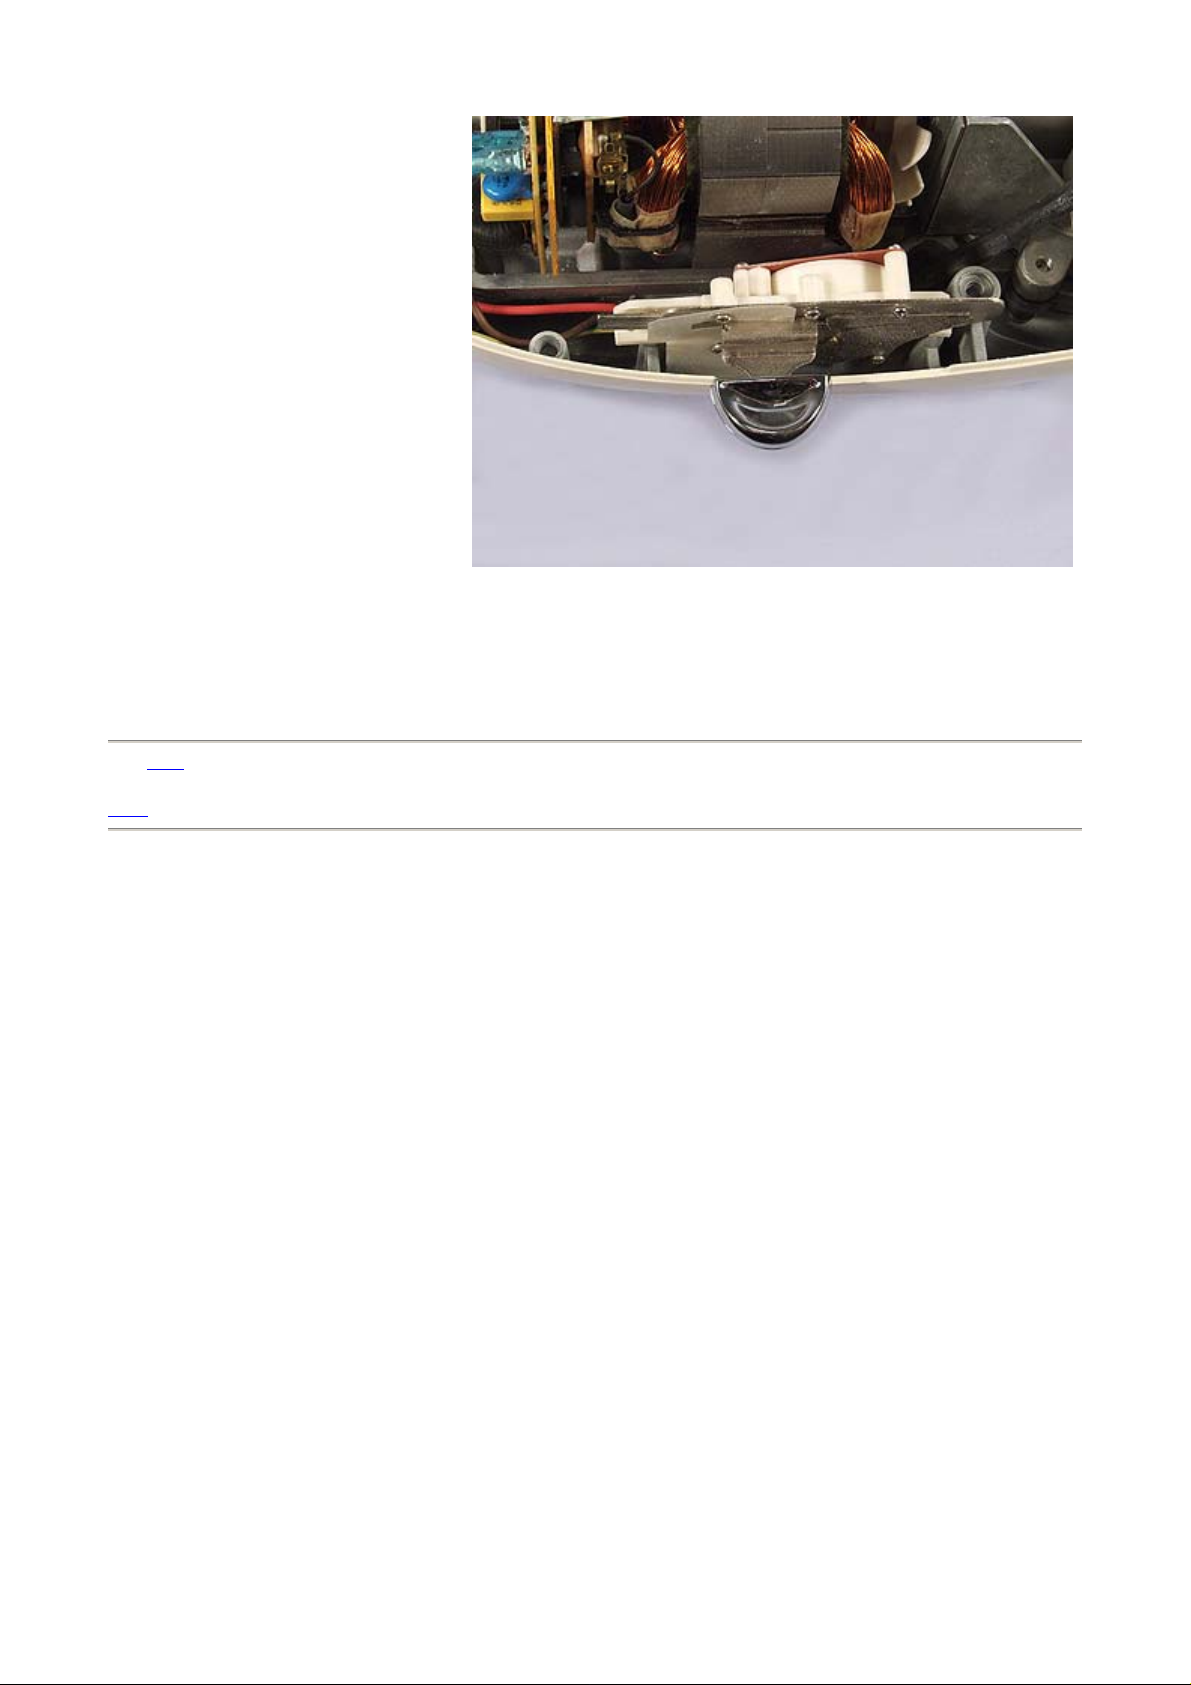
Main PCB wiring.
Speed control switch and lever
assembly.
30/04/2009http://www.kenwoodservice.co.uk/product-files-kar/guide_MX270.htm
Page 8
Page 8 of 8Spares - MX270 Disassembly & re-assembly instructions
Click here to return to the top of the page.
Back.
30/04/2009http://www.kenwoodservice.co.uk/product-files-kar/guide_MX270.htm
 Loading...