

Page 1

Dell Storage vSphere Client Plugin
Version 6.0 Administrator’s Guide
Jan uar y 2 021
Rev . D
Page 2

Notes, cautions, and warnings
NOTE: A NOTE indicates important information that helps you make better use of your product.
CAUTION: A CAUTION indicates either potential damage to hardware or loss of data and tells you how to avoid
the problem.
WARNING: A WARNING indicates a potential for property damage, personal injury, or death.
© 2020 – 2021 Dell Inc. or its subsidiaries. All rights reserved . D ell , E MC, and other trademarks are trademarks of Dell Inc. or its
subsidiaries. Other trademarks may be trademarks of their respec tiv e o wne rs.
Page 3

Preface
The Dell Storage vSphere Client Plugin Administrator’s Guide provides instructions for installing, configuring, and using the Dell
Storage vSphere Client Plugin. The plugin provides management of Dell storage with the VMware vSphere Client.
Revision History
Document Number: 680-054-010
Revision Date Description
A March 2020 Initial release
B April 2020 Clarify VMware vCenter Server support
C June 2020 Update supported VMware versions
D January 2021 Update supported software versions
Audience
The intended audience of this guide is information technology professionals who have intermediate to expert knowledge of both
Dell Storage Centers and Dell Storage Manager. This guide also assumes administrative working knowledge of VMware vSphere
Client, VMware vCenter, and VMware ESXi.
Related Publications
In addition to this guide, the following documentation is available for client applications used with Dell Storage products:
● Dell Storage vSphere Client Plugin Release Notes
Describes new enhancements and known issues for the Dell Storage vSphere Client Plugin.
● Dell Storage Integration Tools for VMware Administrator’s Guide
Provides instructions for deploying and configuring the Dell Storage vSphere Client Plugin.
● Dell Storage Integration Tools for VMware Release Notes
Describes the new features and enhancements in the latest version of DSITV.
● Storage Manager Administrator’s Guide
Provides instructions for using the Storage Manager software.
● Unisphere and Unisphere Central Administrator’s Guide
Provides instructions and information for managing storage systems using Unisphere and Unisphere Central.
Contacting Dell
Dell provides several online and telephone-based support and service options. Availability varies by country and product, and
some services might not be available in your area.
To contact Dell for sales, technical support, or customer service issues, go to Dell.com/support.
● For customized support, type your system service tag on the support page and click Submit.
● For general support, browse the product list on the support page and select your product.
Page 4

Contents
Chapter 1: Getting Started............................................................................................................ 6
Key Features.........................................................................................................................................................................6
Requirements for the vSphere Client Plugin................................................................................................................ 6
Software Requirements............................................................................................................................................... 6
Replication Requirements for VMFS Datastores....................................................................................................7
Configuring Dell Storage vSphere Client Plugin...........................................................................................................7
VASA Provider......................................................................................................................................................................8
Registering VASA provider.......................................................................................................................................... 9
Unregistering VASA provider...................................................................................................................................... 9
Managing the vSphere Client Plugin............................................................................................................................. 10
Changing vCenter and Dell Storage Manager Credentials.................................................................................10
Displaying Storage Center Information....................................................................................................................11
Disabling and Enabling the vSphere Client Plugin................................................................................................ 12
Chapter 2: Working With Dell Storage.......................................................................................... 13
Introduction to Dell Storage............................................................................................................................................ 13
Creating and Managing VMFS Datastores on Storage Centers.............................................................................14
Adding a VMFS Datastore ........................................................................................................................................ 14
Editing Volume Settings............................................................................................................................................. 16
Expanding a Datastore................................................................................................................................................ 17
Removing a Datastore................................................................................................................................................. 17
Configuring, Creating, and Recovering Snapshots.................................................................................................... 18
Applying a Snapshot Profile for a Datastore......................................................................................................... 18
Taking a Snapshot of a Datastore............................................................................................................................18
Deleting Snapshots for a Datastore.........................................................................................................................18
Recovering a Datastore From a Storage Center Snapshot............................................................................... 19
Create and Manage Replications and Live Volumes..................................................................................................19
Replication Operations............................................................................................................................................... 20
Live Volume Operations............................................................................................................................................. 22
Chapter 3: Working With Virtual Machines.................................................................................. 26
Deploy Virtual Machines to an Existing VMFS Datastore....................................................................................... 26
Deploy Virtual Machines to a New VMFS Datastore................................................................................................ 27
Chapter 4: Viewing Dell Storage Information............................................................................... 29
Viewing the Host Settings.............................................................................................................................................. 29
Connectivity Legend...................................................................................................................................................29
Adapter Details.............................................................................................................................................................30
Storage Details.............................................................................................................................................................30
Configuring Storage Center Connections.................................................................................................................... 31
Using Dell Storage Views................................................................................................................................................. 31
Viewing General Information..................................................................................................................................... 31
Viewing Usage Statistics........................................................................................................................................... 33
Viewing Connectivity Information........................................................................................................................... 34
4 Contents
Page 5

Viewing Volume Snapshots....................................................................................................................................... 35
Viewing Protocol Endpoints...................................................................................................................................... 36
Viewing Replications and Live Volumes................................................................................................................. 37
Viewing Dell Storage Charts........................................................................................................................................... 39
Dell Storage-Charts View.......................................................................................................................................... 39
Contents 5
Page 6

Getting Started
The Dell Storage vSphere Client Plugin provides management of Dell Storage
NOTE: Use the VMware vSphere Client to perform all procedures in this guide, unless instructed otherwise.
Topics:
• Key Features
• Requirements for the vSphere Client Plugin
• Configuring Dell Storage vSphere Client Plugin
• VASA Provider
• Managing the vSphere Client Plugin
Key Features
The Dell Storage vSphere Client Plugin provides these functions:
● Adding and removing VMFS storage, such as datastores on Storage Centers
● Provisioning virtual machines on Dell Storage
● Configuring VMware ESXi hosts on Dell Storage
● Creating and managing Storage Center Replays for VMFS datastores
● Replicating VMFS datastores between Storage Centers
● Adding and managing Live Volumes
● Recovering VMFS datastores from VMFS datastore Replays
In addition, the vSphere Client Plugin displays information tabs within the VMware vSphere Client inventory views.
1
Requirements for the vSphere Client Plugin
Hardware and software requirements must be met before installing the Dell Storage vSphere Client Plugin. Also, Storage Center
requirements must be met to replicate data.
Software Requirements
Dell Storage vSphere Client Plugin is compatible with the products that are listed in the following table:
Product
Dell Storage Manager 2018 R1, 2019 R1, 2020 R1
Storage Center 7.2.x, 7.3.x, 7.4.x
VMware ESXi 6.5, 6.7, 7.0
VMware vCenter Server (vCSA) 6.5, 6.7, 7.0
NOTE: Microsoft Windows vCenter Server is not supported.
Versions
6 Getting Started
Page 7

Replication Requirements for VMFS Datastores
To replicate data from one Storage Center to another, ensure that the following requirements are met:
● Storage Center: Both the source and destination Storage Centers must be configured in Dell Storage Manager or Unisphere.
They must be configured for the Dell Storage Manager or Unisphere user credentials that are supplied to the vSphere Client
Plugin.
● QoS Definition: A Quality of Service (QoS) definition must be set up on the source Storage Center for replication. See the
Dell Storage Manager Administrator’s Guide for instructions on creating QoS definitions.
If you are using iSCSI connections for replications:
The destination Storage Center must be defined as an iSCSI Remote System on the source Storage Center.
●
● The source Storage Center must be defined as an iSCSI Remote Connection on the destination Storage Center.
See the Dell Storage Manager Administrator’s Guide or Unisphere and Unisphere Central Administrator's Guide for instructions
on configuring iSCSI connections between Storage Centers.
Configuring Dell Storage vSphere Client Plugin
Configure the Dell Storage vSphere Client Plugin to communicate with a Dell Storage Manager server.
Getting Started 7
Page 8
Prerequisites
Install the Dell Storage Integration Tools for VMware (DSITV), and register the Dell Storage vSphere Client Plugin with a
vCenter server as described in the Dell Storage Integration Tools for VMware Administrator’s Guide.
NOTE: This version of vSphere Client Plugin supports only VMware vCenter Server Appliance. Microsoft Windows vCenter
Server is not supported.
Steps
1. Log in to the vSphere Client.
2. In the vSphere Client window, select Menu and click
3. In the Administration pane, click Dell Storage.
4. Click the Manage tab.
5. Click Update.
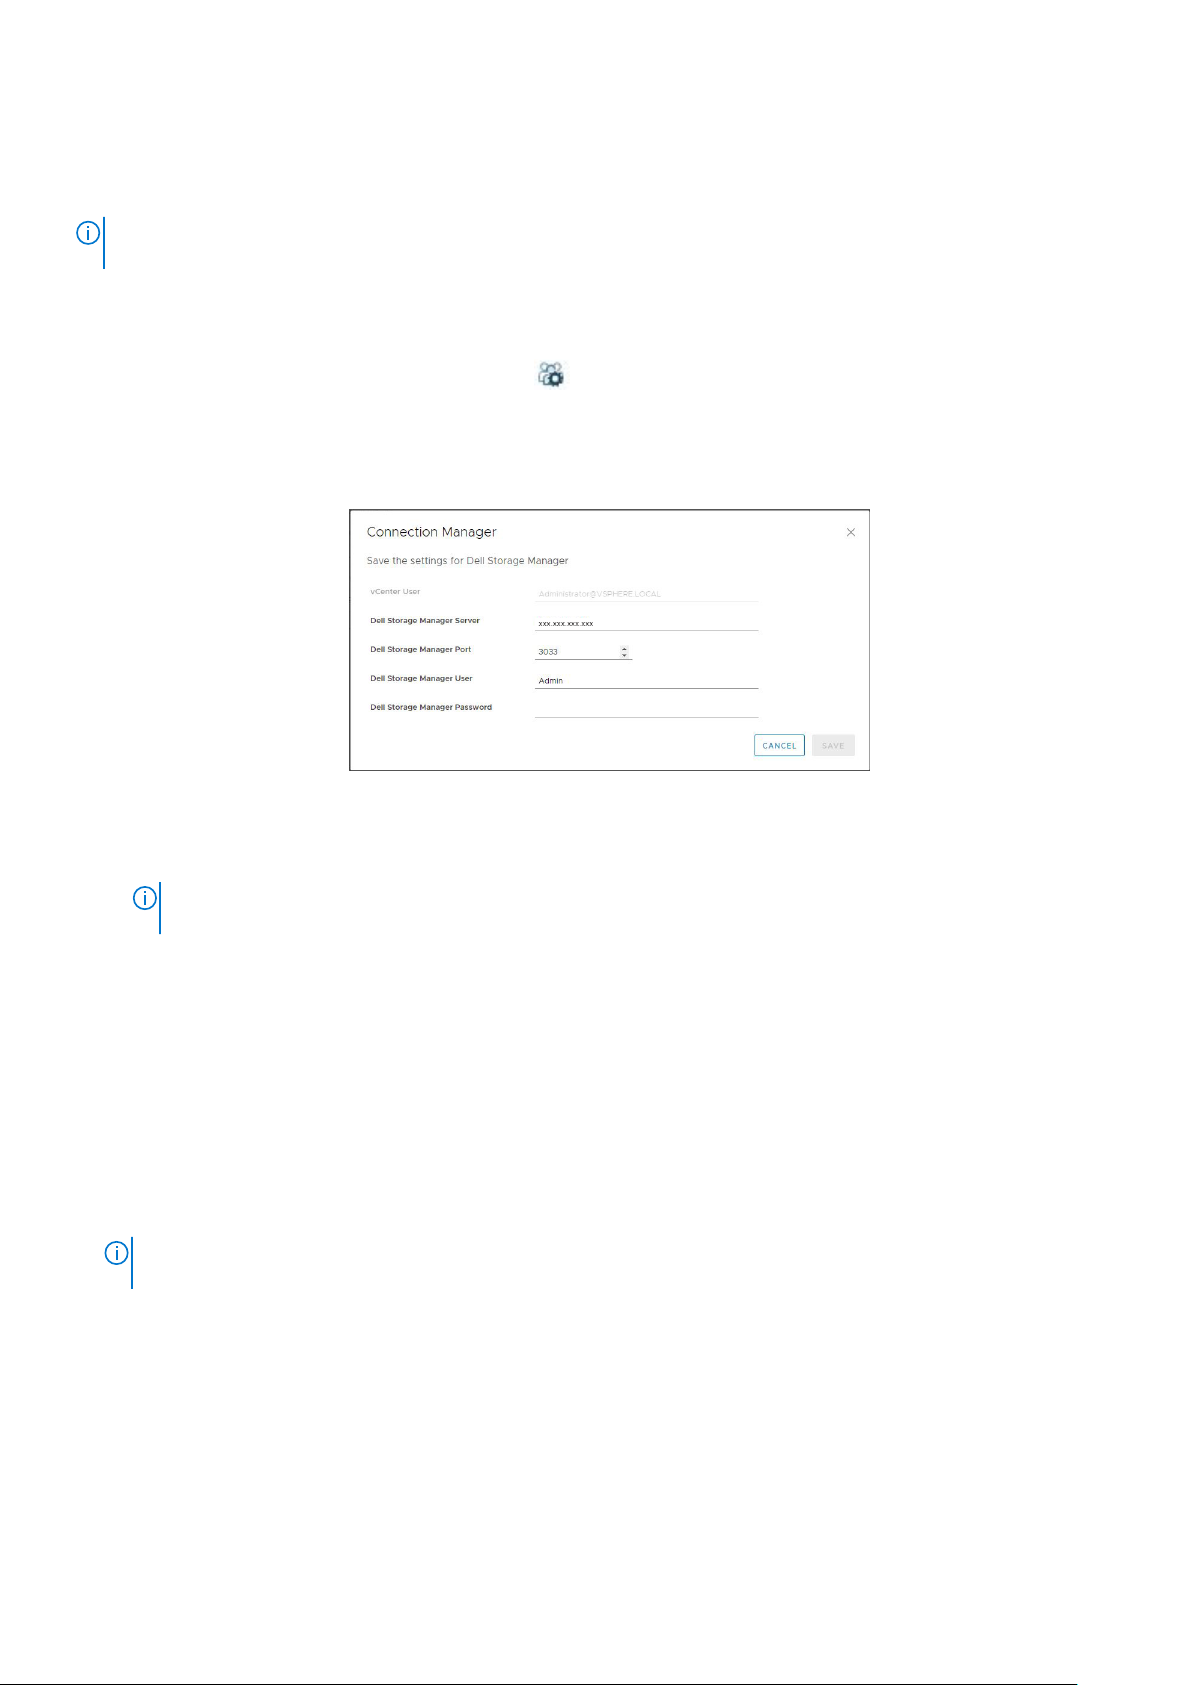
The Connection Manager dialog box opens.
Figure 1. Connection Manager Dialog Box
6. Enter the requested information:
● vCenter User (not editable) – The field displays the user that was used to log in to the vSphere Client. To configure the
vSphere Client Plugin for a different vCenter user, log out of the vSphere Client and log back in with that user.
NOTE:
The Dell Storage vSphere Client Plugin uses the vCenter user credentials to continue running the tasks after
the vSphere Client Plugin is closed.
● Dell Storage Manager Server – Type the hostname or IP address of the Dell Storage Manager server.
● Dell Storage Manager Port – Type the port number for the Dell Storage Manager in the field.
● Dell Storage Manager User and Password – Type the username and password of a Dell Storage Manager user with
administrator privileges. The Dell Storage Manager user credentials control which Storage Centers can be managed in the
vSphere Client Plugin.
To add a Storage Center to the vSphere Client Plugin, log in to the Dell Storage Manager client using the same user
credentials. Add the Storage Center to manage. See the Storage Manager Administrator’s Guide for instructions on adding a
Storage Center to Storage Manager.
7. Click Save.
● The vSphere Client Plugin validates the vCenter and Dell Storage Manager credentials.
● If the credentials are correct, the vSphere Client Plugin retrieves Storage Center information from the Dell Storage
Manager server.
Administration.
The more Storage Centers and volumes that are managed by the Dell Storage Manager user, the longer it takes
NOTE:
to display the Dell Storage page.
If the credentials are incorrect, a Connection Manager error dialog box opens.
VASA Provider
The Dell VASA Provider gathers information about the available storage topologies, capabilities, and status of Storage Centers,
as well as Storage Center events and alerts. The VASA provider passes this information to VMware vCenter, making it
accessible to vSphere clients. This information allows VMware vCenter administrators to make informed decisions when
selecting the datastore on which to place new virtual machines.
8
Getting Started
Page 9
Registering VASA provider
Follow these steps to register the VASA provider.
Prerequisites
Ensure that vSphere Client is added to Dell Storage Manager.
Steps
1. Log in to the vSphere Client.
2. In the vSphere Client window, select Menu and click
3. In the Administration pane, click Dell Storage.
4. Click the Manage tab.
5. Click Update.
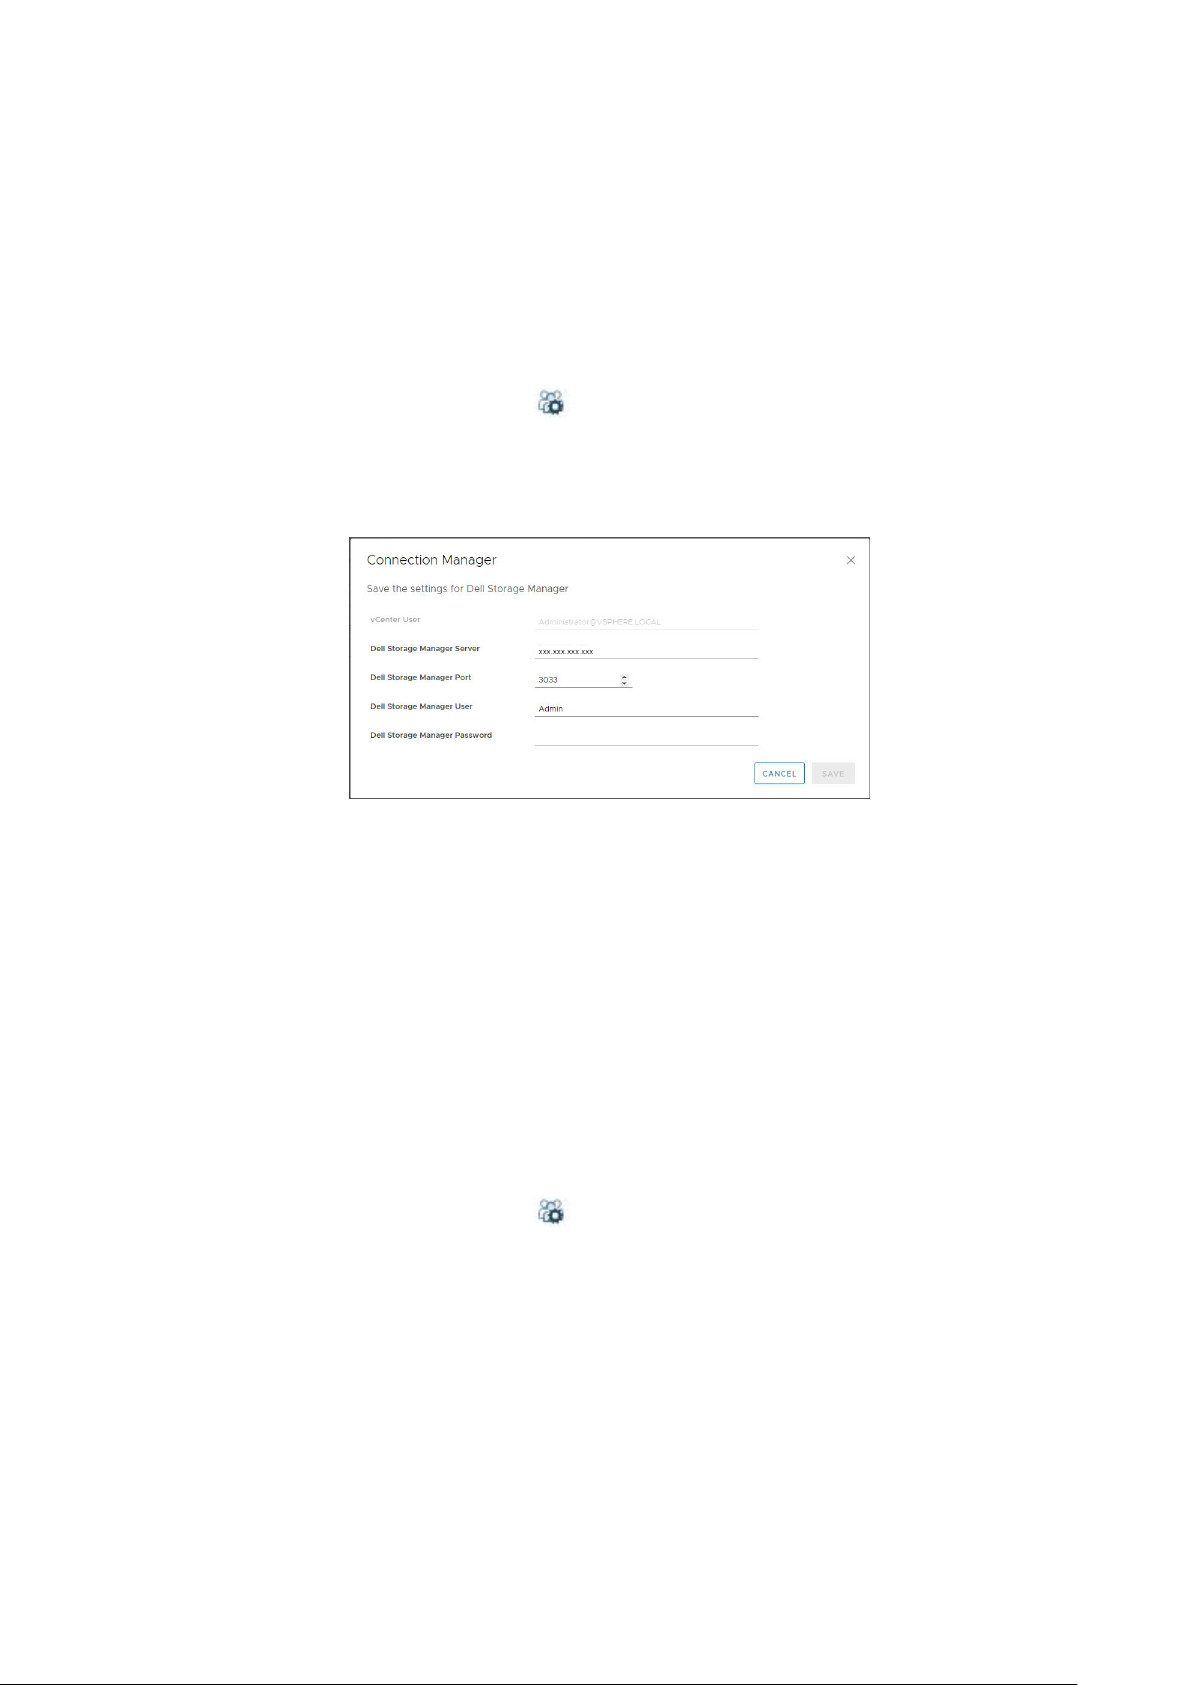
The Connection Manager dialog box opens.
Figure 2. Connection Manager Dialog Box
6. In vCenter Password, type the password of the vCenter user.
7. In Dell Storage Manager Password, type the password of a Storage Manager user with administrator privileges.
8. Click Save.
9. In the Manage tab, select Register VASA Provider.
The vSphere Client Plugin reviews the settings and registers the VASA provider, or displays an error message if it cannot be
registered.
Administration.
Unregistering VASA provider
Follow these steps to unregister a VASA provider.
Steps
1. Log in to the vSphere Client.
In the vSphere Client window, select Menu and click
2.
3. In the Administration pane, click Dell Storage.
4. Click the Manage tab.
5. Click Update.
The Connection Manager dialog box opens.
Administration.
Getting Started
9
Page 10
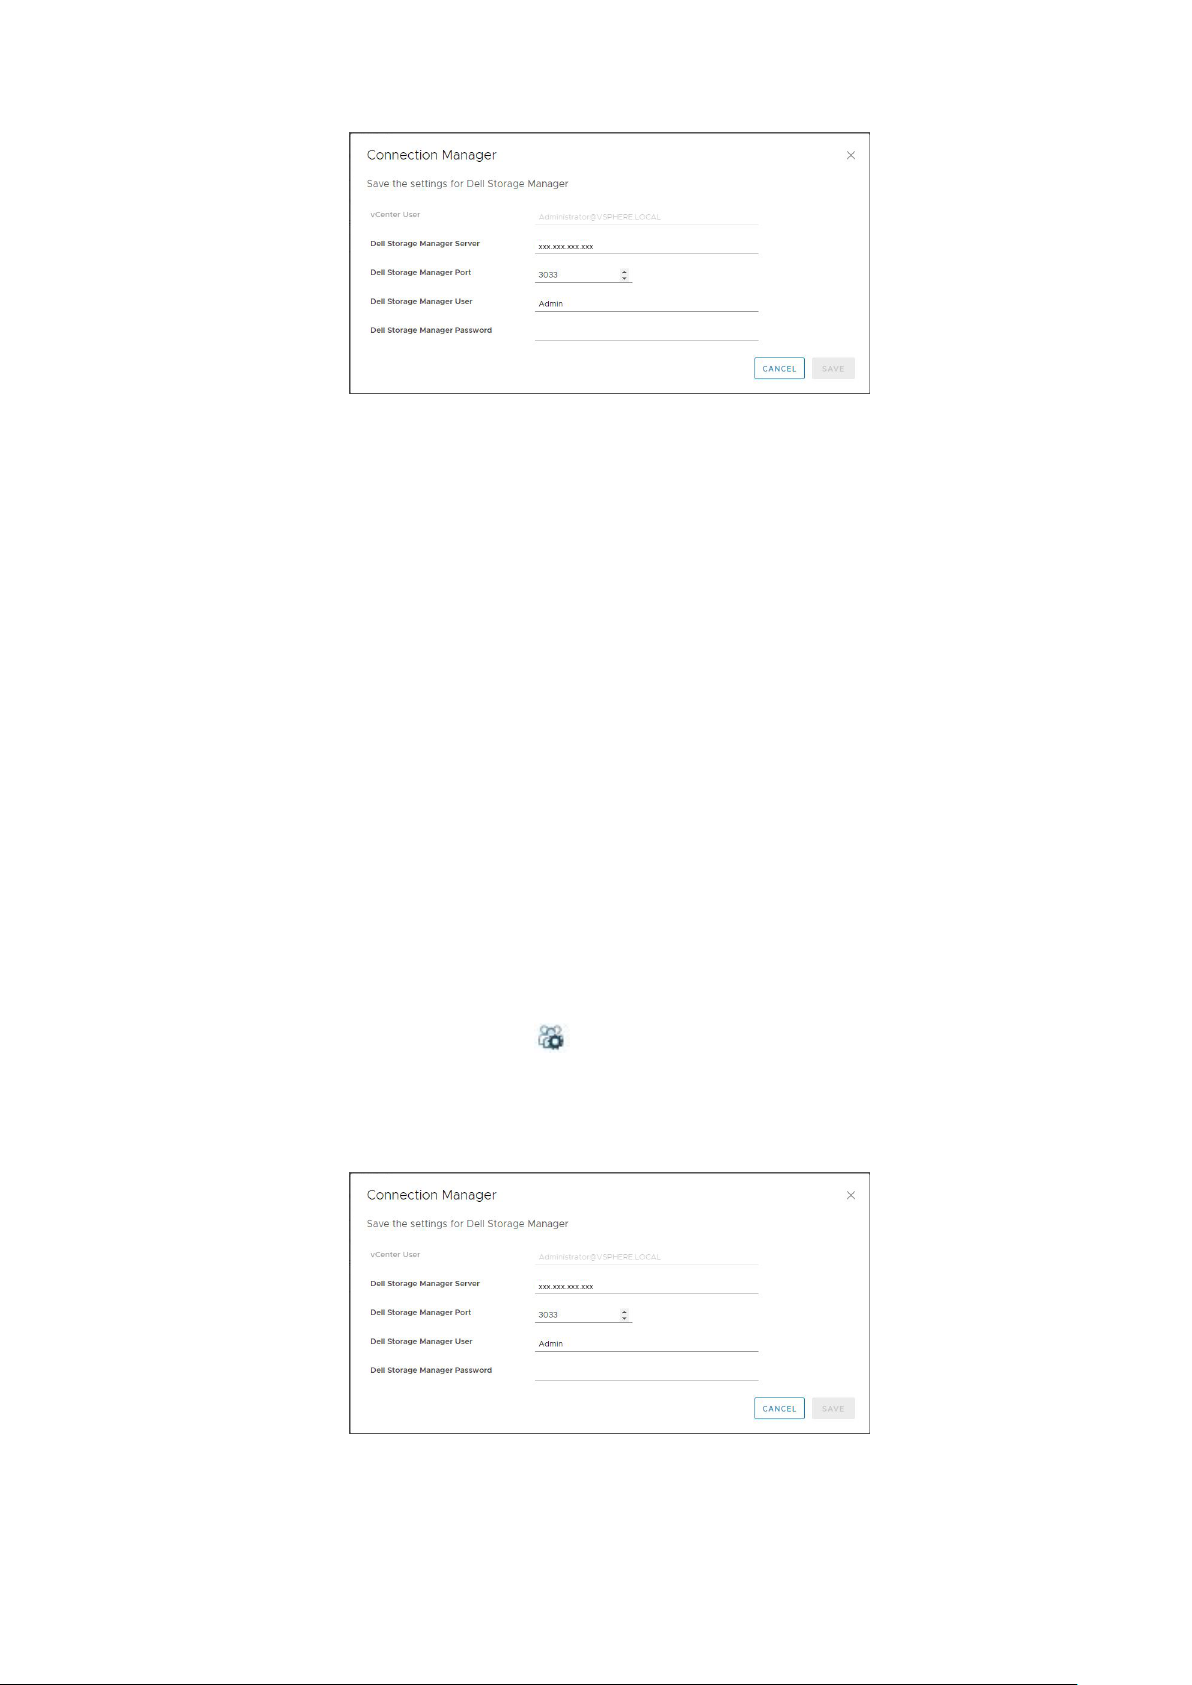
Figure 3. Connection Manager Dialog Box
6. In vCenter Password, type the password of the vCenter user.
7. In Dell Storage Manager Password, type the password of a Storage Manager user with administrator privileges.
8. Click Save.
9. In the Manage tab, clear the Register VASA Provider setting.
Managing the vSphere Client Plugin
The following sections describe how to manage vCenter and Dell Storage Manager credentials, display Storage Center
information, and disable or enable thevSphere Client Plugin.
Changing vCenter and Dell Storage Manager Credentials
If the credentials change for the Dell Storage Manager user defined in the vSphere Client Plugin, update the credentials on the
Manage tab of the Dell Storage page.
Prerequisites
A Data Collector must be installed and running before you can configure thevSphere Client Plugin. See the Dell Storage
Manager Installation Guide for information about installing the Data Collector.
Steps
1. Log in to the vSphere Client.
2.
In the vSphere Client window, select Menu and click
3. In the Administration pane, click Dell Storage.
4. Click the Manage tab.
5. Click Update.
The Connection Manager dialog box opens.
Figure 4. Connection Manager Dialog Box
6. Modify the vCenter and Dell Storage Manager credentials as needed and click Save.
10
Getting Started
Administration.
Page 11

Displaying Storage Center Information
The Summary tab on the Dell Storage page displays summary information for Storage Center. The Monitor tab displays
performance and usage charts for Storage Center.
Display Storage Center Information
The Summary tab displays Storage Center controller information and storage type information.
Steps
1. Log in to the vSphere Client.
2. In the vSphere Client window, select Menu and click
3. In the Administration pane, click Dell Storage.
4. Click the Summary tab.
5. Select the Storage Center to display.
The bottom pane displays information about the selected Storage Center.
Label Description
Controller Information Displays network and status information about each Storage Center
Storage Type Information Displays the Storage Types defined on the Storage Center.
Administration.
controller.
Monitor Storage Performance and Disk Usage
Display performance and usage information for Storage Center on the Monitor tab.
Steps
1. Log in to the vSphere Client.
2.
In the vSphere Client window, select Menu and click
3. In the Administration pane, click Dell Storage.
4. Click the Monitor tab.
5. Select the Storage Center to display.
The bottom pane displays performance and usage data for the selected Storage Center.
Administration.
Charts
The Charts tab displays performance information for the selected Storage Center.
Label/Option
KB/sec Chart
IO/sec Chart
Description
Read KB/sec —Transfer rate of read operations in kilobytes per second
Total KB/sec — Combined transfer rate of read and write operations in kilobytes per second
Write KB/sec —Transfer rate of write operations in kilobytes per second
Read IO/sec — Transfer rate of read operations in I/O operations per second
Total IO/sec — Combined transfer rate of read and write operations in I/O operations per second
Write IO/sec —Transfer rate of write operations in I/O operations per second
Enables you to download an image of the chart in .png format
Getting Started 11
Page 12

Usage
The Usage tab displays free versus used disk space information for the selected Storage Center.
Label/Option Description
Available Space Total amount of disk space available on the disks of the Storage Center
Allocated space Amount of disk space allocated on the disks of the Storage Center for
volume use
Used space Amount of disk space used by volumes on the Storage Center
Free space Amount of disk space available for use by the Storage Center
Space reserved by system Space consumed by Replays and RAID overhead
Savings vs. RAID 10 Amount of disk space saved by using Dell Dynamic Block Architecture
instead of RAID 10 storage
Enables you to download an image of the chart in .png format
Disabling and Enabling the vSphere Client Plugin
After installing the vSphere Client Plugin, enable it by registering the plugin with VMware vCenter.
All plugins can also be enabled or disabled using vSphere. The procedures for enabling and disabling plugins vary depending on
the version of the vSphere Client. For instructions on managing plugins, see the vSphere documentation.
12
Getting Started
Page 13

2
Working With Dell Storage
The Dell Storage vSphere Client Plugin communicates with Dell Storage Manager and enables the management of Dell Storage.
Topics:
• Introduction to Dell Storage
• Creating and Managing VMFS Datastores on Storage Centers
• Configuring, Creating, and Recovering Snapshots
• Create and Manage Replications and Live Volumes
Introduction to Dell Storage
An administrator can use the Dell Storage vSphere Client Plugin to manage Dell storage on a Storage Center.
A Storage Center configures and uses storage based on the following settings.
Storage Term Description
Storage Tier
physical media classes
Storage Type
RAID level and page size
Volume
a logical unit of storage
Live Volume
keeps applications online and data
accessible during planned or unplanned
downtime
Storage tiers represent the classification of all physical storage media in the
Storage Center. Storage Center automatically populates storage tiers with the
available media in the Assigned disk folder.
● Tier 1: Contains the fastest media appropriate for frequently used, missioncritical data. Tier 1 media is typically the most expensive media.
● Tier 2: Contains medium-quality media appropriate for medium-priority data.
● Tier 3: Contains slower, inexpensive media appropriate for backup copies,
Replays, and low-priority, rarely used data.
Within each tier, the following storage types are available.
● Non-redundant: RAID 0 with 2-MB page size
● Single Redundant: RAID 10, RAID 5–5, RAID 5–9 with 512 KB, 2 MB, or 4 MB
page size
● Dual redundant: RAID 10, RAID 6-6, RAID 6-10 with 2 MB page size
● The default and recommended setting for storage type is dual redundant, and
for drive 18 TB or larger, dual redundant is required and enforced.
A volume is a logical unit of storage on the Storage Center. When you add a
datastore within the vSphere Client, you create and map a new Dell volume as a
datastore, or map an existing Dell volume as a datastore. When mapping an
existing Dell volume as a datastore, the volume must have been a previouslyformatted VMFS volume that was used as a datastore and unmapped.
A Live Volume is a replicating volume that can be mapped and active on a source
and destination Storage Center at the same time.
Data Type
writeable or Snapshot
Storage Profiles
applied to a volume to determine how data
is migrated on the Storage Center
Volume data can be either of the following types:
● Writeable: Data written to storage dynamically
● Snapshot: Point-in-time copy data
Storage Profiles determine how volume data is stored and migrated on the
Storage Center. The following Storage Profiles are defined by the system:
● Recommended: Available only on Storage Center with Licensed Data
Progression. Use the Recommended profile to optimize Data Progression and
performance on the Storage Center. The Recommended profile allows the
Working With Dell Storage 13
Page 14

Storage Term Description
system to automatically progress data between storage types and across all
storage tiers based on data type and usage.
● High Priority: Use the High Priority profile only for volumes that contain data
you want to keep in tier 1 storage. That is, applying the High Priority profile to
a volume prevents the volume data from migrating to another tier.
● Medium Priority: Use the Medium Priority profile only for volumes that contain
data you want to keep in tier 2 storage. That is, applying the Medium Priority
profile to a volume prevents the volume data from migrating to another tier.
● Low Priority: Use the Low Priority profile only for volumes that contain data
you want to keep in tier 3 storage. That is, applying the Low Priority profile to
a volume prevents the volume data from migrating to another tier.
You can create and modify Storage Profiles within a Storage Center, if you have
licensed Data Progression software.
Snapshots and Snapshot Profiles
applied to a volume to determine how
often snapshots are taken
View Volume
an Exposed (mapped) snapshot
A Storage Center snapshot is a point-in-time copy of data. As such, a snapshot
can be exposed and mapped to allow recovery of a datastore or virtual machine.
Snapshot Profiles determine a schedule for volume snapshots. System-defined
Snapshot Profiles include commonly used schedules for daily and weekly
snapshots. Custom Snapshot profiles can be created to schedule snapshots
appropriate to the data that you want to back up.
An exposed (mapped) snapshot used to recover data from a point-in-time copy of
data (snapshot).
Data Progression
automatically migrating volume data based
on the Storage Profile settings
Based on the Storage Profile applied to the volume and the Data Progression
licensing, volume data automatically progresses on the Storage Center.
On a Storage Center with licensed Data Progression, data can automatically
migrate to different Storage Types within a storage tier, and also across storage
tiers.
Creating and Managing VMFS Datastores on Storage Centers
The vSphere Client Plugin enables you to create and manage volumes that are mapped as VMFS datastores to ESXi hosts or
clusters on a Storage Center.
NOTE:
The options that appear when creating and managing datastores change depending on the Storage Center user
preferences of the Storage Manager user that is defined in the vSphere Client Plugin.
Adding a VMFS Datastore
Use the Add Datastore wizard to add Dell storage as a VMFS datastore.
When you add a VMFS datastore, you create and/or map a Dell volume on the Storage Center. See Introduction to Dell Storage
on page 13 for details about Dell volumes.
To add a VMFS datastore, use these options:
● Create New Dell Volume – Create and map a new Dell volume as a VMFS datastore.
● Map Existing Dell Volume – Select an existing Dell volume to map as a datastore.
NOTE: The existing volume must be a formatted VMFS datastore.
14 Working With Dell Storage
Page 15

Adding a Datastore Using a New Dell Volume
Create one or more datastores using the Add Datastore wizard.
Prerequisites
● The SAS mapping protocol selection is only available on Storage Centers that support Front-end SAS: SCv2000 Series and
SC4020 Storage Centers.
● On the Volumes page, the values for Storage Profile and Disk Folder can be modified only if the preferences for the Storage
Center have been set to Allow. For information about managing the preferences, see the Dell Storage Manager
Administrator’s Guide or Unisphere for SC Series Administrator's Guide.
Steps
1. Select an object in inventory that can be a parent of a datastore:
● Datacenter
● Host
● Cluster
2. Select Actions > All Dell Storage Actions > Add Datastore.
The Add Datastore wizard opens.
3. Select whether to create a single datastore or multiple datastores, and click Next.
4. Select one or more hosts to which to map the new volume, and click Next.
5. Select the Storage Center, and click Next.
6. Select Create New Dell Volume, and click Next.
7. Type the name and size for the new volume, select the volume folder, and click Next.
8. Select the volume settings:
● Storage Type—A Storage Type is a pool of storage with a single datapage size. The Storage Type is set at the disk
folder level, and once set it cannot be changed without assistance from technical support. (This entry appears only if the
preferences are set in Storage Center).
● Storage Profile—A Storage Profile controls how the Storage Center manages volume data.
○ Recommended (All Tiers)—Select this option for most volumes. The Recommended profile allows the system to
automatically progress data between and across all storage tiers based on the type of data and usage.
○ High Priority (Tier 1)—Select this option to force volume data to remain in tier 1 storage.
○ Medium Priority (Tier 2)—Select this option to force volume data to remain in tier 2 storage.
○ Low Priority (Tier 3)—Select this option to force volume data to remain in tier 3 storage.
● Data Reduction Profile—Data Reduction uses compression and deduplication to decrease the amount of disk space
that is used by volume data. Compression reduces the amount of space that is used by a volume by encoding data.
Deduplication finds duplicate pages and removes them, conserving the disk space that would be used by additional
copies. When deduplication is used, compression is also applied to a volume.
● Cache Settings—Select or clear the Read Cache Enabled and Write Cache Enabled check boxes to set the default
cache settings for the new volume.
● Selected Volume QoS Profile—Accept the Volume QoS Profile Default or click Change it to select a different QoS
Profile.
9. Click Next.
10. Select a Snapshot Profile for the volume, and click Next.
11. Select the LUN for mapping the volume, and click Next.
12. Select the VMFS version, and click Next
13. Select the I/O protocol to use for this volume, and click Next.
14. Review the Datastore Properties.
a. When creating a single datastore, you can change the name or location.
b. When creating multiple datastores, specify the number of datastores to create and the number of the first datastore.
Subsequent datastores are numbered consecutively.
15. (Optional) Select Create Replication/Live Volume if you want to replicate the volume data to a second Storage Center
and allow both Storage Centers to process I/O requests for the volume. For more information, see Create and Manage
Replications and Live Volumes on page 19.
a. Select a Target Storage Center, and click Next.
b. Select the Target Volume Settings, and click Next.
Working With Dell Storage
15
Page 16

c. Select the Replication Options, and click Next.
16. Click Next.
The Ready to Complete page opens.
17. Review the settings and click Finish to create the datastore.
Map an Existing Dell Volume as a Datastore
An existing Dell volume can be mapped as a datastore using the vSphere Client Plugin.
Prerequisites
● The SAS mapping protocol selection is available only on Storage Centers that support Front-end SAS: SCv2000 series and
SC4020 Storage Centers.
● The volume must be formatted with VMFS file system.
Steps
1. Select an object in inventory that can be a parent of a datastore:
● Datacenter
● Host
● Cluster
2. Select Actions > All Dell Storage Actions > Add Datastore.
The Add Datastore wizard opens.
3. Select Create single Datastore, and click Next.
4. Select one or more hosts to which to map the new volume, and click Next.
5. Select the Storage Center for volume creation. Click Next.
6. Select Map existing Dell Volume, and click Next.
a. Find and select an existing Dell volume to map as a datastore, and click Next.
NOTE: The Dell volume must be a VMFS volume.
b. Specify the LUN for mapping the volume, and click Next.
7. Select the I/O protocol to use for this volume, and click Next.
8. Specify the name for the datastore. The Dell volume name is used by default.
9. (Optional) Select Create Replication/Live Volume if you want to replicate the volume data to a second Storage Center
and allow both Storage Centers to process I/O requests for the volume. For more information, see Create and Manage
Replications and Live Volumes on page 19.
a. Select a Target Storage Center and click Next.
b. Select the Target Volume Settings and click Next.
c. Select the Replication Options and click Next.
10. Click Next.
The Ready to Complete page opens.
11. Review the settings and click Finish to create the datastore.
Editing Volume Settings
Edit the datastore settings to expand the datastore, change the volume Storage Profile or to select a different QoS Profile for
the datastore.
Prerequisites
QoS Profiles are created and managed in Storage Manager. For information about managing QoS Profiles, see the Dell Storage
Manager Administrator’s Guide or the Unisphere for SC Series Administrator's Guide.
Steps
1. Select a datastore.
16
Working With Dell Storage
Page 17

2. Select Actions > All Dell Storage Actions > Edit Datastore.
The Edit Datastore wizard opens to the Expand Datastore page.
3. Select a new size for the datastore, and click Next.
The Volume Settings page opens.
4. Select the volume settings:
● Storage Type—A Storage Type is a pool of storage with a single datapage size. The Storage Type is set at the disk
folder level, and once set it cannot be changed without assistance from technical support. (This entry appears only if the
preferences are set in Storage Center).
● Storage Profile—A Storage Profile controls how the Storage Center manages volume data.
○ Recommended (All Tiers)—Select this option for most volumes. The Recommended profile allows the system to
automatically progress data between and across all storage tiers based on the type of data and usage.
○ High Priority (Tier 1)—Select this option to force volume data to remain in tier 1 storage.
○ Medium Priority (Tier 2)—Select this option to force volume data to remain in tier 2 storage.
○ Low Priority (Tier 3)—Select this option to force volume data to remain in tier 3 storage.
● Data Reduction Profile—Data Reduction uses compression and deduplication to decrease the amount of disk space
that is used by volume data. Compression reduces the amount of space that is used by a volume by encoding data.
Deduplication finds duplicate pages and removes them, conserving the disk space that would be used by additional
copies. When deduplication is used, compression is also applied to a volume.
● Cache Settings—Select or clear the Read Cache Enabled and Write Cache Enabled check boxes to set the default
cache settings for the new volume.
● Selected Volume QoS Profile—Accept the Volume QoS Profile Default or click Change it to select a different QoS
Profile.
5. Select a Snapshot Profile for the volume, and click Next.
6. Click Next.
The Ready to Complete page opens.
7. Review the settings and click Finish to apply the new settings.
Expanding a Datastore
Use the Edit Settings wizard to increase the capacity of a datastore.
Steps
1. Select a datastore.
2. Select Actions > All Dell Storage Actions > Edit Datastore.
The Edit Datastore wizard opens to the Expand Datastore page.
3. Select a new size for the datastore, and click Next.
The Volume Settings page opens.
4. Select a Snapshot Profile for the volume, and click Next.
5. Review the volume settings, and then click Next.
The Ready to Complete page opens.
6. Review the settings, and then click Finish to apply the new settings.
Removing a Datastore
Use the Remove Storage wizard to remove a datastore.
Steps
1. Select a datastore.
2. Select Actions > All Dell Storage Actions > Remove Datastore.
The Remove Datastore wizard opens.
3. Select one or more datastores to remove.
4. Select a retention option:
● Unmap Volume—deletes the mappings between the datastore and the server.
● Place in Recycle Bin—moves the datastore to the recycle bin.
● Permanently Delete—skips the recycle bin and permanently deletes the datastore.
Working With Dell Storage
17
Page 18

5. Click Next to advance the wizard.
The Ready to Complete page opens.
6. Review the settings an click Finish to apply the new settings.
Configuring, Creating, and Recovering Snapshots
The Dell Storage vSphere Client Plugin allows you to create, configure, and expire snapshots, and recover data from snapshots.
NOTE: The options that appear when configuring, creating, and recovering snapshots change depending on the volume
preferences of the Dell Storage Manager user defined in the Dell Storage vSphere Client Plugin.
Applying a Snapshot Profile for a Datastore
Apply a Snapshot Profile to a datastore (Dell volume) or to all volumes associated with a virtual machine to establish a schedule
for automatically taking snapshots. Only Snapshot Profiles already defined on the Storage Center are available for selection.
Steps
1. Select a datastore in inventory.
2. Select Actions > All Dell Storage Actions > Snapshot > Set Snapshot Profile.
The Set Snapshot Profile wizard starts.
3. Select one or more Snapshot Profiles to apply to the datastore.
4. Click Next.
The Ready to Complete page opens.
5. Click Finish.
Taking a Snapshot of a Datastore
Besides scheduled snapshots that are taken automatically based on a Snapshot Profile, you can also take an immediate
(unscheduled) snapshot. During snapshot creation, you can specify an expiration time for the snapshots. If you create a
snapshot with the Never Expire option, the snapshot remains on the Storage Center until it is manually expired.
Steps
1. Select the datastore for which you want to take a snapshot.
2. Select Actions > All Dell Storage Actions > Snapshot > Create Datastore Snapshot.
The Create Snapshot wizard starts.
3. Specify a time after which you want the snapshot to expire. To set the snapshot to never expire, select the Never Expire
option.
4. (Optional) Enter a description of the snapshot.
5. Click Next.
The Ready to Complete page opens.
6. Click Finish.
Deleting Snapshots for a Datastore
When a snapshot is created, an expiration time is assigned to the snapshot. However, you can override the expiration time by
explicitly deleting a snapshot. Deleting a snapshot removes the snapshot from the Storage Center.
Steps
1. Select the datastore for which you want to delete snapshots.
2. Select Actions > All Dell Storage Actions > Snapshot > Delete Datastore Snapshot.
The Expire Storage Center Snapshot wizard starts.
3. Select the snapshots that you want to delete.
4. Click Next.
18
Working With Dell Storage
Page 19

The Ready to Complete page opens.
5. Click Finish.
Recovering a Datastore From a Storage Center Snapshot
Use the Storage Center Snapshot Recovery wizard to recover data from a Storage Center snapshot. The wizard allows you to
select the snapshot from which you want to recover data and then exposes and maps the snapshot to allow you to copy data
for recovery.
Prerequisites
A snapshot of the datastore must exist.
Steps
1. Select the datastore for which you want to recover data.
2. Select Actions > All Dell Storage Actions > Snapshot > Recover Datastore from Snapshot.
The Storage Center Snapshot Recovery wizard starts.
3. Select a snapshot from which to recover data.
NOTE: Only one snapshot per volume can be selected.
4. Click Next.
The Host Selection page opens.
5. Select the host for accessing the recovered datastore.
6. Click Next.
The Datastore Name page opens.
7. Specify a name and location for the recovered datastore.
8. Click Next.
The Mapping LUN page opens.
9. Select the LUN for mapping the recovered datastore.
10. Click Next.
The Ready to Complete page opens.
11. Click Finish.
Create and Manage Replications and Live Volumes
Use the plugin to add and manage replications and Live Volumes to VMFS datastores on Dell storage. You can use the plugin
convert a replication to a Live Volume and vice versa.
The Dell Storage vSphere Client Plugin supports two basic models for migrating data between Storage Centers:
● Replications
● Live Volumes
A replication copies volume data from one Storage Center to another Storage Center to safeguard data. A Live Volume is a
replicating volume that can be mapped and active on a source and destination Storage Center at the same time.
Replications can be synchronous or asynchronous:
● Asynchronous replication—Copies snapshots from the source volume to the destination volume. If the local Storage Center
or site fails before the write is delivered, it is possible that writes will not be delivered to the destination volume
● Synchronous replications—Keeps the source and destination volume fully synchronized at all times by making sure that each
write is successfully written to both the source volume and the destination volume before responding to the server.
Synchronous replications can be further defined by the mode:
● High Availability Mode—Accepts IO requests to the source volume when the destination volume is unavailable (or when
latency is too high) to avoid interrupting service. However, if writes are accepted to the source volume, the destination
volume data becomes stale.
● High Consistency Mode—Prevents IO requests to the source volume when the destination volume is unavailable to make
sure that the volumes remain identical. However, the source volume cannot be modified during this time, which can interrupt
operations.
Working With Dell Storage
19
Page 20

For information about replications and Live Volumes, see the Dell Storage Manager Administrator’s Guide.
Replication Operations
Use the vSphere Client Plugin to add, modify, and remove datastore replications.
Replicating a Datastore
Follow this procedure to replicate a datastore.
Prerequisites
If you are using iSCSI connections for replications, the following conditions must be met:
● The destination Storage Center must be defined as an iSCSI Remote System on the source Storage Center.
● The source Storage Center must be defined as an iSCSI Remote Connection on the destination Storage Center.
See the Dell Storage Manager Administrator’s Guide for instructions on configuring iSCSI connections between Storage
Center.
● At least one Quality of Service (QoS) definition must be set up on the source Storage Center for replication.
See the Dell Storage Manager Administrator’s Guide for instructions on creating QoS definitions.
Steps
1. Select a datastore to replicate.
2. Select Actions > Dell Storage Actions > Replications/Live Volume > Add.
The Add Replica/Live Volume wizard starts.
3. Select the target (destination) Storage Center.
4. Click Next.
The Volume Settings page opens.
5. Select the volume settings:
● Storage Type—A Storage Type is a pool of storage with a single datapage size. The Storage Type is set at the disk
folder level, and once set it cannot be changed without assistance from technical support. (This entry appears only if the
preferences are set in Storage Center).
● Storage Profile—A Storage Profile controls how the Storage Center manages volume data.
○ Recommended (All Tiers)—Select this option for most volumes. The Recommended profile allows the system to
automatically progress data between and across all storage tiers based on the type of data and usage.
○ High Priority (Tier 1)—Select this option to force volume data to remain in tier 1 storage.
○ Medium Priority (Tier 2)—Select this option to force volume data to remain in tier 2 storage.
○ Low Priority (Tier 3)—Select this option to force volume data to remain in tier 3 storage.
● Data Reduction Profile—Data Reduction uses compression and deduplication to decrease the amount of disk space
that is used by volume data. Compression reduces the amount of space that is used by a volume by encoding data.
Deduplication finds duplicate pages and removes them, conserving the disk space that would be used by additional
copies. When deduplication is used, compression is also applied to a volume.
● Cache Settings—Select or clear the Read Cache Enabled and Write Cache Enabled check boxes to set the default
cache settings for the new volume.
● Selected Volume QoS Profile—Accept the Volume QoS Profile Default or click Change it to select a different QoS
Profile.
6. Click Next.
The Replication Options page opens.
7. Select the replication settings:
● Replication Type:
○ Replication, Asynchronous
○ Replication, Synchronous—High Availability
○ Replication, Synchronous—High Consistency
● QoS definition—Select a predefined QoS definition for the replication.
● Replicate Active Snapshot—Select this option to copy all writes from the active snapshot area of the volume. This
option cannot be disabled for synchronous replication.
20
Working With Dell Storage
Page 21

● Deduplication—Select this option to copy only the changed portions of the snapshot history on the source volume,
rather than all data captured in each snapshot. Deduplication saves bandwidth but is more resource intensive for the
Storage Center.
● Select the Replication Target Location.
8. Click Next.
The Ready to Complete page opens.
9. Click Finish.
Modify a Datastore Replication
Modify the settings of an existing datastore replication.
Steps
1. Select the datastore that is being replicated.
2. Select Actions > Dell Storage Actions > Replications/Live Volume > Edit Settings/Convert.
The Modify Replication or Live Volume wizard starts.
3. Select a replication to modify.
4. Click Next.
The Volume Settings page opens.
5. Select the volume settings:
● Storage Type—A Storage Type is a pool of storage with a single datapage size. The Storage Type is set at the disk
folder level, and once set it cannot be changed without assistance from technical support. (This entry appears only if the
preferences are set in Storage Center).
● Storage Profile—A Storage Profile controls how the Storage Center manages volume data.
○ Recommended (All Tiers)—Select this option for most volumes. The Recommended profile allows the system to
automatically progress data between and across all storage tiers based on the type of data and usage.
○ High Priority (Tier 1)—Select this option to force volume data to remain in tier 1 storage.
○ Medium Priority (Tier 2)—Select this option to force volume data to remain in tier 2 storage.
○ Low Priority (Tier 3)—Select this option to force volume data to remain in tier 3 storage.
● Data Reduction Profile—Data Reduction uses compression and deduplication to decrease the amount of disk space
that is used by volume data. Compression reduces the amount of space that is used by a volume by encoding data.
Deduplication finds duplicate pages and removes them, conserving the disk space that would be used by additional
copies. When deduplication is used, compression is also applied to a volume.
● Cache Settings—Select or clear the Read Cache Enabled and Write Cache Enabled check boxes to set the default
cache settings for the new volume.
● Selected Volume QoS Profile—Accept the Volume QoS Profile Default or click Change it to select a different QoS
Profile.
6. Click Next.
The Snapshot Profile page opens.
7. Select a Snapshot Profile to use for the volume and click Next.
The Replication Options page opens.
8. Select the replication settings:
● Replication Type:
○ Replication, Asynchronous
○ Replication, Synchronous—High Availability
○ Replication, Synchronous—High Consistency
● QoS definition—Select a predefined QoS definition for the replication.
● Replicate Active Snapshot—Select this option to copy all writes from the active snapshot area of the volume. This
option cannot be disabled for synchronous replication.
● Deduplication—Select this option to copy only the changed portions of the snapshot history on the source volume,
rather than all data captured in each snapshot. Deduplication saves bandwidth but is more resource intensive for the
Storage Center.
● Select the Replication Target Location.
9.
NOTE: If you choose to change the replication type from a replication to a Live Volume, a warning dialog box opens.
Select the check box to confirm that you want to make the conversion, and then click OK.
If you confirmed that you want to convert the replica to a Live Volume, the Live Volume Options page opens.
Working With Dell Storage
21
Page 22

10. Set the Live Volume options:
● Select a Secondary QoS Definition from the drop-down list.
● Select or clear the Storage Center swap options. If you choose to Automatically Swap Primary Storage Center, click
Show advanced settings for more options for determining when to swap:
○ Min. data written to secondary before swap
○ Min. % of I/O on secondary before swap
○ Min. time as primary before swap
● For synchronous replications, select Failover Automatically to configure Live Volumes to automatically fail over when
service is disrupted. By default, Restore Automatically is also selected.
● Specify a Live Volume Secondary Mapping target location.
11. Click Next.
The Ready to Complete page opens.
12. Click Finish.
Remove a Datastore Replication
Remove a datastore replication after the replication is no longer needed.
Steps
1. Select the datastore for which you want to remove a replication.
2. Select Actions > All Dell Storage Actions > Replications/Live Volume > Remove.
The Remove Replication or Live Volume wizard starts.
3. Select the replications to remove.
4. Click Next.
The Delete Options page opens.
5. Select the removal options for the replications:
● Delete Restore Point—Select this option if you want to delete the restore point for the replication.
● Recycle Destination Volume—Select this option if you want to move the destination volume to the Recycle Bin on the
destination Storage Center.
● Delete Destination Volume—Select this option if you do not want to retain the deleted destination volume in the
Recycle Bin—not recommended.
CAUTION:
Storage Center. The volume is permanently deleted.
6. Click Next.
The Ready to Complete page opens.
7. Click Finish.
If you delete the destination volume, you cannot recover the volume on the destination (target)
Live Volume Operations
The Dell Storage vSphere Client Plugin enables you to add, modify, and remove Live Volumes for datastores. You can also
configure automatic failover and restore features.
Adding a Live Volume to a Datastore
Use the Dell Storage vSphere Client Plugin to add Live Volumes to datastore.
Steps
1. Select a datastore to replicate.
2. Select Actions > Dell Storage Actions > Replications/Live Volume > Add.
The Add Replica or Live Volume wizard starts.
3. Select the target (destination) Storage Center.
4. Click Next.
The Volume Settings page opens.
5. Select the volume settings:
22
Working With Dell Storage
Page 23

● Storage Type—A Storage Type is a pool of storage with a single datapage size. The Storage Type is set at the disk
folder level, and once set it cannot be changed without assistance from technical support. (This entry appears only if the
preferences are set in Storage Center).
● Storage Profile—A Storage Profile controls how the Storage Center manages volume data.
○ Recommended (All Tiers)—Select this option for most volumes. The Recommended profile allows the system to
automatically progress data between and across all storage tiers based on the type of data and usage.
○ High Priority (Tier 1)—Select this option to force volume data to remain in tier 1 storage.
○ Medium Priority (Tier 2)—Select this option to force volume data to remain in tier 2 storage.
○ Low Priority (Tier 3)—Select this option to force volume data to remain in tier 3 storage.
● Data Reduction Profile—Data Reduction uses compression and deduplication to decrease the amount of disk space
that is used by volume data. Compression reduces the amount of space that is used by a volume by encoding data.
Deduplication finds duplicate pages and removes them, conserving the disk space that would be used by additional
copies. When deduplication is used, compression is also applied to a volume.
● Cache Settings—Select or clear the Read Cache Enabled and Write Cache Enabled check boxes to set the default
cache settings for the new volume.
● Selected Volume QoS Profile—Accept the Volume QoS Profile Default or click Change it to select a different QoS
Profile.
6. Click Next.
The Replication Options page opens.
7. Select the replication settings:
● Replication Type:
Live Volume, Asynchronous
○
○ Live Volume, Synchronous—High Availability
○ Live Volume, Synchronous—High Consistency
● QoS definition—Select a predefined QoS definition for the replication.
● Replicate Active Snapshot—Select this option to copy all writes from the active snapshot area of the volume. This
option cannot be disabled for synchronous replication.
● Deduplication—Select this option to copy only the changed portions of the snapshot history on the source volume,
rather than all data captured in each snapshot. Deduplication saves bandwidth but is more resource intensive for the
Storage Center.
● Select the Replication Target Location.
8. Click Next.
The Live Volume Settings page opens.
9. Set the Live Volume options:
● Select a Secondary QoS Definition from the drop-down list.
● Select or clear the Storage Center swap options. If you choose to Automatically Swap Primary Storage Center, click
Show advanced settings for more options for determining when to swap:
○ Min. data written to secondary before swap
○ Min. % of I/O on secondary before swap
○ Min. time as primary before swap
● For synchronous replications, select Failover Automatically to configure Live Volumes to automatically fail over when
service is disrupted. By default, Restore Automatically is also selected.
● Specify a Live Volume Secondary Mapping target location.
10. Click Next.
The Ready to Complete page opens with a summary of the selections that you made.
11. Click Finish.
Modifying a Live Volume Datastore
Modify the settings of an existing Live Volume datastore.
Steps
1. Select the datastore that is being replicated.
2. Select Actions > Dell Storage Actions > Replications/Live Volume > Edit Settings/Convert.
The Modify Replication or Live Volume wizard starts.
3. From the list of replications, select one to modify.
4. Click Next.
Working With Dell Storage
23
Page 24

The Volume Settings page opens.
5. Select the volume settings:
● Storage Type—A Storage Type is a pool of storage with a single datapage size. The Storage Type is set at the disk
folder level, and once set it cannot be changed without assistance from technical support. (This entry appears only if the
preferences are set in Storage Center).
● Storage Profile—A Storage Profile controls how the Storage Center manages volume data.
○ Recommended (All Tiers)—Select this option for most volumes. The Recommended profile allows the system to
automatically progress data between and across all storage tiers based on the type of data and usage.
○ High Priority (Tier 1)—Select this option to force volume data to remain in tier 1 storage.
○ Medium Priority (Tier 2)—Select this option to force volume data to remain in tier 2 storage.
Low Priority (Tier 3)—Select this option to force volume data to remain in tier 3 storage.
○
● Data Reduction Profile—Data Reduction uses compression and deduplication to decrease the amount of disk space
that is used by volume data. Compression reduces the amount of space that is used by a volume by encoding data.
Deduplication finds duplicate pages and removes them, conserving the disk space that would be used by additional
copies. When deduplication is used, compression is also applied to a volume.
● Cache Settings—Select or clear the Read Cache Enabled and Write Cache Enabled check boxes to set the default
cache settings for the new volume.
● Selected Volume QoS Profile—Accept the Volume QoS Profile Default or click Change it to select a different QoS
Profile.
6. Click Next.
The Snapshot Profile page opens.
7. Select the Snapshot Profile to use, and click Next.
The Replication Options page opens.
8. Select the replication settings:
● Replication Type:
○ Live Volume, Asynchronous
○ Live Volume, Synchronous—High Availability
○ Live Volume, Synchronous—High Consistency
● QoS definition—Select a predefined QoS definition for the replication.
● Replicate Active Snapshot—Select this option to copy all writes from the active snapshot area of the volume. This
option cannot be disabled for synchronous replication.
● Deduplication—Select this option to copy only the changed portions of the snapshot history on the source volume,
rather than all data captured in each snapshot. Deduplication saves bandwidth but is more resource intensive for the
Storage Center.
● Select the Replication Target Location.
9. Click Next.
If you did not choose to convert from a Live Volume to a replication, the Live Volumes Options page opens.
10. Set the Live Volume options:
● Select a Secondary QoS Definition from the drop-down list.
● Select or clear the Storage Center swap options. If you choose to Automatically Swap Primary Storage Center, click
Show advanced settings for more options for determining when to swap:
○ Min. data written to secondary before swap
○ Min. % of I/O on secondary before swap
○ Min. time as primary before swap
● For synchronous replications, select Failover Automatically to configure Live Volumes to automatically fail over when
service is disrupted. By default, Restore Automatically is also selected.
● Specify a Live Volume Secondary Mapping target location.
11. Click Next.
The Ready to Complete page opens.
12. Click Finish.
Removing a Live Volume Datastore
Remove a Live Volume datastore after the replication is no longer needed.
Steps
1. Select the datastore for which you want to remove a replication.
24
Working With Dell Storage
Page 25

2. Select Actions > All Dell Storage Actions > Replications/Live Volume > Remove.
The Remove Replication or Live Volume wizard starts.
3. Select one or more replications to remove.
4. Click Next.
The Delete Options page opens.
5. Select the removal options for the replications:
● Delete Restore Point—Select this option if you want to delete the restore point for the replication.
● Recycle Destination Volume—Select this option if you want to move the destination volume to the Recycle Bin on the
destination Storage Center.
● Delete Destination Volume—Select this option if you do not want to retain the deleted destination volume in the
Recycle Bin—not recommended.
CAUTION: If you delete the destination volume, you cannot recover the volume on the destination (target)
Storage Center. The volume is permanently deleted.
6. Click Next.
The Ready to Complete page opens.
7. Click Finish.
Configure Live Volume Automatic Failover and Restore
You can enable Storage Center Automatic Failover and Automatic Restore from the vSphere Client Plugin on Live Volumes that
meet certain criteria. When Automatic Failover is enabled, the secondary Live Volume will automatically be promoted to primary
in the event of a failure. After the primary Live Volume comes back online, Automatic Restore, configured by default, restores
the Live Volume relationship.
Prerequisites
Configure a datastore Live Volume with the following attributes:
● Synchronous
● High Availability
● Protected
Steps
1. Select a datastore in the inventory for which you have configured Live Volume synchronous replication with high availability.
The vSphere Client Plugin wizard loads information for the selected datastore.
2. Select Actions > All Dell Storage Actions > Replication/Live Volume > Edit Settings/Convert.
The Modify Replication or Live Volume wizard starts.
3. Make sure the replication to modify is selected and click Next.
The Volume Settings page opens.
4. Verify that the volume settings are correct and click Next.
The Snapshot Profile page opens.
5. Verify that the correct Snapshot profile is selected and click Next.
The Replication Options page opens.
6. Make sure that the replication type selected is Live Volume, Synchronous - High Availability, and click Next.
The Live Volume Options page opens.
7. Under Live Volume Settings, select Failover Automatically. By default, Restore Automatically is also selected.
8. Click Next.
The Ready to Complete page opens.
9. Click Finish to accept the configuration, and exit the wizard.
Working With Dell Storage
25
Page 26

3
Working With Virtual Machines
The Dell Storage vSphere Client Plugin provides the ability to provision virtual machines and recover virtual machine data from a
snapshot. You can provision (create) virtual machines and deploy them to an existing VMS datastore or to a new VMFS
datastore.
Topics:
• Deploy Virtual Machines to an Existing VMFS Datastore
• Deploy Virtual Machines to a New VMFS Datastore
Deploy Virtual Machines to an Existing VMFS Datastore
Use the Provision Virtual Machines wizard to deploy one or more virtual machines to an existing VMFS datastore.
Prerequisites
A virtual machine template must be created from which new virtual machines can be deployed. For information about creating or
updating a virtual machine template, see the vSphere help topics on virtual machine templates.
Steps
1. Select an object that can be the parent of a virtual machine:
● Datacenter
● Host
2. Select Actions > All Dell Storage Actions > Provision Virtual Machine.
The Provision Virtual Machine wizard starts.
3. On the Template Selection page, select the virtual machine template to use for the new VM.
Details of the selected template are shown on the page.
4. Click Next.
The Name and Location page opens.
5. Specify a base name for the VMs, the number of VMs to create, and an inventory location for new virtual machines, and
click Next.
The Host and Clusters page opens.
6. Select the host or cluster on which to run virtual machines, and click Next.
The Resource Pool page opens.
7. Specify the resource pool within which to run virtual machines, and click Next.
The Datastore Options page opens.
8. Select Lookup for Existing Datastore, and click Next.
The Datastore Lookup page opens.
9. Select the datastore in which to store virtual machine files, and click Next.
10. Customize the settings for each virtual machine.
● Name—Type a name for the virtual machine.
● CPU—Select the number of CPUs for the virtual machine.
● Memory—Select the memory capacity for the virtual machine.
● Network—Select the virtual networks to which to connect this virtual machine.
11. Click Update, and click Next
The Ready to Complete page opens.
12. Click Finish.
26 Working With Virtual Machines
Page 27

Deploy Virtual Machines to a New VMFS Datastore
Use the Create Virtual Machines wizard to deploy one or more virtual machines to a new datastore.
Prerequisites
A virtual machine template must be created from which new virtual machines can be deployed. For information about creating or
updating a virtual machine template, see the vSphere help topics on virtual machine templates.
NOTE: The options that appear when deploying a virtual machine change depending on the volume preferences of the
Storage Manager user-defined in the vSphere Client Plugin.
Steps
1. Select an object that can be the parent of a virtual machine:
● Datacenter
● Host
● Cluster
2. Select Actions > All Dell Storage Actions > Provision Virtual Machine.
The Provision Virtual Machine wizard starts.
3. On the Template Selection page, select the virtual machine template to use for the new VM.
Details of the selected template are shown on the page.
4. Click Next.
The Name and Location page opens.
5. Specify a base name for the VMs, the number of VMs to create, and an inventory location for new virtual machines, and
click Next.
The Host and Clusters page opens.
6. Select the host or cluster on which to run virtual machines, and click Next.
The Resource Pool page opens.
7. Specify the resource pool within which to run virtual machines, and click Next.
The Datastore Options page opens.
8. Select Create VMFS Datastore, and click Next.
The Storage Center page opens.
9. Select the Storage Center on which to create the volume, and click Next.
The Volume page opens.
10. Enter the name and size for the new volume, select the volume folder, and click Next.
11. Select the volume settings:
● Storage Type—A Storage Type is a pool of storage with a single datapage size. The Storage Type is set at the disk
folder level, and once set it cannot be changed without assistance from technical support. (This entry appears only if the
preferences are set in Storage Center).
● Storage Profile—A Storage Profile controls how the Storage Center manages volume data.
○ Recommended (All Tiers)—Select this option for most volumes. The Recommended profile allows the system to
automatically progress data between and across all storage tiers based on the type of data and usage.
○ High Priority (Tier 1)—Select this option to force volume data to remain in tier 1 storage.
○ Medium Priority (Tier 2)—Select this option to force volume data to remain in tier 2 storage.
○ Low Priority (Tier 3)—Select this option to force volume data to remain in tier 3 storage.
● Data Reduction Profile—Data Reduction uses compression and deduplication to decrease the amount of disk space
that is used by volume data. Compression reduces the amount of space that is used by a volume by encoding data.
Deduplication finds duplicate pages and removes them, conserving the disk space that would be used by additional
copies. When deduplication is used, compression is also applied to a volume.
● Cache Settings—Select or clear the Read Cache Enabled and Write Cache Enabled check boxes to set the default
cache settings for the new volume.
● Selected Volume QoS Profile—Accept the Volume QoS Profile Default or click Change it to select a different QoS
Profile.
12. Click Next.
The Snapshot Profile page opens.
13. Select a Snapshot Profile for the Volume and click Next.
Working With Virtual Machines
27
Page 28

14. Select the LUN for mapping the volume, and click Next.
15. Select the VMFS version, and click Next
16. Select the I/O protocol to use for this volume, and click Next.
17. Confirm the Datastore Properties, or change the datastore name, and click Next.
18. (Optional) Select Create Replication/Live Volume if you want to replicate the volume data to a second Storage Center
and allow both Storage Centers to process I/O requests for the volume. For more information, see Create and Manage
Replications and Live Volumes on page 19.
a. Select a Target Storage Center, and click Next.
b. Select the Target Volume Settings and click Next.
c. Select the Replication Options and click Next.
19. Customize the settings as needed for each virtual machine.
● Name—Type a name for the virtual machine.
● CPU—Select the number of CPUs for the virtual machine.
● Memory—Select the memory capacity for the virtual machine.
● Network—Select the virtual networks to which to connect this virtual machine.
20. Click Next.
The Ready to Complete page opens.
21. Click Finish.
28 Working With Virtual Machines
Page 29

Viewing Dell Storage Information
Use the Dell Storage vSphere Client Plugin to display information about Dell Storage including HBA to Storage Center
connectivity, datastore information, and performance charts.
Topics:
• Viewing the Host Settings
• Configuring Storage Center Connections
• Using Dell Storage Views
• Viewing Dell Storage Charts
Viewing the Host Settings
Use the Dell Storage Settings tab to display information about the Fibre Channel, iSCSI, and SAS connections between the
ESXi host and the Storage Center. The Dell Storage Settings page is accessible from the Configure tab of an ESXi host.
Steps
1. In the left navigation pane, select a host.
2. Click the Configure tab.
3. In the middle navigation pane, scroll down and select Dell Storage Settings.
The HBAs associated with the host are displayed.
4. In the HBAs area, select an HBA to display the Adapter Details
5. Expand the HBA to view the Storage Centers that are connected to the HBA.
6. Select a Storage Center to display details about the Storage Center.
4
Connectivity Legend
Table 1. Description of Connectivity Icons
Icon Label Description
Connected HBA
Disconnected HBA
Connected Storage Center
Partially Connected Storage
Center
Not Connected Storage Center
Storage Center Ready to
Configure
A connection between the HBA and Storage Center exists.
A connection between the HBA and Storage Center does not exist.
The Storage Center is connected to the ESXi host.
The Storage Center is partially connected to the ESXi host.
The Storage Center is not connected to the ESXi host.
The Storage Center is ready to be configured to connect to the ESXi
host.
Viewing Dell Storage Information 29
Page 30

Adapter Details
Table 2. Description of Reported Adapter Information
Label Description
Model Adapter model name
WWN World Wide Name (WWN) for Fibre Channel and the iSCSI Qualified Name (IQN) for
iSCSI
Device Name of the adapter
Type Storage adapter type (FC or iSCSI)
Node Name Fibre Channel node name
Alias iSCSI alias name
Status Status of the adapter
Storage Details
Table 3. Description of Storage Details
Label Description
Storage Center Name of the Storage Center
Storage Center SN Serial number of the Storage Center
Storage Server Server to which the device is connected
Status Configuration status of the Storage Center (Configured, Configurable, Not Visible)
Connectivity Status of the Storage Center connection (Up, Down, or Not Connected)
30 Viewing Dell Storage Information
Page 31

Configuring Storage Center Connections
Use the Dell Storage Settings tab to configure a connection between an HBA and a Storage Center.
Steps
1. In the left navigation pane, select a host.
2. Click the Configure tab.
3. In the middle navigation pane, scroll down and select Dell Storage Settings.
The HBAs associated with the host are displayed.
4. In the HBAs area, select an HBA to display the Adapter Details
5. Expand the HBA to view the Storage Centers that are connected to the HBA.
6. Select a Storage Center connection that is unconfigured and shows the Storage Center Ready to Configure icon.
7. Click Configure.
The configure operation performs the following tasks for a Fibre Channel or a SAS connection:
● Creates a server definition on the Storage Center if it does not exist.
● Creates corresponding HBA definition that is associated with this server.
NOTE: If the host is in a cluster that does not exist on the Storage Center, the cluster definition is created on the
Storage Center.
The configure operation performs the following tasks for an iSCSI connection:
● If necessary, enables the iSCSI software initiator on the ESXi host side.
● Sets the ESXi host firewall rules to enable iSCSI connections
● Configures iSCSI software initiators with Storage Center IP (IQN) targets (the targets are added to a list of iSCSI static
targets on the ESXi host)
● Creates a server definition on the Storage Center if it does not exist and creates a corresponding HBA definition that is
associated with this server.
NOTE:
If the host is in a cluster that does not exist on the Storage Center, the cluster definition is created on the
Storage Center.
Using Dell Storage Views
Use Dell Storage views to display information about a Dell datastore or RDM. The Dell Storage view is accessible from the
Monitor tab of a host, cluster, datastore, datastore cluster, virtual machine, or datacenter.
Viewing General Information
The General tab in the Dell Storage Monitor view displays information about a Storage Center object and the Storage Center
to which it is connected.
Steps
1. In the left navigation pane, select a Storage Center object such as one of the following:
● Host
● Datacenter
● Datastore
● Datastore cluster
● Virtual machine
2. Click the Monitor tab.
3. In the middle navigation pane, scroll down and select Dell Storage.
4. In the top pane of the view, select a datastore.
5. In the lower pane of the view, click the General tab.
Viewing Dell Storage Information
31
Page 32

Dell Storage General Tab
The following figure shows an example of information in the General tab for the selected object:
Figure 5. General Information for a Datastore
Label
Name Name of the volume
Device ID Volume identifier assigned by Dell Storage vSphere Client Plugin
Storage Center Storage Center on which the volume resides
Dell SN Dell serial number of the volume
Dell Index Object index for the volume
Size Size of the volume
Disk Folder Storage Center disk folder location
Volume Folder Folder location of the volume
Storage Type Storage type of the volume
Status Current status for the volume, as well as the controller on which the volume is active
Snapshot Profiles Snapshot Profiles applied to the volume
Storage Profiles Storage profile for the volume
Volume QoS Profile QoS profile for the volume
Write Cache Indicates whether write cache is enabled for the volume
Read Cache Indicates whether read cache is enabled for the volume
Created By User that created the volume and time and date of creation
Updated By User that updated the volume and time and date of the update
Notes Descriptive notes for the volume
Description
32 Viewing Dell Storage Information
Page 33

Viewing Usage Statistics
The Usage Statistics tab in the Dell Storage Monitor view displays usage information about a selected datastore.
Steps
1. In the left navigation pane, select a Storage Center object such as one of the following:
● Host
● Datacenter
● Datastore
● Datastore cluster
● Virtual machine
2. Click the Monitor tab.
3. In the middle navigation pane, scroll down and select Dell Storage.
4. In the top pane of the view, select a datastore.
5. In the lower pane of the view, click the Usage Statistics tab.
Dell Storage Usage Statistics Tab
The following figure shows an example of usage statistics for the selected datastore:
Figure 6. Usage Statics for a Datastore
Label
Total volume space consumed Total space used on the volume
Total disk space consumed Total disk space consumed by the volume
Savings vs. basic RAID 10 storage Estimate of storage space saved using Dell Dynamic Block Architecture compared to
Data Instant Snapshotoverhead Total space consumed by volume snapshots
Description
basic RAID storage
Viewing Dell Storage Information 33
Page 34

Label Description
Data Reduction Profile Indicates either Compress or None, depending on the Data Reduction option selected
Data Reduction Paused Indicates whether Data Compression is currently running on the volume
Compression Savings Percentage of volume space saved by using Compression
Compression Ratio Indicates the volume efficiency of using Compression
Disk Space Saved Through
Compression
Tier 1 Storage Active volume space, active disk space, and Snapshot space for the volume on tier 1
Tier 2 Storage Active volume space, active disk space, and Snapshot space for the volume on tier 2
Tier 3 Storage Active volume space, active disk space, and Snapshot space for the volume on tier 3
Amount of volume space saved by using Compression
Enables you to download an image of the chart in .png format
Viewing Connectivity Information
The Connectivity Info tab in the Dell Storage Monitor view displays connectivity information about the selected Dell volume.
Steps
1. In the left navigation pane, select a Storage Center object such as one of the following:
● Host
● Datacenter
● Datastore
● Datastore cluster
● Virtual machine
2. Click the Monitor tab.
3. In the middle navigation pane, scroll down and select Dell Storage.
4. In the top pane of the view, select a datastore.
5. In the lower pane of the view, click the Connectivity Info tab.
Dell Storage Connectivity Info Tab
The following figure shows an example of usage statistics for a datastore:
Figure 7. Connectivity Information for a Datastore
34
Viewing Dell Storage Information
Page 35

Label Description
Server Port Server name and port
Storage Port Storage port on the Storage Center
LUN Mapping LUN
Type Protocol (Fibre Channe, iSCSI, or SAS)
Status Status for the path
Viewing Volume Snapshots
The Volume Snapshots tab in the Dell Storage Monitor view displays information about the snapshots take for the selected
datastore.
Steps
1. In the left navigation pane, select a Storage Center object such as one of the following:
● Host
● Datacenter
● Datastore
● Datastore cluster
● Virtual machine
2. Click the Monitor tab.
3. In the middle navigation pane, scroll down and select Dell Storage.
4. In the top pane of the view, select a datastore.
5. In the lower pane of the view, click the Volume Snapshots tab.
Volume Snapshots Tab
The Volume Snapshots tab displays information about the snapshsots for the selected Dell volume.
The following figure shows an example of information that is shown on the Volume Snapshots tab:
Figure 8. Volume Snapshots Tab
Label
Description
Freeze Time Time at which the snapshot was taken.
Expire Time Time at which the snapshot automatically expires.
Snapshot Size Total space used by the snapshot
Viewing Dell Storage Information 35
Page 36

Label Description
Description Name of the Snapshot Profile that automatically created the snapshot.
Viewing Protocol Endpoints
The Protocol Endpoint tab in the Dell Storage Monitor view displays details about the protocol endpoints used by the server
for VVol operations.
Steps
1. In the left navigation pane, select a Storage Center object such as one of the following:
● Host
● Datacenter
● Datastore
● Datastore cluster
● Virtual machine
2. Click the Monitor tab.
3. In the middle navigation pane, scroll down and select Dell Storage.
4. In the top pane of the view, select a datastore.
5. In the lower pane of the view, click the Protocol Endpoint tab.
Protocol Endpoint Tab
The following figure shows an example of the information that is displayed about a VVol protocol endpoint
Figure 9. Protocol Endpoint Tab
Label
Server Port Server name and port
Storage Port Storage port on the Storage Center
Lun Mapping LUN
Type Protocol (Fibre Channel, iSCSI, or SAS)
Status Status for the path
Server HBA HBA port used for the path
Read-Only Indicates whether the endpoint is read-only
Description
36 Viewing Dell Storage Information
Page 37

Label Description
Operational State Current state of the endpoint path
Viewing Replications and Live Volumes
The Replications and Live Volumes tab in the Dell Storage Monitor view displays replication or Live Volume information
about the selected Dell volume.
Steps
1. In the left navigation pane, select a Storage Center datastore or volume that is configured for replication or Live Volume.
2. Click the Monitor tab.
3. In the middle navigation pane, scroll down and select Dell Storage.
4. In the top pane of the view, select a datastore.
5. In the lower pane of the view, click the Replications and Live Volumes tab.
Replications/Live Volume Tab
The Replications/Live Volume tab displays information about the replications for the selected Dell volume.
The following figure shows an example of information in the Replications/Live Volume tab.
Viewing Dell Storage Information
37
Page 38

Label Description
Replication Type Type of replication
State Current state of the replication
Destination Storage Center Destination (target) Storage Center for the replication
Synced Percentage of data currently in sync
Remaining Amount of data that is not yet synced
For each replication:
General Options Settings that are configured for the replication
Live Volume Options Settings that are configured for the Live Volume, if the selected volume is a Live
Volume
Source Details Information about the replication source
Destination Details Information about the replication destination
Source Snapshots Current snapshots for the source volume
38 Viewing Dell Storage Information
Page 39

Label Description
Destination Snapshots Current snapshots for the destination volume
Viewing Dell Storage Charts
Use Dell Storage-Charts to display Storage Center performance information for an ESXi host. The Dell Storag- Charts view
is accessible from the Monitor tab of a host, cluster, datastore, datastore cluster, virtual machine, or datacenter.
Steps
1. In the left navigation pane, select a Storage Center object such as one of the following:
● Host
● Datacenter
● Datastore
● Datastore cluster
● Virtual machine
2. Click the Monitor tab.
3. In the middle navigation pane, scroll down and select Dell Storage-Charts.
4. Select a Storage Center.
The charts view displays performance, I/O size, and latency graphs.
Dell Storage-Charts View
The following figures show the charts displayed for a Storage Center
Figure 10. Performance Graphs
Viewing Dell Storage Information
39
Page 40

Figure 11. IO Size and Latency Charts
Charts
The following table describes the type of Storage Center performance data displayed in charts.
Label
KB/sec Chart
IO/sec Chart
IO Size Chart Average IO Size – Average size of I/O operations in kilobytes
Latency (ms)
Chart
Description
Read KB/sec – Transfer rate of read operations in kilobytes per second
Total KB/sec – Combined transfer rate of read and write operations in kilobytes per second
Write KB/sec – Transfer rate of write operations in kilobytes per second
Read IO/sec – Transfer rate of read operations in I/O operations per second
Total IO/sec – Combined transfer rate of read and write operations in I/O operations per second
Write IO/sec – Transfer rate of write operations in I/O operations per second
Read Latency – Latency of read operations in milliseconds
Write Latency – Latency of write operations in milliseconds
Transfer Latency – Latency of data transfer operations in milliseconds
40 Viewing Dell Storage Information
 Loading...