

Page 1
Dell™ PowerEdge™ Rack Console 15FP
Flat-Panel Monitor
User’s Guide
Guide Utilisateur du Moniteur à Ecran Plat
Flachbildschirm-Monitor - Bedienungsanleitung
フラットパネルモニタ ユーザーズガイド
Guía del usuario del monitor de pantalla plana
平板顯示器用戶指南
平面顯示器使用手冊
LCD 모니터 사용 설명서
Instrukcja Obsługi Monitora Płaskoekranowego
Руководство
пользователя монитора с плоским экраном
www.dell.com | support.dell.com
Page 2

Page 3

Dell™ PowerEdge™ Rack Console 15FP
Flat-Panel Monitor
User’s Guide
www.dell.com | support.dell.com
Page 4
Notes, Notices, and Cautions
NOTE: A NOTE indicates important information that helps you make better use of your computer.
NOTICE: A NOTICE indicates either potential damage to hardware or loss of data and tells you
how to avoid the problem.
CAUTION: A CAUTION indicates a potential for property damage, personal injury,
or death.
____________________
Information in this document is subject to change without notice.
© 2003 Dell Computer Corporation. All rights reserved.
Reproduction in any manner whatsoever without the written permission of Dell Computer Corporation is strictly forbidden.
Trademarks used in this text: Dell, the DELL logo , and PowerEdge are trademarks of Dell Computer Corporation. Microsoft
and Windows are registered trademarks of Microsoft Corporation. VESA is a registered trademark of Video Electronics
Standards Association. ENERGY STAR is a registered trademark of the U.S. Environmental Protection Agency. As an
ENERGY STAR Partner, Dell Computer Corporation has determined that this product meets the ENERGY STAR
guidelines for energy efficiency.
Other trademarks and trade names may be used in this document to refer to either the entities claiming the marks and
names or their products. Dell Computer Corporation disclaims any proprietary interest in trademarks and trade names
other than its own.
April 2003 P/N 3Y386 Rev. A01
Page 5

Contents
CAUTION: Safety Instructions . . . . . . . . . . . . . . . . . . . 1-1
Rack Mounting of Systems
. . . . . . . . . . . . . . . . . . . . 1-1
Instruction
Specifications
. . . . . . . . . . . . . . . . . . . . . . . . . . . . . . 1-2
Overview
Features
Power Management Modes
. . . . . . . . . . . . . . . . . . . . . . . . . . . . . 1-2
. . . . . . . . . . . . . . . . . . . . . . . . . . . . . . 1-2
. . . . . . . . . . . . . . . . . . . . . . . . . . . . 1-3
. . . . . . . . . . . . . . . . . . . . 1-5
Flat-Panel Monitor Front and Back View. . . . . . . . . . . . . . 1-6
Setting Up the Flat-Panel Monitor
. . . . . . . . . . . . . . . . 1-7
Power Management System . . . . . . . . . . . . . . . . . . . 1-7
Maintenance . . . . . . . . . . . . . . . . . . . . . . . . . . . . . 1-8
Controls and Indicators
Overview
. . . . . . . . . . . . . . . . . . . . . . . . . . . . . 1-8
Adjusting the Monitor Display
Troubleshooting
Issue: Display is unclear and unstable.
Issue: There is no display on the flat-panel monitor.
. . . . . . . . . . . . . . . . . . . . . . . 1-8
. . . . . . . . . . . . . . . . . . 1-11
. . . . . . . . . . . . . . . . . . . . . . . . . . 1-13
. . . . . . . . . . . . . . 1-13
. . . . . . . 1-13
Issue: "Input Signal Out of Range" message in the OSD. . . . . . 1-14
Issue: "No Signal" message in the OSD. . . . . . . . . . . . . . 1-14
Regulatory Notices. . . . . . . . . . . . . . . . . . . . . . . . . 1-14
Energy Efficiency
. . . . . . . . . . . . . . . . . . . . . . . . . 1-14
Federal Communications Commission (FCC) Notice
(U.S. Only)
. . . . . . . . . . . . . . . . . . . . . . . . . . . . 1-14
EU Declaration of Conformity (LVD, EMC) . . . . . . . . . . . 1-16
Canadian Regulatory Information (Canada Only). . . . . . . . . 1-16
Contents 3
Page 6

Figures
Tables
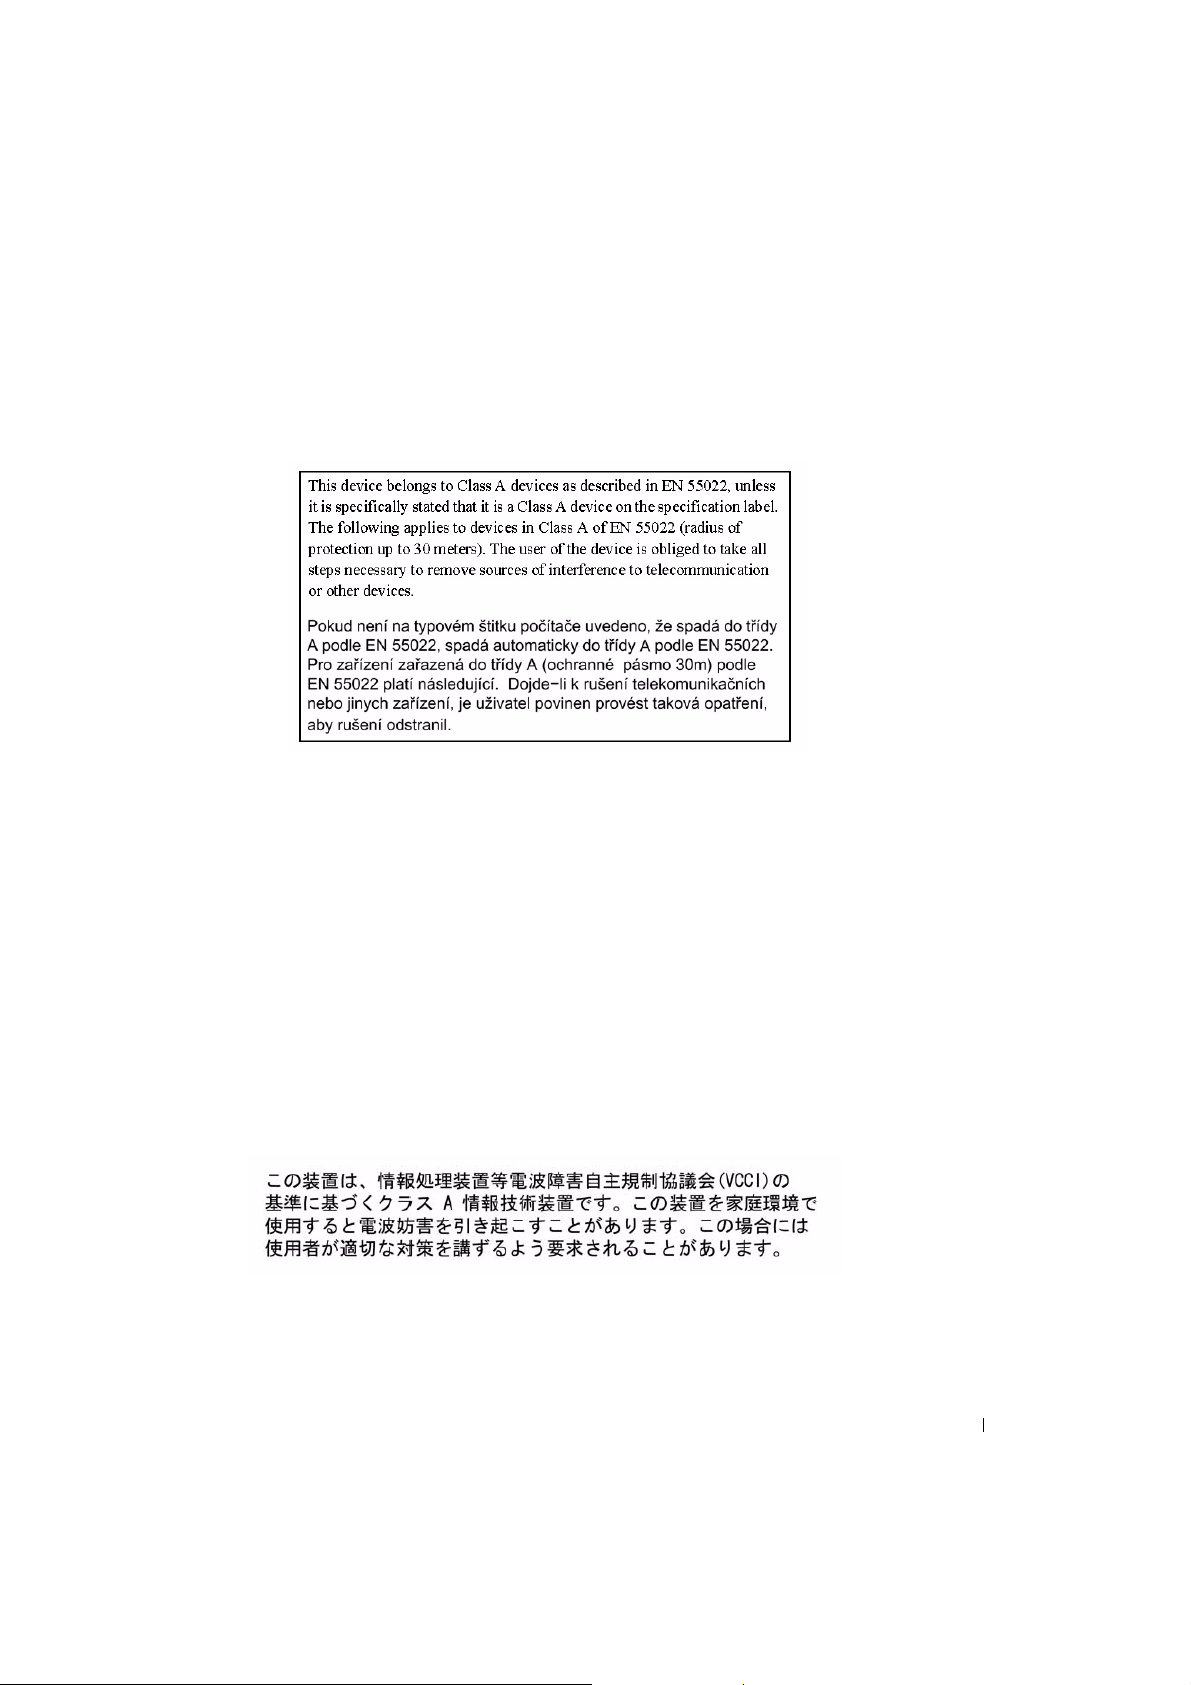
EN 55022 Compliance (Czech Republic Only) . . . . . . . . . 1-17
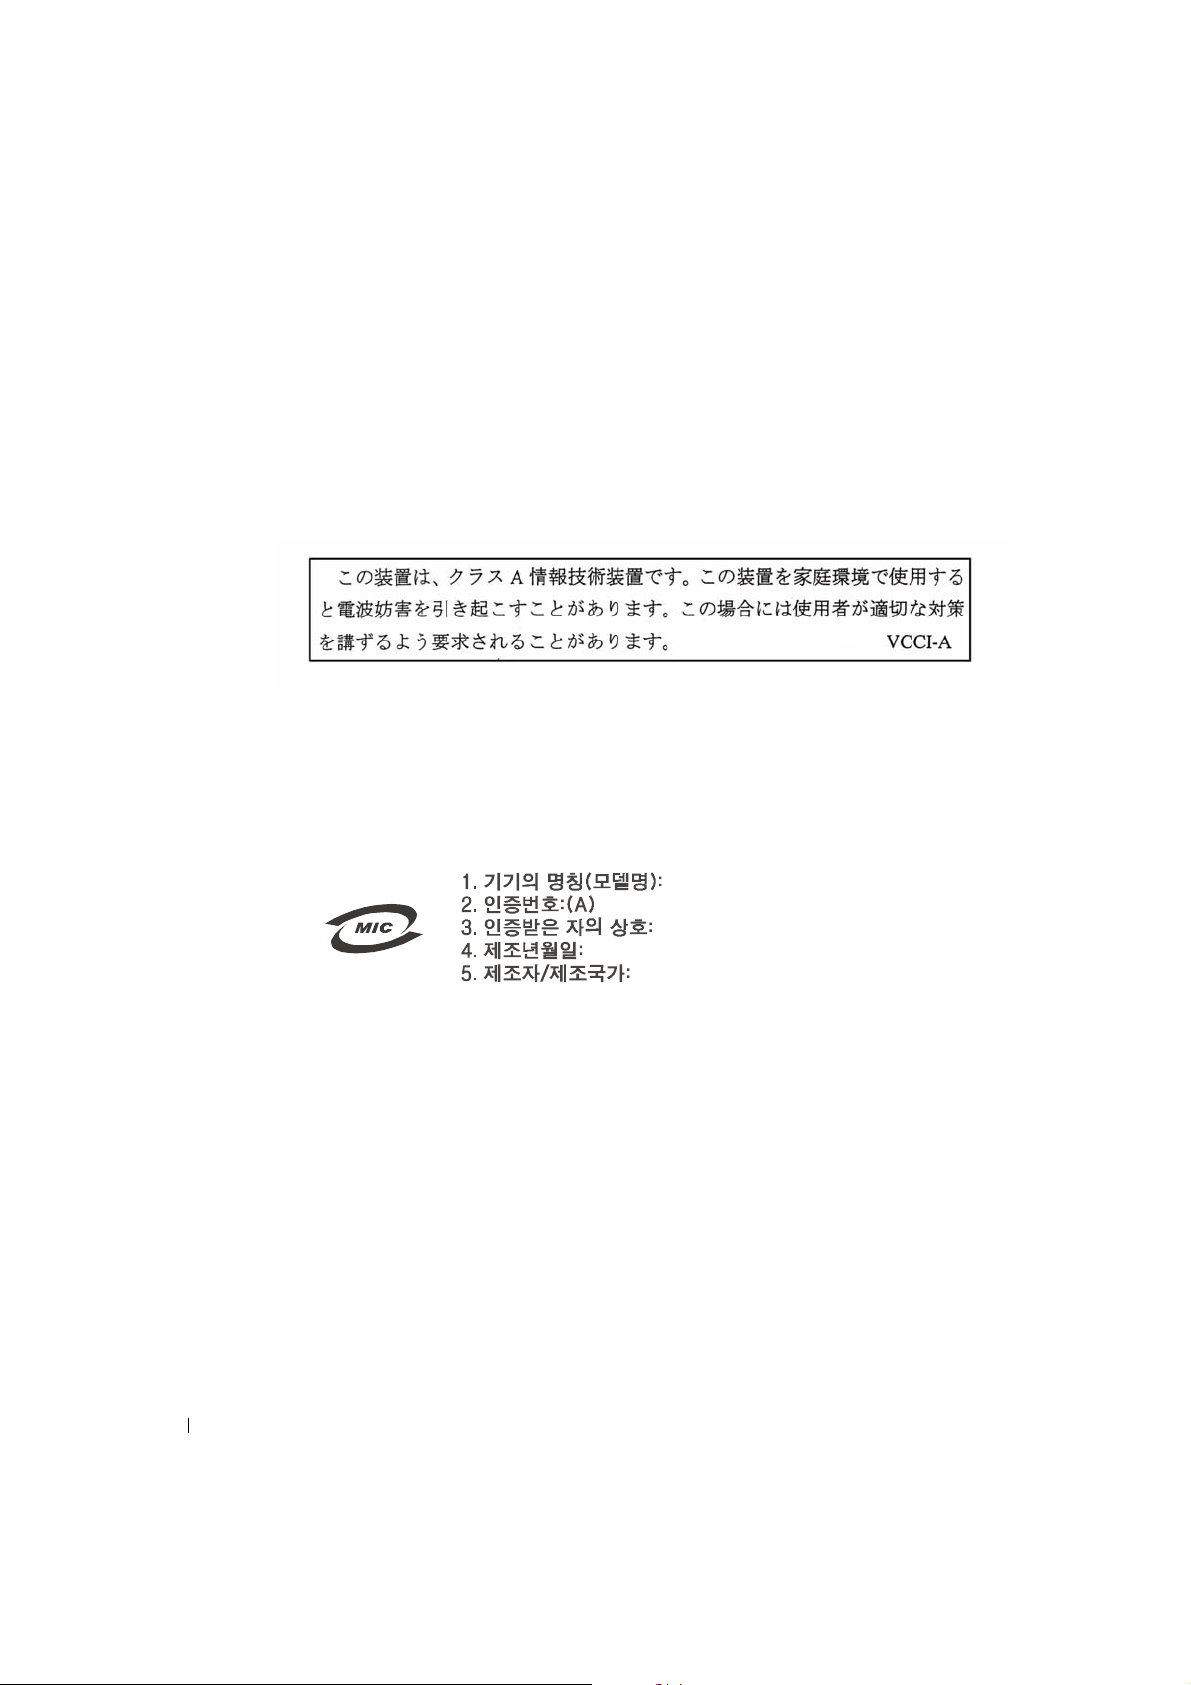
VCCI Class A Notice (Japan Only) . . . . . . . . . . . . . . . 1-17
MIC Class A Regulatory Label . . . . . . . . . . . . . . . . . 1-18
Polish Center for Testing and Certification Notice
. . . . . . . . 1-18
NOM Information (Mexico Only) . . . . . . . . . . . . . . . . 1-19
BSMI Notice (Taiwan Only) . . . . . . . . . . . . . . . . . . . 1-20
Ergonomics Notice (Germany Only)
. . . . . . . . . . . . . . . 1-20
Ergonomie Hinweis (nur Deutschland). . . . . . . . . . . . . . 1-20
Figure 1-1. Pin Assignment . . . . . . . . . . . . . . . . . 1-5
Figure 1-2. Front View
Figure 1-3. Back View
Figure 1-4. Controls
Figure 1-5. On Screen Display
. . . . . . . . . . . . . . . . . . . . 1-6
. . . . . . . . . . . . . . . . . . . . 1-7
. . . . . . . . . . . . . . . . . . . . . 1-8
. . . . . . . . . . . . . . . . 1-9
Table 1-1. Features . . . . . . . . . . . . . . . . . . . . . 1-2
Table 1-2. Power Management Modes
Table 1-3. Signal Connector (15 pin D-sub Connector)
Table 1-4. Control Panel (Monitor Front Panel)
Table 1-5. OSD Layout
Table 1-6. OSD Description
Table 1-7. LED Indicators
Table 1-8. OSD Functions
4 Contents
. . . . . . . . . . . 1-5
. . . 1-5
. . . . . . . 1-8
. . . . . . . . . . . . . . . . . . . 1-9
. . . . . . . . . . . . . . . . . 1-9
. . . . . . . . . . . . . . . . . 1-10
. . . . . . . . . . . . . . . . . 1-11
Page 7
CAUTION: Safety Instructions
Use the following safety guidelines to help ensure your own personal safety and to help
protect yo ur system f
rom potential damage. For complete safety information, see the safety
documentation that came with your system.
Rack Mounting of Systems
Observe the following precautions for rack stability and safety. Also refer to the rack
installation documentati on accompan ying the syst em and the rack for s pecific warning and/or
caution statements and procedures.
Systems are considered to be components in a rack. T hus, "component" refers to any system
as well as to various peripherals or supporting hardware.
CAUTION: Installing systems in a rack without the front and side stabilizers
installed could cause the rack to tip o ver, potentially resulting in bodi ly injur y
under certain circumstances. Therefore, always install the stabilizers before
installing components in the rack.
After installing syst em/components in a rack, never pull more than one
component out of the rack on its mounting rails at one time. The weight of more
than one extended component could cau se the rack to tip over an d may resul t in
serious injury.
NOTE: Your sy stem is safety-certified as a free-standing unit and as a component for
use in a rack cabinet using the customer rack kit when both the rack cabinet and rack kit
were designed for your system. The instal lation of your system and rack kit in any other
rack cabinet has not been approved by any safety agencies. It is your responsibility to
have the final combination of system and rack kit in a cabinet evaluated for suitability
by a certified safety agency. The manufacturer disclaims all warranties and liability in
connection with such combinations.
• System rack kits are intended to be installed in a rack by trained service technicians. If
you install the kit in any other rack, be sure that the rack meets the specifications.
CAUTIO N: Do not move racks by yourself. Due to the height and weight of the
rack, a minimum of two people should acc omplish this task.
• Before working on the rack, make sure that the stabilizers are secured to the rack,
extended to the floor, and that the full weight of the rack rests on the floor. Install front
and side stabilizers on a single rack or front stabilizers for joined multiple racks before
working on the rack.
• Always load the rack from the bottom up, and load the heaviest item in the rack first.
User’s Guide 1-1
Page 8

www.dell.com | support.dell.com
CAUTION: Safety Instructions
• Make sure that the rack is level and stable before extending a component from the rack.
• Do not overload the AC supply branch circuit that provides power to the rack. The total
rack load should not exceed 80 percent of the branch circuit rating.
• Ensure that proper airflow is provided to components in the rack.
• Do not step on or stand on any component when servicing other components in a rack.
(continued)
Instruction
Overview
This product outlines the specifications for the 15-inch, high-resolution color flat-panel
monitor. This flat-panel monitor is designed from the latest flat-panel monitor technology and
provides a performance oriented product with no radiation. This product uses a D-Sub 15-pin
VGA connector and can support 16 VGA modes, VESA DPMS power management, and plug
and play function. It is also a space saving design which conserves rack space compared to a
traditional CRT monitor. In addition, the flat-panel monitor consumes less power.
Features
This product has the following features:
Table 1-1. Features
Feature Description
Faceplate coating Anti-glare treatment of th e front polarizer
Optimal resolution and refresh 1024 x 768 at 60 Hz
Screen type Active Matrix Thin Film Transistor (TFT)
Pixel dot pitch 0.297 mm
Display active area 304.1 mm x 228.1 mm
Physical size (width x dept h x height) 339 mm (3.3 inches) x 42 mm ( 1.6 inches) x 275 mm (10.8
Weight (monitor only) 2.1 kg (4.621 lbs)
1-2 User ’s Guide
Liquid Crystal Display (LCD)
inches)
Page 9

Specifications
General
Model number Rackmount
Flat Panel
Screen type Active matrix-TFT LCD
Screen dimensions 15 inches (15-inch viewable image size)
Preset display area:
Horizontal
Vertical
Pixel dot pitch 0.297 mm
Viewing angle:
Horizontal
Vertical
Luminance output 250 cd/m
Contrast ratio 300:1 typical
Faceplate coating Anti-glare
Backlight CCFL <2> edge light system
304.1 mm ± 0.5 mm (11.97 inches ± 0.02 in ches)
228.1 mm ± 0.5 mm (8.98 inches ± 0.02 inches)
+45 / –55 degree
+65/-65 degree s
2
typical
Resoluti on
Horizontal scan range 24 KHz to 60 KHz
Vertical scan range 56 Hz to 75 Hz
Optimal preset resolution 1024 x 768 at 60 Hz
Highest preset resolution 1024 x 768 at 75 Hz
Supported Timing
Mode H-Freq V-Fre q Pixel req. H/V Sync. Comment
640x350 31.469 70.087 25.175 +/– VGA-350
640x400 24.83 56.42 21.05 –/– NEC PC9801
640x400 31.469 70.0870 25.175 –/+, –/– VGA-GRAPH, NEC PC9821
640x480 31.469 59.904 25.175 –/– VGA-480
User’s Guide 1-3
Page 10

Supported Timing
Mode H-Freq V-Freq Pixel req. H/V Sync. Commen t
640x480 37.861 72.809 31.500 –/– VESA-480
640x480 37.500 75.000 31.500 –/– VESA-480-75 Hz
720x400 37.469 70.087 28.322 –/+ VGA-400-TEXT
800x600 35.156 56.250 36.000 +/+ SVGA
800x600 37.879 60.317 40.000 +/+ VESA-6 00
800x600 48.077 72.188 50.000 +/+ VESA-600-72 Hz
www.dell.com | support.dell.com
800x600 46.875 75.000 49.500 +/+ VESA-600-75 Hz
1024x768 48.363 60.004 65.000 –/– XGA
1024x768 53.964 66.132 71.664 +/+ COMPAQ-XGA
1024x768 56.476 70.069 75.000 –/– VESA-768
1024x768 60.023 75.029 78.750 +/+ VESA-768-75 Hz
NOTE: Mode 640 x 350, 70 Hz is not full screen.
Environmental
Temperature:
Operating
Nonoperating
5° to 35° C (50° to 95° F)
–20° to 60° C (–4° to 113° F) for 240 hours
Humidity:
Operating
Nonoperating
20% to 80% (noncondensing)
5% to 80% (noncondensing)
Altitude:
Operating
Nonoperating
3000 m (10,000 ft)
12,192 m (40,000 ft)
Thermal dissipation:
Maximum
Typical
71.7 BTU/hour
51.2 BTU/hour
1-4 User ’s Guide
Page 11
Power Management Modes
If you have a VESA DPMS compliance display card or software installed in your system, the
monitor can automatically reduce its power consumption when not in use. If input from the
keyboard, mouse, or other i nput de vices is detected, the mon itor will automatically "wake up."
Table 1-2 shows the power consumption and signals for this automatic power savin g feature.
Table 1-2. Power Management Modes
VESA’s Mode Video H-sync V-sync Power
Used
Power Saving
(%)
LED Color
On Active Yes Yes Maximum 0% Full bright < blue >
Sleep mode Blanked No Yes <5 W 75% Half bright < blue >
Sleep mode Blanked Yes No <5 W 75% Half bright < blue >
Active-off Blanked No No <5 W 75% Dark
DC power of f <5 W 75% Dark
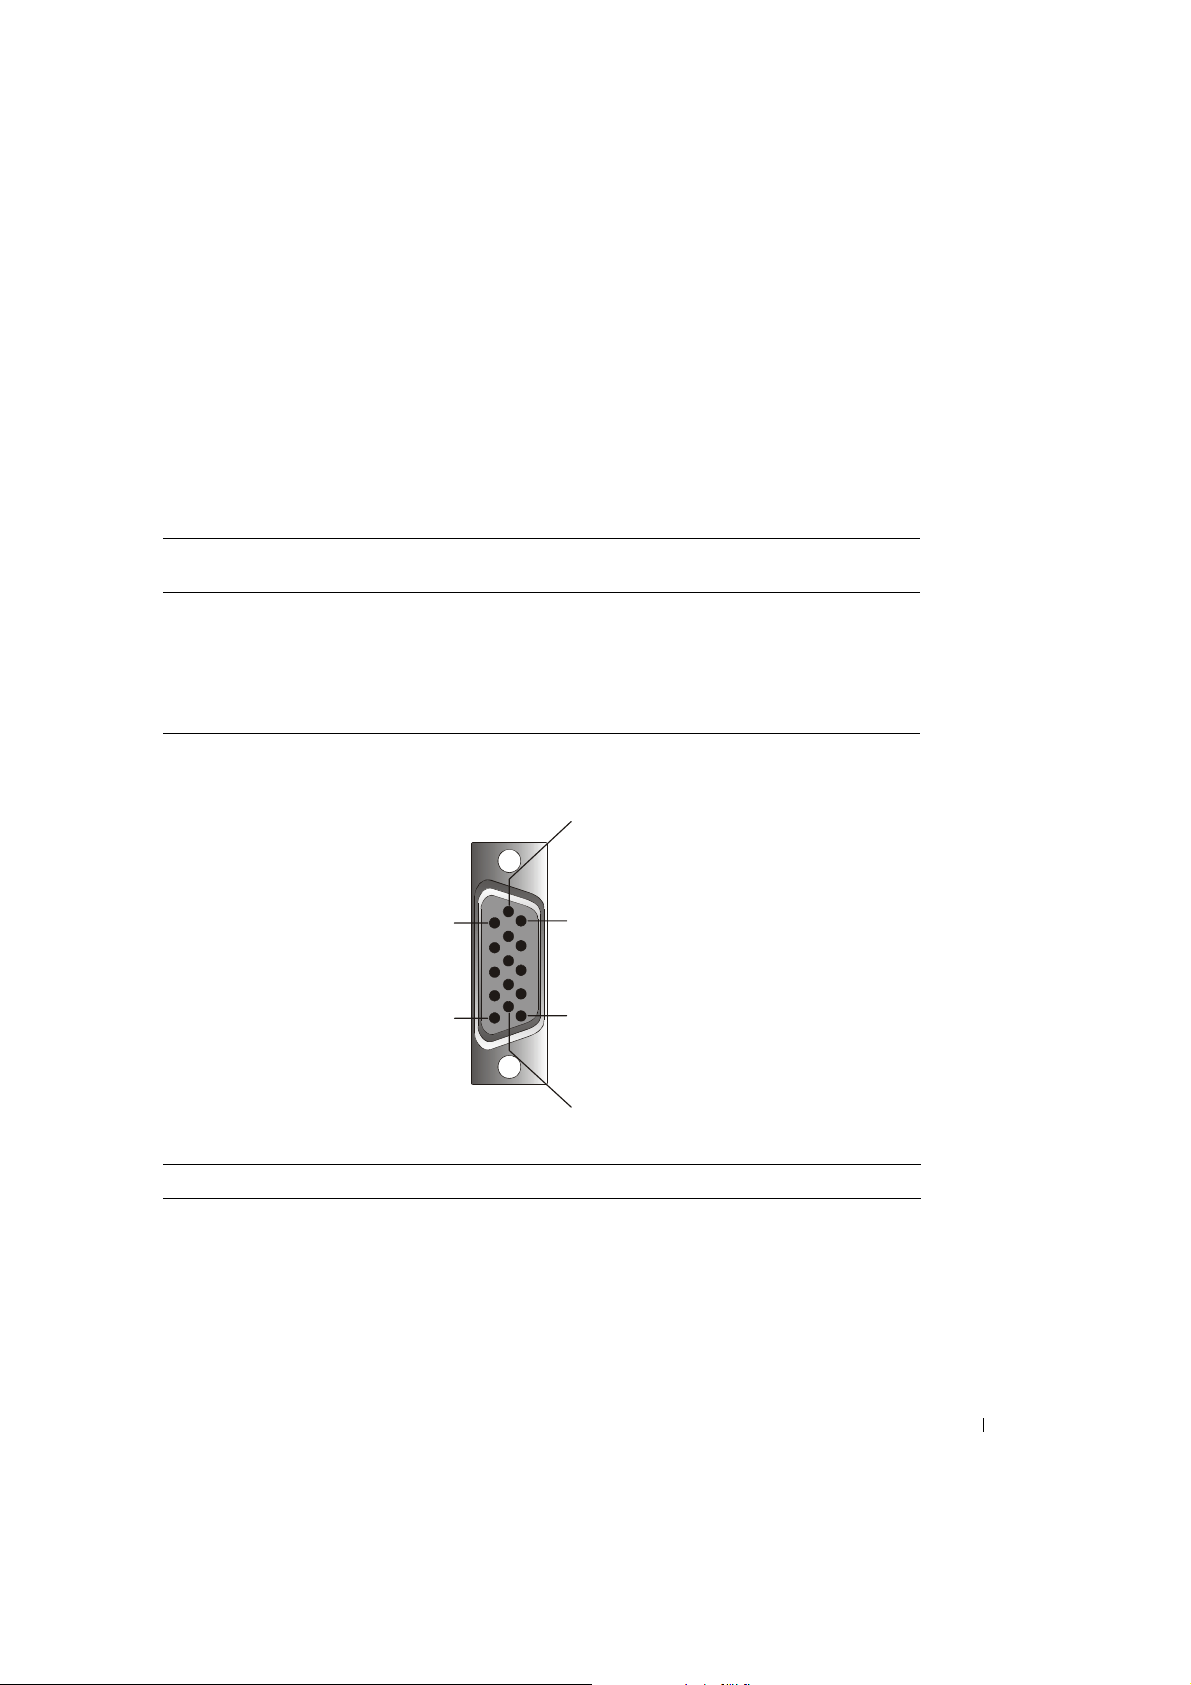
Figure 1-1. Pin Assignment
6
1
5
11
15
10
Table 1-3. Signal Connector (15 pin D-sub Connector)
Pin No Signal
1Red Video
2 Green Video
3Blue Video
4NC
User’s Guide 1-5
Page 12
www.dell.com | support.dell.com
Table 1-3. Signal Connector (15 pin D-sub Connector)
Pin No Signal
5 Logic Ground
6 Red Video Ground
7 Green Video Ground
8 Blue Video Ground
9VCC
10 VGA _ CON (check VGA cable)
11 NC
12 SDA (DDC1/2B)
13 Horizontal Sync
14 Vertical Sync
15 SCL (DDC2B)
(continued)
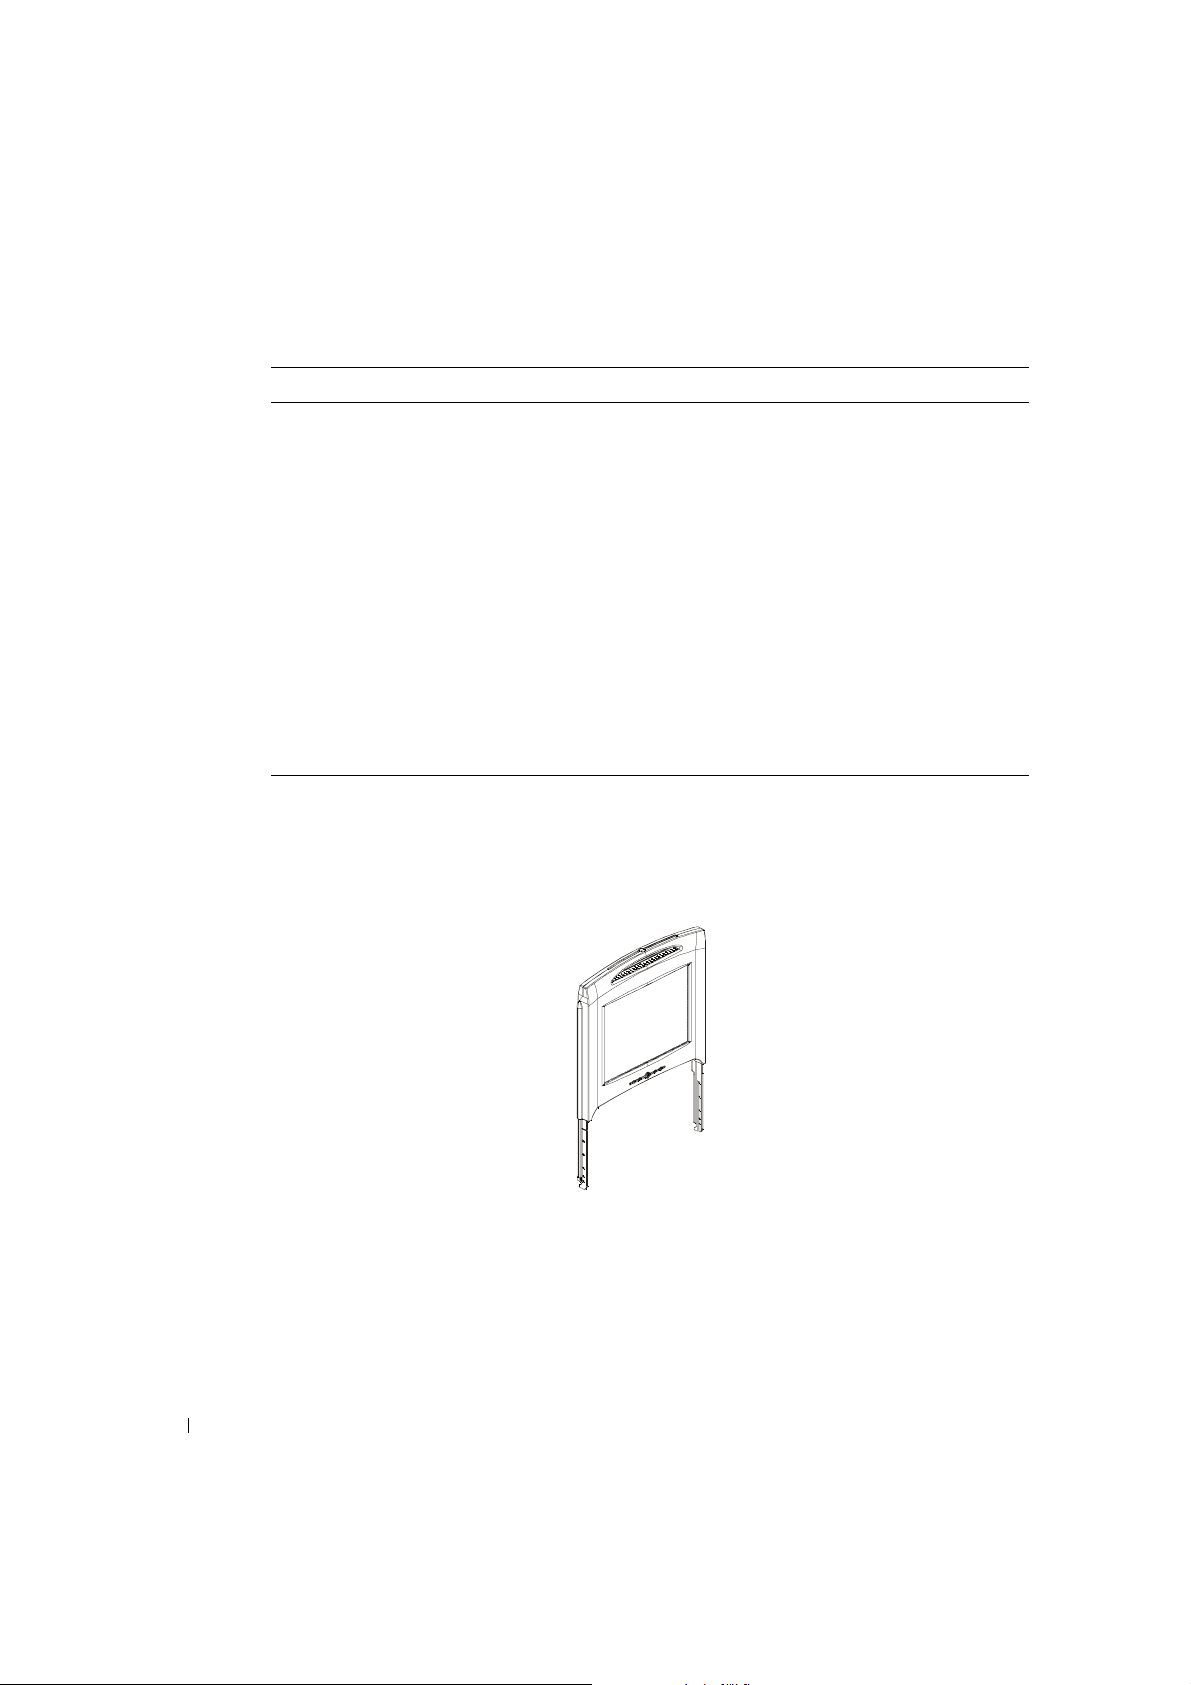
Flat-Panel Monitor Front and Back View
Figure 1-2. Front View
1-6 User ’s Guide
Page 13
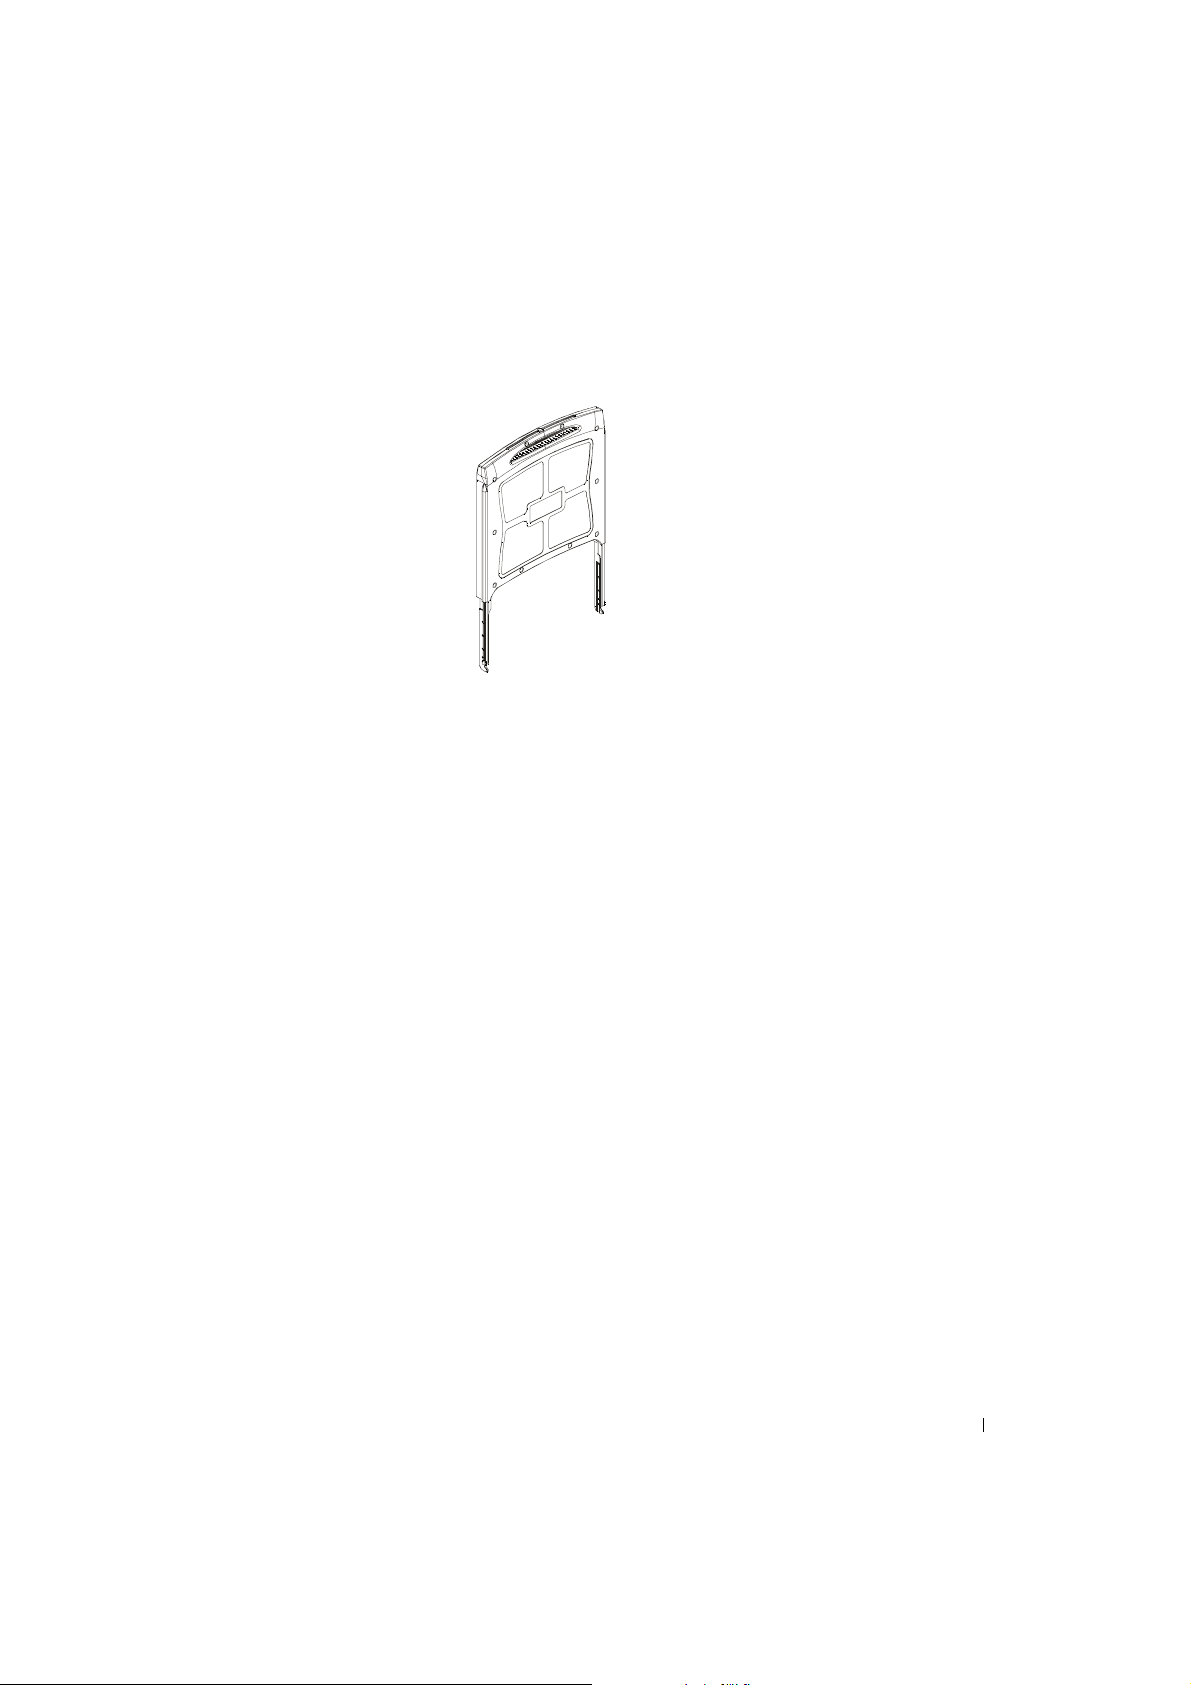
Figure 1-3. Back View
Setting Up the Flat-Panel Monitor
Follow the steps below to set up the flat-panel monitor.
• Ensure flat-panel monitor has been connected to an AC power source. See the Rack
Installation Guide.
• You can power on this flat-panel monitor by using either one of the following two
methods.
– Automatically: Pull the flat-panel monitor tray out until it locks, and then grasp the
monitor by its handle and rotate it up to a desirable position. The flat-panel monitor
automatically turns on when it reaches approximately a 90° angle.
– Manually: Press the Power button located at the back side of the bezel.
• To adjust the height, grasp the monit or at bot h sides and us e equal pr ess ure on both s id es
to move it up and down.
Power Management System
This flat-panel monitor complies with the VESA DPMS (version 1.0p) power management
standard. The VESA DPMS proposal provides four phases of power saving modes by
detecting horizontal or vertical sync signal. See Table 1-2 for information about power
consumption for each different power management mode.
When the flat-panel monitor is in the power saving mode or detects an incorrect timing, the
monitor screen will be blank and the power button LED indicator color will be half-bright
blue.
User’s Guide 1-7
Page 14
www.dell.com | support.dell.com
Maintenance
CAUTION: To avoid risk of electric shock, do not disassemble the monitor
cabinet. Users cannot ser vice the monitor. User maintenance is restricted to
cleaning.
CAUTION: Before cleaning the monitor, unplug it from the electrical outlet.
• To clean your flat-panel monitor screen, use a soft, clean cloth lightly dampened with
water or isopropyl alcohol.
• To clean the monitor cabinet, use a cloth lightly dampened with a mild detergent.
• Wipe off stubborn stains from the cabinet with a cloth lightly dampened in isopropyl
alcohol. Do not use benzene, thinner, ammonia, or abrasive cleaners.
Controls and Indicators
Overview
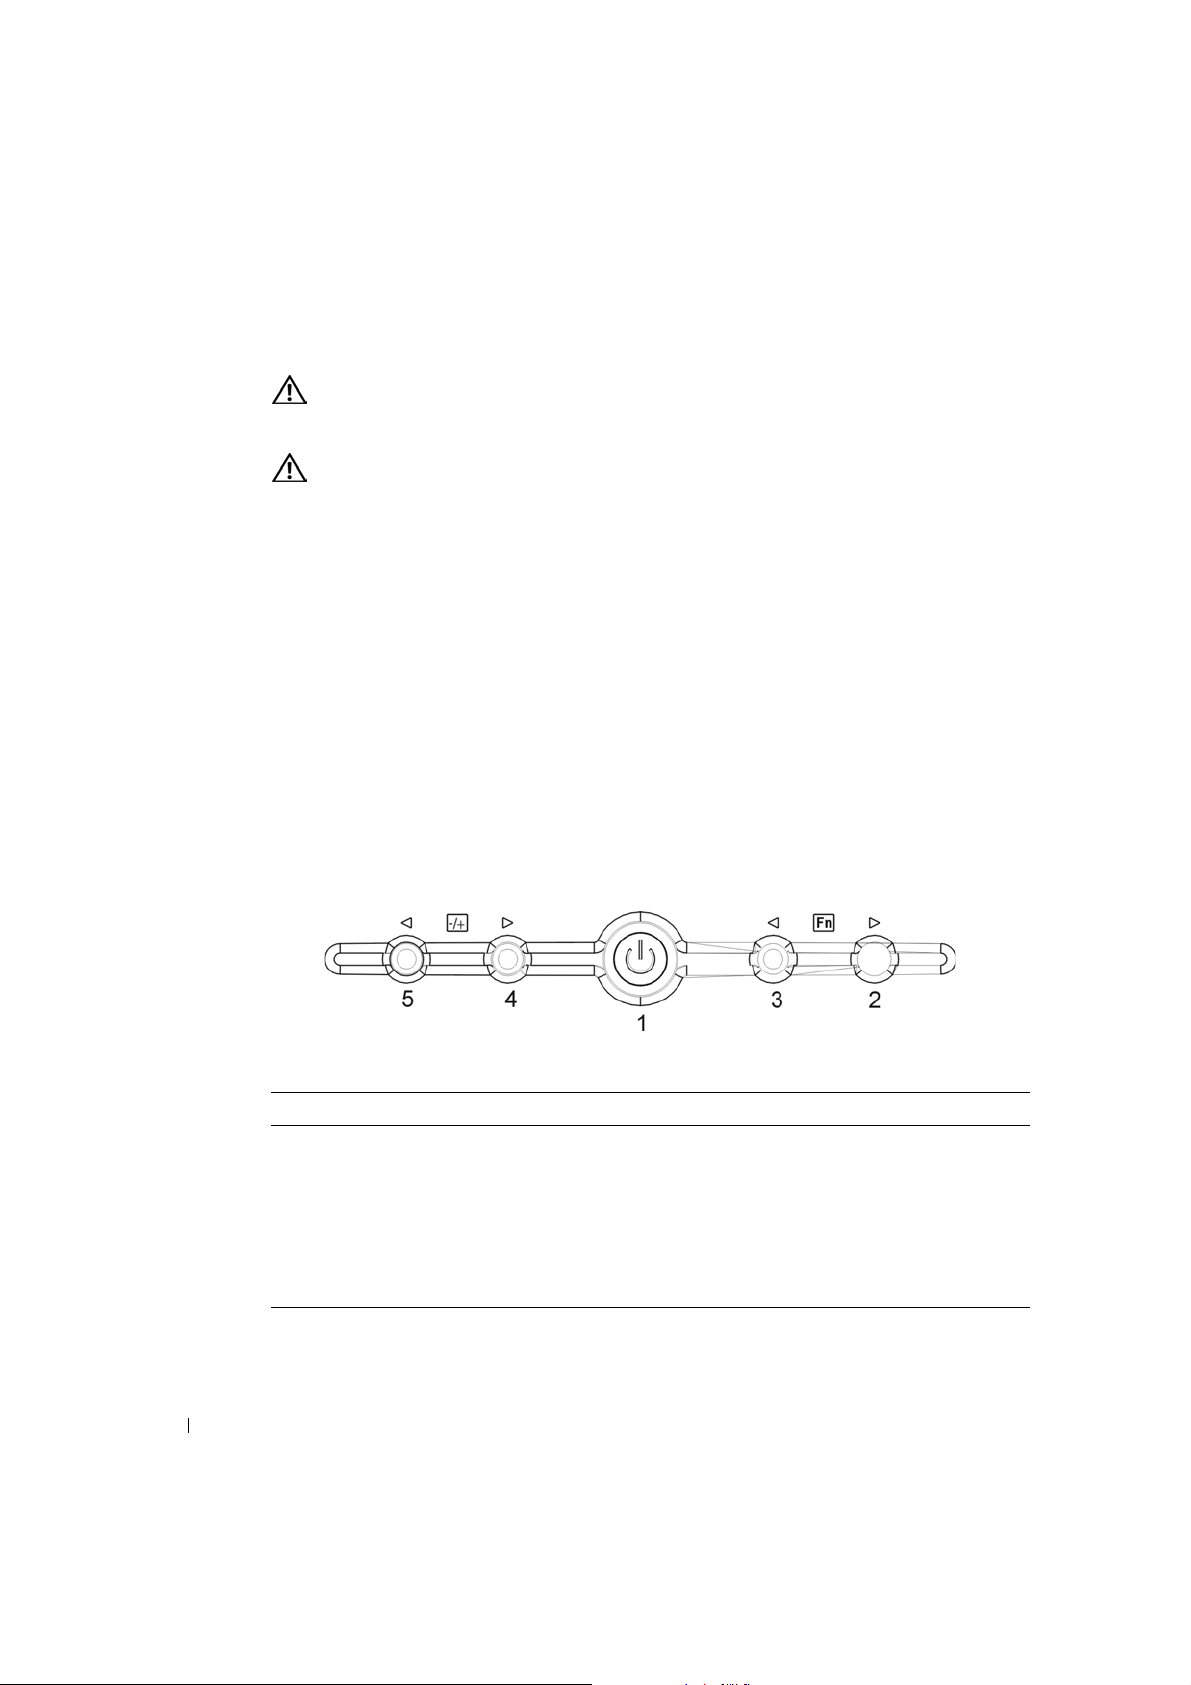
Use the control buttons located below the monitor screen to adjust the characteristics of the
image being displayed.
Figure 1-4. Controls
Table 1-4. Control Panel (Monitor Front Panel)
Control Description
1 Power LED will be full bright (blue) when monito r is on and will b e half bright (blue)
2 Function select co unter-clockwise.
3 Function select clockwise.
4 Adjust increase.
5 Adjust decrease. (Auto Adjust: Enabled by pressing 1 second)
1-8 User ’s Guide
when in power saving mo de.
Page 15
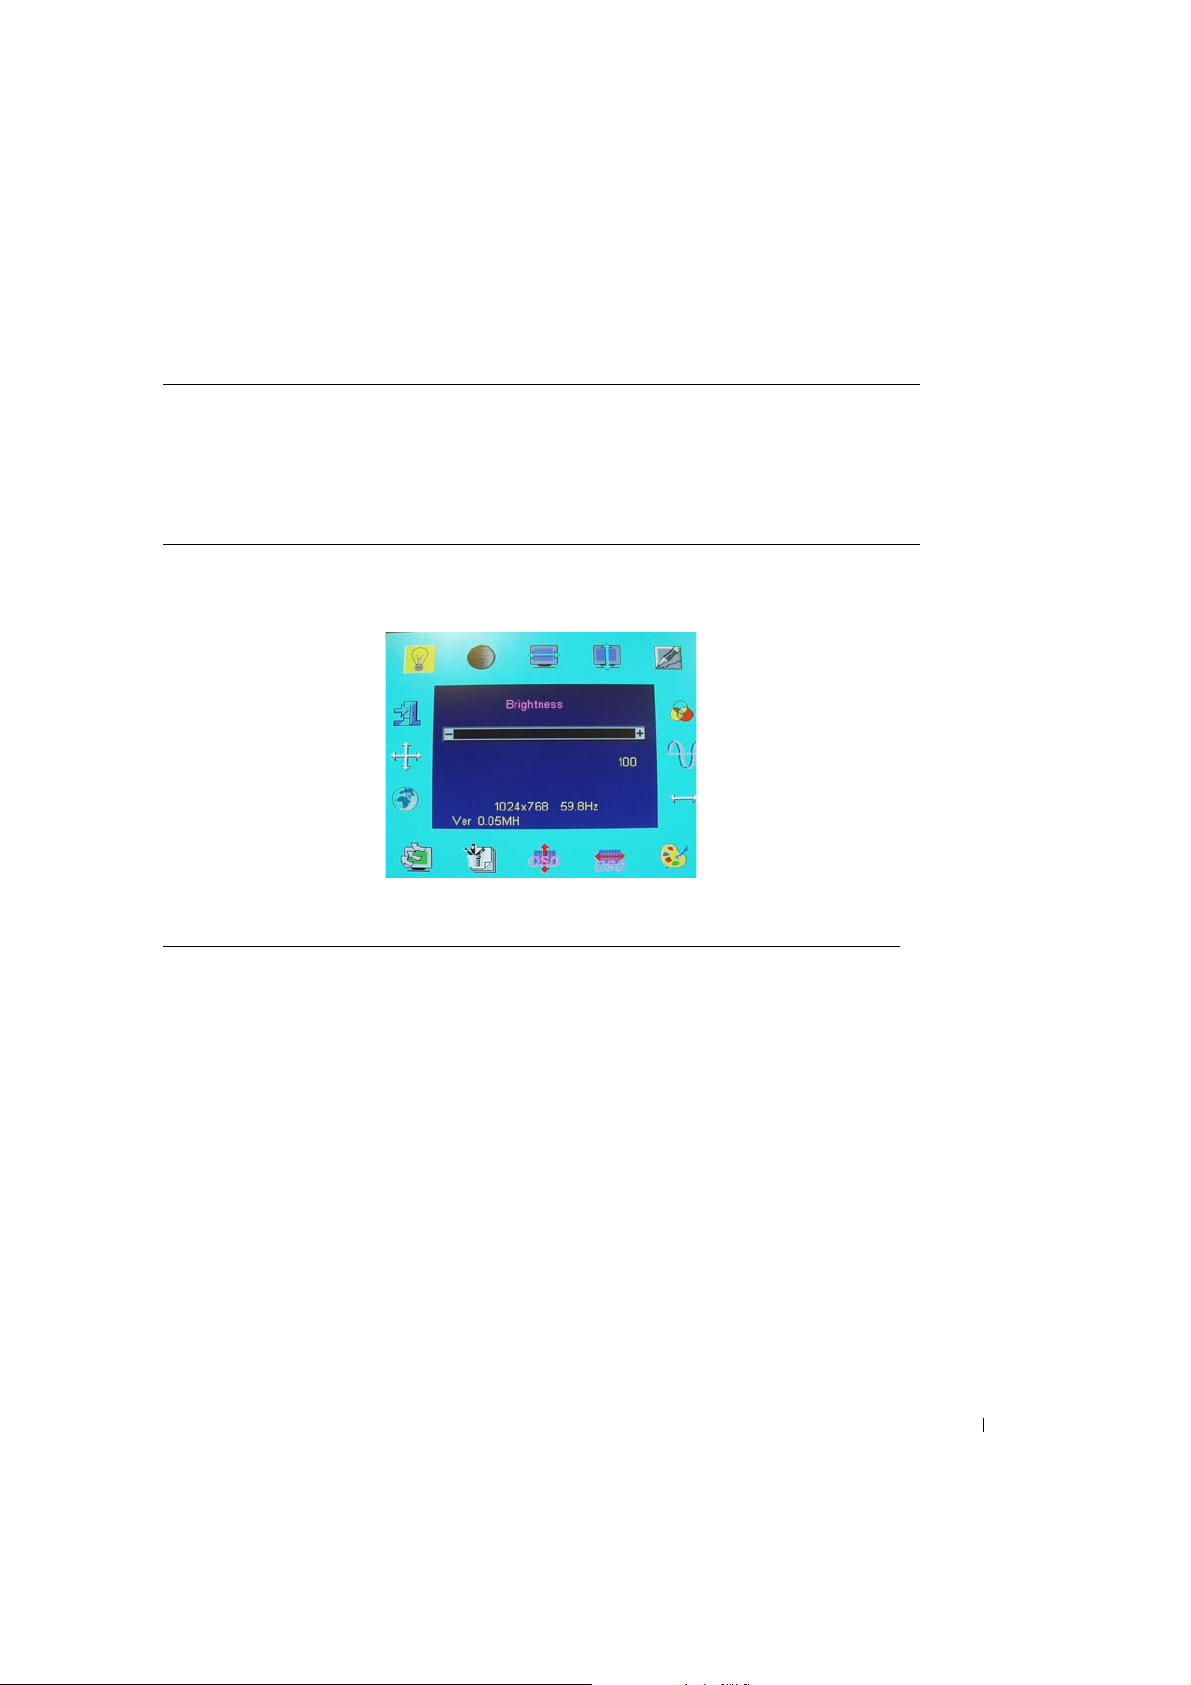
Table 1-5. OSD Layout
OSD format 20 characters by 9 rows
OSD bord er Cyan co l o r
OSD tunable item Black foreground, Cyan background
Selected item Magenta foreground, Yellow background
Comment Magenta foregr ou nd , B l ue ba ck ground
Figure 1-5. On Screen Display
Table 1-6. OSD Description
Brightness: Brightness adjustment, from 0 t o 100
Contrast: Contrast adjustment, from 0 to 100.
H. position: Horizontal positio n adju stmen t.
V. position: Vertical position adjustment.
Phase: Focus adjustment, the range from 0 to 255, 255 steps.
OSD position: OSD position adjustment.
Auto adjustment: This feature will automatically adjust H position, V position, clock and
phase. It takes 3–5 seconds to finish. When auto adjustment starts, an
"Auto Adjusting…." message is displayed.
Clock: Frequency tracking adjustment. The maximum range from –50 to +50,
but to some modes, the range will be limited.
Graph text: 640 x 400 (GRAPH) or 720 x 400 ( TEX T) mo de select.
Language: 5 OSD description languages are available, including English, German,
French, Spanish, and Jap anese.
Recall: Recall default value.
User’s Guide 1-9
Page 16

Table 1-6. OSD Description
(continued)
www.dell.com | support.dell.com
Color temp:
Color temperature for standard 9300, 6500 or user defined.
User:
User R:
User G:
User B:
6500:
9300:
Red signal gain by user defined.
Green signal gain by use r defined.
Blue signal gain by user defined.
Set CIE coordinate at 6500°K color temperature.
Set CIE coordinate at 9300°K color temperature.
Exit: Exit OSD menu function.
Sharpness: Adjust the scale-up effect (smo ot her or sharper).
OSD transparency: Adjust transparency level from OSD menu. The range
is from 0 to 100 scales.
1024 x 768: Current mode resolu tion.
59.8 HZ: Current mode vertical frequency ±1 Hz.
VER 0.05MH: Firmware revision.
Other features:
Intellectual-Auto:
The auto-adjustment func tion starts automatic ally whe n a di splay mode is
input for the first time. After a djustm ent, this mode is saved. The monitor
switches to the optimized condition automatically whenever this mode is
encountered again. A total of 21 recently used modes are recorded into
this system.
VESA DPMS
Functionality: When signaled by the host system , the mo nitor disp lays a bla ck screen f or
about 3 seconds. After 3 seconds, if the monitor receives no further signal,
it will display "No Signal" and then enter the power saving mode.
Table 1-7. LED Indicators
Mode LED color
On Full bright < blue >
Stand-by Half bright < blue >
Suspend Half bright < blue >
Off Dark
Button power off Dar k
Cable disconnection 1. Half bright < blue > <Sleep mode>
1-10 User’s Guide
2. Dark <DC power off; Off mode>
Page 17
Adjusting the Monitor Display
The flat-panel monitor features an intuitive, menu-driven, On-Screen Display (OSD) that
makes the display settings adjustment quick and simple. This flat-panel monitor has four
function control keys that allow the user to select functions shown on the OSD menu and to
customize the viewing environmen t. Use the f unction control buttons to access the OSD and to
scroll through the menu. Use the adjustment buttons to make changes to the selected menu. See
"Controls and Indicators."
To access the OSD main menu, press one of the function buttons and the menu diagram will
appear as shown in Figure 1-5.
Current input resolution and vertical scanning frequency (FV) are displayed at the bottom of
the OSD menu along with firmware version number. Continuing to press the function control
buttons will scroll through the entire menu.
NOTICE: The version number shown on the OSD menu in this guide is for illustration purposes
only. The firmware revision for your monitor may have been updated to a later version.
Easy to access detailed descriptions of each function in the OSD menu is provided below.
Also, please refer to the function buttons and adjustment buttons:
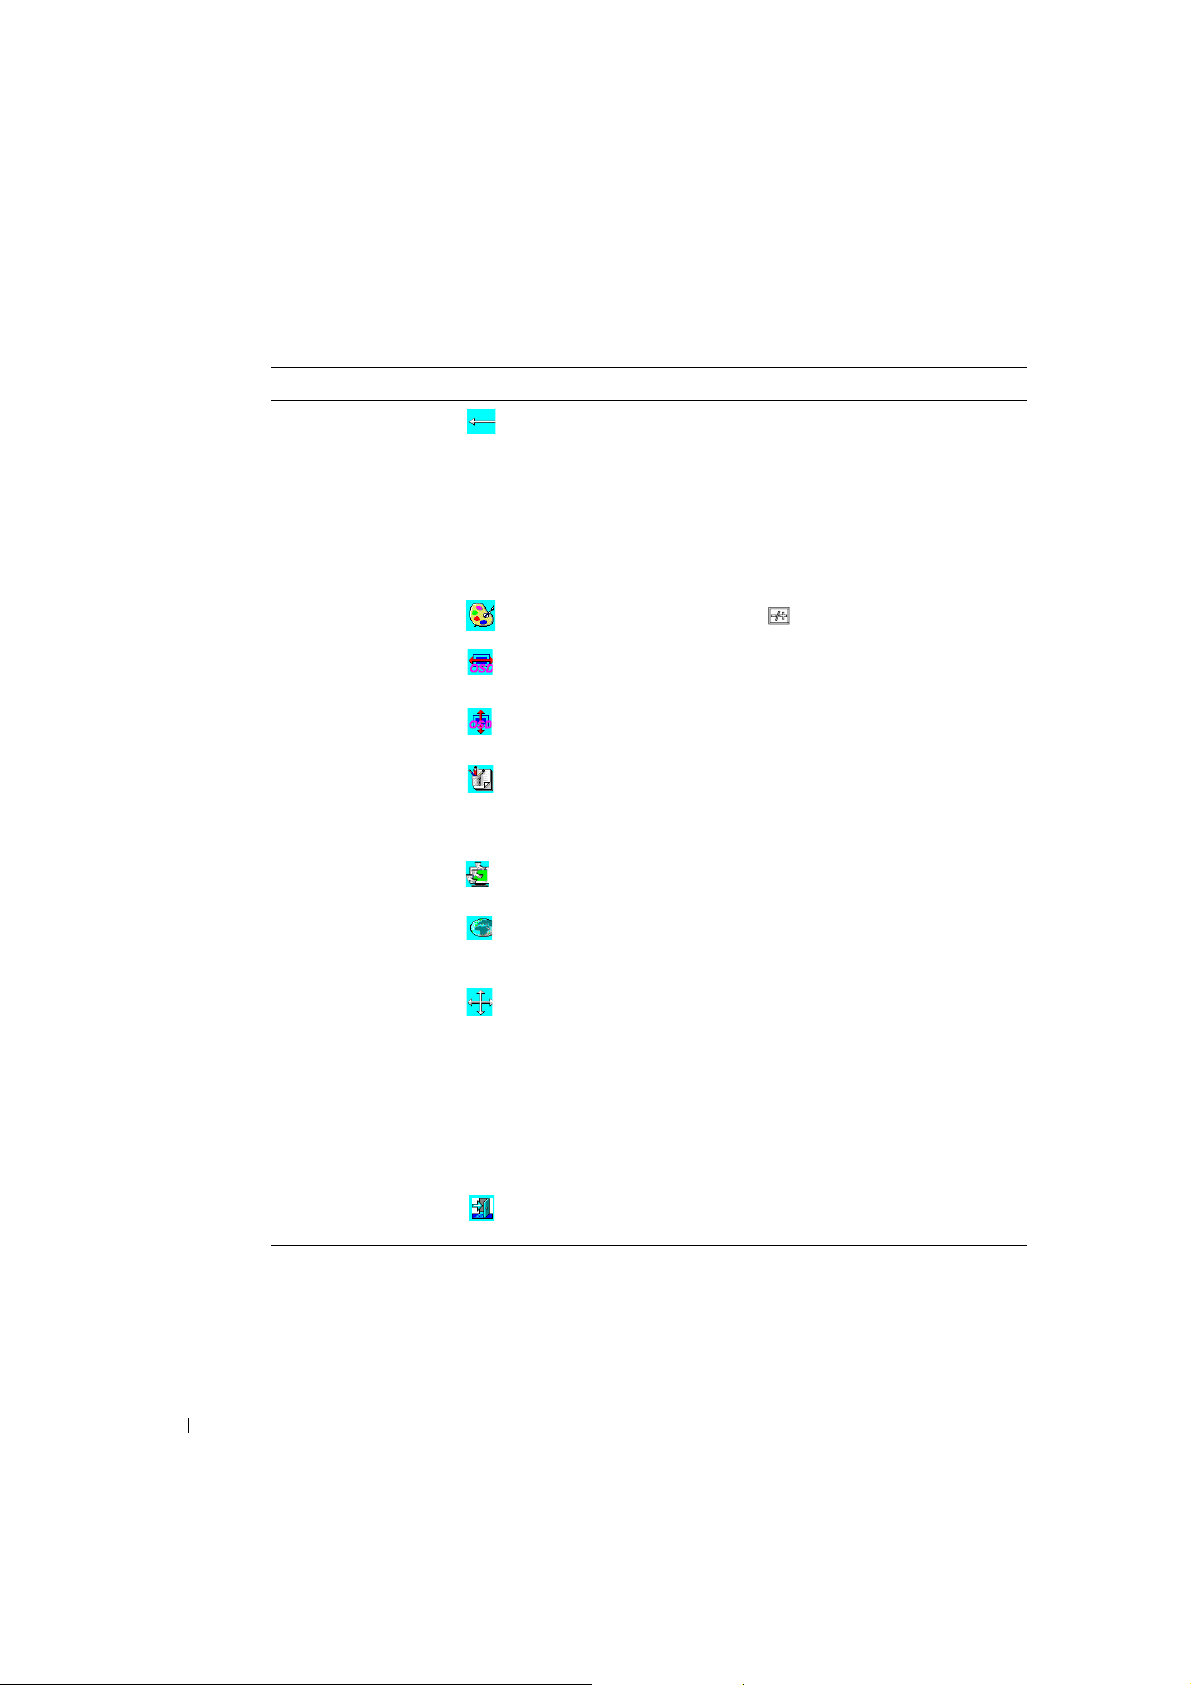
Table 1-8. OSD Functions
Function Icon Description
Brightness 101 brightness setting are available (0 to 100).
Contrast 101 contrast setting are available (0 to 100).
H. Position This function lets you adjust the display's horizontal
position
V. Position This function lets you adjust the display's vertical
position.
OSD Transparency This function lets you set the transparency of the OSD
menu. The transparency can be adjusted from 0% to 10%.
11 scales are available.
Phase A total of 256 scales (0 to 255) are available to adjust
focus and clarity of the display.
User’s Guide 1-11
Page 18
www.dell.com | support.dell.com
Table 1-8. OSD Functions
(continued)
Function Icon Description
Clock This function carries a frequency-tracking feature that
provide a stable and clarity environment. 101 settings
(from –50 to +50) are available on the mode that is
currently running. The adjustment ranges are variable in
different mo des. Th is functio n reco rds de viated nu mber o f
clock cycle between input timin g an d sup po rte d tim ing .
The clock value may not be "0" after Auto Adjustment
when the input timing is different from supported timing.
Color Temperature Push the ( ) button to select a different color
temperature.
OSD H. Position This function moves OSD menu horizontally.
OSD V. Position This function moves OSD menu vertically.
Graph / Text Because the H and V-Frequencies of both 640 x 400, 70
Hz, and 720 x 400, 70 Hz, are the same, this func tio n will
let you manually select either 640 x 400 (graphics mode)
or 720 x 400 (text mode).
Recall The recall function will reset all adjusted parameters to
factory preset values.
Language Five OSD languages are available: English, German,
French, Spanish, an d J ap ane s e. Pres s left or ri gh t
adjustment button to select the desired language.
Auto adjustment Press + and – buttons to activate the auto adjustment
function.
The auto adjustment function allows you to ad ju st the
display size, cl ock, and pha se to obtain a optimize vie wing
setting. This process will take 3 ~ 5 seconds to activate.
NOTE: After auto adjustment, the display might display
the wrong position or size if it has received a pattern
which has no screen border.
Exit Saves the values of this setting and exits the OSD menu
function.
1-12 User’s Guide
Page 19

Troubleshooting
NOTICE: This product supports multiple VGA modes. This flat-panel monitor is pre-adjusted in
the factory with standard VGA timings. Due to output timing difference among various VGA cards
in the market, you may initially experience an unstable or unclear display when a new display mode
or new VGA card is selected.
NOTICE: Display optimization can not be assured if the mode chosen is not supported in the list.
Issue: Display is unclear and unstable.
Please follow procedures listed below to achieve the best flat panel performance for systems
®
running a Microsoft
1 Enter the initial step to shutdown the operating system by clicking th e Start button and
Windows® operating system.
then clicking Shutdown).
2 If any "black noise" vertical stripes appear, use the Clock function in the OSD menu to
adjust display until those bars disappear.
3 Use the Phase function to adjust the monitor screen.
4 Click No on Shut Down Windows to return to the normal operating system environment.
You can also use the Auto adjustment function to adjust the flat panel monitor . See "Adjusting
the Monitor Display."
Issue: There is no display on the flat-panel monitor.
If there is no display on the flat-panel monitor, please follow below steps:
1 Make sure the power indicator is illuminated, all connections are secured, and the system
is operating on the correct timings. See "Specifications" for more information.
2 Turn off the flat-panel monitor and then turn it on again. P ress the UP funct ion button and
then to press either up or down adjustment button several times. If there is still no display,
press the other adjustment button several times.
3 If step 2 does not work, connect your system with another external monitor (either CRT
or flat-panel monitor). If your system is operated and functioned properly with monitor,
the output timing of the VGA card may be out of flat-panel monitor’ s synch ronous range.
Please change to an alternative mode listed in appendix or replace the VGA card and then
to repeat step 1 and 2.
4 If the previous steps do not correct the issue, please contact the manufacturer for
assistance.
User’s Guide 1-13
Page 20
www.dell.com | support.dell.com
Issue: "Input Signal Out of Range" message in the OSD.
If you choose an output timing that is outside the synchronous range of the flat panel monitor,
the OSD displays an "Input Signal Out of Range" message. Choose another mode that is
supported by the flat panel monitor. See "Specifications" for information on timing.
Issue: "No Signal" message in the OSD.
Please check the video cable connection to the host system.
Regulatory Notices
Energy Efficiency
ENERGY STAR® Emblem
The EPA's ENERGY STAR® Computers program is a joint effort between the EPA and
computer manufacturers to reduce air pollution by promoting energy-efficient computer
products. The EPA estimates that use of ENERGY STAR
computer users up to two billion dollars annually in electricity costs. In turn, this reduction in
electricity usage can reduce emissions of carbon dioxide, the gas primarily responsible for the
greenhouse effect, and sulfur dioxide and nitrogen oxides, the primary causes of acid rain.
®
computer products can save
You can also help reduce electricity usage and its side effects by turning off your computer
when it is not in use for extended periods of time, particularly at night and on weekends.
Federal Communications Commission (FCC) Notice (U.S. Only)
This device complies with Part 15 of the FCC Rules. Operation is subject to the following two
conditions:
• This device may not cause harmful interference.
• This device must accept any interference received, including interference that may cause
undesired operation.
1-14 User’s Guide
Page 21

Class A
This equipment has been tested and found to comply with the limits for a Class A digital
device pursuant to Part 15 of the FCC Rules. These limits are designed to provide reasonable
protection against harmful interference when the equipment is operated in a commercial
environment. This equipment generates, uses , and can radiate radio frequency energy and, if
not installed and used in accordance with the manufacturer’s instruction manual, may cause
harmful interference with radio communications. Operation of this equipment in a residential
area is likely to cause harmful interference, in which case you will be required to correct the
interference at your own expense.
*For the following named produce:
LCD MONITOR (Category Name)
Rackmount / DELL 4U132 (Basic Model)
*Manufactured at : Compal Electronics, Inc.
We hereby declare that this device complies with Part 15 of the
FCC Rules.
Operation is subject to the following two conditions:
This device may not ca use harmful interference.
This device must accept any in terference received, including
interference that may cause undesired operation.
*FCC Rules: Tested to comply with FCC part 15, class A
*Test site at: C&A LABORATORY, CO., LTD
*Responsible Party for Produce:
Compliance:
*Manufacturer Information: Compal Electronics, Inc.
Compal Electronics, Inc.
No. 581, Jui-kuang R d.
Neihu, Taipei, Taiwan, 114
Tel)+(886)-2-8797-8588
Safety Dept.
NO.581, Juikuang Rd.
Neihu, Taipei, Taiwan, 114
Safety Dept.
Manager
Supplier signature
User’s Guide 1-15
Page 22
www.dell.com | support.dell.com
EU Declaration of Conformity (LVD, EMC)
For the following pro du c t: LCD MONI TOR (category name)
Rackmount (model name)
Manufactured at: Compal Electronics, Inc.
8, Nan-Tung Rd., Pin-Cheng City Taoyuan Hsien, Taiwan
We hereby declare, that all major safety requirements, concerning to CE-Mark Directive (93/68/EEC)
and Low Voltage Directive (73/23/EEC), Electromagnetic Compatibility Directives (89/336/EEC,
92/31/EEC) are fulfilled, as laid out in the guidelines set down by the member states of the EEC
Commission. This declaration is valid for all samples that are part of this declaration, which are
manufactured accor ding to the production charts appendix. The standards r elevant for the evaluation of
electrical safety and EMC requirement s are as follows:
LVD:EN60950
EMC:EN55024, EN55022, EN61000- 3-2, EN61000-3-3
1. Certificate of conformity /Test report issued by:
LVD:TÜV
2. Technical documentation kept at:
Compal Electronics, Inc.
Which will be made availab le upon request.(Manufacturer)
Compal Electronics, Inc.
No. 581, Jui-kuang Rd.
Neihu, Ta ipei, Taiwan, 114
Safety Dept.
Manager
Canadian Regulatory Information (Canada Only)
This digital apparatus does not exceed the Class A limits for radi o noise emission s from digital
apparatus set out in the Radio Interference Regulations of the Canadian Department of
Communications.
Note that Canadian Department of Communications (DOC) regulations provide that changes
or modifications not expressly approved by Dell Computer Corporation could void your
authority to operate this equipment.
This Class A digital apparatus meets all requirements of the Canadian Interference-Causing
Equipment Regulations
1-16 User’s Guide
Page 23
Cet appareil numérique de la classe A respecte toutes les exigences du Règulement sur le
matèriel brouilleur du Canada.
EN 55022 Compliance (Czech Republic Only)
VCCI Class A Notice (Japan Only)
Most Dell computer systems are classified by the Voluntary Control Council for Interference
(VCCI) as Class B in formatio n technolo gy equipment (I TE). However, the inclusion of certain
options can change the rating of some configurations to Class A. ITE, including peripherals,
expansion cards, printers, input/output (I/O) devices, monitors, and so on, integrated into or
connected to the system should match the electromagnetic environmen t classification (C lass A
or B) of the computer system.
To determine which classification applies to your computer system, examine the regulatory
labels/markings (see "VCCI Class A ITE Regulatory Mark" and "VCCI Class B ITE
Regulatory Mark") located o n the bot tom, side, or back pane l of your c omputer. Once you have
determined your system’s VCCI classification, read the appropriate VCCI notice.
Class A ITE
User’s Guide 1-17
Page 24
www.dell.com | support.dell.com
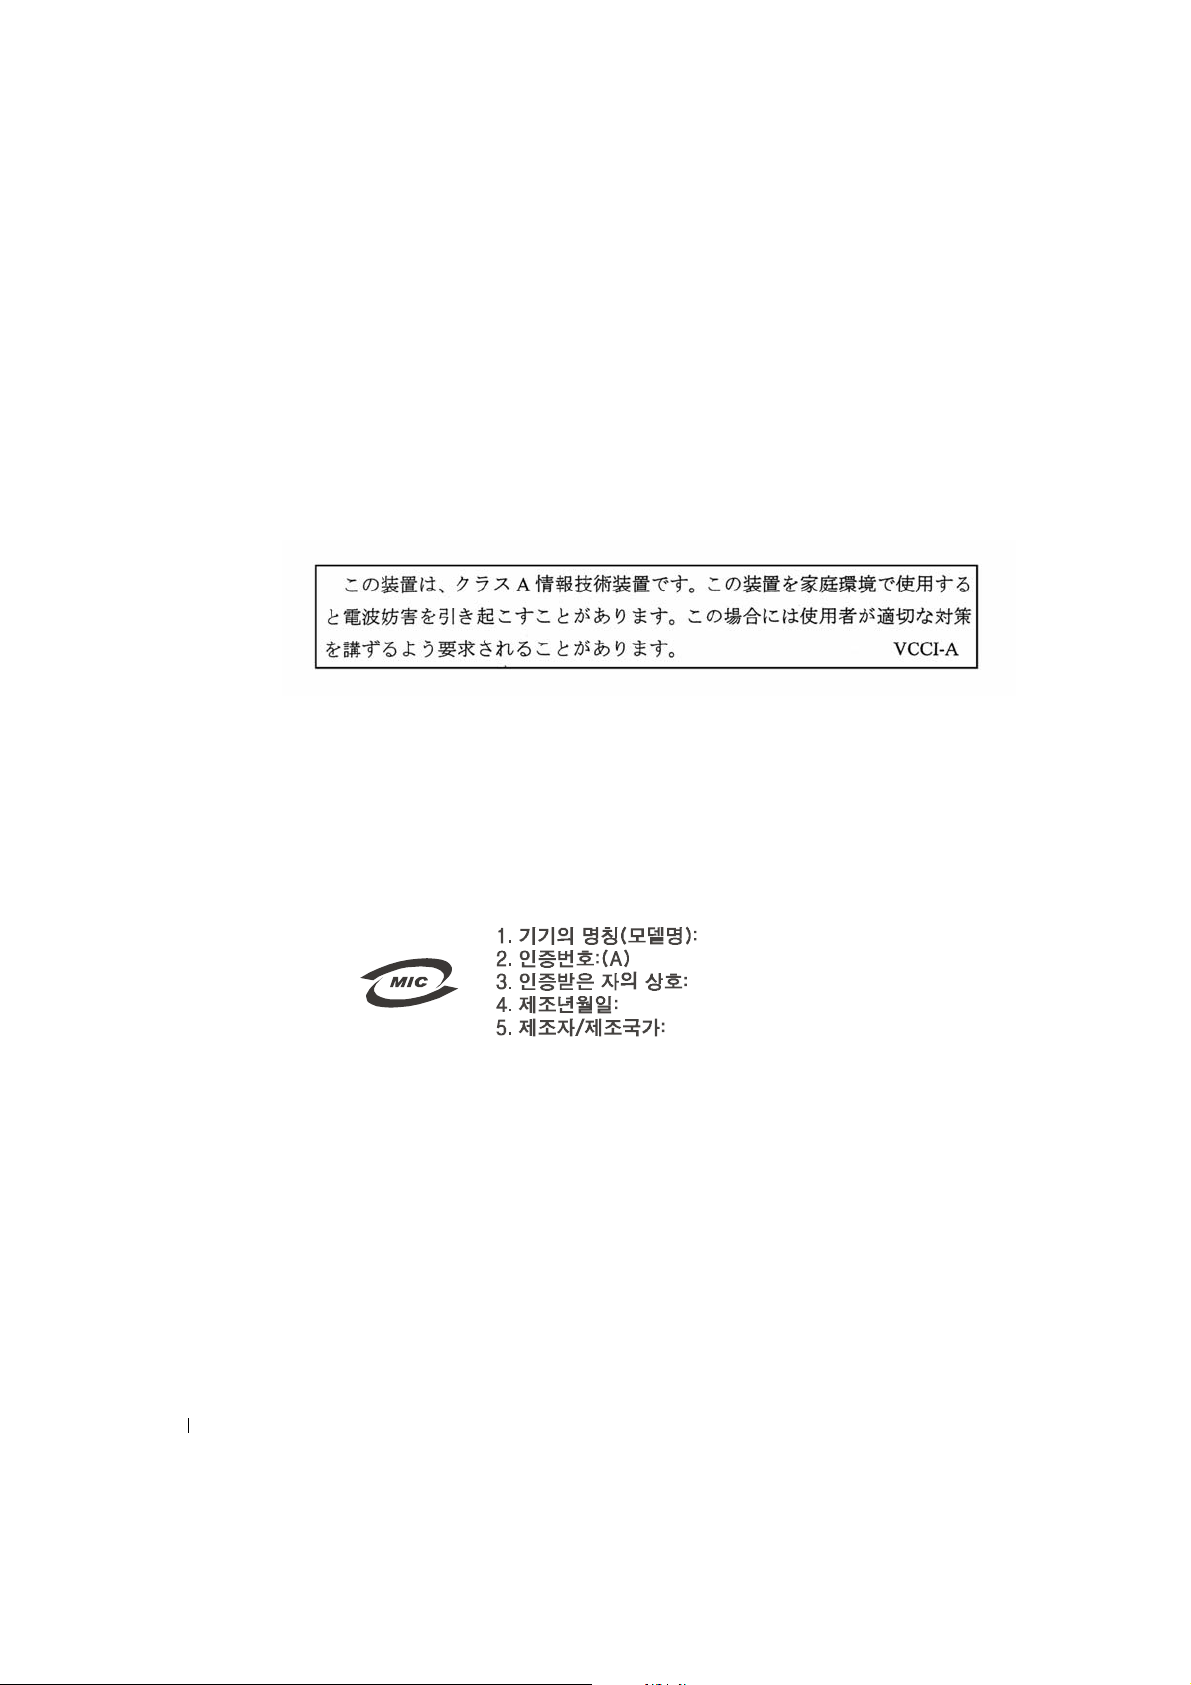
This is a Class A product based on the standard of the Voluntary Control Council fo r
Interference (VCCI) for information technology equipment. If this equipment is used in a
domestic environment, radio disturbance may arise. When such trouble occurs, the user may
be required to take corrective actions.
VCCI Class A ITE Regulatory Mark
If the regulatory label includes the following marking, your computer is a Class A product:
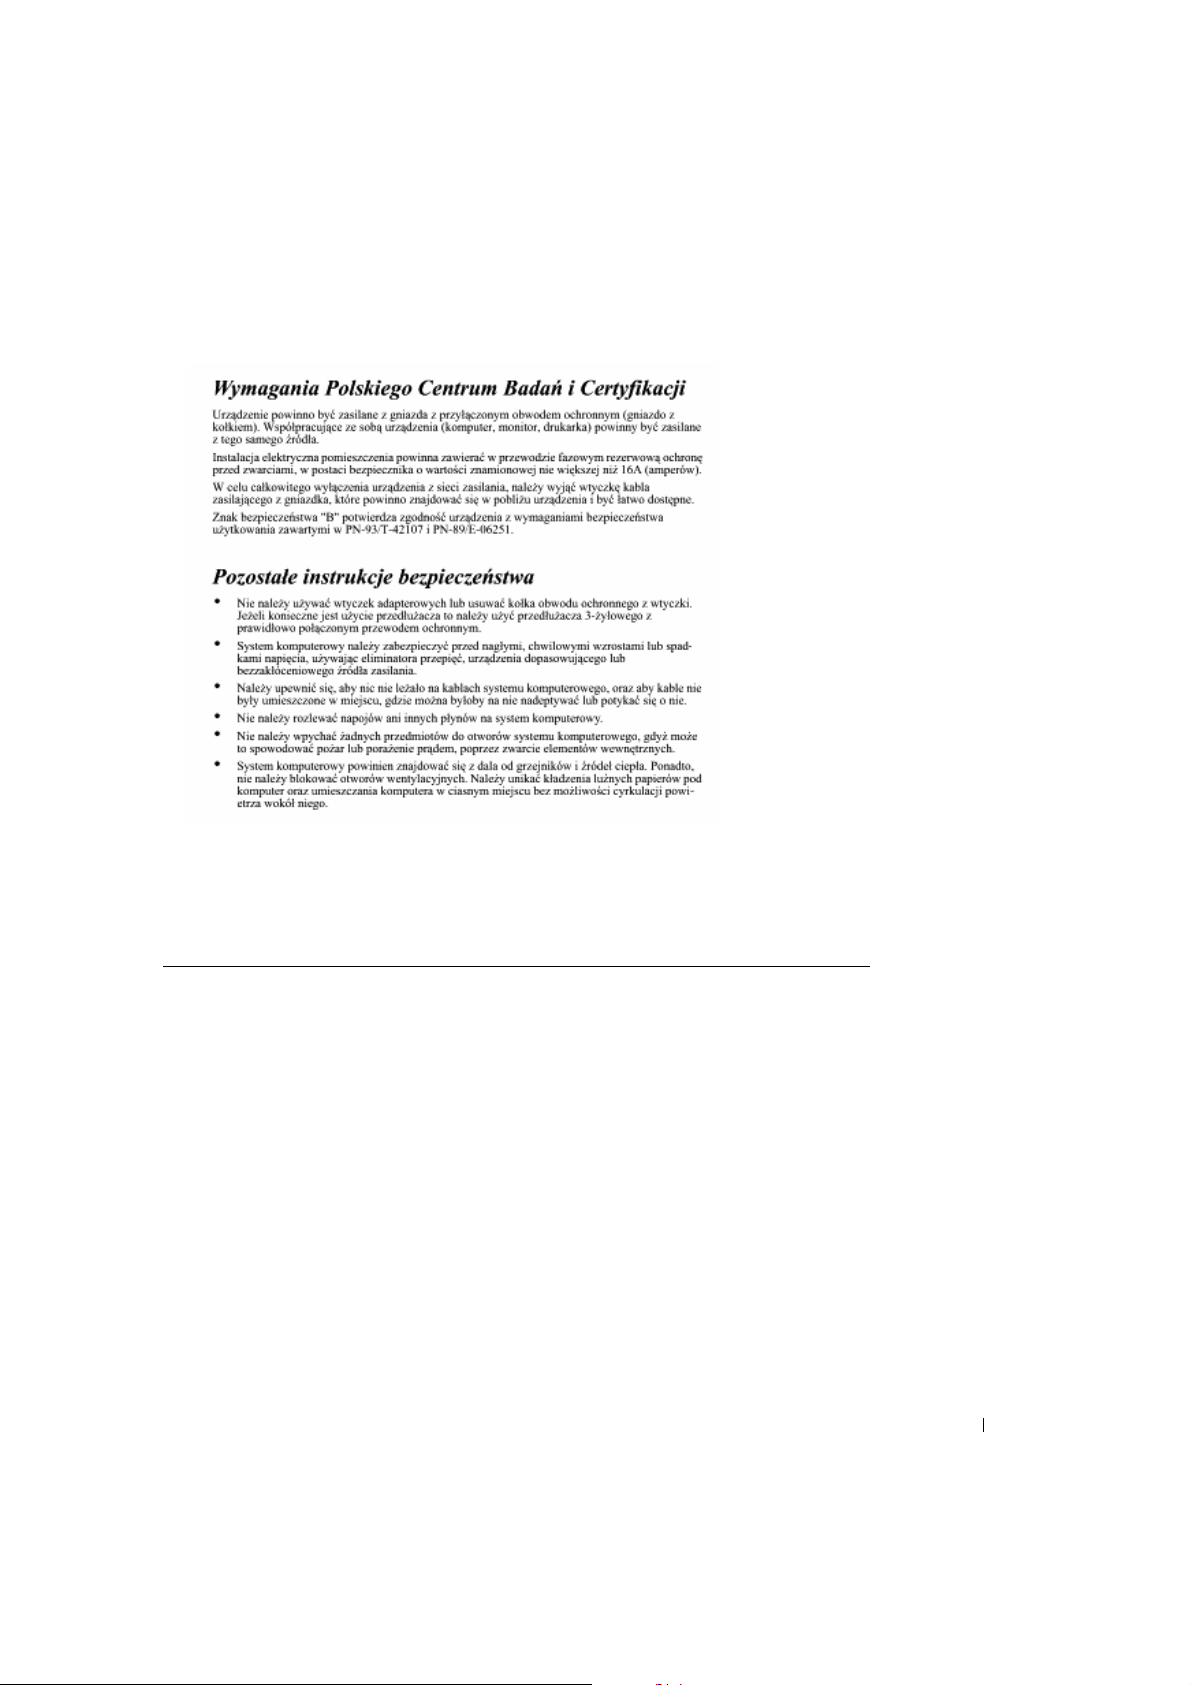
MIC Class A Regulatory Label
If the regulatory label includes the following marking, your computer is a Class A product:
Class A Device
LCD monitor / SL358
E-B012-03-2283(A)
Compal Electronics, Inc.
May, 2003
Compal Electronics, Inc
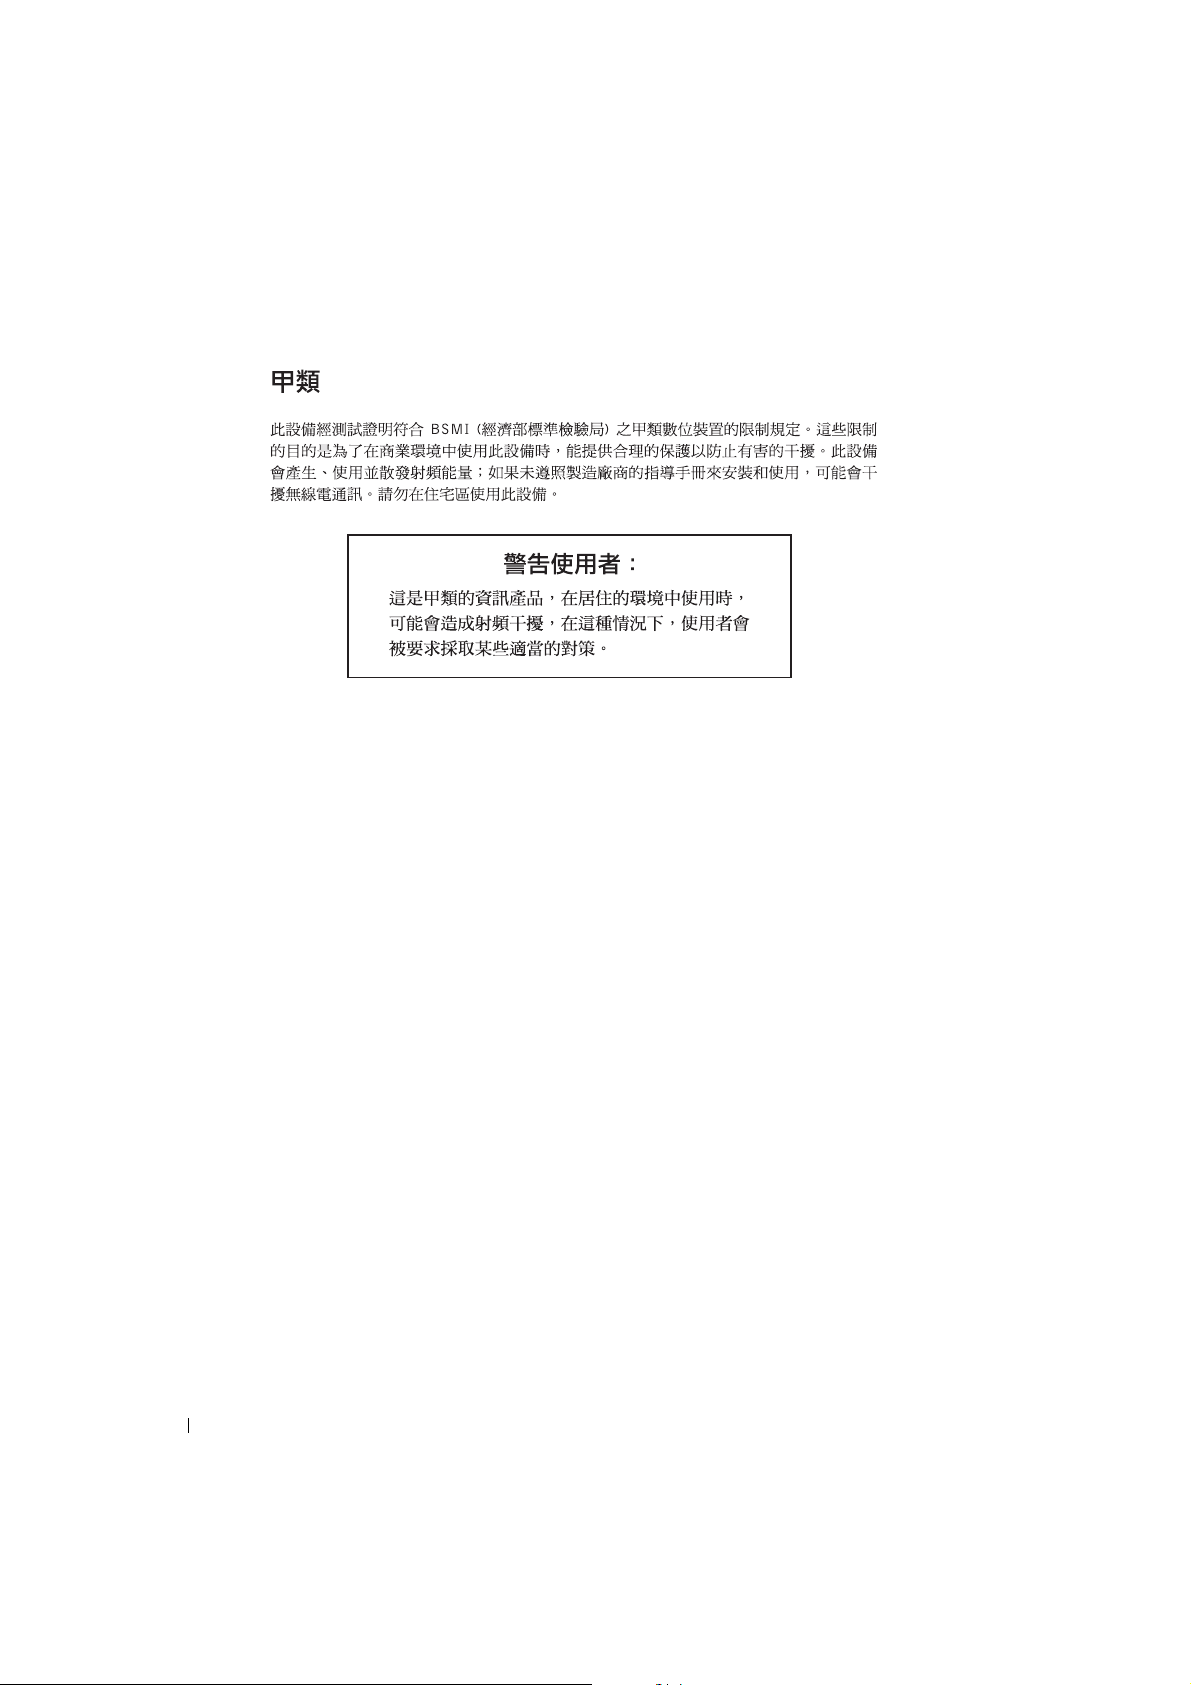
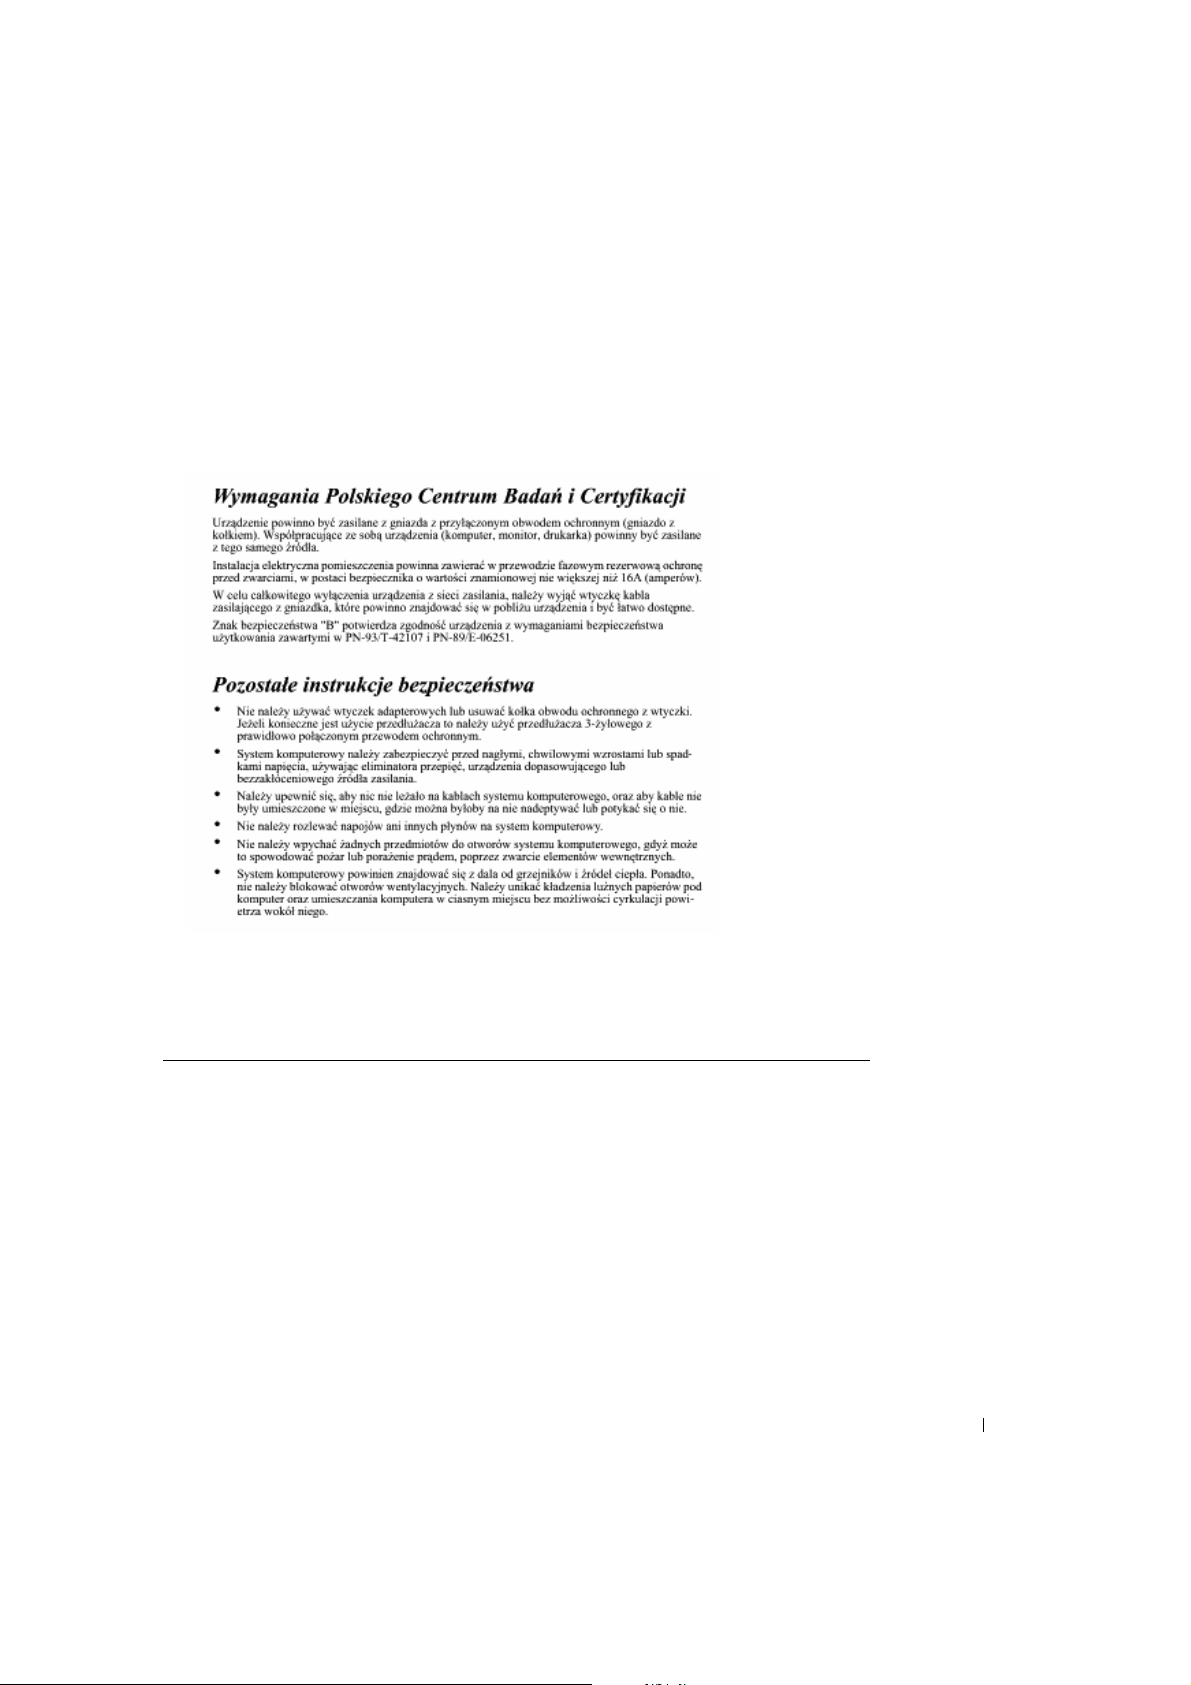
Polish Center for Testing and Certification Notice
The equipment should draw power from a socket with an attached protection circuit (a threeprong socket). All equipment that works together (computer, monitor, printer, and so on)
should have the same power supply source.
The phasing conductor of the room's electrical installation should have a reserve short-circuit
protection device in the form of a fuse with a nominal value no larger than 16 amperes (A).
To completely switch off the equipment, the power supply cable must be removed from the
power supply socket, which should be located near the equipment and easily accessible.
A protection mark "A" confirms that the equipment is in compliance with the protection usage
requirements of standards PN-93/T-42107 and PN-89/E-06251.
1-18 User’s Guide
Page 25
NOM Information (Mexico Only)
The following information is provided on the device(s) described in this document in
compliance with the requirements of the official Mexican standards (NOM).
Exporter: Dell Computer Corporation
One Dell Way
Round Rock, TX 78682
Importer: Dell Computer de México,
S.A. de C.V. Rio Lerma No. 302 -4° Piso
Col. Cuauhtemoc 16500 México, D.F.
Ship to: S.A. de C.B. al Cuidado de Kudhne & Nagel
de México S. de R.I., Avenida Soles No.55
Col. Peñon de los Baños, 15520 México, D.F.
Supply voltage:
Frequency:
Current consumption:
> 12 VDC, 5
50/60 Hz
2 A
User’s Guide 1-19
Page 26
www.dell.com | support.dell.com
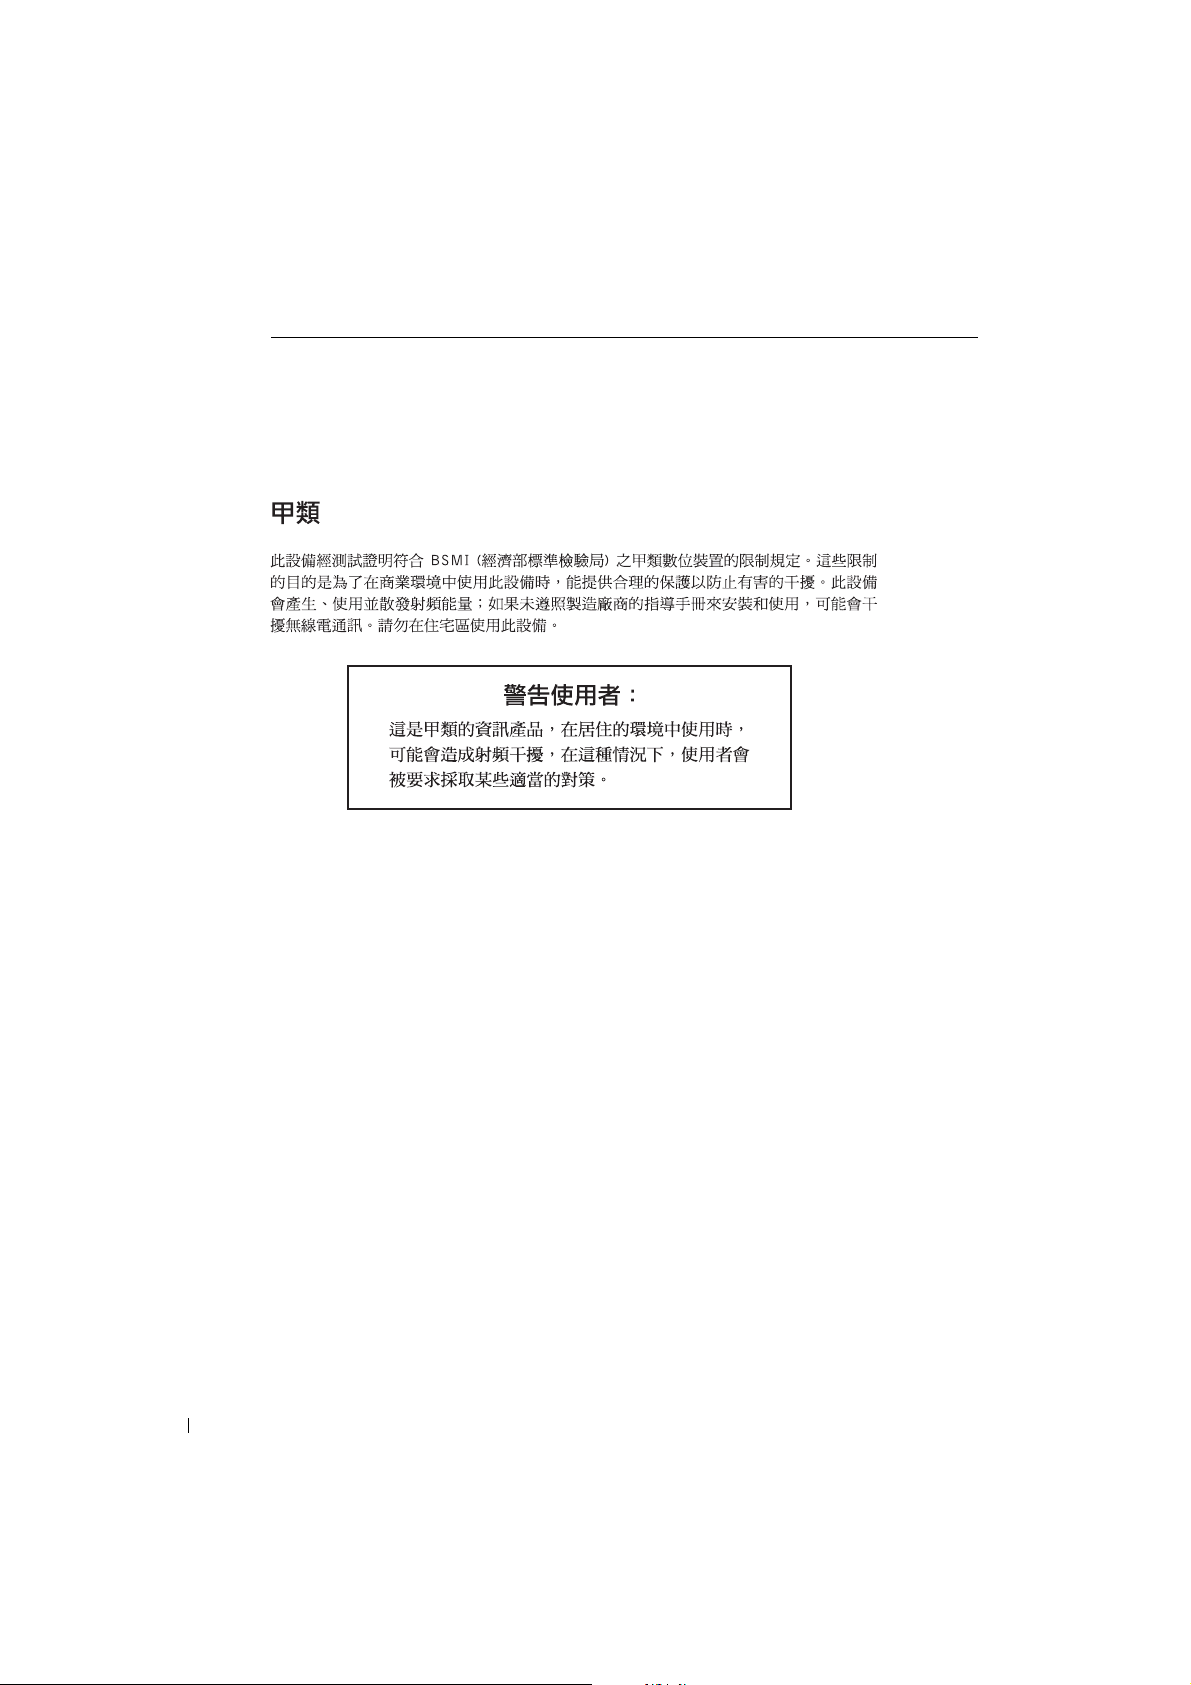
BSMI Notice (Taiwan Only)
Ergonomics Notice (Germany Only)
Under the requirements of German ergonomics standard ISO13406-2, graphics or characters:
• Blue graphics or characters in dark backgrou nd are n ot recommended. (This co mbination
may increase eye fatigue due to poor visibility caused by low contrast.)
• Graphics controller and monitor are recommended to be used in the following conditions:
– Vertical frequency: 56 Hz or higher.
– Display mode: Dark characters in bright background.
Ergonomie Hinweis (nur Deutschland)
Um den Anforderungen der deutschen Ergonomie-Norm ISO13406-2 zu antsprechen.
• Wird empfahlen, die Grunfarbe Blau nicht auf dunklem Hintergrund zu verwenden
• (schiechte Erkennbarkeit. Augenbelastung bei zu geringem Zeicheenkontrast).
• Wird folgende Einstellung des Grafik-Comtrlooers und Monitors empfohlen.
– Vertikalfrequenz: 56 Hz oder hoher.
– Ohne Zellensprung.
1-20 User’s Guide
Page 27

Console de Rack 15 FP Dell™ PowerEdge™
Guide Utilisateur du
Moniteur à Ecran Plat
www.dell.com | support.dell.com
Page 28
Remarques, Notices, et Précautions
REMARQUE: Une REMARQUE indique une information importante qui vous permettra de mieux
utiliser votre ordinateur.
NOTICE: Une NOTICE indique soit une détérioration potentielle de matériel ou une perte de
données et vous indique comment éviter le problème.
PRÉCAUTION: Un AVERTISSEMENT indique des risques potentiels de
détérioration de propr iétés, de blessu res corporelles , ou de mort.
____________________
Les informations contenues dans le présent document peuvent être modifiées sans préavis.
© 2003 Dell Computer Corporation. Tous droits réservés.
Toute reproduction sans la permission écrite de Dell Computer Corp ora ti on e st stric te m ent int e rdi te .
Les marques utilisé es dans ce text e : Dell, le logo DELL, et PowerEdge sont des marques de Dell Computer Corporation.
Microsoft et Windows sont des marques déposées de Microsoft Corporation. VESA est une marque dép osé e de Video
Electronics Standards Association. ENERGY ST AR est une marque déposée de U.S. Environmental Protection Agency. En
tant que Partenaire d'ENERGY STAR, Dell Computer Corporation a déterminé que ce produit est conforme aux directives
d'ENERGY STAR, concernant le rendement énergétiq ue.
D’autres marques et appellations commerciales peuvent être utilisées dans le présent document pour désigner soit les
entités revendiquant les marques e t les nom s, soit leu rs prod uits . De ll Com puter Corporation renonce à tout intérêt
propriétaire sur les marques et appellations commerciales autres que les siennes propres.
Avril 2003 P/N 3Y386 Rev. A01
Page 29

Table des Matières
PRECAUTIONS: Consignes de sécurité . . . . . . . . . . . . . . 2-1
Montage en Rack des Systèmes
. . . . . . . . . . . . . . . . . . 2-1
Instructions
Présentation
Caractéristiques
Spécifications
Modes de Gestion d'Alimentation
. . . . . . . . . . . . . . . . . . . . . . . . . . . . . . 2-2
. . . . . . . . . . . . . . . . . . . . . . . . . . . . 2-2
. . . . . . . . . . . . . . . . . . . . . . . . . . 2-2
. . . . . . . . . . . . . . . . . . . . . . . . . . . . 2-3
. . . . . . . . . . . . . . . . . 2-5
Vue Avant et Arrière du Moniteur à Ecran Plat . . . . . . . . . . 2-6
Paramétrage du Moniteur à Ecran Plat
. . . . . . . . . . . . . . 2-7
Système de Gestion d'Alimentation. . . . . . . . . . . . . . . . 2-7
Entretien . . . . . . . . . . . . . . . . . . . . . . . . . . . . . . . 2-8
Contrôles et Indicateurs
Présentation
. . . . . . . . . . . . . . . . . . . . . . . . . . . . 2-8
Réglage de l'Affichage du Moniteur
Dépannage
. . . . . . . . . . . . . . . . . . . . . . . . . . . . . 2-13
Problème: L'Affichage n'est pas clair et instable.
Problème: Rien ne s’affiche sur le moniteur à écran plat.
. . . . . . . . . . . . . . . . . . . . . . . 2-8
. . . . . . . . . . . . . . . 2-11
. . . . . . . . . 2-13
. . . . . 2-13
Problème: Message "Signal d’Ent rée ho rs Limites" da ns l’OSD. . 2-14
Problème: Message "Pas de Signal" dans l’OSD. . . . . . . . . . 2-14
Notices de Réglementation . . . . . . . . . . . . . . . . . . . . 2-14
Rendement Energétique
. . . . . . . . . . . . . . . . . . . . . . 2-14
Commission Fédérale sur les Communications (FCC) Notice
(U.S. Seulement)
. . . . . . . . . . . . . . . . . . . . . . . . . 2-14
Déclaration de Conformité UE (LVD, EMC) . . . . . . . . . . . 2-16
Informations de Réglementation Canadienne
(Canada Seulement)
. . . . . . . . . . . . . . . . . . . . . . . 2-16
Table des Matières 3
Page 30

Figures
Figure 2-1. Affectation des Broches . . . . . . . . . . . . . 2-5
Figure 2-2. Vue de Face
Figure 2-3. Vue de Dos
Figure 2-4. Contrôles
Figure 2-5. Affichage d’Ecran
Tableaux
Conformité EN 55022 (République Tchèque Seulement) . . . . 2-17
Notice de Classe A VCCI (Japon Seulement) . . . . . . . . . . 2-17
Etiquette de Réglementation de Classe A MIC. . . . . . . . . . 2-18
Centre Polonais de Test et de Notice de Certification
. . . . . . 2-18
Information NOM (Mexique Seulement). . . . . . . . . . . . . 2-19
Notice BSMI (Taïwan Seulement) . . . . . . . . . . . . . . . . 2-20
Notice Ergonomique (Allemagne Seuleme nt)
. . . . . . . . . . 2-20
Ergonomie Hinweis (nur Deutschland). . . . . . . . . . . . . . 2-20
. . . . . . . . . . . . . . . . . . . 2-6
. . . . . . . . . . . . . . . . . . . 2-7
. . . . . . . . . . . . . . . . . . . . . 2-8
. . . . . . . . . . . . . . . . 2-9
Tableau 2-1. Fonctionnalités . . . . . . . . . . . . . . . . . . 2-2
Tableau 2-2. Modes de Gestion d’Alimentation
Tableau 2-3. Connecteur de Signal (Connecteur D-sub
Tableau 2-4. Panneau de Contrôle (Panneau Avant du
Tableau 2-5. Présentation OSD
Tableau 2-6. Description OSD
Tableau 2-7. Indicateurs LED
Tableau 2-8. Fonctions OSD
4 Table des Matières
. . . . . . . . 2-5
15 broches) . . . . . . . . . . . . . . . . . . . 2-5
Moniteur) . . . . . . . . . . . . . . . . . . . . 2-8
. . . . . . . . . . . . . . . . 2-9
. . . . . . . . . . . . . . . . . 2-9
. . . . . . . . . . . . . . . . 2-10
. . . . . . . . . . . . . . . . . 2-11
Page 31
PRECAUTIONS: Consignes de sécurité
Utilisez les consignes de sécurité suivantes afin d'assurer votre sécurité personnelle et protéger le
système c
ontre tout dommage pot entiel. Pour les co nsignes d e sécurité com plètes, vo ir la docu mentation
qui accompagne votre système.
Montage en Rack des Systèmes
Observez les précautions suivantes pour la stabilité et la sécurité du rack. Reportez-vous aussi à la
documentation d'installation q ui accompagn e le système et le ra ck pour les instru ctions d' avertissemen ts
et/ou précautions et procéd ures spécifiques.
Les systèmes sont considérés comme faisant partie d'un rack. Donc, "co mposant" se rapporte à tout
système ainsi qu'aux divers périphériques ou matér iel de support.
AVERTISSEMENT: L'installation des systèmes dans un rack sans que les
stabilisateurs avant et latéraux soient installés peut faire basculer le rack, pouvant
occasionner des blessures corporelles dans certaines circonstances. Donc, installez
toujours les stabilisateurs avant d'installer les composants dans le rack.
Après avoir installé le système/composants dans un rack, ne tirez jamais plus d'un
composant à la fois en dehors du rack sur ses rails de montage. Le poids de plus d'un
composant étendu pourrait faire basculer le rack et pourrait entraîner des blessures
graves.
REMARQUE: Votre système est homologué pour la sécurité comm e unité auto-stable et
comme composan t en utilisa tion dans un casier d e rack util isant le kit de rack client quand le
casier de rack et le kit de rack sont tous deux conçus pour votre système. L'installation de
votre système et le kit de rack dans tout autre casier de rack n'a été approuvé par aucune
agence de sécurité. Il est de votre responsabilité de faire évaluer conforme la combinaison
finale du système et du kit de rack dans un casier, par une agence de sécurité agréée. Le
fabricant rejette toute garantie et responsabilité pour la connexion avec de telles
combinaisons.
• Les kits de rack système sont destinés à être installés dans un rack par des techniciens
expérimentés. Si vous installez le kit dans tout autre rack, assurez-vous que le rack est conforme
aux spécifications.
AVERTISSEMENT: Ne retirez pas les racks vous-même. Etant donné la hauteur et le
poids du rack, un minimum de deux personnes est nécessaire pour accomplir cette
tâche.
• Avant de travailler sur le rack, assurez-vous que les stabilisateurs sont fixés au rack, étendu sur le
sol, et que le poids total du rack repose sur le sol. Installez le s stabilisateur avan t et latéraux sur un
rack unique ou les stabilisateurs avant pour des racks multiples joints, avant de travailler sur le
rack.
• Chargez toujours le rack de bas en haut, et chargez d'abord l'élément le plus lourd dans le rack.
Guide Utilisateur 2-1
Page 32

PRECAUTIONS: Consignes de sécurité
• Assurez-vous que le rack est de niveau et stable avant d'éten dre un composant du rack.
• Ne surchargez pas le c ircuit d'alimentation CA fournissant l' a lim entatio n au rack. La charge total e
du rack ne doit pas dépasser 80 pour cent de la valeur nominale du circuit d'alimentati on.
• Assurez-vous que les composants sont correctement ventilés dans le rack.
• Ne montez pas ou ne vous te nez pas sur un composant quand vous réparez d'autres composants
dans un rack.
(Suite)
www.dell.com | support.dell.com
Instructions
Présentation
Ce produit met en reli ef les spécifications du m oniteur à écran plat couleur de 15 pouces, à haute
résolution. Ce moniteur à écran est conçu à l'aide de la dernière technologie de moniteur à écran plat et
offre un produit orienté performances sans radiation. Ce produit utilise un connecteur VGA 15 broches
D-Sub et peut supporter 16 modes VGA, la gestion d'alimenta tio n VESA DPMS, et la fonction plug &
play. Il présente aussi un faible encombrement permettant de gagner de la place dans le rack en
comparaison avec le moniteur TRC traditionnel. De plus, le moniteur à écran plat consomme moins
d'énergie.
Caractéristiques
Ce produit présente les caractéristiques suivantes:
Tableau 2-1. Caractéristiques
Caractéristiques Description
Couche de surface Traitement anti-refl et du polariseur frontal
Résolution et rafraîchissement
optimaux
Type d'écran Matrice Active à Transistors à Film Fin (TFT)
Ecartement de pixel 0.297 mm
Zone d'affichage acti ve 304.1 mm x 228.1 mm
Ta ille phy siq ue (largeur x profond eur
x hauteur)
Poids (moniteur seulement) 2.1 kg (4.621 lbs)
1024 x 768 à 60 Hz
Affichage à Cristaux Liquides (LCD)
339 mm (3.3 pouces) x 42 mm (1.6 pouces) x 275 mm (10.8
pouces)
2-2 Gu ide Utilisateur
Page 33

Spécifications
Généralités
Numéro du Modèle Rackmount
Ecran Plat
Type d'écran Matrice active-TFT LCD
Dimensions de l'écran 15 p ouces (taille d'image affichable de 15 pouces)
Zone d'affichage préréglée:
Horizontale
Verticale
Ecartement de pixel 0.297 mm
Angle d'affichage:
Horizontal
Vertical
Luminance en sortie 250 cd/m
Taux de Contraste 300:1 standard
Couche de surface Antireflet
Rétroéclairage CCFL <2> système de lumière latérale
304.1 mm ± 0.5 mm (11.97 pouces ± 0.02 pouces)
228.1 mm ± 0.5 mm (8.98 pouces ± 0.02 pouces)
+45 / –55 degrés
+65/-65 degrés
2
typique
Résolution
Plage de balayage horizontal 24 KHz à 60 KHz
Plage de balayage vertical 5 6 Hz à 75 Hz
Résolution optimale prédéfinie 1024 x 768 à 60 Hz
Résolution prédéfinie la plus haute 1024 x 768 à 75 Hz
Synchron isati on Sup porté e
Mode Fréq H Fréq V Pixel req. Sync. H/V Commentaire
640x350 31.469 70.087 25.175 +/– VGA-350
640x400 24.83 56.42 21.05 –/– NEC PC9801
640x400 31.469 70.0870 25.175 –/+, –/– VGA-GRAPH, NEC PC9821
640x480 31.469 59.904 25.175 –/– VGA-480
Guide Utilisateur 2-3
Page 34

Synchron isati on Sup porté e
Mode Fréq H Fréq V Pixel req. Sync. H/V Commentaire
640x480 37.861 72.809 31.500 –/– VESA-480
640x480 37.500 75.000 31.500 –/– VESA-480-75 Hz
720x400 37.469 70 .0 87 28.322 –/+ VGA-400-TEXTE
800x600 35.156 56.250 36.000 +/+ SVGA
800x600 37.879 60.317 40.000 +/+ VESA-6 00
800x600 48.077 72.188 50.000 +/+ VESA-600-72 Hz
www.dell.com | support.dell.com
800x600 46.875 75.000 49.500 +/+ VESA-600-75 Hz
1024x768 48.363 60.004 65.000 –/– XGA
1024x768 53.964 66.132 71.664 +/+ COMPAQ-XGA
1024x768 56.476 70.069 75.000 –/– VESA-768
1024x768 60.023 75.029 78.750 +/+ VESA-768-75 Hz
REMARQUE: Le mode 640 x 350, 70 Hz n'est pas l e plein écran.
Environnement
Température:
Utilisation
Repos
5° à 35° C (50° à 95° F)
–20° à 60° C (–4° à 113° F) pendant 240 heures
Humidité:
Utilisation
Repos
20% à 80% (sans condensa tion)
5% à 80% (sans condensation)
Altitude:
Utilisation
Repos
3000 m (10.000 pieds)
12 192 m (40 000 pied s)
Dissipation thermique:
Maximum
Standard
71.7 BTU/heure
51.2 BTU/heure
2-4 Gu ide Utilisateur
Page 35
Modes de Gestion d'Alimentation
Si vous avez une carte ou un logiciel d'affichage compatible DPMS VESA installé dans votre système, le
moniteur peut réduire automatiquement sa consommation d'énergie lorsqu'il n'est pas utilisé. Si une
entrée provenant du clavier, souris, ou autre périphérique d'ent rée est détectée, le moniteur "s'é veille"
automatiquement. Tableau 2-2 affiche la consommation d'énergie et émet des signaux pour cette
fonctionnalité d'économie d'énergie automatique.
Tableau 2-2. Modes de Gestion d'Alimentation
Mode VESA Vidéo Sync H Sync V Energie
Utilisée
Allumé Active Oui Oui Maximum 25 W 0% Pleine luminosité
Mode veille Vide Non Oui <5 W 75% Demi-luminosité
Mode veille Vide Oui Non < 5 W 75% Demi-luminosité
Active-Désactivé Vide Non Non <5 W 75% Sombre
Alimentation
CC coupée
<5 W 75% S ombr e
Economie
d'Energie (%)
Couleur de LED
< bleue >
< bleue>
< bleue>
Figure 2-1. Affectation des Broches
6
1
5
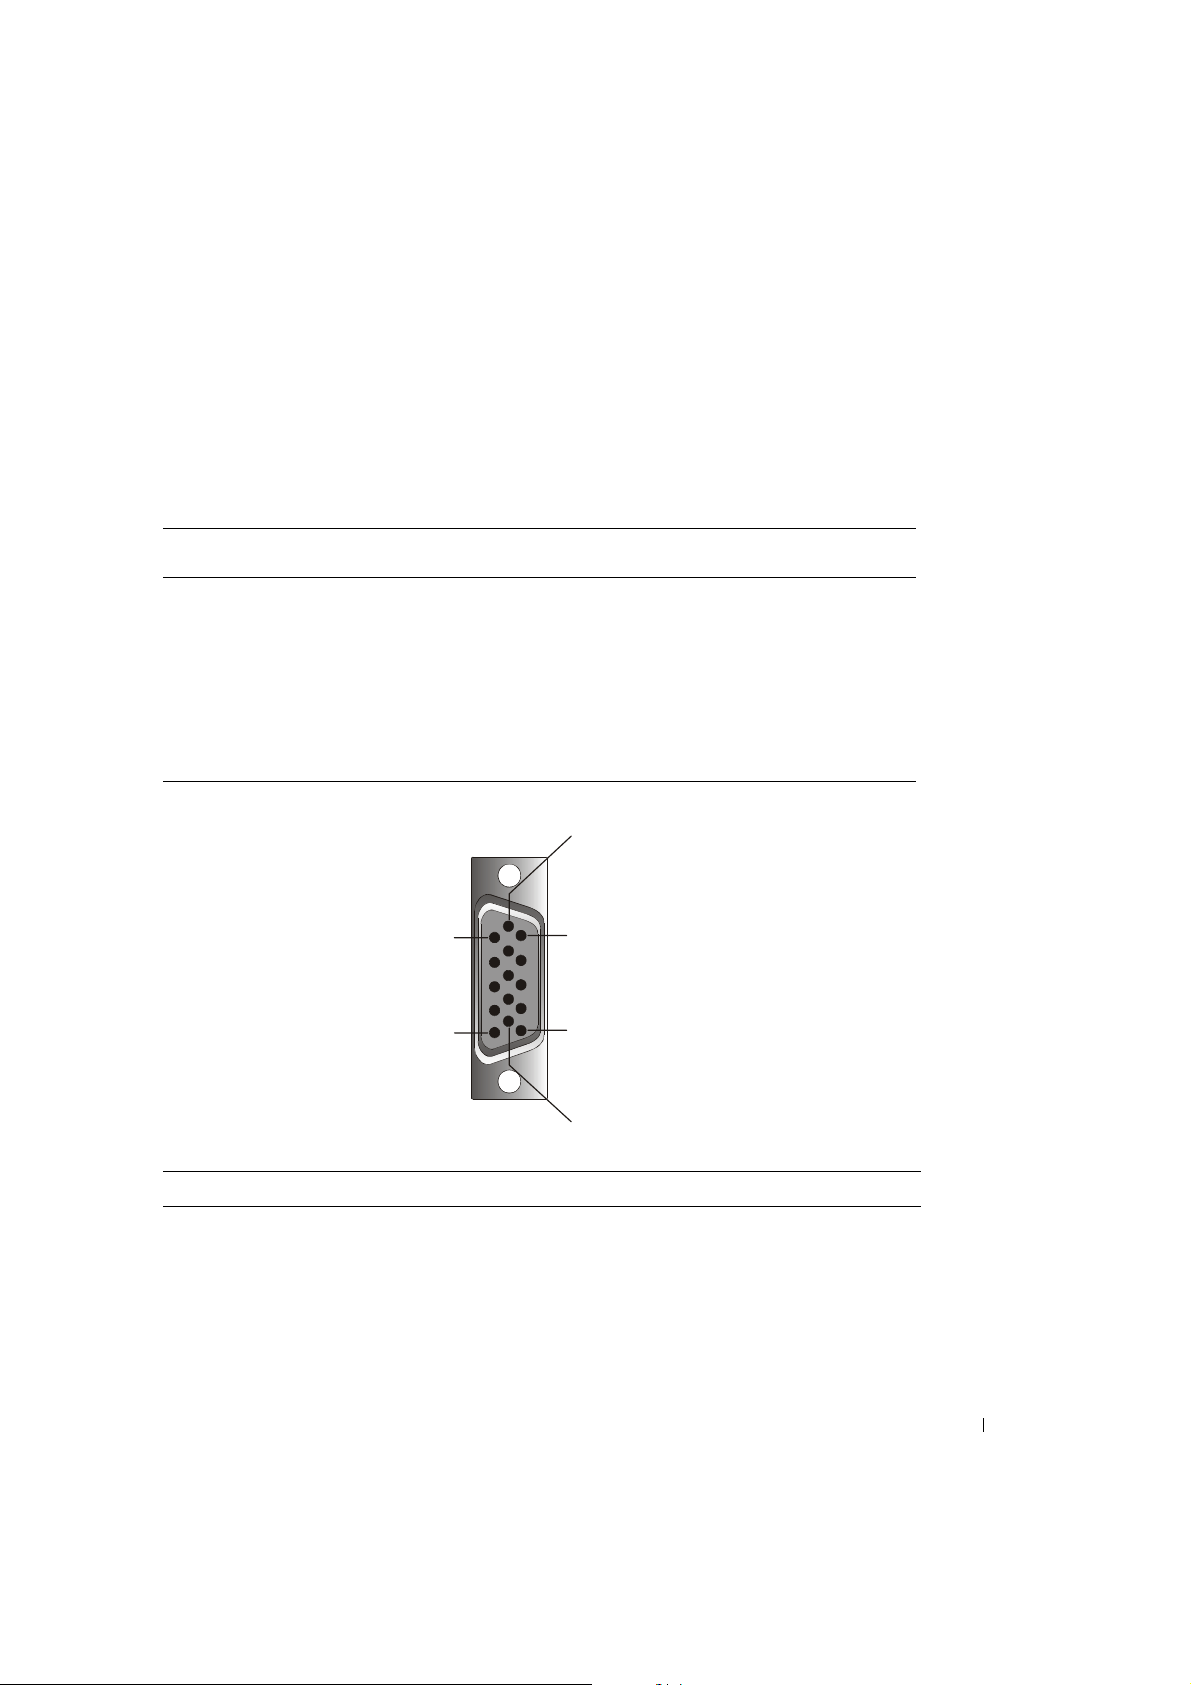
Tableau 2-3. Connecteur de Signal (Connecteur D-sub 15 broches)
11
15
10
Broche N° Signal
1 Rouge Vidéo
2Vert Vidéo
3Bleu Vidéo
4NC
Guide Utilisateur 2-5
Page 36
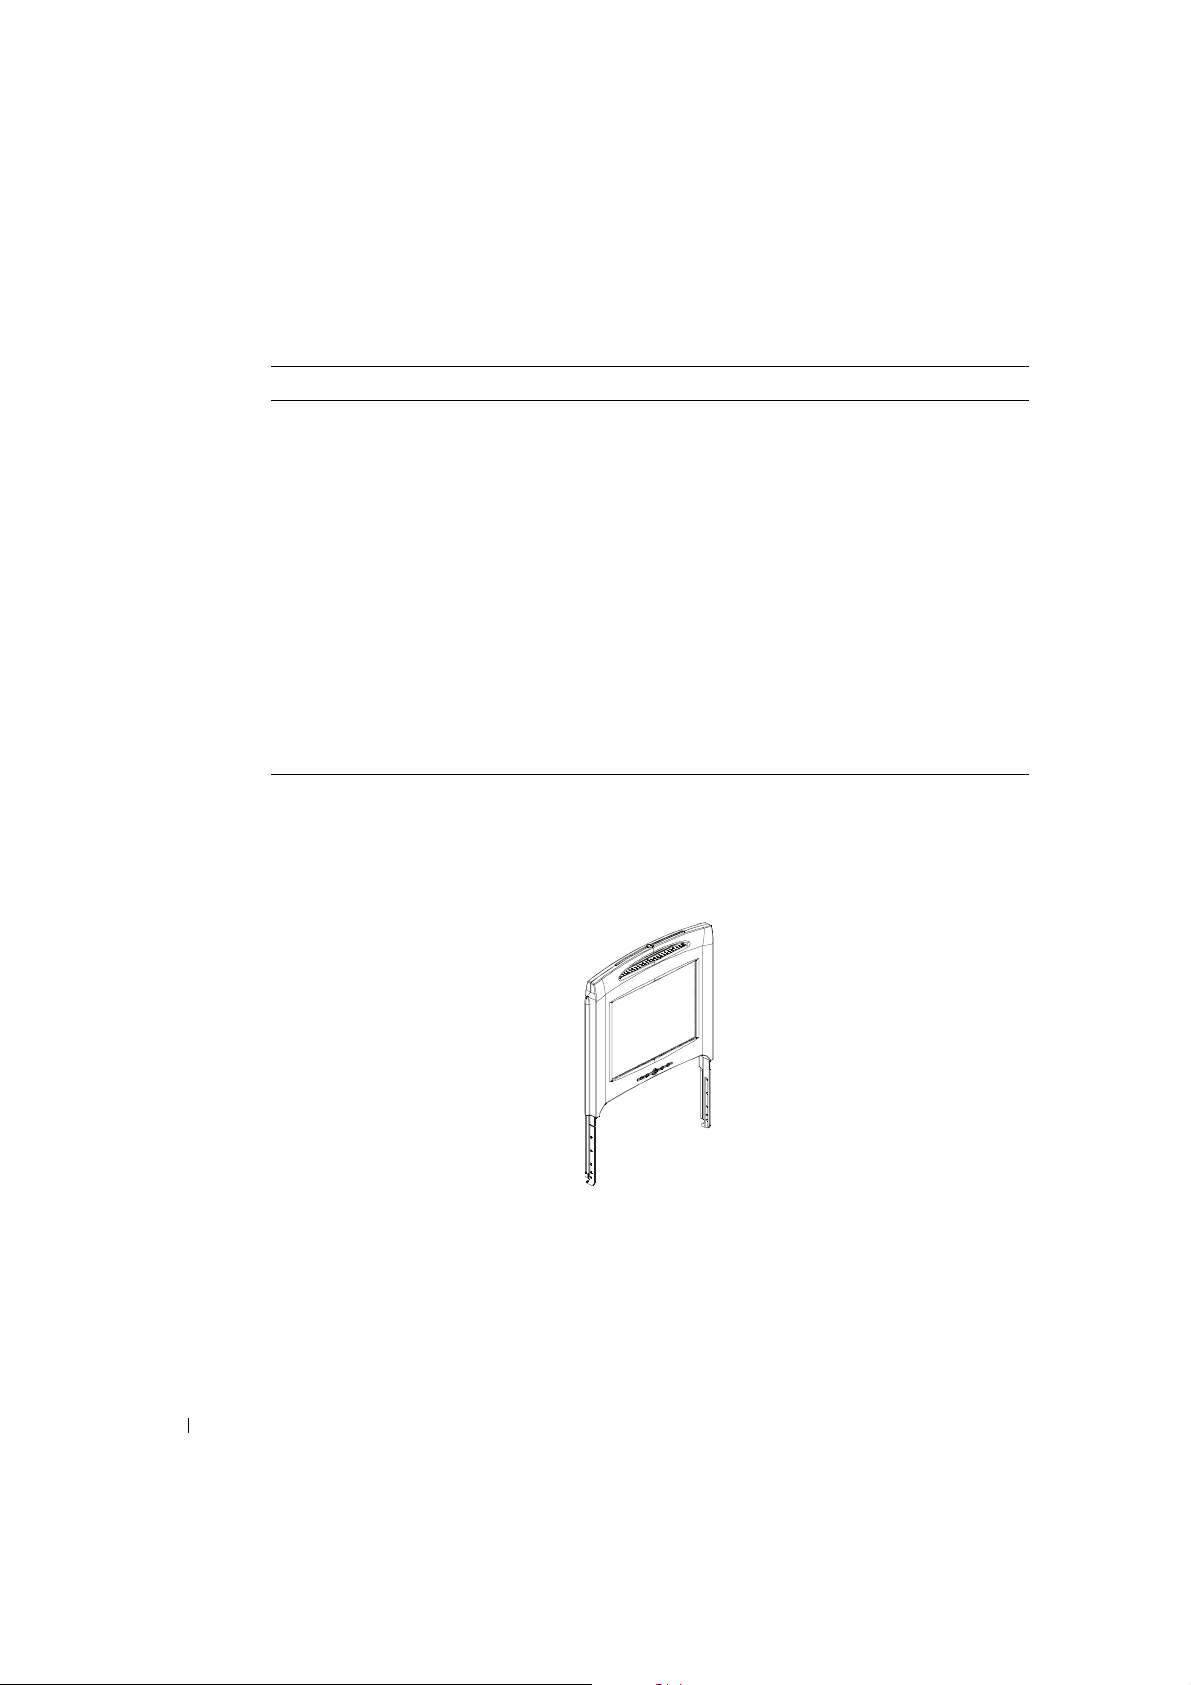
Tableau 2-3. Connecteur de Signal (Connecteur D-sub 15 broches)
Broche N° Signal
5 Masse Logique
6 Rouge Masse Vidéo
7 Vert Masse Vidéo
8 Bleu Masse Vidéo
9VCC
10 VGA _ CON (vérification du câble VGA)
(Suite)
www.dell.com | support.dell.com
11 NC
12 SDA (DDC1/2B)
13 Sync Horizo nta le
14 Sync V erticale
15 SCL (DDC2B)
Vue Avant et Arrière du Moniteur à Ecran Plat
Figure 2-2. Vue de Face
2-6 Gu ide Utilisateur
Page 37
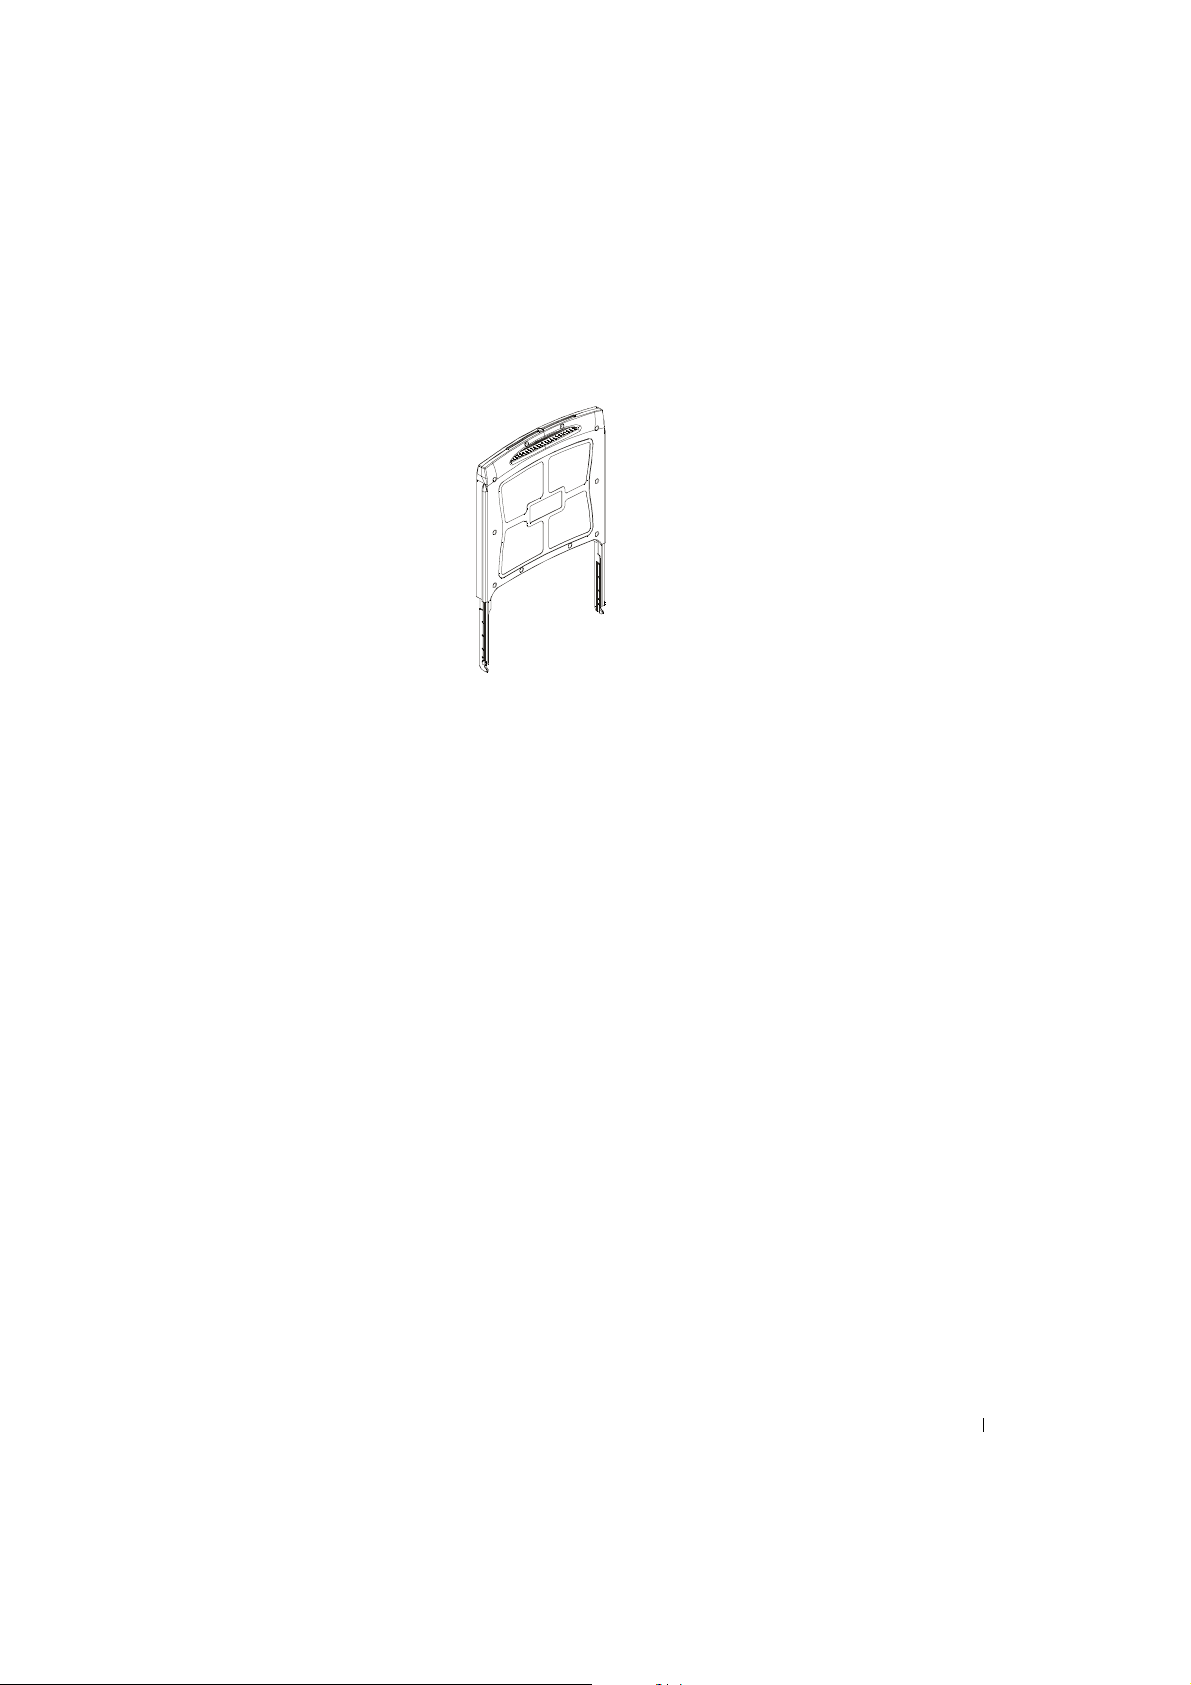
Figure 2-3. Vue de Dos
Paramétrage du Moniteur à Ecran Plat
Suivez les étapes ci-d essous pour paramétrer le moni teur à écran plat.
• Assurez-vous que le moniteur à écran plat à été connecté à une source d'alimentation CA. Voir le
Guide d'Installation du Rack.
• Vous pouvez ali menter ce moniteur à écran plat à l'aid e d'une des deux méthodes suivantes.
– Automatiquement: Tirez le tiroir du moniteur à écran plat vers l'extérieur jusqu'à ce qu'il se
verrouille, et saisissez le moniteur par ses poignées et tournez-le dans la position désirée. Le
moniteur à écran plat s’allume automatiquement quand il atteint un angle d’environ 90°.
– Manuellement: Appuyez sur le bouton de Marche situé au dos du cadre.
• Pour ajuster la hauteur, saisissez le moniteur par les deux côtés et appliquez une pression uniforme
de chaque côté pour l’ incliner vers le haut ou vers le bas.
Système de Gestion d'Alimentation
Ce Moniteur à écran plat est compatible avec la gestion d'alimentation VESA DPMS (version 1.0p)
standard. La p ropos iti on VESA DP MS offre quatre phases de modes d' écon omie d'é ner gie en d étecta nt le
signal de synchronisation horizontale ou verticale. Voir Tableau 2-2 pour les informations concernant la
consommation de courant pour chaque différent mode de gestion d’ alimentation.
Quand le moniteur à écran plat est en mode d’économi e d’énergie ou détecte une synchronisation
incorrecte, l’écran du moniteur sera v id e et la couleur de l’indicateur LED de bouton d’ alimentation sera
en demi-luminosité bleue.
Guide Utilisateur 2-7
Page 38
www.dell.com | support.dell.com
Entretien
AVERTISSEMENT: Pour éviter tout risque d'électrocution, ne démontez pas le carter
du moniteur. Les utilisateurs ne peuvent pas réparer le moniteur. L'entretien du
moniteur est limité à son nettoyage.
AVERTISSEMENT: Avant de procéder au nettoyage du moniteur, débranchez-le de la
prise de courant secteur.
• Pour nettoy er l'écran plat de votre mo ni teur, imprégn e z lé gè re me n t un ch iffon doux et propre av ec
de l'eau ou de l'alcool isopropylique.
• Pour nettoyer le carter du moniteur, utilisez un chiffon légèrement imprégné d'un détergent doux.
• Essuyez les taches résistantes du carte r avec un chiffon doux légèrement imprégné d’ alcool
isopropylique. N’utilisez pas de benzène, de solvant, d’ammoniaque, ou de détergeants abrasifs.
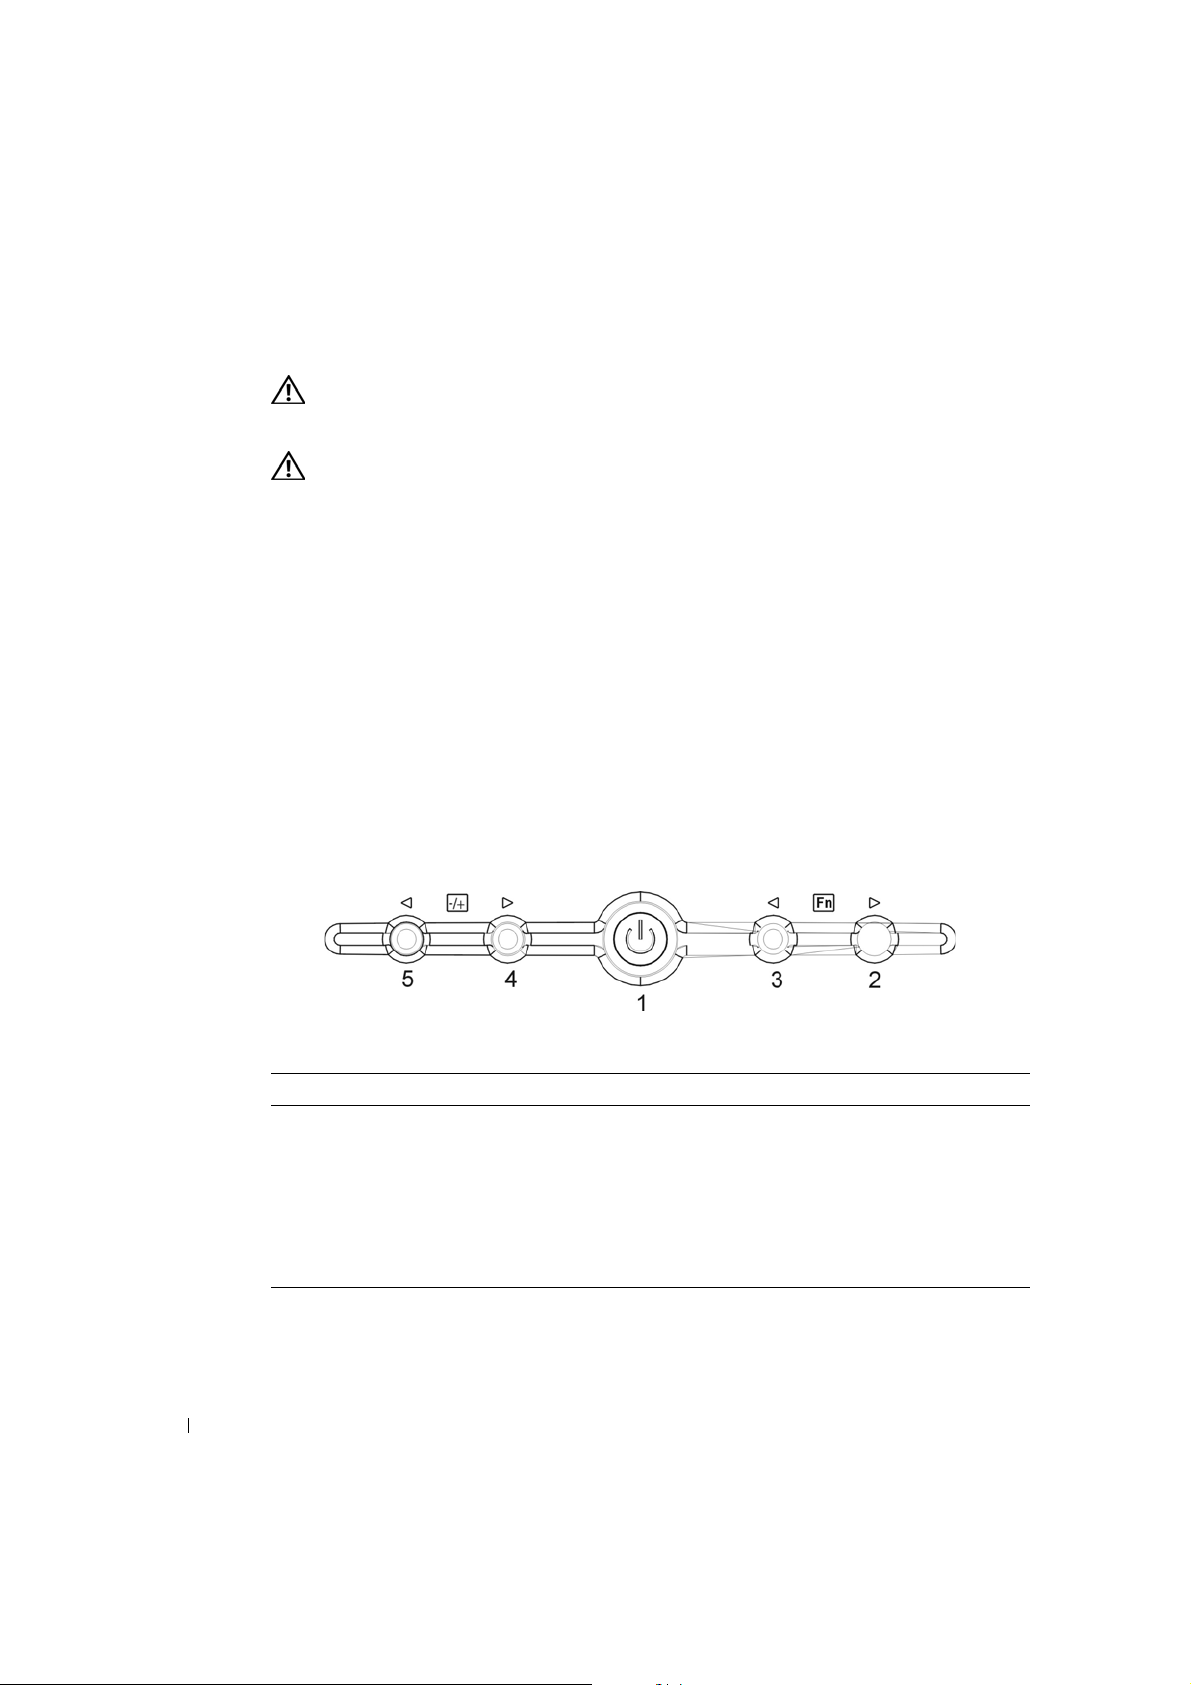
Contrôles et Indicateurs
Présentation
Utilisez les boutons de contrôle situés sous l'écran du moniteur pour ajuster les caractéristique s de l'image
affichée.
Figure 2-4. Contrôles
Tableau 2-4. Panneau de Contrôle (Panneau Avant du Moniteur)
Contrôle Description
1 La LED d’alimentation est en pleine luminosité (bleue) quand le moniteur est allumé
2 Fonction de sélection sens inverse des aiguilles d'une montre.
3 Fonction de sélection sens des aiguilles d'une montre.
4 Ajuster augmenter
5 Ajuster diminuer (Réglage Auto : Activé en appuyant pendant 1 seconde)
2-8 Gu ide Utilisateur
et en demi-luminosité (bleu e) en mode d’économie d’énergie.
Page 39
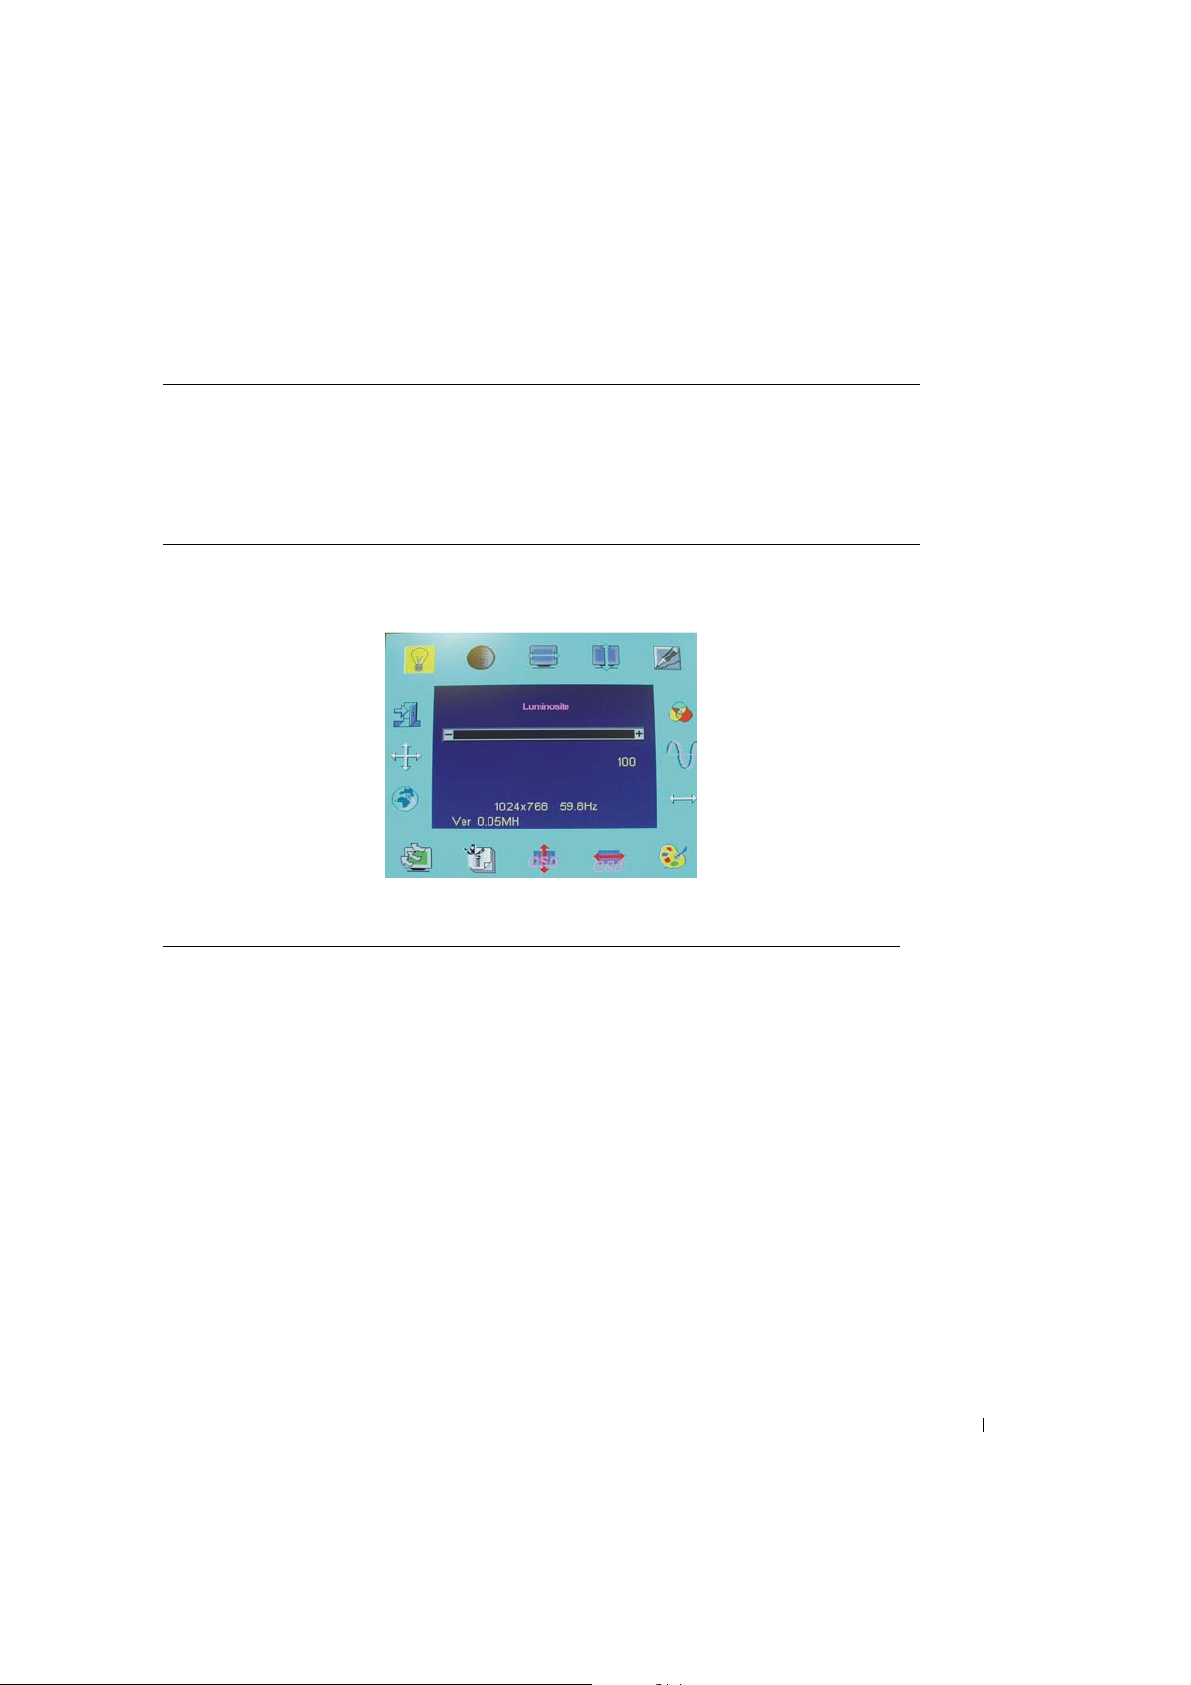
Tableau 2-5. Disposition de l’OSD
Format OSD 20 Caractères sur 9 lignes
Bordure OSD Couleur Cyan
Elément Réglable OSD Premier plan noir, fond Cyan
Élément sélectionné Premier plan Magenta, fond Jaune
Commentaire Premier plan Magenta, fond Bleu
Figure 2-5. Affichage d'Ecran
Tableau 2-6. Description OSD
Luminosité: Réglage de luminosité, de 0 à 100
Contraste : Réglage du contraste, de 0 à 100
Position H : Réglage de la positi on horizontale.
Position V : Réglage de la position verticale.
Phase : Réglage de la mise au point, la plage va de 0 à 255, 255 pas.
Position OSD : Réglage de la position OSD.
Réglage Auto : Cette fonction ajuste automatiquement la position H, p osition V, l’horloge
et la phase. Le réglage prend entre 3 et 5 secondes. Quand le réglage
automatique commence, le message "Réglage Auto…." s'affiche.
Horloge : Réglage du suivi de fréquence. Les extrêmes vont de –50 à +50, mais
pour certains modes, la plage est limitée.
Texte graphique: Sélection du mode 640 x 400 (GRAPHIQUE) ou 720 x 400 (TEXTE).
Langue : 5 langues de description OS D s ont disponibles, inclua nt l’Anglais,
l’Allemand, le Français, l’Espagnol, et le Japonais.
Rappel: Valeur de rappel par défaut.
Guide Utilisateur 2-9
Page 40

Tableau 2-6. Description OSD
(Suite)
www.dell.com | support.dell.com
Temp de couleur :
Utilisateur :
R utilisateur :
V utilisateur :
B utilisateur :
6500:
9300:
Température de couleur pour standard 9300, 6500 ou définie par
l'utilisateur.
Gain de signal rouge défini par l’utilisateur.
Gain de signal vert défini par l’utilisateur.
Gain de signal bleu défini par l’utilisateur.
Positionner la coordonnée CIE à 6500 °K de Temp érature de Couleur.
Positionner la coordonnée CIE à 9300 °K de Temp érature de Couleur.
Quitter : Quitter la fonction du menu OSD.
Netteté : Régler l’effet d’échelle (plus doux ou plus net).
Transparence OSD: Ajuste le niveau de transparen ce depuis le menu
OSD. La plage s’étend de 0 à 100 niveaux.
1024 x 768: Résolution de mode actuel.
59.8 HZ: Fréquence verticale du mode actuel ±1 Hz.
VER 0.05MH: Révision du microprogramme.
Autres fonctions :
Intellectuel Auto :
La fonction de régl age automatique démarr e automatiquement quand un
mode d’affichage est entré pour la première fois. Après le réglage, ce
mode est enregistré. Le moniteur passe automatiquement sur les
conditions optimisées chaque fois que ce mode es t à nouveau rencontré.
Un total de 21 modes utilisés les plus récemment est enregistré dans ce
système.
Fonctionnalité VESA
DPMS: Au bout de 3 secondes, le moniteur ne recevant pas de signal
supplémentaire, il affichera "Pas de Signal" et entrera ensuite en mode
d'économie d'énergie.
Tableau 2-7. Indicateurs LED
Mode Couleur de LED
Allumé Pleine luminosité < bleu >
Veille Demi-luminosité < bleue>
Suspension Demi-luminosité < bleue>
Arrêt Sombre
Bouton Eteint Sombre
Déconnexion de câble 1. Demi-luminositéé < bleue><mode Veille>
2-10 Guide U tilisateur
2. Sombre <Coupure CC; mode Désactivé>
Page 41
Réglage de l'Affichage du Moniteur
Le Moniteur à écran plat présente un Affichage d'Ecran (OSD) intuitif, piloté par menu, qui rend le
réglage des paramètres d'affichage facil e et simple. Le moniteur à écran plat possèd e quatre touches de
contrôle de fonction qui permettent à l'utilisateur de sélectionner parmi les fonctions affichées dans le
menu OSD et de personnaliser l'environnement d'affichage. Utilisez les boutons de contrôle de fonction
pour accéder à l’OSD et pour parcourir le menu. Utilisez les boutons de réglage pour réaliser les
modifications sur le menu sélectionné. Voir "Contrôles et Indicateurs."
Pour accéder au menu principal de l’OSD, appuyez sur un des boutons de fonction et le schéma du menu
apparaîtra comme indiqué dans Figure 2-5.
La résolution d’entrée et la fréquence de balayage verticale (FV) actuelles sont affichées au bas du menu
OSD avec le numéro de ver s ion du microprogramme. Le fait de continuer à appuyer sur les boutons de
contrôle de fonction fera parcourir le menu complet.
NOTICE: Le numéro de version affiché sur le menu OSD dans ce guide sert uniquement pour
l'illustration. La révision du microprog ramme de votre mon iteur pe ut avoir é té mise à jo ur dans u ne
version ultérieure.
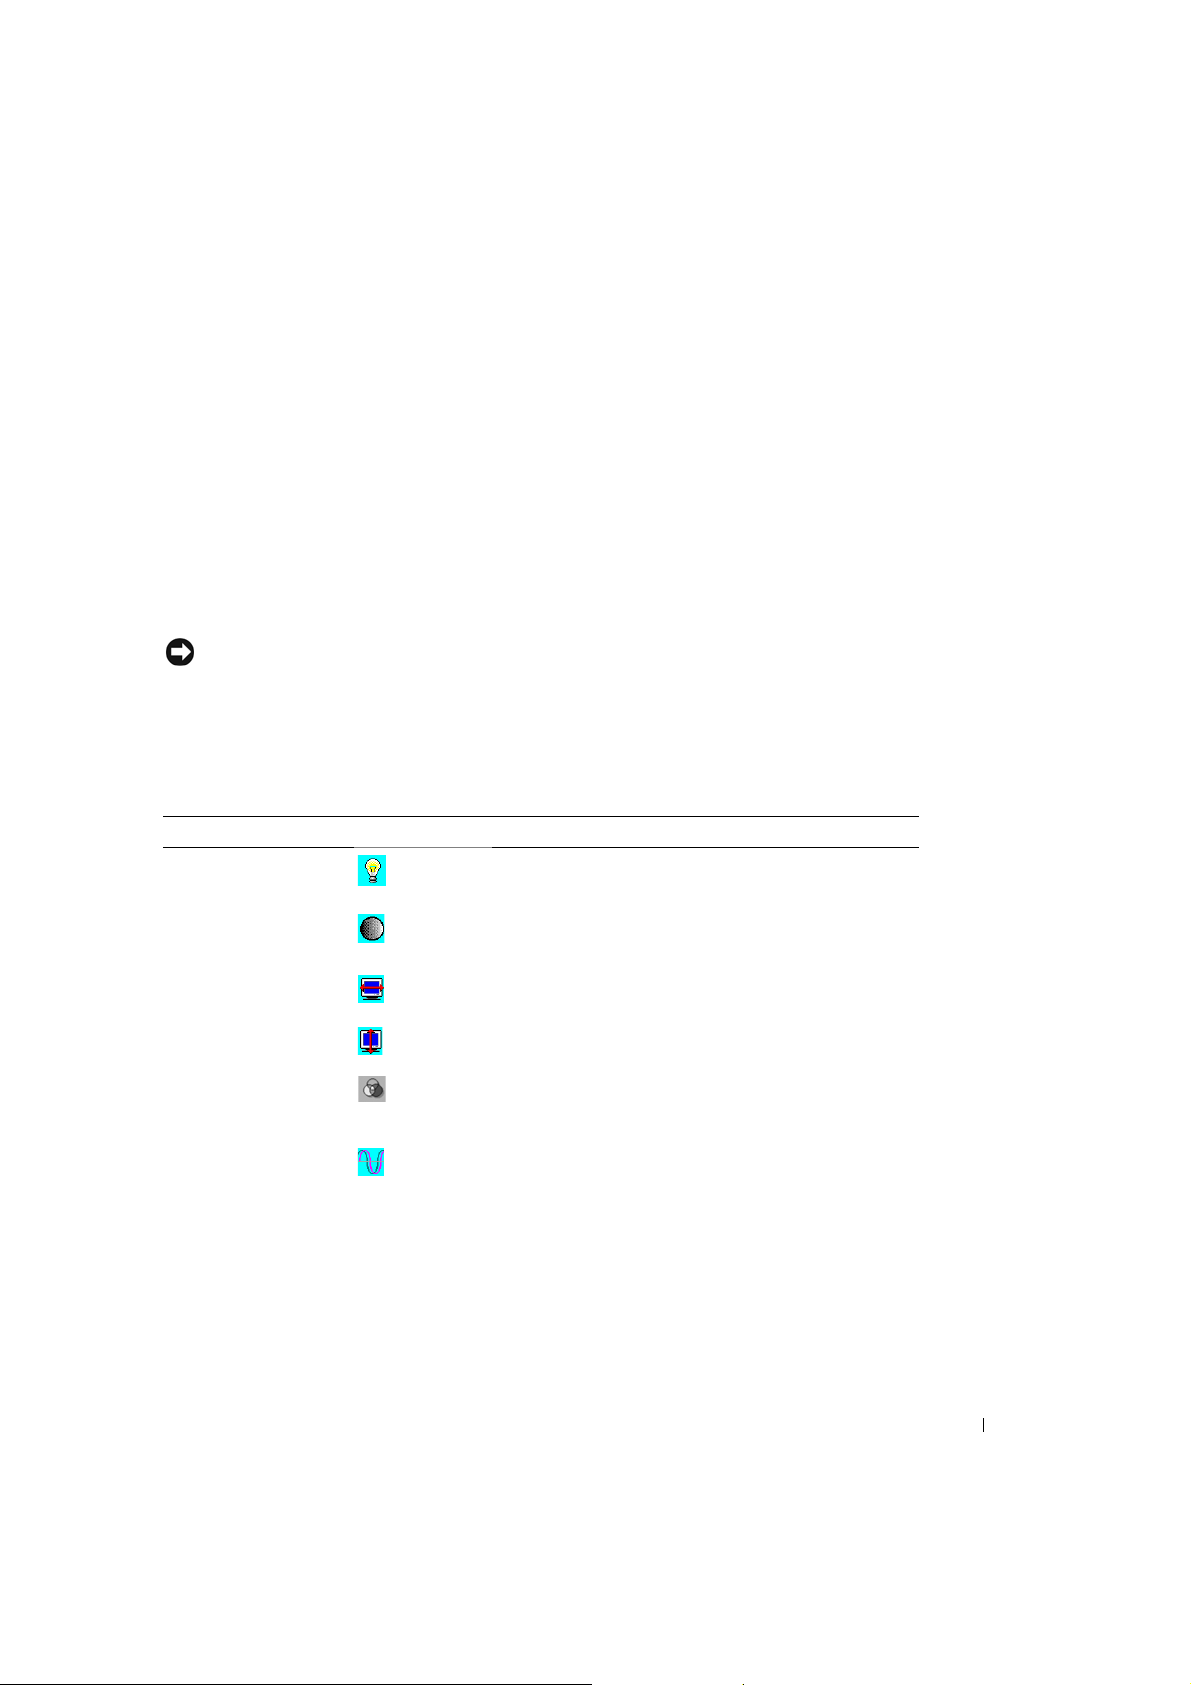
Des descriptions détaillées faciles d'accès pour chaque fonction du me nu OSD sont données cidessous. Reportez-vous aussi aux boutons de fonction et aux boutons de réglage:
Tableau 2-8. Fonctions OSD
Fonction Icône Description
Luminosité 101 paramètre s deluminosité sont disponibles (0 à 100).
Contraste 101 paramètres de contraste sont disponibles (0 à 100).
Position H. Cette fonction vous permet de régler la position horizontale
de l’affichage
Position V. Cette fonction vous permet de régler la position verticale de
l’affichage.
Transparence OSD Cette fonction vou s permet de définir la tra n s p arence du
menu OSD. La tra ns parence peut être régléed de 0% à 10%.
11 niveaux sont disponibles .
Phase Un total 256 niveaux (0 à 255) sont disponibles pour ajuster
la mise au point et la clarté de l'affichage.
Guide Utilisateur 2-11
Page 42
www.dell.com | support.dell.com
Tableau 2-8. Fonctions OSD
(Suite)
Fonction Icône Description
Horloge Cette fonction comporte une fonctionnalité de suivi de
fréquence offrant un environnement stab le et claire. 101
paramètres (de –50 à +50) sont disponibl es sur le mode en
cours d’exécution. Les plages de réglage varient sui v ant les
modes. Cette fonction enregistre le nom bre dévié de cycles
d’horloge entre la synchronisation d’entrée et la
synchronis ation supportée. La valeur de l’horloge ne doit pas
être "0" après le Réglage Auto quand la synchron is at i on
d’entrée est différente de la synchronisation supportée.
Température de Couleur Appuyez sur le bouton ( ) pour sélectionner une
température d e couleur différente.
Position H. OSD Cette fonction déplace le menu OSD horizontalement.
Position V. OSD Cette fonction déplace le menu OSD verticalement.
Graphique / Texte Etant donné que les Fréquences H et V 640 x 400, 70 H z, et
720 x 400, 70 Hz, sont toutes deux les mêmes, cette fonction
vous permettrade sélectionner manuellement 640 x 400
(mode graphiqu e) ou 720 x 400 (mode texte).
Rappel La fonction de rappel réinitialis era tous les para mètres ajus tés
sur les valeurs préréglées en usine.
Langue Cinq langues OSDs sont disponible s: A nglais, Allemand,
Français, Espagnol, et Japonais. Appuy ez sur le bouton de
réglage gauche ou droit pour sélectionner la langue désirée.
Réglage Auto Appuyez sur les boutons + et – pour activer la fonction de
réglage auto.
La fonction de réglage auto vous permet de régler la taille
d’affichage, l’horloge, et la phase pour obtenir un paramètre
d’affichage optimal. Ce processus prendra entre 3 ~ 5
secondes pour s’activer.
REMARQUE: Après le réglage auto, l’ affi chage peut
afficher la mauvaise position ou taille s’il a reçu un modèle
n’ayant pas de bordure d’écran.
Quitter Enregistre les valeur s d e c e par amè tre et quitte la fonction du
menu OSD.
2-12 Guide U tilisateur
Page 43

Dépannage
NOTICE: Ce produit prend en charge des modes VGA multiples. Ce moniteur à écran plat a été
préréglé en usine avec les synchronisations VGA standard. Etant donné les différences de
synchronisation qui existent entre les diverses cartes VGA sur le marché, il se peut que vo us
obteniez au départ un affichage instable ou pas claire lorsqu'un nouveau mode d'affichage ou une
nouvelle carte VGA est sélectionnée.
NOTICE: L'optimisation de l' affichage ne peut être assurée si le mode que vous avez choisi n'est
pas présent dans la liste.
Problème: L'Affichage n'est pas clair et instable.
Suivez les procédures énumérées ci-dessous pour obtenir les meilleures performances d’écran plat pour
les systèmes fonctionnant sous un système d’exploitation Microsof t
1 Entrez dans l’étape initiale pour fermer le système d’exploitation en cliquant sur le bouton
Démarrer et en cliquant ensuite sur Arrêter).
2 Si des bandes verticales de “bruit noir” apparaissent, utilisez la fonction Horloge dans le menu
OSD pour ajuster l’affichage jusqu’à ce que ces barres di sparaissent.
3 Utilisez la fonction Phase pour ajuster l’écran du moniteur.
4 Cliquez sur Non dans Arrêter Windows pour retourner dans l'e nv ir o nnement normal du sys t è m e
d’exploitation.
Vous pouv ez aussi utiliser la fonction Réglage Auto pour ajuster le moniteur à écran plat. Voir "Réglage
de l'Affichage du Moniteur."
®
Windows®.
Problème: Rien ne s’affiche sur le moniteur à écran plat.
S’il n’y a pas d’affichage sur le moniteur à écran plat, procédez comme suit :
1 Assurez-vous que l’indicateur d’alimentati on est allumé, que toutes les connexions sont correctez,
et que le système fonctionne sous la bonne synchronisation. Voir "Spécifications" pour plus
d'informations.
2 Eteignez le moniteur à écran plat et rallumez-le. Appuyez sur le bouton de fonction HAUT et
appuyez ensuite sur le bouton de réglage haut ou bas plusieurs fois. S'il n'y a toujours pas
d'affichage, appuyez pl usieurs fois sur l'autre bouton de réglage.
3 Si l’ étape 2 ne donne pas de résultat, connectez votre système à un autre moniteur externe (soit un
moniteur TRC ou à écran plat). Si votre système fonctionne correctement avec le monit eur, la
synchronisation de sortie de la carte VGA est peut-être hors des limites de synchron isation du
moniteur à écran plat. Veuillez passer à un autre mode apparaissant dans l'appendice ou remplacez
la carte VGA, puis répétez les étapes 1 et 2.
4 Si les ét apes précédentes ne corrigent pas le probl ème, faites appel à l’aide du fabricant.
Guide Utilisateur 2-13
Page 44
www.dell.com | support.dell.com
Problème: Message "Signal d’Entrée hors Limites" dans l’OSD.
Si vous choisissez un e s ynchronisation de sortie se trouvant à l’extérieur de la plage de synchronisation
du moniteur à écran plat, l’OSD affichera le message "Signal d’Entrée hors Limites". Choisissez un autre
mode supporté par le moniteur à écran plat. Voir "Spécifications" pour les informations sur la
synchronisation.
Problème: Message "Pas de Signal" dans l’OSD.
Vérifiez la connexion du câble vidéo au système hôte.
Notices de Réglementation
Rendement Energétique
ENERGY STAR® Emblème
Le programme d'Ordinateur ENERGY STAR® d'EPA est un effort commun entre EPA et les fabricants
d'ordinateur pour dimi nuer la pollu tion d e l' air e n fa isant la promo tion d e prod uits info rmatiqu es d'un bon
rendement énergétique. EPA estime que l'utilisation de produits informatiques ENERGY STAR® peut
permettre aux utilisateurs d'ordinateurs d'économiser chaque année deux milliards de dollars en
électricité. En re tour, cette réduction d'utilisation d'électricité peut diminuer les émissions de dioxyde de
carbone, le ga z pr inc ipalem ent r espo nsa ble de l' ef fe t de se rre , et de diox yde de s oufr e et d'ox ydes d'a zote ,
les causes principales des pluies acides.
Vous pouv ez aussi aider à réduire la consommation d'électricité et ses effets secondaires en éteign ant
votre ordinateur quand il n'est pas utilisé pendant des périodes prolongées, particulièrement la nuit et les
week-ends.
Commission Fédérale sur les Communications (FCC) Notice (U.S. Seulement)
Ce matériel est conforme à l'Article 15 du Règlement de la FCC. L'utilisation est sujette aux deux
conditions suivantes:
• Cet appareil ne doit pas générer d’interférences nuisibles.
• Ce matériel doit accepter n'importe qu'elle interférence reçue, y compris les interférences qui
pourraient avoir des effets non désirés sur le fonctionnement.
2-14 Guide U tilisateur
Page 45

Classe A
Cet équipement a été testé et déclaré conforme aux normes des appareils di gitaux de Classe A,
conformément à l'ar ticle 15 du Règlement de la F CC. Ces normes sont conçues pour fournir une bonne
protection contre les interférences nuis ibles quand l’équipe ment est utilisé en environneme nt commercial.
Cet équipement génère, utilise et peut radier des énergies de fréquence radio, et s'il n'est pas installé et
utilisé conformément à le manuel d’in structions du fabrica nt, il peut engen drer des interféren ces nuisibles
avec les communications radio. L’utilisation de cet équipement dans des zones résidentielles risque
d’engendrer des inte r férences nuisibles, dans ce cas vous devrez corri ger ces interférences à vos propres
frais.
*Pour le produit nommé ci après:
MONITEUR LCD (Nom de Catégorie)
Rackmount / DELL 4U132 (Modèle de Base)
*Fabriqué à: Compal Electronics, Inc.
Nous déclarons par la présente que ce matériel est conforme à
l'Article 15 du Règlement de la FCC.
L'utilisation est sujette aux deux conditions suivantes:
Cet appareil ne doit pas générer d’interférences nuisibles.
Ce matériel doit accepter n'importe qu'elle interférence reçue, y
compris les interférences qui pourraient avoir des effets non
désirés sur le fonctionnement.
*Règlement de la FCC: Test é pour être conforme à l’article 15 de la FCC, class e A
*Site test à: C&A LABORATORY, CO., LTD
*Partie respons ib le de l a Pro du ction:
Conformité :
*Informations sur le Fabricant : Compal Electronics, Inc.
Compal Electronics, Inc.
No. 581, Jui-kuang Rd.
Neihu, Taipei, Taiwan, 114
Tel)+(886)-2-8797-8588
Dept. Sécurité
NO.581, Juikuang Rd.
Neihu, Taipei, Taiwan, 114
Dept. Sécurité
Directeur
Signature du
Fournisseur
Guide Utilisateur 2-15
Page 46
www.dell.com | support.dell.com
Déclaration de Conformité UE (LVD, EMC)
Pour le produit suivant: MONITEUR LCD (Nom de catégorie)
Rackmount (nom du modèle)
Fabriqué à: Compal Electronics, Inc.
8, Nan-Tung Rd., Pin-Cheng Ci ty Taoyuan Hsien, Taiwan
Nous déclarons par la présent e, q ue l es exigences de sécurité majeures, conformément à la Directive de
Marque CE (93/68/EEC) et à la Directive sur les Voltages de Basse Tension (73/23/EEC), Directives de
Compatibilité Electromagnétique (89/336/EEC, 92/31/EEC) sont remplies, comme cela est stipulé dans
les directives établies par les états membres de la Commission EEC. Cette déclaration est valable pour
tous les échantillons compris dans cette déclaratio n, q ui son t fabriq ué s confor mém ent à l'a ppendi ce des
chartes de production. Les standards rel atifs à l'évaluation des exigences de sécurité électrique et EMC
se présentent comme suit:
LVD:EN60950
EMC:EN55024 , EN55022, EN61000- 3-2, EN61000-3-3
1. Certificat de conformité / Rapport de test émis par:
LVD:TÜV
2. Documentation technique gardée à:
Compal Electronics, Inc.
Qui sera mise à disposition sur demande. (Fabricant)
Compal Electronics, Inc.
No. 581, Jui-kuang Rd.
Neihu, Taipei, Taiwan, 114
Dept. Sécurité
Directeur
Informations de Réglementation Canadienne (Canada Seulement)
This digital apparatus does not exceed the Class A limits for radio noise emissions from digital apparatus
set out in the Radio Interference Regulations of the Canadian Department of Communications.
Note that Canadian Department of Communications (DOC) regulations provide that changes or
modifications not expressly approved by Dell Computer Corporation could void your authority to operate
this equipment.
This Class A digital apparatus meets all requirements of the Canadian Interference-Causing Equipment
Regulations
Cet appareil numérique de la classe A res pect e toutes les exigences du Règlement sur le mat ériel
brouilleur du Canada.
2-16 Guide U tilisateur
Page 47
Conformité EN 55022 (République Tchèque Seulement)
Notice de Classe A VCCI (Japon Seulement)
La plupart des ordinateurs Dell sont classés par le Conseil de Contrôle Volontaire pour les Interférences
(VCCI) comme équipement de tech nolo gie d e l 'inform atio n (ITE) de Classe B. Cependant, l'inclusion de
certaines options pe ut changer le classement de ce rtaines configurations en Classe A. ITE, incluant des
périphériques, des car tes d'ex tension, imp rimantes, périphé riques d'entré e/sortie (E/S), monite urs, e t ainsi
de suite, intégrés dans ou connectés au système doivent correspondre à la classification d'environnement
électromagnétique (Classe A ou B) de l'ordinateur.
Pour déterminer la classe s'appliquant à votre ordinateur, examinez les étiquettes/marques de
réglementation (voir "Marque de Réglementation ITE de Classe A VCCI" et "Marque de Réglementation
ITE de Classe B VCCI") situées au bas, sur le côté ou au dos de l'écran de votre ordinateur. Une fois que
vous avez déterminé la classification VCCI de votre système, lisez la notice VCCI appr opriée.
Classe A ITE
Guide Utilisateur 2-17
Page 48
www.dell.com | support.dell.com
Ceci est un produit de Classe A basé sur le standard du Conseil de Contrôle Volontaire pour les
Interférences (VCCI) des Equipements de Technologie de l'Information. Si cet équipement est utilisé en
environnement domestique, des interférences radio peuvent se produire. Si de telles interférences se
produisaient, l’utilisateur sera invité à procéder à des corrections.
Marque de Réglementation ITE de Classe A VCCI
Si l’étiquette de la réglementation comprend les marques suivantes, votre ordinateur est un
produit de Classe A :
Etiquette de Réglementation de Classe A MIC
Si l’étiquette de la réglementation comprend les marques suivantes, votre ordinateur est un produit de
Classe A :
Matériel de Classe A
Centre Polonais de Test et de Notice de Certification
Cet appareil doit être alimenté par une prise comprenant un circuit de protection (une prise à trois
broches). Tous les équipements fonctionnant ensemble (ordinateur, moniteur, imprimante, et autres)
doivent avoir la même source d'alimentation.
Le conducteur de phase de l'installation électrique de la pièce doit être équipé d'un matériel de protection
contre les courts-circuits sous la forme d'un fusible avec une valeur nominale non supérieure à 16
ampères (A).
2-18 Guide U tilisateur
LCD monitor / SL358
E-B012-03-2283(A)
Compal Electronics, Inc.
May, 2003
Compal Electronics, Inc
Page 49
Pour éteindre entièrement l'équipement, le cordon d'alimentation doit être débranché de la prise
d'alimentation, qui devra être située près de l'équipement et faci le d'accès.
Une marque de protection "A" confirme que l'équipement est conforme aux exigences de protection des
standards PN-9 3/T-42107 et PN-89/E-06 251.
Information NOM (Mexique Seulement)
L'information suivante est fournie sur le(s) matériel(s) décrit(s) dans ce document conformément aux
exigences des standards officiels Mexicains (NOM).
Exportateur: Dell Computer Corporation
One Dell Way
Round Rock, TX 78682
Importateur: Dell Computer de México,
S.A. de C.V. Rio Lerma No. 302 -4° Piso
Col. Cuauhtemoc 16500 México, D.F.
Livraison à: S.A. de C.B. al Cuid ado de Kudhne & Nagel
de México S. de R.I., Avenida Soles No.55
Col. Peñon de los Baños, 15520 México, D.F.
Guide Utilisateur 2-19
Page 50
www.dell.com | support.dell.com
Te nsio n d' Alime ntatio n:
Fréquence :
Consommation de
Courant:
> 12 VCC, 5
50/ 60 Hz
2 A
Notice BSMI (Taïwan Seulement)
Notice Ergonomique (Allemagne Seulement)
Conformément au sta ndard d'ergonomie Allemand ISO13406-2, graphiques ou caractères:
• Les graphiques ou les caractères en bleu sur fon d sombre ne sont pas recommandés. (Cette
combinaison peut augmenter la fatigue oculaire dûe à une mauvaise visibilité engendrée par un
contraste faible.)
• Il est recommandé d'utiliser les contrôleurs graphiques et les moniteurs dans les conditions
suivantes:
– Fréquence Verticale: 5 6 Hz ou supérieur.
– Mode d'affichage: Caractè r es sombres sur fond clair.
Ergonomie Hinweis (nur Deutschland)
Um den Anforderungen der deutschen Ergonomie-Norm ISO13406-2 zu antsprechen.
• Wird empfahlen, die Grunfarb e Blau nicht auf dunklem Hintergrund zu verwenden
• (schiechte Erkennbarkeit. Augenbelastung bei zu geringem Zeicheenkontrast).
• Wird folg e nde Ein ste llun g des Grafik-Com trlooers und Monitors empfo hlen.
– Vertikalfrequenz: 56 Hz oder hoher.
–Ohne Zellensprung.
2-20 Guide U tilisateur
Page 51

Dell™ PowerEdge™ Rack Console 15FP
FlachbildschirmMonitor Bedienungsanleitung
www.dell.com | support.dell.com
Page 52
Hinweis, Bitte Beachten und V orsicht
HINWEIS: Ein HINWEIS enthält wichtige Informationen, mit deren Hilfe Sie Ihren Computer
besser nutzen können.
BITTE BEACHTEN:BITTE BEACHTEN weist auf eine mögliche Beschädigung von Hardware
oder den Verlust von Daten hin und beschreibt, wie dieses Problem vermieden werden kann.
VO RSICHT: VORSICHT wei st dara ufhin, d ass Gef ahr für einen Sach- o der
Personenschaden oder Lebensgefahr besteht .
____________________
Die in diesem Dokument enthaltenen Informationen können ohne Vorankündigung geändert werden.
© 2003 Dell Computer Corporation.Alle Rechte vorbehalten.
Eine Reproduktion diese s Dokumentes in jedweder Form ist nur mit vorheriger schriftlicher Genehmi gung von Dell
Computer Corporation erlaubt.
Die in diesem Text verwendeten Warenzeichen: Dell, das DELL-Logo und Pow erE dge sind Warenzeichen der Del l
Computer Corporation. Microsoft und Windows sind eingetragene Warenzeichen der Microsoft Corporation. VESA ist ein
eingetragenes Warenzeichen d er Video Electronics Standards Association. ENERGY STAR ist ein eingetragenes
Warenzeichen der US-amerikanischen Umwe lt schutzbehörde (U.S. Environme nt al Prote ction Agency). Als Partner im
ENERGY STAR-Programm hat die Dell Computer Corporation festgelegt, dass dieses Produ kt die ENERGY STARRichtlinien für E nergie-Effizienz erfüllt.
Andere W a renzei chen oder Markenna men wer den in die sem Doku ment even tuell ve rwende t, um ent weder auf die Fi rmen
mit diesem Zeichen oder deren Produkte hinzuweisen. Mit Ausnahme der eigenen Warenzeichen und Markennamen hat
Dell Computer Corporation kein Interesse an jeglichen Eigentu msansprüchen an Warenzeichen oder Markennamen.
April 2003 Produkt-Nr. 3Y386 Rev. A01
Page 53

Inhalt
VORSICHT: Sicherheitshinweise. . . . . . . . . . . . . . . . . . 3-1
Rack-Montage von Systemen
. . . . . . . . . . . . . . . . . . . 3-1
Anleitung
Spezifikationen
. . . . . . . . . . . . . . . . . . . . . . . . . . . . . . . 3-2
Übersicht
Technische Daten und Eigenschaften
Powermanagement-Modi
. . . . . . . . . . . . . . . . . . . . . . . . . . . . . 3-2
. . . . . . . . . . . . . . . 3-2
. . . . . . . . . . . . . . . . . . . . . . . . . . . . 3-3
. . . . . . . . . . . . . . . . . . . . . 3-5
Flachbildschi rm-Monitor Vorder- und Rückansicht . . . . . . . . 3-6
Installation des Flachbildschirm-Monitors
. . . . . . . . . . . . 3-7
Powermanagement . . . . . . . . . . . . . . . . . . . . . . . . 3-7
Wartung. . . . . . . . . . . . . . . . . . . . . . . . . . . . . . . . 3-8
Bedienelemente und Anzeigen
Übersicht
. . . . . . . . . . . . . . . . . . . . . . . . . . . . . 3-8
Einstellung des Monitor-Displays
Fehlersuche und -behebung
Problem: Bild unscharf und instabil.
Problem: Kein Bild auf dem Flachbildschirm-Monitor.
. . . . . . . . . . . . . . . . . . . 3-8
. . . . . . . . . . . . . . . . . 3-11
. . . . . . . . . . . . . . . . . . . . 3-13
. . . . . . . . . . . . . . . 3-13
. . . . . . 3-13
Problem: "Input Signal Out of Range" erscheint im OSD. . . . . 3-14
Problem: "No Signal" erscheint im OSD. . . . . . . . . . . . . . 3-14
Vorschriften und Konformitätserklärungen . . . . . . . . . . . 3-14
Energieverbrauch
. . . . . . . . . . . . . . . . . . . . . . . . . 3-14
Hinweis des Federal Communications Commis sion FCC)
(nur für USA)
. . . . . . . . . . . . . . . . . . . . . . . . . . . 3-14
EU-Konformitäts erklärung (LVD, EMC) . . . . . . . . . . . . . 3-16
Vorschriften kanadischer Behörden (nur für Kanada) . . . . . . . 3-16
Inhalt 3
Page 54

EN 55022-Konformität (nur für Tschechische Republik). . . . . 3-17
VCCI Klasse A-Hinweis (nur für Japan). . . . . . . . . . . . . 3-17
MIC Klasse A Kennzeichnung. . . . . . . . . . . . . . . . . . 3-18
Hinweis des polnischen Instituts für Prüfung und Zulassung
(Polish Center for Testing and Certification)
NOM-Informationen (nur für Mexiko). . . . . . . . . . . . . . 3-19
BSMI-Hinweis (nur für Taiwan)
Ergonomie-Hinweis (nur für Deutschland). . . . . . . . . . . . 3-20
Ergonomie-Hinweis (nur Deutschland) . . . . . . . . . . . . . 3-20
Abbildungen
Abbildung 3-1. Stiftbelegung . . . . . . . . . . . . . . . . . . . 3-5
Abbildung 3-2. Vorderansicht
Abbildung 3-3. Rückansicht
Abbildung 3-4. Bedienelemente
Abbildung 3-5. Bildschirm-Menü (OSD)
Tabellen
. . . . . . . . . . . 3-18
. . . . . . . . . . . . . . . . . 3-20
. . . . . . . . . . . . . . . . . . 3-6
. . . . . . . . . . . . . . . . . . . 3-7
. . . . . . . . . . . . . . . . . 3-8
. . . . . . . . . . . . . 3-9
4 Inhalt
Tabelle 3-1. Funktionen . . . . . . . . . . . . . . . . . . . . 3-2
Tabelle 3-2. Powermanagement-Modi
Tabelle 3-3. Signalanschluss (15poliger D-Sub-Anschluss)
Tabelle 3-4. Bedienfeld Monitor-Vorderseite)
Tabelle 3-5. Layout des Bildschirm-Menüs (OSD)
Tabelle 3-6. Beschreibung des Bildschirm-Menüs (OSD)
Tabelle 3-7. LED-Anzeigen
. . . . . . . . . . . . . . . . . . 3-10
Tabelle 3-8. OSM-Funktionen
. . . . . . . . . . . . 3-5
. . 3-5
. . . . . . . . 3-8
. . . . . . 3-9
. . . 3-9
. . . . . . . . . . . . . . . . 3-11
Page 55
VORSICHT: Sicherheitshinweise
Beachten Sie die folgenden Sicherheitshinweise, um Ihre eigene Sicherheit zu gewäh rleisten und
mögliche Schäden am System zu vermeiden. Vollständige Informationen über die
Sicherheitsa nforderungen finden Si e in der Sicherheitsdokumentation, die Sie mi t Ihrem System
erhalten haben.
Rack-Montage von Systemen
Um die Stabilität und Sicherheit des Racks zu gewährleisten, beachten Sie bitte die folgenden
Vorsic htsmaßnahmen. Spezielle Warnungen und/oder Sicherheitshinwe ise und Prozeduren finden Sie
auch in der Dokumentatio n zur Rack-Installation, die Sie zusammen mit dem System und dem Rack
erhalten haben.
Systeme werden als Komponenten in einem Rack betrachtet. Der Begriff "Komponente" kann somit ein
System sowie verschiedene Peri pheriegeräte oder Zusatzhardware bezeic hnen.
Vorsicht: Werden Systeme in einem Rack inst al liert, an dem die vorderen und seitlichen
Stabilisatoren fe hl en, kann das Rack umkippen und un ter Umständen schwere Verletzung en
verursachen. Befestigen Sie daher immer zuerst die Stabilisatoren, bev or S ie Komponenten
im Rack installieren.
Ziehen Sie nach der Insta llat i on von Systemen/Komponenten in einem Rack niemals mehr als
eine Komponente gleic hze it i g auf den Einbauschienen aus dem Rack. Das Gewicht von
mehreren heraus gez ogenen Komponenten kann das Rack umki ppen lassen und schwere
Verletzungen verursachen.
Hinweis: Ihr System ist als frei stehende Einheit und für die Verwendung als Komponente in
Gestellschränken sicherheitszertifiziert (wobe i das Customer Rack K it ei ngesetzt werden mus s),
vorausgesetzt sowohl der Gestellschrank als auch das Rack-Kit wurden für Ihr System entwickelt. Die
Installation Ih res Systems und Rack -K i ts in anderen Gestellschränken ist von Prüfbehörden nicht
genehmigt. Sie sind in einem solchen Fall selbst dafür verantwortlich, die Eignung der endgültigen
Kombination vo n System und Rack-Kit in einem Gestellschrank durch eine zertifizierte Prüfbehörde
untersuchen zu lassen. Der Hersteller lehnt jede Haftung und Gewährleistung für solche
Kombinationen ab.
• System-Rack-Kits müssen von geschulten Servicetechnikern in einem Rack installiert werden.
Wenn Sie das Kit in einem anderen Rack installieren, vergewissern Sie sich, dass das Rack die
Spezifikationen erfüllt .
Vorsicht: Bewegen Sie Racks nich t alleine. W egen der Höhe und des Gewichts des Racks
muss diese Aufgabe von mindestens zwei Personen gemeinsam ausgeführt werden.
• Bevor Sie an einem Rack arbeiten, vergewissern Sie sich, dass die Stabilisatoren sicher am Rack
befestigt sind, fest auf dem Boden aufliegen und dass das gesamte Gewicht des Racks auf dem
Boden lastet. Installieren Sie an einem einzelnen Rack die vorderen und seitlichen Stabilisatoren
bzw . an mehre ren miteina nder v erbund enen Ra cks die vo rderen St abilisa toren, bevo r Sie Arbe iten
an dem Rack durchführen.
Bedienungsanl eitung 3-1
Page 56

www.dell.com | support.dell.com
VORSICHT: Sicherheitshinweise
• Beladen Sie das Rack immer von unten nach oben und bauen Sie die schwerst e Komponente
zuerst in das Rack ein.
• Vergewissern Sie sich, dass das Rack eben und sicher st eht, bevor Sie eine Komponente aus dem
Rack herausziehen.
• Überlasten Sie den AC-Versorgungsstromkreis für das Rack nicht. Die Gesamtlast des Racks
sollte 80 Prozent der Nennleistung des Stromkreises nicht übersteigen.
• Überprüfen Sie, ob eine ausreichende Luftzufuhr z u d en Kompone nte n im R ack gew ährleistet ist.
• Steigen oder stellen Sie sich nicht auf eine Komponente, wenn Sie an andere n Komponenten in
einem Rack Arbeiten durchführen.
(Fortsetzung)
Anleitung
Übersicht
In der vorliegenden Bedienungsanleitung finden Sie die Spezif ikationen für den 15" hochauflösenden
Flachbildschirm-Farbmonitor. Dieser Flachbildschirm-Farbm onitor entspricht dem neuesten Stand der
LCD-Technologie. Er ist leistungsstark und gibt keine Strahlung ab. Der Dell FlachbildschirmFarbmonitor benutzt einen 15poligen D-Sub VGA-Anschlussstecker und unterstützt 16 VGA-Modi,
VESA DPMS-Powermana gement sowie Plug-and-Play. Dank seines platzsparenden Designs benötigt er
weniger Platz als herkömmliche CRT-Bil dsc hir m e . Au ßerdem verbraucht der Dell Fla c hb ildschirmFarbmonitor weniger Strom.
Technische Daten und Eigenschaften
Der Dell Flachbildschirm-Farbmonitor bietet folgende Eigenschaften:
Tabelle 3-1. Technische Daten und Eigenschaften
Merkmal Beschreibung
Schirmträgerbesc hichtung Frontpolarisator en tspiegelt (Antiglare)
Optimale Auflösung un d Bi ldaufbau 1024 x 768 bei 60 Hz
Schirmtyp Aktiv-Matrix Thin Film Transistor (TFT)
Pixelpunktabstand 0,297 mm
Bildfläche 304,1 mm x 228,1 mm
Abmessungen (Breite x Tiefe x Höhe) 339 mm (3,3 Z ol l) x 42 mm (1,6 Zoll) x 275 mm (10,8 Zoll)
Gewicht (nur Monitor) 2,1 kg (4,621 lb)
3-2 Bedienungsanleitung
LCD-Anzeige
Page 57

Spezifikationen
Allgemein
Modellnummer rackmontiert
Flachbildschirm
Schirmtyp Aktiv-Matri x-T F T L CD
Bildschirmabmessungen 15 Zoll (sichtbare Bildgröße: 15")
Voreingestellte Bildfläche:
Horizontal
Vertikal
Pixelpunktabstand 0,297 mm
Sichtwinkel:
Horizontal
Vertikal
Bildhelligkeit 250 cd/m
Kontrastverhältnis 300:1 typisch
Schirmträgerbeschichtung Antiglare-Entspiegelung
Hintergrundbeleuchtung CCFL <2> Beleuchtungssystem
304,1 mm ± 0,5 mm (11,97 Zoll ± 0,02 Zoll)
228,1 mm ± 0,5 mm (8,98 Zol l ± 0,02 Zoll)
+45 / -55 Grad
+65 / -65 Grad
2
typisch
Auflösung
Horizontaler Abtastbereich 24 KHz bis 60 KHz
Vertikaler Abtastbereich 56 Hz bis 75 Hz
Optimale voreingestellte Auflösung 1024 x 768 be i 60 Hz
Höchste voreingestellte Auflösung 1024 x 768 bei 75 Hz
Unterstütztes Timing
Modus Horizontalfre
640x350 31.469 70.087 25. 175 +/– VG A -350
quenz (KHz)
Vertikalfrequenz (Hz) Pixeltakt (MHz) H/V sync.
Polarität
Bemerkungen
640x400 24.83 56.42 21.05 –/– NEC PC9801
640x400 31.469 70.0870 25.175 –/+ , –/ – VGA-GRAPH, NE C PC9821
640x480 31.469 59.904 25. 175 –/– VGA-480
Bedienungsanl eitung 3-3
Page 58

www.dell.com | support.dell.com
Unterstütztes Timing
Modus Horizontalfre
640x480 37.861 72.809 31. 500 –/– VESA-480
640x480 37.500 75.000 31. 500 –/– VESA-480-75 Hz
720x400 37.469 70.087 28.322 –/+ VGA-400-T EX T
800x600 35.156 56.250 36. 000 +/+ SVGA
800x600 37.879 60.317 40. 000 +/+ VESA-600
800x600 48.077 72.188 50. 000 +/+ VESA-600-72 Hz
800x600 46.875 75.000 49. 500 +/+ VESA-600-75 Hz
1024x768 48.363 60.004 65.000 –/– XGA
1024x768 53.964 66.132 71.664 +/+ COMPAQ-XGA
1024x768 56.476 70.069 75.000 –/– VESA-768
1024x768 60.023 75.029 78.750 +/+ VESA-768-75 H z
quenz (KHz)
Vertikalfrequenz (Hz) Pixeltakt (MHz) H/V sync.
Polarität
Bemerkungen
Hinweis: Modus 640 x 350, 70 Hz – kein Vollbild.
Umgebungsbedingungen
Temperatur:
im Betrieb
außer Betrieb
Feuchtigkeit
im Betrieb
außer Betrieb
Höhe über NN:
im Betrieb
außer Betrieb
Wärmeabgabe:
Maximal
Typisch
5° bis 35° C (50° bis 95° F)
–20° bis 60° C (–4° bis 113° F) für 240 Stunden
20% bis 80% (nicht kondens ie re nd)
5% bis 80% (nicht kondensierend)
3 000 m (10 000 ft)
12 192 m (40 000 ft)
71,7 BTU/Stunde
51,2 BTU/Stunde
3-4 Bedienungsanleitung
Page 59
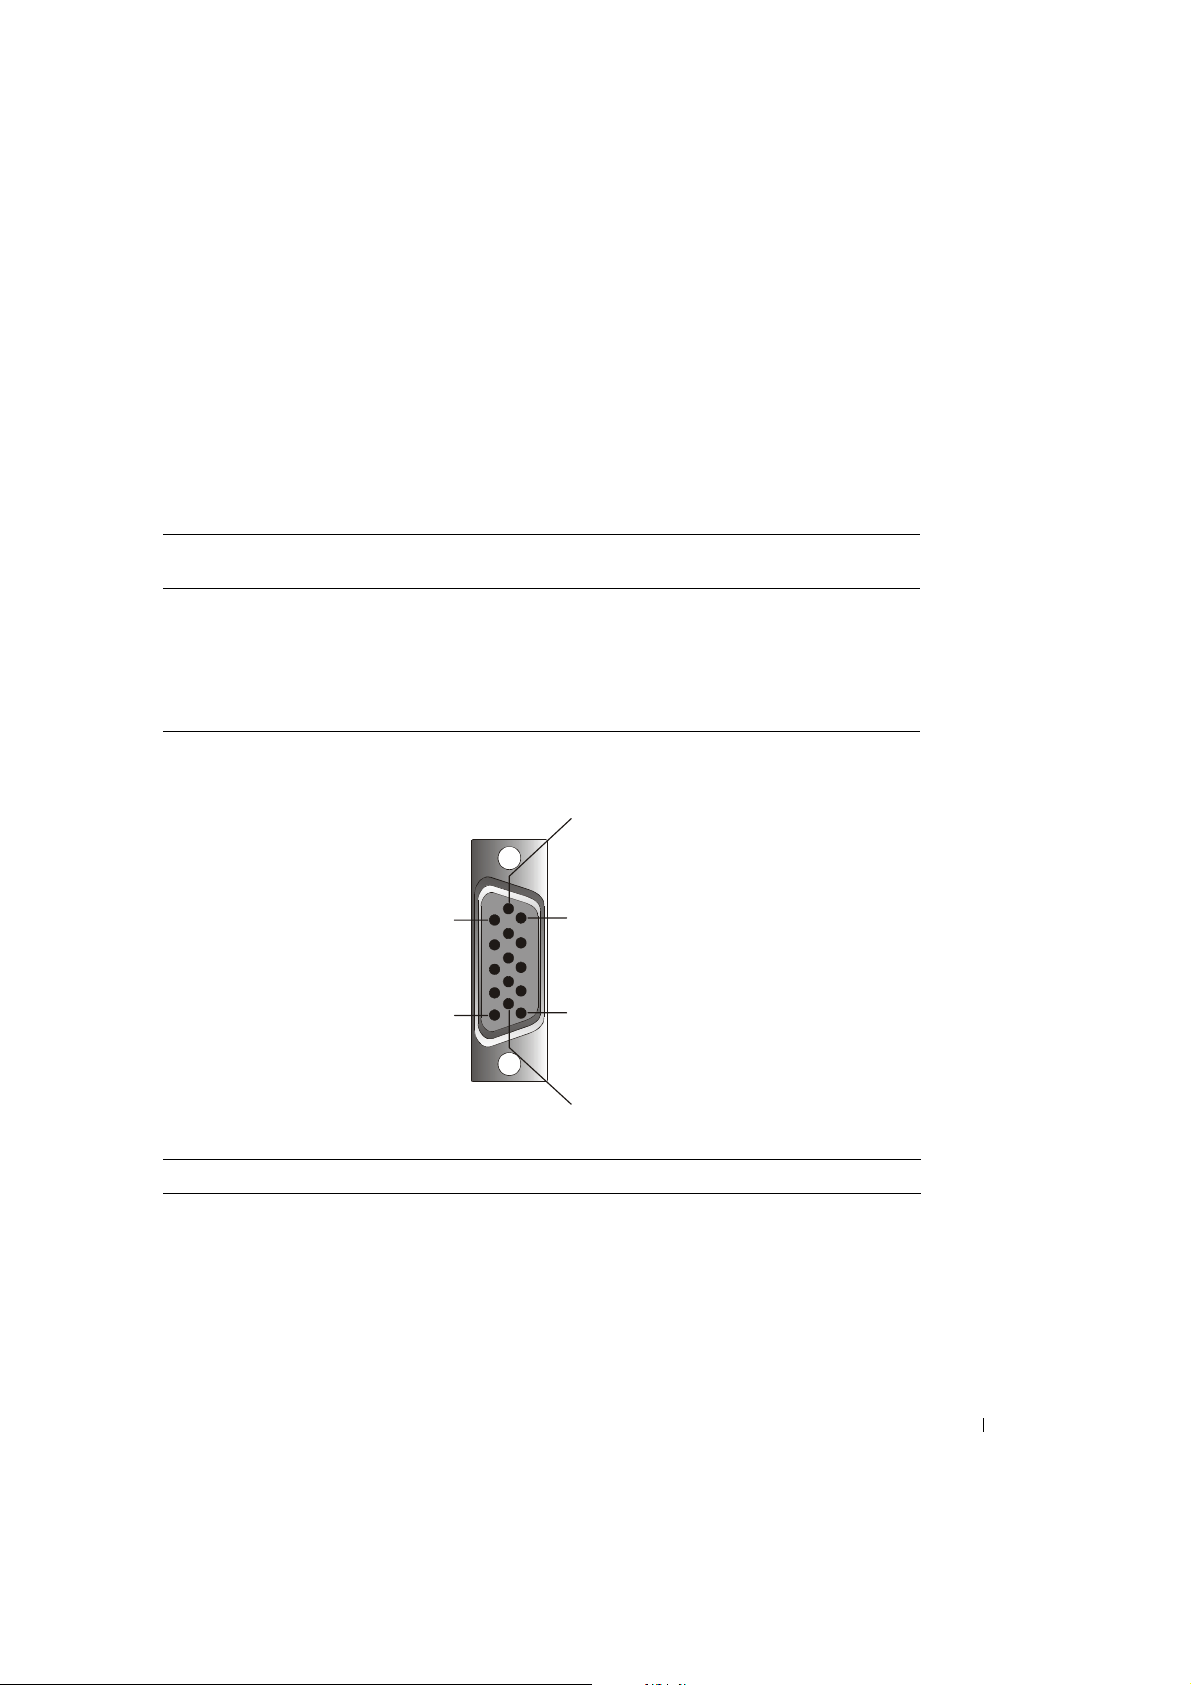
Powermanagement-Modi
Falls in Ihrem System eine VESA DPMS-kompatible Grafikkarte oder Software installiert ist, kann der
Monitor seine Stromaufnahme automatisch verringern, wenn er nicht in Betrieb ist. Sobald über die
Tastatur, Maus oder ein sonstiges Eingabegerät ei ne Eingabe erfolgt, "wacht" der Monitor automatisch
auf. Tabelle 3-2 gibt die Stromaufnahme an und zeigt, wie der jeweilige Energiesparmodus dargestellt
wird.
Tabelle 3-2. Powermanagement-Modi
VESA Modus Video H-Sync V-Sync Stromverb
rauch
EIN aktiv ja ja max. 25 W 0% leuchtend < blau >
Schlafmodus leer nein ja <5 W 75% gedämpftes < bla u >
Schlafmodus leer ja nei n <5 W 75% gedämpftes < blau >
Aktiv-AUS leer nein nein <5 W 75% schwarz
Gleichstrom AUS <5 W 75% schwarz
Stromeinspar
ung (%)
LED-Farbe
Abbildung 3-1. Stiftbelegung
6
1
5
11
15
10
Tabelle 3-3. Signalanschluss (15poliger D-Sub-Anschluss)
Pin Nr. Signal
1Video-Rot
2 Video-Grün
3Video-Blau
4NC
Bedienungsanl eitung 3-5
Page 60
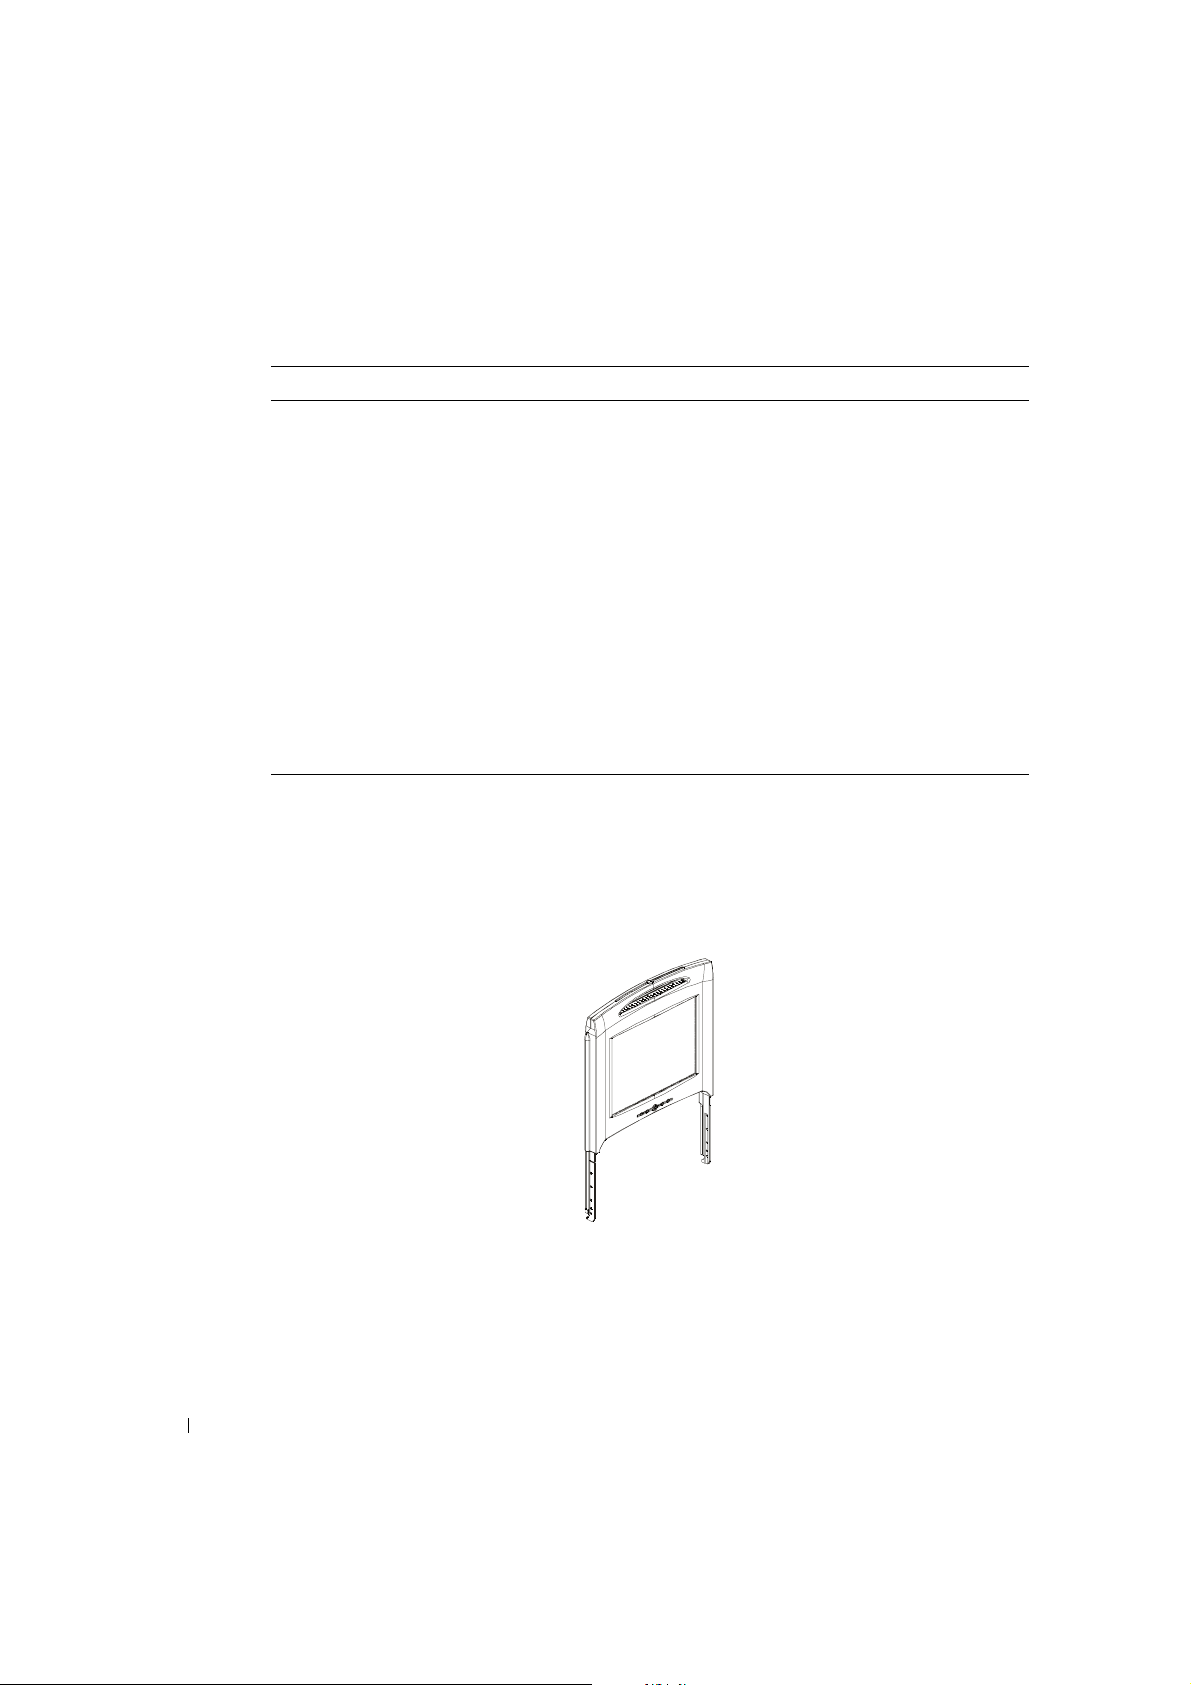
Tabelle 3-3. Signalanschluss (15poliger D-Sub-Anschluss)
Pin Nr. Signal
5Masse
6 Masse-Video Rot
7 Masse-Video Grün
8 Masse-Video Blau
9VCC
10 VGA _ CON (VGA-Kabel prüfen)
(Fortsetzung)
www.dell.com | support.dell.com
11 NC
12 SDA (DDC1/2B)
13 hor. Sync.
14 vert. Sync.
15 SCL (DDC2B)
Flachbildschirm-Monitor Vorder - und
Rückansicht
Abbildung 3-2. Vorderansicht
3-6 Bedienungsanleitung
Page 61
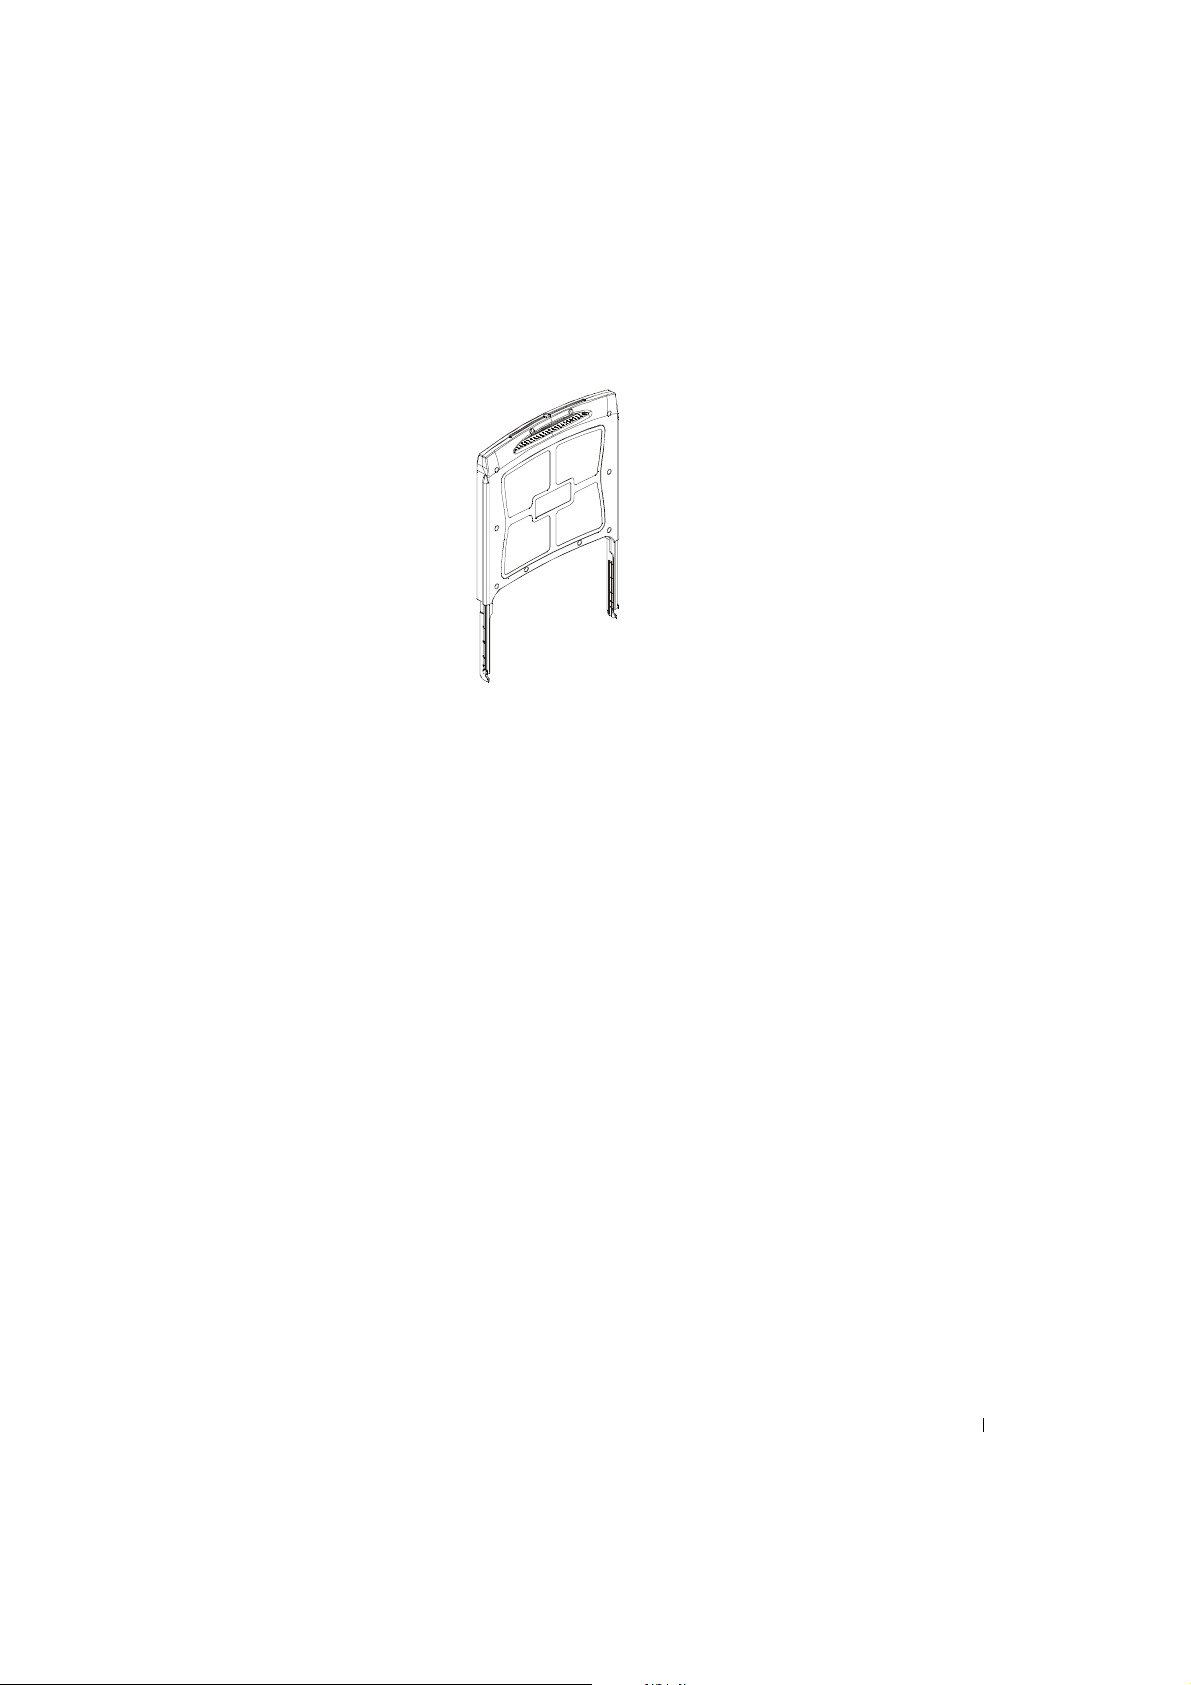
Abbildung 3-3. Rückansicht
Installation des Flachbildschirm-Monitors
Bitte befolgen Sie bei der Installation des Flachbildschirm-Monitors folgende Schritte.
• Vergewissern Sie sich, dass der Flachbildschirm-Monitor an ei ne Wechselstromquelle
angeschlossen ist (siehe Rack-Installationsanleitung).
• Es gibt zwei verschiede ne Möglichkeiten, den Flachbildschirm-Monitor anzuschalten.
– Autom atisch: Ziehen Sie die Fl achbildschirm-Monitorplatte heraus, bis sie einrastet. Fassen
Sie den Griff und bringen Sie den Monitor in die ge w üsc hte Pos ition. Der Flachbildschirm Monitor schaltet bei einem Winkel von ca. 90° automatisch ein.
– Manuell: Drücken Sie auf den Einschalter, der sich hinten an der Schrägkante befindet.
• Um die Höh e de s Monitors einzust ell en, fassen Sie den Mo nitor auf beiden Se ite n und drücken ihn
gleichmäßig nach unten bzw. ziehen ihn gleichmäßig nach oben.
Powermanagement
Dieser Flachbildschirm-Monitor entspricht der VESA DPMS-Energiespar-Norm (Version 1.0p). Die
VESA DPMS-Norm sieht vier Phasen von Energiesparmodi vor, in denen horizontale ode r vertikale
Synchronisiers ignale erfasst werden. Weitere Informationen über den Stromverbrauch in e inem
bestimmten Energiespar modus finden Sie in Tabelle 3-2.
Wenn der Monitor sich in einem Energiesparmodus befindet oder ein fals ches Timing erkennt, wird der
Bildschirm le er und die LED-Anzeige leu c hte t in ge dä m pftem Blau.
Bedienungsanl eitung 3-7
Page 62
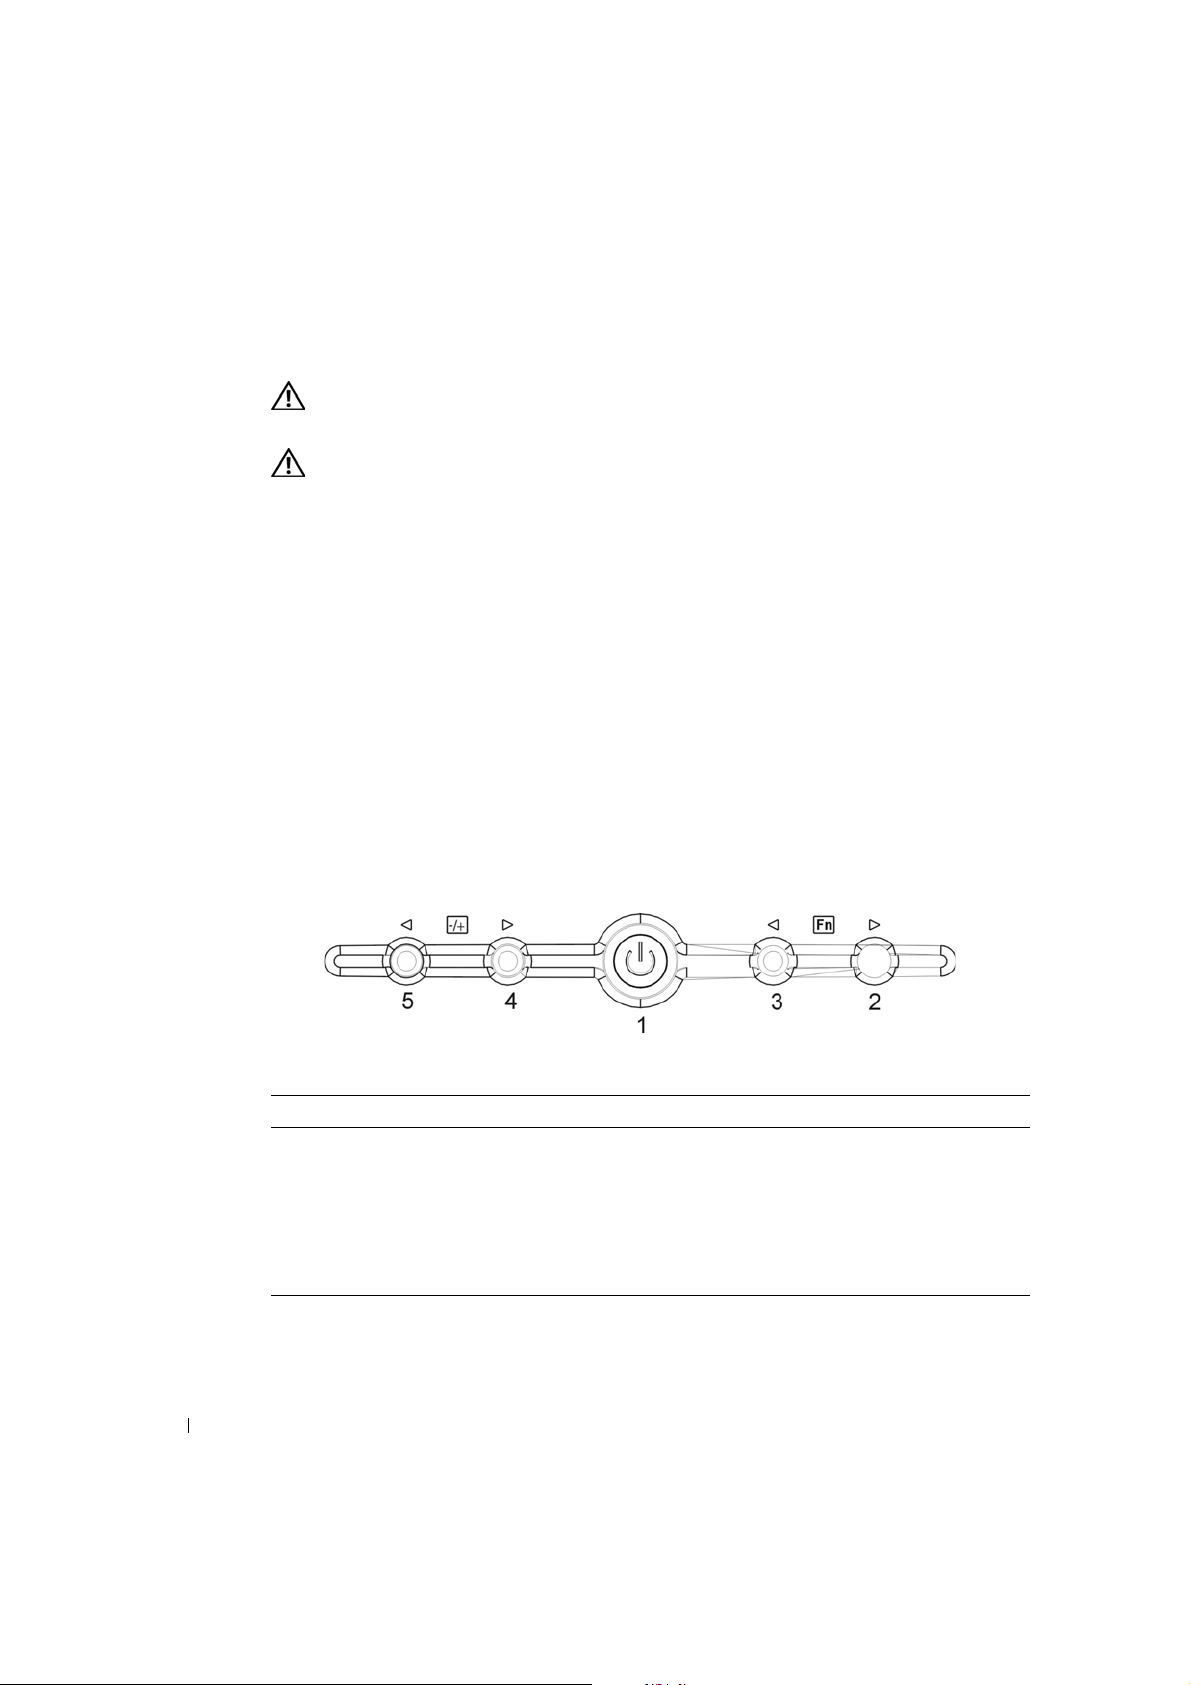
www.dell.com | support.dell.com
Wartung
Vorsicht: Um Stromschläge zu verme iden, öffnen Sie auf ke inen F a ll das Monit orgehä use. D er
Benutzer kann den Monitor nicht warten, er kann lediglich di e unten beschriebene Reinigung
durchführen.
Vo rsicht: Ziehen Sie vor der Reinigung des Monitors den Netzst ec ker aus der Steckdose.
• Befeuchten Sie zum Reinigen Ihres Flachbi ldschirm-Monitors ein weiches, sauberes Tuch mit
Wasser oder Isopropylalkohol.
• Verwenden Si e zum Reinigen des Monitorgehäuses ein mit einem milden Reinigungsmittel
befeuchtetes Tuch.
• Hartnäckige Flecken auf dem Gehäuse können Sie mit einem mit Isopropylalkohol befeuchteten
Tuch entfernen. Verwenden Sie auf keinen Fall Benzol, Verdünner, Ammoniak oder
Reingungsmittel mit Abrasivstoffen.
Bedienelemente und Anzeigen
Übersicht
Ver w enden Sie die Steuertasten unterhalb des Monitor-Bildschirms, u m die Eigenschaften des gezei gten
Bildes einzustellen.
Abbildung 3-4. Bedientasten
Tabelle 3-4. Bedienfeld (Monitor-Vorderseite)
Bedientaste Beschreibung
1 Stromver so rgungs- L ED leuchtet hell (blau), wenn der Moni to r ei ngeschaltet ist bzw. gedämpft
2 Funk tionsauswahl gegen den Uhrzeigersinn.
3 Funktionsauswahl im Uhrzeigersinn.
4 Erhöhung.
5 Verringerung. (Auto-Adjust: 1 Sekunde drücken um Auto-Adjust zu aktiviere n)
3-8 Bedienungsanleitung
(blau), wenn sich der Monitor im Energiesparmodus befindet.
Page 63
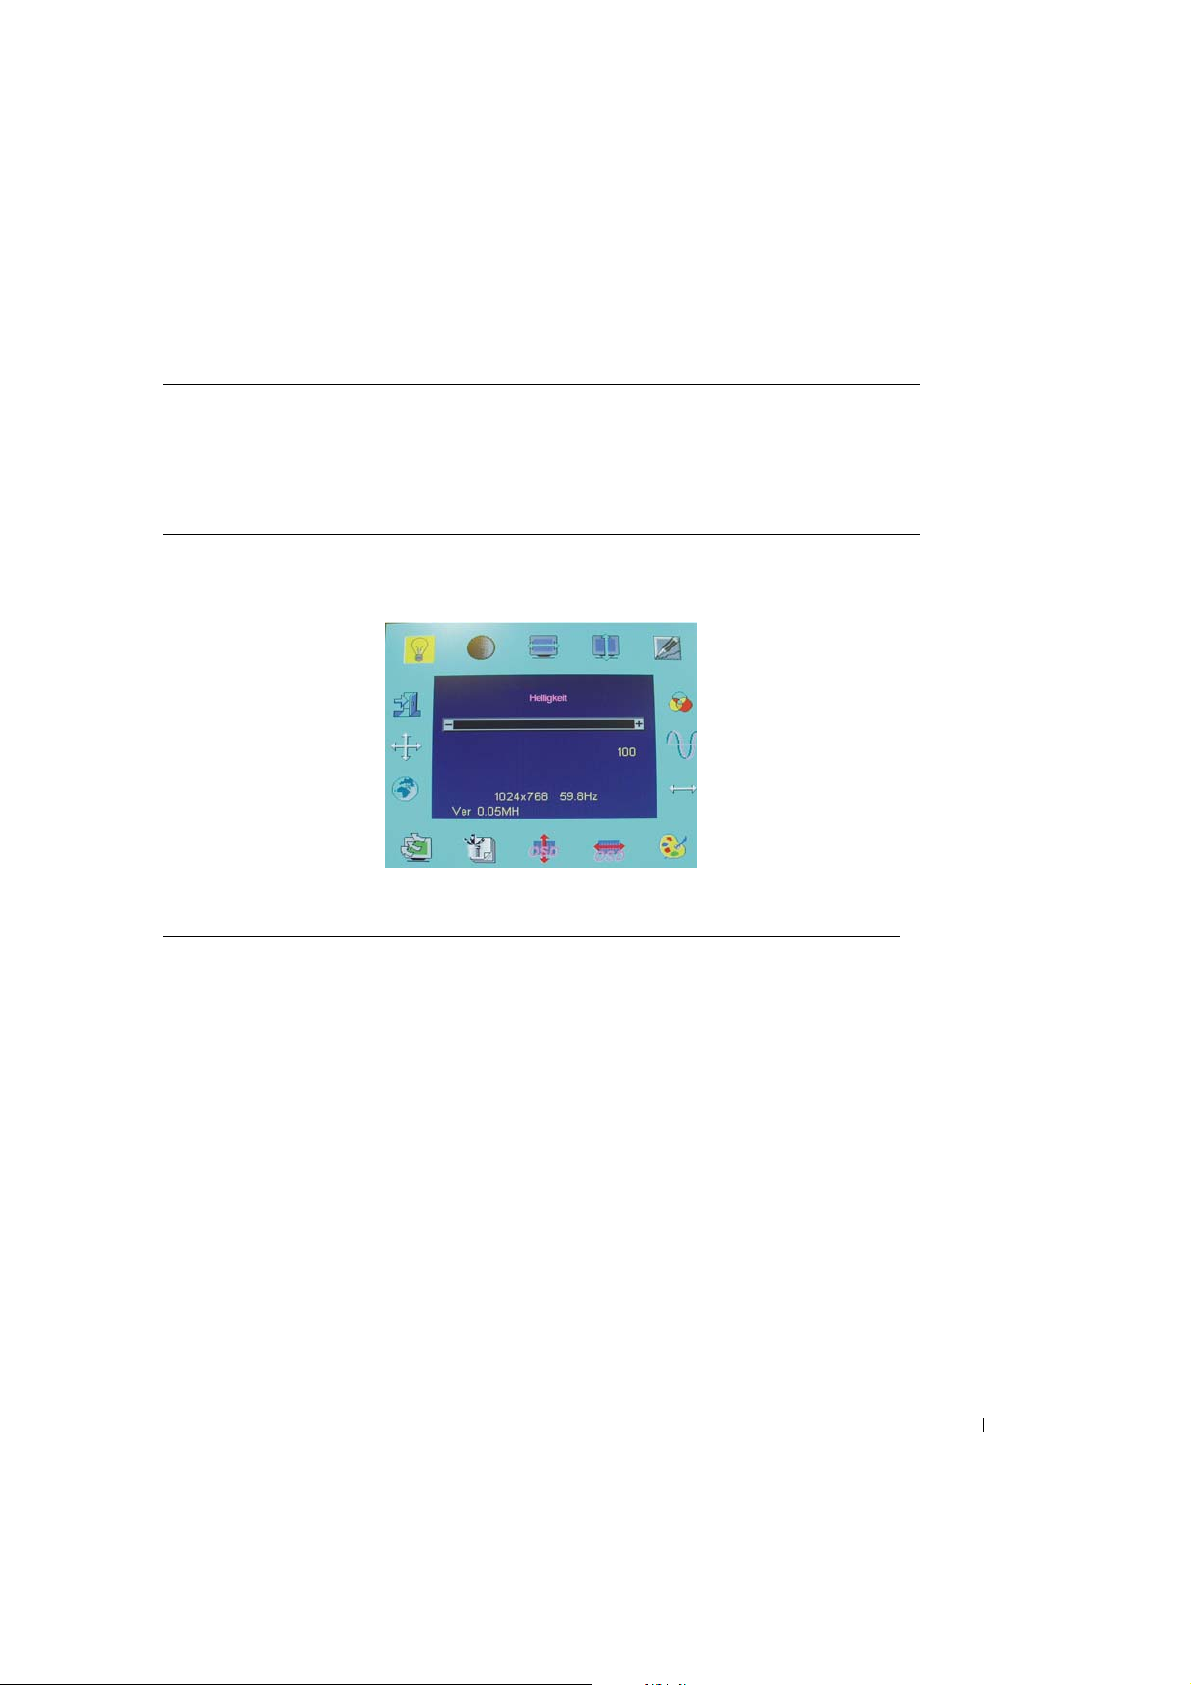
Tabelle 3-5. Layout des Bildschirm-Menüs (OSD)
OSD-Format 20 Zeichen x 9 Zeilen
OSD-Rand cyanblau
OSD-einstellbare Funktion schwarz er Vordergrund , cyanblauer Hintergrund
ausgewählte Funk tio n magentaroter Vordergrund , gelber Hintergrund
Bemerkung magentaroter Vordergrund, blauer Hintergrund
Abbildung 3-5. Bildschirm-Menü (OSD)
Tabelle 3-6. Beschreibung des Bildschirm-Menüs (OSD)
Helligkeit: Einstellung der He llig ke it von 0 bi s 100
Kontrast: Einstellung des Kontrastes von 0 bi s 100.
Hor. Position: Einstellung der horizontalen Bildpositi on.
Vert. Position: Einstellung der vertikalen Bildposition.
Phase: Einstellung der Schärfe in 255 Schritten, von 0 bis 255.
OSD Position: Einstellung der Position des OSD.
Auto-Adjustment: Mit dieser Funktion werden hor. und vert. Position, Clock (Takt) und Phase
Clock (Takt): E instellung des Frequenzverfolgers. Der Maximalbereich beträgt –50 bis +50; er
Grafik Text: Auswahl des 640 x 400 (GRAFIK) oder 720 x 400 (T EX T )-Modus.
Sprache: Für das OSD stehen 5 Sprachen zur Verfügung: Englisch, Deutsch, Französisch,
Wiedera uf rufen: Stellt di e we rkseitige Voreinstellung wied er her.
automatisch eingestellt. Dies nimmt 3 bis 5 Sekunden in Anspruch. Beim Starten
von Auto-Adjustment er sche i nt di e Me ldung "Auto Adjusting….".
ist jedoch in manchen Modi be grenzt.
Spanisch und Japanisch.
Bedienungsanl eitung 3-9
Page 64

www.dell.com | support.dell.com
Tabelle 3-6. Beschreibung des Bildschirm-Menüs (OSD)
Farbtemp:
Farbtemperatureinstel lu ng für Standard 9300 oder 6500 oder benutze rde fi niert.
Benutzer:
Benutzer-R:
Benutzer-G:
Benutzer-B:
6500:
Einstellung der benutzerdefinierten Rotverstärkung.
Einstellung der benutzerdefinierten Grünverstärku ng.
Einstellung der benutz erdefinierten Blauverstärkung.
CIE-Koordinate auf 6500° K Farbtemperatur einstellen.
CIE-Koordinate auf 9300° K Farbtemperatur einstellen.
9300:
Beenden: OSD-Funktion beenden.
Bildschärfe: Einste llung des Vergrößerungseffektes (weicher oder schärfer).
OSD-Transparenz: Einstellung der Transparenz des OSD-Menüs. Der
Transparenzbereich reicht von 0 bis 100.
1024 x 768: Auflösung aktueller Modus.
59,8 Hz: Vertikale Frequenz aktuel ler Modus ±1 Hz.
VER 0.05MH: Version der Firmware.
Weitere Funktionen:
Intellektuelles Auto:
Die Auto-Adjustme ntfunktion wird automatisch durc hgeführt, wenn ein
Anzeigemodu s zu m er sten Ma l ei ngeg e ben w ir d. An sc hl ie ße nd wi rd di ese r Modu s
gespeichert. Der Monitor schaltet automatisch in den optimalen Zustand, sobald
dieser Modus wieder gefordert ist. Insgesamt können im System die 21 zuletzt
verwendeten M od i gespeichert werde n.
VESA DPMSFunktionalität:
Sobald der Monitor vom Hostsystem das entsprechende Signal empfängt, wird der
Bildschirm 3 Sekunden la ng schwarz. Empfängt der Mon it or da raufhin kein
weiteres Signal, erscheint anschl ie ße nd di e Meldung "No Signal" und der Monitor
schaltet in den Energiespa rmodus.
(Fortsetzung)
Tabelle 3-7. LED-Anzeigen
Modus LED-Farbe
EIN leuchtend < blau >
Standb y gedämpftes < blau >
Bereitsc h a ft gedämpftes < blau >
AUS schwarz
Stromschalter AUS schwarz
Kabel getrennt 1. gedämpftes < blau > <Schlafmodus>
3-10 Bedienungsanleitung
2. schwarz <Gleichstrom aus; AUS-Modus>
Page 65
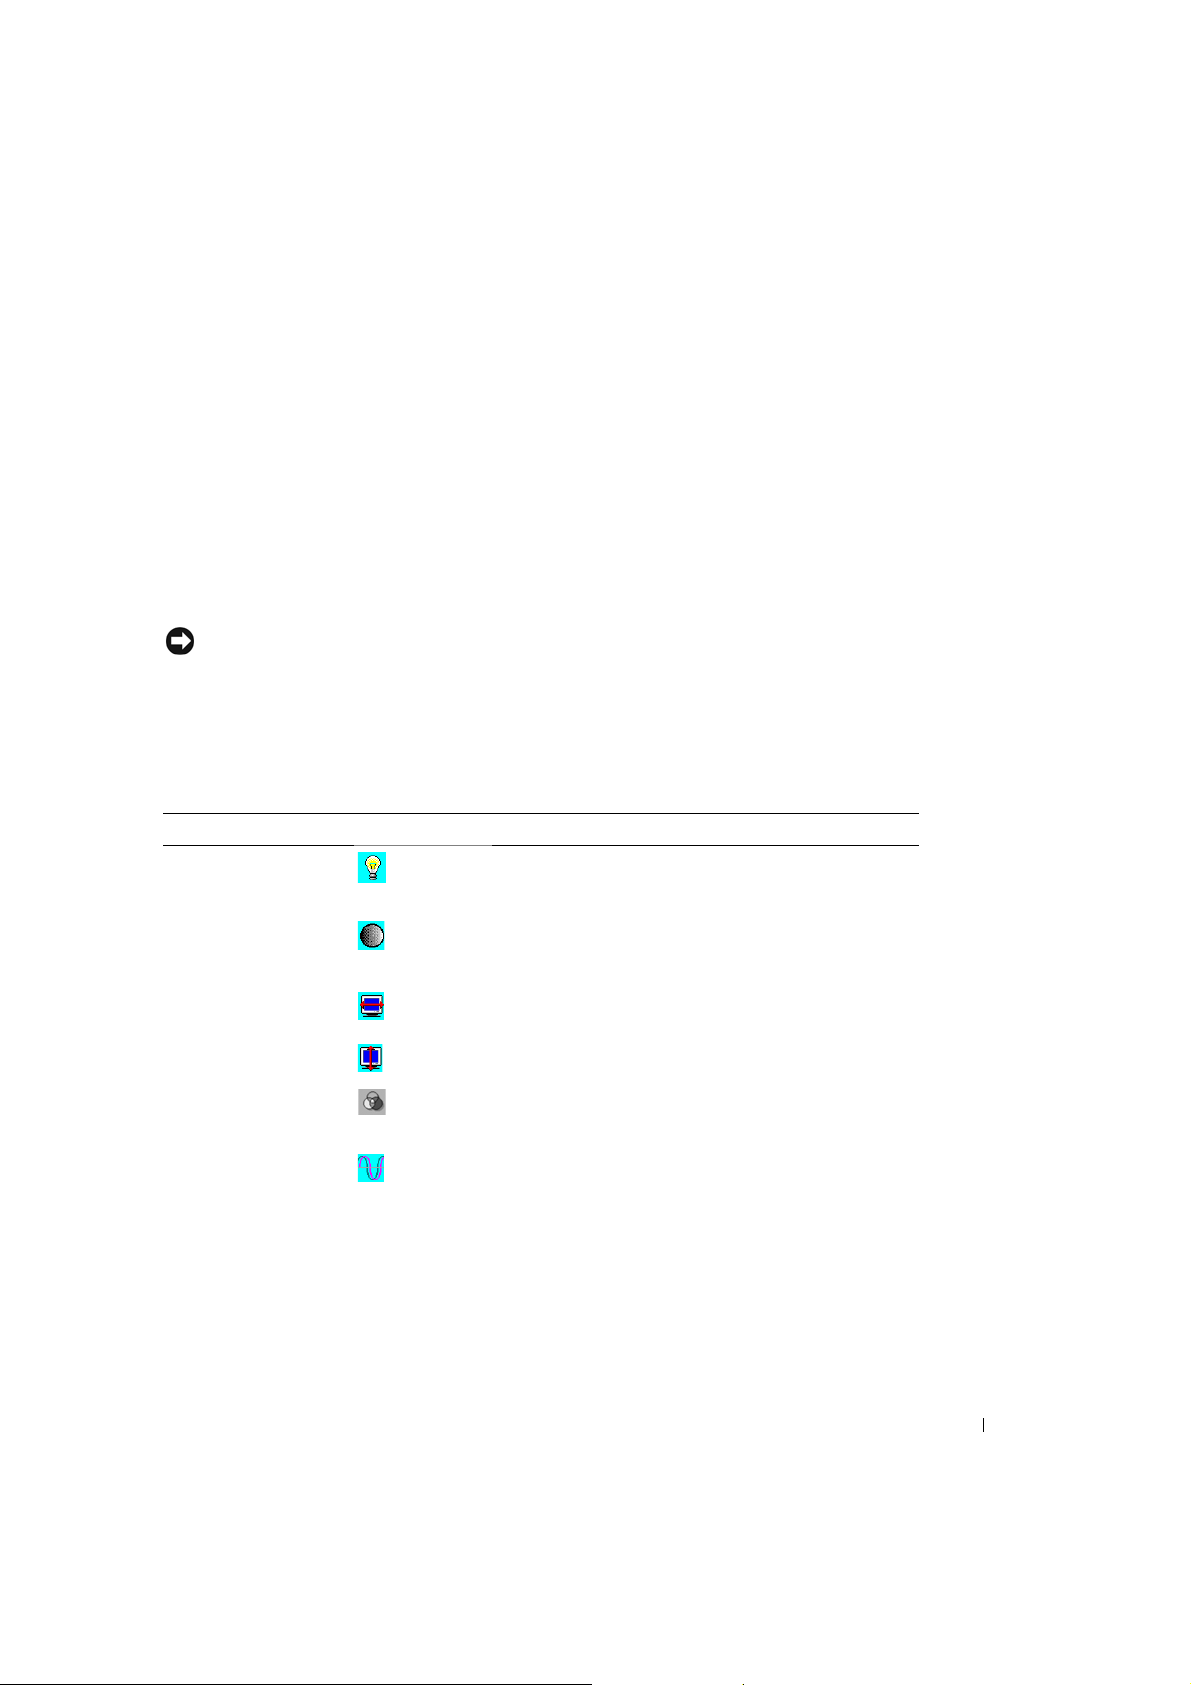
Einstellung des Monitor-Displays
Der Flachbildschirm verfügt über ein intuitives, menügesteuertes Bildschirm-Menü (OSD), das ein
unkompliziertes und schnelles Einst e llen der Anzeige ermöglicht. Auf dem Monitor bef inden sich vier
Funktions-Auswahltasten, mit denen der Benu tzer die auf dem OSD gezeigten Funktionen auswählen
und so die Bildschirmanzeige individuell anpassen kann. Verwenden Sie die Funktions-Auswahltasten,
um auf das OSD zuzugreife n und durch das Menü zu blätt e rn. Ver w enden Sie die Einstelltasten, um im
ausgewählten Menüpunkt Änderungen vorzunehmen. Siehe auch "Bedienelemente und Anzeigen."
Um auf das OSD-Hauptmenü zuzugreifen, drücken Sie einfach auf eine der Funktions-Auswahltasten. Es
erscheint das in Abbildung 3-5 gezeigte Menü.
Die aktuelle Eingangsauflösung und di e vert ikale Scanfrequenz (FV) werden am unteren Ende des OSDMenüs angezeigt, zusammen mit der Versionsnummer der Firmware. Durch fortgesetztes Drücken auf
die Funktions-Auswahltasten können Sie durc h sämtliche Menüpunkte blättern.
BITTE BEACHTEN: Die in der vorliegenden Anleitung im OSM-Menü gezeigte
Versionsnummer dient lediglich der Veranschaulichung. Die Firmware für Ihren Monitor kann
bereits in eine neuere Version überarbeitet worden sein.
Ausführliche, leichtverständliche E rläuterungen zu den einzelnen Funktionen im OSM-Menü finden Sie
unten. Siehe bitte auch Funktiontasten und Einstelltasten:
Tabelle 3-8. OSD-Funktionen
Funktion Symbol Beschreibung
Helligkeit 101 verschiedene Helligke itsgrade stehen zur Auswahl (0 bis
100).
Kontrast 101 verschiedene Kontrast ei nstellungen stehen zur Verfügung (0
Hor. Position Mit dieser Funktion können Sie die horizon tale Bi ldposition
Vert. Position Mit dieser Funktion könn en Sie die vertikale Bildposition
OSD-Transparenz Mit dieser Funktion können Sie die Transparenz des OSD-Menüs
Phase Insgesamt stehen 256 Gra de (0 bis 255) zur Optimierung der
bis 100).
einstellen.
einstellen.
einstellen. Die Transparenz kan n in ein em Be reichvon 0% bis
10% eingestellt werden. 11 Grade stehen zu r Verfügung.
Bildschärfe und -klarheit zur Verfügung.
Bedienungsanl eitung 3-11
Page 66
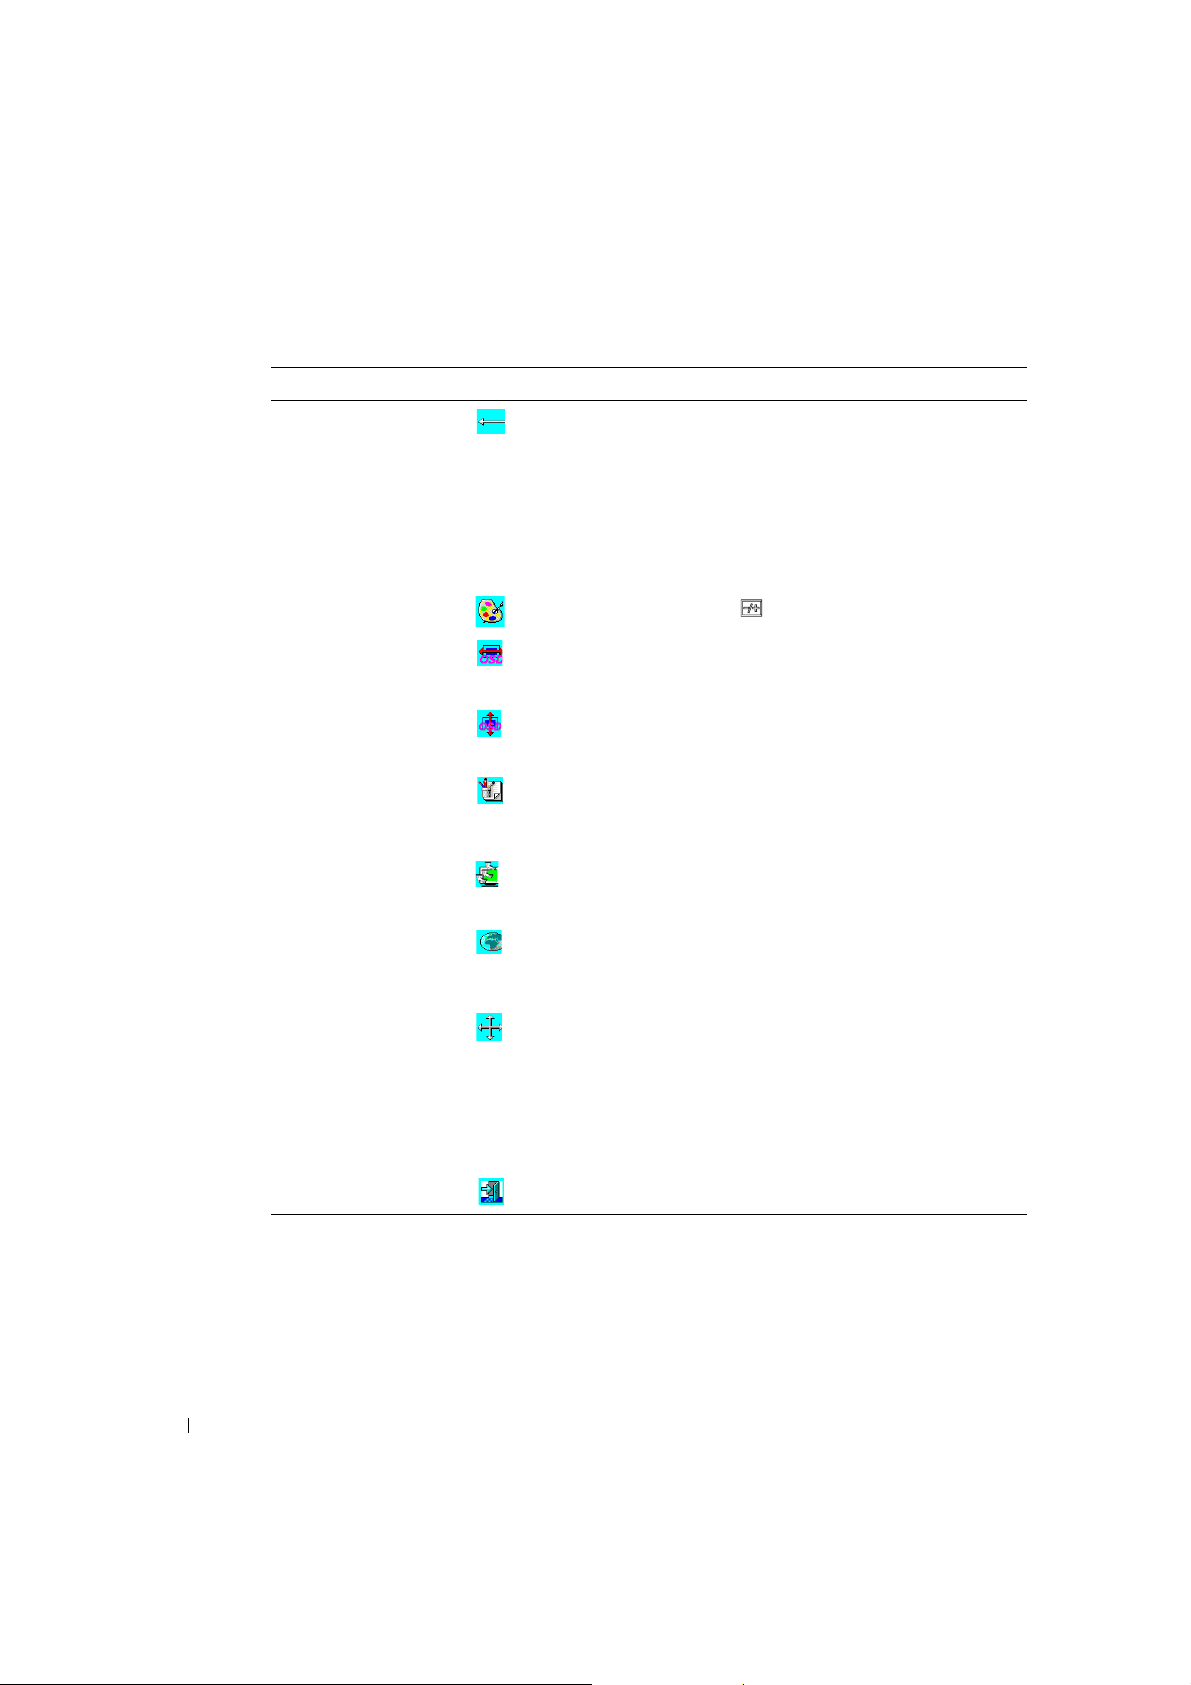
www.dell.com | support.dell.com
Tabelle 3-8. OSD-Funktionen
(Fortsetzung)
Funktion Symbol Beschreibung
Clock (Takt) Diese Funktion ermöglicht das Freque nzverfolgen, mit dessen
Farbtemperatur Drücken Sie auf die ( )-Taste, um eine neue Farbtemperatur
OSD Hor. Position Mit dieser Funktion könn en Sie das OSD-Menü in horizontaler
Hilfe Sie den Bildschirm auf höhere Stabilität und Klarheit
einstellen können. Für de n a ktu ellen Modus stehen 101 Grade
(von –50 bis +50) zur Verfügung. Die Einstellbereich
unterschei det sich bei vers chiedenen Modi. Die Clock-Funk tion
zeichnet die Abwei chung der Taktzyklen zwischen EingabeTiming und unterstütztem Timing auf. Der Taktwert kann nach
einem Auto-Adjustment-Vorgang von "0" verschieden sein, wenn
sich das Eingabe-Timing vom unterstü tz te n Timing
unterscheidet.
auszuwählen.
Richtung ver s ch ieben.
OSD Vert. Position Mit dieser Funktion können Sie das OSD-Me nü i n vertikaler
Grafik / Text Da die H- und V-Frequenzen vo n 640 x 400, 70 Hz und 720 x
Wiederaufrufen Mit der Funktion 'Wiederaufrufen' könne n Sie sämtliche
Sprache Für die OSD-Anzeige stehen 5Spr achen zur Auswahl: En glisch,
Auto-Adjustment Drücken Sie die Tasten '+' und '–', um die Auto- A d j u s tment-
Richtung ver s ch ieben.
400, 70 Hz gleich sind, können Si e m it die s er Funktion manuell
entweder 640 x 400 (Grafikmodus) oder 720 x 400 (Textmodus)
einstellen.
Parameter wied er auf die werkseitigen E instellungen
zurücksetzen.
Deutsch, Französisch, Spanisch un d Japa nisch. Drücken Sie die
linke bzw. rechte Einstelltaste, um die gewünschte Sprache
auszuwählen.
Funktion zu aktivieren.
Mit der Auto-Adjustment-Funktion können Sie Bildgröße, Clock
(Takt) und Phase automatisch einstellen, um die Bildqualität zu
optimieren. Diese r Vorgang nimmt 3 ~ 5 Sekunden in Anspruch.
Hinweis: Nach einem Auto-Adjustment-Vorgang kann
das Bild die falsche Lage oder Größe haben, falls es ein
Muster erhalten ha t, dass keinen Bildschirm ra nd hat.
Beenden Speichert di e Ei nstellungen und beendet das OSD-Menü.
3-12 Bedienungsanleitung
Page 67

Fehlersuche und -behebung
BITTE BEACHTEN: Dieses Produkt unterstützt mehrere VGA-Modi. Der Flachb ildschirm-
Monitor wurde werkseitig mit Standard-VGA-Timings voreingestellt. Die Unterschiede beim
Ausgangs-Timing der verschiedenen VGA-Karten können eventuell dazu führen, dass Sie zunächst
ein instabiles und unscharfes Bild sehen, wenn ein neuer Display-Modus oder eine neue VGAKarte ausgewählt wird.
BITTE BEACHTEN: Die Optimierung des Displays kann nicht garantiert werden, falls der
ausgewählte Modus in der Liste nicht unterstützt wird.
Problem: Bild unscharf und instabil.
Gehen Sie bitte w ie folg t vor, um bei Systemen mit Microsof t® Wind ows®-Betriebs sys tem ei ne op tim al e
Leistung zu erhalten.
1 Führen Sie den ersten Schritt zum Herunterfahren des Betr iebssystems durch (klicken Sie auf die
T as te 'Start' und dann auf 'Herunterfahren').
2 Verwenden Sie die Clock-Funktion, um das Bild bei ev entuell auftretendem, vertikalem 'b lack
noise' einzustellen, bi s die Streifen verschwunden sind.
3 Verwenden Sie die Phase-Funktion, um den Monitorbildschirm ei nzustellen.
4 Klicken Sie nun auf 'Nein', um in die normale Windows-Betriebssystemumgebung
zurückzugelangen.
Sie können den Flachbildschirm-Monitor auch mit der Auto-Adjustment-Funktion einstellen. Siehe
"Einstellung des Monitor-Displays."
Problem: Kein Bild auf dem Flachbildschirm-Monitor.
Erscheint auf dem Flachbildschirm-Monitor kein Bild, gehen Sie bitte wie folgt vor:
1 Vergewissern Sie sich, dass die Stromversorgungs-LED leuchtet, sämtliche Kabel richtig
angeschlossen sind und das System mit dem richtigen Timing arbeitet. Weitere Informationen siehe
"Spezifikationen".
2 Schalten Sie den Flachbildschirm-Monitor aus und anschließend wieder ein. Drücken Sie auf d ie
Funktionstaste 'UP' und anschließend mehrmals auf die Einstelltaste 'auf' oder 'ab'. Erscheint noch
immer kein Bild, drücken Sie mehrmals auf die andere Einstelltaste.
3 Bleibt Schritt 2 ohne Erfolg, schließen Sie Ihr System an einen anderen externen Monitor an (CRT-
oder Flachbildschirm-Monitor). Wenn Ihr PC-System mit einem externen CRT-Monitor richtig
funktioniert, liegt das Ausgangs-Timing der VGA-Karte möglicherweise außerhalb des
Synchronbereiches des Flachbildschirm-Monitors. Wählen Sie bitte einen anderen, im Anhang
aufgeführten Modus oder tauschen Sie die VGA-Karte aus und wiederholen Sie Schritt 1 und 2.
4 Besteht das Problem nach Durchführung der genannten Schritte weiter, wenden Sie sich bitte an
den Hersteller.
Bedienungsanl eitung 3-13
Page 68
Problem: "Input Signal Out of Range" erscheint im OSD.
Falls Sie ein Ausgangs-Timing ausgewählt haben, das außerha lb des Synchronbereiches des
Flachbildschirm-Monitors liegt, erscheint im OSD die Meldung "Input Signal Out of Range". Wählen Sie
einen anderen Mo dus, der vom Flachbildschirm-Monitor unterstützt wird. Informationen über TimingEinstellungen en tn eh m en Si e bit t e "Spe z if ik at i on e n" .
Problem: "No Signal" erscheint im OSD.
Überprüfen Sie bitt e den Anschluss des Videokabels an das Hostsystem.
V orschriften und Konformitätserklärungen
www.dell.com | support.dell.com
Energieverbrauch
ENERGY STAR®-Emblem
Das ENERGY STAR®-Computerprogramm von EPA ist eine gemeinsame Initiative von EPA und
Computerherstel lern, um die Luftverschmutzung durch die Förderung energieeffizienter
Computerprodukte zu vermindern. Nach Schätzungen von EPA können durch die Verwendung von
ENERGY STAR
eingespart werden. Der reduzierte Energieverbrauch kann wiederum zu einem geringeren Ausstoß an
Kohlendioxid, dem so g. 'Treibhausgas', sowie Schw efe ldi oxid und St ic kstof fo xid, den Ha upturs ac hen f ür
'sauren Regen', füh r en. Sie können selbst den En ergieverbrauch und dessen negative Auswirkungen
vermindern, indem Sie Ihren Rechner aussch a lten, wenn Sie ihn läng ere Zeit nicht benutzen,
insbesondere nachts und am Wochenende.
®
-Computerprodukten Energiekosten in Höhe von bis zu 2 Milliarden Dollar jährlich
Hinweis des Federal Communications Commission FCC) (nur für USA)
Dieses Gerät erfüllt Teil 15 der FCC-Richtlinien. Der Betrieb unterliegt den folgenden beiden
Bedingungen:
• Das Gerät darf keine schädlichen Störungen verursachen.
• Das Gerät muss empfangene Störungen vertragen können; dies gilt auch für Störungen, die
unerwünschte Betriebsweisen verursachen.
3-14 Bedienungsanleitung
Page 69

Klasse A
Die Prüfung de s Gerä tes hat erge ben, da ss die G renzw erte fü r ein digita les Ge rät der K lasse A gemäß Teil
15 der FCC-Richtlinien eingehalten werden. Die Grenzwerte wurden festgelegt, um einen angemessenen
Schutz gegen unerwünschte Störungen beim Betrieb in gewerblic her Umgebung zu bieten. Das Gerät
nutzt und erzeugt Hochfrequenzenergie und kann diese abgeben. Diese kann zu Störungen im
Funkwellenempfang führen, wenn das Gerät nicht entsprechend der Anleitung installiert und genutzt
wird. Der Betrieb in Wohnbereichen kann zu unerwünschten Störungen füh ren. In diesem Fall müssen
Sie die Störung auf eige ne Kosten beheben.
*Für das folgende Pr odukt:
LCD-MONITOR (Kategoriebezeichnung)
Rack-Einbau / DELL
(Modell-Nr / Markenname)
*Hergestellt von: Compal Electronics, Inc.
*FCC-Richtlinien: Geprüft auf Übereinstimmung mit FCC Teil 15, Klasse A
*Prüfstelle: C&A LABORATORY, CO., LTD
*Verantwortlich für Produkt-
Übereinstimmung:
*Herstellerangaben: Compal Electronics, Inc.
4U132 (Grundmodell)
Wir bescheinigen hiermit, dass dieses Gerät Teil 15 der FCC-Richtlinien
erfüllt.
Der Betrieb unterliegt den folgenden beiden Bedingungen:
Das Gerät darf keine schädliche n Störungen verursachen.
Das Gerät muss empfangene Störung en vertragen können; dies gilt auch
für Störungen, die unerwünschte Betriebsweisen verursachen.
Compal Electronics, Inc.
No. 581, Jui-kuang Rd.
Neihu, Taipei, Taiwan, 114
Tel: +(886)-2-8797-8588
Fax: +(886)-2-2658-3168
Abteilung für
Abteilung Produktsicherheit
NO.581, Juikuang Rd.
Neihu, Taipei, Taiwan, 114
Produktsicherheit
Manager
Unterschrift des
Lieferanten
Bedienungsanl eitung 3-15
Page 70

EU-Konformitätserklä rung (LVD, EMC)
www.dell.com | support.dell.com
Für das folgende Produkt: LCD-MONITOR (Kategoriename)
Hergestellt von: Compal Electronics, Inc.
Hiermit wird bescheinigt, da ss alle wic hti ge n Sic he rhe it sanforderungen im Hinblick auf die D ir ektiven der CEKennzeichnung (93/ 68/EEC), der Niederspannungsric ht li ni e (73/23/EEC) und der Elektroma gnetischen
Verträglichkeit (89/3 36/ EEC, 92/31/EEC) erfüllt werden, wie in den Richtlinien der Mitgli edsst aaten der EUKommission festgelegt. Di ese Erklärung gilt für alle Muster, die Bestandteil dieser Erkl ä rung sind und gemäß den
Produktionstabellen im Anhang hergestellt werden. Die entsprechenden Normen für die Beurteilung der elektrischen
Sicherheit und EMC-A nforderungen sind wie folgt:
LVD:EN60950
EMC:EN55024, EN55022, EN61000-3-2, EN61000-3-3
1. Konformitätserklärung / Prüfb eri c ht e rstell t du rch:
LVD:TÜV
2. Aufbewahrung der tec hni schen Dokumentation bei:
Compal Electronics, Inc.
Wird auf Anfrage zur Verfügung gestellt (Hersteller)
Compal Electronics, Inc.
No. 581, Jui-kuang Rd.
Neihu, Taipei, Taiwan, 114
Rackmount (Modellname)
8, Nan-Tung Rd., Pin-Cheng City Taoyuan Hsien, Taiwan
Abteilung für Produktsicherheit
Manager
Vorschriften kanadischer Behörden (nur für Kanada)
Diese digitale Gerät überschreitet nicht die Klasse-A-Grenzen für Funkstörungen durch digitale Geräte,
wie sie in den Funkstörungsvorschriften der kanadischen Behörd e für den Funkverkehr vorgesehen sind.
Beachten Sie bitte, dass laut der kanadischen Behörde für Funkverkehr (Canadian Department of
Communication s DOC) sämtliche von Dell Computer Corporation ni cht genehmigten Änder ungen und
Modifikationen Ihre Berechtigung zum Betrieb dieses Gerätes hinfällig werden lassen können.
This Class A digital apparatus meets all requirements of the Canadian Interference-Causing Equipment
Regulations
3-16 Bedienungsanleitung
Page 71
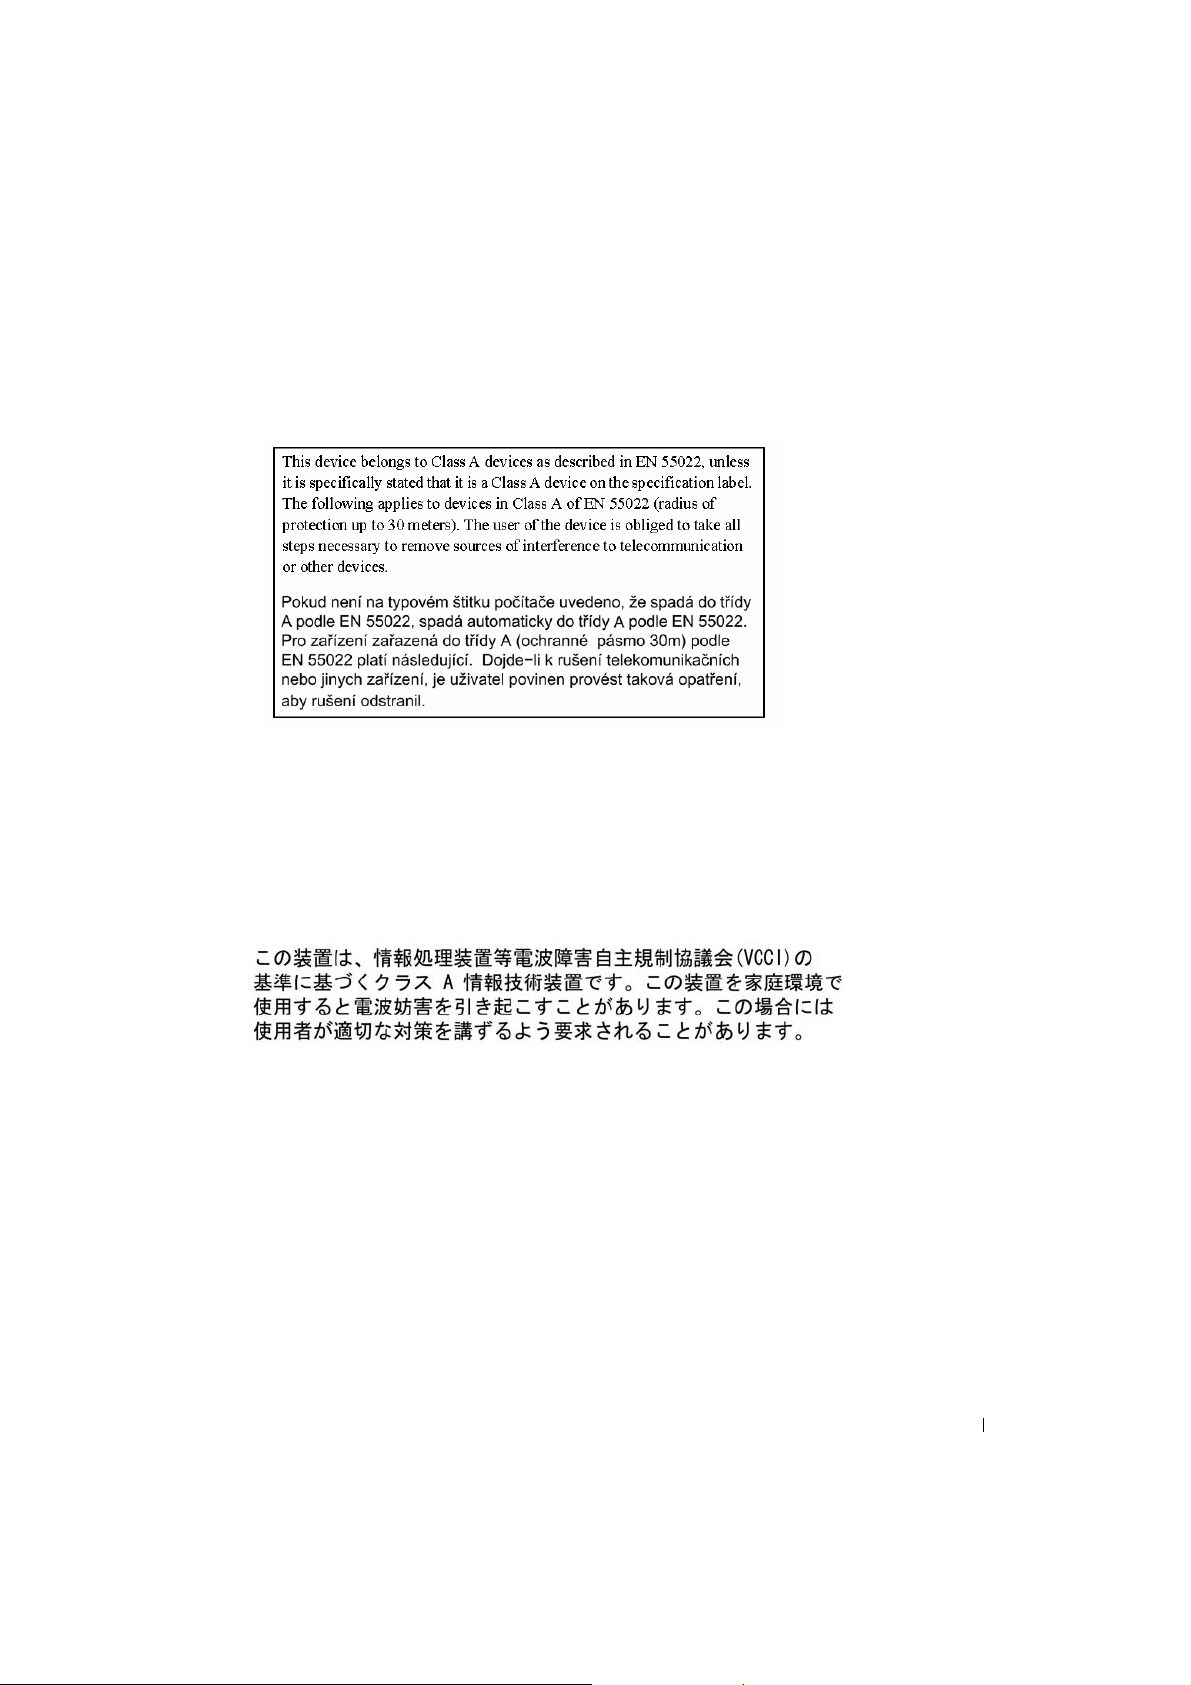
Cet appareil numérique de la classe A respect e toutes les exigences du Règulement sur le mat èriel
brouilleur du Canada.
EN 55022-Konformität (nur für Tschechische Republik)
VCCI Klasse A-Hinweis (nur für Japan)
Dieses Gerät liegt innerhalb der Grenzen für digi tale Geräte der Klasse 2 (Geräte, die in einem
Wohngebiet od er in benachbarten Gebieten eingesetzt werden) und erfüllt die vom Voluntary Control
Council for Interference (VCCI) für Funkstörungen durch DV-Anlagen festgelegten Normen, die der
Vermeidung von Funkstör ungen in Wohngebieten dienen.
Klasse A ITE
Bedienungsanl eitung 3-17
Page 72
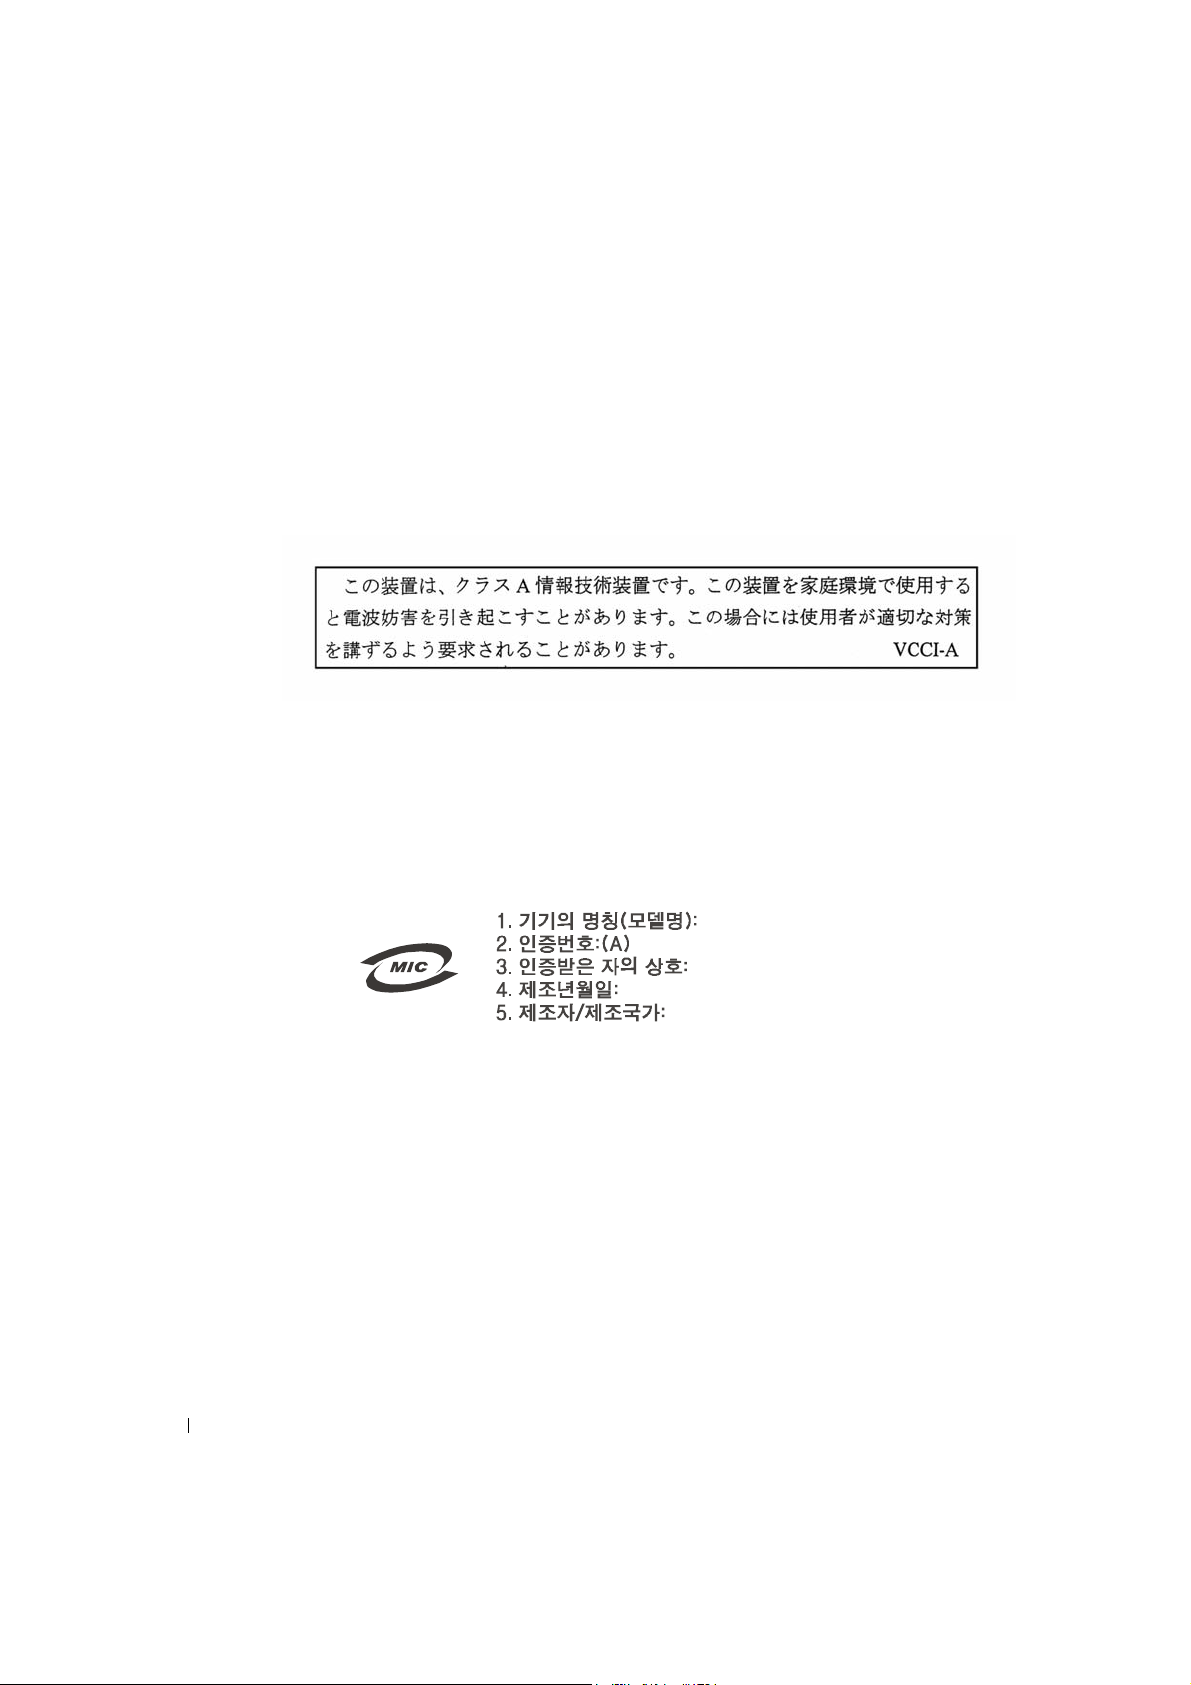
www.dell.com | support.dell.com
Bei diesem Gerät handelt es sich laut den Normen des Voluntary Control Council for Interference (VCCI)
für DV-Anlagen um ein Gerät der Klasse A. Beim Einsatz dieses Ger ätes in Wohngegenden ka nn es zu
Funkstörungen ko mmen. Beim Auftreten dera rtiger Störungen kann der Ben utzer aufgefordert werd en,
Abhilfemaßnahmen zu ergreifen.
VCCI Klasse A ITE-Produktkennzeichnung
Wenn die Produktkennzeichnung folgendes Zeichen enthält, ist Ihr Rechner ein Gerät der
Klasse A:
MIC Klasse A Kennzeichnung
Wenn die Produktkennzeichnung folgendes Zeichen enthält , ist Ihr Rechner ein Gerät der Klasse A:
Gerät der Klasse A
LCD monitor / SL358
E-B012-03-2283(A)
Compal Electronics, Inc.
May, 2003
Compal Electronics, Inc
Hinweis des polnischen Instituts für Prü fung und Zulassung (Polish Cen ter for
Testing and Certification)
Dieses Gerät darf nur aus einer Schutzkontaktsteckdose mit Strom versorgt werden (Dreistift-Steckdose).
Alle miteinander betriebenen Geräte (Rechner, Monitor, Drucker etc.) müssen von der gleichen
Stromqu ell e ve r s orgt werden.
Der Phasenleiter der Elektroinstallatio n d es Raume s muss über eine zusätz lic he Kurz schlu sssic h erhe it in
Form einer Sicherung mit einem Nennwert von max. 16 Amperes (A) verfügen.
3-18 Bedienungsanleitung
Page 73
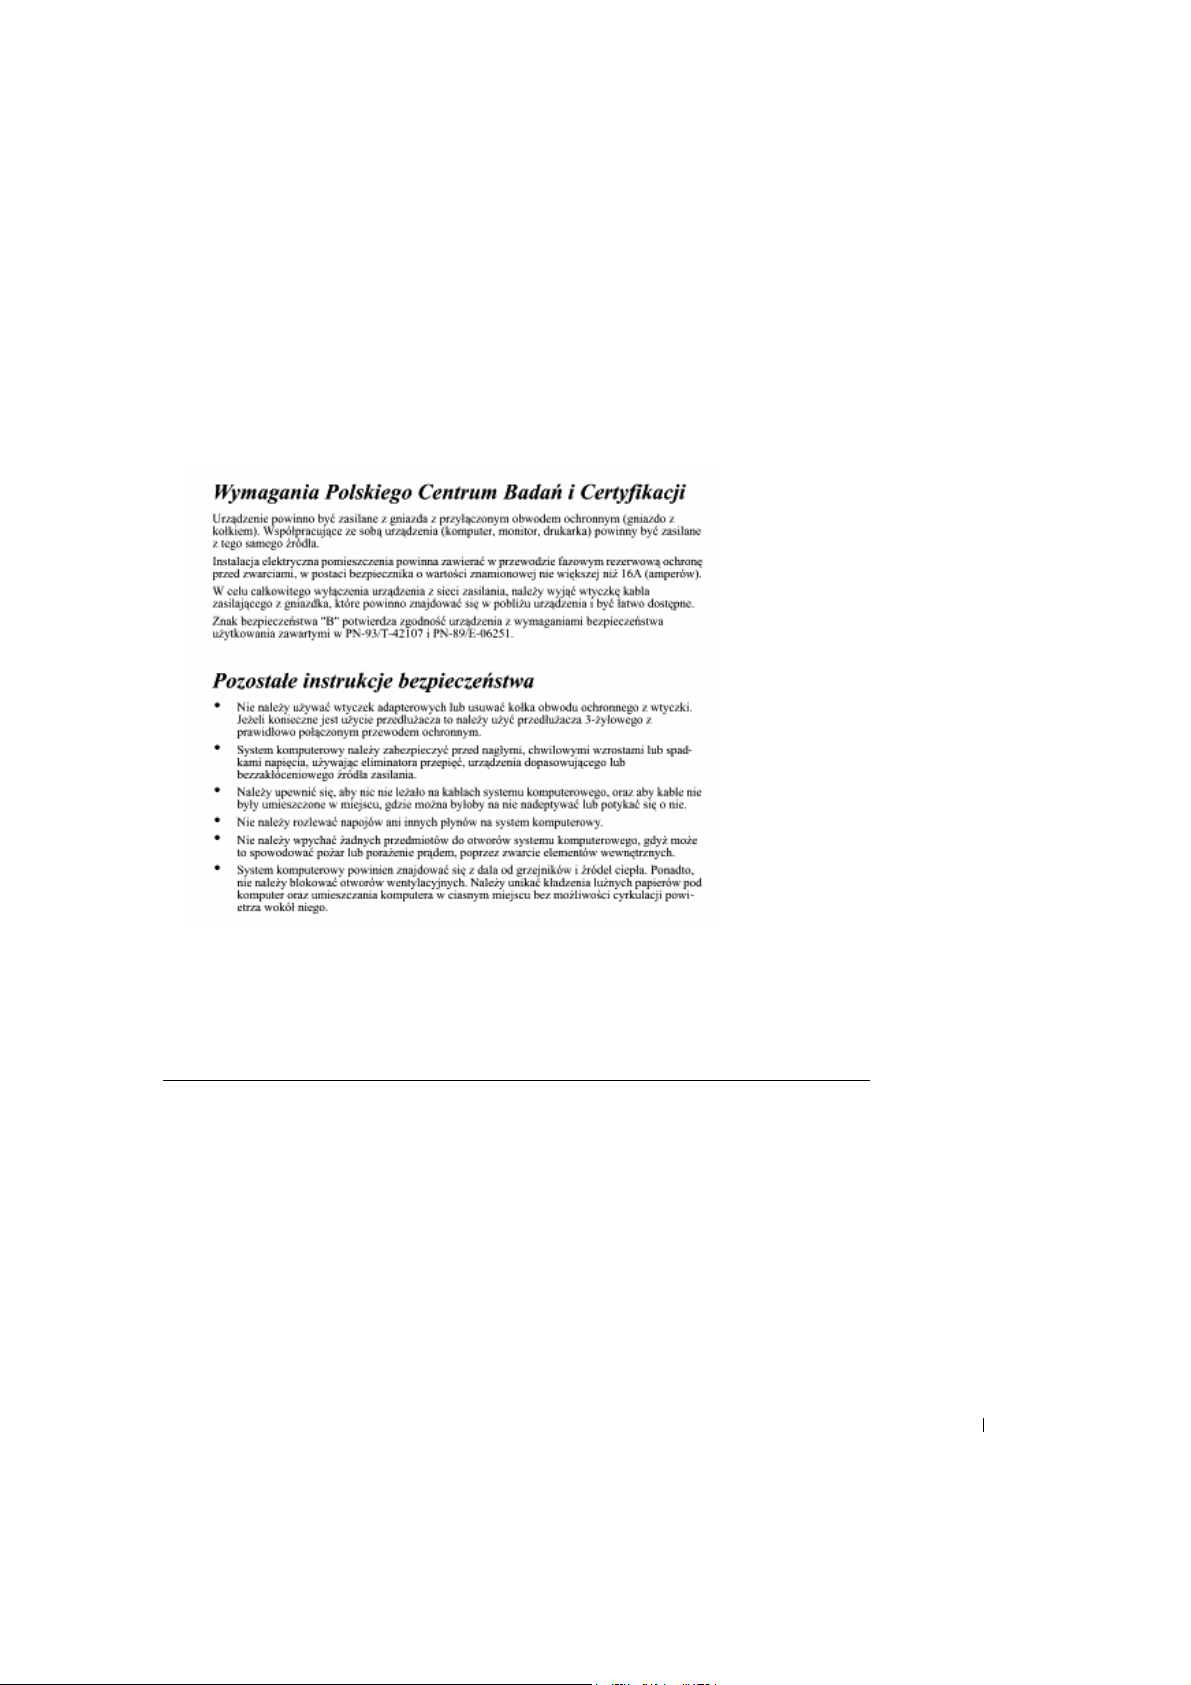
Um das Gerät vollständig auszuschalten, muss das Netzkabel aus der Netzsteckdose gezogen werden, die
leicht zugänglich und in der Nähe des Gerätes sein sollte.
Das Sicherheitszeichen "A" bescheinigt, dass das Gerät die Schutzanforderungen der Normen PN-93/T42107 und PN-89/E-06251 erfüllt.
NOM-Informationen (nur für Mexiko)
Die folgenden Angaben werden in Übereinstimmung mit den Anforderungen der offiziellen
mexikanischen Normen (NOM) auf dem in der vorliegenden Anleitung beschriebenen Gerät zur
Ver fügung gestellt.
Exporteur: Dell Computer Corporation
Importeur: Dell Computer de Mé xico,
Versand an: S.A. de C.B. al Cuidado de Kuehne & Nagel
One Dell Way
Round Rock, TX 78682
S.A. de C.V. Rio Lerma No. 302 -4° Piso
Col. Cuauhtemoc 16500 México, D.F.
de México S. de R.I., Avenida Soles No.55
Col. Peñon de los Baños, 15520 Méxi co, D.F.
Bedienungsanl eitung 3-19
Page 74
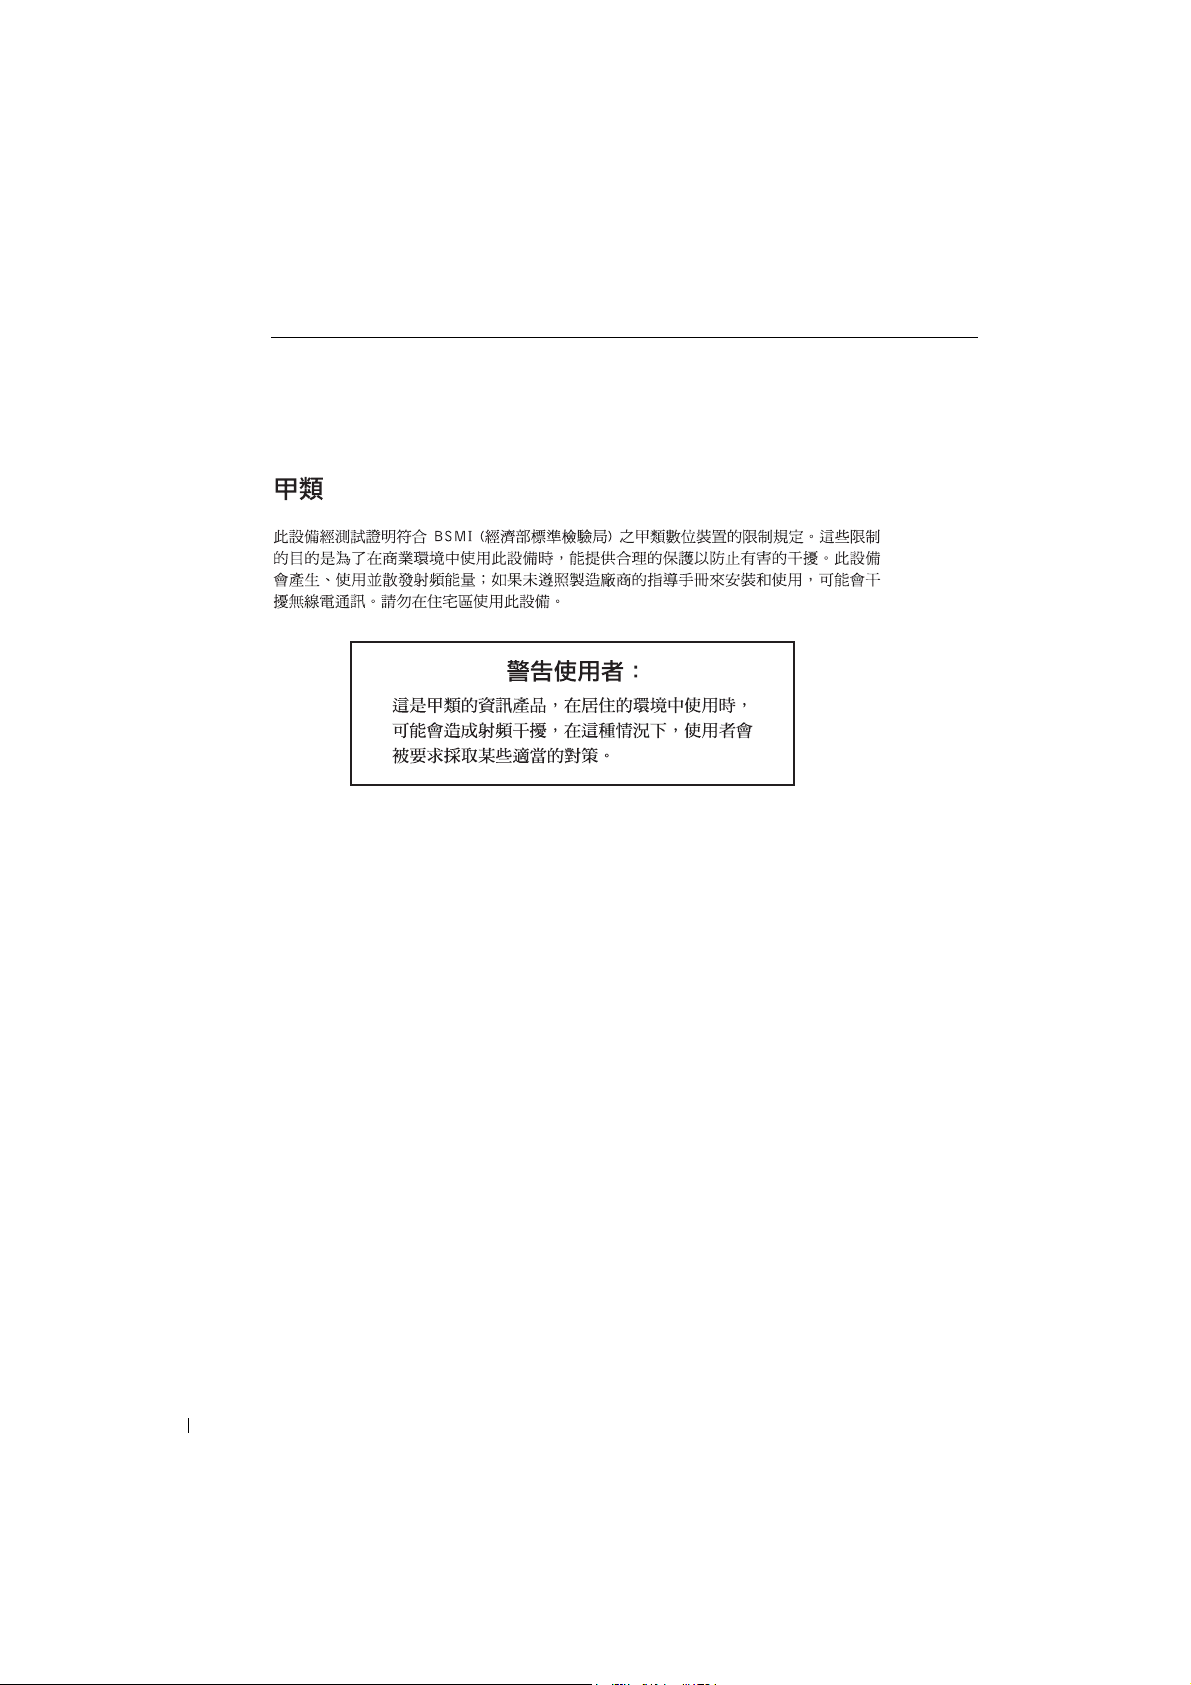
www.dell.com | support.dell.com
Versorgungsspannung:
Frequenz:
Stromaufnahme:
> 12 VDC, 5
50/60 Hz
2 A
BSMI-Hinweis (nur für Taiwan)
Ergonomie-Hinweis (nur Deutschland)
Um den Anforderungen der deutschen Ergonomie-Nor m ISO13406-2 zu entsprechen,
• wird empfohlen, die Grundfarbe Blau nicht auf dunklem Hintergrund zu verwenden
• (schlechte Erkennbark eit wegen des geringen Kontrastes, und damit schnellere Augenermüdung).
• wird folgende Einstellung des Grafik-Controllers und Monitors empfohlen:
– Vertikalfrequenz: 56 Hz oder höher.
–Ohne Zellensprung.
3-20 Bedienungsanleitung
Page 75

Dell™ PowerEdge™ ラックコンソール 15FP
フラットパネルモニタ
ユーザーズガイド
www.dell.com | support.dell.com
Page 76

メモ、注意、及び警告
メモ : " メモ " とは、コンピュータをより使いやすくするための重用な情報を指します。
注意 : " 注意 " とはハードウェアの破損やデータ損失につながる恐れがあるため、いかに
して問題を防ぐかを説明しています。
警告 : " 警告 " とは物品の破損や、人体への負傷、死亡の恐れのある事柄を示してい
ます。
____________________
本紙に含まれる情報は、予告なく変更されることがあります。
c 2003 Dell Computer Corporation. 版権所有
Dell Computer Corporation の書面による許可なく、ここに記載される情報をいかなる形式で再製すること
は禁じられています。
ここで使われている商標 : Dell、DELL のロゴ、PowerEdge は Dell Computer Corporation の商標です。
Microsoft および Windows はマイクロソフト社の登録商標です。 VESA は Video Electronics Standards
Association の登録商標です。 国際エネルギースターは米国環境保護局の登録商標です。 国際エネルギース
ターのパートナーとして、Dell Computer Corporation は本製品が国際エネルギースターのガイドラインに
符合するよう設計しています。
ここに記載されるその他の商標や名称は、それぞれの商品の識別目的にのみ記載されています。 Dell
Computer Corporation は、他社に帰属する商標や名称の所有権を否定します。
2003年4月 P/N 3Y386 改訂版 A01
Page 77

目次
警告: 安全上のご注意 . . . . . . . . . 4-1
システムのラックマウント . . . . . . . . . . . . . . . . . . 4-1
はじめに . . . . . . . . . . . . . 4-2
概要 . . . . . . . . . . . . . . . . . . . . . . . . . . . . . . . 4-2
. . . . . . . . . . . . . . . . . . . . . . . . . . . . . . . 4-2
機能
仕様 . . . . . . . . . . . . . . . 4-3
パワーマネジメントモード . . . . . . . . . . . . . . . . . . 4-5
フラットパネルモニタ 前および後ろから見た図 . . 4-6
フラットパネルモニタのセットアップ . . . . . . . . . . . . 4-7
パワーマネジメントシステム . . . . . . . . . . . . . . . . . 4-7
メンテナンス . . . . . . . . . . . . 4-8
コントロールとインジケータ . . . . . . . 4-8
概要 . . . . . . . . . . . . . . . . . . . . . . . . . . . . . . . 4-8
ディスプレイの調整
. . . . . . . . . . . . . . . . . . . . . 4-11
トラブルシューティング. . . . . . . . . 4-13
問題 : ディスプレイがはっきりしない、または不安定。 . 4-13
問題 : フラットパネルモニタに何も表示されない。. . . . 4-13
問題 : OSD に " 入力シグナル範囲外 " というメッセ
ージが表示されます。
問題 : OSD に " シグナルなし " というメッセージが
表示される。
. . . . . . . . . . . . . . . . . . . . . . . . . . 4-14
. . . . . . . . . . . . . . . . . . . . . 4-14
規定 . . . . . . . . . . . . . . . 4-14
エネルギー効率について . . . . . . . . . . . . . . . . . . . 4-14
FCC からのお知らせ ( 米国のみ ) . . . . . . . . . . . . . . 4-14
EU 順応性に関する声明 (LVD、EMC)
. . . . . . . . . . . . 4-16
目次 3
Page 78

図
表
カナダにおける規制(カナダのみ). . . . . . . . . . . . . . 4-16
EN 55022 Compliance (Czech Republic Only) . . . . . . . 4-17
VCCI クラス A について ( 日本のみ ). . . . . . . . . . . . . 4-17
MIC クラス A 規約ラベル
. . . . . . . . . . . . . . . . . . . . 4-18
ポーランド中央からの試験及び認証に関するお知らせ. . . 4-18
NOM に関する情報(メキシコのみ). . . . . . . . . . . . . . 4-19
BSMI について(台湾のみ)
. . . . . . . . . . . . . . . . . . 4-20
人間工学について(ドイツのみ). . . . . . . . . . . . . . . 4-20
Ergonomie Hinweis (nur Deutschland)
. . . . . . . . . . . 4-20
図 4-1. ピンの割り当て . . . . . . . . . . . . . . . . . 4-5
図 4-2. 前から見た図
図 4-3. 後ろから見た図
図 4-4. コントロール
図 4-5. オンスクリーンディスプレイ
. . . . . . . . . . . . . . . . . . 4-6
. . . . . . . . . . . . . . . . . 4-7
. . . . . . . . . . . . . . . . . . 4-8
. . . . . . . . . 4-9
4 目次
表 4-1. 機能 . . . . . . . . . . . . . . . . . . . . . . . 4-2
表 4-2. パワーマネジメントモード
表 4-3. シグナルコネクタ (15 ピン D-sub コネクタ )
表 4-4. コントロールパネル ( モニタの前面パネル )
表 4-5. OSD レイアウト
表 4-6. OSD 説明
表 4-7. LED インジケータ
表 4-8. OSD 機能
. . . . . . . . . . . . . . . . . 4-9
. . . . . . . . . . . . . . . . . . . . . 4-9
. . . . . . . . . . . . . . . . 4-10
. . . . . . . . . . . . . . . . . . . . . 4-11
. . . . . . . . . . 4-5
4-5
4-8
Page 79
警告 : 安全上のご注意
以下の安全上のご注意をよくお読みになり、自己の安全とシステムの安全を確保してくだ
さい。 より詳しい安全上のご注意については、システム付属の説明書をお読みください。
システムのラックマウント
ラックの安定性と安全性について、以下の注意事項をお読みください。 また、システム
及びラック付属のラック取り付けに関する説明書をお読みになり、警告や注意事項、及
びその他の手順についてご参照ください。
システムはラックに対しコンポーネントとして見なされます。 " コンポーネント " に
は、システムやその他の周辺機器、ハードウェアなども含まれます。
警告 : システムをラックに取り付ける際、前面または側面に安定器をご使用くださ
い。システムが倒れ、怪我などの原因となることがあります。 コンポーネントを
ラックに取り付ける前に、必ず安定器を取り付けてください。
システムやコンポーネントをラックに取り付けた後は、マウントレールから 1 度に
1 つ以上のコンポーネントを引き出さないようご注意ください。 1 つのコンポーネ
ント以上の重さがかかると、ラックが倒れ、事故につながる恐れがあります。
メモ : 当システムは本体のみで安全にご使用いただくことができます。また、当シ
ステム用にデザインされた正しいラックキャビネットとラックキットをご使用の場
合のみ、ラックキャビネットのコンポーネントとしてもお使いいただくことができ
ます。 その他のラックキャビネットへのシステム及びラックキットの取り付けは、
安全機構による認可を受けていません。 最終的にお使いのシステムとラックキット
が安全機構の認可を受けた適切なラックに取り付けられるかどうかは、お客様自身
の責任となります。 メーカーはこれらの組み合わせについて、一切の保証や責任を
負いかねますのでご了承ください。
• システムラックキットは、経験のあるサービス技師により取り付けが行われる
よう設計されています。 キットをその他のラックに取り付ける場合は、ラック
の仕様をよくご確認ください。
警告 : ラックはお客様ご自身で取り外さないでください。 ラックの高さと重量につ
き、最低でも二人で作業を行う必要があります。
• ラックをお取り扱いになる前に、安定器がラックに固定され、床まで達してお
り、ラックの重量が床にかかっていることを確認してください。 1 つのラック
に前面及び側面の安定器を取り付けてください。複数ラックの場合は、ラック
で作業を行う前に前面安定器を取り付けてください。
• ラックには必ず下から上へと取り付けを行い、一番重い物を最初に取り付けて
ください。
ユーザーズガイド 4-1
Page 80

www.dell.com | support.dell.com
警告 : 安全上のご注意 (続く)
• ラックからコンポーネントを伸ばす前に、ラックが均等で、安定していること
を確認してください。
• ラックに給電する AC 電源の分岐回路に過重電流を流さないでください。 ラック
の負荷が分岐回路の 80 パーセントを超えないようご注意ください。
• ラックのコンポーネントに適切な通気を与えてください。
• ラックのコンポーネントを修理する際は、その他のコンポーネントを踏んだ
り、乗ったりしないようご注意ください。
はじめに
概要
本製品は 15 インチ、高解像度のカラーフラットパネルモニタです。 このフラットパネル
モニタは最新のフラットパネルモニタ技術を駆使しており、放射線のない安全な操作を
行うことができます。 本製品は D-Sub 15 ピン VGA コネクタを使用し、16VGA モード、
VESA DPMS パワーマネジメント、プラグ & プレイ機能などを搭載しています。 また、従来
の CRT モニタと比べてラックスペースを取らず、コンパクトにデザインされています。
また、フラットパネルモニタは消耗電力も低くなっています。
機能
本製品には次の機能が搭載されています :
表 4-1. 機能
機能 説明
画面コーティング 前面偏光子のちらつき防止措置
最高解像度とリフレッシュレート 1024 x 768 @ 60 Hz
画面タイプ アクティブマトリックス薄型フィルムトランジスタ(TFT)
画素ピッチ 0.297 mm
表示面積 304.1 mm x 228.1 mm
寸法(幅 x 奥 x 高) 339 mm (3.3 インチ ) x 42 mm (1.6 インチ ) x 275 mm
重量(モニタのみ) 2.1 kg (4.621 lbs)
4-2 ユーザーズガイド
液晶ディスプレイ(LCD)
(10.8 インチ )
Page 81

仕様
全般
モデル番号 ラックマウント
フラットパネル
画面タイプ アクティブマトリックス TFT LCD
画面サイズ 15 インチ(15 インチ可視イメージサイズ)
プリセット表示範囲 :
水平
垂直
画素ピッチ 0.297 mm
視野角 :
水平
垂直
最大輝度 250 cd/m
コントラスト 300:1 典型
画面コーティング ちらつき防止
バックライト CCFL <2> エッジライトシステム
304.1 mm ± 0.5 mm (11.97 インチ ± 0.02 インチ )
228.1 mm ± 0.5 mm (8.98 インチ ± 0.02 インチ )
+45 / –55°
+65 / –65°
2
典型
解像度
水平スキャン範囲 24 KHz ~ 60 KHz
垂直スキャン範囲 56 Hz ~ 75 Hz
最適プリセット解像度 1024 x 768 @ 60 Hz
最高プリセット解像度 1024 x 768 @ 75 Hz
対応解像度
モード 水平周波 垂直周波 画素要求 水平 / 垂直 備考
640x350 31.469 70.087 25.175 +/– VGA-350
640x400 24.83 56.42 21.05 –/– NEC PC9801
640x400 31.469 70.0870 25.175 –/+, –/– VGA-GRAPH, NEC PC9821
640x480 31.469 59.904 25.175 –/– VGA-480
ユーザーズガイド 4-3
Page 82

対応解像度
モード 水平周波 垂直周波 画素要求 水平 / 垂直 備考
640x480 37.861 72.809 31.500 –/– VESA-480
640x480 37.500 75.000 31.500 –/– VESA-480-75 Hz
720x400 37.469 70.087 28.322 –/+ VGA-400-TEXT
800x600 35.156 56.250 36.000 +/+ SVGA
800x600 37.879 60.317 40.000 +/+ VESA-600
800x600 48.077 72.188 50.000 +/+ VESA-600-72 Hz
www.dell.com | support.dell.com
800x600 46.875 75.000 49.500 +/+ VESA-600-75 Hz
1024x768 48.363 60.004 65.000 –/– XGA
1024x768 53.964 66.132 71.664 +/+ COMPAQ-XGA
1024x768 56.476 70.069 75.000 –/– VESA-768
1024x768 60.023 75.029 78.750 +/+ VESA-768-75 Hz
メモ : モード 640 x 350、70 Hz は全画面ではない。
環境
温度:
操作
保存
5 ℃ ~ 35 ℃ (50
-20 ℃ ~ 60 ℃ (-4
°
F ~ 95°F)
°
F ~ 113°F) 240 時間
湿度:
操作
保存
20% ~ 80% ( 結露なし )
5% ~ 80% ( 結露なし )
海抜 :
操作
保存
3000 m (10,000 ft)
12,192 m (40,000 ft)
放熱 :
最大
典型
71.7 BTU/ 時
51.2 BTU/ 時
4-4 ユーザーズガイド
Page 83
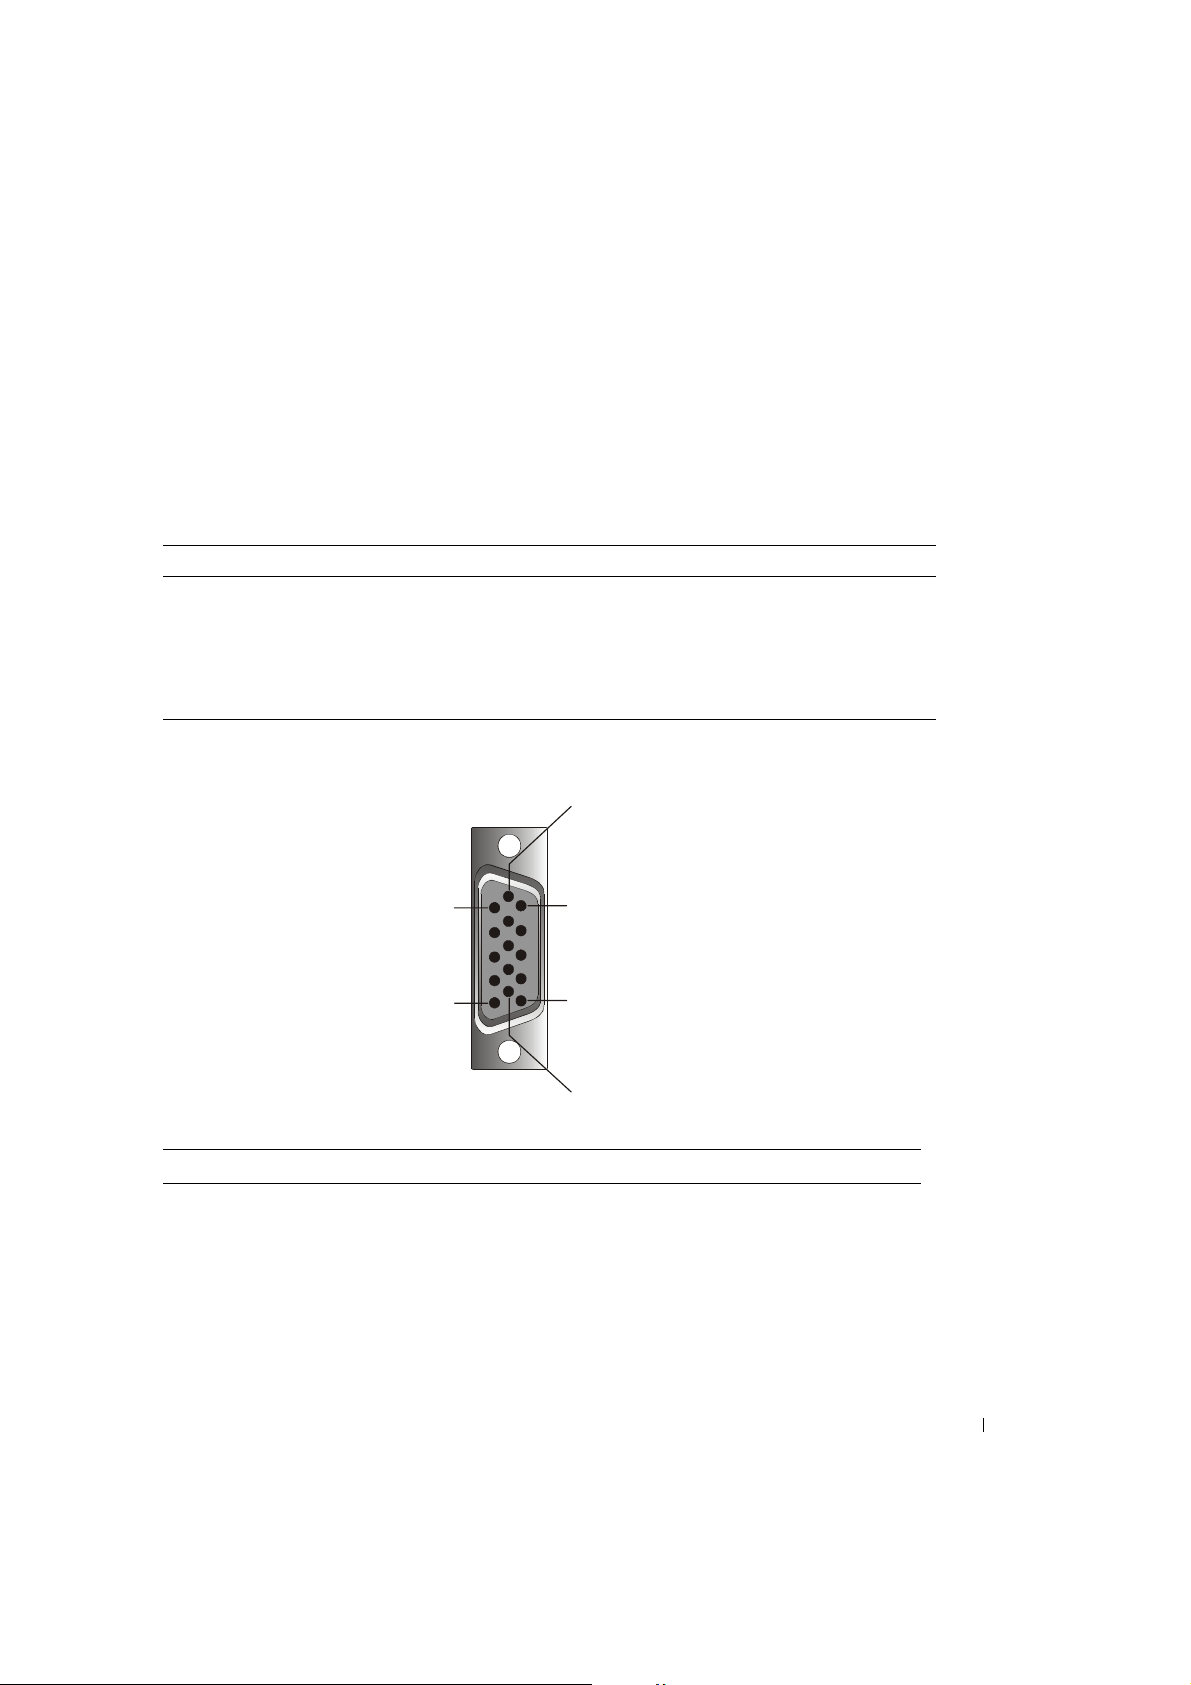
パワーマネジメントモード
お使いのシステムに VESA DPMS 対応のディスプレイカードやソフトウェアがインストー
ルされている場合、当モニタは使用中でないときには自動的に省電力モードに入ります。
キーボードからの入力、マウス、またはその他のデバイスの動きが検出されると、モニ
タは自動的に " 目を覚まします "。 表4-2では、自動省電力機能に関する消耗電力とシ
グナルについて説明しています。
表 4-2. パワ ーマネジメントモード
VESA のモード ビデオ 水平同期 垂直同期 使用電力 省電力(%)LEDの色
オン作動 はいはい 最大25W 0%完全な明るい < 青 >
スリープモード なし いいえ はい <5 W 75%半分の明るい < 青 >
スリープモード なし はい いいえ <5 W 75%半分の明るい < 青 >
アクティブオフなし いいえ いいえ <5 W 75%暗い
DC 電源オフ <5 W 75%暗い
図 4-1. ピンの割 り当て
6
1
5
11
15
10
表 4-3. シグナルコネクタ(15 ピン D- s u b コネクタ)
ピン番号 シグナル
1 赤ビデオ
2 緑ビデオ
3 青ビデオ
4 NC
ユーザーズガイド 4-5
Page 84
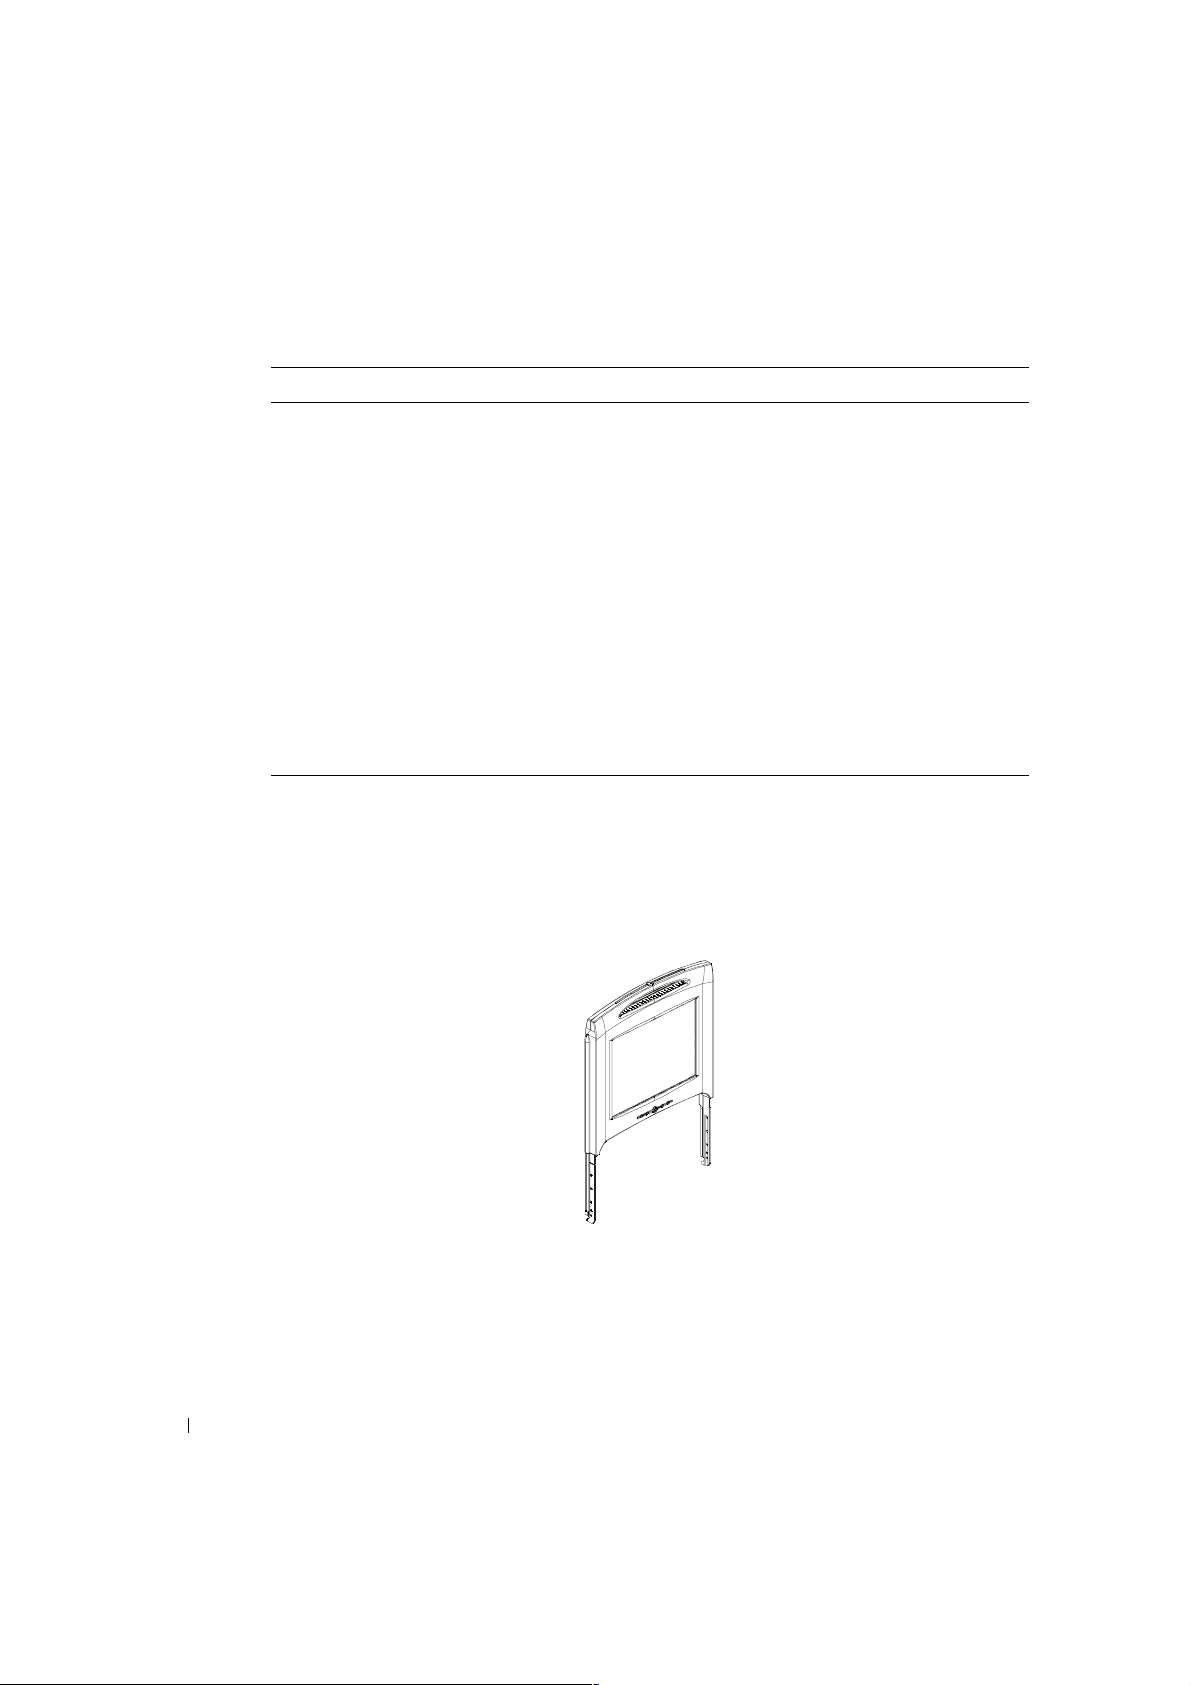
www.dell.com | support.dell.com
表 4-3. シグナルコネクタ(15 ピン D- s u b コネクタ) (続く)
ピン番号 シグナル
5 ロジックグラウンド
6 赤ビデオグラウンド
7 緑ビデオグラウンド
8 青ビデオグラウンド
9 VCC
10 VGA _ CON (VGA ケーブルをチェック )
11 NC
12 SDA (DDC1/2B)
13 水平同期
14 垂直同期
15 SCL (DDC2B)
フラットパネルモニタ 前および後ろから見た
図
図 4-2. 前から見 た 図
4-6 ユーザーズガイド
Page 85
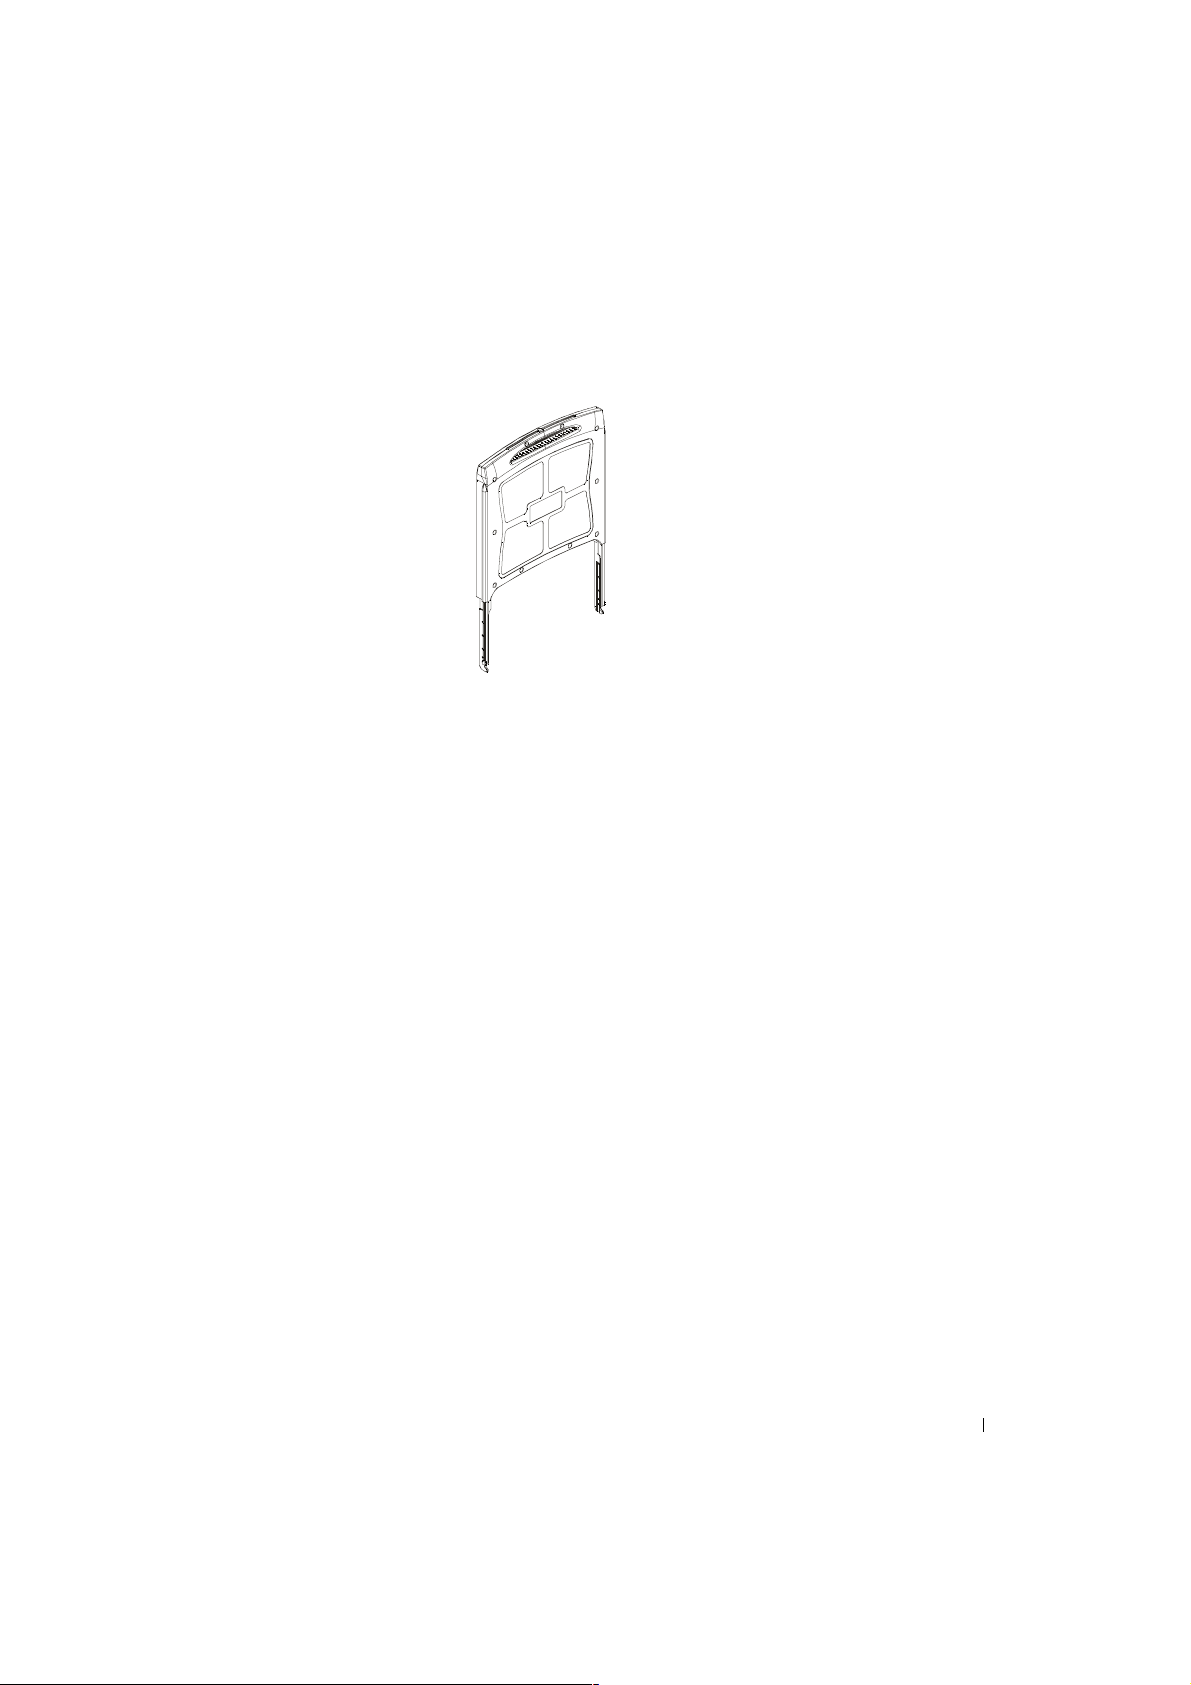
図 4-3. 後ろ から見 た 図
フラットパネルモニタのセットアップ
フラットパネルモニタのセットアップ手順に従ってください。
• フラットパネルモニタが AC 電源に接続されていることを確認してください。
ラック取り付けガイドをご覧ください。
• 以下のいずれかの方法で、フラットパネルモニタの電源を入れることができま
す。
– 自動 : フラットパネルモニタのトレイをロックされるまで引き出し、モニ
タを持って希望の位置まで回転させます。 フラットパネルモニタが約 90°
の位置まで達すると、自動的に電源が入ります。
– 手動 : ベゼル背面にある電源ボタンを押します。
• 高さを調節するには、モニタの両側を持ち、両方に均等な力をかけて上下に移
動させてください。
パワーマネジメントシステム
このフラットパネルモニタは VESA DPMS ( バージョン 1.0p) パワーマネージメント標準
に準拠しています。 VESA DPMS は、水平及び垂直同期シグナルを検出することにより、4
段階の省電力モードを提供しています。 各パワーマネジメントモードの消耗電力につい
ては表4-2をご覧ください。
フラットパネルモニタが省電力モードにある場合や、不当なタイミングを検出した場合、
モニタ画面は白紙となり、電源ボタン LED インジケータが半分明るい青になります。
ユーザーズガイド 4-7
Page 86
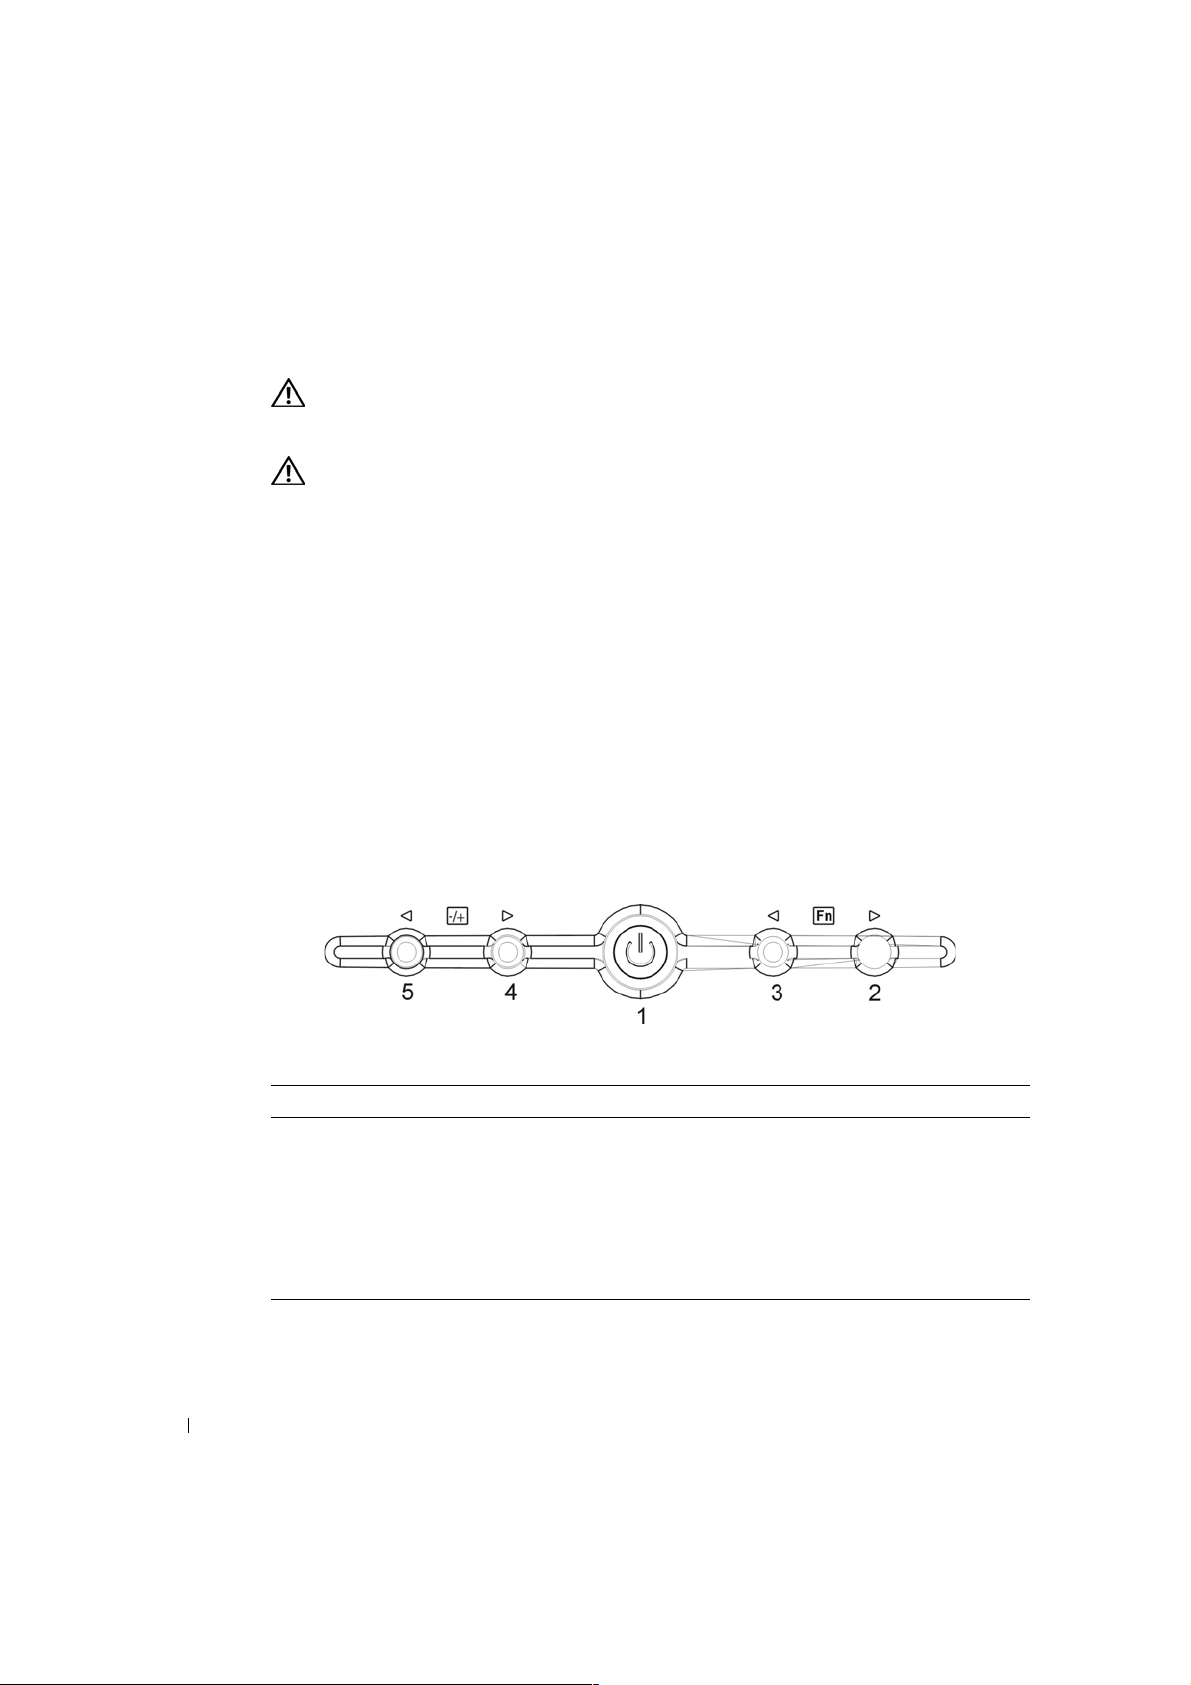
www.dell.com | support.dell.com
お手入れ
警告 : 感電の危険性を防ぐため、モニタキャビネットはご自分で分解しないでくだ
さい。 ユーザー 自身がモニタを修理することはできません。 ユーザーによるお手入
れは、清掃にのみ限られています。
警告 : モニタを清掃する前に、必ずコンセントから抜いておいてください。
• フラットパネルモニタの画面を掃除する場合は、柔らかいきれいな布を水また
はイソプロピル・アルコールなどに浸してお使いください。
• モニタキャビネットを掃除する場合は、中性洗剤に浸した布をお使いください。
• 落ちにくい汚れは、イソプロピル・アルコールに浸した布で拭き取ってくださ
い。 ベンジン、シンナー、アンモニア、研磨剤などはご使用にならないでくだ
さい。
コントロールとインジケータ
概要
モニタ下方にあるコントロールボタンを使い、表示されている画像を調整してください。
図 4-4. コントロ ール
表 4-4. コントロールパネル(モニタ前面パネル)
コントロール 説明
1 モニタの電源が入ると電源 LEDが完全な明るい青になります。省電力モード
2機能選択逆時計回り
3機能選択時計回り
4 調整増加
5 調整減少 (自動調整 : 1 秒押すと実行)
4-8 ユーザーズガイド
にあるときは半分の明るい青になります。
Page 87
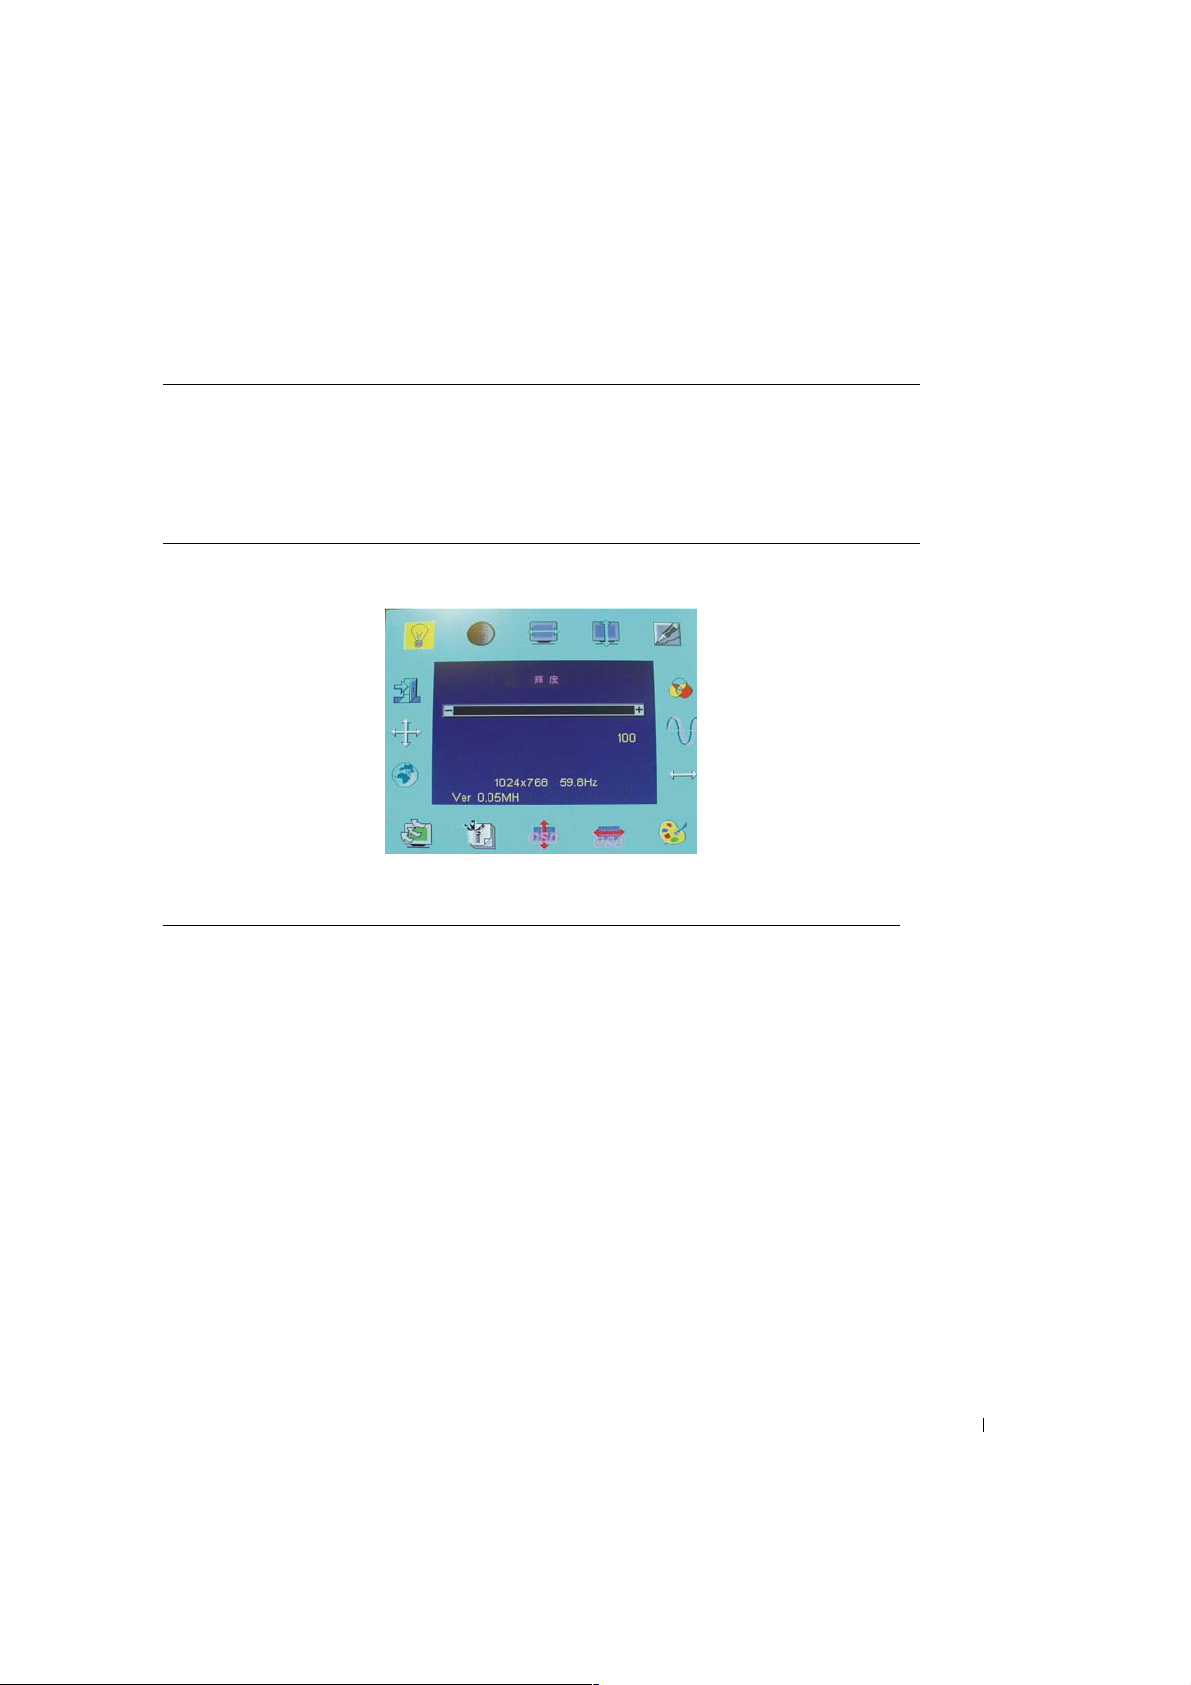
表 4-5. OSD レイアウト
OSD 形式 各行20文字で9行
OSD ボーダー シアン
OSD 調整可能アイテム 前景黒、背景シアン
選択されたアイテム 前景赤紫、背景黄色
備考 前景赤紫、背景青
図 4-5. オ ンスクリーン・ ディスプレイ
表 4-6. OSD説明
輝度 : 輝度調整 0 ~ 100
コントラスト : コントラスト調整 0 ~ 100
水平位置: 水平位置の調整。
垂直位置: 垂直位置の調整。
フェーズ : フォーカス調整 範囲 0 ~ 255、255 段階
OSD 位置: OSD 位置の調整。
自動調整 :水平位置、垂直位置、クロック、フェーズを自動調整します。 約
3~5秒かかります。 調整が始まると、画面に " 自動調整中・・・ "
というメッセージが表示されます。
クロック : 周波数トラッキング調整 : 最大 -50 ~ +50 但し、一部のモード
では範囲に制限があります。
グラフテキスト : 640 x 400 ( グラフ ) または 720 x 400 ( テキスト ) モードの選
択。
言語 : 英語、ドイツ語、フランス語、スペイン語、日本語の5種類の
OSD 言語から選択することができます。
リセット : 初期設定にリセットします。
ユーザーズガイド 4-9
Page 88

表 4-6. OSD説明 (続く)
www.dell.com | support.dell.com
カラー温度:
カラー温度は標準 9300、6500、またはユーザー定義です。
ユーザー :
ユーザー赤 :
ユーザー定義の赤シグナルレベル。
ユーザー定義の緑シグナルレベル。
ユーザー定義の青シグナルレベル。
ユーザー青 :
6500:
CIE 組み合わせを 6500°K カラー温度で設定。
CIE 組み合わせを 9300°K カラー温度で設定。
9300:
終了 : OSD メニュー機能を終了します。
シャープ : 一定比率効果を調整します(スムーズまたはシャープ)。
OSD 透明度 : OSD メニューの透明度を調整します。 範囲は 0 ~ 100
レベル。
1024 x 768: 現在のモードの解像度。
59.8 HZ: 現在のモードの垂直周波数±1Hz。
VER 0.05MH: ファームウェアバージョン
その他の機能 :
スマート自動調整 :
自動調整機能は、最初にディスプレイモードが入力されると、自
動的に実行されます。 調整の後はこのモードが保存されます。 こ
のモードが再度使われると、モニタは自動的に最適な状態に切り
替わります。 このシステムには、最近使用したモードを合計 21 種
類保存することができます。
VESA DPMS の機能 :
ホストシステムからのシグナルを受信すると、モニタは 3 秒間ほ
ど黒い画面を表示します。 3 秒後、モニタが何もシグナルを受信
しないと、画面には " シグナルなし " と表示され、省電力モード
に入ります。
表 4-7. LE Dインジケ ータ
モード LEDの色
オン 完全な明るい < 青 >
スタンドバイ 半分の明るい < 青 >
一時停止 半分の明るい < 青 >
オフ 暗い
ボタン電源オフ 暗い
ケーブル未接続 1. 半分の明るい < 青 > < スリープモード >
4-10 ユーザーズガイド
2. 暗い <DC 電源オフ、オフモード >
Page 89
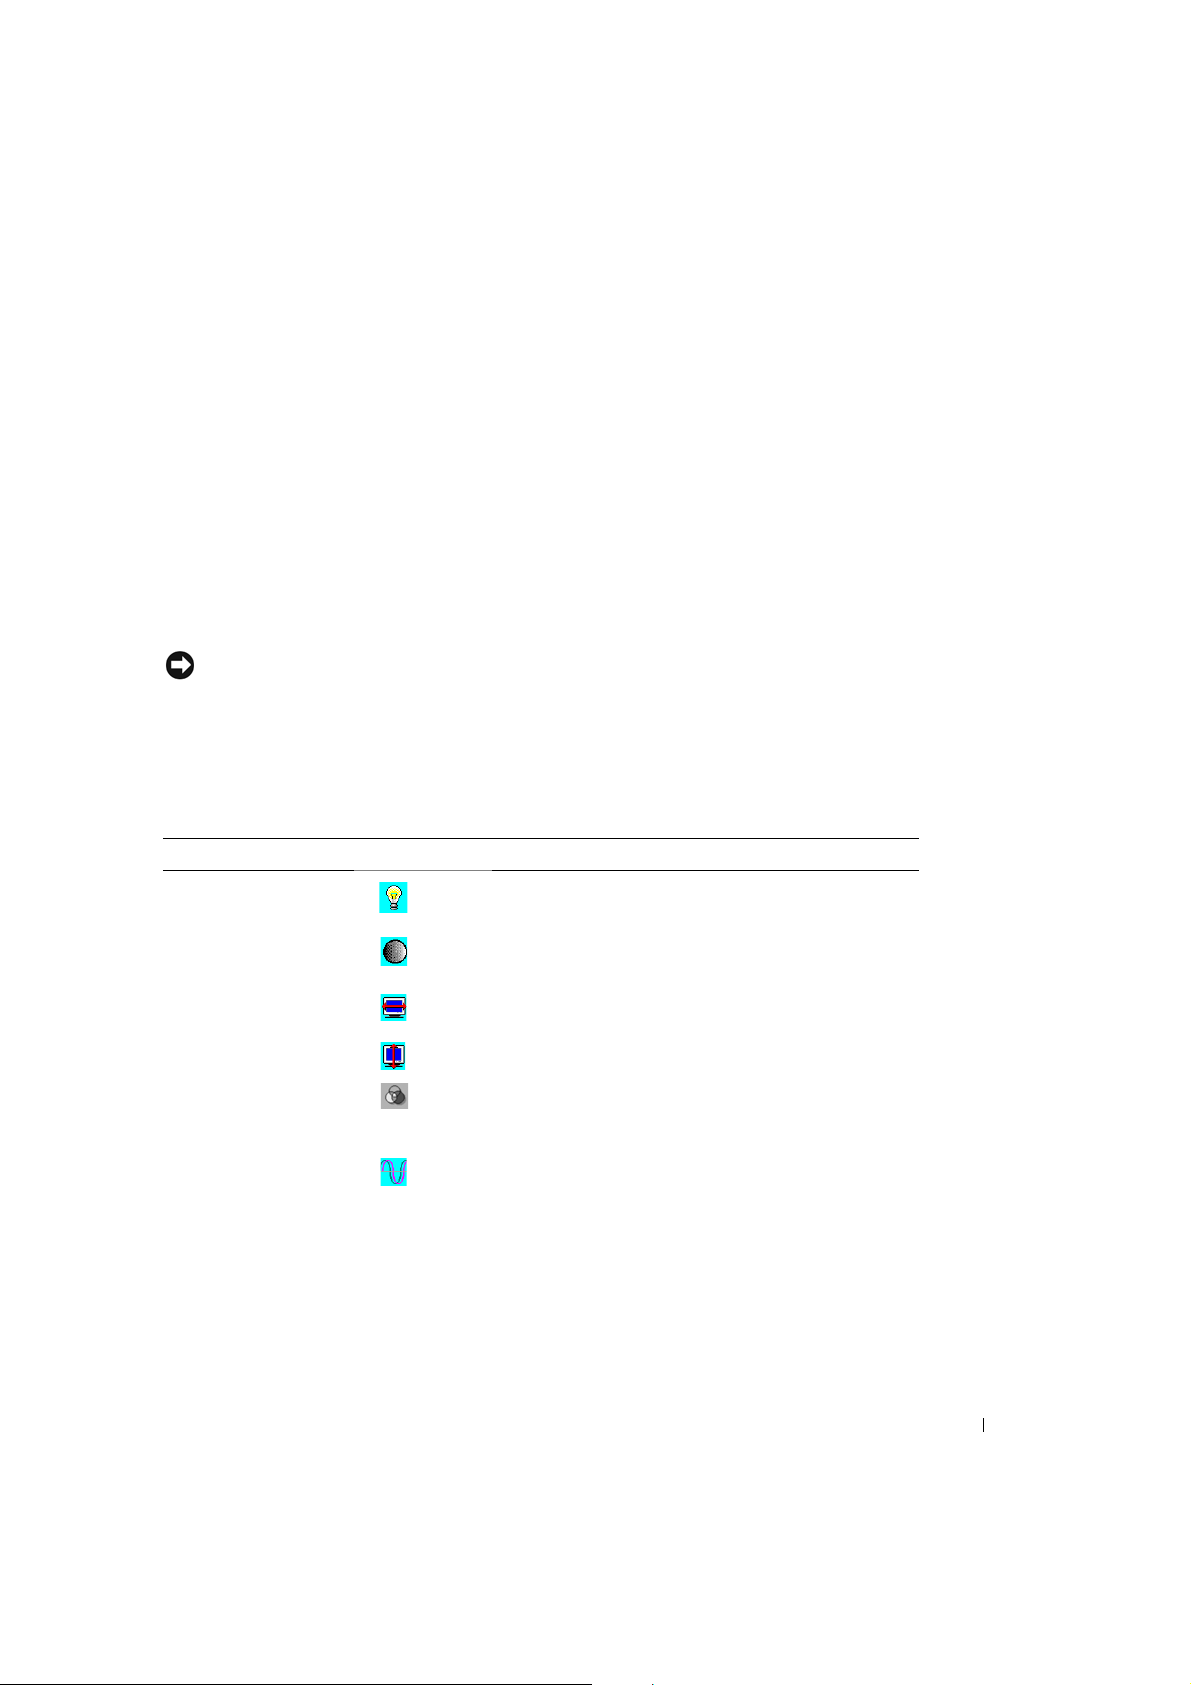
ディスプレイの調整
フラットパネルモニタには、分かりやすいメニュー別のオンスクリーン・ディスプレイ
(OSD)機能が搭載されており、すばやく簡単にディスプレイ設定を行うことができます。
当フラットパネルモニタには 4 つのコントロールキーがあり、OSD メニューに表示される
機能を選択し、必要に応じてカスタマイズすることができます。 機能コントロールボタ
ンを使って OSD を起動し、メニューを選択してください。 調整ボタンを使って、選択さ
れたメニューを変更します。 " コントロールとインジケータ " をご覧ください。
OSD メニューを表示するには、いずれかの機能ボタンを押してください。図 4-5 のよう
なメニュー表が表示されます。
ファームウェアバージョン番号とともに、現在の入力解像度と垂直スキャン周波数(FV)
が OSD メニューの下方に表示されます。 続けて機能コントロールボタンを押すと、メ
ニュー全体を移動することができます。
注意 : このガイドで示す OSD メニュー上のバージョン番号は、参照目的で記載されたも
のです。お買い上げのモニタのファームウェアバージョンは、最新バージョンに更新さ
れていることがあります。
下表では、OSD メニューの各機能に関する説明を記載しています。また、機能ボタンと調整ボ
タンについてもご覧ください。
表 4-8. OSD機能
機能 アイコン 説明
輝度 101 輝度設定範囲は (0 ~ 100) です。
コントラスト 101 コントラスト設定範囲は (0 ~ 100) です。
水平位置 この機能はディスプレイの水平位置を 調整 しま
す。
垂直位置 この機能はディスプレイの垂直位置を調整 します。
OSD 透明度 この機能は、OSD メニューの透明度を 調整します。
透明度は 0% ~10% の間で調整することができます。
11 段階での調整が可能です。
フェーズ 合計 256 段階(0 ~ 255)で画面のフォーカスと鮮
明度を調整することができます。
ユーザーズガイド 4-11
Page 90
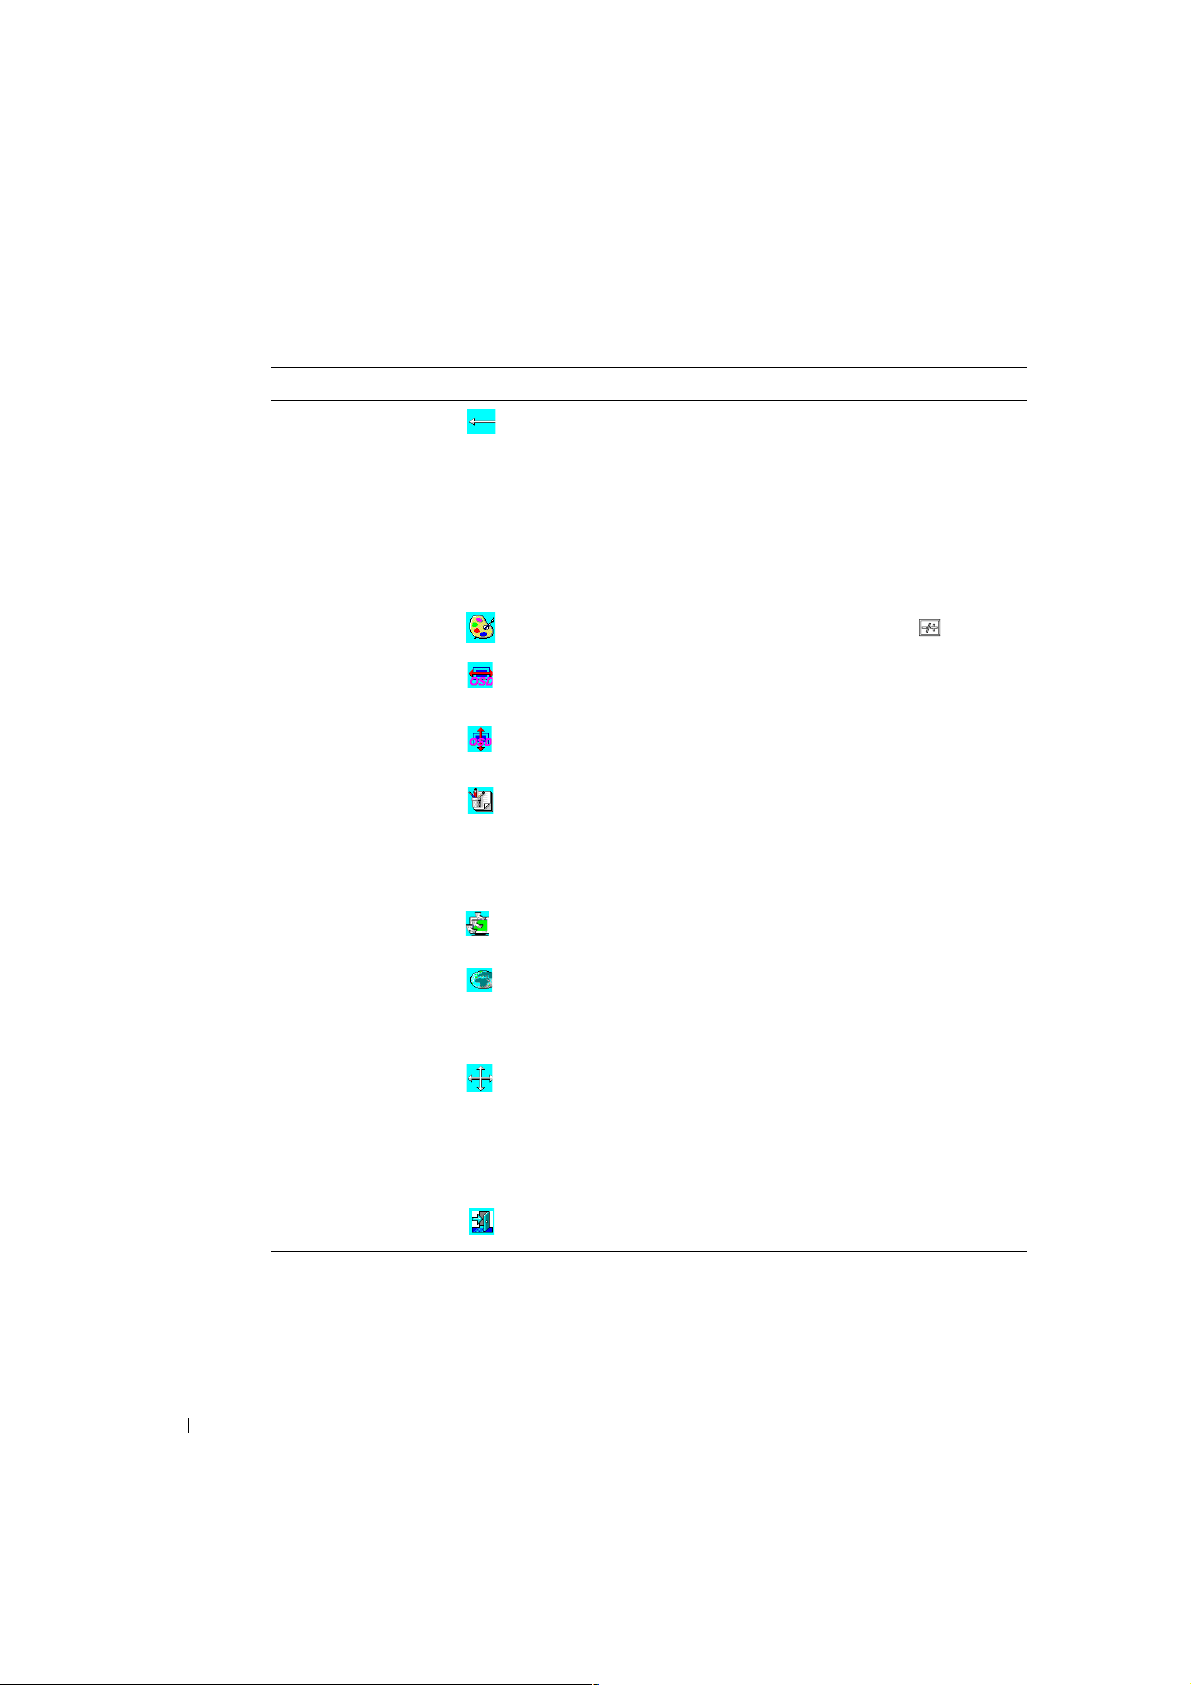
www.dell.com | support.dell.com
表 4-8. OSD機能 (続く)
機能 アイコン 説明
クロック この機能は、安定した鮮明な画面を提供するため、
周波数トラッキング機能を搭載しています。 現在実
行中のモードでは 101 の設定(-50 から +50)が使
用できます。 それぞれのモードで調整範囲が異なり
ます。 この機能は、入力タイミングと対応タイミン
グの間でクロックサイクルから外れた番号を記録し
ます。 入力タイミングと対応タイミングが異なる場
合、自動調整の後はクロック値が "0" にならない
場合があります。
カラー温度 異なるカラー温度を選択する場合は、( ) ボタン
を押してください。
OSD水平位置 この機能は、OSD メニューを左右に移動します。
OSD垂直位置 この機能は、OSD メニューを上下に移動します。
グラフ / テキスト 640 x 400 @ 70 Hz と 720 x 400 @ 70 Hz の水平およ
び垂直周波数は同じであるため、この機能は 640 x
400 ( グラフィックモード ) または 720 x 400 ( テ
キストモード ) のいずれかを手動で選択することが
できます。.
リセット リセット機能は、調整済みのすべての値を工場出荷
時の初期設定にリセットします。
言語 5 種類の OSD 言語から選択することができます : 英
語、ドイツ語、フランス語、スペイン語、日本語。
左右の調整ボタンを使って希望の言語を選択してく
ださい。
自動調整 + と -ボタンを押すと、自動調整機能が実行されま
す。
自動調整機能は、ディスプレイサイズ、クロック、
フェーズを最適化します。 調整には 3 ~ 5 秒間かか
ります。
終了 この設定を保存し、OSD メニューを終了します。
4-12 ユーザーズガイド
Page 91

トラブルシューティング
注意 : 本製品は複数の VGA モードに対応しています。 このフラットパネルモニタは標準
VGA タイミングであらかじめ設定されています。 市販されている様々な VGA カードは、
それぞれ異なる出力タイミングを持つため、新しいディスプレイモードや新しい VGA
カードをご使用になる際は、一時的に画面が不安定になることがあります。
注意 : 選択されたモードがリストに掲載されていない場合、ディスプレイの最適機能を
確保することができない可能性があります。
問題 : ディスプレイがはっきりしない、または不安定。
Microsoft® Windows® オペレーションシステムで稼動しているシステムと当フラットパ
ネルを最適にご利用いただくために、以下の要領で操作を行ってください。
1 [ スタート ] ボタンをクリックし、[ シャットダウン ] をクリックして Windows 終
了の手順を踏んでください。
2 縦しまが表示されたら、OSD メニューのクロック機能を使って縦しまがなくなる
まで調整を行ってください。
3 フェーズ機能を使い、モニタ画面を調整してください。
4 Windows の終了で [ いいえ ] をクリックし、正常な Windows に戻ってください。
フラットパネルモニタの自動調整機能を使用することもできます。 " ディスプレイの調整
" をご覧ください。
問題 : フラットパネルモニタに何も表示されない。
フラットパネルモニタに何も表示されない場合は、以下の要領で操作を行ってください :
1 電源インジケータが点灯し、全てのケーブルがしっかり接続されているか、シ
ステムが正しいタイミングで稼動していることを確認してください。 詳しくは
" 仕様 " をご覧ください。
2 フラットパネルモニタの電源を切り、もう一度電源を入れてください。 " 上 " 機
能ボタンを押し、再度上または下の調整ボタンを何度か押してください。 それ
でも画面が表示されない場合は、その他の調整ボタンを何度か押してください。
3 ステップ 2 を試しても画面が表示されない場合は、他のモニタ(CRT またはフラッ
トパネルモニタ)に接続してみてください。 別のモニタでシステムが正しく作動
した場合は、VGA カードの出力タイミングがフラットパネルモニタの同期範囲を
超過している可能性があります。 付録の表に記載された他のモードに変更する
か、まはた VGA カードを交換した後、ステップ 1 と 2 を繰り返してください。
4 前述の手順を追っても問題が解決されない場合は、メーカーにお問い合わせく
ださい。
ユーザーズガイド 4-13
Page 92
問題 : OSD に " 入力シグナル範囲外 " というメッセージが表示されます。
フラットパネルモニタの同期範囲を超えた出力タイミングを選択した場合は、OSD が
"Input Signal Out of Range" というメッセージを表示します。 フラットパネルモニタが
対応できる他のモードを選択してください。 タイミングについては " 仕様 " をご覧くだ
さい。
問題 : OSD に " シグナルなし " というメッセージが表示される。
システムとのビデオケーブル接続を点検してください。
www.dell.com | support.dell.com
規定
エネルギー効率について
国際エネルギースター® マーク
EPA の国際エネルギースター R コンピュータプログラムは、エネルギー効率の高いコン
ピュータ製品を製造することにより空気汚染を削減するため、EPA とコンピュータメー
カーが共同に取り組んでいるプログラムです。EPA は国際エネルギースター R コンピュー
タ製品は、コンピュータユーザーの電気消耗量を約 20 億ドルも削減していると考えられ
ています。こうした電気消耗量の削減が、温室効果につながる主な原因となっている二
酸化炭素の発生を防ぎ、そして酸性雨の原因となっている二酸化物および窒素酸化物を
防ぎます。また、夜間や週末など、長時間コンピュータをご使用にならない場合は、コ
ンピュータの電源を切り、電気消耗やその他の副作用を防ぐことができます。
FCC からのお知らせ(米国のみ)
本製品は FCC 規定の第 15 項に準拠しています。 操作は次の条件の対象となります :
・ 本製品は有害な干渉を招いてはならない。
・ 本製品は不本意な操作を招く可能性のある干渉を含め、あらゆる干渉を受信し
なければなりません。
4-14 ユーザーズガイド
Page 93

クラス A
本装置は既に FCC 規定第 15 項の ClassA デジタル装置としてのテストを受け、その条件
を満たしています。 これらの条件は、本装置を商業エリアにおいて使用した場合に、有
害な干渉から適切な保護を得られるようデザインされたものです。 本装置は、ラジオ周
波数を発生、使用、及び放射するため、メーカーの指示に従って正しくインストールさ
れていない場合は、有害な通信妨害を招く恐れがあります。 住宅地区における本装置の
操作は有害な干渉を招く恐れがあり、このような干渉を招いた場合は、ユーザーが自ら
これを修正する義務があります。
* 製品名称 :
LCD モニタ(カテゴリー名)
ラックマウント /DELL 4U132(基本モデル)
* 製造元 :Compal Electronics, Inc.
当社は本製品は FCC 規定の第 15 項に準拠していることを
証明します。
操作は次の条件の対象となります :
本製品は有害な干渉を招いてはならない。
本製品は不本意な操作を招く可能性のある干渉を含め、あ
らゆる干渉を受信しなければなりません。
*FCC 規定: FCC第 15 項 Class A 準拠
* テスト場所 :C&A LABORATORY, CO., LTD
*製造責任者 : 準拠 :Compal Electronics, Inc.
114 台湾台北市内湖区
瑞光路 581 号
Tel)+(886)-2-8797-8588
Fax)+(886)-2-2658-3168
* メーカー情報 :Compal Electronics, Inc.
安全部門
114 台湾台北市内湖区
瑞光路 581 号
安全部門
マネージャー
供給者 署名
ユーザーズガイド 4-15
Page 94
www.dell.com | support.dell.com
EU 順応性に関する声明 (LVD、EMC)
製品名称 : LCD モニタ(カテゴリー名)
ラックマウント ( モデル名 )
製造元 :Compal Electronics, Inc.
台湾省桃園県平鎮市南東路 8号
当社はCE-Mark 指令 (93/68/EEC) 及び低電圧指令 (73/23/EEC)、 電磁適合性指令
(89/336/EEC, 92/31/EEC) に関するすべての主要安全要求を完全に満たしており、ECC 委員会
のメンバーにより規定されたガイドラインに符合していることを証明します。 この声明は、
この声明の一部となる全てのサンプルに対し有効であり、製造チャート付属に基づき製造さ
れます。 電気安全性及び EMC 要求に関する評価標準は以下の通りです :
LVD:EN60950
EMC:EN55024, EN55022, EN61000-3-2, EN61000-3-3
1. 順応性証明書 / 試験報告書発行元 :
LVD:TUV
2. 技術書保存場所 :
Compal Electronics, Inc.
必要に応じて閲覧可能(メーカー)。
Compal Electronics, Inc.
114 台湾台北市内湖区
瑞光路 581 号
安全部門
マネージャー
カナダにおける規制(カナダのみ)
このデジタル装置は、カナダ通信局の無線干渉規制で定められたデジタル装置から放出
される無線干渉雑音に対するクラス A の制限を越えていません。
カナダ通信局(DOC)は、Dell Computer Corporation による許可のない変更や修正が、
使用者の当装置の操作に対する使用権を破棄することになる可能性があることを規定し
ています。
当クラス A デジタル装置はカナダ電波障害発生機器規約(Canadian InterferenceCausing Equipment Regulations)の全ての要求を満たしています。
4-16 ユーザーズガイド
Page 95
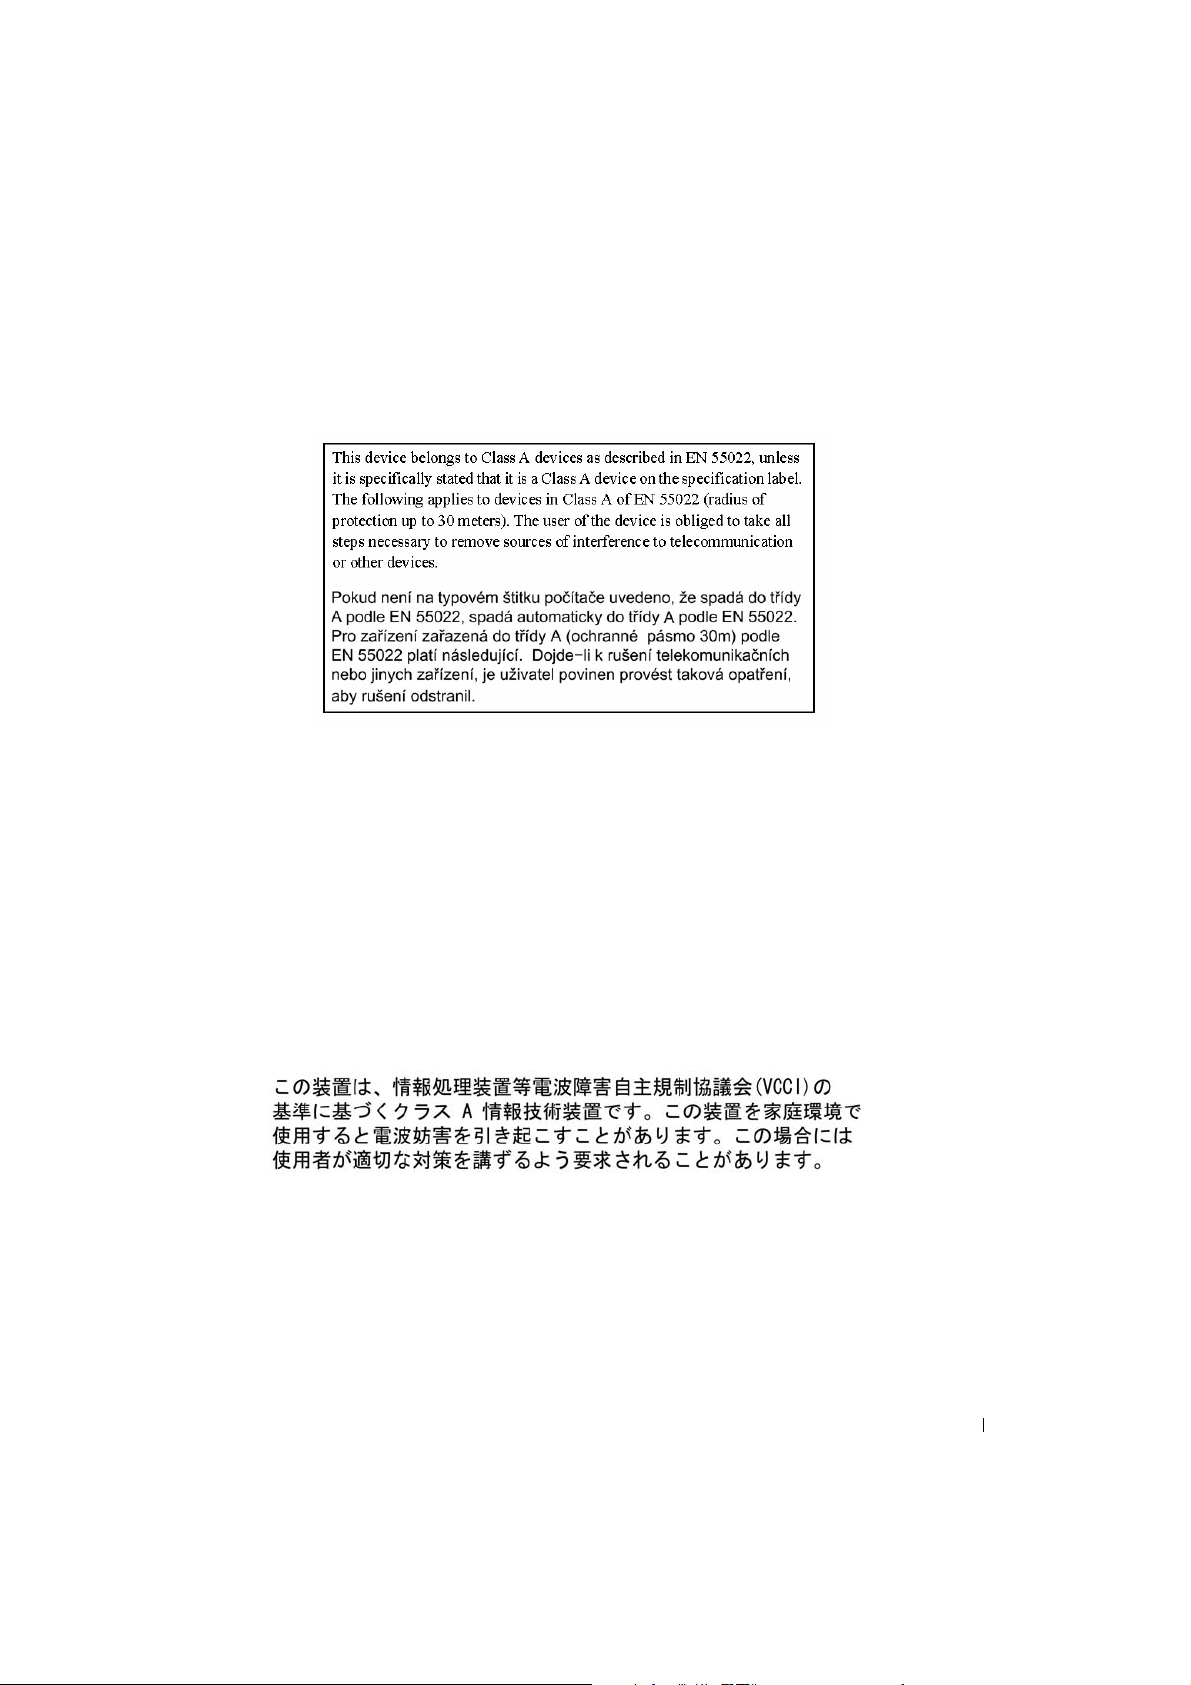
Cet appareil numérique de la classe A respecte toutes les exigences du Règulement sur le matèriel
brouilleur du Canada.
EN 55022 Compliance (Czech Republic Only)
VCCI クラス A について ( 日本のみ )
ほとんどの Dell コンピュータシステムは電波障害自主規制協議会(VCCI)によりクラス
B 情報処理装置(ITE)として分類されています。但し、特定のオプションを搭載するこ
とにより、装置の分類がクラス A となることがあります。周辺機器、拡張カード、プリ
ンタ、入出力(I/O)デバイス、モニタ等のシステムに統合された、または接続された周
辺機器を含む情報処理装置は、コンピュータシステムの電磁環境分類(クラス A または
B)に符合する必要があります。
お買い上げのコンピュータシステムがどの分類に属するかを判断するには、コンピュー
タ底部、側面、背面などにある規定ラベル / マーク("VCCI クラス A ITE 規定マーク "
および "VCCI クラス B ITE 規定マーク ")をご覧ください。システムの VCCI 分類が判明
したら、分類に適した VCCI からのお知らせをお読みください。
クラス A ITE
ユーザーズガイド 4-17
Page 96
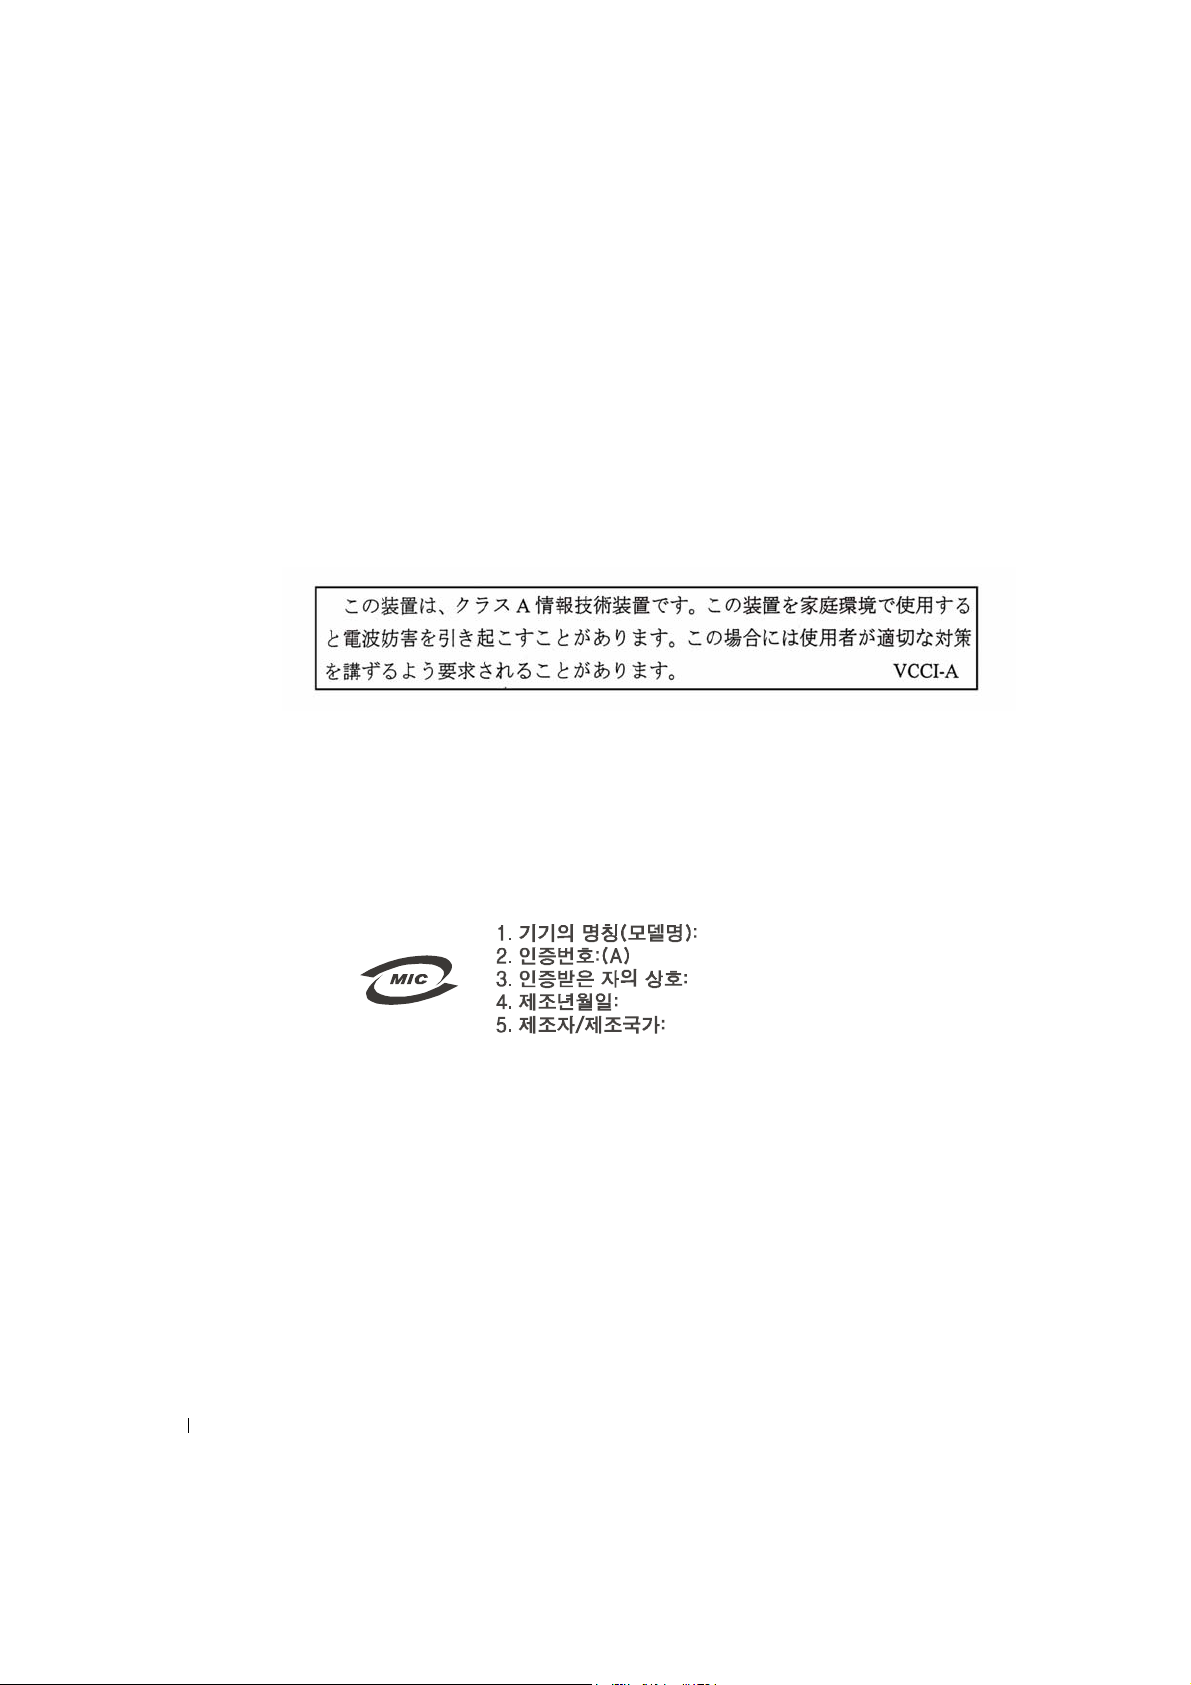
www.dell.com | support.dell.com
この装置は、情報処理装置等電波障害自主規制協議会(VCCI)の基準に基づくクラス A
情報技術装置です。 この装置は、家庭環境で使用することを目的としていますが、この
装置がラジオやテレビジョン受信機に近接して使用されると、受信障害を引き起こすこ
とがあります。 このような障害が発生した場合、使用者は必要な措置を採るよう促され
ます。
VCCI クラス A ITE 規約マーク
規約ラベルに次のマークが含まれる場合、お使いのコンピュータはクラス A 製品で
す。
MICクラスA規約ラベル
規約ラベルに次のマークが含まれる場合、お使いのコンピュータはクラス A 製品です。
クラス A 装置
ポーランド中央からの試験及び認証に関するお知らせ
この装置は保護回路のついたソケット(3 つのピンがあるソケット)を使用しています。
併用される全ての装置(コンピュータ、モニタ、プリンタなど)は同じ電源をご使用く
ださい。
室内電気取り付け時に使用するフェーズコンダクタは、通常 16 アンペア(A)以下の
ショート防止装置(ヒューズ)を搭載している必要があります。
4-18 ユーザーズガイド
LCD monitor / SL358
E-B012-03-2283(A)
Compal Electronics, Inc.
May, 2003
Compal Electronics, Inc
Page 97
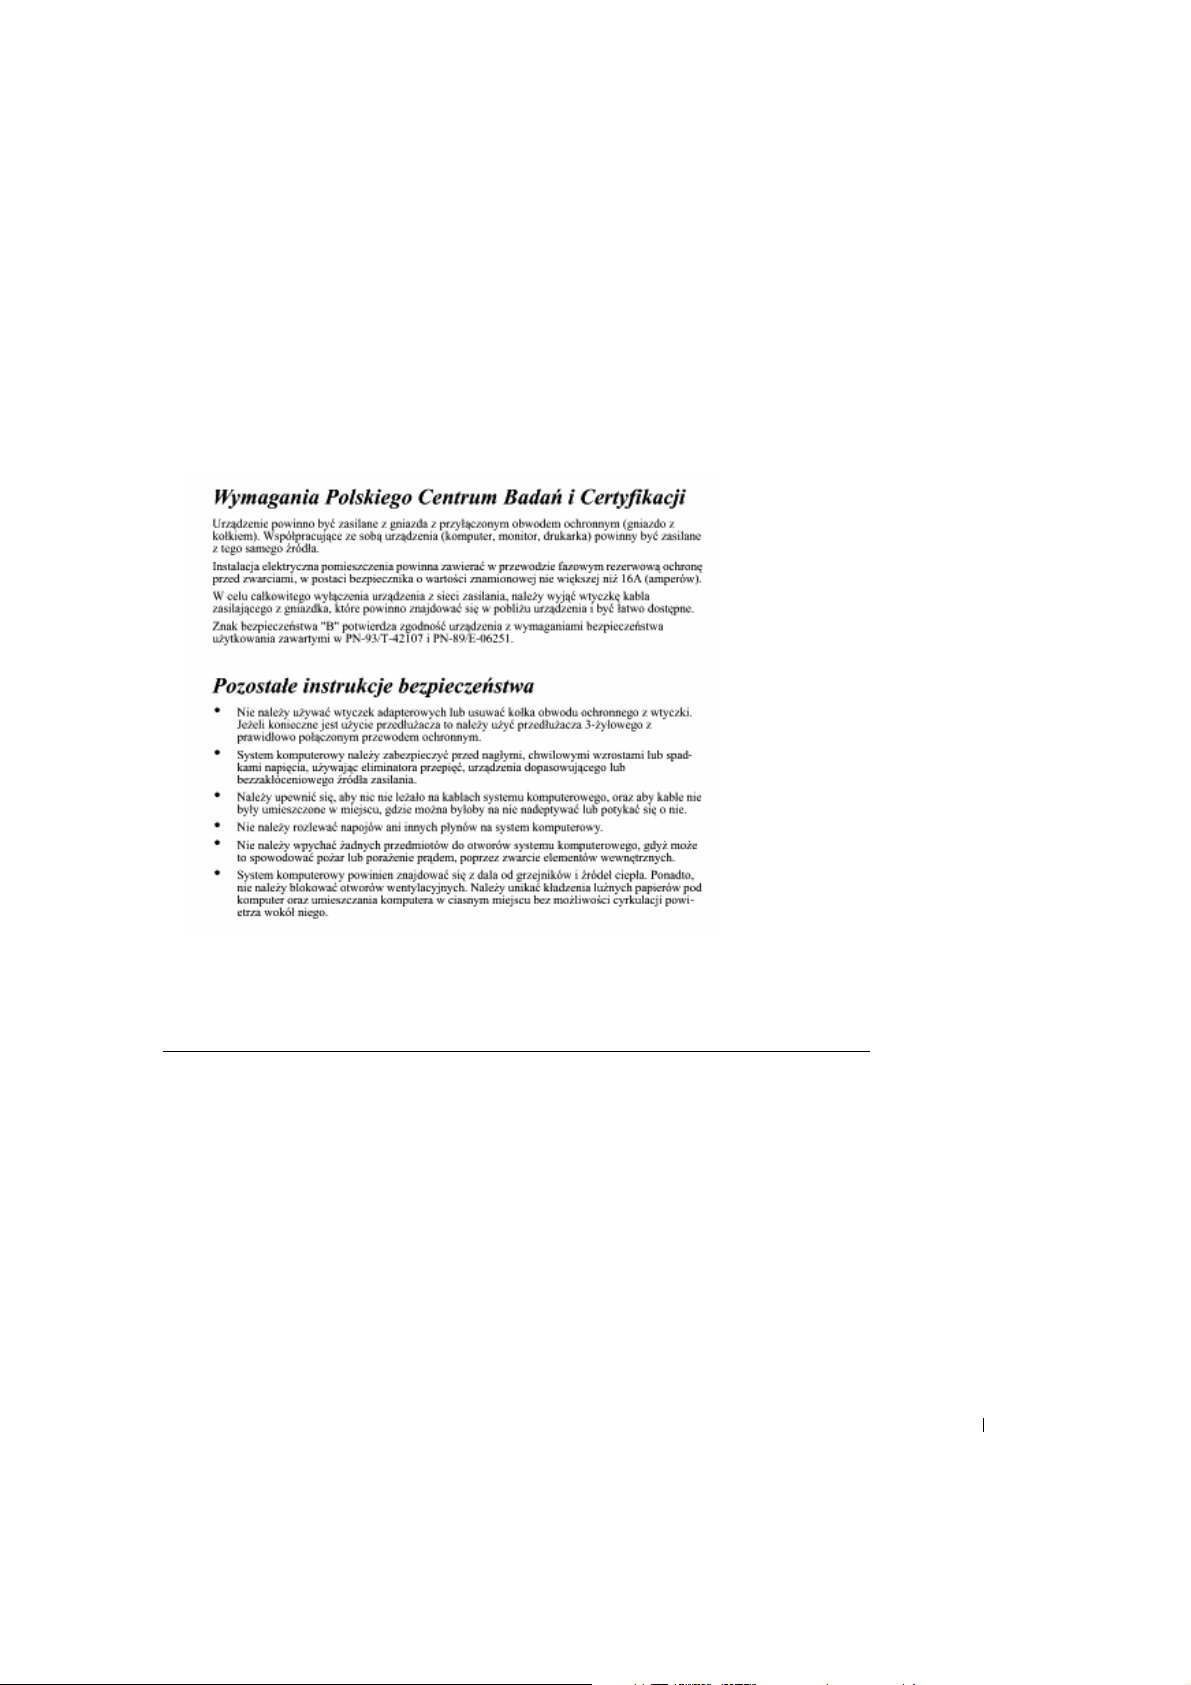
装置の電源を完全に切るには、電源コードをコンセントから外してください。コンセン
トは装置の近くにあり、手の届きやすいものをお使いください。
保護マーク "A" は、装置が標準PN-93/T-42107 及び PN-89/E-06251 の保護装置の使用に
関する要求を満たしていることを保証します。
NOM に関する情報(メキシコのみ)
以下の情報は、当説明書で説明される本装置が公式メキシコ標準(NOM)の要求を満たし
ていることを説明しています。
輸出者 :
輸入者 :
出荷先 :
Dell Computer Corporation
One Dell Way
Round Rock, TX 78682
Dell Computer de México,
S.A. de C.V. Rio Lerma No. 302 -4° Piso
Col. Cuauhtemoc 16500 México, D.F.
S.A. de C.B. al Cuidado de Kudhne & Nagel
de México S. de R.I., Avenida Soles No.55
Col. Peñon de los Baños, 15520 México, D.F.
ユーザーズガイド 4-19
Page 98
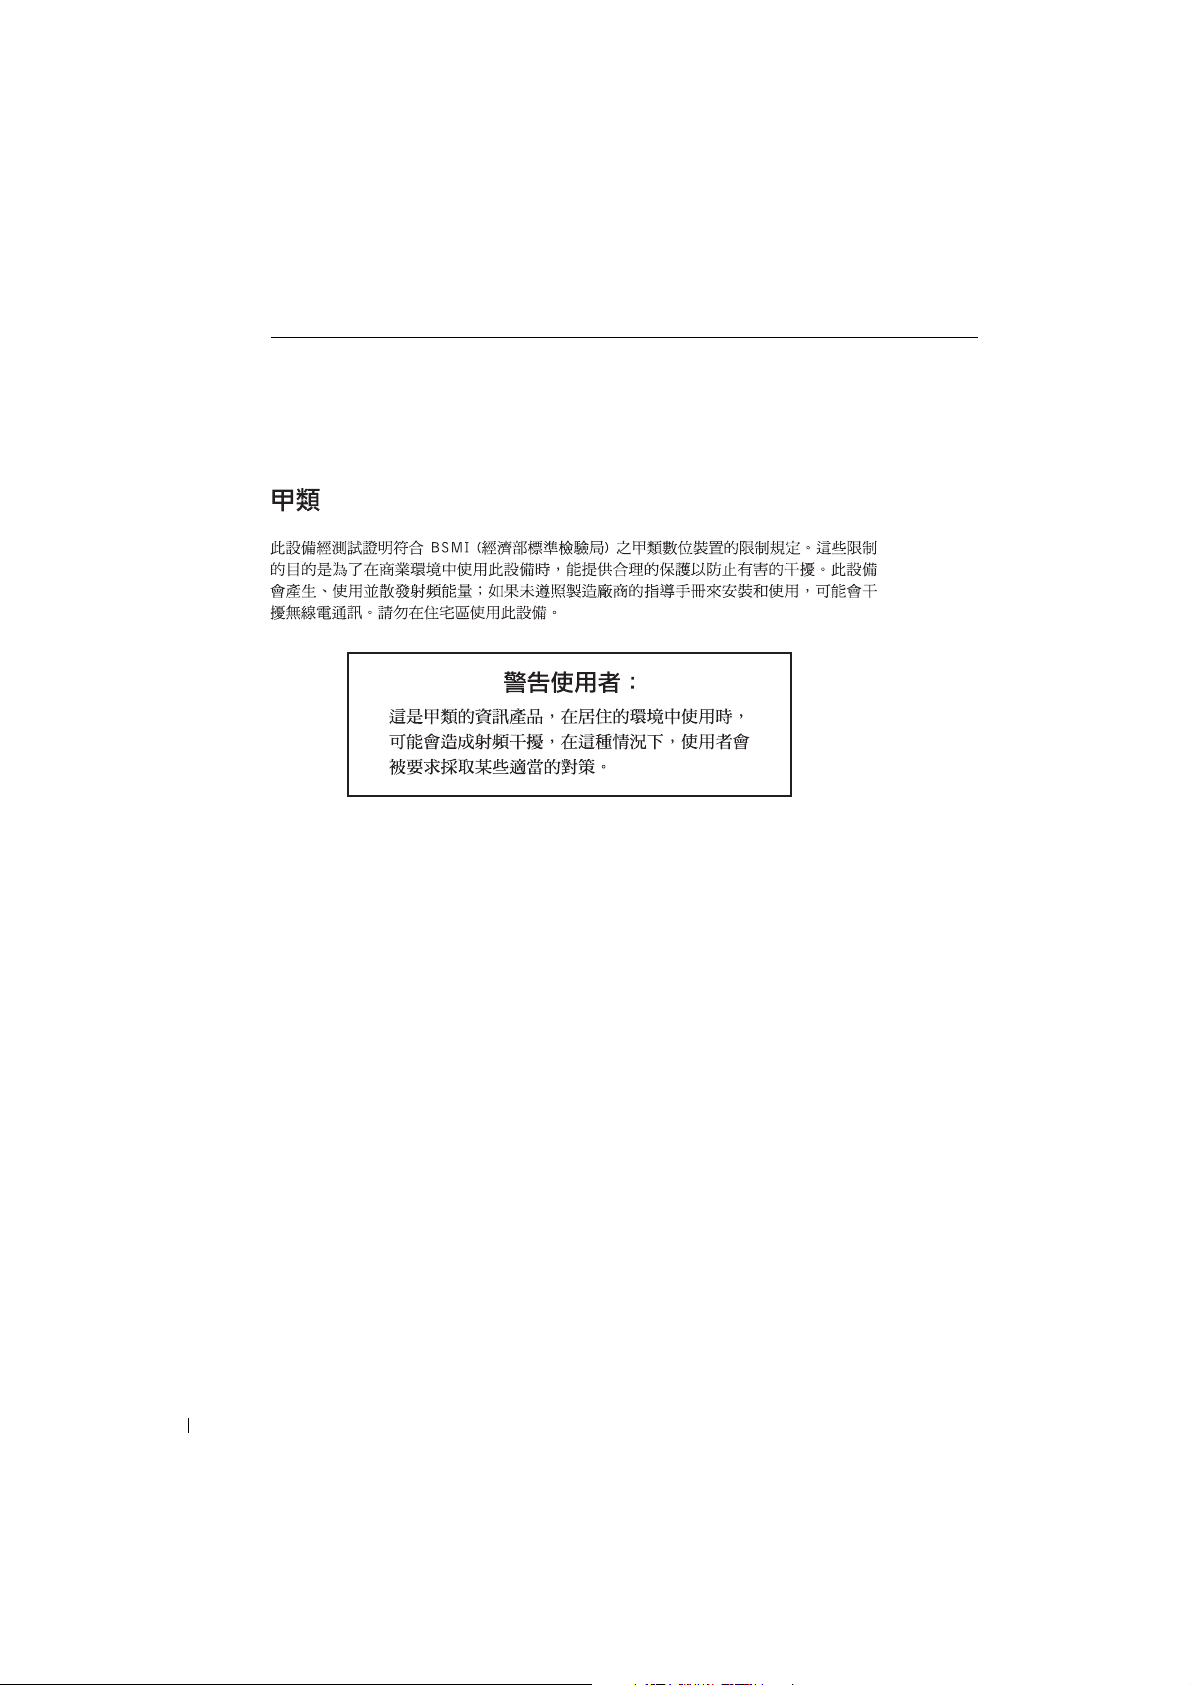
www.dell.com | support.dell.com
電圧 :
周波数 :
現在の消耗量:
> 12 VDC, 5
50/60 Hz
2 A
BSMI について(台湾のみ)
人間工学について(ドイツのみ)
ドイツ人間工学標準 ISO13406-2 の要求に基づき、グラフィックまたは文字は以下の要求
を満たす必要があります :
• 黒い背景での青いグラフィックや文字は推奨されません。 (このような組み合
わせは低コントラストにより視界が悪く、目の疲れの原因となります。)
• グラフィックコントローラとモニタは次の条件でご使用ください :
– 垂直周波数 : 56Hz 以上
– 表示モード : 明るい背景での暗い文字
Ergonomie Hinweis (nur Deutschland)
Um den Anforderungen der deutschen Ergonomie-Norm ISO13406-2 zu antsprechen.
• Wird empfahlen, die Grunfarbe Blau nicht auf dunklem Hintergrund zu verwenden
• (schiechte Erkennbarkeit. Augenbelastung bei zu geringem Zeicheenkontrast).
• Wird folgende Einstellung des Grafik-Comtrlooers und Monitors empfohlen.
– Vertikalfrequenz: 56 Hz oder hoher.
– Ohne Zellensprung.
4-20 ユーザーズガイド
Page 99

Dell™ PowerEdge™ Rack Console 15FP
Guía del usuario del
monitor de pantalla
plana
www.dell.com | support.dell.com
Page 100
Notas, avisos y precauciones
NOTA: Una NOTA indica información importante que le ayuda a llevar a cabo un mejor uso del
ordenador.
AVISO: Un AVISO indica un daño potencial al hardware o pérdida de datos y le dice cómo prevenir
el problema.
PRECAUCIÓN: Una PRECAUCIÓN indica un daño potencial a la propiedad,
lesiones personales o muerte.
____________________
La información en este documento está sujeta a cambios sin previo aviso.
© 2003 Dell Computer Corporation. Todos los derechos reservados.
Queda terminantemente prohibido cualquier tipo de reproducción sin el consentimiento por escrito de Dell Computer
Corporation.
Marcas usadas en este texto: Dell, el logotipo DELL y PowerEdge son marcas de Dell Computer Corporation. Microsoft
y Windows son marcas registradas de Microsoft Corporation. VESA es una marca registrada de la Asociación de Estándares
Electrónicos de Vídeo. ENERGY STAR es una marca registrada de la Agencia de Protección Medioambiental de los EE.UU.
Como alia do de ENERGY STAR‚ Dell Computer Co rporation ha determinado que este pro ducto cumple con las direc trices
de ENERGY STAR para la eficiencia energética.
En este documento pueden utilizarse nombres de marcas y marcas para referirse a las entidades que reclaman las marcas
y a los nombres de sus productos. Dell Computer Corporation niega cualquier interés de propiedad de las marcas y nombres
de marcas distintas a las suyas.
Abril de 2003 P/N 3Y386 Rev. A01
 Loading...