

Page 1
Setting Up Your Dell™ E-Port
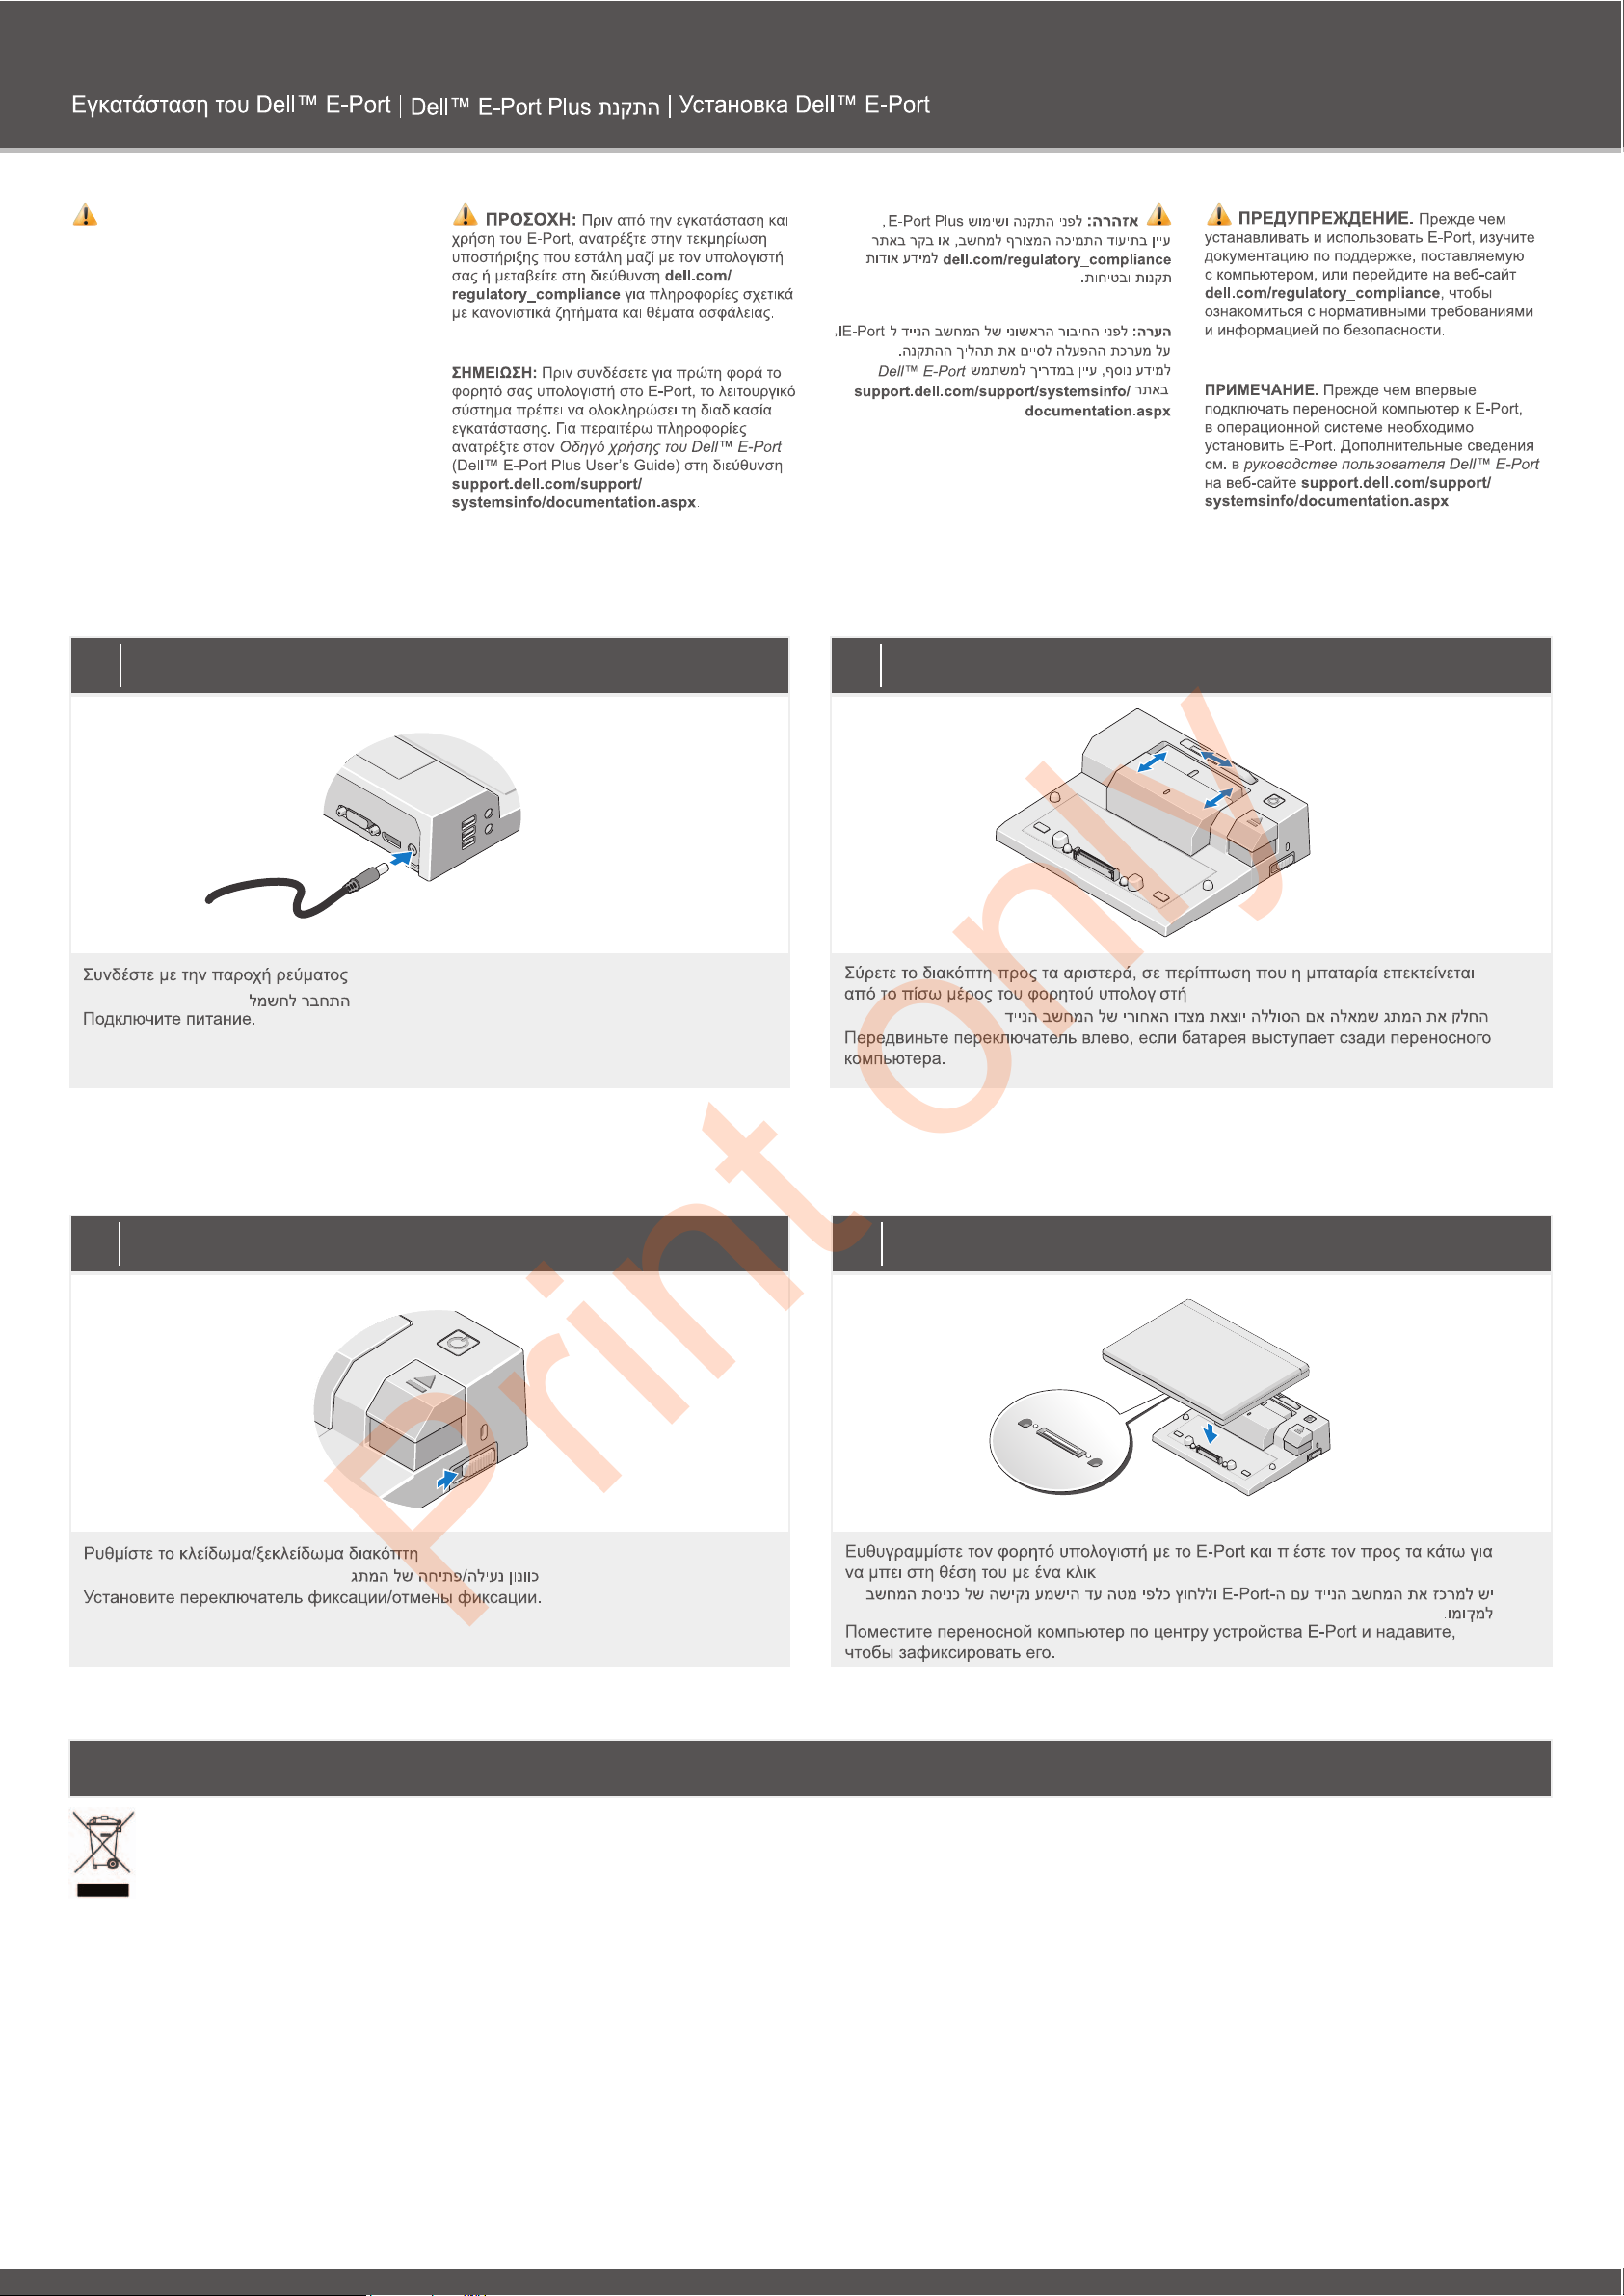
1
Connect power
2
Slide switch left if battery extends from back of laptop
Misc. Information
4
Center laptop with E-Port and push down to click into place
3
Adjust lock/unlock switch
WWaassttee EElleeccttrriiccaall aanndd EElleeccttrroonniicc EEqquuiippmmeenntt ((WWEEEEEE)) DDiirreeccttiivvee
In the European Union, this label indicates that this product
should not be disposed of with household waste. It should be
deposited at an appropriate facility to enable recovery and
recycling. For information on how to recycle this product
responsibly in your country, please visit:
www.euro.dell.com/recycling.
CAUTION: Before you set up and use your
E-Port, see the support documentation that shipped
with your computer or go to
ddeellll..ccoomm//rreegguullaattoorryy__ccoommpplliiaannccee
for regulatory and
safety information.
NNOOTTEE::
Before you initially connect your laptop to the
E-Port, the operating system must complete its setup
process. For further information see the Dell™ E-Port
User’s Guide on
ssuuppppoorrtt..ddeellll..ccoomm//ssuuppppoorrtt//ssyysstteemmssiinnffoo//
ddooccuummeennttaattiioonn..aassppxx
.
Print only
Page 2
www.dell.com | support.dell.com
Printed in Ireland.
Dell™ E-Port
Quick Setup Guide
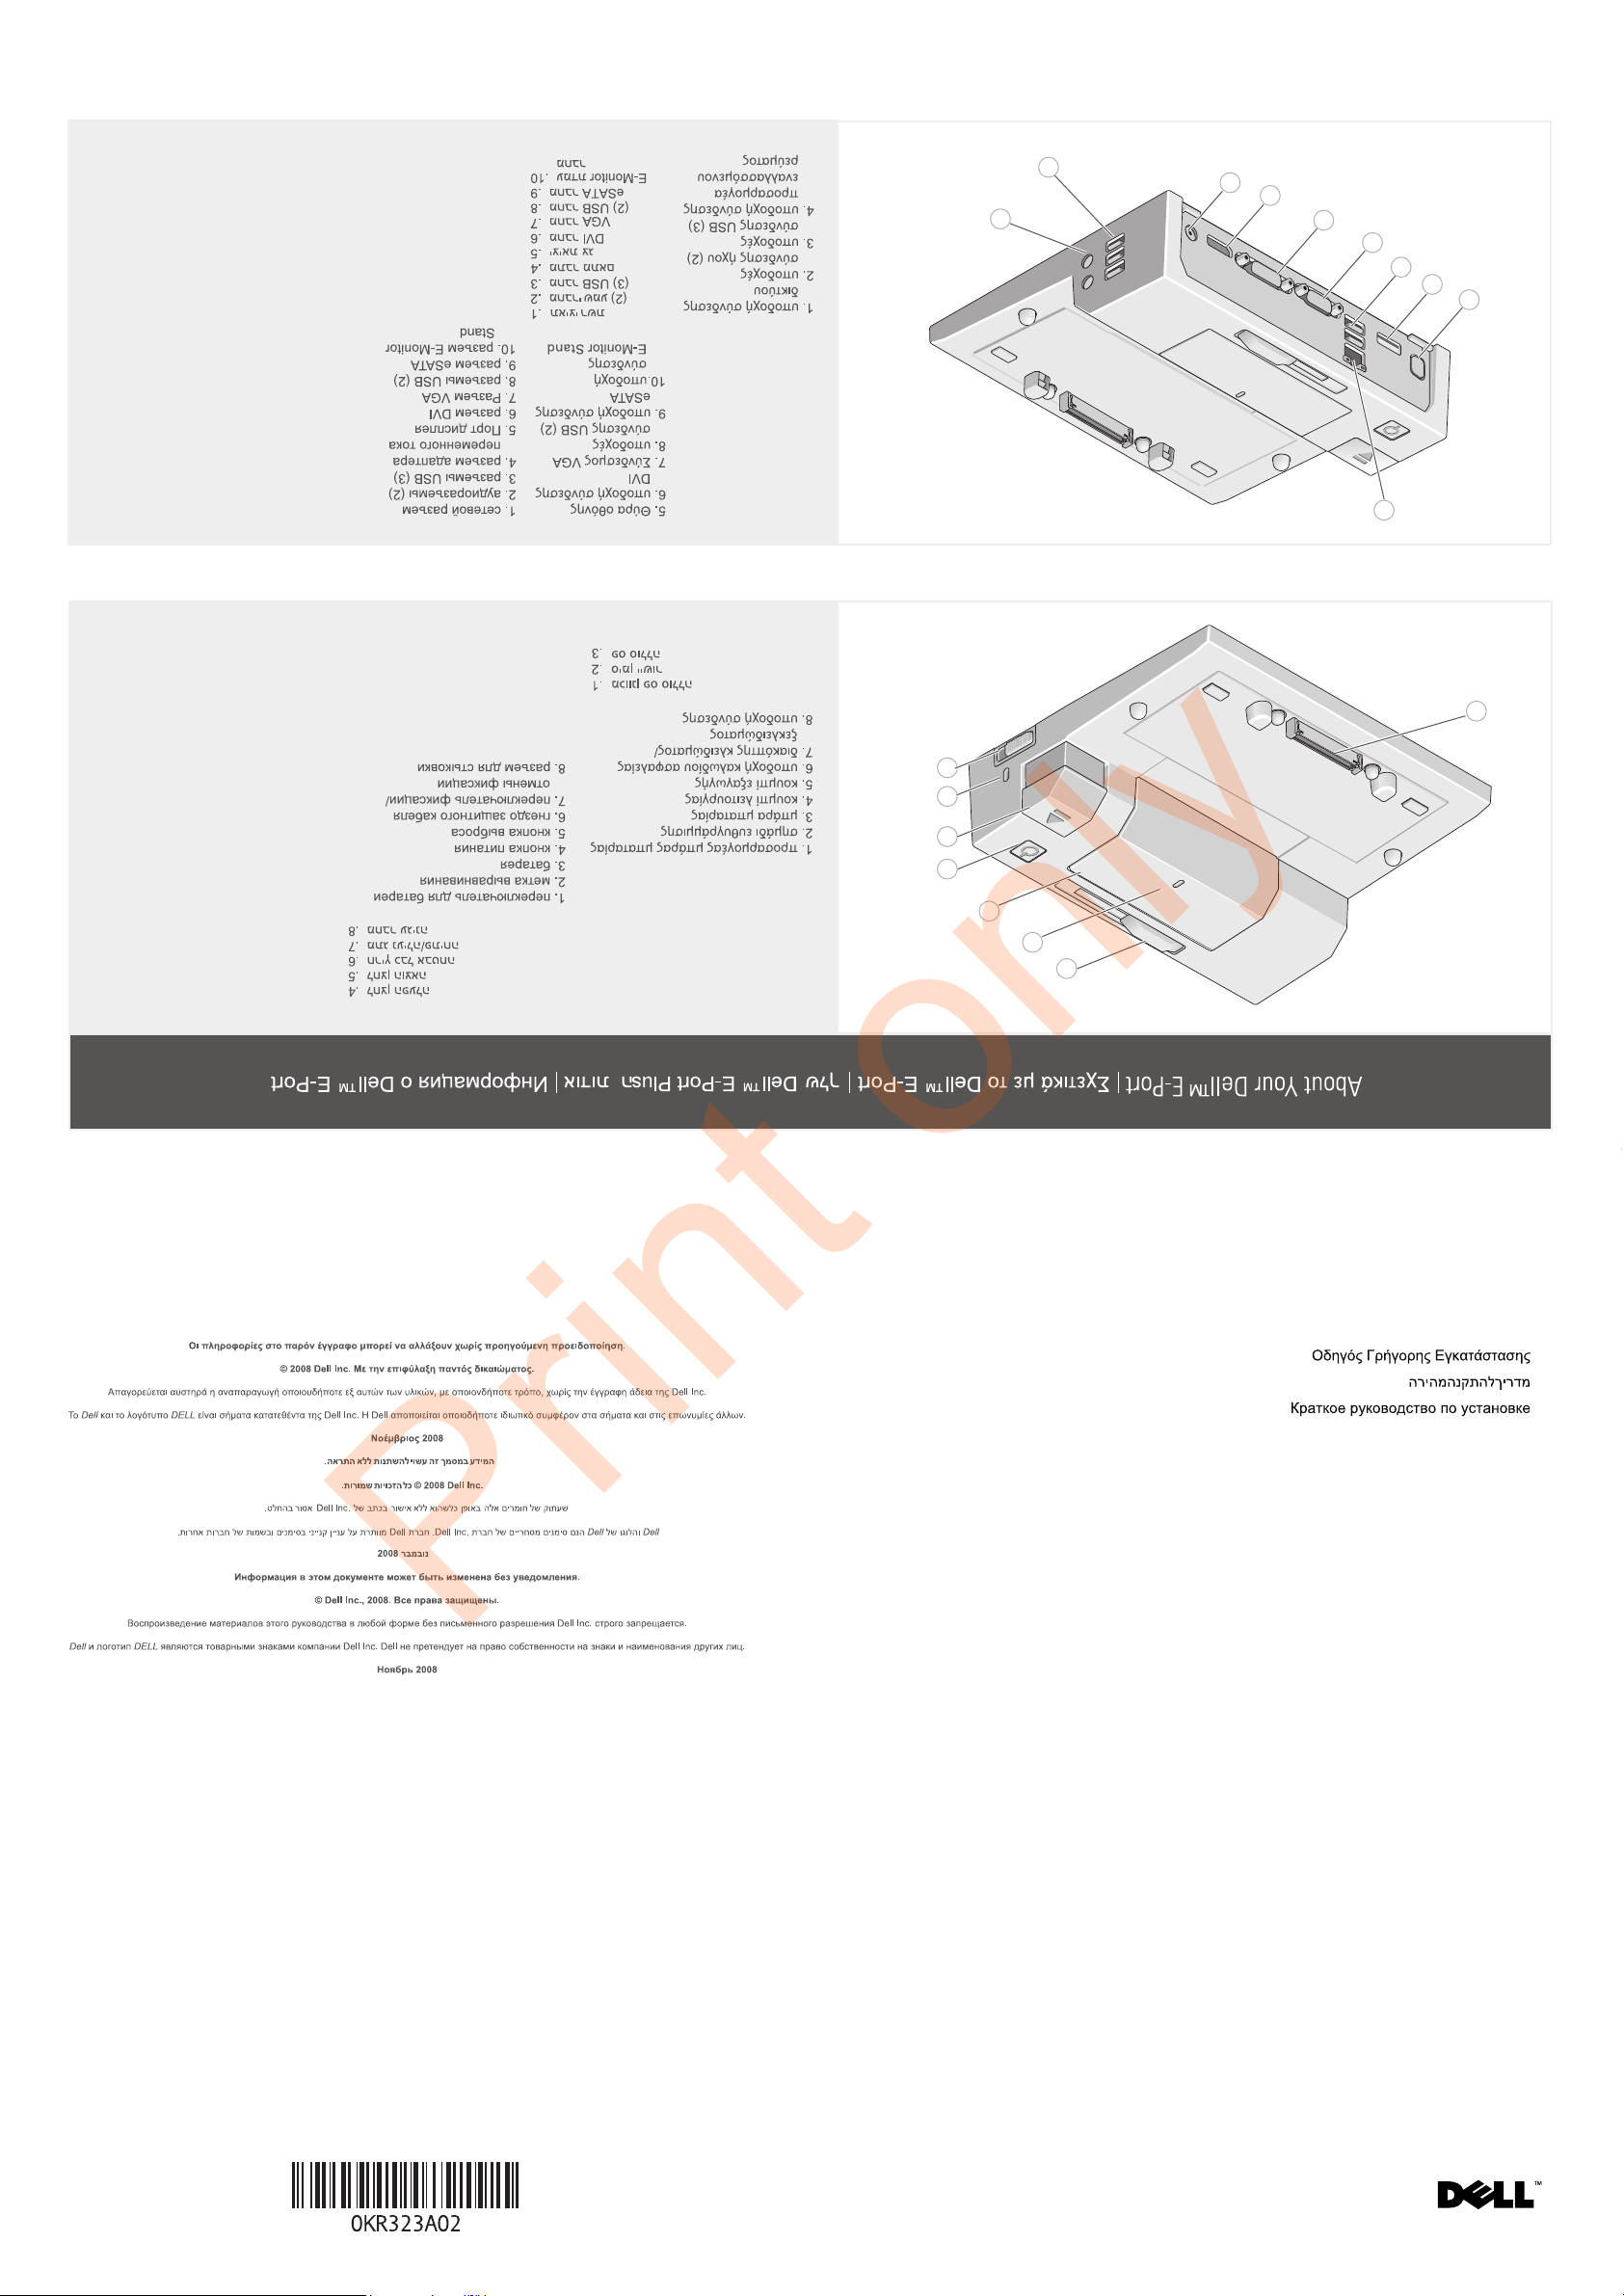
1. battery bar adjuster
2. alignment mark
3. battery bar
4. power button
5. eject button
6. security cable slot
7. lock/unlock switch
8. docking connector
11
22
44
55
66
77
88
1. network connector
2. audio connectors (2)
3. USB connectors (3)
4. AC adapter
connector
5. Display Port
6. DVI connector
7. VGA connector
8. USB connectors (2)
9. eSATA connector
10. E-Monitor Stand
connector
11
22
44
55
66
77
88
99
1100
33
33
Information in this document is subject to change without notice.
© 2008 Dell Inc. All rights reserved.
Reproduction of these materials in any manner whatsoever without the written permission of Dell Inc. is strictly forbidden.
Dell, and the DELL logo, are trademarks of Dell Inc. Dell disclaims proprietary interest in the marks and names of others.
November 2008
Print only
 Loading...