

Page 1
Page 2

NOTE: A NOTE indicates important information that helps you make
better use of your computer.
CAUTION: A CAUTION indicates either potential damage to hardware or
loss of data and tells you how to avoid the problem
WARNING: A WARNING indicates a potential for property damage,
personal injury, or death.
Copyright © 2016 Dell Inc. All rights reserved. This product is protected by U.S. and international copyright
and intellectual property laws. Dell™ and the Dell logo are trademarks of Dell Inc. in the United States
and/or other jurisdictions. All other marks and names mentioned herein may be trademarks of their
respective companies.
2016 - 07
Rev. A00
Page 3

3
What’s in the box .................................................................................................................................... 4
Features ................................................................................................................................................ 5
Setting up your headset .................................................................................................................... 7
System requirements ......................................................................................................................... 7
Downloading the application .......................................................................................................... 7
Connecting your headset to your computer ............................................................................... 9
Viewing your headset settings ...................................................................................................... 11
Configuring the audio settings ...................................................................................................... 12
DTS Headphone:X 7.1 Surround Sound .................................................................................. 12
Equalizer ......................................................................................................................................... 12
Mic auto optimization ................................................................................................................. 13
Configuring illumination settings ................................................................................................. 14
Using your headset .......................................................................................................................... 16
Muting the microphone .................................................................................................................. 16
Adjusting the headset volume ....................................................................................................... 16
Troubleshooting ............................................................................................................................... 17
Specifications .................................................................................................................................... 18
Statutory information ............................................................................................................................ 19
Warranty ............................................................................................................................................. 19
Page 4
4
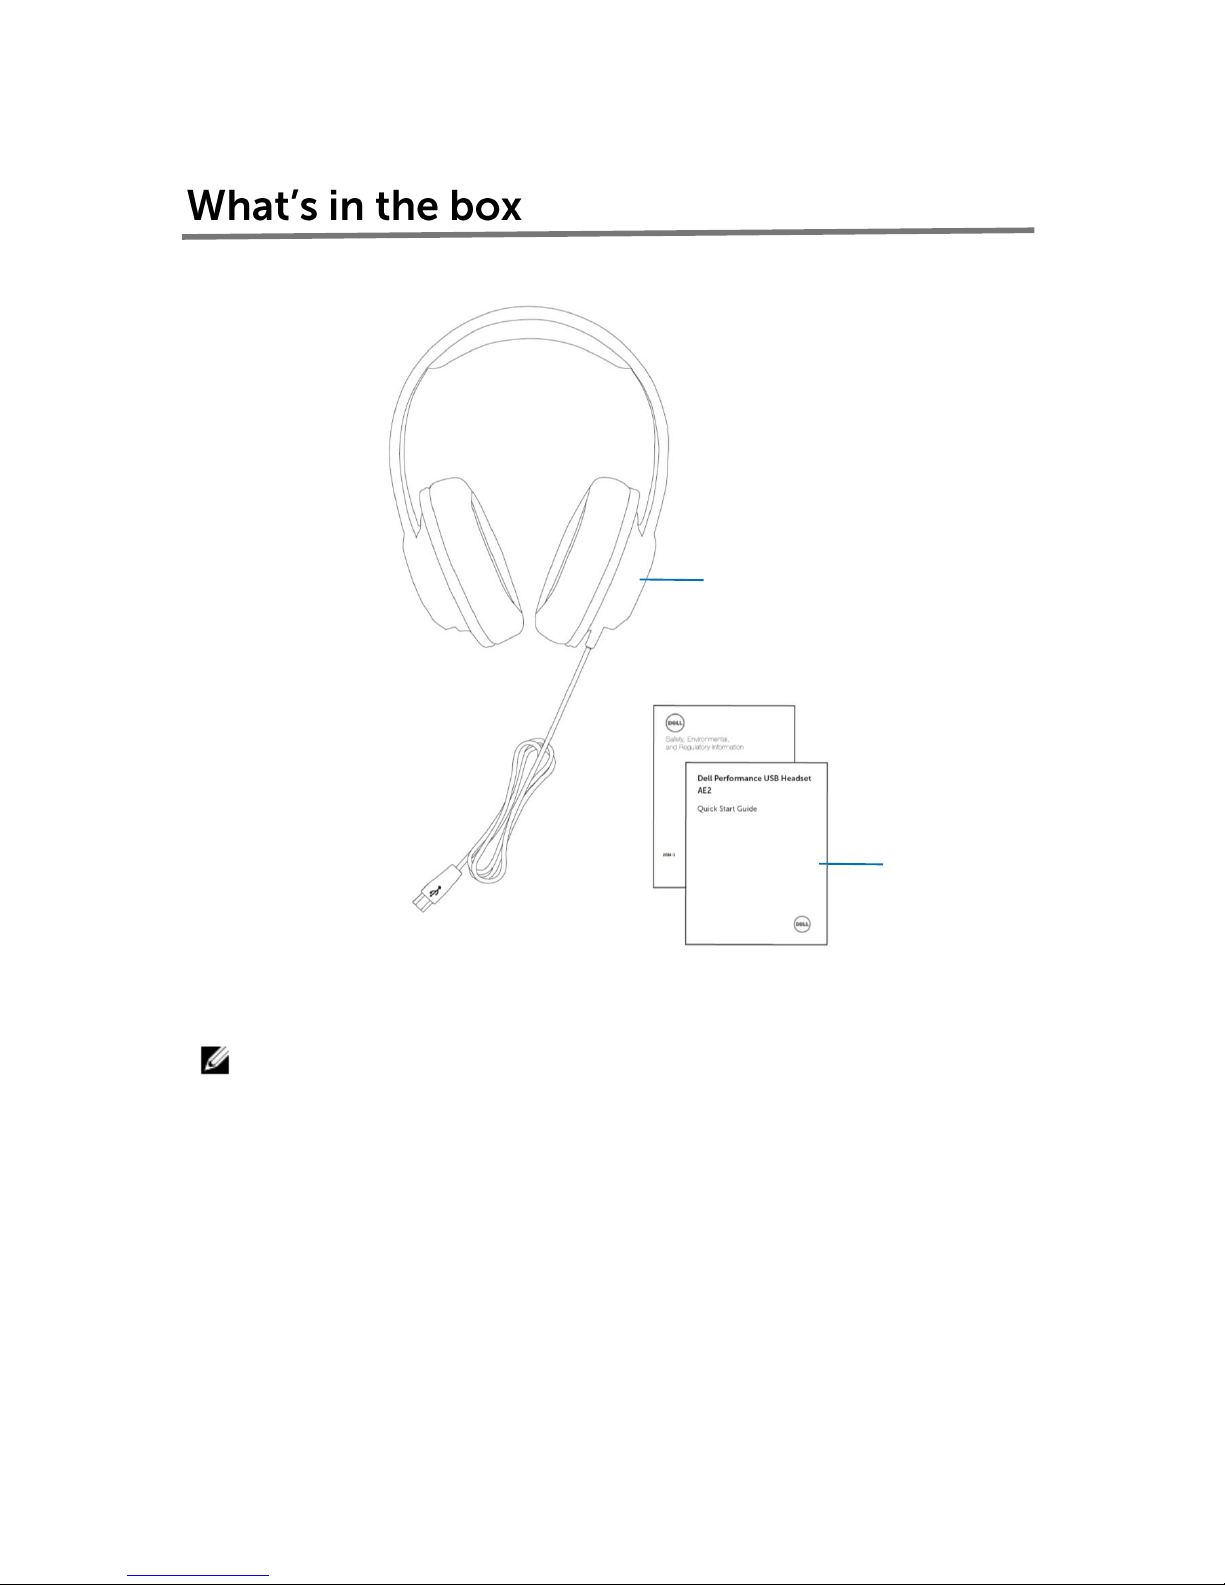
1
Dell Performance USB Headset AE2
2
Documents
NOTE: The documents that shipped with the headset may vary
based on your region.
Page 5
5
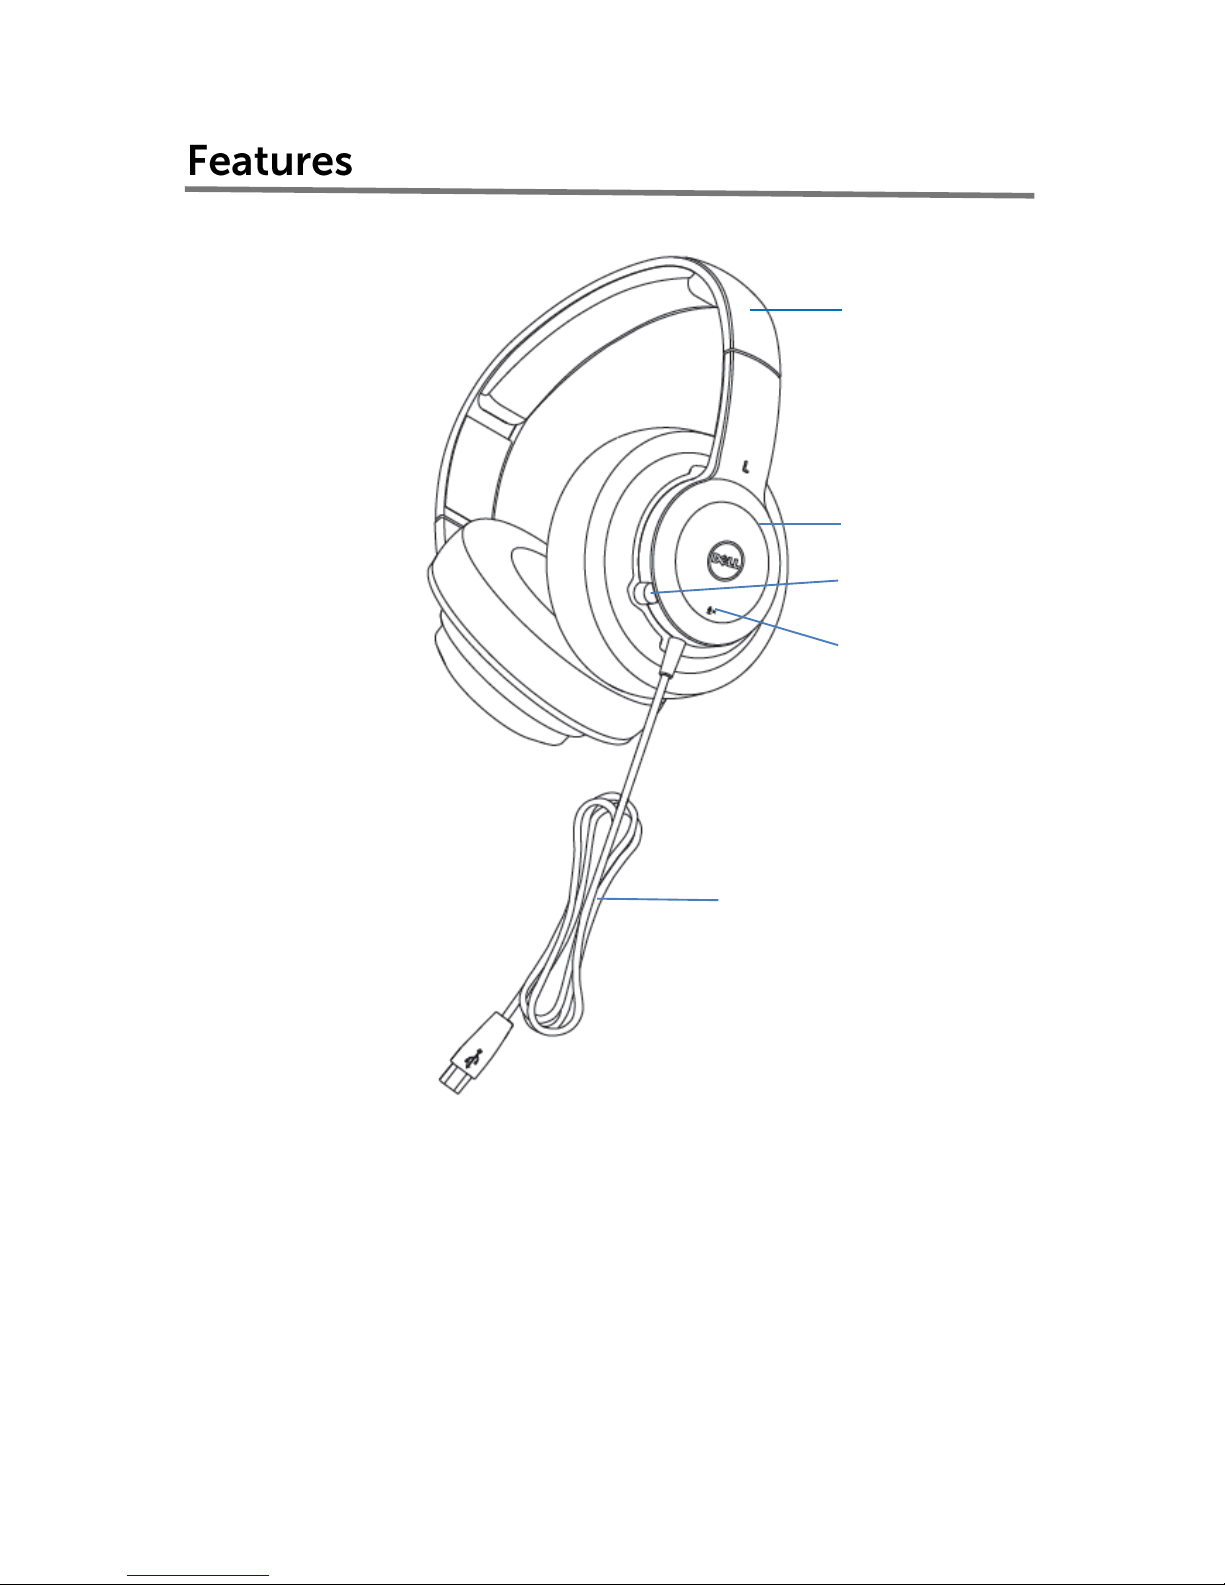
1
Adjustable headband
2
Illumination ring
3
Microphone
4
Mute/unmute button
5
USB cable
Page 6

6
The features of the Dell Performance USB Headset AE2 include:
Comfortability
With its lightweight headband, over-ear design, and breathable soft-leather ear
cups, the headset is designed to be comfortable, even during extended hours of
use.
Customizable prism RGB ear cup illumination
Your headset comes with the SteelSeries Engine 3 application, which you can
download to configure your headset.
This application allows you to choose from 16.8 million colors and various lighting
modes, creating your own style on a game or application basis, and backing those
settings up to the cloud.
Noise isolation
Comes with an over-ear cup design which blocks out the outside noise.
Active soundscape
With high quality components which produce detailed audio and accurate active
soundscape.
Customizable audio
Using the application, you can enhance the sound experience by adjusting a five
band equalizer, enabling equalizer presets, using a custom equalizer setting, and
enabling DTS Headphone:X 7.1 Surround Sound.
Onboard microphone
With a low-profile microphone built into the left ear cup, a mute button located
on the left outer ear cup, and the Mic Auto-Optimization setting enabled in the
application, you will be ready for crisp voice communication that accounts for
your background noise and your voice volume.
Page 7
7
One USB port
Microsoft Windows 7/Microsoft Windows 8/Microsoft Windows 10
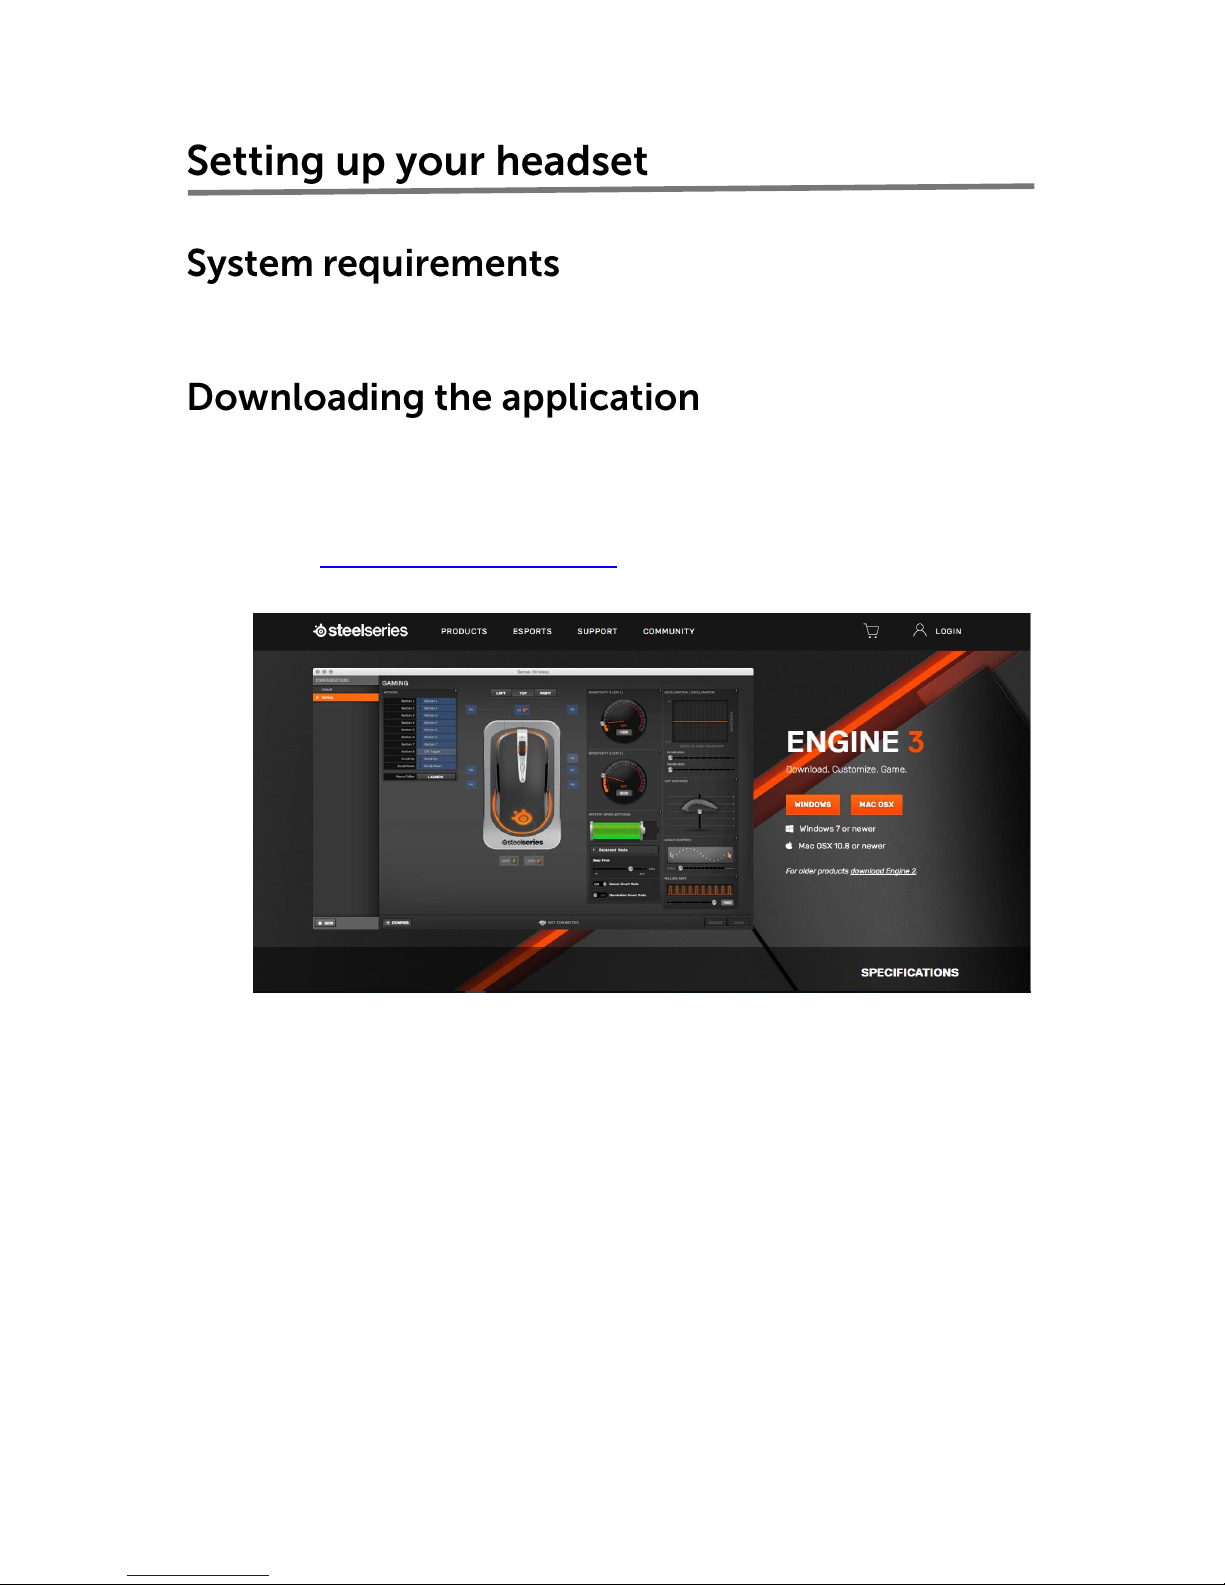
To configure settings on your headset, the Engine 3 application is available for
download.
1. Turn on your computer.
2. Go to www.steelseries.com/engine.
3. Click WINDOWS to download the application.
4. After the download is complete, navigate to the folder where you saved the
setup file.
5. Double-click the setup file and follow the instructions on the screen to
install the application.
Page 8
8
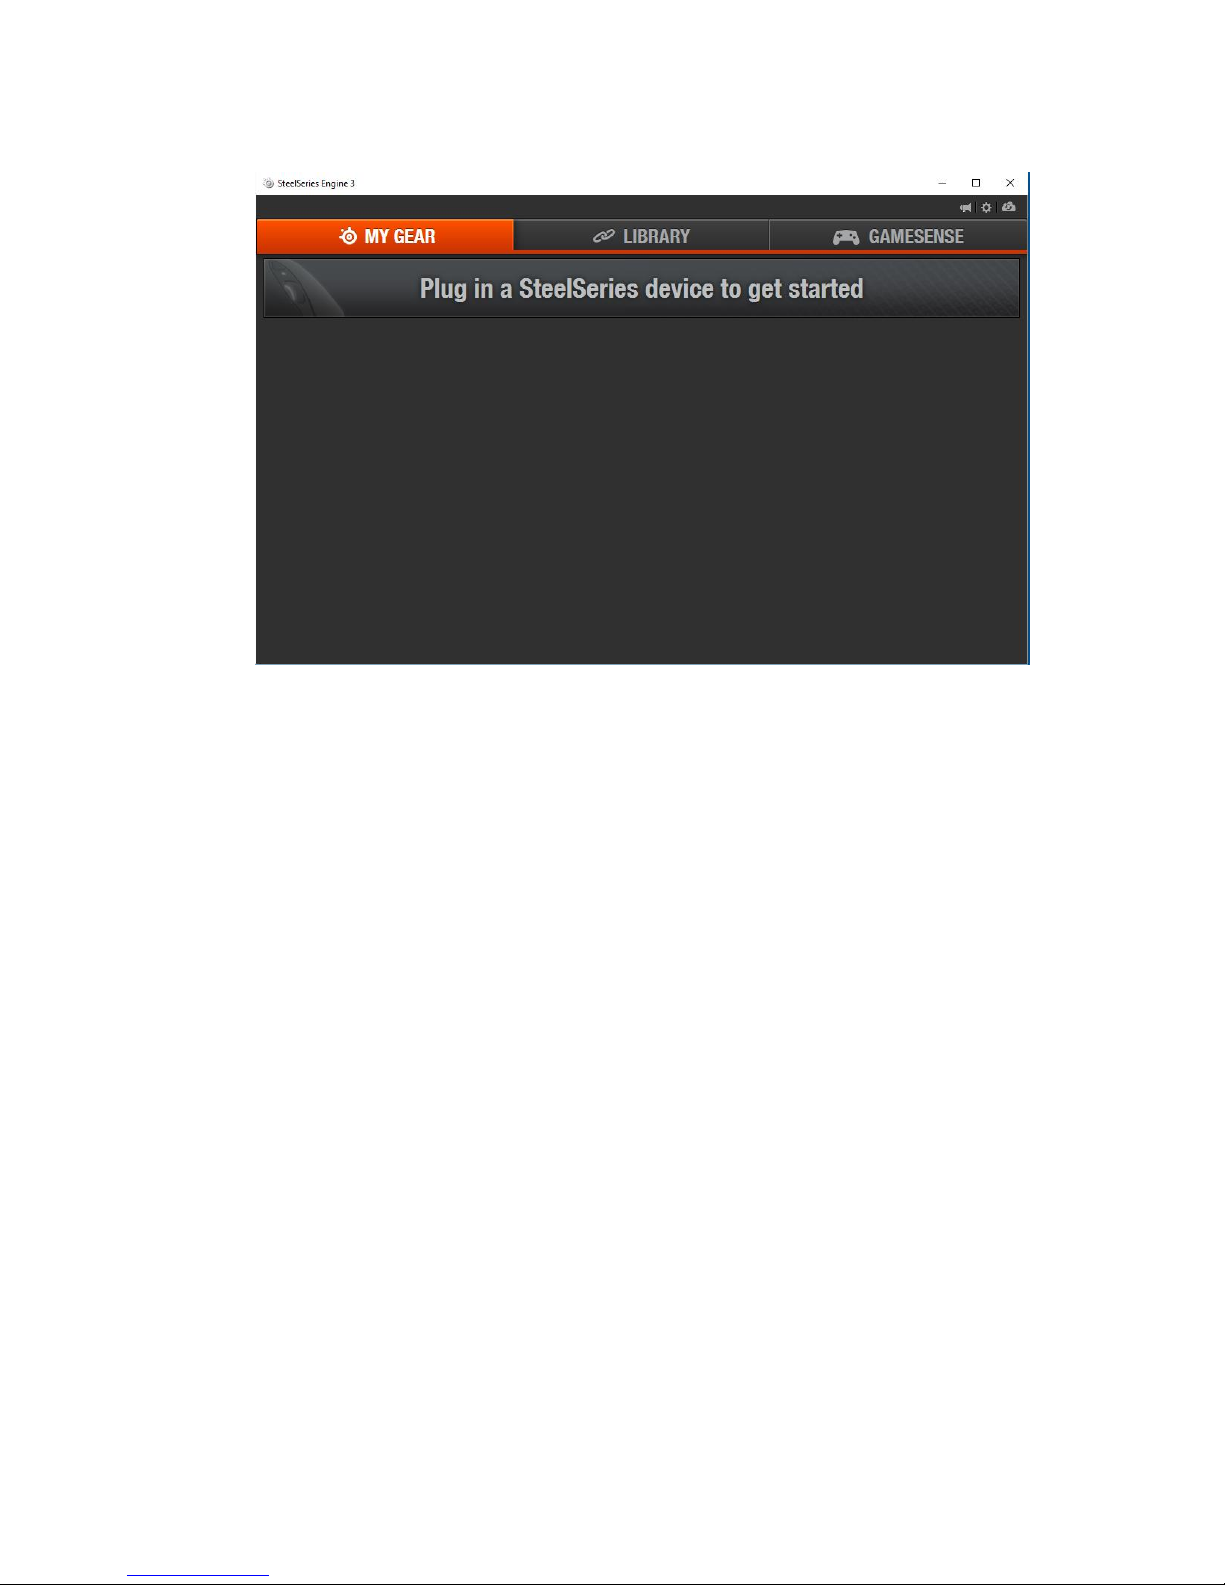
6. Once the installation is completed, plug in your headset.
Page 9
9
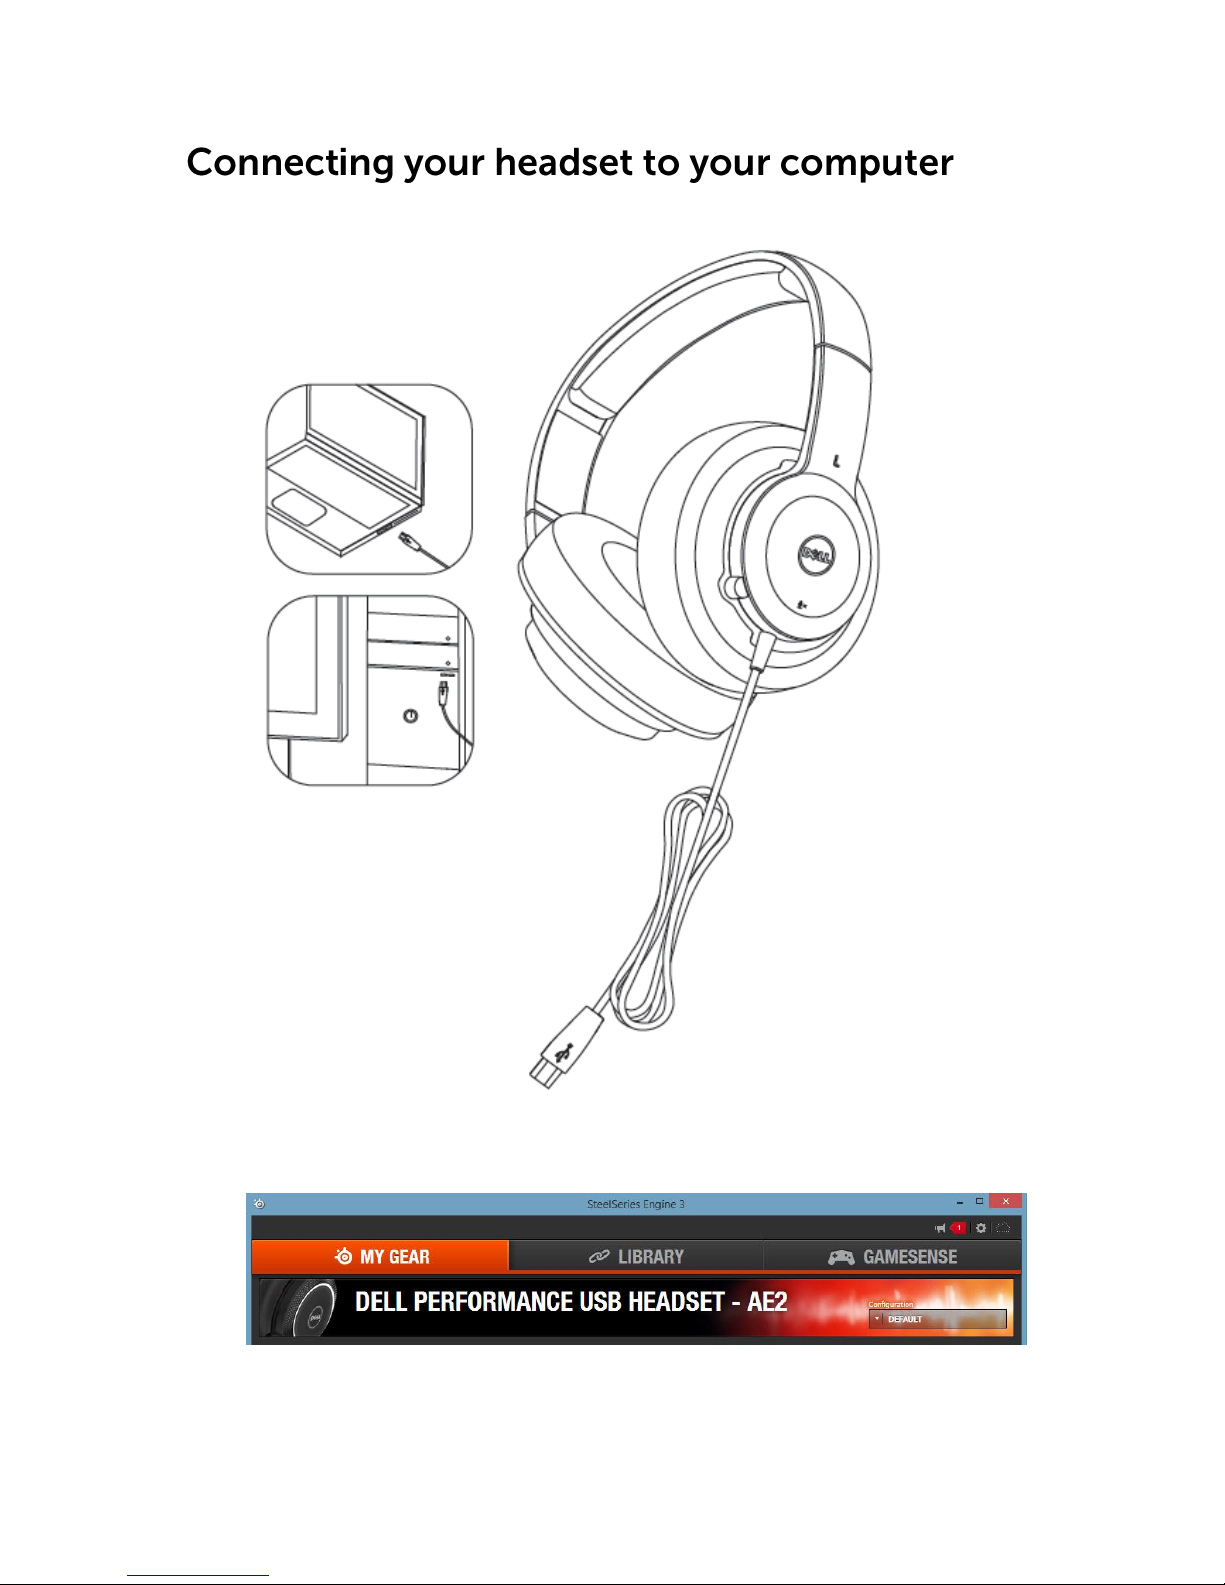
1. Plug the USB cable of your headset to a USB port on your computer.
2. The Dell Performance USB Headset – AE2 screen is displayed. You can
begin to use your device.
Page 10

10
NOTE: You can use your headset even without installing the
application. Install the application to customize your settings or to
use the DTS Headphone:X 7.1 Surround Sound feature.
Page 11
11
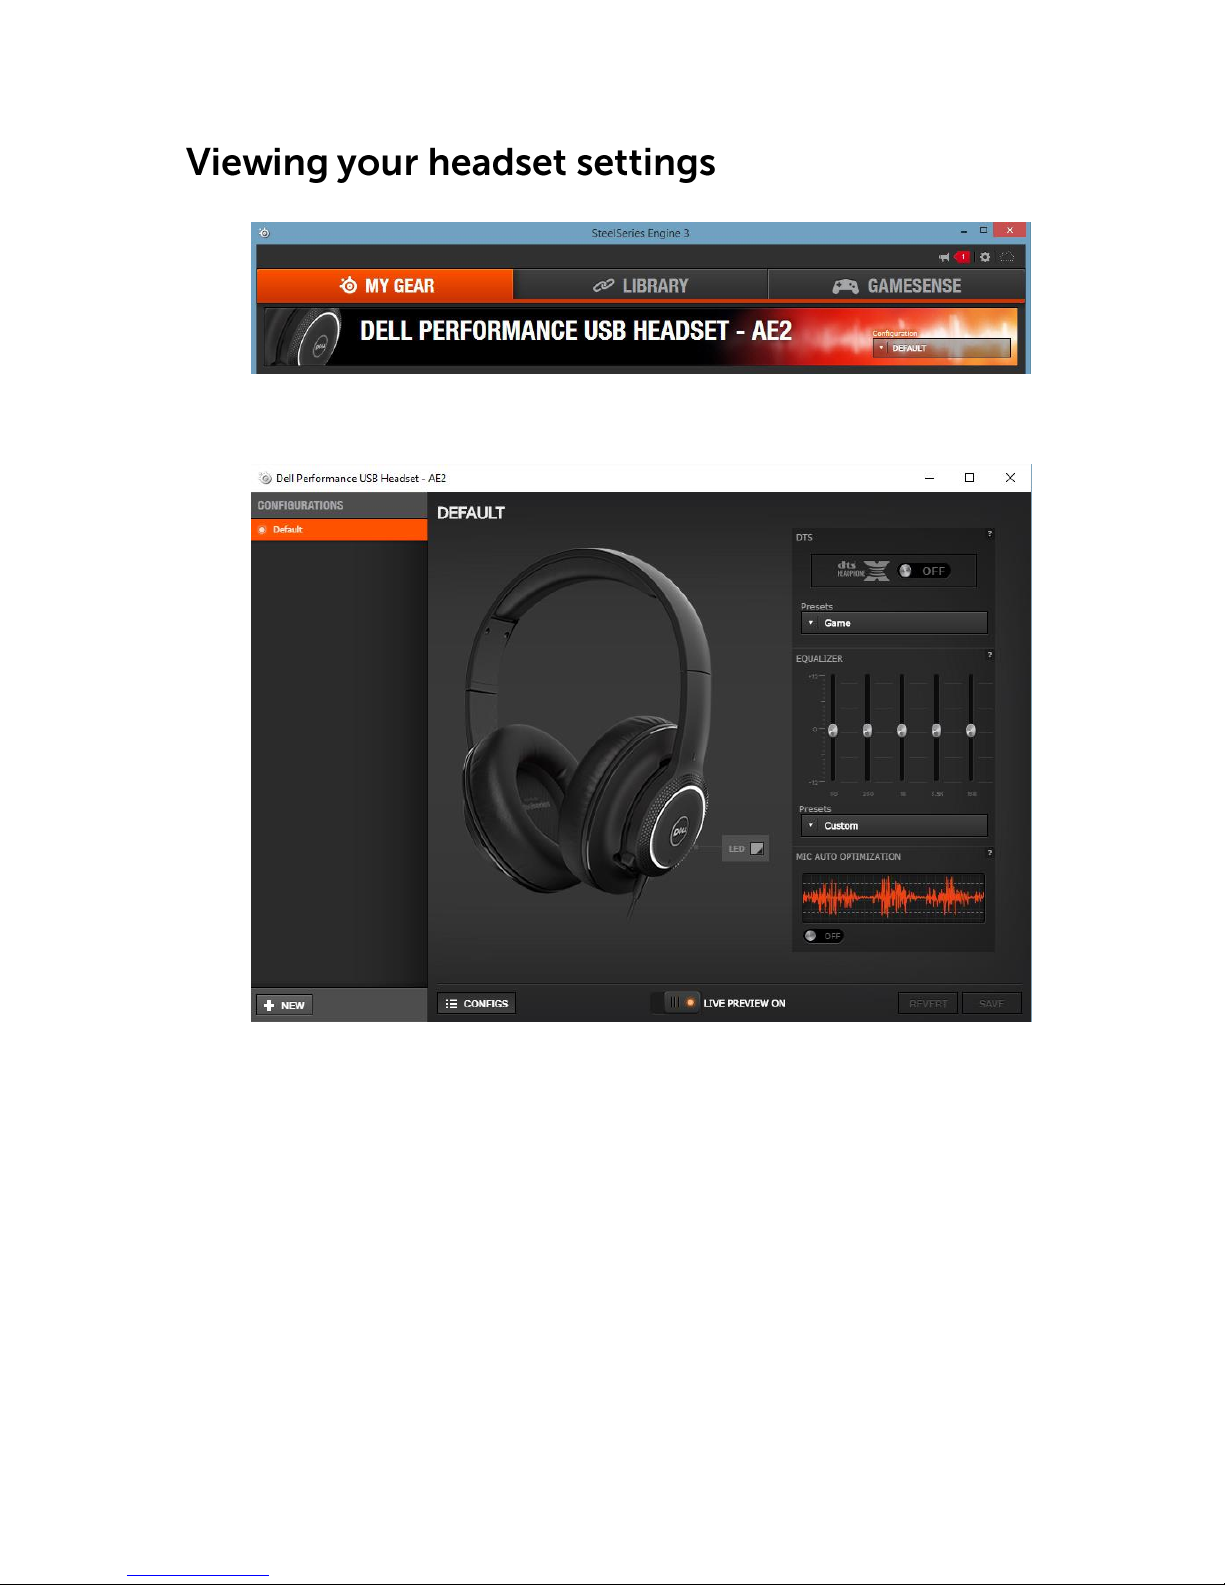
1. Click DELL PERFORMANCE USB HEADSET – AE2.
2. The device configuration screen is displayed.
Page 12
12
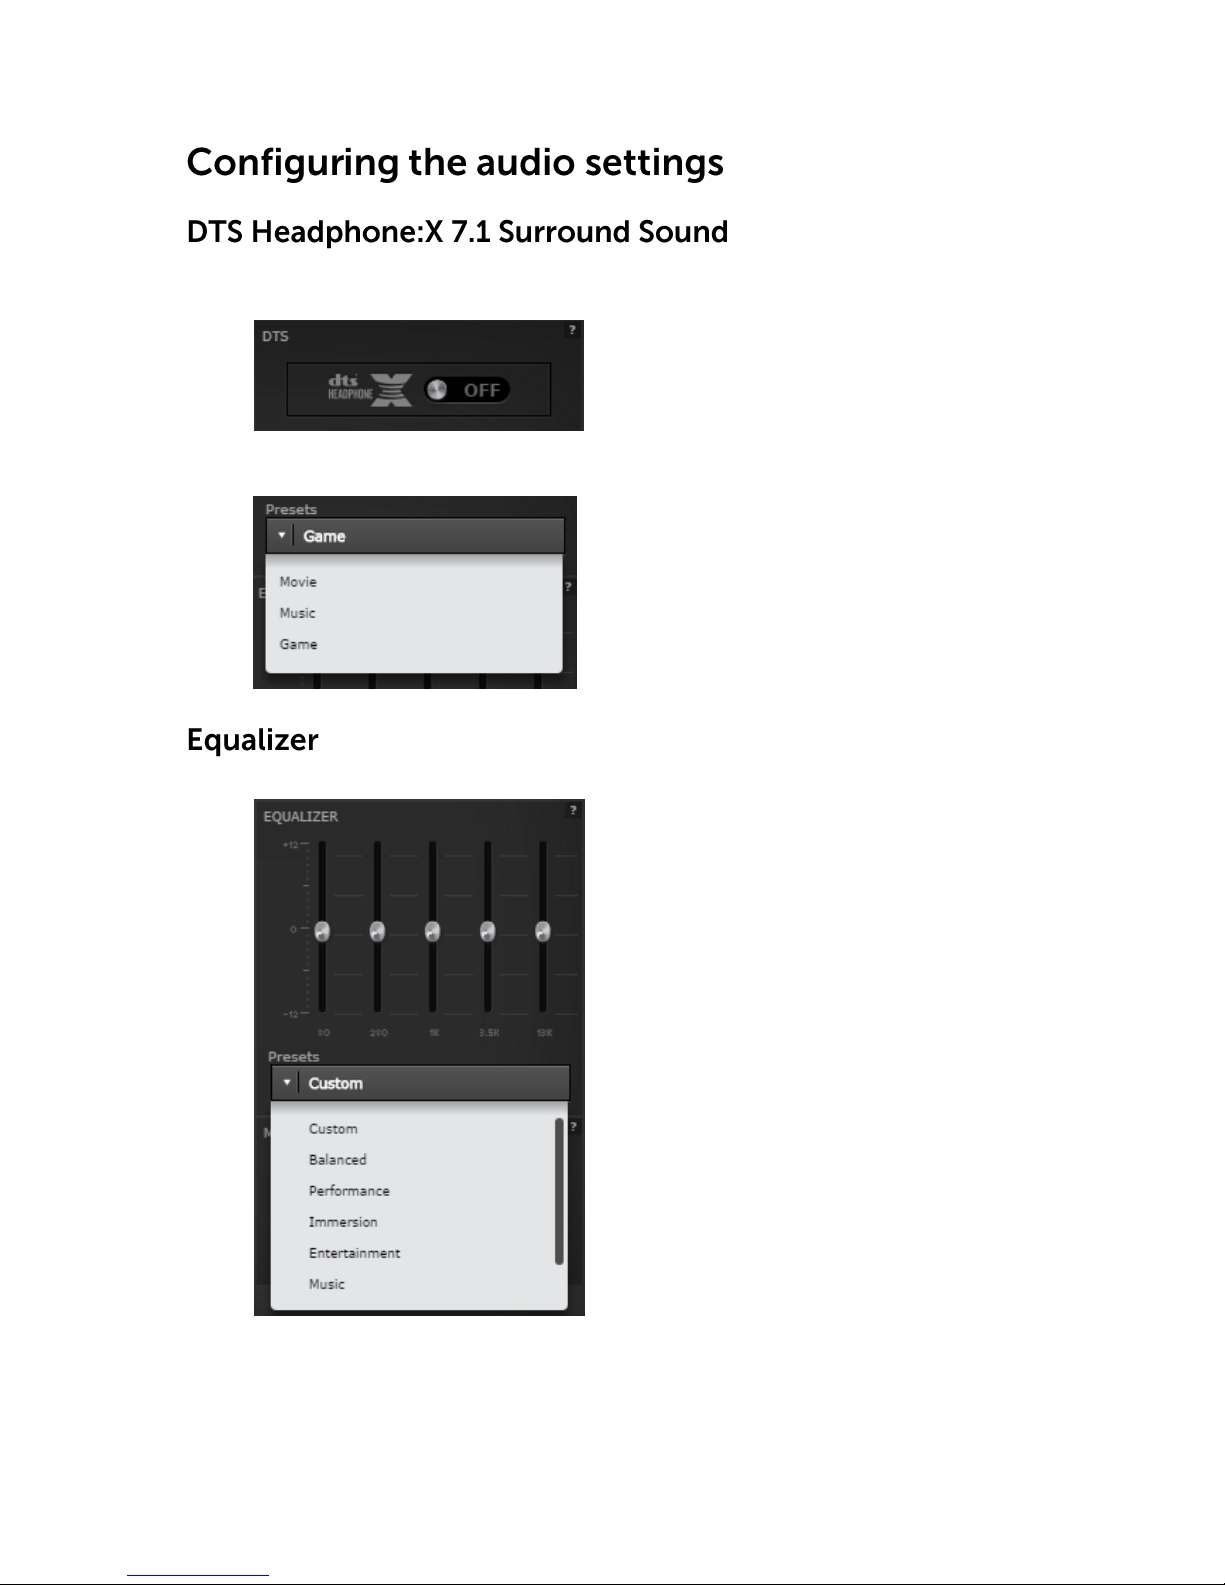
1. To turn on DTS Headphone:X 7.1 Surround Sound support, click OFF. This
will set the button to ON.
2. Under Presets, select from the following options.
1. Under Presets, select from the following options.
2. To customize the equalizer, under Presets, select Custom from the drop-
down list.
3. Adjust the five band equalizer to your preferred settings.
Page 13
13
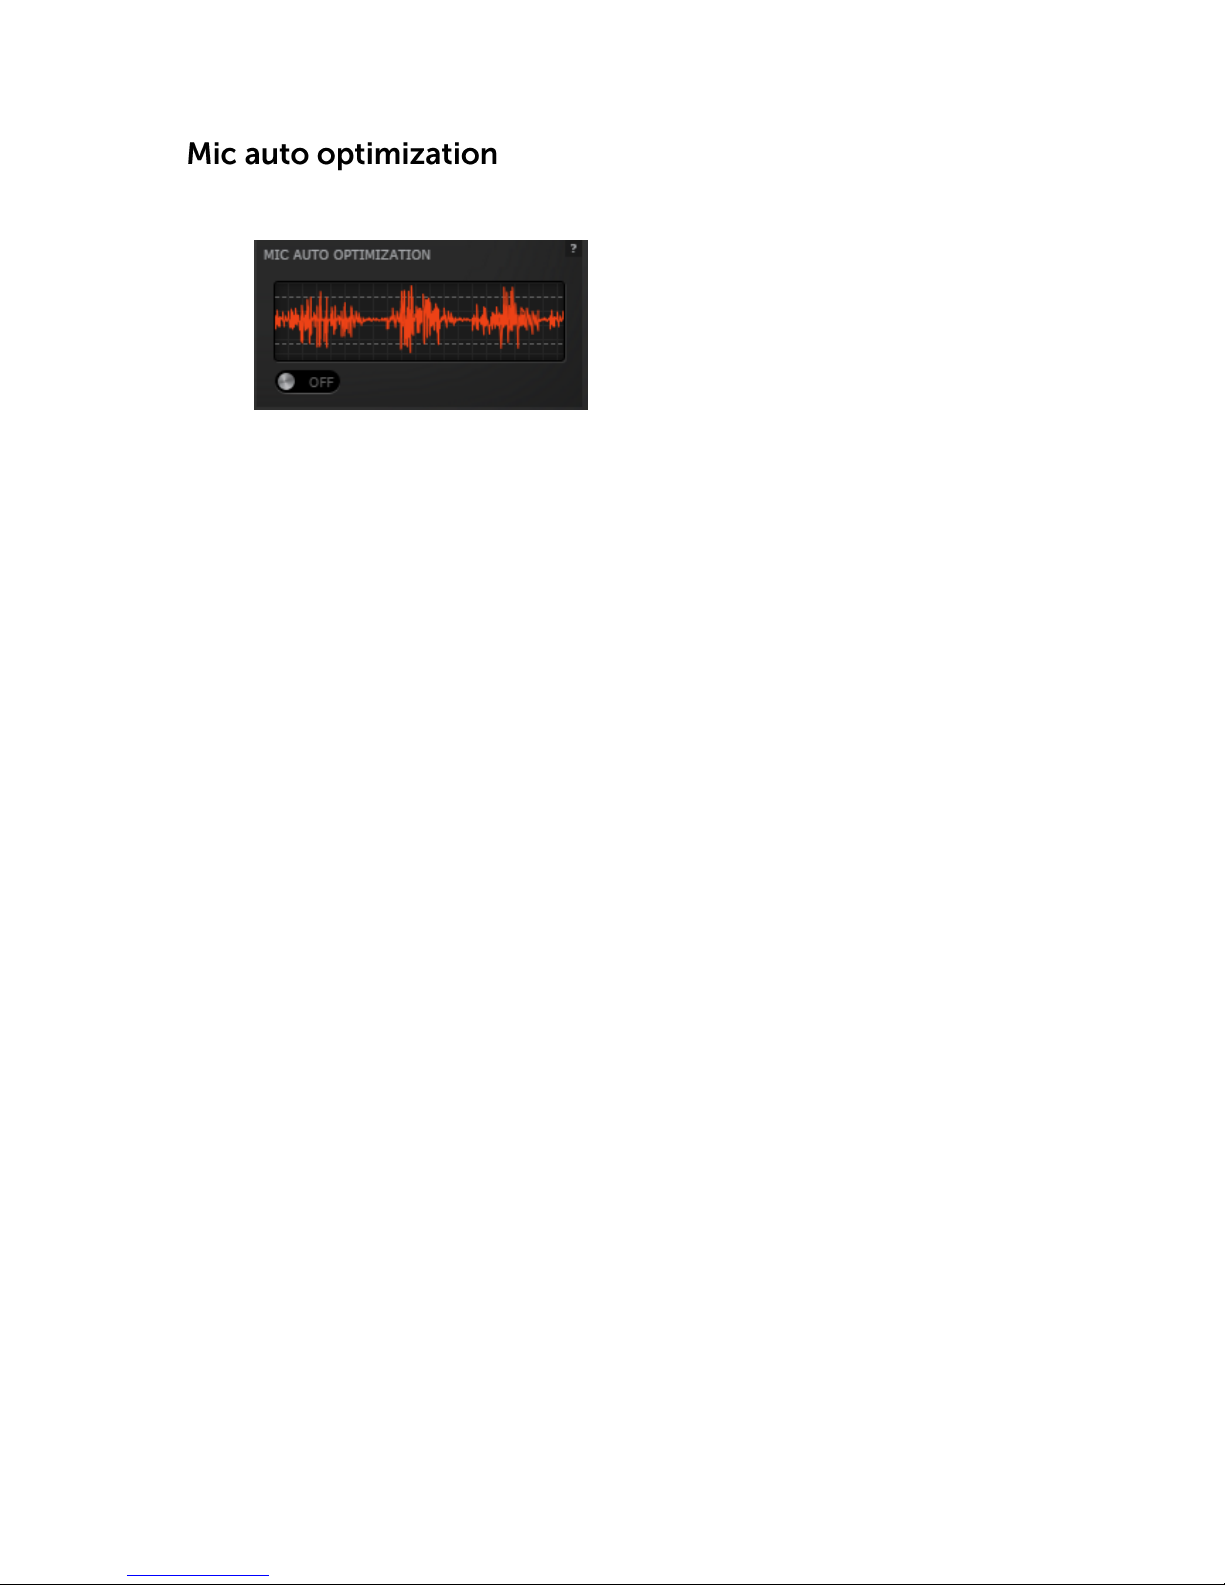
1. To turn on MIC AUTO OPTIMIZATION, click OFF. This will set the button to
ON.
Page 14
14
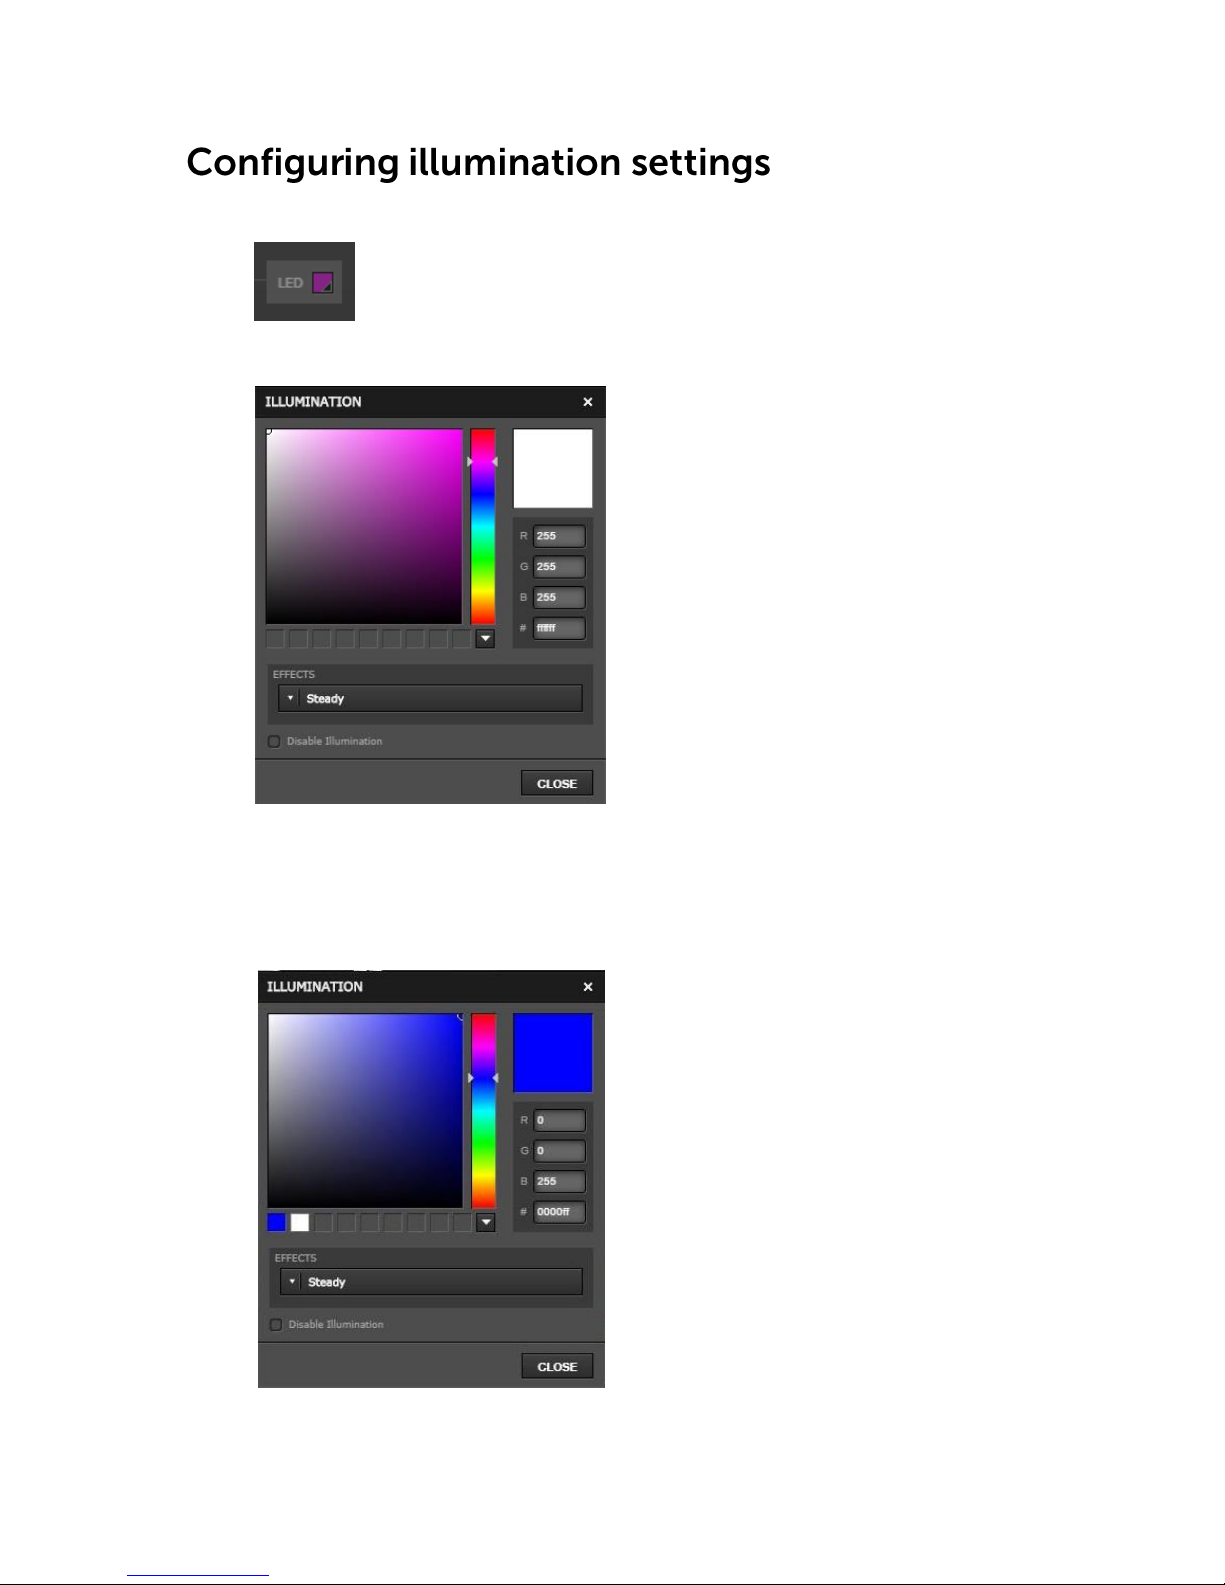
1. To change the headset illumination settings, click the LED icon.
2. The ILLUMINATION window is displayed.
3. Drag the slider to change the color palette.
4. Click on the palette to select a color.
You can also change the color by entering an RGB LED value in decimal or
hexadecimal on the right side of the Illumination window.
Page 15
15
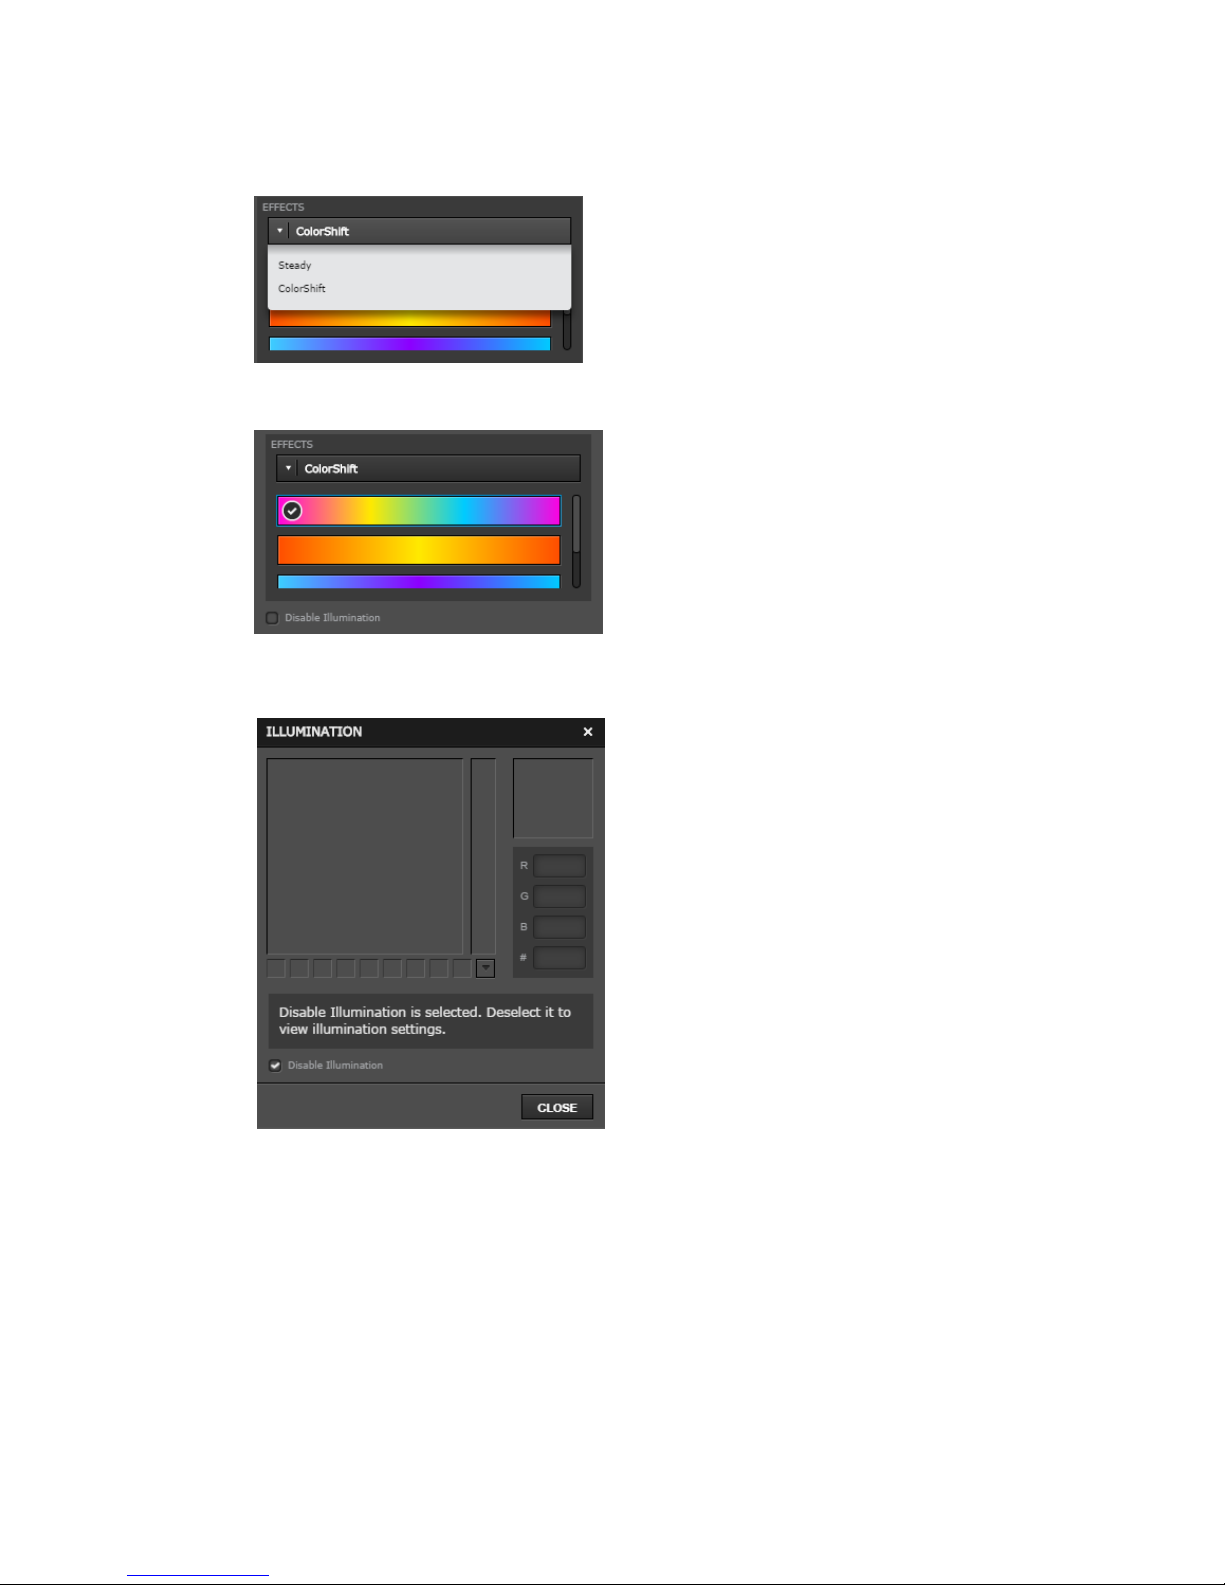
5. To change the headset illumination mode, under Effects, select from the
following options.
If you select ColorShift mode, you can select from the following options.
6. To disable Illumination, click the Disable Illumination checkbox.
Page 16
16
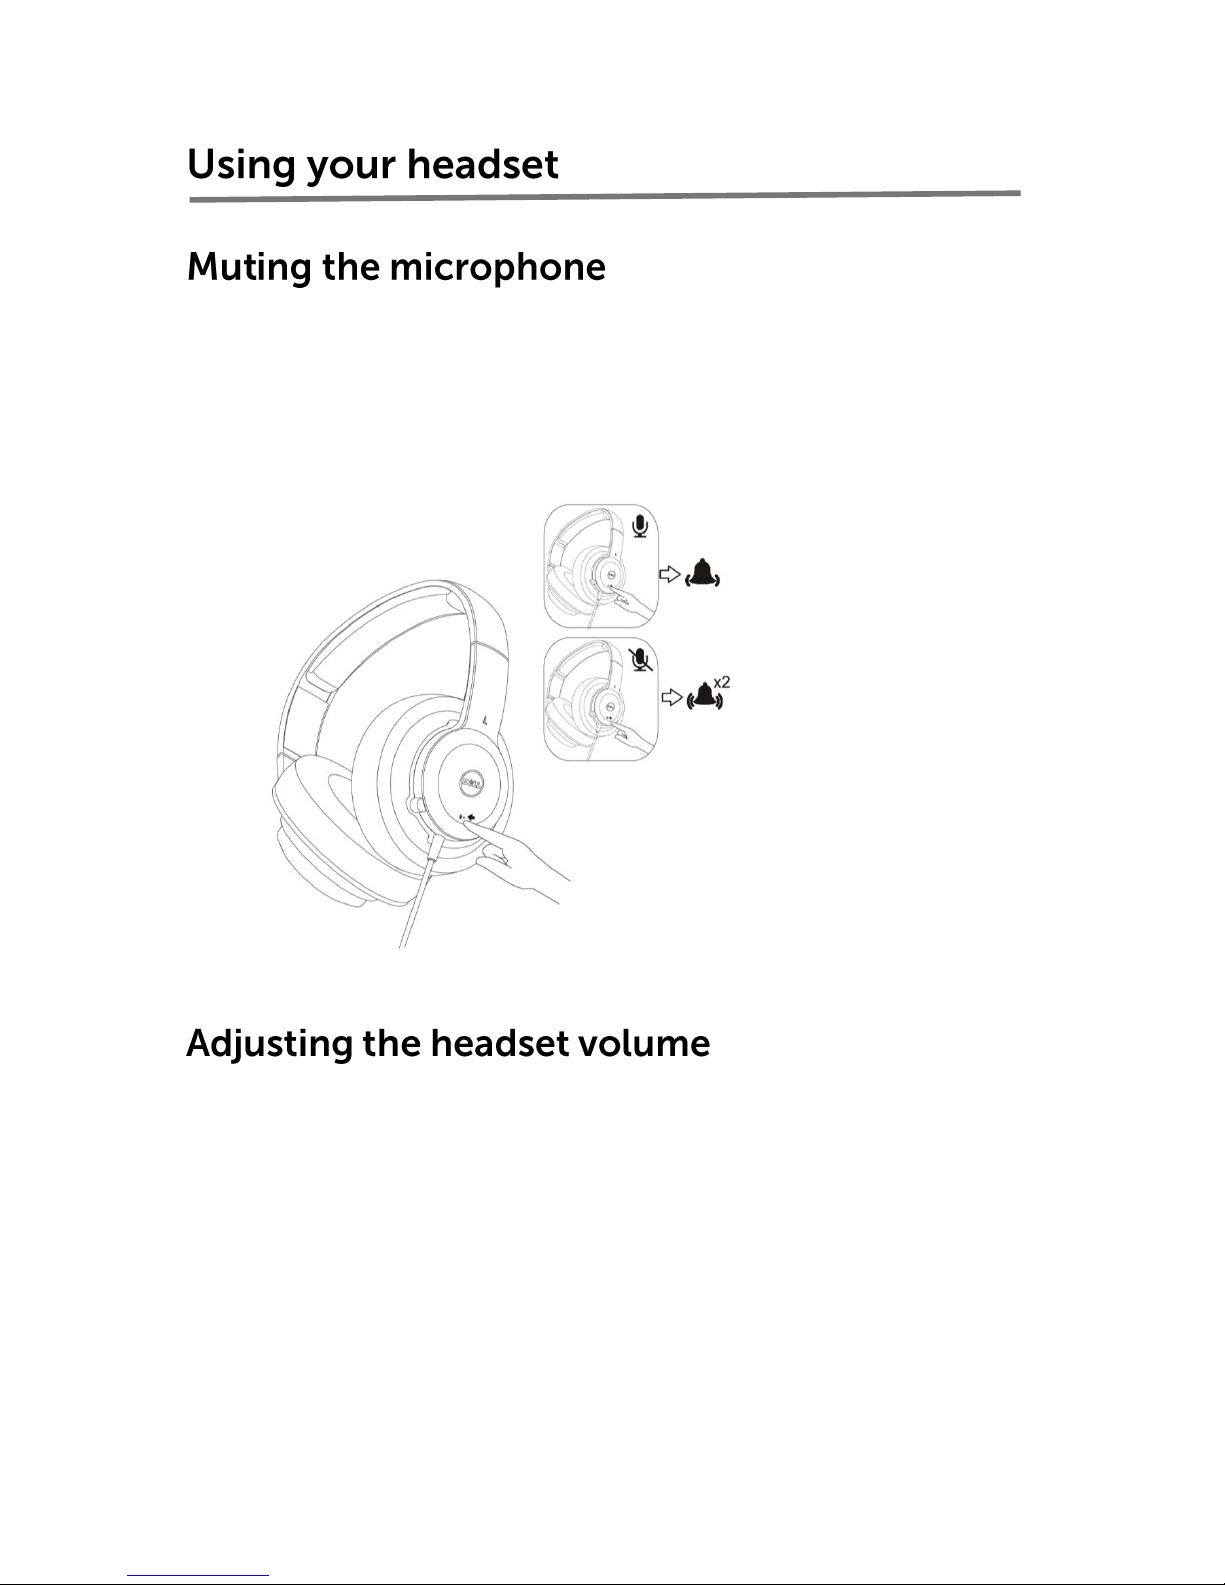
1. While in a Voice-over Internet Protocol (VoIP) call, press the mute button
on the headset to mute the microphone. You will hear two audible tones to
indicate that the microphone is on mute.
2. To unmute the microphone, press the mute button again. You will hear a
single long audible tone to indicate that the microphone have been
enabled.
To adjust the volume of your headset, use the speaker adjustment setting on your
computer, the volume control within the application software that you are using,
or both.
Page 17

17
Headset volume is
too low
Master
speaker
volume or
application
volume is set
too low
1. After plugging in the headset, adjust
the speaker volume using Control
Panel -> Sounds in your computer.
2.
Adjust the speaker volume in the
application you are using to play
music or make VoIP calls.
Headset
microphone
volume is too low
Master
microphone
volume or
application
volume is set
too low
1. After plugging in the headset, adjust
the microphone volume using
Control Panel -> Sounds in your
computer.
2. Adjust the microphone volume in
the application you are using to
make VoIP calls.
No audio is heard
through the
headset speakers
Headset not
set as the
default
speaker on
the computer
1. Unplug and then plug in the headset
USB cable into your computer.
2. Set the headset as the default
speaker using Control Panel ->
Sounds -> Playback Devices in your
computer.
The headset is not
functioning based
on the
configuration
selected
Application is
no longer
running on
the computer
or a different
configuration
is active in the
application
1. Make sure that the application is
running on your computer as
indicated by the SteelSeries icon in
your system tray.
2. Open the application and make sure
that the active configuration for
your headset is set properly.
No sound effect
change when
switching the
Equalizer or
surround sound
function in the
application
Application is
not properly
installed
1. Reinstall the application.
Page 18

18
General
Model number
AE2
Connection type
USB
Supported operating
systems
Microsoft Windows 7
Microsoft Windows 8
Microsoft Windows 10
Electrical
Operating voltage
5V
Audio Input
USB Digital Audio Input
Physical Characteristics
Height
192 mm (± 0.5mm)
Length
100 mm (± 0.5mm)
Width
161 mm (± 0.5mm)
Weight
278g (±10g)
Environmental
Operating temperature
0°C to 40°C
Storage temperature
-40°C to 65°C
Operating humidity
90% maximum relative humidity,
non condensing
Storage humidity
90% maximum relative humidity,
non condensing
Page 19
19
Dell-branded products carry a 1-year limited hardware warranty. If purchased
together with a Dell system, it will follow the system warranty.
This purchase and your use of this product are subject to Dell’s end user
agreement, which you can find at . This document contains a
binding arbitration clause.
Dell-branded products that are sold and used are subject to applicable national
consumer legal rights, the terms of any retailer sale agreement that you have
entered into (which will apply between you and the retailer) and Dell’s end user
contract terms.
Dell may also provide an additional hardware warranty—full details of the Dell
end user contract and warranty terms can be found by going to Dell.com,
selecting your country from the list at the bottom of the “home” page and then
clicking the “terms and conditions” link for the end user terms or the “support”
link for the warranty terms.
For non-U.S. customers:
Dell-branded products that are sold and used are subject to applicable national
consumer legal rights, the terms of any retailer sale agreement that you have
entered into (which will apply between you and the retailer) and Dell’s warranty
terms. Dell may also provide an additional hardware warranty
—full details of Dell’s warranty terms can be found by going to Dell.com,
selecting your country from the list at the bottom of the “home” page and then
clicking the “terms and conditions” link or the “support” link for the warranty
terms.
 Loading...