

Page 1

1. AC adapter
2. power connector
3. USB ports
4. modem connector
5. network connector
6. audio connectors
7. volume control
8. floppy drive
1. adaptateur de CA
2. connecteur d'alimentation
électrique
3. ports USB
4. connecteur de modem
5. connecteur réseau
6. connecteurs audio
7. bouton de réglage du volume
8. lecteur de disquette
1. AC-Adapter
2. Stromstecker
3. USB-Ports
4. Modem-Anschluss
5. Netzwerkanschluss
6. Audio-Anschlüsse
7. Lautstärkeregler
8. Diskettenlaufwerk
9. display latch
10. power button
11. touch pad
12. touch pad buttons
13. four-directional scroll pad
14. optical drive
15. battery
16. PC Card slot
9. Loquet de verrouillage de
l'écran
10. bouton de mise sous tension
11. tablette tactile
12. boutons de la tablette tactile
13. souris à molette
omnidirectionnelle
14. lecteur optique
15. batterie
16. connecteur de carte PC
9. Display-Verriegelung
10. Netzschalter
11. Touchpad
12. Touchpad-Tasten
13. Scroll-Pad
14. Optisches Laufwerk
15. Batterie
16. Steckplatz für PC-Karte
1
2
6
4
3
7
8
Setting Up Your Computer
Caution:
Before you set up and operate your Dell computer, read
and follow the safety instructions in the Owner's Manual.
See the Owner's Manual for a complete feature list.
Attention :
Avant de configurer et d'utiliser votre ordinateur Dell,
lisez attentivement les instructions de sécurité du manuel
de l'utilisateur. Reportez-vous au manuel de l'utilisateur
pour obtenir une liste complète des fonctions.
Vorsicht:
Bevor Sie Ihren Dell-Computer aufstellen und einrichten,
lesen Sie unbedingt die Sicherheitshinweise im
Benutzerhandbuch. Eine umfassende Liste der Merkmale
finden Sie im Benutzerhandbuch.
9
10
12
14
15
13
11
www.dell.com | support.dell.com
AC Adapter
Adaptateur de CA
AC-Adapter
Modem Option
Option modem
Modem-Option
Network Option
Option réseau
Netzwerk-Option
Power Button
Bouton de mise sous tension
Netzschalter
5
Configuration de votre ordinateur |Einrichtung Ihres Computers
|
16
9T132am0.qxd 6/6/02 3:53 PM Page 1
Page 2
1
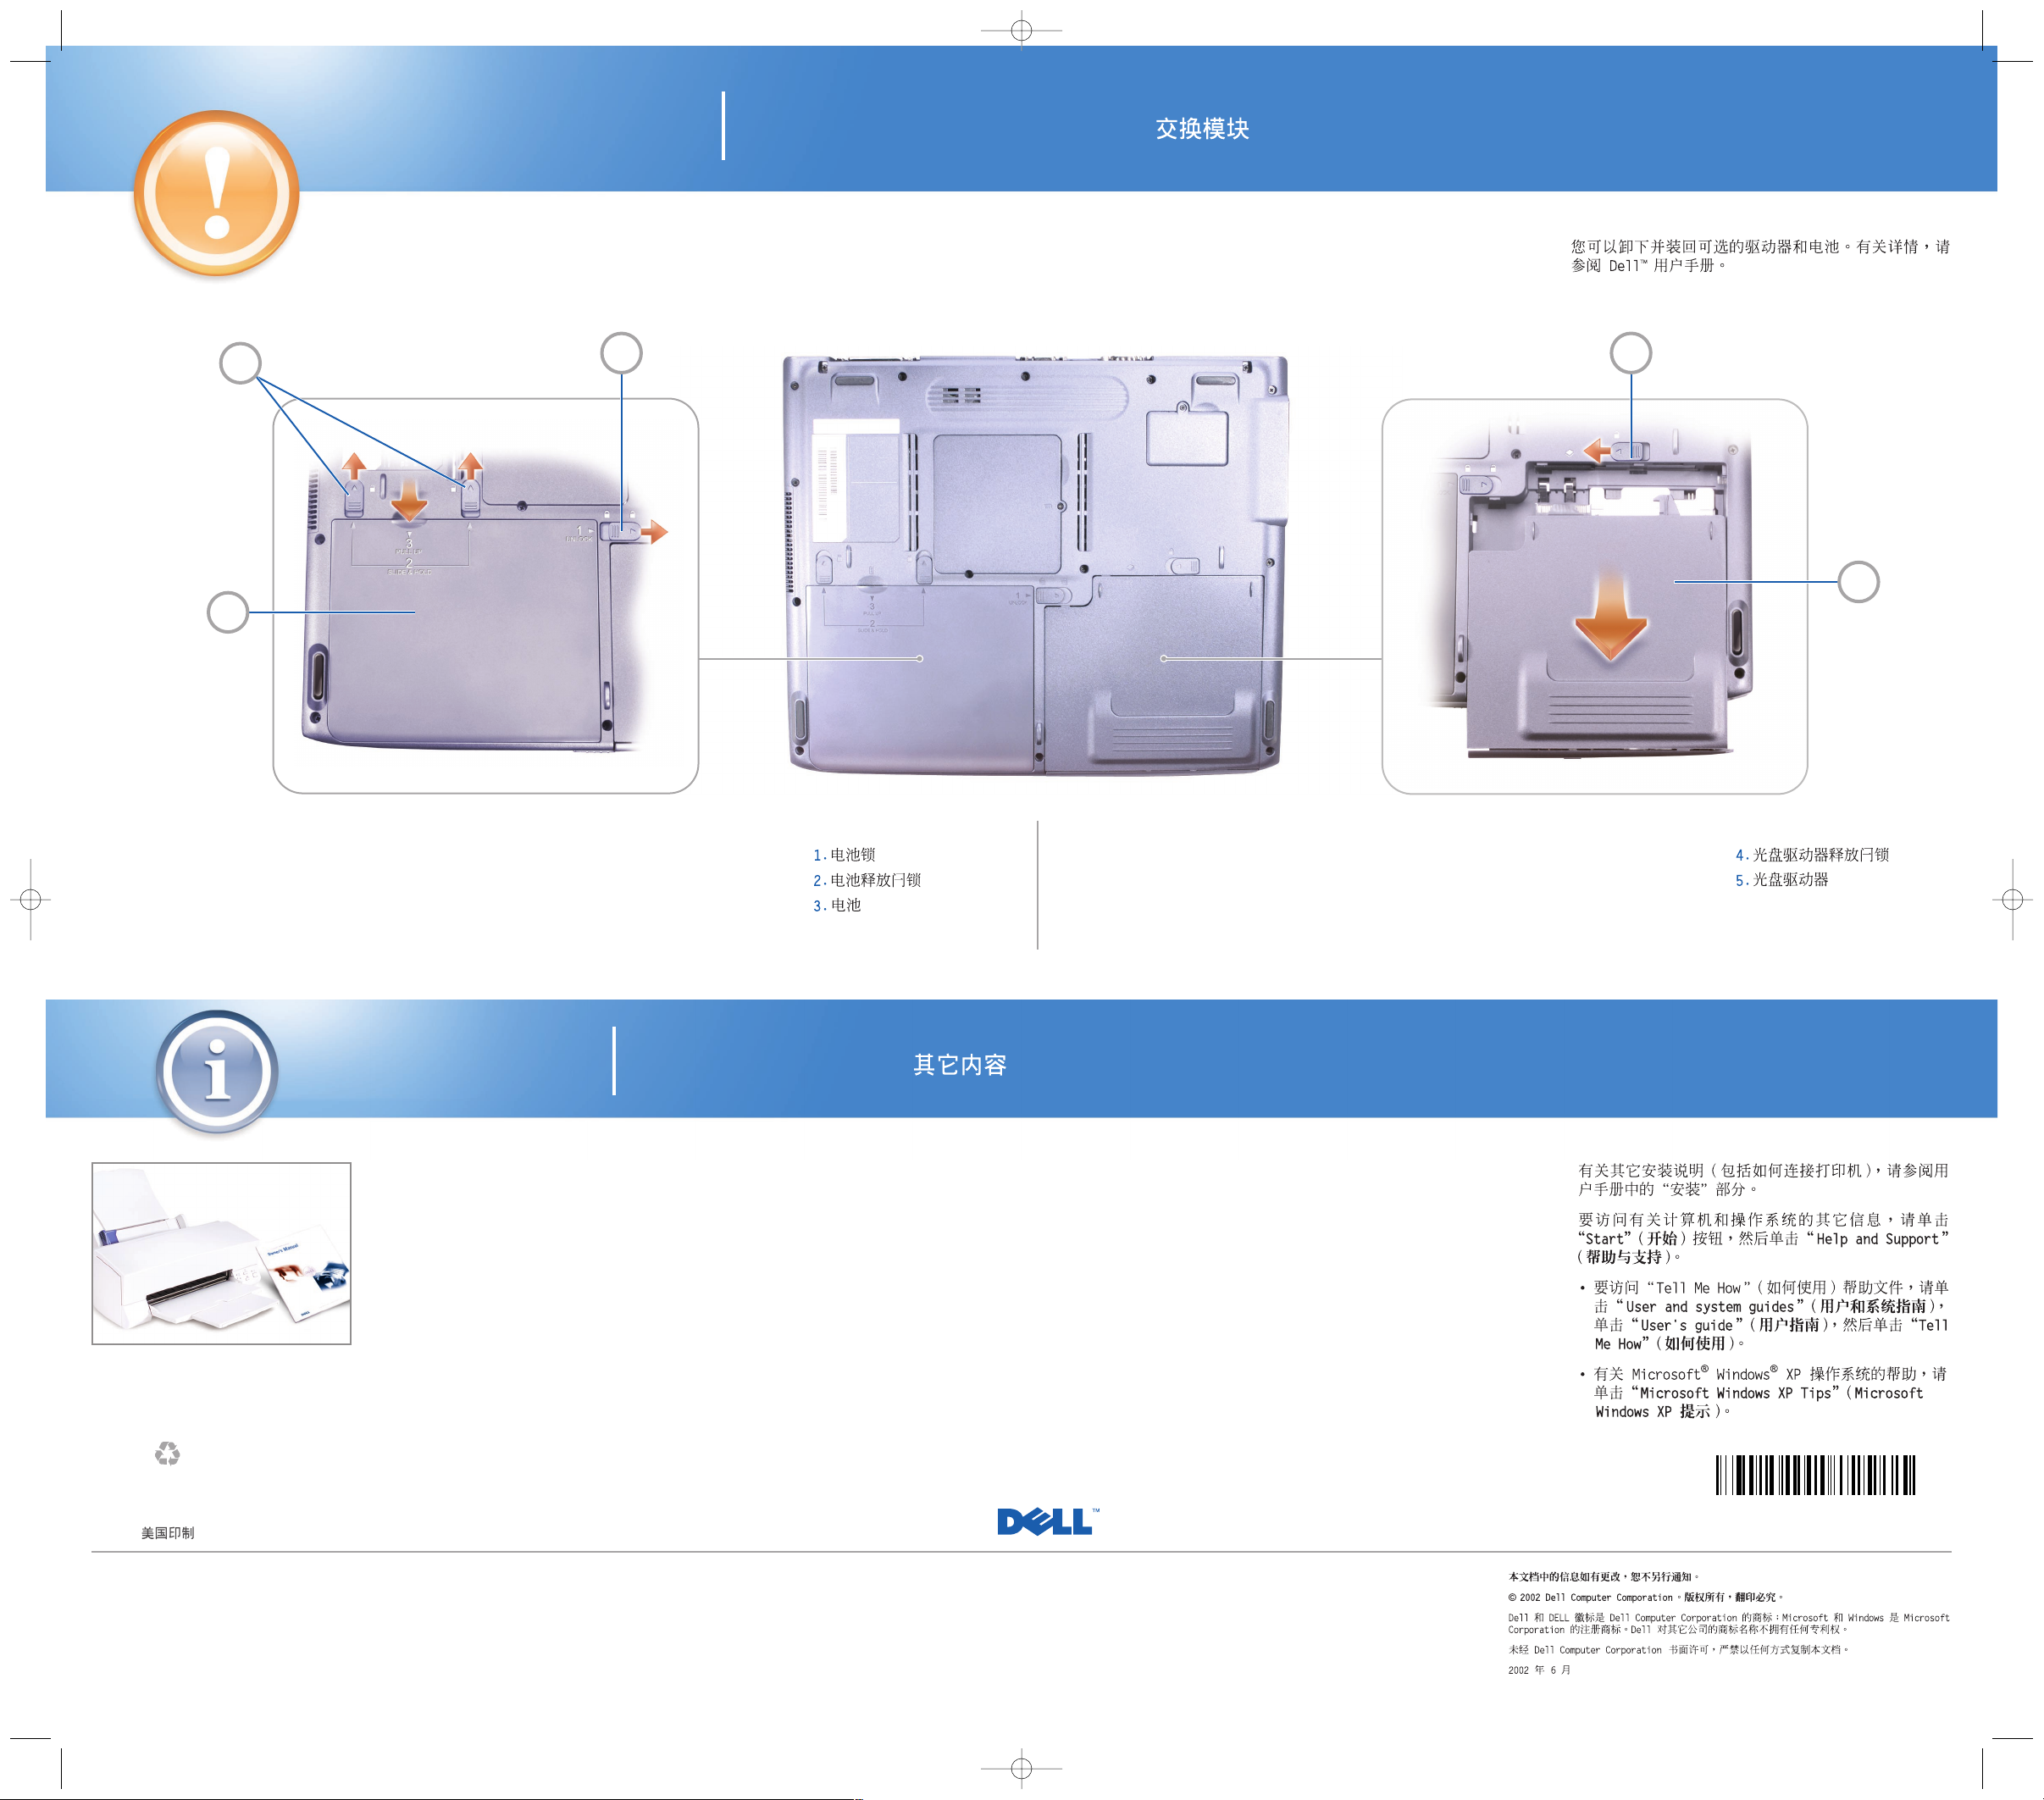
1. battery lock
2. battery latch releases
3. battery
1. dispositif de verrouillage
de la batterie
2. loquets de dégagement de
la batterie
3. batterie
1. Batterie-Verschluss
2. Batterie-Verriegelungshebel
3. Batterie
You can remove and replace the optical drive and battery.
See the Dell Owner's Manual for detailed instructions.
Vous pouvez retirer et remettre en place le lecteur optique
et la batterie. Reportez-vous au manuel de l'utilisateur
Dell pour plus d'informations.
Das optionale Laufwerk und die Batterie können entfernt
und ausgetauscht werden. Eine detaillierte Anleitung
finden Sie im Dell-Benutzerhandbuch.
2
4. optical-drive latch release
5. optical drive
4. loquet de dégagement du
lecteur optique
5. lecteur optique
4. Sperrklinke des optischen
Laufwerks
5. Optisches Laufwerk
Information in this document is subject to change without notice.
© 2002 Dell Computer Corporation. All rights reserved.
Dell and the DELL logo are trademarks of Dell Computer Corporation; Microsoft and Windows are
registered trademarks of Microsoft Corporation. Dell disclaims proprietary interest in the marks and names
of others.
Reproduction in any manner whatsoever without the written permission of Dell Computer Corporation is
strictly forbidden.
June 2002
Les informations fournies dans ce guide sont susceptibles d'être modifiées sans préavis.
© 2002 Dell Computer Corporation. Tous droits réservés.
Dell et le logo DELL sont des marques de Dell Computer Corporation ; Microsoft et Windows sont des
marques déposées de Microsoft Corporation. Dell ne revendique aucun droit sur les noms de marques des
autres sociétés.
La reproduction de ce document de quelque manière que ce soit sans l'autorisation écrite de Dell Computer
Corporation est strictement interdite.
Juin 2002
Die in diesem Dokument enthaltenen Informationen können ohne Vorankündigung geändert werden.
© 2002 Dell Computer Corporation. Alle Rechte vorbehalten.
Dell und das DELL-Logo sind Warenzeichen der Dell Computer Corporation; Microsoft und Windows sind
eingetragene Warenzeichen der Microsoft Corporation. Dell erhebt keinen Anspruch auf die Warenzeichen
und Handelsnamen anderer Hersteller.
Eine Reproduktion dieses Dokuments in jeglicher Form ist nur mit vorheriger schriftlicher Genehmigung
der Dell Computer Corporation erlaubt.
Juni 2002
P/N 9T132 Rev. A00
Printed in the U.S.A.
Imprimé aux Etats-Unis.
Gedruckt in U.S.A.
See "Setting Up" in your Owner's Manual for additional
setup instructions, including how to connect a printer.
To access additional information on your computer and
operating system, click the Start button and click Help
and Support.
To access the Tell Me How help file, click User and
system guides, click User's guides, and then click Te l l
Me How.
For help with the Microsoft
®
Windows®XP operating
system, click Microsoft Windows XP Tips.
Consultez la section de configuration du manuel de
l'utilisateur pour plus d'informations, notamment pour
savoir comment connecter une imprimante.
Pour en savoir plus sur votre ordinateur et son système
d'exploitation, cliquez sur le bouton Démarrer, puis sur
Aide et support.
Pour accéder au fichier d'instructions, cliquez sur le lien
relatif aux guides utilisateur et système. Cliquez
ensuite sur le lien concernant le guide de l'utilisateur
puis sur le fichier d'instructions.
Pour obtenir de l'aide sur le système d'exploitation
Microsoft
®
Windows®XP, cliquez sur les astuces (ou
conseils) Microsoft Windows XP.
Zusätzliche Hinweise zur Einrichtung sowie zum
Anschließen eines Druckers finden Sie unter
Einrichtung im Benutzerhandbuch.
Zusätzliche Informationen über Ihren Computer und das
Betriebssystem erhalten Sie, indem Sie auf Start und
dann auf Help and Support klicken.
Um die Hilfedatei Tell Me How zu öffnen, klicken Sie
auf User und System guides. Klicken Sie auf
User's guide und danach auf Tell Me How.
Für die Hilfe zum Betriebssystem Microsoft
®
Windows
®
XP klicken Sie auf Microsoft Windows XP Tips.
Swapping Modules
Modules d'échange |Austausch von Modulen
|
Whats Next?
En savoir plus |Und was nun?
|
3
5
4
'6! )
9T132am0.qxd 6/6/02 3:53 PM Page 2
 Loading...