

Page 1

Dell™PhotoAll-In-One Printer 944 User's Guide
Click the links to the left for information on the features and operation of your printer. For information on other documentation included with your printer, see
Finding Information.
To order ink or supplies from Dell:
1. Double-click the icon on your desktop.
2. Visit Dell's website: www.dell.com/supplies
3. Order Dell printer supplies by phone. Refer to the Owner's Manual for the correct phone number for your country.
For the best service, make sure you have the Dell printer Service Tag available. See Express Service Code and Service Tag number.
Notes, Notices, and Cautions
Information in this document is subject to change without notice.
©2005DellInc.Allrightsreserved.
Reproduction in any manner whatsoever without the written permission of Dell Inc. is strictly forbidden.
Trademarks used in this text: Dell, the DELL logo, Dell Picture Studio, and Dell Ink Management System are trademarks of Dell Inc.; Microsoft and Windows are registered trademarks
of Microsoft Corporation.
Other trademarks and trade names may be used in this document to refer to either the entities claiming the marks and names or their products. Dell Inc. disclaims any
proprietary interest in trademarks and trade names other than its own.
Model 944
May2005SRVHC345Rev.A00
NOTE: A NOTE indicates important information that helps you make better use of your printer.
NOTICE: A NOTICE indicates either potential damage to hardware or loss of data and tells you how to avoid the problem.
CAUTION: A CAUTION indicates a potential for property damage, personal injury, or death.
Page 2
About Your Printer
Understanding the Printer Parts
Setting Up Your Printer
Using the Operator Panel
Loading Paper
Understanding the Automatic Paper Type Sensor
You can use the Dell Photo AIO Printer 944 to do a variety of things. A few important things to note:
l If your printer is connected to a computer, you can use either the printer operator panel or the printer software to create your projects.
l You do need to connect your printer to a computer to scan, print, and fax.
l You do not need to connect your printer to a computer to copy a document or print from memory cards, USB memory keys, or PictBridge-enabled digital
cameras.
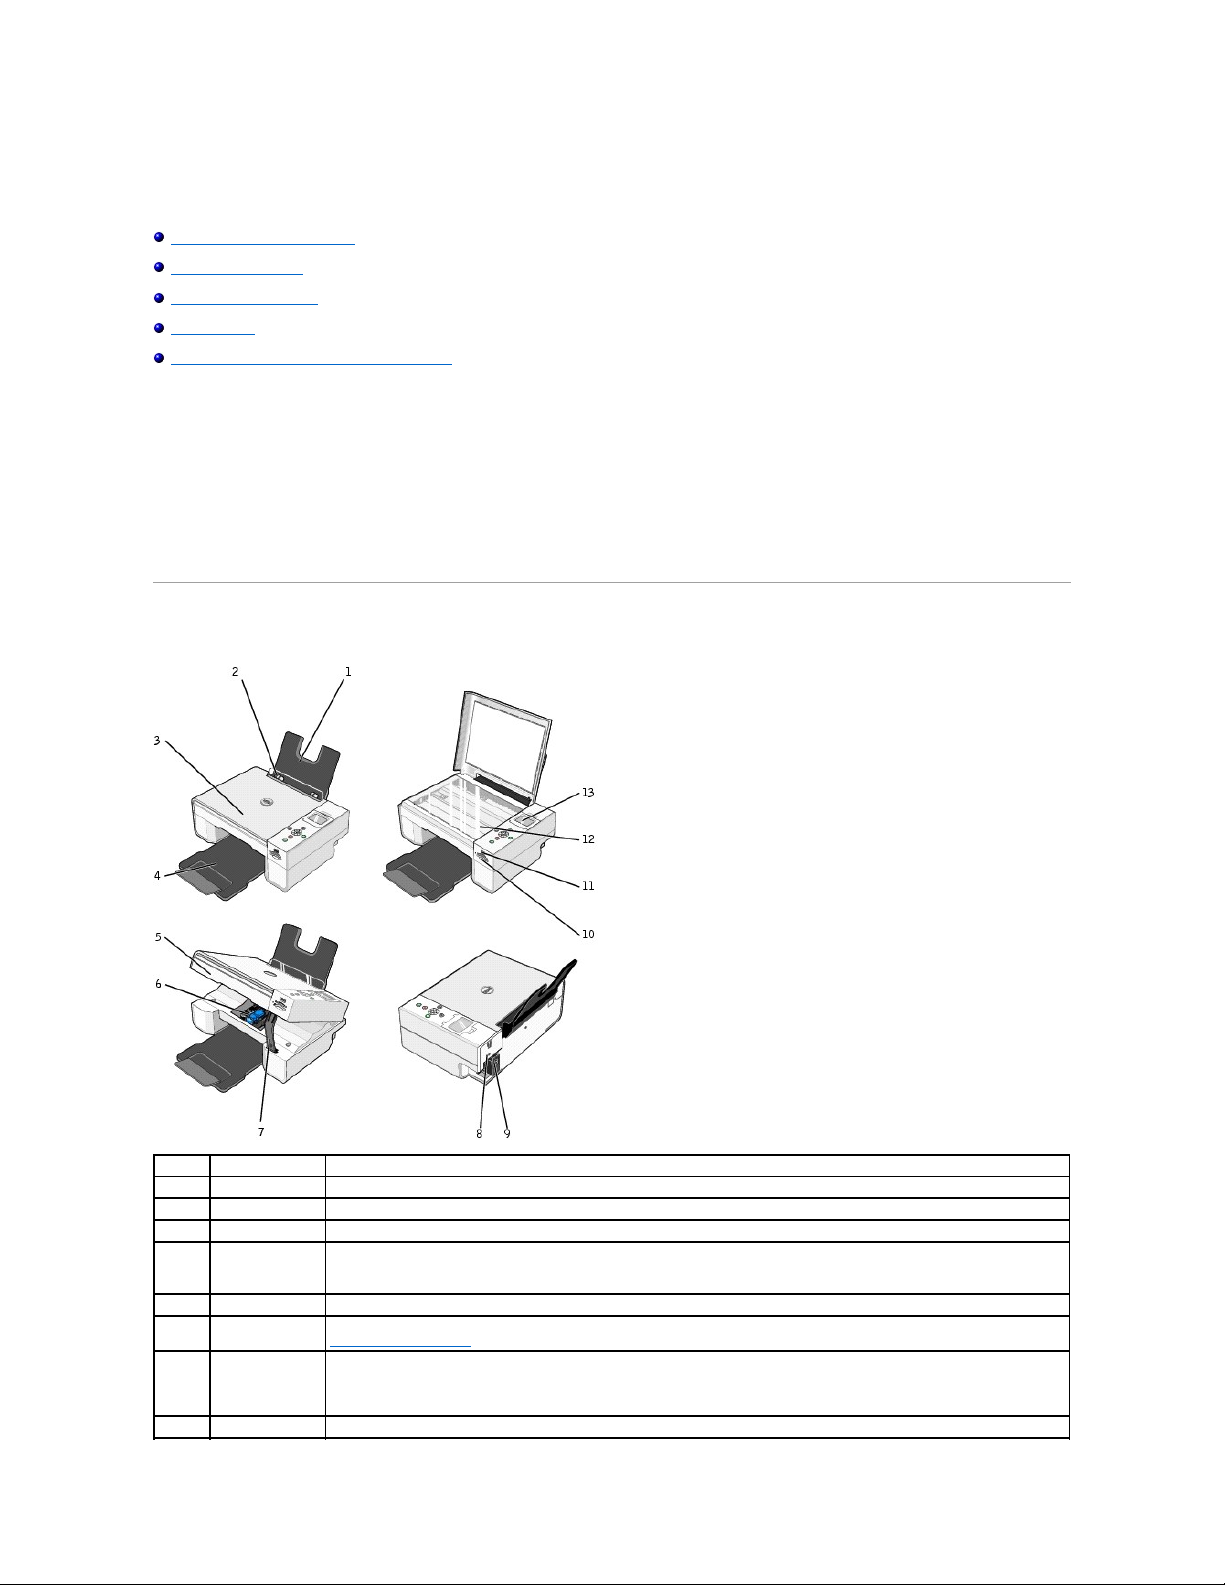
Understanding the Printer Parts
Number
Part:
Description:
1
Paper support
Part that supports loaded paper.
2
Paper guide
Guide that helps the paper feed into the printer properly.
3
Top cover
Top of printer that holds your document or photo flat while you scan it.
4
Paper exit tray
Tray that holds the paper as it exits the printer.
NOTE: To extend the paper exit tray, pull the tray straight out and flip out the extender.
5
Printer unit
Unit you lift to gain access to the ink cartridges.
6
Ink cartridge
carrier
Carrier that holds two ink cartridges, one color and the other black or photo. For more information on your cartridges, see
Replacing Ink Cartridges.
7
Scanner support
Part under printer unit that keeps the printer open while you change ink cartridges.
NOTE: To close the printer for normal operation, lift the printer unit, push the scanner support inward toward the back of the
printer, and then lower the printer unit until it rests on the main body of the printer.
8
USB connector
Slot into which you plug the USB cable (sold separately). The other end of the USB cable plugs into your computer.
Page 3
Setting Up Your Printer
Follow the instructions on your Setting Up Your Printer poster to install the hardware and software. If you encounter problems during setup, see Setup
Problems.
Setting the Language on Your Printer
To set the language on your printer initially:
1. When you first power on your printer, press the Arrow buttons to find your language.
2. Press the Select button to select your language.
Resetting the Language on Your Printer
If you need to change the default language used on the operator panel, complete the following steps:
1. Press the Power button to turn on your printer.
2. Press the Arrow buttons until you see Setup.
3. Press the Select button .
4. Press the Arrow buttons until you see Language.
5. Press the Arrow buttons to find your language.
6. Press the Select button to select your language.
Using the Operator Panel
The operator panel buttons allow you to scan, copy, and customize documents. The printer is on when the Power button is illuminated.
9
Power connector
Slot into which you plug the power cable.
NOTE: Insert the power cable into the printer before connecting the power cable into the wall outlet.
10
Memory card slots
Slots into which you insert a memory card containing digital pictures.
11
PictBridge USB
connector
Slot into which you plug a USB memory key or the USB cable (sold separately) that connects your printer to a PictBridgeenabled camera. For more information, see Printing Photos From a PictBridge-Enabled Camera.
12
Scanner glass
Surface on which you place your document or photo face down to copy, fax, or scan it.
13
Operator panel
Panel on the printer you use to control copying, faxing, and printing. For more information, see Using the Operator Panel.
NOTE: The Dell Photo AIO Printer 944 supports Microsoft®Windows®2000, Windows XP, and Windows XP Professional x64.
Page 4
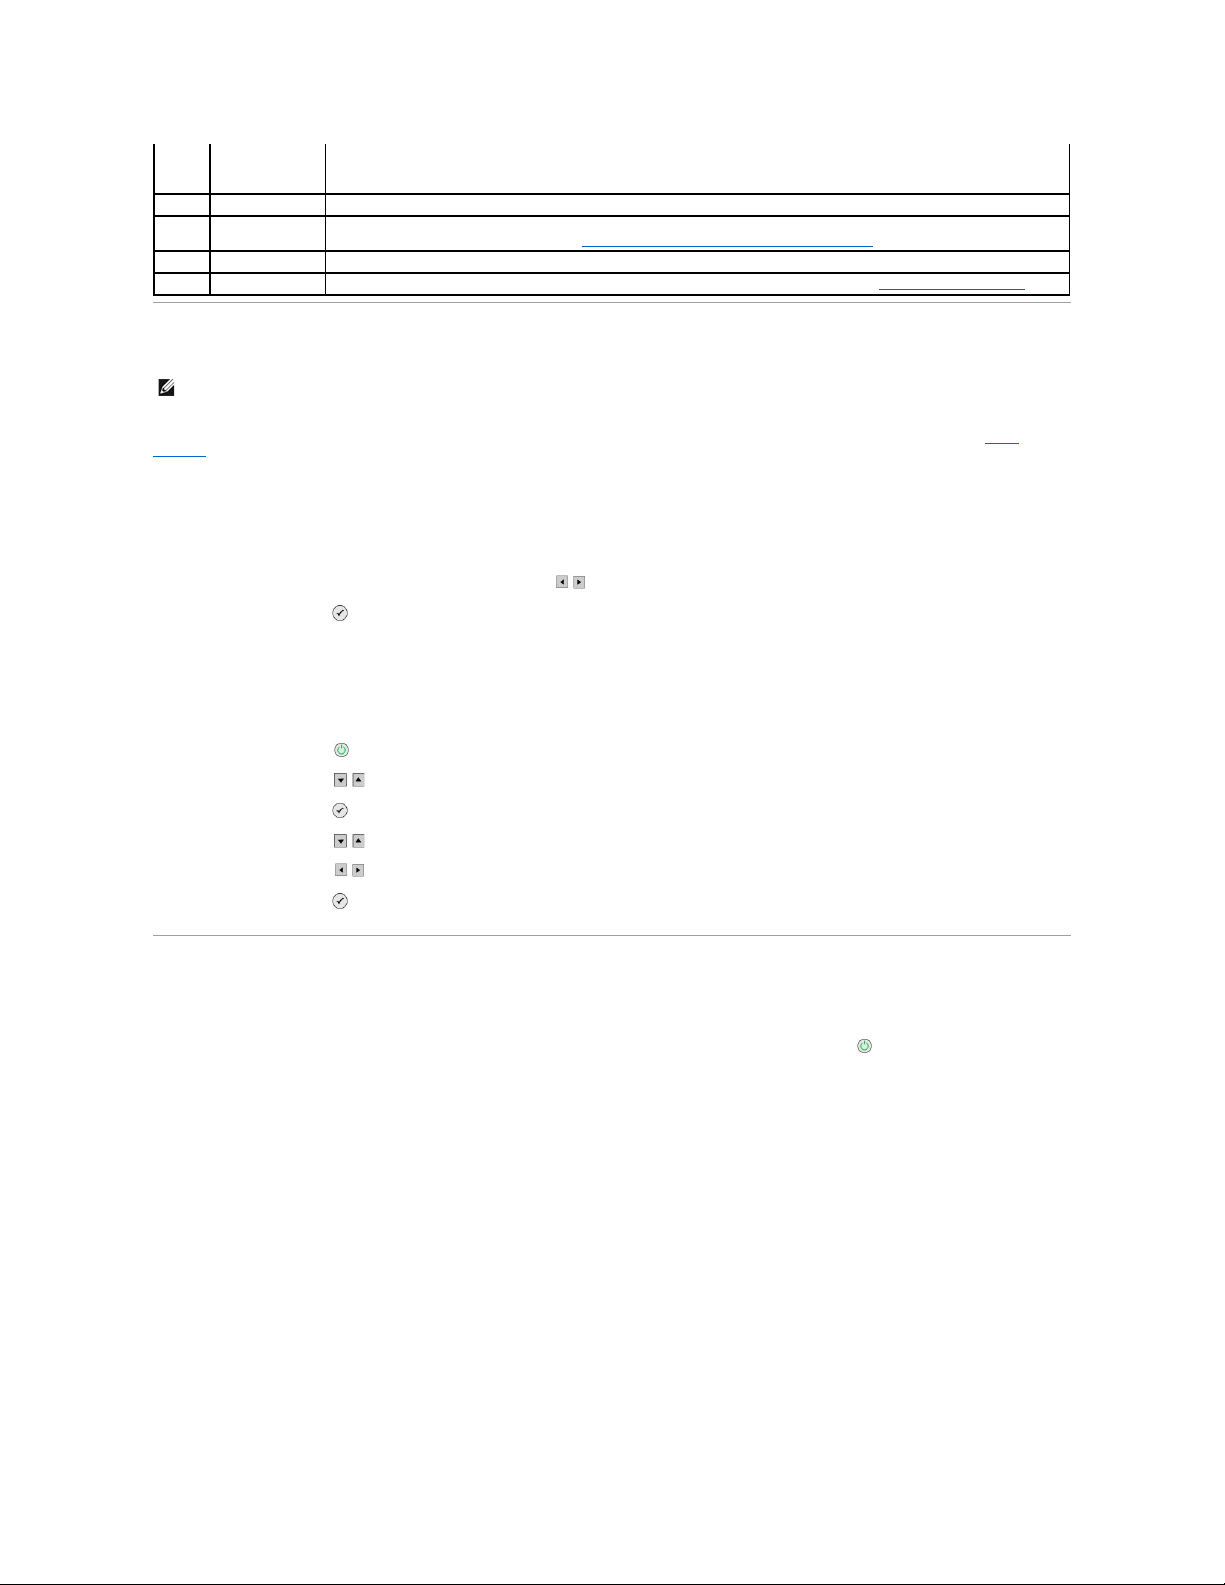
Operator Panel Menus
When you press the Menu button , the following menus appear. Press the Arrow buttons to scroll through the options available in each menu. When
the setting you want to use is displayed, press the Menu button again to save the setting and move to the next menu available.
Copy Mode
Number
Use the:
To:
1
LCD display
Display scanning, copying, faxing, and printing options as well as status and error messages. For more information,
see Using the Operator Panel.
2
Menu button
Enter or exit a menu.
3
Back button
Return to the previous menu or screen.
4
Arrow
buttons
l Navigate menus and menu items.
l Decrease/increase number of copies.
l Change the selected mode.
l Navigate photos on photo card or digital camera.
5
Power
button
Turn your printer on or off.
6
Cancel
button
l Cancel a scan, print, or copy job in progress.
l Cancel a copy job (using only the printer), and eject a page.
l Exit a menu, and return to the default settings.
7
Start button
Initiate a copy, scan, or fax.
8
Select
button
l Select a menu item.
l Select an image to be printed (in Photo mode).
l Initiate a paper feed by holding the button for 3 seconds.
Copy menu item
Settings
Color
l Color*
l Black and White
Copies
1–99
Reduce/Enlarge
l 50%
l 100%*
l 200%
l Custom%
l Fit to Page
l 2 x 2 Poster
l 3 x 3 Poster
l 4 x 4 Poster
l 2¼x3¼in.
l 3 x 5 in.
l 3½x5in.
Page 5
Photo Mode
When a memory card or USB memory key is inserted into the printer, the following options are available.
l 4 x 6 in.
l 5 x 7 in.
l 8 x 10 in.
l 8½x11in.
l 8½x14in.
l A6
l A5
l B5
l A4
l L
l 2L
l Hagaki
l 10 x 15 cm
l 13 x 18 cm
Copy Quality
l Draft
l Normal
l Photo
l Automatic*
Brightness
Press the Select button , and then use the Arrow buttons to adjust the brightness setting.
Blank Paper Size
l 3 x 5 in.
l 3½x5in.
l 4 x 6 in.
l 10 x 15 cm
l 5 x 7 in.
l 13 x 18 cm
l 8½x11in.
l 8½x14in.
l A6
l A5
l B5
l A4
l L
l 2L
l Hagaki
l 6 x 8 cm
Paper Type
l Auto-Detect*
l Plain
l Coated
l Glossy
l Transparency
Repeat Image
l 1X*
l 4X
l 9X
l 16X
Size of Original
l Automatic
l 2¼x3¼in.
l 3 x 5 in.
l 3½x5in.
l 4 x 6 in.
l 10 x 15 cm
l 5 x 7 in.
l 13 x 18 cm
l 8 x 10 in.
l 8½x11in.
l A6
l A5
l B5
l A4
l L
l 2L
l Hagaki
l 6 x 8 cm
Preview
Press the Select button .
* Factory default setting
Photo menu item
Settings
View Photos or Print
Press the Select button . For more information, see Printing Photos From a Memory Card or USB Memory Key.
Save to Computer
Press the Select button . For more information, see Printing Photos From a Memory Card or USB Memory Key.
View Slideshow
Press the Select button . For more information, see Printing Photos From a Memory Card or USB Memory Key.
Print All X Photos
Press the Select button . For more information, see Printing Photos From a Memory Card or USB Memory Key.
Page 6
Press the Menu button to access these other Photo menu items.
Scan Mode
The Scan submenu is only available if the printer is connected to a computer or a network adapter. If you choose Scan as the mode, you are prompted to
choose the destination computer for the scanned document. You can scroll through the available computers by pressing the Arrow buttons
. Pressing the
Menu button selects the currently displayed computer name.
Photo menu item
Settings
Color
l Color*
l Black and White
Photo Size
l 2¼x3¼in.
l 3½x5in.
l 4 x 6 in.
l 5 x 7 in.
l 8 x 10 in.
l L
l 2L
l 6 x 8 cm
l 10 x 15 cm
l 13 x 18 cm
l 8½x11in
l A4
l A5
l B5
l A6
l Hagaki
Quality
l Draft
l Normal
l Photo
l Automatic*
Brightness
Press the Select button , and then use the Arrow buttons to adjust the brightness setting.
Paper Size
l 3 x 5 in.
l 3½x5in.
l 4 x 6 in.
l 10 x 15 cm
l 5 x 7 in.
l 13 x 18 cm
l 8½x11in.
l 8½x14in.
l A6
l A5
l B5
l A4
l L
l 2L
l Hagaki
l 6 x 8 cm
Paper Type
l Auto-Detect*
l Plain
l Coated
l Glossy
l Transparency
Crop
Press the Select button , and then use the Arrow buttons to adjust the image for cropping.
Rotate 90 Degrees
Press the Select button .
Preview
Press the Select button .
Red Eye Reduction
l On
l Off*
Automatic Image Enhancement
l On
l Off*
Sepia Tone Print
l On
l Off*
* Factory default setting
NOTE: If your printer is connected locally, the Scan submenu does not appear; the host computer is automatically selected.
Scan menu item
Settings
Color
l Color*
Page 7

Setup Mode
Maintenance Mode
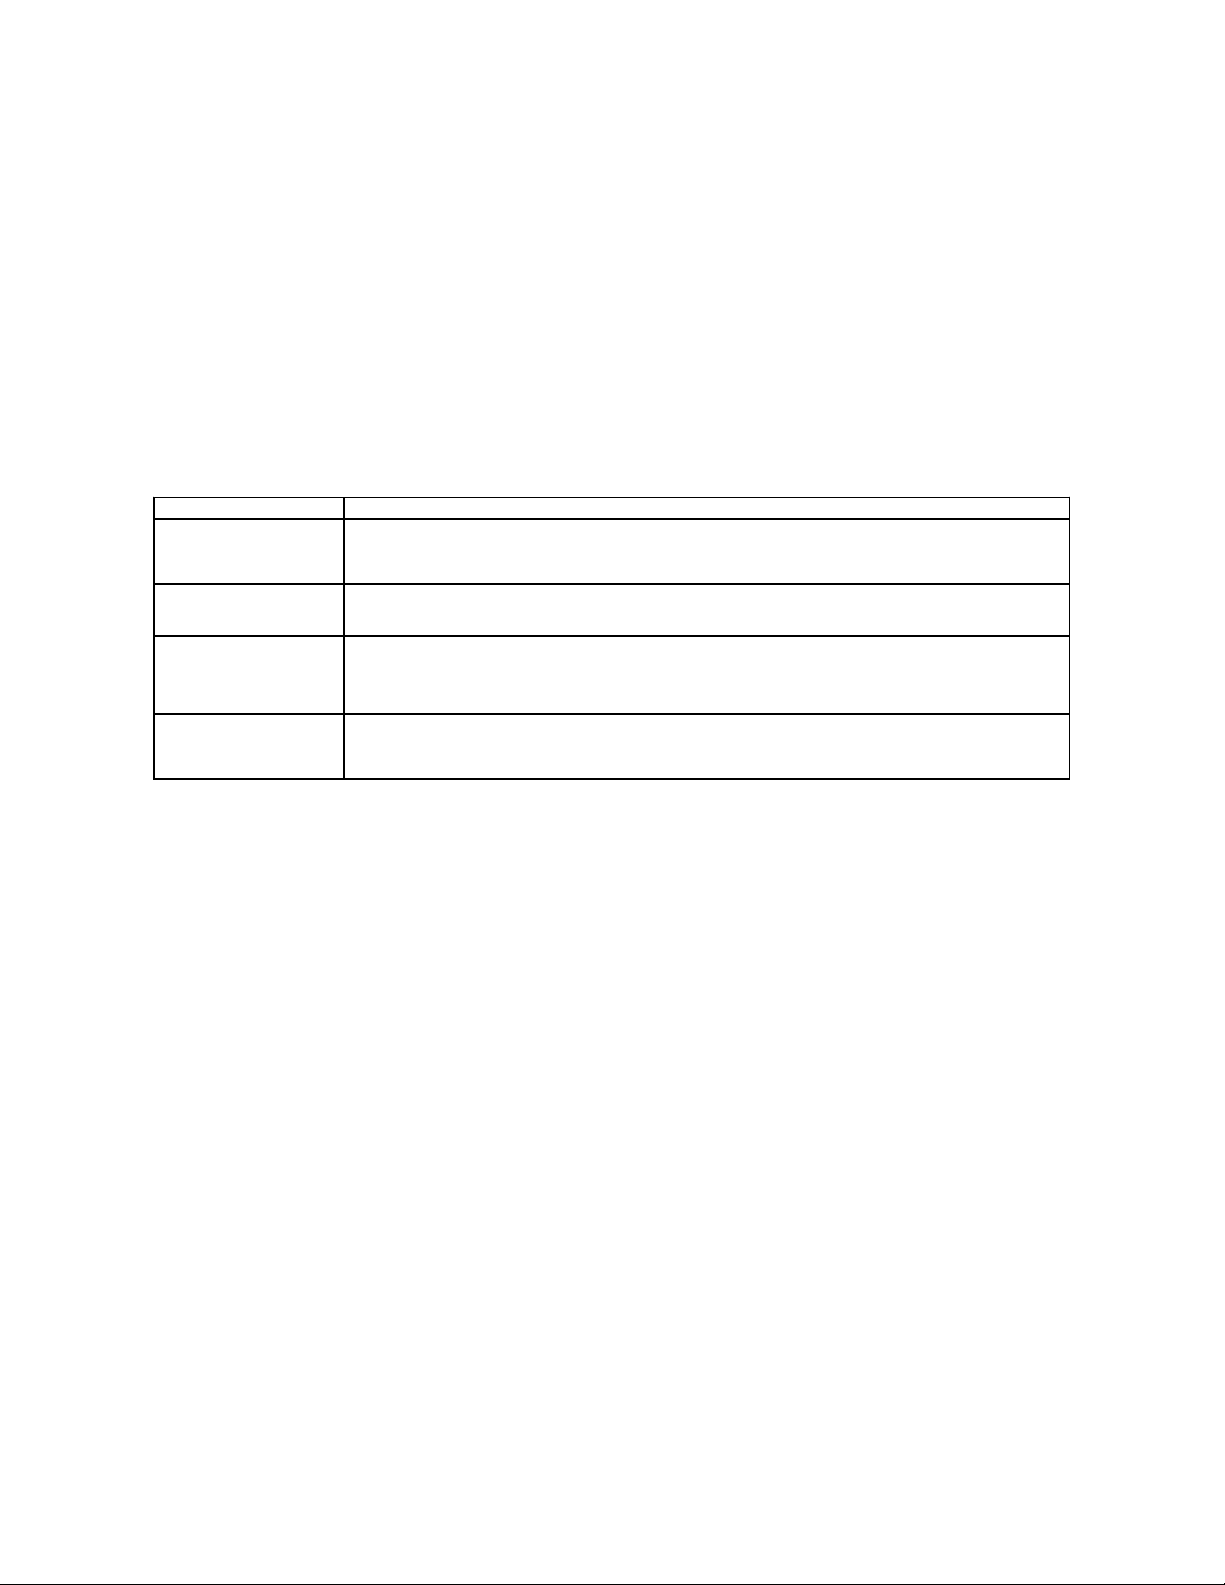
Loading Paper
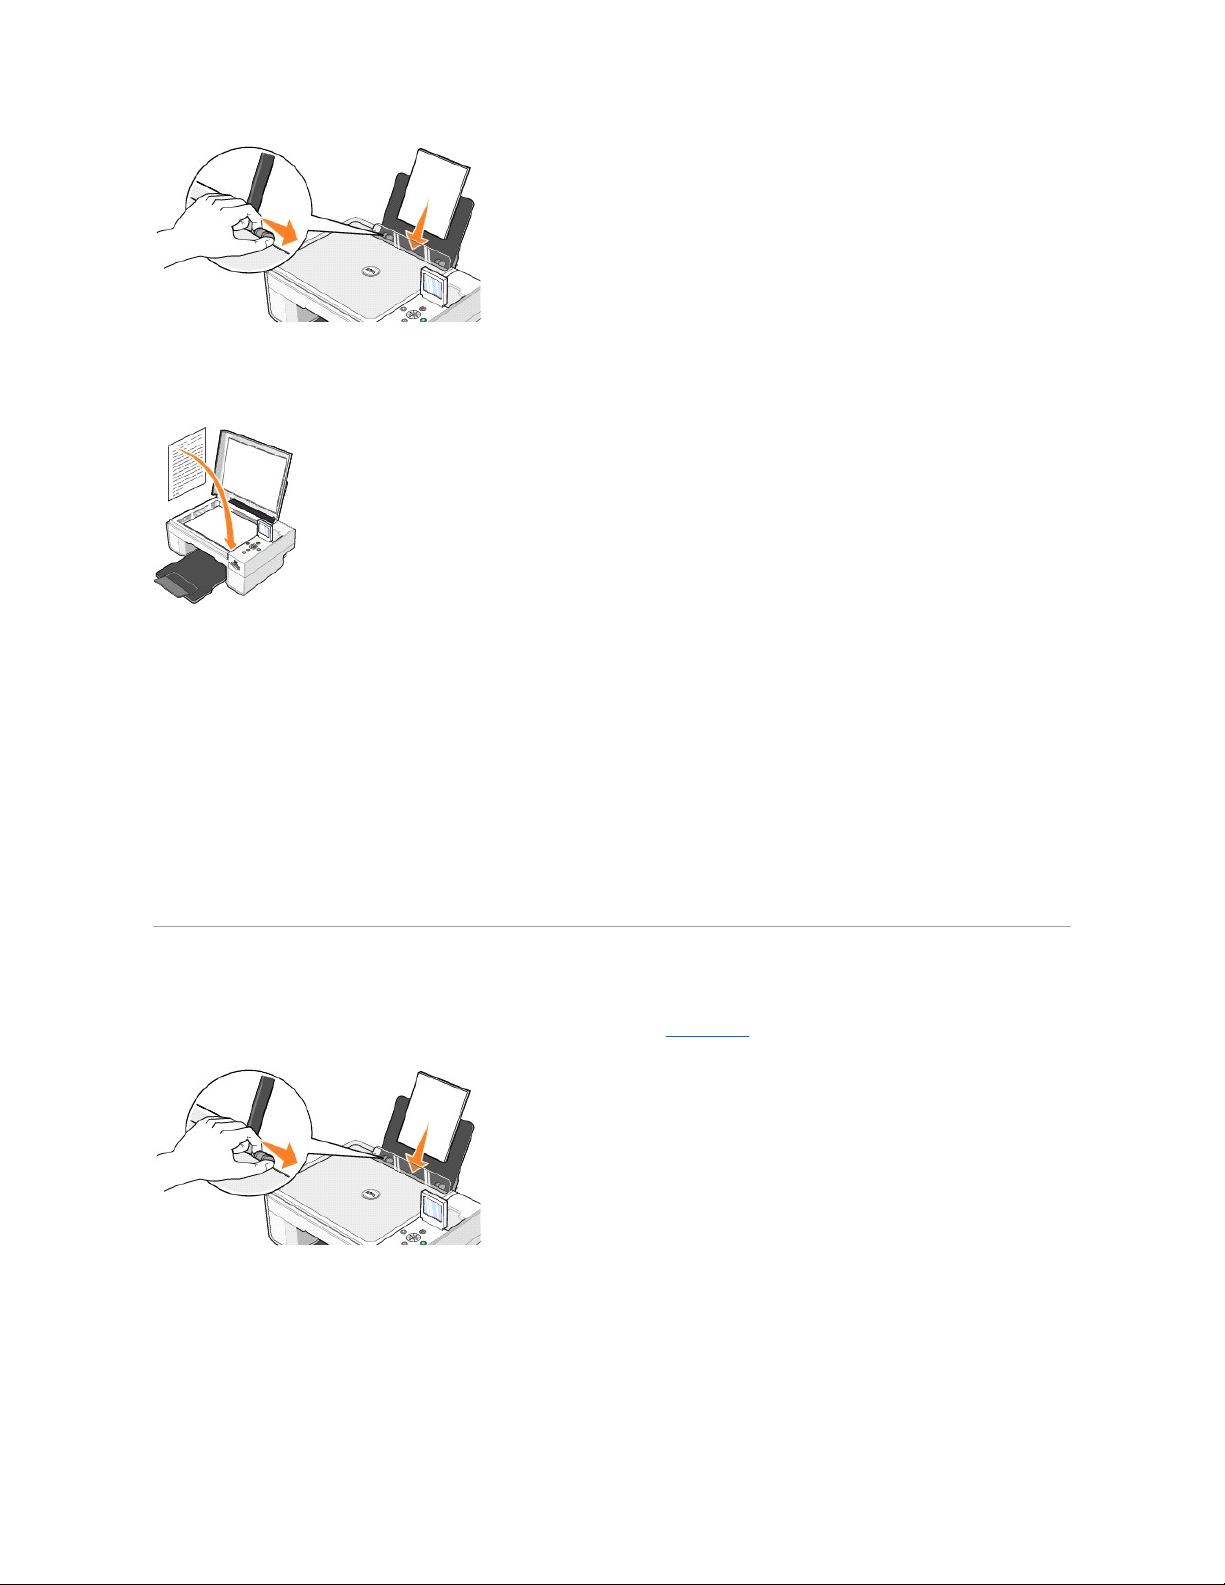
1. Fan the paper.
2. Center the paper on the paper support.
3. Adjust the paper guides so both are resting against the edges of the paper.
l Black and White
Application
Use the Arrow buttons to select the application in which you want your scanned document to open.
* Factory default setting
Setup menu item
Settings
Restore Defaults
Press the Select button .
Language
l Brazilian Portuguese
l Czech
l Danish
l Dutch
l English
l Finnish
l French
l German
l Greek
l Italian
l Japanese
l Norwegian
l Polish
l Russian
l Spanish
l Swedish
Clear Settings When
l Never
l After 2 minutes*
* Factory default setting
Maintenance menu item
Settings
Ink Levels
Press the Select button .
Change Cartridge
Press the Select button .
Align Cartridges
Press the Select button .
Clean Cartridges
Press the Select button .
Print Test Page
Press the Select button .
NOTE: Do not pull on both paper guides simultaneously. When one paper guide is moved, the other adjusts accordingly.
NOTE: Do not force paper into the printer. The paper should be flat against the paper support surface, and the edges should be flush against both
paper guides.
Page 8
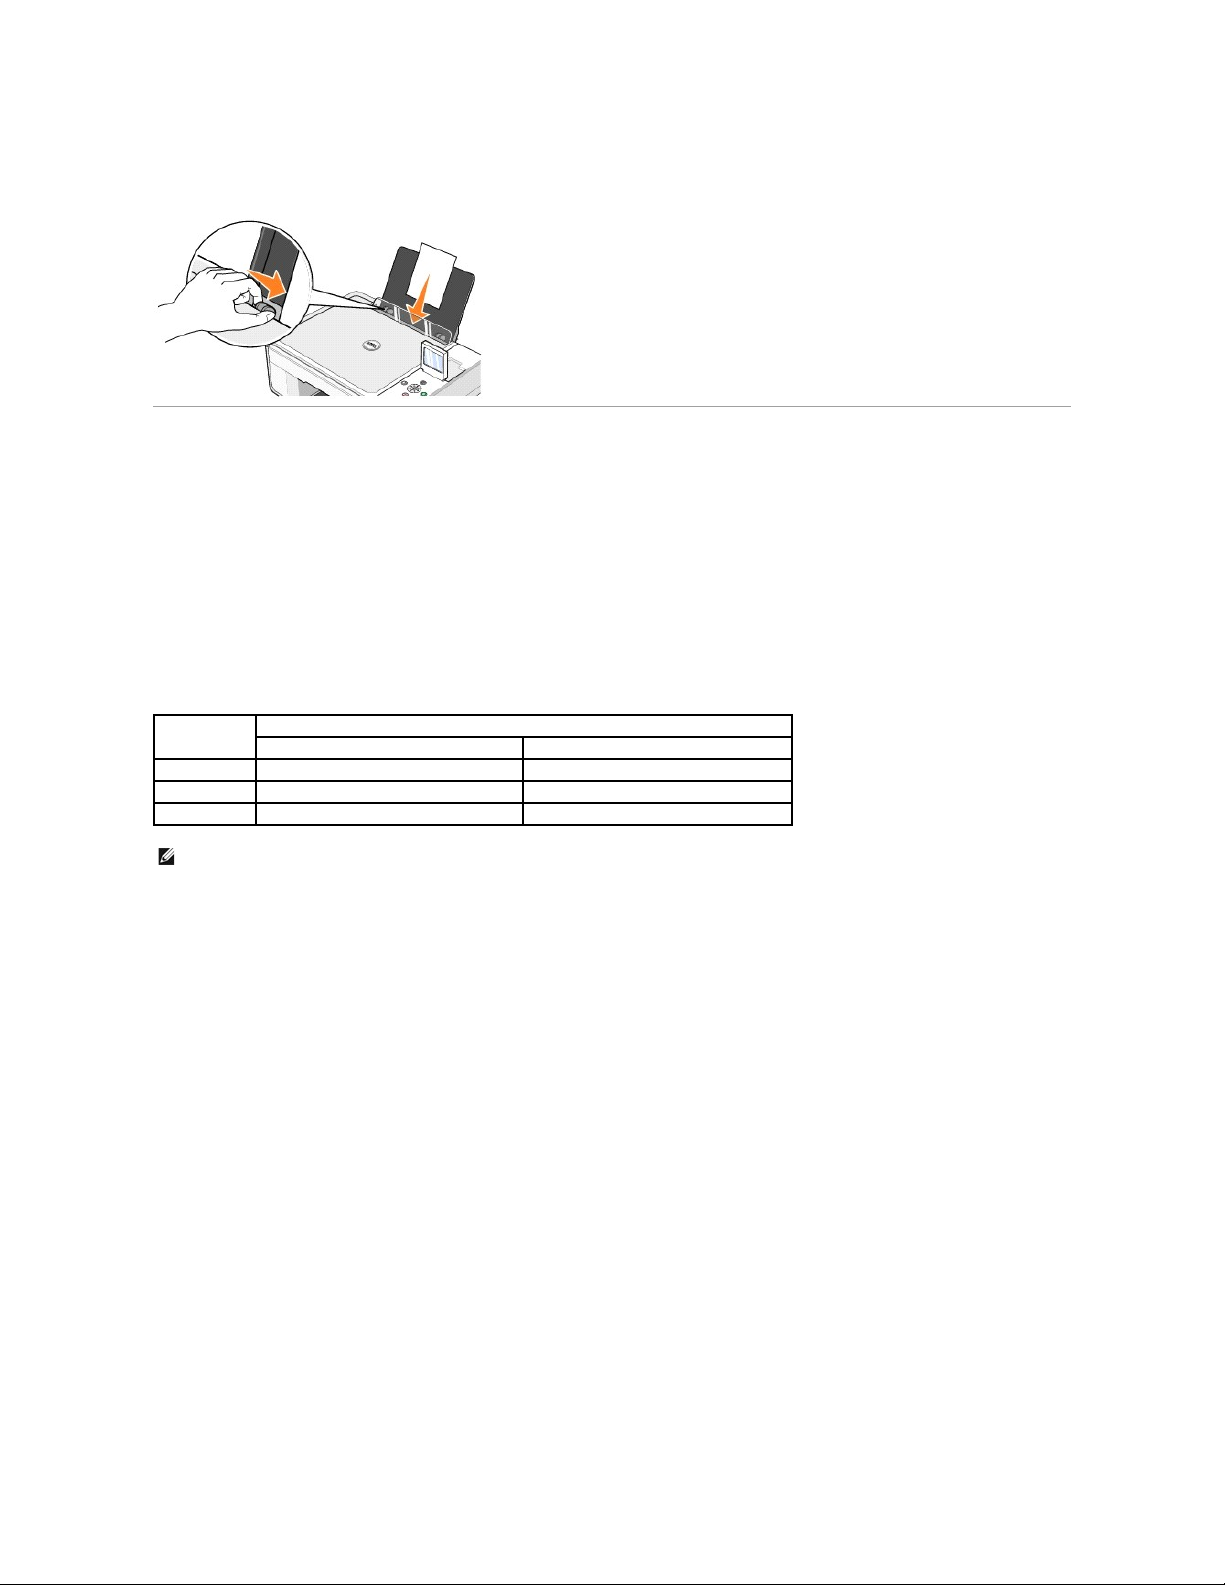
Photo paper should be loaded short-edge first with the glossy/photo side facing up.
Understanding the Automatic Paper Type Sensor
Your printer has an automatic paper type sensor that detects the following paper types:
l Plain
l Transparency
l Glossy/photo
If you load one of these paper types, the printer detects the paper type and automatically adjusts the Quality/Speed settings.
To choose paper size:
1. With your document open, click File®Print.
2. In the Print dialog box, click Preferences or Properties (depending on your program or operating system).
The Printing Preferences dialog box opens.
3. On the Print Setup tab, select the paper size.
4. Click OK.
Unless you turn off the automatic paper type sensor, it always remains on. To turn off the automatic paper type sensor for a specific print job:
1. With your document open, click File®Print.
2. In the Print dialog box, click Preferences or Properties (depending on your program or operating system).
The Printing Preferences dialog box opens.
3. Click the Print Setup tab.
4. Select the paper type from the Media Type drop-down menu.
5. Click OK.
To turn off the automatic paper type sensor for all print jobs:
1. In Windows XP, click Start®Control Panel® Printers and Other Hardware®Printers and Faxes.
In Windows 2000, click Start®Settings®Printers.
2. Right-click the Dell Photo AIO Printer 944 icon.
Papertype
Quality/Speed settings
Black and Color Cartridges Installed
Photo and Color Cartridges Installed
Plain
Normal
Photo
Transparency
Normal
Photo
Glossy/photo
Photo
Photo
NOTE: Your printer cannot detect the paper size.
Page 9

3. Click Printing Preferences.
4. Click the Print Setup tab.
5. Select the paper type from the Media Type drop-down menu.
6. Click OK.
Page 10

Appendix
Dell Technical Support Policy
Contacting Dell
Warranty and Return Policy
Dell Technical Support Policy
Technician-
assisted technical support requires the cooperation and participation of the customer in the troubleshooting process and provides for restoration of
the Operating System, application software and hardware drivers to the original default configuration as shipped from Dell, as well as the verification of
appropriate functionality of the printer and all Dell-installed hardware. In addition to this technician assisted technical support, online technical support is
available at Dell Support. Additional technical support options may be available for purchase.
Dell provides limited technical support for the printer and any Dell-installed software and peripherals. Support for third-party software and peripherals is
provided by the original manufacturer, including those purchased and/or installed through Software & Peripherals (DellWare), ReadyWare, and Custom Factory
Integration (CFI/DellPlus).
Contacting Dell
You can access Dell Support at support.dell.com. Select your region on the WELCOME TO DELL SUPPORT page, and fill in the requested details to access help
tools and information.
You can contact Dell electronically using the following addresses:
l World Wide Web
www.dell.com/
www.dell.com/ap/ (for Asian/Pacific countries only)
www.euro.dell.com (for Europe only)
www.dell.com/la/ (for Latin American countries)
www.dell.com/jp (for Japan only)
l Anonymous file transfer protocol (FTP)
ftp.dell.com/
Log in as user: anonymous, and use your email address as your password.
l Electronic Support Service
mobile_support@us.dell.com
support@us.dell.com
apsupport@dell.com (for Asian/Pacific countries only)
support.euro.dell.com (for Europe only)
l Electronic Quote Service
sales@dell.com
apmarketing@dell.com (for Asian/Pacific countries only)
l Electronic Information Service
info@dell.com
Warranty and Return Policy
Dell Inc. ("Dell") manufactures its hardware products from parts and components that are new or equivalent to new in accordance with industry-standard
practices. For information about the Dell warranty for your printer, refer to the Owner's Manual.
Page 11

BSD License and Warranty Statements
Copyright (c) 1991 The Regents of the University of California. All rights reserved.
Redistribution and use in source and binary forms, with or without modification, are permitted provided that the following conditions are met:
1. Redistributions of source code must retain the above copyright notice, this list of conditions and the following disclaimer.
2. Redistributions in binary form must reproduce the above copyright notice, this list of conditions and the following disclaimer in the documentation and/or
other materials provided with the distribution.
3. The name of the author may not be used to endorse or promote products derived from this software without specific prior written permission.
THIS SOFTWARE IS PROVIDED BY THE AUTHOR "AS IS" AND ANY EXPRESS OR IMPLIED WARRANTIES, INCLUDING, BUT NOT LIMITED TO, THE IMPLIED
WARRANTIES OF MERCHANTABILITY AND FITNESS FOR A PARTICULAR PURPOSE ARE DISCLAIMED. IN NO EVENT SHALL THE AUTHOR BE LIABLE FOR ANY DIRECT,
INDIRECT, INCIDENTAL, SPECIAL, EXEMPLARY, OR CONSEQUENTIAL DAMAGES (INCLUDING, BUT NOT LIMITED TO, PROCUREMENT OF SUBSTITUTE GOODS OR
SERVICES; LOSS OF USE, DATA, OR PROFITS; OR BUSINESS INTERRUPTION) HOWEVER CAUSED AND ON ANY THEORY OF LIABILITY, WHETHER IN CONTRACT,
STRICT LIABILITY, OR TORT (INCLUDING NEGLIGENCE OR OTHERWISE) ARISING IN ANY WAY OUT OF THE USE OF THIS SOFTWARE, EVEN IF ADVISED OF THE
POSSIBILITY OF SUCH DAMAGE.
Page 12
Copying
Copying Documents Using the Operator Panel
Copying Documents Using Your Computer
Copying Photos Using the Operator Panel
Copying Photos Using Your Computer
Changing Copy Settings
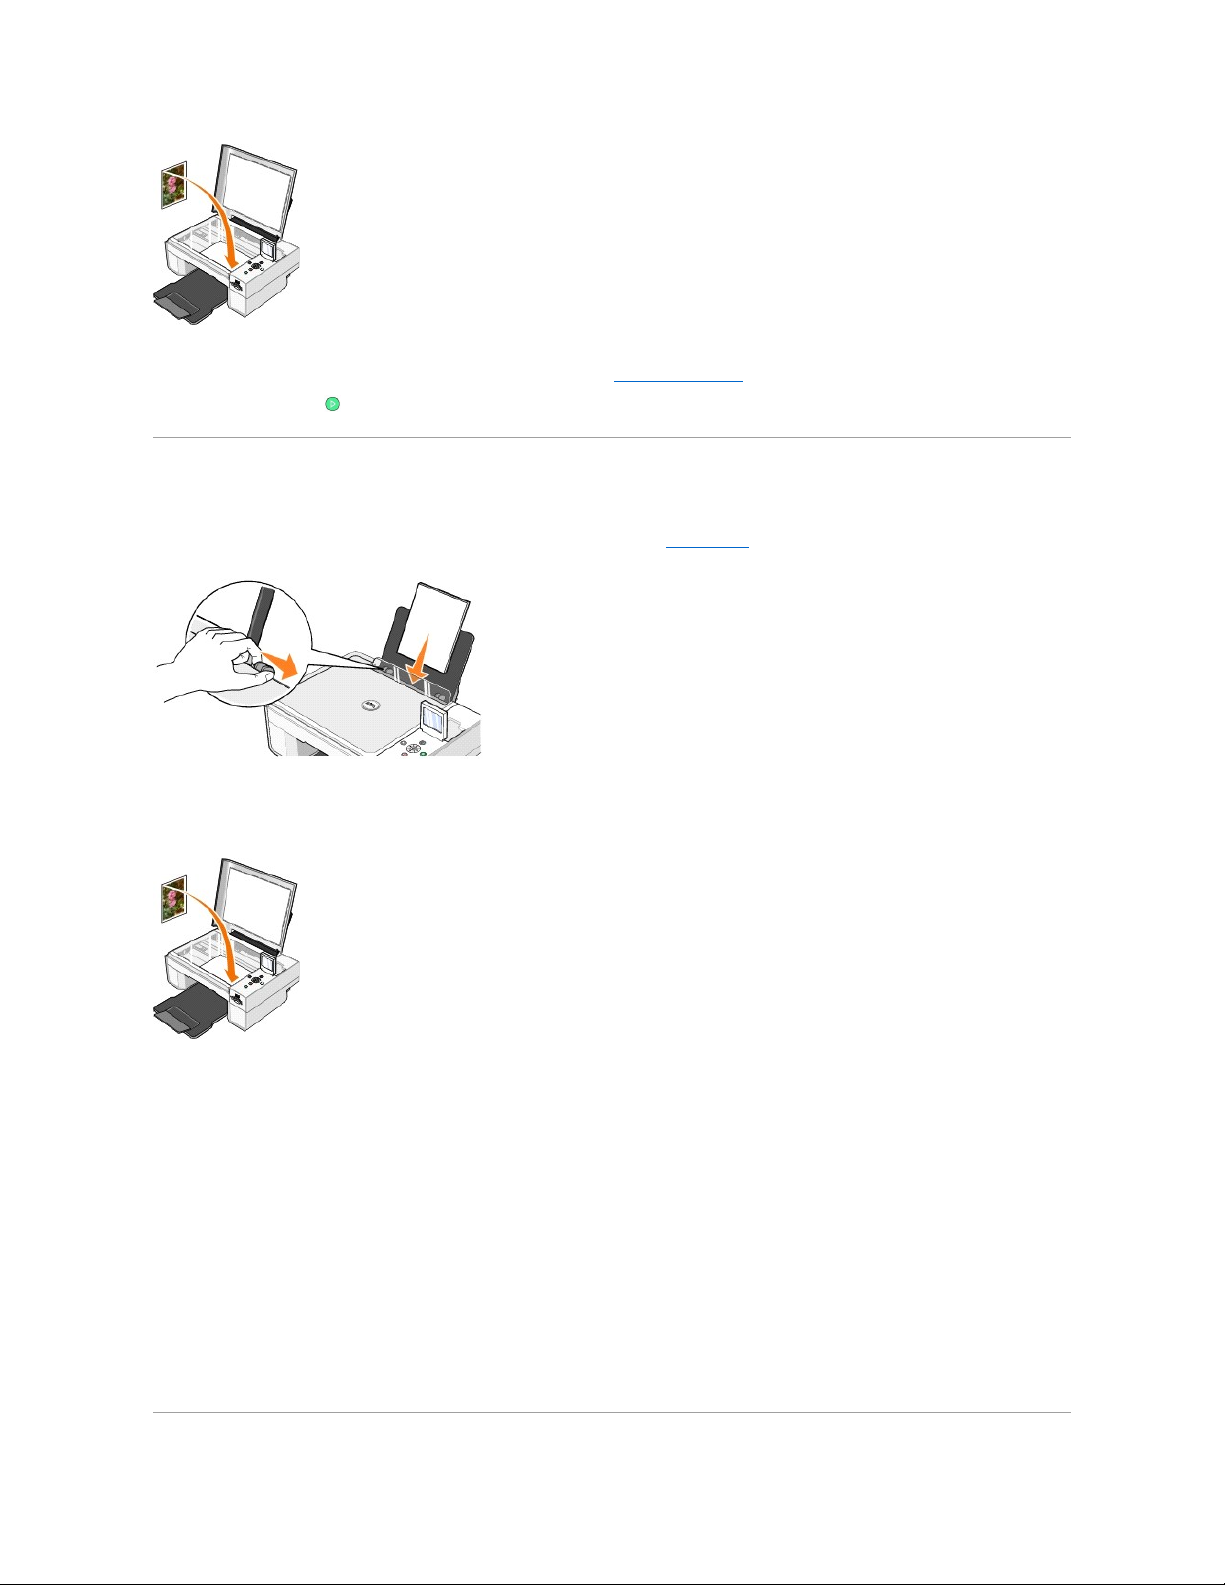
Copying Documents Using the Operator Panel
1. Turn on your printer.
2. Load the paper. For more information, see Loading Paper.
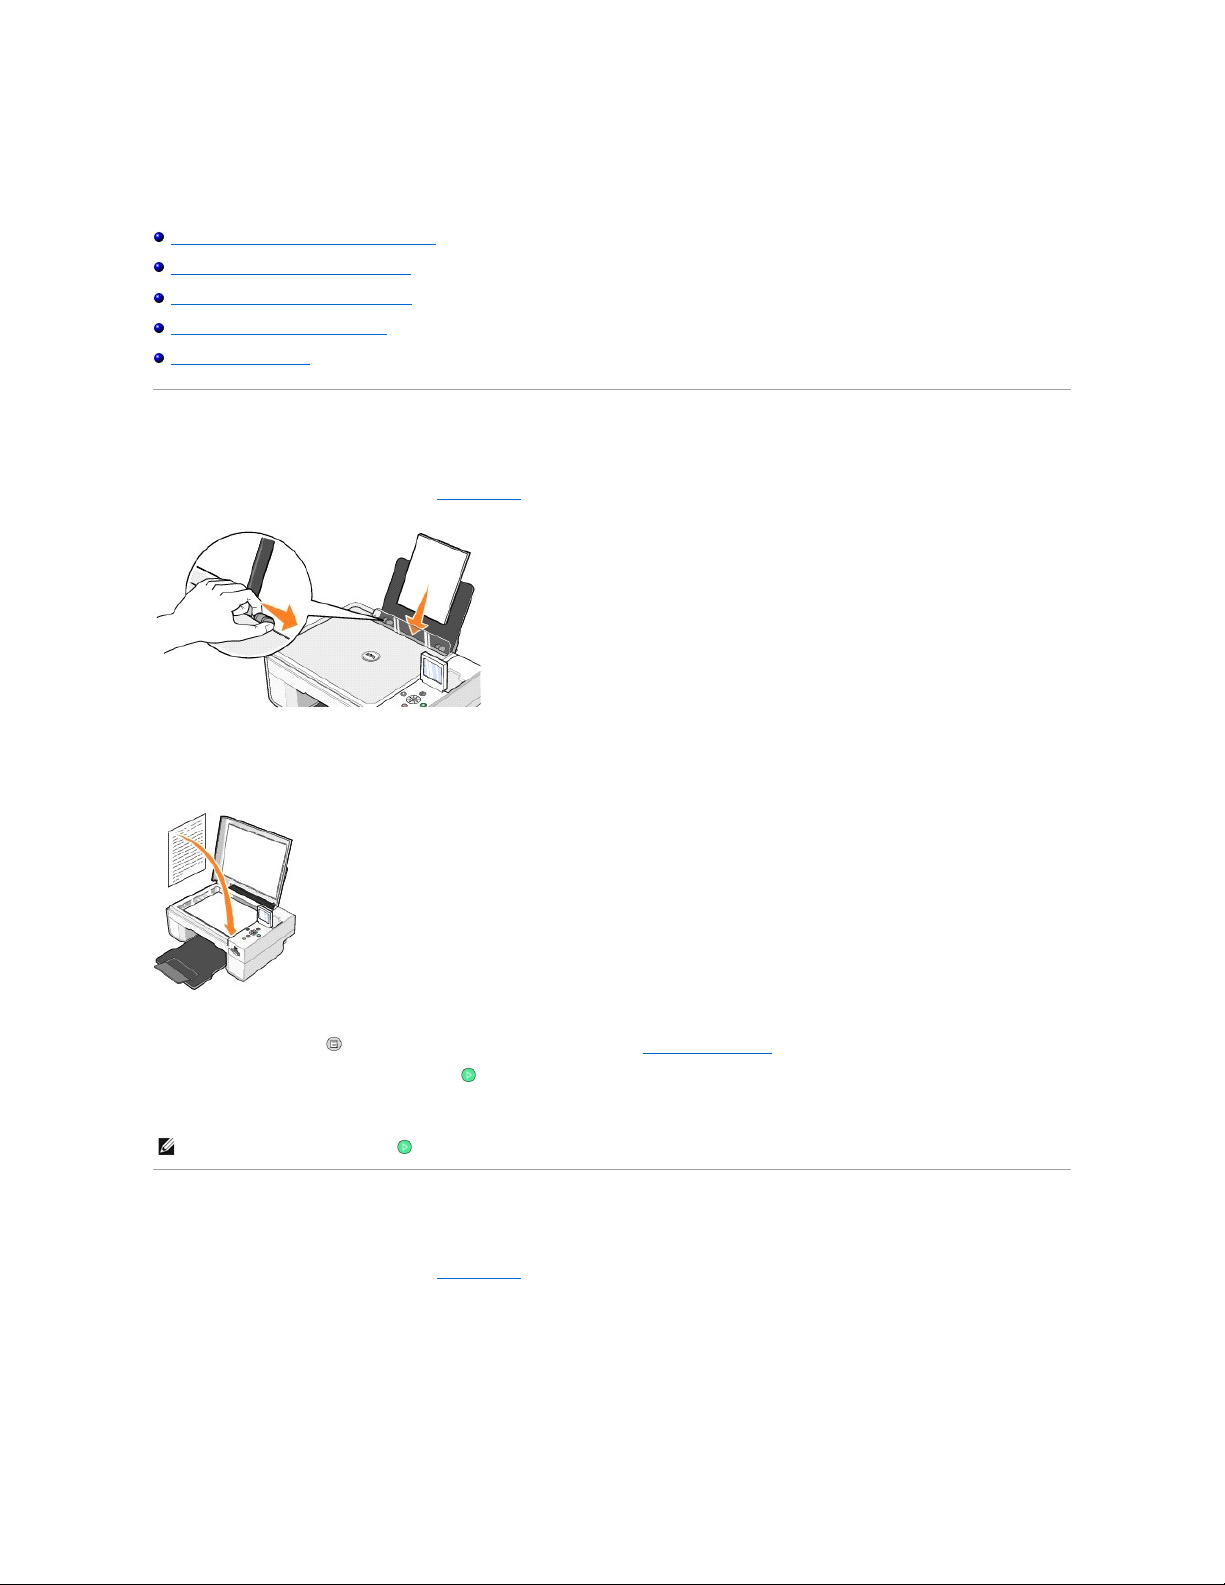
3. Open the top cover.
4. Place the document you want to copy face down on the scanner glass. Make sure the upper left corner of the front of the document aligns with the
arrow on the printer.
5. Close the top cover.
6. Press the Menu button to change copy settings. For more information, see Operator Panel Menus.
7. On the operator panel, press the Start button . The copy is made in the currently specified copy selection (Color or Black).
Copying appears on the display.
Copying Documents Using Your Computer
1. Turn on your computer and printer, and make sure they are connected.
2. Load the paper. For more information, see Loading Paper.
NOTE: If you press the Start button . without specifying a copy selection, the copy is printed in color by default.
Page 13
3. Open the top cover.
4. Place the document you want to copy face down on the scanner glass. Make sure the upper left corner of the front of the document aligns with the
arrow on the printer.
5. Close the top cover.
6. Click Start®Programs or All Programs®Dell Printers® Dell Photo AIO Printer 944®Dell All-In-One Center.
The Dell All-In-One Center opens.
7. Select the number of copies (1–99) and color setting from the Copy drop-down menus.
8. Click See More Copy Settings to:
¡ Choose a copy quality.
¡ Select the blank paper size.
¡ Select the original document size.
¡ Lighten or darken your document.
¡ Reduce or enlarge your document.
9. When you are finished customizing your settings, click Copy Now.
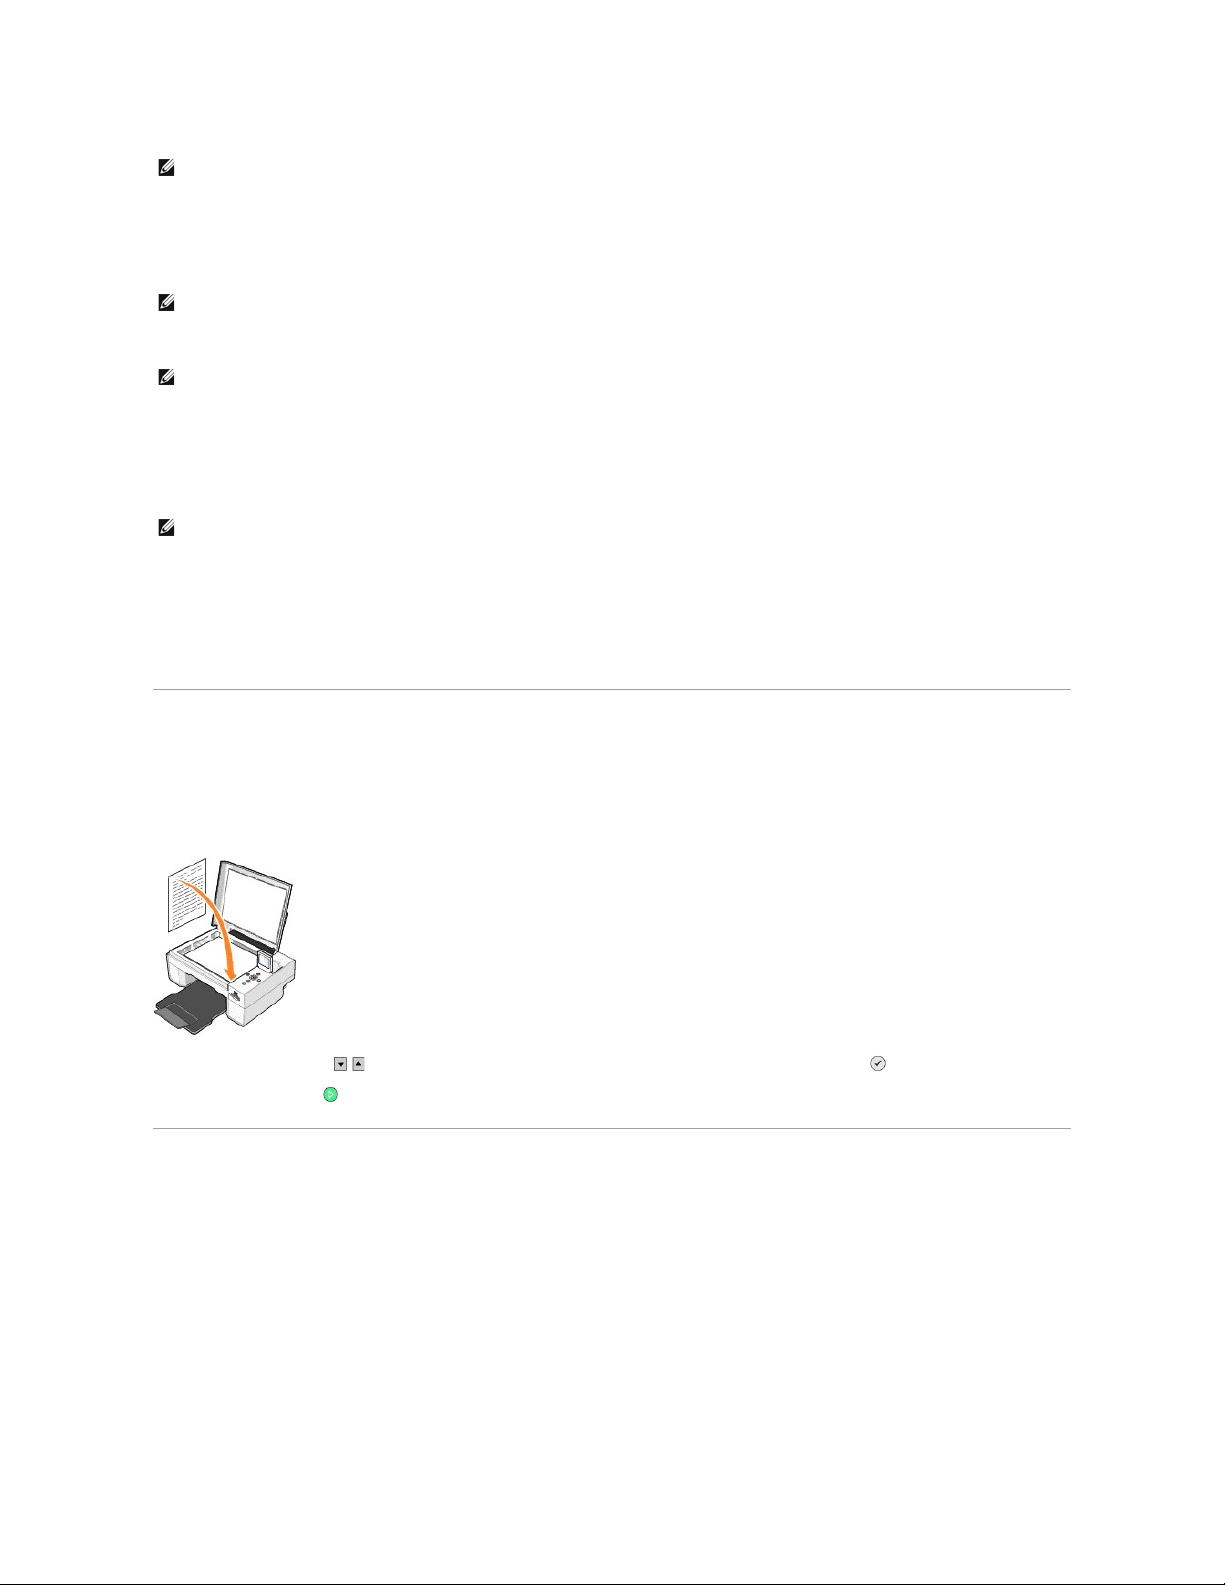
Copying Photos Using the Operator Panel
1. Turn on your printer.
2. Load photo paper with the print (glossy) side facing up. For more information, see Loading Paper.
3. Open the top cover.
4.
Place the photo you want to copy face down on the scanner glass. Make sure the upper left corner of the front of the photo aligns with the arrow on the
printer.
Page 14
5. Close the top cover.
6. From the Copy Quality submenu, select Photo. For more information, see Operator Panel Menus.
7. Press the Start button .
Copying Photos Using Your Computer
1. Turn on your computer and printer, and make sure they are connected.
2. Load photo paper with the print (glossy) side facing up. For more information, see Loading Paper.
3. Open the top cover.
4.
Place the photo you want to copy face down on the scanner glass. Make sure the upper left corner of the front of the photo aligns with the arrow on the
printer.
5. Close the top cover.
6. Click Start®Programs or All Programs®Dell Printers® Dell Photo AIO Printer 944®Dell All-In-One Center.
The Dell All-In-One Center opens.
7. Click Preview Now.
8. Adjust the dotted lines to fit around the portion of the image you want to print.
9. In the Copy section, select a quantity, and choose a photo option (Color Photo or Black and White Photo).
10. Click See More Copy Settings to:
¡ Choose a copy quality.
¡ Select the blank paper size.
¡ Select the original document size.
¡ Lighten or darken your document.
¡ Reduce or enlarge your document.
11. When you finish customizing your settings, click Copy Now.
Page 15
Changing Copy Settings
1. Click Start®Programs or All Programs®Dell Printers® Dell Photo AIO Printer 944®Dell All-In-One Center.
The Dell All-In-One Center opens.
2. Select a copy quantity and color.
3. Click See More Copy Settings to:
¡ Choose a copy quality.
¡ Select the blank paper size.
¡ Select the original document size.
¡ Lighten or darken your document.
¡ Reduce or enlarge your document.
4. Click the Advanced button to change options such as paper size and quality.
5. To make any changes, click the following tabs.
6. When you finish customizing your copy settings, click OK, and then click Copy Now.
Click this tab:
To:
Print
l Select the paper size and type.
l Select borderless printing options.
l Select the print quality.
Scan
l Select the color depth and scan resolution.
l Auto-crop the scanned image.
Image Enhancements
l Straighten images after scan (deskew).
l Sharpen your blurry images.
l Adjust the brightness of your image.
l Adjust the color correction curve (gamma) of your image.
Image Patterns
l Smooth the conversion of a gray image to a black and white dot pattern (dither).
l Remove image patterns from magazines or newspapers (descreen).
l Reduce the background noise on your color document.
Page 16

Faxing
Installing Microsoft Fax Console in Windows XP
Configuring Microsoft Fax Console (Windows XP) or Fax Service Management (Windows 2000)
Faxing a Paper Document Using the Operator Panel
Faxing a Paper Document Using Your Computer
Faxing Electronic Documents
Receiving a Fax Using Fax Console or Fax Service Management
Viewing Sent and Received Faxes Using Fax Console or Fax Service Management
Viewing the Status of a Fax Using Fax Console or Fax Service Management
Changing the Fax Configuration
To send a fax using this printer, you need to have the printer attached to a computer that is equipped with a modem and has Microsoft Fax installed. Before
you do anything else, check to see that the Microsoft Fax software is on your computer by clicking Start®Programs or All
Programs®Accessories®Communications.
For Windows XP:
l If you see Fax in the list that appears, you have Microsoft Fax on your computer. Continue with Configuring Microsoft Fax Console (Windows XP) or Fax
Service Management (Windows 2000).
l If you do not see Fax in the list that appears, continue with Installing Microsoft Fax Console in Windows XP.
For Windows 2000, Fax Service Management is automatically installed.
Installing Microsoft Fax Console in Windows XP
1. Click Start®Settings®Control Panel. Under Pick a Category, click Add or Remove Programs.
The Add or Remove Programs dialog box opens.
2. Click Add/Remove Windows Components.
3. In the Components list, click to select the Fax Services box.
4. Click Next.
5. Click Finish.
6. In the Add or Remove Programs dialog box, click Close.
Configuring Microsoft Fax Console (Windows XP) or Fax Service Management
(Windows 2000)
To configure for fax:
1. Click Start®Programs or All Programs®Accessories®Communications®Fax®Fax Console (Windows XP) or Fax Service Management (Windows
2000).
2. On the Welcome to Fax Configuration screen, click Next.
3. On the Sender Information screen, type the information you want to be displayed on your fax cover page, and then click Next.
4. On the Select Device for Sending or Receiving Faxes screen, click the modem that is installed in your computer in the Please select the fax device
list.
5. If you want to disable the sending of faxes, click to clear the Enable Send check box.
6. Click the Manual answer button or Automatically answer after (user-defined number of rings) button.
7. Click to select the Enable Receive check box if you want to receive faxes.
Page 17
8. Click Next.
9. On the Transmitting Subscriber Identification (TSID) screen, type the identification information (usually your fax number and your name or business
name) in the TSID box. This information will appear in the header area of the faxes you send and identifies your fax machine to the person who
receives your faxes.
10. Click Next.
11. On the Called Subscriber Identification (CSID) screen, type the CSID (appears to confirm that the fax is being sent to the correct recipient) that you
want in the CSID box.
12. Click Next.
13. On the Routing Options screen, click to select the Print it on check box if you want each received fax to be automatically printed. When you select this
check box, select the Dell Photo AIO Printer 944 to print the received fax.
14. Click to select the Store a copy in a folder check box if you want to create an archive copy of each fax. When you select this check box, you are able to
specify the storage location for the fax copy.
15. Click Next.
16. Confirm the configuration settings in the Configuration Summary list, and then click Finish.
You are now ready to send or receive faxes.
Faxing a Paper Document Using the Operator Panel
1. Turn on your printer and computer, and make sure they are connected. Make sure your computer modem is connected to an active analog phone line. If
you have DSL broadband service on the same phone line that you are using to fax, you must also have a DSL filter installed. Contact your Internet
Service Provider for information.
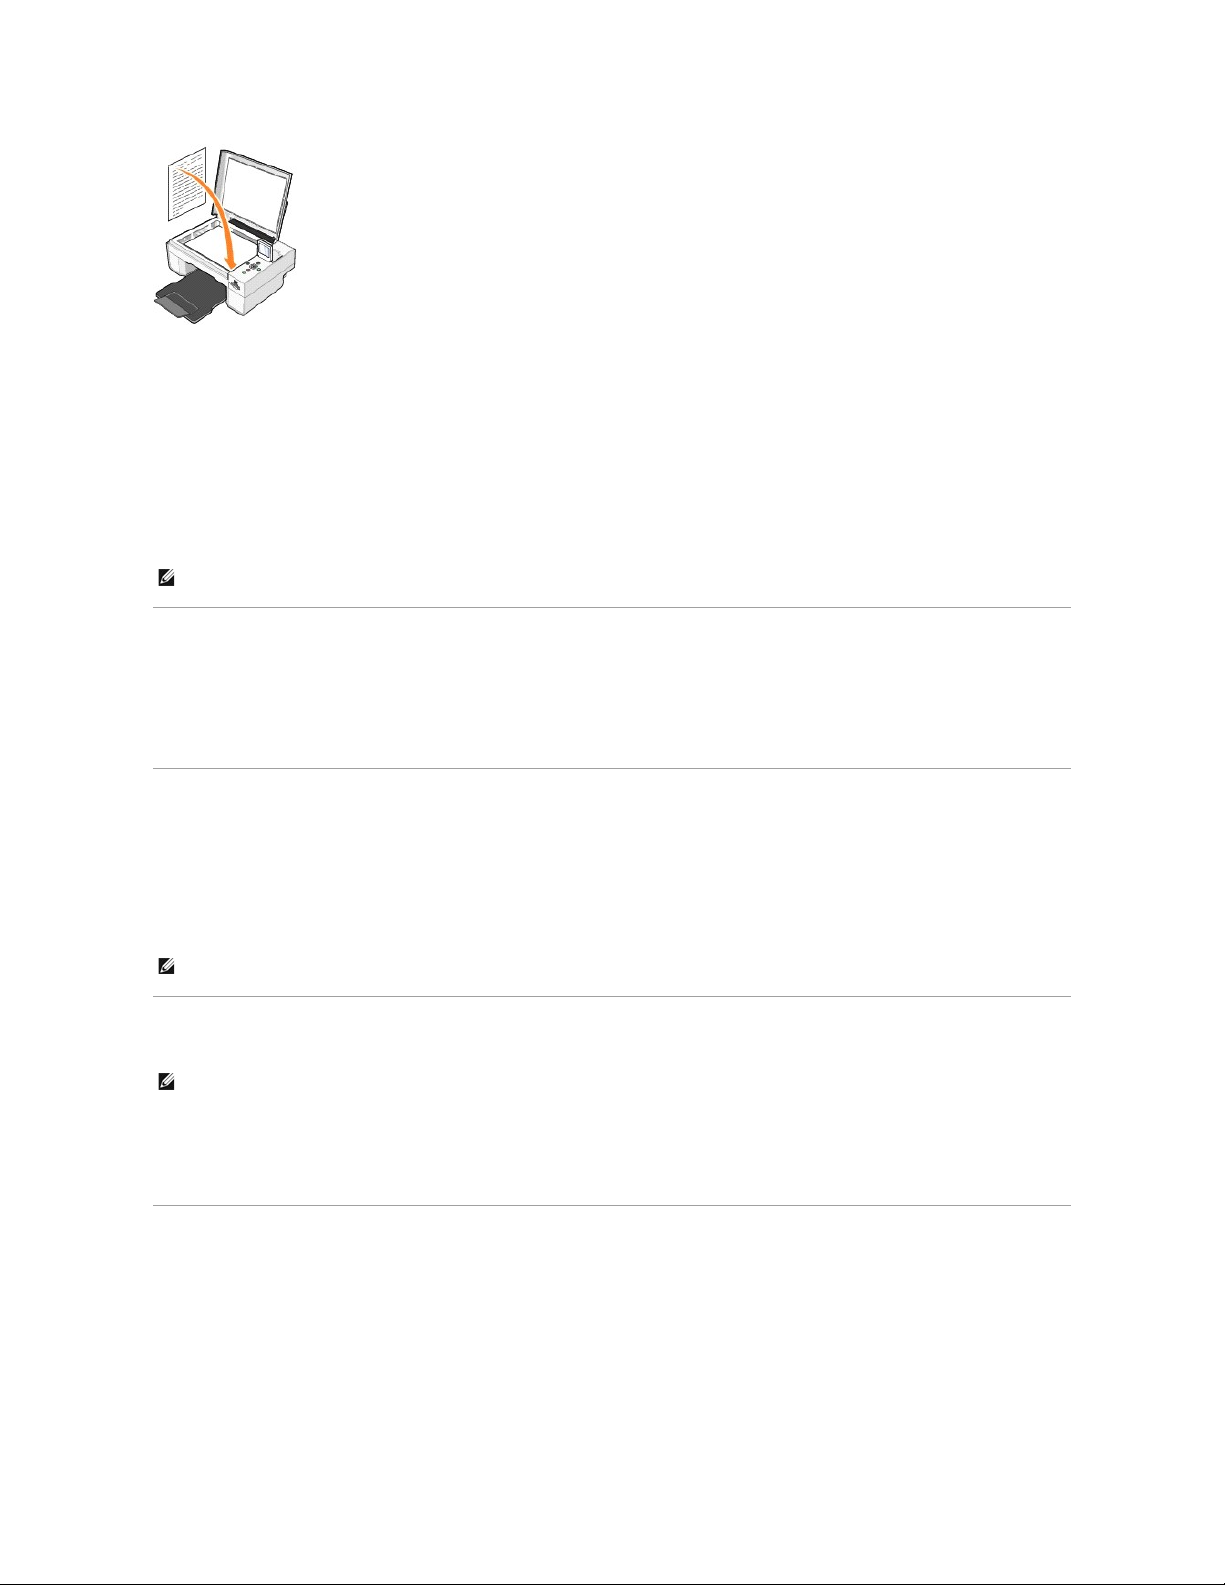
2. Place your document on the scanner glass, and make sure the upper left corner aligns with the arrow on the printer.
3. Press the Arrow buttons on the operator panel until Fax Mode is highlighted, and then press the Select button .
4. Press the Start button . The printer will scan the document to your computer, and the document will open in Microsoft Fax.
Faxing a Paper Document Using Your Computer
1. Turn on your printer and computer, and make sure they are connected. Make sure your computer modem is connected to an active analog phone line. If
you have DSL broadband service on the same phone line that you are using to fax, you must also have a DSL filter installed. Contact your Internet
Service Provider for information.
2. Place your document on the scanner glass, and make sure the upper left corner aligns with the arrow on the printer.
NOTE: Selecting the Enable Receive check box allows you to receive faxes but may cause the computer modem to answer all phone calls, in which case
you may not receive voice mail.
NOTE: The TSID is mandatory in some areas.
NOTE: Steps 11–14 only occur if you enabled your machine to receive faxes in step 7.
NOTE: Your printer must be on and connected to your computer in order to automatically print faxes.
Page 18
3. Click Start®Programs or All Programs®Dell Printers® Dell Photo AIO Printer 944®Dell All-In-One Center.
The Dell All-In-One Center opens.
4. In the Dell All-In-One Center you can either:
l In the Scan or Fax section, you can send a single or multiple page fax. First, customize your fax job by answering the questions that appear on
your screen.
To send a single-page fax, click Fax Now.
To send a multiple-page fax, click Advanced®Scan multiple items before output®OK.
l In the Productivity Tools section, click Fax an image, and follow the instructions on the screen.
Faxing Electronic Documents
1. With the file open, click File®Print.
2. In the printer list, select Fax.
3. Click Print, and then follow the instructions on the screen.
Receiving a Fax Using Fax Console or Fax Service Management
1. Make sure that an active telephone line is connected to the wall jack connector on the computer modem.
2. Click Start®Programs or All Programs® Accessories®Communications® Fax.
3. Click Fax Console or Fax Service Management.
If you selected the Enable Receive check box when configuring Fax Console or Fax Service Management, you are now ready to receive a fax.
Viewing Sent and Received Faxes Using Fax Console or Fax Service Management
1. Click Start®Programs or All Programs® Accessories®Communications® Fax.
2. Click Fax Console or Fax Service Management.
View received faxes in the Inbox; view sent faxes in Sent Items.
Viewing the Status of a Fax Using Fax Console or Fax Service Management
1. Click Start®Programs or All Programs® Accessories®Communications® Fax.
2. Click Fax Console or Fax Service Management.
3. The following folders appear:
l Incoming — faxes currently being received
l Inbox — faxes that have been received
l Outbox — faxes scheduled to be sent
NOTE: One of the questions on the screen asks if there is more than one page. If there are multiple pages in your fax, you should choose Yes, prompt
me for each page.
NOTE: Selecting the Enable Receive check box allows you to receive faxes but may cause the computer modem to answer all phone calls, in which case
you may not receive voice mail.
NOTE: Only faxes sent and received by Fax Console can be seen by Fax Console.
Page 19

l Sent Items — faxes successfully sent
4. Click the folder of your choice.
5. Click the fax in the right pane for which you want to view the status, and then click Preferences or Properties.
6. Click the General tab, and view the Status line.
7. Click Close when you are finished.
Changing the Fax Configuration
1. Click Start®Programs or All Programs®Accessories®Communications®Fax, and then click Fax Console.
2. In Fax Console, click Configure Fax on the Tools menu to start the Fax Configuration Wizard.
Page 20

Finding Information
What are you looking for?
Find it here
l Drivers for my printer
l My User's Guide
Drivers and Utilities CD
If you purchased your Dell computer and printer at the same time, documentation and drivers for your printer are already
installed on your computer. You can use the CD to uninstall/reinstall drivers or access your documentation.
Readme files may be included on your CD to provide last-minute updates about technical changes to your printer or
advanced technical reference material for experienced users or technicians.
How to set up my printer
Setting Up Your Printer poster
l Safety information
l How to set up and use my
printer
l Warranty information
Owner's Manual
Express Service Code and Service
Tag number
Express Service Code and Service Tag number
This label is located under the printer unit and on the back of the printer.
l Latest drivers for my
printer
l Answers to technical
service and support
questions
l Documentation for my
printer
Dell Support Website: support.dell.com
The Dell Support website provides several online tools, including:
l Solutions — Troubleshooting hints and tips, articles from technicians, and online courses
l Upgrades — Upgrade information for components, such as memory
l Customer Care — Contact information, order status, warranty, and repair information
l Downloads — Drivers
l Reference — Printer documentation and product specifications
l How to use Windows XP
l Documentation for my
printer
Windows XP Help and Support Center
1. Click Start®Help and Support.
2. Type a word or phrase that describes your problem, and then click the arrow icon.
3. Click the topic that describes your problem.
4. Follow the instructions shown on the screen.
Page 21

GNU License
GENERAL PUBLIC LICENSE
Version 2, June 1991
Copyright (C) 1989, 1991 Free Software Foundation, Inc.
59 Temple Place, Suite 330, Boston, MA 02111-1307 USA
Everyone is permitted to copy and distribute verbatim copies of this license document, but changing it is not allowed.
Preamble
The licenses for most software are designed to take away your freedom to share and change it. By contrast, the GNU General Public License is intended to
guarantee your freedom to share and change free software--to make sure the software is free for all its users. This General Public License applies to most of
the Free Software Foundation's software and to any other program whose authors commit to using it. (Some other Free Software Foundation software is
covered by the GNU Library General Public License instead.) You can apply it to your programs, too.
When we speak of free software, we are referring to freedom, not price. Our General Public Licenses are designed to make sure that you have the freedom to
distribute copies of free software (and charge for this service if you wish), that you receive source code or can get it if you want it, that you can change the
software or use pieces of it in new free programs; and that you know you can do these things.
To protect your rights, we need to make restrictions that forbid anyone to deny you these rights or to ask you to surrender the rights. These restrictions
translate to certain responsibilities for you if you distribute copies of the software, or if you modify it.
For example, if you distribute copies of such a program, whether gratis or for a fee, you must give the recipients all the rights that you have. You must make
sure that they, too, receive or can get the source code. And you must show them these terms so they know their rights.
We protect your rights with two steps: (1) copyright the software, and (2) offer you this license which gives you legal permission to copy, distribute and/or
modify the software.
Also, for each author's protection and ours, we want to make certain that everyone understands that there is no warranty for this free software. If the
software is modified by someone else and passed on, we want its recipients to know that what they have is not the original, so that any problems introduced
by others will not reflect on the original authors' reputations.
Finally, any free program is threatened constantly by software patents. We wish to avoid the danger that redistributors of a free program will individually
obtain patent licenses, in effect making the program proprietary. To prevent this, we have made it clear that any patent must be licensed for everyone's free
use or not licensed at all.
The precise terms and conditions for copying, distribution and modification follow.
GNU GENERAL PUBLIC LICENSE
TERMS AND CONDITIONS FOR COPYING, DISTRIBUTION AND MODIFICATION
1.
This License applies to any program or other work which contains a notice placed by the copyright holder saying it may be distributed under the terms of
this General Public License. The "Program", below, refers to any such program or work, and a "work based on the Program" means either the Program
or any derivative work under copyright law: that is to say, a work containing the Program or a portion of it, either verbatim or with modifications and/or
translated into another language. (Hereinafter, translation is included without limitation in the term "modification".) Each licensee is addressed as "you".
Activities other than copying, distribution and modification are not covered by this License; they are outside its scope. The act of running the Program is
not restricted, and the output from the Program is covered only if its contents constitute a work based on the Program (independent of having been
made by running the Program). Whether that is true depends on what the Program does.
Page 22

2. You may copy and distribute verbatim copies of the Program's source code as you receive it, in any medium, provided that you conspicuously and
appropriately publish on each copy an appropriate copyright notice and disclaimer of warranty; keep intact all the notices that refer to this License and
to the absence of any warranty; and give any other recipients of the Program a copy of this License along with the Program.
You may charge a fee for the physical act of transferring a copy, and you may at your option offer warranty protection in exchange for a fee.
3. You may modify your copy or copies of the Program or any portion of it, thus forming a work based on the Program, and copy and distribute such
modifications or work under the terms of Section 1 above, provided that you also meet all of these conditions:
a. You must cause the modified files to carry prominent notices stating that you changed the files and the date of any change.
b.
You must cause any work that you distribute or publish, that in whole or in part contains or is derived from the Program or any part thereof, to be
licensed as a whole at no charge to all third parties under the terms of this License.
c. If the modified program normally reads commands interactively when run, you must cause it, when started running for such interactive use in the
most ordinary way, to print or display an announcement including an appropriate copyright notice and a notice that there is no warranty (or else,
saying that you provide a warranty) and that users may redistribute the program under these conditions, and telling the user how to view a copy
of this License. (Exception: if the Program itself is interactive but does not normally print such an announcement, your work based on the Program
is not required to print an announcement.)
These requirements apply to the modified work as a whole. If identifiable sections of that work are not derived from the Program, and can be reasonably
considered independent and separate works in themselves, then this License, and its terms, do not apply to those sections when you distribute them as
separate works. But when you distribute the same sections as part of a whole which is a work based on the Program, the distribution of the whole must
be on the terms of this License, whose permissions for other licensees extend to the entire whole, and thus to each and every part regardless of who
wrote it.
Thus, it is not the intent of this section to claim rights or contest your rights to work written entirely by you; rather, the intent is to exercise the right to
control the distribution of derivative or collective works based on the Program.
In addition, mere aggregation of another work not based on the Program with the Program (or with a work based on the Program) on a volume of a
storage or distribution medium does not bring the other work under the scope of this License.
4.
You may copy and distribute the Program (or a work based on it, under Section 2) in object code or executable form under the terms of Sections 1 and 2
above provided that you also do one of the following:
a. Accompany it with the complete corresponding machine-readable source code, which must be distributed under the terms of Sections 1 and 2
above on a medium customarily used for software interchange; or,
b. Accompany it with a written offer, valid for at least three years, to give any third party, for a charge no more than your cost of physically
performing source distribution, a complete machine-
readable copy of the corresponding source code, to be distributed under the terms of Sections
1 and 2 above on a medium customarily used for software interchange; or,
c. Accompany it with the information you received as to the offer to distribute corresponding source code. (This alternative is allowed only for
noncommercial distribution and only if you received the program in object code or executable form with such an offer, in accord with Subsection b
above.)
The source code for a work means the preferred form of the work for making modifications to it. For an executable work, complete source code means all
the source code for all modules it contains, plus any associated interface definition files, plus the scripts used to control compilation and installation of
the executable. However, as a special exception, the source code distributed need not include anything that is normally distributed (in either source or
binary form) with the major components (compiler, kernel, and so on) of the operating system on which the executable runs, unless that component
itself accompanies the executable.
If distribution of executable or object code is made by offering access to copy from a designated place, then offering equivalent access to copy the
source code from the same place counts as distribution of the source code, even though third parties are not compelled to copy the source along with
the object code.
5.
You may not copy, modify, sublicense, or distribute the Program except as expressly provided under this License. Any attempt otherwise to copy, modify,
sublicense or distribute the Program is void, and will automatically terminate your rights under this License. However, parties who have received copies,
or rights, from you under this License will not have their licenses terminated so long as such parties remain in full compliance.
6. You are not required to accept this License, since you have not signed it. However, nothing else grants you permission to modify or distribute the
Program or its derivative works. These actions are prohibited by law if you do not accept this License. Therefore, by modifying or distributing the
Program (or any work based on the Program), you indicate your acceptance of this License to do so, and all its terms and conditions for copying,
distributing or modifying the Program or works based on it.
7. Each time you redistribute the Program (or any work based on the Program), the recipient automatically receives a license from the original licensor to
copy, distribute or modify the Program subject to these terms and conditions. You may not impose any further restrictions on the recipients' exercise of
the rights granted herein. You are not responsible for enforcing compliance by third parties to this License.
8. If, as a consequence of a court judgment or allegation of patent infringement or for any other reason (not limited to patent issues), conditions are
imposed on you (whether by court order, agreement or otherwise) that contradict the conditions of this License, they do not excuse you from the
conditions of this License. If you cannot distribute so as to satisfy simultaneously your obligations under this License and any other pertinent
obligations, then as a consequence you may not distribute the Program at all. For example, if a patent license would not permit royalty-free
redistribution of the Program by all those who receive copies directly or indirectly through you, then the only way you could satisfy both it and this
License would be to refrain entirely from distribution of the Program.
If any portion of this section is held invalid or unenforceable under any particular circumstance, the balance of the section is intended to apply and the
section as a whole is intended to apply in other circumstances.
It is not the purpose of this section to induce you to infringe any patents or other property right claims or to contest validity of any such claims; this
section has the sole purpose of protecting the integrity of the free software distribution system, which is implemented by public license practices. Many
people have made generous contributions to the wide range of software distributed through that system in reliance on consistent application of that
system; it is up to the author/donor to decide if he or she is willing to distribute software through any other system and a licensee cannot impose that
choice.
This section is intended to make thoroughly clear what is believed to be a consequence of the rest of this License.
9. If the distribution and/or use of the Program is restricted in certain countries either by patents or by copyrighted interfaces, the original copyright holder
who places the Program under this License may add an explicit geographical distribution limitation excluding those countries, so that distribution is
permitted only in or among countries not thus excluded. In such case, this License incorporates the limitation as if written in the body of this License.
10.
The Free Software Foundation may publish revised and/or new versions of the General Public License from time to time. Such new versions will be similar
in spirit to the present version, but may differ in detail to address new problems or concerns.
Each version is given a distinguishing version number. If the Program specifies a version number of this License which applies to it and "any later
version", you have the option of following the terms and conditions either of that version or of any later version published by the Free Software
Page 23

Foundation. If the Program does not specify a version number of this License, you may choose any version ever published by the Free Software
Foundation.
11. If you wish to incorporate parts of the Program into other free programs whose distribution conditions are different, write to the author to ask for
permission. For software which is copyrighted by the Free Software Foundation, write to the Free Software Foundation; we sometimes make exceptions
for this. Our decision will be guided by the two goals of preserving the free status of all derivatives of our free software and of promoting the sharing
and reuse of software generally.
NO WARRANTY
12. BECAUSE THE PROGRAM IS LICENSED FREE OF CHARGE, THERE IS NO WARRANTY FOR THE PROGRAM, TO THE EXTENT PERMITTED BY APPLICABLE LAW.
EXCEPT WHEN OTHERWISE STATED IN WRITING THE COPYRIGHT HOLDERS AND/OR OTHER PARTIES PROVIDE THE PROGRAM "AS IS" WITHOUT WARRANTY
OF ANY KIND, EITHER EXPRESSED OR IMPLIED, INCLUDING, BUT NOT LIMITED TO, THE IMPLIED WARRANTIES OF MERCHANTABILITY AND FITNESS FOR A
PARTICULAR PURPOSE. THE ENTIRE RISK AS TO THE QUALITY AND PERFORMANCE OF THE PROGRAM IS WITH YOU. SHOULD THE PROGRAM PROVE
DEFECTIVE, YOU ASSUME THE COST OF ALL NECESSARY SERVICING, REPAIR OR CORRECTION.
13.
IN NO EVENT UNLESS REQUIRED BY APPLICABLE LAW OR AGREED TO IN WRITING WILL ANY COPYRIGHT HOLDER, OR ANY OTHER PARTY WHO MAY MODIFY
AND/OR REDISTRIBUTE THE PROGRAM AS PERMITTED ABOVE, BE LIABLE TO YOU FOR DAMAGES, INCLUDING ANY GENERAL, SPECIAL, INCIDENTAL OR
CONSEQUENTIAL DAMAGES ARISING OUT OF THE USE OR INABILITY TO USE THE PROGRAM (INCLUDING BUT NOT LIMITED TO LOSS OF DATA OR DATA
BEING RENDERED INACCURATE OR LOSSES SUSTAINED BY YOU OR THIRD PARTIES OR A FAILURE OF THE PROGRAM TO OPERATE WITH ANY OTHER
PROGRAMS), EVEN IF SUCH HOLDER OR OTHER PARTY HAS BEEN ADVISED OF THE POSSIBILITY OF SUCH DAMAGES.
END OF TERMS AND CONDITIONS
How to Apply These Terms to Your New Programs
If you develop a new program, and you want it to be of the greatest possible use to the public, the best way to achieve this is to make it free software which
everyone can redistribute and change under these terms.
To do so, attach the following notices to the program. It is safest to attach them to the start of each source file to most effectively convey the exclusion of
warranty; and each file should have at least the "copyright" line and a pointer to where the full notice is found.
1 April 1989
Lexmark International, Inc.
This General Public License does not permit incorporating your program into proprietary programs. If your program is a subroutine library, you may consider it
more useful to permit linking proprietary applications with the library. If this is what you want to do, use the GNU Library General Public License instead of this
License.
GNU LESSER GENERAL PUBLIC LICENSE
Version 2.1, February 1999
Copyright (C) 1991, 1999 Free Software Foundation, Inc.
59 Temple Place, Suite 330, Boston, MA 02111-1307 USA
Everyone is permitted to copy and distribute verbatim copies of this license document, but changing it is not allowed.
[This is the first released version of the Lesser GPL. It also counts as the successor of the GNU Library Public License, version 2, hence the version number
2.1.]
Preamble
The licenses for most software are designed to take away your freedom to share and change it. By contrast, the GNU General Public Licenses are intended to
guarantee your freedom to share and change free software--to make sure the software is free for all its users.
Page 24

This license, the Lesser General Public License, applies to some specially designated software packages--typically libraries--of the Free Software Foundation
and other authors who decide to use it. You can use it too, but we suggest you first think carefully about whether this license or the ordinary General Public
License is the better strategy to use in any particular case, based on the explanations below.
When we speak of free software, we are referring to freedom of use, not price. Our General Public Licenses are designed to make sure that you have the
freedom to distribute copies of free software (and charge for this service if you wish); that you receive source code or can get it if you want it; that you can
change the software and use pieces of it in new free programs; and that you are informed that you can do these things.
To protect your rights, we need to make restrictions that forbid distributors to deny you these rights or to ask you to surrender these rights. These restrictions
translate to certain responsibilities for you if you distribute copies of the library or if you modify it.
For example, if you distribute copies of the library, whether gratis or for a fee, you must give the recipients all the rights that we gave you. You must make
sure that they, too, receive or can get the source code. If you link other code with the library, you must provide complete object files to the recipients, so that
they can relink them with the library after making changes to the library and recompiling it. And you must show them these terms so they know their rights.
We protect your rights with a two-step method: (1) we copyright the library, and (2) we offer you this license, which gives you legal permission to copy,
distribute and/or modify the library.
To protect each distributor, we want to make it very clear that there is no warranty for the free library. Also, if the library is modified by someone else and
passed on, the recipients should know that what they have is not the original version, so that the original author's reputation will not be affected by problems
that might be introduced by others.
Finally, software patents pose a constant threat to the existence of any free program. We wish to make sure that a company cannot effectively restrict the
users of a free program by obtaining a restrictive license from a patent holder. Therefore, we insist that any patent license obtained for a version of the library
must be consistent with the full freedom of use specified in this license.
Most GNU software, including some libraries, is covered by the ordinary GNU General Public License. This license, the GNU Lesser General Public License,
applies to certain designated libraries, and is quite different from the ordinary General Public License. We use this license for certain libraries in order to permit
linking those libraries into non-free programs.
When a program is linked with a library, whether statically or using a shared library, the combination of the two is legally speaking a combined work, a
derivative of the original library. The ordinary General Public License therefore permits such linking only if the entire combination fits its criteria of freedom. The
Lesser General Public License permits more lax criteria for linking other code with the library.
We call this license the "Lesser" General Public License because it does Less to protect the user's freedom than the ordinary General Public License. It also
provides other free software developers Less of an advantage over competing non-free programs. These disadvantages are the reason we use the ordinary
General Public License for many libraries. However, the Lesser license provides advantages in certain special circumstances.
For example, on rare occasions, there may be a special need to encourage the widest possible use of a certain library, so that it becomes a de-
facto standard.
To achieve this, non-free programs must be allowed to use the library. A more frequent case is that a free library does the same job as widely used non-free
libraries. In this case, there is little to gain by limiting the free library to free software only, so we use the Lesser General Public License.
In other cases, permission to use a particular library in non-free programs enables a greater number of people to use a large body of free software. For
example, permission to use the GNU C Library in non-free programs enables many more people to use the whole GNU operating system, as well as its variant,
the GNU/Linux operating system.
Although the Lesser General Public License is Less protective of the users' freedom, it does ensure that the user of a program that is linked with the Library
has the freedom and the wherewithal to run that program using a modified version of the Library.
The precise terms and conditions for copying, distribution and modification follow. Pay close attention to the difference between a "work based on the library"
and a "work that uses the library". The former contains code derived from the library, whereas the latter must be combined with the library in order to run.
GNU LESSER GENERAL PUBLIC LICENSE
TERMS AND CONDITIONS FOR COPYING, DISTRIBUTION AND MODIFICATION
This License Agreement applies to any software library or other program which contains a notice placed by the copyright holder or other authorized party
saying it may be distributed under the terms of this Lesser General Public License (also called "this License"). Each licensee is addressed as "you".
Page 25

A "library" means a collection of software functions and/or data prepared so as to be conveniently linked with application programs (which use some of those
functions and data) to form executables.
The "Library", below, refers to any such software library or work which has been distributed under these terms. A "work based on the Library" means either
the Library or any derivative work under copyright law: that is to say, a work containing the Library or a portion of it, either verbatim or with modifications
and/or translated straightforwardly into another language. (Hereinafter, translation is included without limitation in the term "modification".)
"Source code" for a work means the preferred form of the work for making modifications to it. For a library, complete source code means all the source code for
all modules it contains, plus any associated interface definition files, plus the scripts used to control compilation and installation of the library.
Activities other than copying, distribution and modification are not covered by this License; they are outside its scope. The act of running a program using the
Library is not restricted, and output from such a program is covered only if its contents constitute a work based on the Library (independent of the use of the
Library in a tool for writing it). Whether that is true depends on what the Library does and what the program that uses the Library does.
1. You may copy and distribute verbatim copies of the Library's complete source code as you receive it, in any medium, provided that you conspicuously
and appropriately publish on each copy an appropriate copyright notice and disclaimer of warranty; keep intact all the notices that refer to this License
and to the absence of any warranty; and distribute a copy of this License along with the Library.
You may charge a fee for the physical act of transferring a copy, and you may at your option offer warranty protection in exchange for a fee.
2. You may modify your copy or copies of the Library or any portion of it, thus forming a work based on the Library, and copy and distribute such
modifications or work under the terms of Section 1 above, provided that you also meet all of these conditions:
a. The modified work must itself be a software library.
b. You must cause the files modified to carry prominent notices stating that you changed the files and the date of any change.
c. You must cause the whole of the work to be licensed at no charge to all third parties under the terms of this License.
d. If a facility in the modified Library refers to a function or a table of data to be supplied by an application program that uses the facility, other than
as an argument passed when the facility is invoked, then you must make a good faith effort to ensure that, in the event an application does not
supply such function or table, the facility still operates, and performs whatever part of its purpose remains meaningful.
(For example, a function in a library to compute square roots has a purpose that is entirely well-
defined independent of the application. Therefore,
Subsection 2d requires that any application-supplied function or table used by this function must be optional: if the application does not supply it,
the square root function must still compute square roots.)
These requirements apply to the modified work as a whole. If identifiable sections of that work are not derived from the Library, and can be reasonably
considered independent and separate works in themselves, then this License, and its terms, do not apply to those sections when you distribute them as
separate works. But when you distribute the same sections as part of a whole which is a work based on the Library, the distribution of the whole must
be on the terms of this License, whose permissions for other licensees extend to the entire whole, and thus to each and every part regardless of who
wrote it.
Thus, it is not the intent of this section to claim rights or contest your rights to work written entirely by you; rather, the intent is to exercise the right to
control the distribution of derivative or collective works based on the Library.
In addition, mere aggregation of another work not based on the Library with the Library (or with a work based on the Library) on a volume of a storage
or distribution medium does not bring the other work under the scope of this License.
3. You may opt to apply the terms of the ordinary GNU General Public License instead of this License to a given copy of the Library. To do this, you must
alter all the notices that refer to this License, so that they refer to the ordinary GNU General Public License, version 2, instead of to this License. (If a
newer version than version 2 of the ordinary GNU General Public License has appeared, then you can specify that version instead if you wish.) Do not
make any other change in these notices.
Once this change is made in a given copy, it is irreversible for that copy, so the ordinary GNU General Public License applies to all subsequent copies and
derivative works made from that copy.
This option is useful when you wish to copy part of the code of the Library into a program that is not a library.
4.
You may copy and distribute the Library (or a portion or derivative of it, under Section 2) in object code or executable form under the terms of Sections 1
and 2 above provided that you accompany it with the complete corresponding machine-readable source code, which must be distributed under the
terms of Sections 1 and 2 above on a medium customarily used for software interchange.
If distribution of object code is made by offering access to copy from a designated place, then offering equivalent access to copy the source code from
the same place satisfies the requirement to distribute the source code, even though third parties are not compelled to copy the source along with the
object code.
5. A program that contains no derivative of any portion of the Library, but is designed to work with the Library by being compiled or linked with it, is called
a "work that uses the Library". Such a work, in isolation, is not a derivative work of the Library, and therefore falls outside the scope of this License.
However, linking a "work that uses the Library" with the Library creates an executable that is a derivative of the Library (because it contains portions of
the Library), rather than a "work that uses the library". The executable is therefore covered by this License. Section 6 states terms for distribution of
such executables.
When a "work that uses the Library" uses material from a header file that is part of the Library, the object code for the work may be a derivative work of
the Library even though the source code is not. Whether this is true is especially significant if the work can be linked without the Library, or if the work is
itself a library. The threshold for this to be true is not precisely defined by law.
If such an object file uses only numerical parameters, data structure layouts and accessors, and small macros and small inline functions (ten lines or less
in length), then the use of the object file is unrestricted, regardless of whether it is legally a derivative work. (Executables containing this object code
plus portions of the Library will still fall under Section 6.)
Otherwise, if the work is a derivative of the Library, you may distribute the object code for the work under the terms of Section 6. Any executables
containing that work also fall under Section 6, whether or not they are linked directly with the Library itself.
6. As an exception to the Sections above, you may also combine or link a "work that uses the Library" with the Library to produce a work containing
Page 26

portions of the Library, and distribute that work under terms of your choice, provided that the terms permit modification of the work for the customer's
own use and reverse engineering for debugging such modifications.
You must give prominent notice with each copy of the work that the Library is used in it and that the Library and its use are covered by this License. You
must supply a copy of this License. If the work during execution displays copyright notices, you must include the copyright notice for the Library among
them, as well as a reference directing the user to the copy of this License. Also, you must do one of these things:
a. Accompany the work with the complete corresponding machine-readable source code for the Library including whatever changes were used in
the work (which must be distributed under Sections 1 and 2 above); and, if the work is an executable linked with the Library, with the complete
machine-readable "work that uses the Library", as object code and/or source code, so that the user can modify the Library and then relink to
produce a modified executable containing the modified Library. (It is understood that the user who changes the contents of definitions files in the
Library will not necessarily be able to recompile the application to use the modified definitions.)
b. Use a suitable shared library mechanism for linking with the Library. A suitable mechanism is one that (1) uses at run time a copy of the library
already present on the user's computer system, rather than copying library functions into the executable, and (2) will operate properly with a
modified version of the library, if the user installs one, as long as the modified version is interface-compatible with the version that the work was
made with.
c. Accompany the work with a written offer, valid for at least three years, to give the same user the materials specified in Subsection 6a, above, for
a charge no more than the cost of performing this distribution.
d. If distribution of the work is made by offering access to copy from a designated place, offer equivalent access to copy the above specified
materials from the same place.
e. Verify that the user has already received a copy of these materials or that you have already sent this user a copy.
For an executable, the required form of the "work that uses the Library" must include any data and utility programs needed for reproducing the
executable from it. However, as a special exception, the materials to be distributed need not include anything that is normally distributed (in either
source or binary form) with the major components (compiler, kernel, and so on) of the operating system on which the executable runs, unless that
component itself accompanies the executable.
It may happen that this requirement contradicts the license restrictions of other proprietary libraries that do not normally accompany the operating
system. Such a contradiction means you cannot use both them and the Library together in an executable that you distribute.
7. You may place library facilities that are a work based on the Library side-by-side in a single library together with other library facilities not covered by
this License, and distribute such a combined library, provided that the separate distribution of the work based on the Library and of the other library
facilities is otherwise permitted, and provided that you do these two things:
a. Accompany the combined library with a copy of the same work based on the Library, uncombined with any other library facilities. This must be
distributed under the terms of the Sections above.
b. Give prominent notice with the combined library of the fact that part of it is a work based on the Library, and explaining where to find the
accompanying uncombined form of the same work.
8.
You may not copy, modify, sublicense, link with, or distribute the Library except as expressly provided under this License. Any attempt otherwise to copy,
modify, sublicense, link with, or distribute the Library is void, and will automatically terminate your rights under this License. However, parties who have
received copies, or rights, from you under this License will not have their licenses terminated so long as such parties remain in full compliance.
9.
You are not required to accept this License, since you have not signed it. However, nothing else grants you permission to modify or distribute the Library
or its derivative works. These actions are prohibited by law if you do not accept this License. Therefore, by modifying or distributing the Library (or any
work based on the Library), you indicate your acceptance of this License to do so, and all its terms and conditions for copying, distributing or modifying
the Library or works based on it.
10.
Each time you redistribute the Library (or any work based on the Library), the recipient automatically receives a license from the original licensor to copy,
distribute, link with or modify the Library subject to these terms and conditions. You may not impose any further restrictions on the recipients' exercise
of the rights granted herein. You are not responsible for enforcing compliance by third parties with this License.
11. If, as a consequence of a court judgment or allegation of patent infringement or for any other reason (not limited to patent issues), conditions are
imposed on you (whether by court order, agreement or otherwise) that contradict the conditions of this License, they do not excuse you from the
conditions of this License. If you cannot distribute so as to satisfy simultaneously your obligations under this License and any other pertinent
obligations, then as a consequence you may not distribute the Library at all. For example, if a patent license would not permit royalty-free redistribution
of the Library by all those who receive copies directly or indirectly through you, then the only way you could satisfy both it and this License would be to
refrain entirely from distribution of the Library.
If any portion of this section is held invalid or unenforceable under any particular circumstance, the balance of the section is intended to apply, and the
section as a whole is intended to apply in other circumstances.
It is not the purpose of this section to induce you to infringe any patents or other property right claims or to contest validity of any such claims; this
section has the sole purpose of protecting the integrity of the free software distribution system which is implemented by public license practices. Many
people have made generous contributions to the wide range of software distributed through that system in reliance on consistent application of that
system; it is up to the author/donor to decide if he or she is willing to distribute software through any other system and a licensee cannot impose that
choice.
This section is intended to make thoroughly clear what is believed to be a consequence of the rest of this License.
12. If the distribution and/or use of the Library is restricted in certain countries either by patents or by copyrighted interfaces, the original copyright holder
who places the Library under this License may add an explicit geographical distribution limitation excluding those countries, so that distribution is
permitted only in or among countries not thus excluded. In such case, this License incorporates the limitation as if written in the body of this License.
13. The Free Software Foundation may publish revised and/or new versions of the Lesser General Public License from time to time. Such new versions will
be similar in spirit to the present version, but may differ in detail to address new problems or concerns. Each version is given a distinguishing version
number. If the Library specifies a version number of this License which applies to it and "any later version", you have the option of following the terms
and conditions either of that version or of any later version published by the Free Software Foundation. If the Library does not specify a license version
number, you may choose any version ever published by the Free Software Foundation.
14. If you wish to incorporate parts of the Library into other free programs whose distribution conditions are incompatible with these, write to the author to
ask for permission. For software which is copyrighted by the Free Software Foundation, write to the Free Software Foundation; we sometimes make
exceptions for this. Our decision will be guided by the two goals of preserving the free status of all derivatives of our free software and of promoting the
sharing and reuse of software generally.
NO WARRANTY
15. BECAUSE THE LIBRARY IS LICENSED FREE OF CHARGE, THERE IS NO WARRANTY FOR THE LIBRARY, TO THE EXTENT PERMITTED BY APPLICABLE LAW.
EXCEPT WHEN OTHERWISE STATED IN WRITING THE COPYRIGHT HOLDERS AND/OR OTHER PARTIES PROVIDE THE LIBRARY "AS IS" WITHOUT WARRANTY
OF ANY KIND, EITHER EXPRESSED OR IMPLIED, INCLUDING, BUT NOT LIMITED TO, THE IMPLIED WARRANTIES OF MERCHANTABILITY AND FITNESS FOR A
PARTICULAR PURPOSE. THE ENTIRE RISK AS TO THE QUALITY AND PERFORMANCE OF THE LIBRARY IS WITH YOU. SHOULD THE LIBRARY PROVE DEFECTIVE,
Page 27

YOU ASSUME THE COST OF ALL NECESSARY SERVICING, REPAIR OR CORRECTION.
16.
IN NO EVENT UNLESS REQUIRED BY APPLICABLE LAW OR AGREED TO IN WRITING WILL ANY COPYRIGHT HOLDER, OR ANY OTHER PARTY WHO MAY MODIFY
AND/OR REDISTRIBUTE THE LIBRARY AS PERMITTED ABOVE, BE LIABLE TO YOU FOR DAMAGES, INCLUDING ANY GENERAL, SPECIAL, INCIDENTAL OR
CONSEQUENTIAL DAMAGES ARISING OUT OF THE USE OR INABILITY TO USE THE LIBRARY (INCLUDING BUT NOT LIMITED TO LOSS OF DATA OR DATA BEING
RENDERED INACCURATE OR LOSSES SUSTAINED BY YOU OR THIRD PARTIES OR A FAILURE OF THE LIBRARY TO OPERATE WITH ANY OTHER SOFTWARE),
EVEN IF SUCH HOLDER OR OTHER PARTY HAS BEEN ADVISED OF THE POSSIBILITY OF SUCH DAMAGES.
END OF TERMS AND CONDITIONS
How to Apply These Terms to Your New Libraries
If you develop a new library, and you want it to be of the greatest possible use to the public, we recommend making it free software that everyone can
redistribute and change. You can do so by permitting redistribution under these terms (or, alternatively, under the terms of the ordinary General Public
License).
To apply these terms, attach the following notices to the library. It is safest to attach them to the start of each source file to most effectively convey the
exclusion of warranty; and each file should have at least the "copyright" line and a pointer to where the full notice is found.
1 April 1990
Lexmark International, Inc.
That's all there is to it!
Page 28

Licensing Notice
The printer resident software contains:
l Software developed and copyrighted by Dell and/or third parties
l Dell modified software licensed under the provisions of the GNU General Public License version 2 and the GNU Lesser General Public License version 2.1
l Software licensed under the BSD license and warranty statements
Click the title of the document you want to review:
l BSD License and Warranty Statements
l GNU License
The Dell modified GNU licensed software is free software; you can redistribute it and/or modify it under the terms of the licenses referenced above. These
licenses do not provide you any rights to the Dell- or third-party-copyrighted software in this printer.
Since the GNU licensed software that the Dell modifications are based upon is supplied explicitly without warranty, use of the Dell modified version is similarly
provided without warranty. See the warranty disclaimers in the referenced licenses for additional details.
To obtain source code files for the Dell modified GNU licensed software, launch the Drivers and Utilities CD that shipped with your printer and click Contact Dell,
or refer to the "Contacting Dell" section of your Owner's Manual.
Page 29

Ink Cartridge Maintenance
Replacing Ink Cartridges
Aligning Ink Cartridges
Cleaning the Ink Cartridge Nozzles
Replacing Ink Cartridges
Dell ink cartridges are only available through Dell. You can order more ink online at www.dell.com/supplies or by phone. To order by phone, see "Ordering
Supplies" in your Owner's Manual.
Dell recommends Dell ink cartridges for your printer. Dell does not provide warranty coverage for problems caused by using accessories, parts, or components
not supplied by Dell.
1. Turn on your printer.
2. Lift the printer unit, and position the scanner support between the tabs to hold it open.
The ink cartridge carrier moves and stops at the loading position unless the printer is busy.
3. Press down on the ink cartridge lever to raise each ink cartridge lid.
4. Remove the old ink cartridges.
5. Store the cartridges in an air-tight container, such as the storage unit you received with your photo cartridge, or dispose of them properly.
6. If you are installing new ink cartridges, remove the sticker and transparent tape from the back and bottom of each ink cartridge.
CAUTION: Before performing any of the procedures listed in this section, read and follow the safety information in your Owner's Manual.
Page 30

7. Insert the new ink cartridges. Make sure the black or photo ink cartridge is secure in the left ink cartridge carrier, and the color ink cartridge is secure in
the right ink cartridge carrier.
8. Snap each lid closed.
9. Lift the printer unit, and hold the scanner support up while lowering the printer unit until it is completely closed.
Aligning Ink Cartridges
Your printer automatically prompts you to align the ink cartridges when they are installed or replaced. To verify your ink cartridges are aligned, you can print an
alignment page.
1. Press the Arrow buttons until you see Maintenance.
2. Press the Select button .
3. Press the Arrow buttons until you see Align Cartridges.
NOTE: The illustration below shows a black cartridge and a color cartridge (used for normal printing). For photo printing, use a photo cartridge and a
color cartridge.
Page 31

4. Press the Select button . The alignment page begins printing.
During printing, the operator panel display reads Alignment page printing. The ink cartridges align when the page prints.
You may also need to align ink cartridges when characters are not properly formed or are not aligned at the left margin, or when vertical or straight lines
appear wavy.
To align the ink cartridges:
1. Load plain paper. For more information, see Loading Paper.
2. In Windows XP, click Start®Control Panel® Printers and Other Hardware®Printers and Faxes.
In Windows 2000, click Start®Settings®Printers.
3. Right-click the Dell Photo AIO Printer 944 icon.
4. Click Printing Preferences.
The Printing Preferences dialog box opens.
5. Click the Maintenance tab.
6. Click Align Print Cartridges.
7. Click Print.
The ink cartridges align when the page prints.
Cleaning the Ink Cartridge Nozzles
You may need to clean the nozzles when:
l White lines appear in graphics or solid black areas.
l Print appears smudged or too dark.
l Colors fade, do not print, or do not print completely.
l Vertical lines appear jagged, or edges appear rough.
To clean the ink cartridge nozzles:
1. Load plain paper. For more information, see Loading Paper.
Page 32

2. In Windows XP, click Start®Control Panel® Printers and Other Hardware®Printers and Faxes.
In Windows 2000, click Start®Settings®Printers.
3. Right-click the Dell Photo AIO Printer 944 icon.
4. Click Printing Preferences.
The Printing Preferences dialog box opens.
5. Click the Maintenance tab.
6. Click Clean Print Cartridges.
7. If the print quality has not improved, click Print Again.
8. Print your document again to verify the improved print quality.
9. If you are still not satisfied with the print quality, wipe the ink cartridge nozzles with a clean, dry cloth, and then print your document again.
Page 33

Printing
Printing a Document
Printing Photos
Printing Borderless Photos
Printing Envelopes
Printing Photos From a PictBridge-Enabled Camera
Printing Photos From a Memory Card or USB Memory Key
Printing a Document
1. Turn on your computer and printer, and make sure they are connected.
2. Load paper with the print side facing up. For more information, see Loading Paper.
3. With your document open, click File®Print.
4. To customize your print settings:
a. Click Preferences, Properties, Options, or Setup (depending on the program or operating system).
The Printing Preferences dialog box opens.
b. On the Print Setup tab, select the print quality/speed, paper size, black and white or color printing, borderless printing, orientation, and number
of copies.
c. On the Advanced tab, select 2-sided printing, layout, and the use of Automatic Image Sharpening.
d. After making the changes in Printing Preferences, click OK at the bottom of the screen to return to the Print dialog box.
5. Click OK or Print (depending on the program or operating system).
Printing Photos
1. Load the photo paper with the print (glossy) side facing up. For more information, see Loading Paper.
2. It is recommended that you use a color cartridge and a photo cartridge for printing photos. For more information, see Replacing Ink Cartridges.
3. With your document open, click File®Print.
4. To customize your print settings, click Preferences, Properties, Options, or Setup (depending on the program or operating system).
The Printing Preferences dialog box opens.
Page 34

5. On the Print Setup tab, select Photo, and then select the dpi settings for the photo from the drop-down menu.
6. Select the paper size, orientation, and the number of copies.
7. When you are finished customizing your print settings, click OK.
8. Click OK or Print (depending on the program or operating system).
9. To prevent your photos from sticking together or smudging, remove each photo after it exits the paper exit tray.
Printing Borderless Photos
1. For best results, load photo/glossy paper, and make sure the print side is facing up. For more information, see Loading Paper.
2. It is recommended that you use a color cartridge and a photo cartridge for printing photos. For more information, see Replacing Ink Cartridges.
3. With your document open, click File®Print.
4. To customize your print settings, click Preferences, Properties, Options, or Setup (depending on the program or operating system).
The Printing Preferences dialog box opens.
5. On the Print Setup tab, select Photo, and then select the dpi settings for the photo from the drop-down menu.
6. Select the Borderless check box, orientation of the photo, and the number of copies you want.
7. On the Advanced tab, select the borderless paper size from the drop-down menu, and click OK.
8. Click OK or Print (depending on the program or operating system).
Printing Envelopes
1. Turn on your computer and printer, and make sure they are connected.
2. Load up to 10 envelopes with the stamp in the upper left corner.
NOTE: If you are using Dell Picture Studio, select View All Printer Settings to view Print Properties.
NOTE: Photo/glossy paper is recommended for printing photos.
NOTE: Before placing your prints in a nonadhesive photo album or frame, allow sufficient time for the prints to dry thoroughly (12 to 24 hours,
depending on the ambient conditions). This maximizes the life of your prints.
NOTE: You can load a single envelope into the paper support without removing plain paper.
Page 35

3. With your document open, click File®Print.
4. Click Preferences, Properties, Options, or Setup (depending on the program or operating system).
The Printing Preferences dialog box opens.
5. On the Print Setup tab, select the print quality/speed, paper size, black and white or color printing, orientation, and number of copies.
6. After making the changes in Printing Preferences, click OK at the bottom of the screen to return to the Print dialog box.
7. Click OK or Print (depending on the program or operating system).
Printing Photos From a PictBridge-Enabled Camera
Your printer supports PictBridge-compatible cameras.
1. Insert one end of the USB cable into the camera.
2. Insert the other end of the USB cable into the PictBridge port on the front of the printer.
3. Turn on your digital camera. Refer to the instructions included with your camera for selection of the appropriate camera USB settings and PictBridge
connection and usage information.
Printing Photos From a Memory Card or USB Memory Key
Most digital cameras use a memory card to store photos. The Dell Photo AIO Printer 944 supports the following memory cards:
l CompactFlash Type I
l CompactFlash Type II (MicroDrive)
l Memory Stick
l Memory Stick PRO
l SmartMedia
NOTE: For Japanese customers: If you are mailing within Japan, the envelope can be printed with portrait orientation with the stamp in the lower right
corner or with landscape orientation with the stamp in the lower left corner. If you are mailing internationally, print landscape orientation with the stamp
in the upper left corner.
NOTE: When your printer is not connected to a computer, and a PictBridge camera is connected to your printer, some of the functions of your printer's
operator panel buttons are unavailable. These functions become available after you disconnect the PictBridge camera from your printer.
NOTE: For many digital cameras, there are two USB mode selections: computer and printer (or PTP). For PictBridge printing, the printer (or PTP) USB
selection should be used. For more information, refer to the documentation included with your camera.
Page 36

l Secure Digital
l MultiMediaCard
l xD-Picture Card
Memory cards should be inserted with the label facing up. The card reader has two slots to accommodate these memory cards and a small light that blinks
indicating the card is being read or is transmitting data.
The connector that is used for PictBridge may also be used for accessing information that is stored on USB memory keys.
The USB memory keys that have been
certified for operation with this AIO are as shown below:
l DELL - 256 MB High Speed USB 2.0 Memory Key, Part Number 311-4341
l DELL - 128 MB High Speed USB 2.0 Memory Key, Part Number 311-4340
l DELL - 64 MB High Speed USB 2.0 Memory Key, Part Number 311-4339
When you insert a memory card or USB memory key, the Photo Mode menu is displayed.
Viewing or Printing Photos
1. From the Photo Mode menu on the display, scroll to View Photos or Print, and then press the Select button on the operator panel.
2. Press the left or right Arrow buttons to scroll through the photos on the memory card or USB memory key.
3. Press the Select button to select a photo for printing. Press the up or down Arrow buttons to specify the number of copies.
4. Press the Start button to print.
NOTE: Do not remove the card while it is being read. Data corruption can occur.
NOTE: Do not insert more than one memory card or USB memory key at a time.
NOTE: Only images in JPG or a limited set of TIFF formats can be printed directly from the memory card or USB memory key. If you want to print photos
stored on the memory card or USB memory key in a different file format, the photos must be transferred to your computer before printing.
Page 37

Saving Photos to Your Computer
From the Photo Mode menu on the display, scroll to Save to Computer, and then press the Select button
on the operator panel. All photos on the memory
card or USB memory key are transfered to your computer and are opened in the Memory Card Manager. For more information on Memory Card Manager
, see
Using Memory Card Manager.
Viewing a Slide Show
From the Photo Mode menu on the display, scroll to Slide Show, and then press the Select button on the operator panel. The printer displays each photo
on the memory card or USB memory key.
Printing All Photos on Memory Card or USB Memory Key
From the Photo Mode menu on the display, scroll to Print All X Photos, and then press the Select button on the operator panel. The printer prints all the
photos on the memory card or USB memory key.
Adjusting Photos on a Memory Card or USB Memory Key
You can make adjustments to images on a memory card or USB memory key such as cropping, red eye reduction, and rotating before printing them.
Cropping Photos
1. Insert a memory card or USB memory key into the printer.
2. Press the up or down Arrow buttons to highlight View Photos or Print, and then press the Select button .
3. Press the up or down Arrow buttons until you see the image you want to crop, and then press the Select button .
4. Press the Menu button .
5. Press the up or down Arrow buttons until you see Crop.
6. Press the Select button .
7. Press the left or right Arrow buttons to resize the image, and then press the Select button .
8. Press the Arrow buttons to adjust the section of the image to be cropped, then press the Select button .
9. Press the up or down Arrow buttons to select the number of copies you want to print, and then press the Start button to preview the image.
10. Press the Start button to print.
Rotating Photos
1. Insert a memory card or USB memory key into the printer.
2. Press the up or down Arrow buttons to highlight View Photos or Print, and then press the Select button .
3. Press the up or down Arrow buttons until you see the image you want to rotate, and then press the Select button .
4. Press the Menu button .
5. Press the up or down Arrow buttons until you see Rotate 90 degrees.
6. Press the Select button .
7. Press the up or down Arrow buttons to select the number of copies you want to print, and then press the Start button to preview the image.
8. Press the Start button to print.
Using Red Eye Reduction
1. Insert a memory card or USB memory key into the printer.
2. Press the Menu button .
3. Press the up or down Arrow buttons until you see Red Eye Reduction.
NOTE: Only images in JPG or a limited set of TIFF formats can be printed directly from the memory card or USB memory key. If you want to print photos
stored on the memory card or USB memory key in a different file format, the photos must be transferred to your computer before printing.
Page 38

4. Press the left or right Arrow buttons until you see On for all photos, and then press the Select button .
Red Eye Reduction will be used for all images you select to print from the memory card or USB key until you turn it off.
To turn Red Eye Reduction off:
1. Insert a memory card or USB memory key into the printer.
2. Press the Menu button .
3. Press the up or down Arrow buttons until you see Red Eye Reduction.
4. Press the left or right Arrow buttons until you see Off, and then press the Select button .
Using Automatic Image Enhancement
Automatic Image Enhancement sharpens an image to improve its look.
1. Insert a memory card or USB memory key into the printer.
2. Press the Menu button .
3. Press the up or down Arrow buttons until you see Auto Image Enhance.
4. Press the left or right Arrow buttons until you see On for all photos, and then press the Select button .
Automatic Image Enhancement will be used for all images you select to print from the memory card or USB key until you turn it off.
To turn Automatic Image Enhancement off:
1. Insert a memory card or USB memory key into the printer.
2. Press the Menu button .
3. Press the up or down Arrow buttons until you see Auto Image Enhance.
4. Press the left or right Arrow buttons until you see Off, and then press the Select button .
Printing Photos in Sepia Tone
1. Insert a memory card or USB memory key into the printer.
2. Press the Menu button .
3. Press the up or down Arrow buttons until you see Sepia Tone Print.
4. Press the left or right Arrow buttons until you see On for all photos, and then press the Select button .
Sepia Tone Printing will be used for all images you select to print from the memory card or USB key until you turn it off.
To turn Sepia Tone Printing off:
1. Insert a memory card or USB memory key into the printer.
2. Press the Menu button .
3. Press the up or down Arrow buttons until you see Sepia Tone Print.
4. Press the left or right Arrow buttons until you see Off, and then press the Select button .
Page 39

Regulatory Notices
FCC Notices (U.S. Only)
IC Notice (Canada Only)
CE Notice (European Union)
EN 55022 Compliance (Czech Republic Only)
VCCI Notice (Japan Only)
MIC Notice (Republic of Korea Only)
Polish Center for Testing and Certification Notice
BSMI Notice (Taiwan Only)
NOM Information (Mexico Only)
ENERGY STAR®Compliance
Mercury Statement
Electromagnetic Interference (EMI) is any signal or emission, radiated in free space or conducted along power or signal leads, that endangers the functioning
of a radio navigation or other safety service or seriously degrades, obstructs, or repeatedly interrupts a licensed radio communications service. Radio
communications services include but are not limited to AM/FM commercial broadcast, television, cellular services, radar, air-traffic control, pager, and Personal
Communication Services (PCS). These licensed services, along with unintentional radiators such as digital devices, contribute to the electromagnetic
environment.
Electromagnetic Compatibility (EMC) is the ability of items of electronic equipment to function properly together in the electronic environment. While this device
has been designed and determined to be compliant with regulatory agency limits for EMI, there is no guarantee that interference will not occur in a particular
installation. If this equipment does cause interference with radio communications services, which can be determined by turning the equipment off and on, you
are encouraged to try to correct the interference by one or more of the following measures:
l Reorient the receiving antenna.
l Relocate the device with respect to the receiver.
l Move the device away from the receiver.
l Plug the device into a different outlet so that the device and the receiver are on different branch circuits.
If necessary, consult a Dell Technical Support representative or an experienced radio/television technician for additional suggestions.
Dell™devicesaredesigned,tested,andclassifiedfortheirintendedelectromagneticenvironment.Theseelectromagneticenvironmentclassificationsgenerally
refer to the following harmonized definitions:
l Class A is typically for business or industrial environments.
l Class B is typically for residential environments.
Information Technology Equipment (ITE), including devices, expansion cards, printers, input/output (I/O) devices, monitors, and so on, that are integrated into
or connected to the computer should match the electromagnetic environment classification of the computer.
A Notice About Shielded Signal Cables: Use only shielded cables for connecting devices to any Dell device to reduce the possibility of interference with
radio communications services. Using shielded cables ensures that you maintain the appropriate EMC classification for the intended environment. Cables
are available from Dell at www.dell.com.
Most Dell devices are classified for Class B environments. However, the inclusion of certain options can change the rating of some configurations to Class A. To
determine the electromagnetic classification for your device, see the following sections specific for each regulatory agency. Each section provides countryspecific EMC/EMI or product safety information.
Page 40

FCC Notices (U.S. Only)
Most Dell devices are classified by the Federal Communications Commission (FCC) as Class B digital devices. To determine which classification applies to your
device, examine all FCC registration labels located on the bottom, side, or back panel of your device, on card-
mounting brackets, and on the cards themselves.
If any one of the labels carries a Class A rating, your entire device is considered to be a Class A digital device. If all labels carry an FCC Class B rating as
distinguished by either an FCC ID number or the FCC logo, ( ), your device is considered to be a Class B digital device.
Once you have determined your device's FCC classification, read the appropriate FCC notice. Note that FCC regulations provide that changes or modifications
not expressly approved by Dell could void your authority to operate this equipment.
This device complies with Part 15 of the FCC Rules. Operation is subject to the following two conditions:
l This device may not cause harmful interference.
l This device must accept any interference received, including interference that may cause undesired operation.
Class A
This equipment has been tested and found to comply with the limits for a Class A digital device pursuant to Part 15 of the FCC Rules. These limits are designed
to provide reasonable protection against harmful interference when the equipment is operated in a commercial environment. This equipment generates, uses,
and can radiate radio frequency energy and, if not installed and used in accordance with the manufacturer's instruction manual, may cause harmful
interference with radio communications. Operation of this equipment in a residential area is likely to cause harmful interference, in which case you will be
required to correct the interference at your own expense.
Class B
This equipment has been tested and found to comply with the limits for a Class B digital device pursuant to Part 15 of the FCC Rules. These limits are designed
to provide reasonable protection against harmful interference in a residential installation. This equipment generates, uses, and can radiate radio frequency
energy and, if not installed and used in accordance with the manufacturer's instruction manual, may cause interference with radio communications. However,
there is no guarantee that interference will not occur in a particular installation. If this equipment does cause harmful interference to radio or television
reception, which can be determined by turning the equipment off and on, you are encouraged to try to correct the interference by one or more of the following
measures:
l Reorient or relocate the receiving antenna.
l Increase the separation between the equipment and the receiver.
l Connect the equipment into an outlet on a circuit different from that to which the receiver is connected.
l Consult the dealer or an experienced radio/television technician for help.
FCC Identification Information
The following information is provided on the device or devices covered in this document in compliance with FCC regulations:
l Model number: 944
l Company name:
Dell Inc.
One Dell Way
Round Rock, Texas 78682 USA
512-338-4400
IC Notice (Canada Only)
Most Dell devices are classified by the Industry Canada (IC) Interference-Causing Equipment Standard #3 (ICES-003) as Class B digital devices. To determine
which classification (Class A or B) applies to your device, examine all registration labels located on the bottom, side, or the back panel of your device. A
statementintheformof"ICClassAICES-003"or"ICClassBICES-003" will be located on one of these labels. Note that Industry Canada regulations provide
that changes or modifications not expressly approved by Dell could void your authority to operate this equipment.
Page 41

CE Notice (European Union)
Marking by the symbol indicates compliance of this Dell device to the EMC Directive 89/336/EEC and the Low Voltage Directive 73/23/EEC of the European
Union. Such marking is indicative that this Dell device meets the following technical standards:
l EN 55022 — "Information Technology Equipment — Radio Disturbance Characteristics — Limits and Methods of Measurement."
l EN 55024 — "Information Technology Equipment - Immunity Characteristics - Limits and Methods of Measurement."
l EN 61000-3-2 — "Electromagnetic Compatibility (EMC) - Part 3: Limits - Section2:LimitsforHarmonicCurrentEmissions(EquipmentInputCurrentUpto
and Including 16 A Per Phase)."
l EN 61000-3-3 — "Electromagnetic Compatibility (EMC) - Part3:Limits-Section3:LimitationofVoltageFluctuationsandFlickerinLow-Voltage Supply
SystemsforEquipmentWithRatedCurrentUptoandIncluding16A."
l EN 60950-1 — "Safety of Information Technology Equipment."
NOTE: EN 55022 emissions requirements provide for two classifications:
l Class A is for typical commercial areas.
l Class B is for typical domestic areas.
To determine which classification applies to your device, examine the FCC or ICES information on the regulatory label located on the back, side, or bottom
panel of the device. If the FCC or ICES information on the label indicates a Class A rating, the following Class A warning applies to your device:
RF INTERFERENCE WARNING: This is a Class A product. In a domestic environment this product may cause radio frequency (RF) interference, in which
case the user may be required to take adequate measures.
If the FCC or ICES information on the label indicates a Class B rating, the following Class B statement applies to your device:
This Dell device is classified for use in a typical Class B domestic environment.
A "Declaration of Conformity" in accordance with the preceding directives and standards has been made and is on file at Dell Inc. Products Europe BV, Limerick,
Ireland.
EN 55022 Compliance (Czech Republic Only)
VCCI Notice (Japan Only)
Page 42

Most Dell devices are classified by the Voluntary Control Council for Interference (VCCI) as Class B information technology equipment (ITE). However, the
inclusion of certain options can change the rating of some configurations to Class A. ITE, including devices, expansion cards, printers, input/output (I/O)
devices, monitors, and so on, integrated into or connected to the device should match the electromagnetic environment classification (Class A or B) of the
device.
To determine which classification applies to your device, examine the regulatory labels/markings located on the bottom, side, or back panel of your device.
Once you have determined your device's VCCI classification, read the appropriate VCCI notice (see "VCCI Class A ITE Regulatory Mark" or "VCCI Class B ITE
Regulatory Mark").
Class A ITE
This is a Class A product based on the standard of the Voluntary Control Council for Interference (VCCI) for information technology equipment. If this
equipment is used in a domestic environment, radio disturbance may arise. When such trouble occurs, the user may be required to take corrective actions.
VCCI Class A ITE Regulatory Mark
If the regulatory label includes the following marking, your device is a Class A product:
Class B ITE
This is a Class B product based on the standard of the Voluntary Control Council for Interference (VCCI) for information technology equipment. If this
equipment is used near a radio or television receiver in a domestic environment, it may cause radio interference. Install and use the equipment according to
the instruction manual.
VCCI Class B ITE Regulatory Mark
If the regulatory label includes the following marking, your device is a Class B product:
MIC Notice (Republic of Korea Only)
To determine which classification (Class A or B) applies to your device, examine the Republic of Korean Ministry of Information and Communications (MIC)
registration labels located on your device. The MIC label may be located separately from the other regulatory marking applied to your product. Line two of the
label identifies the emissions class for the product—"(A)" for Class A products or "(B)" for Class B products.
NOTE: MIC emissions requirements provide for two classifications:
l Class A devices are for business purposes.
l Class B devices are for nonbusiness purposes.
Class A Device
Please note that this device has been approved for business purposes with regard to electromagnetic interference. If you find that this device is not suitable
for your use, you may exchange it for a nonbusiness-purpose device.
MIC Class A Regulatory Label
Page 43

If the regulatory label includes the following marking, your device is a Class A product:
Class B Device
Please note that this device has been approved for nonbusiness purposes and may be used in any environment, including residential areas.
MIC Class B Regulatory Label
If the regulatory label includes the following marking, your device is a Class B product:
Polish Center for Testing and Certification Notice
The equipment should draw power from a socket with an attached protection circuit (a 3-
prong socket). All equipment that works together (computer, monitor,
printer, and so on) should have the same power supply source.
The phasing conductor of the room's electrical installation should have a reserve short-circuit protection device in the form of a fuse with a nominal value no
larger than 16 amperes (A).
To completely switch off the equipment, the power supply cable must be removed from the power supply socket, which should be located near the equipment
and easily accessible.
A protection mark "B" confirms that the equipment is in compliance with the protection usage requirements of standard PN-EN 55022.
Page 44

BSMI Notice (Taiwan Only)
If you find a or mark on the regulatory label on the bottom, side, or back panel of your device, the following section is applicable:
NOM Information (Mexico Only)
The following information is provided on the device(s) described in this document in compliance with the requirements of the official Mexican standards (NOM):
Exporter:
Dell Inc.
One Dell Way
Round Rock, TX 78682
Importer:
DellComputerdeMéxico,S.A.deC.V.
Paseo de la Reforma 2620 -11°Piso
Col. Lomas Altas
11950México,D.F.
Ship to:
DellComputerdeMéxico,S.A.deC.V.
alCuidadodeKuehne&NageldeMéxicoS.deR.L.
Avenida Soles No. 55
Col.PeñondelosBaños
15520México,D.F.
Model number:
944
Supply voltage:
100-240 VAC
Frequency:
50/60 Hz
Page 45

ENERGY STAR®Compliance
Any Dell product bearing the ENERGY STAR®emblem on the product or on a start-up screen is certified to comply with Environmental Protection Agency (EPA)
ENERGY STAR®requirements as configured when shipped by Dell. You can also help reduce electricity usage and its side effects by turning off your product
when it is not in use for extended periods of time, particularly at night and on weekends.
ENERGY STAR®Emblem
Mercury Statement
This product contains mercury in the scanner lamp (<5mg Hg). Disposal of mercury may be regulated due to environmental considerations. For disposal or
recycling information, contact your local authorities or the Electronic Industries Alliance: www.eiae.org.
Current consumption:
1.5 A
Output voltage:
30 VDC
Output current:
0.83 A
Page 46

Scanning
Scanning Documents
Scanning Photos
Scanning Multiple Pages or Images
Scanning a Photo or Document Across a Network
Editing Scanned Text Using Optical Character Recognition (OCR)
Saving an Image on Your Computer
E-mailing a Scanned Image or Document
Enlarging or Reducing Images or Documents
Scanning Documents
You can scan with your printer using the printer operator panel or your computer.
1. Turn on your computer and printer, and make sure they are connected.
2. Open the top cover.
3. Place the document you want to scan face down on the scanner glass. Make sure the upper left corner of the front of the document aligns with the
arrow on the printer.
4. Close the top cover.
5. Open the Dell All-In-One Center by clicking Start®Programs or All Programs® Dell Printers®Dell Photo AIO Printer 944®Dell All-In-One
Center.
The Dell All-In-One Center opens.
6. In the Send scanned image to: drop-down menu, select a program as your scan destination. For example, choose Fax to scan an image you want to
fax.
7. Click See More Scan Settings to:
¡ Select what type of document is being scanned.
¡ Select the scan quality.
8. Click Scan Now to complete your scan.
Scanning Photos
1. Turn on your computer and printer, and make sure they are connected.
2. Open top cover.
3.
Place the photo you want to scan face down on the scanner glass. Make sure the upper left corner of the front of the photo aligns with the arrow on the
printer.
NOTE: You can also open the Dell All-In-One Center from the operator panel on your printer. When your printer is in Scan mode, press the Start
button. The Dell All-In-One Center opens on your computer.
NOTE: If the program you want to use is not listed, select Search for more... in the drop-down menu. On the next screen, click Add to locate and add
your program to the list.
Page 47

4. Close the top cover.
5. Open the Dell All-In-One Center by clicking Start®Programs or All Programs® Dell Printers®Dell Photo AIO Printer 944®Dell All-In-One
Center.
The Dell All-In-One Center opens.
6. Click Preview Now to see your scanned image.
7. Adjust the dotted lines to fit around the portion of the image you want to scan.
8. In the Send scanned image to: drop-down menu, select the program you want to use.
9. Click See More Scan Settings to:
¡ Select what type of document is being scanned.
¡ Select the scan quality.
10. When you finish customizing your image, click Scan Now.
When your document has finished processing, the selected program opens.
Scanning Multiple Pages or Images
1. Turn on your computer and printer, and make sure they are connected.
2. Open the top cover.
3. Place the first sheet of the document you want to scan face down on the scanner glass. Make sure the upper left corner of the front of the sheet aligns
with the arrow on the printer.
4. Close the top cover.
5. Open the Dell All-In-One Center by clicking Start®Programs or All Programs® Dell Printers®Dell Photo AIO Printer 944®Dell All-In-One
Center.
The Dell All-In-One Center opens.
6. In the Send scanned image to: drop-down menu, select a program as your scan destination.
7. Click See More Scan Settings to:
NOTE: You can also open the Dell All-In-One Center from the operator panel on your printer. When your printer is in Scan mode, press the Start
button. The Dell All-In-One Center opens on your computer.
NOTE: If the program you want to use is not listed, select Search for more... in the drop-down menu. On the next screen, click Add to locate and add
your program to the list.
Page 48

¡ Select what type of document is being scanned.
¡ Select the scan quality.
8. Click the Advanced button.
9. On the Scan tab, click the Scan multiple items before output box.
10. Click OK.
11. When you finish customizing your settings, click Scan Now.
After you scan the first page, a prompt appears requesting the next page.
12. Place the next sheet on the scanner glass, and click Yes. Repeat until you finish scanning all pages.
13. When finished, click No. The program opens with the multiple pages scanned.
Scanning a Photo or Document Across a Network
If your printer is attached to a network, you can scan photos or documents and have them sent to any computer on the network.
1. Turn on your printer and external network adapter, and make sure they are connected.
2. Open the top cover.
3. Place the document you want to scan face down on the scanner glass. Make sure the upper left corner of the front of the document aligns with the
arrow on the printer.
4. Close the top cover.
5. Press the Arrow buttons on the operator panel until Scan Mode is highlighted, and then press the Select button .
6. Press the Arrow buttons to scroll through the available computers until you find the one you want to send your photo or document to, and then
press the Select button .
7. Enter the PIN number for the computer, if one is required. Use the up and down Arrow buttons to select a number (0–9), and the left and right
Arrow buttons to proceed to the next field.
8. Use the Arrow buttons to select an application in which to open your document, and then press the Select button .
9. Press the Start button .
The photo or document is scanned, sent to the specified computer, and opened in the specified application.
Editing Scanned Text Using Optical Character Recognition (OCR)
Optical Character Recognition (OCR) software converts a scanned image into editable text within a word-processing program.
1. Open the top cover.
2. Place the document you want to scan face down on the scanner glass. Make sure the upper left corner of the front of the document aligns with the
arrow on the printer.
NOTE: The computer must have the printer software installed. Use the Drivers and Utilities CD to install the printer software.
NOTE: If your printer is connected locally, the Scan submenu does not appear, and the host computer is automatically selected.
NOTE: Japanese and Chinese customers: Ensure you have OCR software installed on your computer. A copy of OCR software was provided with your
printer and should have installed at the same time as your printer drivers.
Page 49

3. Close the top cover.
4. Open the Dell All-In-One Center by clicking Start®Programs or All Programs®Dell Printers® Dell Photo AIO Printer 944®Dell All-In-One
Center.
The Dell All-In-One Center opens.
5. In the Send scanned image to: drop-down menu, select a word-processing or text-editing program.
6. Click See More Scan Settings to:
¡ Select what type of document is being scanned.
¡ Select the scan quality.
7. Click the Advanced button.
8. On the Scan tab, click the Convert scanned item to text (OCR) box.
9. Click OK.
10. Click Scan Now.
The scanned text opens in the program you selected.
Saving an Image on Your Computer
1. Click Start®Programs or All Programs® Dell Printers®Dell Photo AIO Printer 944®Dell All-In-One Center.
The Dell All-In-One Center opens.
2. In the Productivity Tools section, click Save an image on my computer.
3. Follow the instructions on your screen.
E-mailing a Scanned Image or Document
To send scanned images or documents through e-mail:
1. Open the top cover.
2. Place the document or photo face down on the scanner glass. Make sure the upper left corner of the front of the item aligns with the arrow on the
printer.
3. Close the top cover.
NOTE: You can also open the Dell All-In-One Center from the operator panel on your printer. When your printer is in Scan mode, press the Start button
. The Dell All-In-One Center opens on your computer.
NOTE: If the program you want to use is not listed, select Search for more... in the drop-down menu. On the next screen, click Add to locate and add
your program to the list.
Page 50

4. Click Start®Programs or All Programs®Dell Printers® Dell Photo AIO Printer 944®Dell All-In-One Center.
The Dell All-In-One Center opens.
5. Click Preview Now.
6. In the Productivity Tools section, click E-mail an image to a friend.
7. In the What is being scanned? menu, make a selection.
8. Follow the instructions on the screen to prepare the photograph for e-mail.
9. Click Next.
10. Open your e-mail program, write a note to accompany the attached photo, and then send it.
Enlarging or Reducing Images or Documents
You can enlarge or reduce your document between 25–400 percent using the Dell All-In-One Center.
1. Load the paper. For more information, see Loading Paper.
2. Open the top cover.
3. Place the document or photo face down on the scanner glass. Make sure the upper left corner of the front of the item aligns with the arrow on the
printer.
4. Close the top cover.
5. Click Start®Programs or All Programs®Dell Printers® Dell Photo AIO Printer 944®Dell All-In-One Center.
The Dell All-In-One Center opens.
6. Click Preview Now.
7. In the Productivity Tools section, select Enlarge or reduce an image.
8. Follow the instructions on the screen to select the size of your new image.
9. When you finish customizing your image, click Print Now.
NOTE: If you have questions about attaching documents to e-mail, consult the Help for your e-mail program.
Page 51

Understanding the Software
Using the Dell All-In-One Center
Using Printing Preferences
Using Dell Picture Studio
Using Memory Card Manager
Dell Ink Management System
Removing and Reinstalling the Software
The printer software includes:
l Dell All-In-One Center — Allows you to perform various scan, copy, fax, and print operations with newly scanned and previously saved documents and
images.
l Printing Preferences — Allows you to adjust printer settings.
l DellPictureStudio™— Allows you to manage, edit, display, print, and convert photos and other types of images.
l DellInkManagementSystem™— Warns you when your printer is running low on ink.
l Memory Card Manager — Allows you to display, manage, edit, print, and save photos to your computer.
Using the Dell All-In-One Center
The Dell All-In-One Center allows you to:
l Scan, copy, fax, and use productivity tools.
l Select where you want to send the scanned image.
l Select the quantity and color of your copies.
l Access troubleshooting and maintenance information.
l Preview images you want to print or copy.
l Manage photos (copy them to folders, print them, perform creative copying).
To access the Dell All-In-One Center:
Click Start®Programs or All Programs®Dell Printers® Dell Photo AIO Printer 944®Dell All-In-One Center.
Page 52

The Dell All-In-One Center includes four main sections: Preview Now, Scan and Fax, Copy, and Productivity Tools.
For more information click Help in the Dell All-In-One Center.
Using Printing Preferences
Printing Preferences allows you to change the various printer settings. You can change your printer settings in Printing Preferences depending on the type
of project you want to create.
To access Printing Preferences when a document is open:
1. Click File®Print.
The Print dialog box opens.
2. In the Print dialog box, click Preferences, Properties, Options, or Setup (depending on the program or operating system).
The Printing Preferences dialog box opens.
To access Printing Preferences when a document is not open:
1. In Windows XP, click Start®Settings®Start®Control Panel®Printers and Other Hardware® Printers and Faxes.
In Windows 2000, click Start®Settings®Printers.
2. Right-click the printer icon, and then select Printing Preferences.
In this section:
You can:
Preview Now
l Select a portion of the preview image to scan.
l View an image of what will be printed or copied.
Scan and Fax
l Select the program where you want to send the scanned image.
l Select the type of image being scanned.
l Select how you will use the scan.
l Select Fax Now.
NOTE: Click See More Scan Settings to view all settings.
Copy
l Select the quantity and color of your copies.
l Select a quality setting for your copies.
l Adjust the size of the scanned area.
l Lighten or darken your copies (this can also be accomplished using the operator panel).
l Enlarge or reduce your copies.
NOTE: Click See More Copy Settings to view all settings.
Productivity Tools
l Enlarge or reduce an image.
l Repeat an image several times on one page.
l Print an image as a multi-page poster.
l Fax using your computer's modem.
l E-mail an image.
l Save an image on your computer.
l Edit text found in a scanned document (Optical Character Recognition).
l Modify an image with a photo editor.
Page 53

Printing Preferences Tabs
Using Dell Picture Studio
In Dell Picture Studio, you can explore digital photography and learn how to organize, create, or print photos. There are three components to the Dell Picture
Studio:
l Paint Shop Photo Album 5
Click Start®Programs or All Programs® Dell Picture Studio 3®Paint Shop Photo Album 5®Paint Shop Photo Album.
l Paint Shop Pro Studio
Click Start®Programs or All Programs® Dell Picture Studio 3®Paint Shop Pro Studio.
l Dell.Shutterfly.com - Online Print Service
Click Start®Programs or All Programs® Dell Picture Studio 3®Dell.Shutterfly.com - Online Print Service.
Using Memory Card Manager
Memory Card Manager allows you to display, manage, edit, print, and save photos from your memory card or USB memory key to your computer.
NOTE: Changes made to the printer settings from the Printers folder become the default settings for most programs.
Tab
Options
Print Setup
Quality/Speed — Select Automatic, Draft, Normal, or Photo depending on your desired output quality. Draft is the fastest option but should
not be selected if you have a photo cartridge installed.
Media Type — Allows you to set the paper type manually, or have the printer sensor detect the paper type automatically.
Paper Size — Select the size and type of paper.
Print in black and white — Print your color images in black and white to save the ink in your color ink cartridge.
NOTE: You cannot select this setting if you have selected Color Cartridge for all Black Printing.
Borderless — Print borderless photos.
Orientation — Select how the document is arranged on the printed page. You can print using portrait or landscape orientation.
Multiple Copies — Customize how the printer prints several photocopies of a single print job: Collated, Normal, or Print Last Page First.
Advanced
2-Sided Printing — Select this to print on both sides of the paper.
Layout — Select Normal, Banner, Mirror, N-up, Poster, Booklet, or Borderless.
Automatic Image Sharpening — Automatically select the best image sharpening level based on image content.
More Options — Allows you to specify Appearance Mode and Complete-A-Print settings.
Maintenance
Install Print Cartridges
Clean Print Cartridges
Align Print Cartridges
Print a Test Page
Network Support
NOTE: Depending on your operating system, some or all of these programs may not be available to you.
Page 54

To launch Memory Card Manager:
1. Insert a memory card into the memory card slot or a USB memory key into the PictBridge port on the front of the printer.
2. Select Save to Computer from the Photo Mode menu.
You can also launch Memory Card Manager from your computer by clicking Start®Programs or All Programs®Dell Printers®
Dell Photo AIO Printer
944®Memory Card Manager.
Dell Ink Management System
Each time you print a job, a printing progress screen appears, which shows the progress of the print job as well as the amount of ink remaining and the
approximate number of pages remaining in the cartridge. The page counter is hidden during the first 50 pages of cartridge use, until printing habits are
learned and a more accurate count can be given. The number of pages remaining changes as a result of the type of print jobs the printer completes.
When your ink cartridge levels are low, a Low Ink Warning appears on your screen when you try to print. This warning is displayed every time you print until
you install a new ink cartridge. For more information on replacing ink cartridges, see Replacing Ink Cartridges.
When one or both of your ink cartridges are empty, the Reserve Tank
window appears on your screen when you try to print. If you continue printing, the print
job may not print as you expect.
If your black ink cartridge is out of ink, you can choose to print black from the color ink cartridge (Process Black) by selecting Complete-A-Print before clicking
the Continue Printing button. If you select Complete-A-Print, and click Continue Printing
, Process Black is used for all black printing until the black cartridge is
replaced, or the option is cleared from More Options, located on the Advanced tab of the Printing Preferences. The Reserve Tank dialog does not display
again until after the low ink cartridge has been replaced. The Complete-A-Print check box is automatically reset when a new or different cartridge is installed.
If your color ink cartridge is out of ink, you can choose to print color documents in grayscale by selecting Complete-A-Print before clicking the Continue
Printing button. If you select Complete-A-Print, and click Continue Printing, all color documents will print in black and white until the color cartridge is
replaced, or the option is cleared from More Options, located on the Advanced tab of the Printing Preferences. The Reserve Tank dialog does not display
again until after the low ink cartridge has been replaced. The Complete-A-Print check box is automatically reset when a new or different cartridge is installed.
Removing and Reinstalling the Software
If your printer does not function properly, or communication error messages appear when using your printer, you can remove and reinstall the printer
software.
1. Click Start®Programs or All Programs® Dell Printers®Dell Photo AIO Printer 944®Uninstall Dell Photo AIO Printer 944.
2. Follow the instructions on the screen.
3. Restart your computer.
4. Insert the Drivers and Utilities CD, and then follow the instructions on the screen.
If the installation screen does not appear:
a. In Windows XP, click Start®My Computer.
In Windows 2000, double-click My Computer from your desktop.
b. Double-click the CD-ROM drive icon. If necessary, double-click setup.exe.
Page 55

c. When the printer software installation screen appears, click Personal Installation or Network Installation.
d. Follow the instructions on your screen to complete the installation.
Page 56

Specifications
Overview
Environmental Specifications
Power Consumption and Requirements
Print and Scan Mode Capabilities
Operating System Support
Memory Specifications and Requirements
Print Media Guidelines
Cables
Overview
Environmental Specifications
Power Consumption and Requirements
Print and Scan Mode Capabilities
Your Dell Photo AIO Printer 944 can scan from 50 to 19,200 dpi. Although your printer has this capability, Dell recommends using the preset resolutions.
Memory
32 MB SDRAM*
Connectivity
USB 2.0 high-speed
Duty cycle (average)
80 pages/month
Duty cycle (maximum)
3,000 pages/month
Printer life
18,000 pages
*The printer memory is not upgradeable.
Condition
Temperature
Relative humidity (non-condensing)
Operation
15°to32°C(60°to90°F)
40 to 80%
Storage
1°to60°C(34°to140°F)
5 to 80%
Shipping
-40°to60°C(-40°to140°F)
5 to 100%
Rated AC Input
100–240 VAC
Rated Frequency
50/60 Hz
Minimum AC input
100 VAC
Maximum AC input
240 VAC
Maximum input current
1.6 A
Average power consumption
Standby mode
Operational mode
15 W
25 W
Print and scan resolution
Scan resolution
Print resolution
Black & white
Color
Black & white
Color
Draft
150x150dpi
150x150dpi
300x600dpi
600x600dpi
Normal
300x300dpi
200x200dpi
600x600dpi
600x600dpi
Photo
600 x 600 dpi
300x300dpi
1200x1200dpi
1200 x 1200 dpi
Page 57

Operating System Support
The Dell Photo AIO Printer 944 supports:
l Windows XP Professional x64 Edition
l Windows XP
l Windows 2000
Memory Specifications and Requirements
Your operating system must meet the minimum system requirements.
Print Media Guidelines
Operating system
Processor
RAM
(MB)
Hard disk
(MB)
Windows XP Professional x64
Edition
AMD Athlon 64, AMD Opteron, Intel Xeon with Intel EM64T support, or Intel Pentium 4 with
Intel EM64T support
256
500
Windows XP
Pentium 300
128
500
Windows 2000
Pentium 233
128
286
Load up to:
Make sure:
100 sheets of plain paper
l The paper is centered between the left and right edge guides.
NOTE: Load letterhead paper with the top of the letterhead entering the printer first and facing up.
l You select Draft, Normal, or Photo print quality.
NOTE: Do not select Draft if you have a Photo cartridge installed.
20 sheets of banner
paper
l You remove any paper from the paper support before inserting banner paper.
l You place a stack of banner paper on or behind the printer, with only the number of sheets required.
NOTE: You must select A4 Banner or Letter Banner paper size in Print Properties. Failure to do so will cause a paper jam. See
Paper Problems.
l You load the leading edge of the banner paper into the printer against the right side of the paper support.
l The banner paper is centered between the left and right edge guides.
l You use banner paper designed for inkjet printers.
10 envelopes
l The print side of the envelopes faces up.
l The envelopes are centered on the paper support, in between the left and right edge guides.
l The stamp location is in the upper left corner and printed with landscape orientation.
NOTE: For Japanese customers: If you are mailing within Japan, the envelope can be printed with portrait orientation with the
stamp in the lower right corner or with landscape orientation with the stamp in the lower left corner. If you are mailing
internationally, print landscape orientation with the stamp in the upper left corner.
l The paper guide rests against the left edge of the envelopes.
l You select the correct envelope size. Select the next biggest size if the exact envelope size is not listed, and set the left
and right margins so that your envelope text will be correctly positioned.
NOTE: You can load a single envelope into the paper support without removing plain paper.
25 greeting cards, index
l The print side of the cards faces up.
Page 58

Cables
Your Dell Photo AIO Printer 944 uses a Universal Serial Bus (USB) cable (sold separately).
cards, postcards, or photo
cards
l The cards are centered on the paper support, in between the left and right edge guides.
l The paper guide rests against the left edge of the cards.
l You select Normal or Photo print quality.
25 sheets of photo or
glossy paper
l The glossy side of the paper faces up.
l The paper is centered on the paper support, in between the left and right edge guides.
l You select Normal or Photo print quality.
l The paper is loaded vertically against the right side of the paper support.
1 iron-on transfer
l You follow the loading instructions on the packaging.
l The blank side of the transfer faces up.
l The transfer is centered on the paper support, in between the left and right paper guides.
l You select Normal or Photo print quality.
20 transparencies
l The rough side of the transparencies faces up.
l The transparencies are centered on the paper support, in between the left and right paper guides.
NOTE: You can load a single transparency into the paper support without removing plain paper.
l You select Normal or Photo print quality.
Page 59

Troubleshooting
Setup Problems
General Problems
Error Messages and Lights
Improving Print Quality
Follow these tips when you troubleshoot your printer:
l If the printer does not work, ensure that the printer is properly connected to the electrical outlet and computer, if using a computer.
l If an error message appears on the operator panel display, write down the exact message.
Setup Problems
Computer Problems
Verify that your printer is compatible with your computer.
The Dell Photo AIO Printer 944 supports Windows 2000 and Windows XP.
Make sure you turned on both your printer and your computer.
Check the USB cable.
l Ensure that the USB cable is firmly connected to your printer and your computer.
l Shut down the computer, reconnect the USB cable as shown on the setup diagram for your printer, and then restart the computer.
If the software installation screen does not appear automatically, install the software manually.
1. Insert the Drivers and Utilities CD.
2. In Windows XP, click Start®My Computer.
In Windows 2000, double-click My Computer from your desktop.
3. Double-click the CD-ROM drive icon. If necessary, double-click setup.exe.
4. When the printer software installation screen appears, click Install or Install Now.
5. Follow the instructions on your screen to complete the installation.
Determine if the printer software is installed.
Click Start®Programs or All Programs®Dell Printers®Dell Photo AIO Printer 944. If the Dell Photo AIO Printer 944 does not appear in
the list of programs, the printer software is not installed. Install the printer software. For more information, see Removing and Reinstalling
the Software.
Correct communication problems between the printer and the computer.
l Remove the USB cable from your printer and your computer. Reconnect the USB cable to your printer and your computer.
l Turn off the printer. Unplug the printer power cable from the electrical outlet. Reconnect the printer power cable into the electrical
outlet and turn on the printer.
l Restart your computer.
Set your printer as the default printer.
1. In Windows XP, click Start®Control Panel®Printers and Other Hardware®Printers and Faxes.
In Windows 2000, click Start®Settings® Printers.
2. Right-click Dell Photo AIO Printer 944 and select Set as Default.
Printer won't print and print jobs are stuck in print queue.
Check for multiple instances of the printer installed on your computer.
1. In Windows XP, click Start®Control Panel®Printers and Other Hardware®Printers and Faxes.
In Windows 2000, click Start®Settings® Printers.
2. Check for multiple printer objects for your Dell printer -- usually shown as Dell 944, Dell 944(Copy 1), Dell 944 (Copy 2), etc.
3. Print a job to each of these print objects to see which printer is active.
Page 60

Printer Problems
General Problems
Fax Problems
Paper Problems
4. Set that print object as the default printer by right-clicking the printer name and selecting Set as Default Printer.
5. Delete the other copies of the print object by left-clicking the printer name and clicking File®Delete.
To prevent multiple instances of your Dell printer in your Printers folder, make sure when disconnecting and reconnecting the printer from
your computer that you always plug the USB cable back into the same USB port that was originally used for the Dell printer. Also, do not
install the Dell printer drivers multiple times from your printer CD.
Ensure that the printer power cable is firmly connected to the printer and the electrical outlet.
Determine if the printer has been held or paused.
1. In Windows XP, click Start®Control Panel®Printers and Other Hardware®Printers and Faxes.
In Windows 2000, click Start®Settings® Printers.
2. Double-click Dell Photo AIO Printer 944, and then click Printer.
3. Make sure a check mark is not next to Pause Printing. If a check mark is next to Pause Printing, click it to clear the option.
Check for flashing lights on the printer.
For more information, see Error Messages and Lights.
Ensure you installed the ink cartridges correctly and removed the sticker and tape from each cartridge.
Make sure you loaded the paper correctly.
For more information, see Loading Paper.
Ensure the printer is not connected to a PictBridge camera.
For more information, see Printing Photos From a PictBridge-Enabled Camera.
Make sure you turned on both your printer and your computer and the USB cable is properly connected.
Ensure the computer is connected to an active analog phone line.
l Using the fax function requires a phone connection to the fax modem in your computer.
l When using a phone line with DSL broadband service, make sure you have a DSL filter installed to your fax modem. Contact your
Internet Service Provider for more information.
l Make sure your computer is not connected to the Internet via dial-up modem when trying to fax.
When using an external modem, make sure it is turned on and it is correctly connected to your computer.
Make sure you loaded the paper correctly.
For more information, see Loading Paper.
Use only paper recommended for your printer.
For more information, see Loading Paper.
Use a smaller amount of paper when printing multiple pages.
For more information, see Loading Paper.
Make sure the paper is not wrinkled, torn or damaged.
Make sure the paper is against the right side of the paper support and the paper guide rests against the left edge of the paper.
Check for a paper jam.
Using your printer and your computer
l Follow the instructions on the screen for clearing the paper jam.
Using your printer only
Page 61

Error Messages and Lights
The following error messages can be found on your computer screen or operator panel display.
If the paper jam is located in the paper support:
1. Turn off your printer.
2. Firmly grasp the paper and gently pull it from the printer.
3. Turn on your printer and print the document again.
If the paper jam is not visible:
1. Turn off your printer.
2. Lift the printer unit and position the scanner support between the tabs to keep it open.
3. Gently pull the paper from the printer.
4. Close the printer unit, turn on the printer, and print the document again.
Error Message:
What it indicates:
Solution:
Alignment Error
Ensure the tape is removed from
both cartridges.
Press Select to retry alignment.
The tape was not removed from the ink cartridges before
the cartridges were installed.
Remove the tape from the ink cartridges. For more
information, see Replacing Ink Cartridges.
Card Format
The memory card formatting is not
supported. Format the card in your
digital camera.
The memory card inserted in the printer is incorrectly
formatted.
Reformat the memory card. Refer to the documentation
that came with your digital camera for more information.
Carrier jam
1. Clear the carrier jam.
2. Press Select to continue.
A printhead carrier jam exists in the printer.
Clear the carrier jam, and then press the Select button
.
Cartridge Error
Insert print cartridges in the correct
positions:
Left: Black or Photo
Right: Color
The ink cartridges are installed in the wrong position.
Remove and reinstall the ink cartridges in the correct
position. For more information, see Replacing Ink
Cartridges.
Cartridge Missing
Install a black or photo print cartridge
on the left side.
A black or photo cartridge is missing.
Insert a black or photo cartridge in the left cartridge
carrier. For more information, see Replacing Ink
Cartridges.
Cartridge Missing
Install a color print cartridge on the
right side.
A color cartridge is missing.
Insert a color cartridge in the right cartridge carrier. For
more information, see Replacing Ink Cartridges.
Error XXXX
If the LCD displays Error followed by a 4-digit number, an
advanced error has occurred.
Contact Customer Support. For more information, go to
support.dell.com or refer to the printer Owner's Manual.
No Computer
Ensure your computer is connected
and turned on.
The Start button was pressed when the printer was in
Scan or Fax mode, but the printer is not connected to a
computer.
Make sure your printer is connected to your computer.
Paper Jam
1. Clear the paper jam.
2. Press Select to continue.
A paper jam exists in the printer.
Clear the paper jam. For more information, see Check for
a paper jam.
Paper Out
The printer is out of paper.
Load paper into the printer, and then press the Select
Page 62

Improving Print Quality
If you are not satisfied with the print quality of your documents, there are several different ways to improve the print quality.
l Use the appropriate paper. For example, use Dell Premium Photo Paper if you are printing photos with a photo ink cartridge.
l Use paper that is a heavier weight, bright white, or coated. Use Dell Premium Photo Paper if you are printing photos.
l Select a higher print quality.
To select a higher print quality:
1. With your document open, click File®Print.
The Print dialog box appears.
2. Click Preferences, Properties, or Options (depending on your program or operating system).
3. On the Quality/Copies tab, select Quality/Speed and select a higher quality setting.
4. Print your document again.
5. If the print quality does not improve, try aligning or cleaning the ink cartridges. For more information on aligning, see Aligning Ink Cartridges. For more
information on cleaning ink cartridges, see Cleaning the Ink Cartridge Nozzles.
For additional solutions, go to support.dell.com.
1. Add paper.
2. Press Select to continue.
button to continue printing. For more information, see
Loading Paper.
Photo Mode
No supported images found on the
memory card.
The card that is inserted in the printer does not contain
any supported image formats.
Remove the memory card.
PictBridge Port
The attached camera or device does
not support PictBridge.
Please disconnect it.
The attached device is not supported, or the PictBridgeenabled digital camera is not set to the correct USB
mode.
Please disconnect the device or check the USB mode
setup. Refer to the documentation that came with your
digital camera for more information.
Size Warning
The paper inserted is smaller than
the selected Blank Paper Size.
Press Select to continue or press
Cancel to go back and retry your job.
The paper in the printer is smaller than the selected
Blank Paper Size.
Change the Blank Paper Size to match the paper in the
printer, or press the Select button to continue
printing.
Low Ink Error
The ink cartridge is running low on ink. The Low Ink
Error occurs when your ink cartridges reach levels of 25
percent, 15 percent, and 10 percent remaining.
Replace the ink cartridge. For more information, see
Replacing Ink Cartridges.
Only one device or media card is
allowed. Please remove all device(s)
and card(s).
More than one memory card or device is inserted in the
printer.
Remove all memory cards and devices.
 Loading...