

Defy SB, SBW Series, SB Series Owner's Manual
Page 1
2 Unpacking
2 Installation
2 Electrical installation
3 Safety advice
3 The control panel
3 Warmer drawer (SBW)
3 Utility storage compartment (SB)
4 The oven
5 Solid plates
6 Ringer timer
6 Maintenance
8 Problem check
8 Owner’s responsibility
8 Service
9 Service centres
10 Warranty
OWNER’S
MANUAL
www.defy.co.za
Kitchenmaster
Slide-In
Models SBW and SB
THE FREE STANDING STOVE
WITH THE BUILT-IN LOOK
You can rely on Defy
With or without splash panel
Page 2
• Please ensure that packaging material is disposed of in a responsible manner. Plastic
bags for example should be cut up to prevent children playing with them and acciden-
tally suffocating.
• If the appliance is damaged in any way, do not use it. Report the damage to your
dealer, who will take the necessary corrective action.
Congratulations on the purchase of this quality product.
We trust that you will enjoy many years of trouble free use. Please
read these instructions carefully before using the stove. This manual
will provide you with information on how to operate and care for your
product in order that you gain the maximum benefit from it.
Introduction.
Unpacking.
Installation.
• This appliance should not be connected through an earth leakage system.
Refer to S.A.B.S. 0142.
Connection to the power supply must be carried out by a licensed electrician, who will
ensure that the oven is correctly connected and safely earthed. The rated current is printed
on the serial number label attached to the back of the stove.
The appliance must be connected to the mains through a double pole isolating
switch which has a minimum clearance between the contacts of 3 mm. in both poles.
A means for disconnection must be provided in the fixed wiring.
• Please ensure that packaging material is disposed of in a responsible manner.
• Plastic bags should be cut up to prevent children playing with them and accidentally
suffocating.
• Remove all packing from the oven cavity and position the accessories.
• If the appliance is damaged in any way, do not use it. Report the damage to your
dealer, who will take the necessary corrective action.
Electrical installation.
“This appliance must be earthed and the manufa cturer and the seller do
not accept responsibility for any damage due to incorrect installation or
electrical connection.”
• Levelling fee t are provid ed at each corner. Adjust ments may
be made by tilting the stove and turning the feet in or ou t until the stove stands firm and level.
• Surfaces immediately adjacent to the oven should be able to
withstand temperatures of up to 100°C without delaminating
or discolouring.
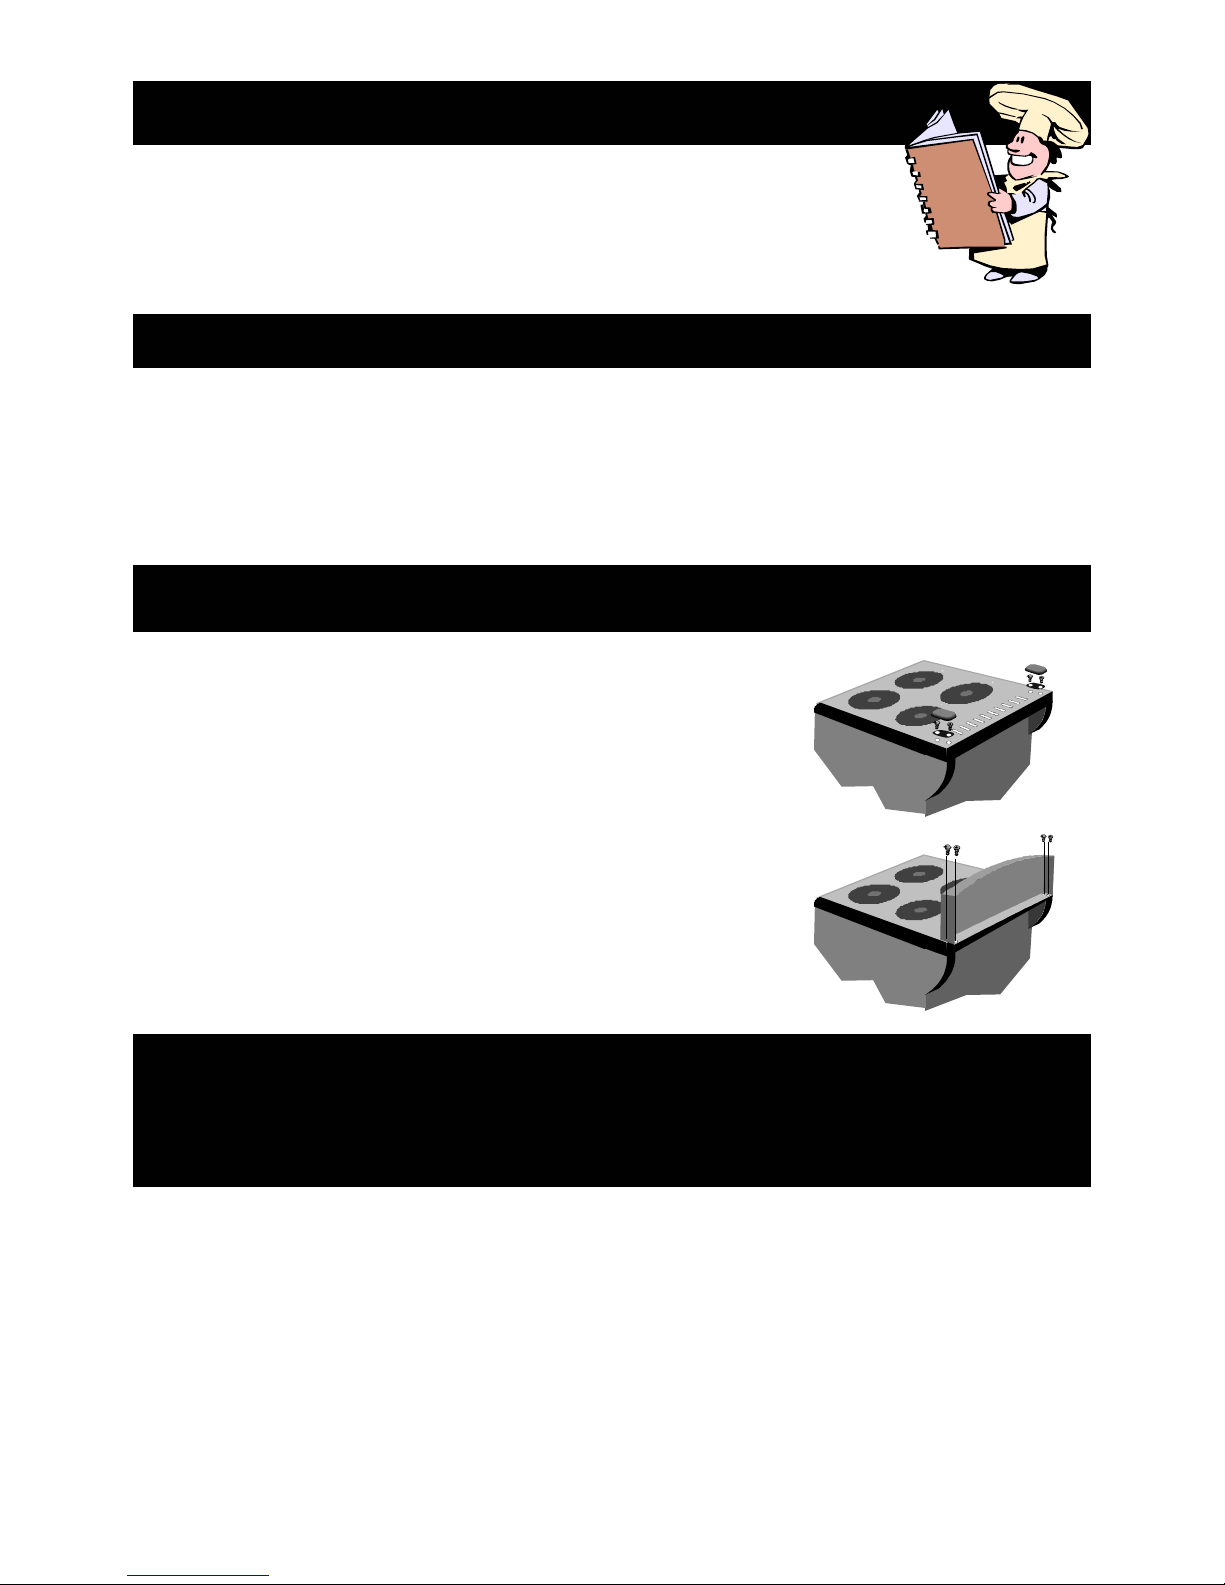
• Use of the splash panel is optional. The splash panel is
packed separately and may be fitted as shown. First carefully prise off the dome shaped plastic covers at the rear end
of the hob. Remove the screws and dispose of the domes
and retainer pieces. Hold the splash panel in position, insert
the screws and finger tighten ( to avoid cross threading) before final tightening with a screw driver.
Page 3
Safety advice.
• This appliance is not intended for use by young children or infirm
persons without supervision. Young children should be supervised
to ensure they do no t play with the appliance.
• Only use the oven and hob for preparing food.
• Do not leave hot fat or oil unattended. If overheating occurs, these
could catch fire.
• Switch off the power at the wall switch in the event of a fault or when cleaning the appliance.
• Do not store flammable items in the oven . If the oven is inadvertently switched on, these
could catch fire.
• Avoid spilling fruit juice, particularly citrus, on the oven as it could damage the enamel.
• Always keep the oven door gasket clean as this will enable the door to seal pr operly.
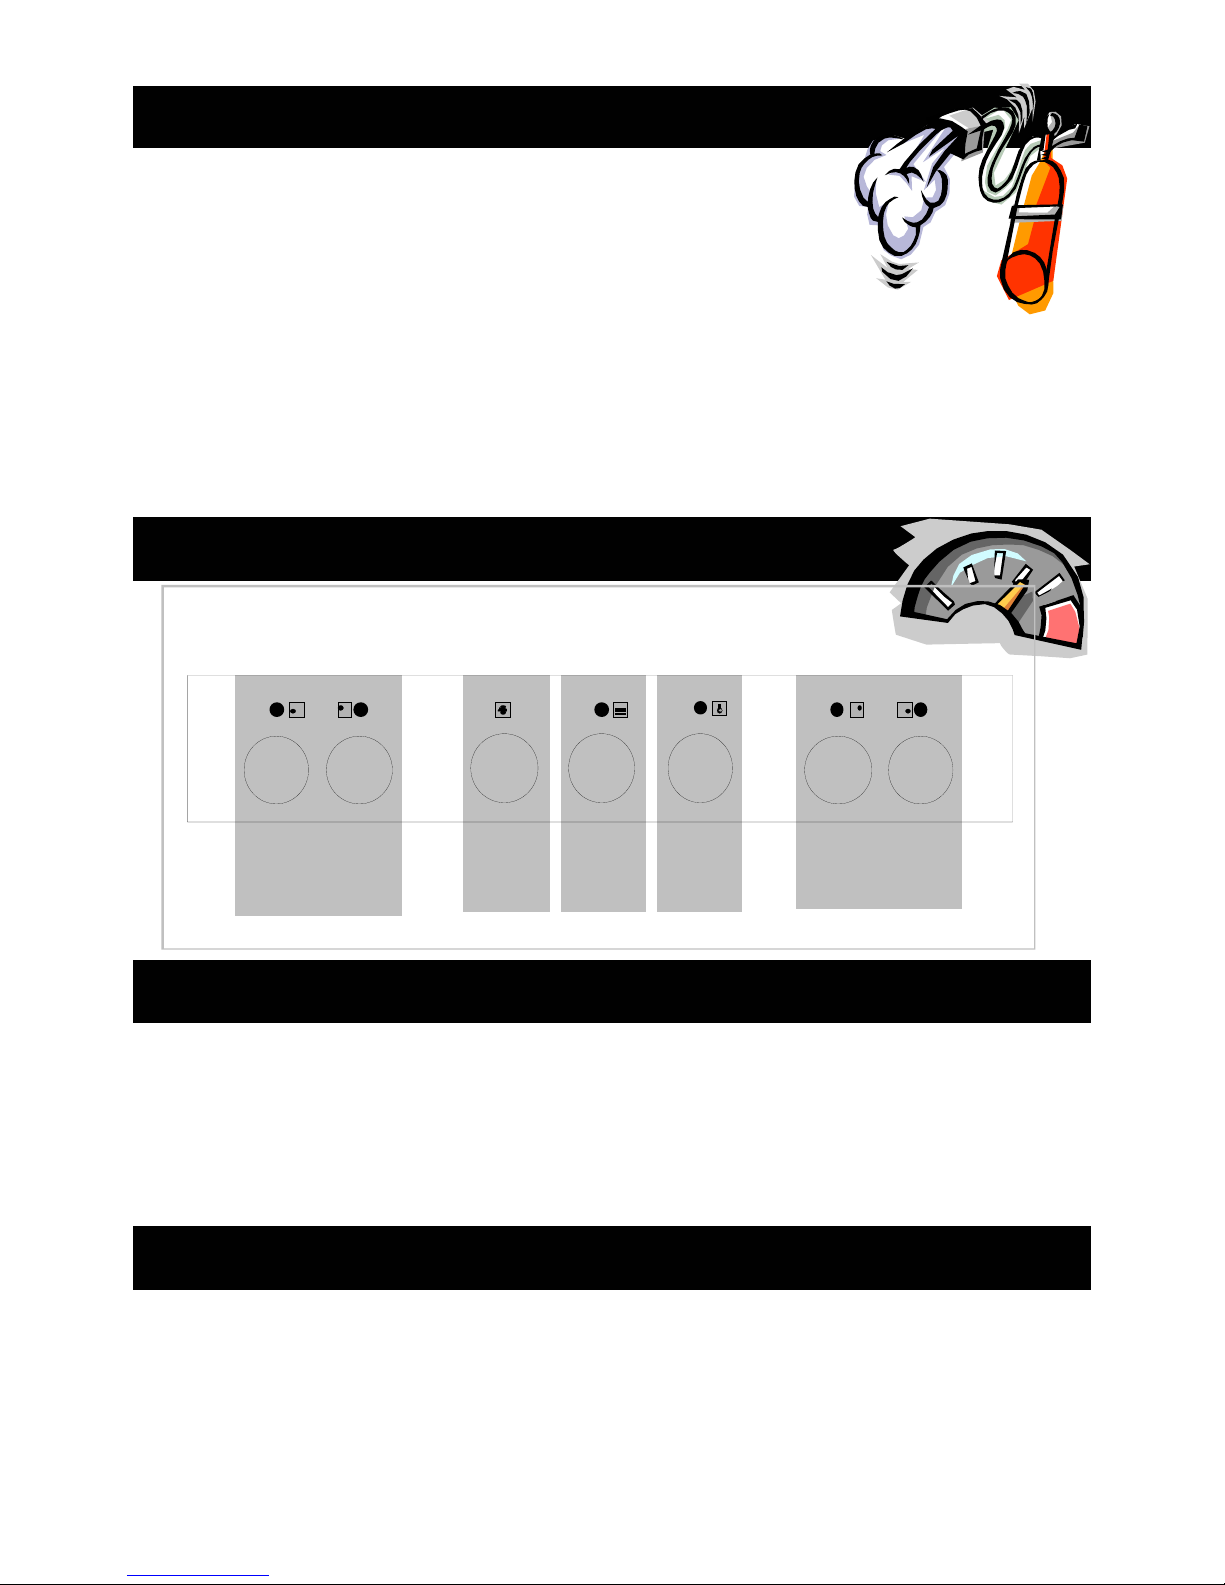
The control panel.
• The utility storage compartment is situated below the oven and may be used for the
storage of pots, pans and general cookware.
• Pull and hold the door down to gain access to the compartment. If access is no longer
required, reduce downward pressure and allow the tensioning springs to gently close
the door.
• The warmer drawer has an on/off contro l. An indicator light will glow when the
drawer has been switched on. If food is to be kept warm for a lengthy period of time it
is best to use the low temperature oven. (see page4).
• Cover the food to minimise the drying out effect.
• To remove the drawer for cleaning purposes, pull to the bump stop, lift slightly and
pull free. Re-fit by lifting the rear of the drawer over the bump stop and sliding it back.
Utility storage compartment (model SB).
Warmer drawer (model SBW).
PLATE CONTROLS
LEFT FRONT LEFT BACK
MINUTE
MINDER
OVEN
THERMOSTAT
PLATE CONTROLS
RIGHT BACK RIGHT FRONT
WARMER
MODEL
SBW

Page 4
Baking Guide.
• Where possible, bake on the middle shelf position of the oven.
• Place the food halfway between the back of the oven and the door.
• Do not open the oven door until at least two thirds of the baking time has lapsed.
• The roast pan must not be used for baking purposes.
Grilling.
• The oven door must remain closed during grilling.
• Position the wire shelf in the desired position below the grill element.
• Set the oven thermostat to the GRILL position.
• The thermostat indicator light will glow.
• Pre-heat the grill element for about 5 minutes.
• Partially withdraw the shelf and place the roast pan and grill rack with the food on it in
the centre of the shelf. Slide the shelf back into position. Close the door.
• Monitor the grilling to avoid burning the food.
• Care must be taken not to touch the grill element while handling food in the oven.
• After grilling is completed , the thermostat must be returned to the "0" position
in an anticlockwise direction.
• Warning: accessible parts may become hot when grilling. Always use oven gloves
when handling food in the oven and keep children away from the product when it
is in use.
The oven.
Baking.
• Set the oven thermostat to the required temperature.
• The thermostat indicator light will glow and remain on until the oven has reached the
selected temperature. The light will then switch off.
• Thereafter place the food in the oven.
• During the baking cycle, the indicator light will switch on and off as the thermostat
maintains the selected temperature.
• After baking is completed, the thermostat must be turned to the "0" position in
an anticlockwise direction.
Note.
• The oven thermostat is marked down to 70 °C. When set to this position, the oven
may be used as a warmer.
• All ovens extract moisture from the food being cooked, especially so during the win-
ter months. This is normal and not detrimental to the food or the oven.
WARNING
UNDER NO CIRCUMSTANCES SHOULD THE OVEN FLOOR
(OR THE BOTTOM OVEN ELEMENT) BE COVERED WITH ALUMINIUM FOIL.
Doing so would reflect the heat from the bake element downwards. Heat to the oven
would be restricted and overheating of the space below the foil would result in damage
to the oven enamel and surrounding cupboards.
 Loading...