

Defy LAUNDROMAID Electro Logic 920 Owner's Manual

Page 1
www.defy.co.za
OWNER’S
MANUAL
You ca n rely on Defy
TOP
LOADING
AUTOMATIC
WASHING
MACHINE
2 Features.
2 Accessories.
3 Safety precautions.
4 Installation.
5 Electrical installation.
6 Loading the machine.
7 Functions of the controls.
8 Programme selections.
9 Time delayed start.
9 Customising programmes.
10 Operating procedure.
11 Maintenance.
12 Technical specification.
13 Trouble shooting.
14 Service.
15 Warranty.
INDEX
E L E C T R O L O G I C 9 2 0
Page 2
Congratulations
Features
You are now the proud owner of one of the finest and most
modern washing machines that today’s technology can produce. You and your machine are going to make a great team
together. But first it will pay if you really get to know each
other. This book will tell you all you need to know about your
machine, what it will do and how to do it. Please read all the
instructions carefully before operating the machine.
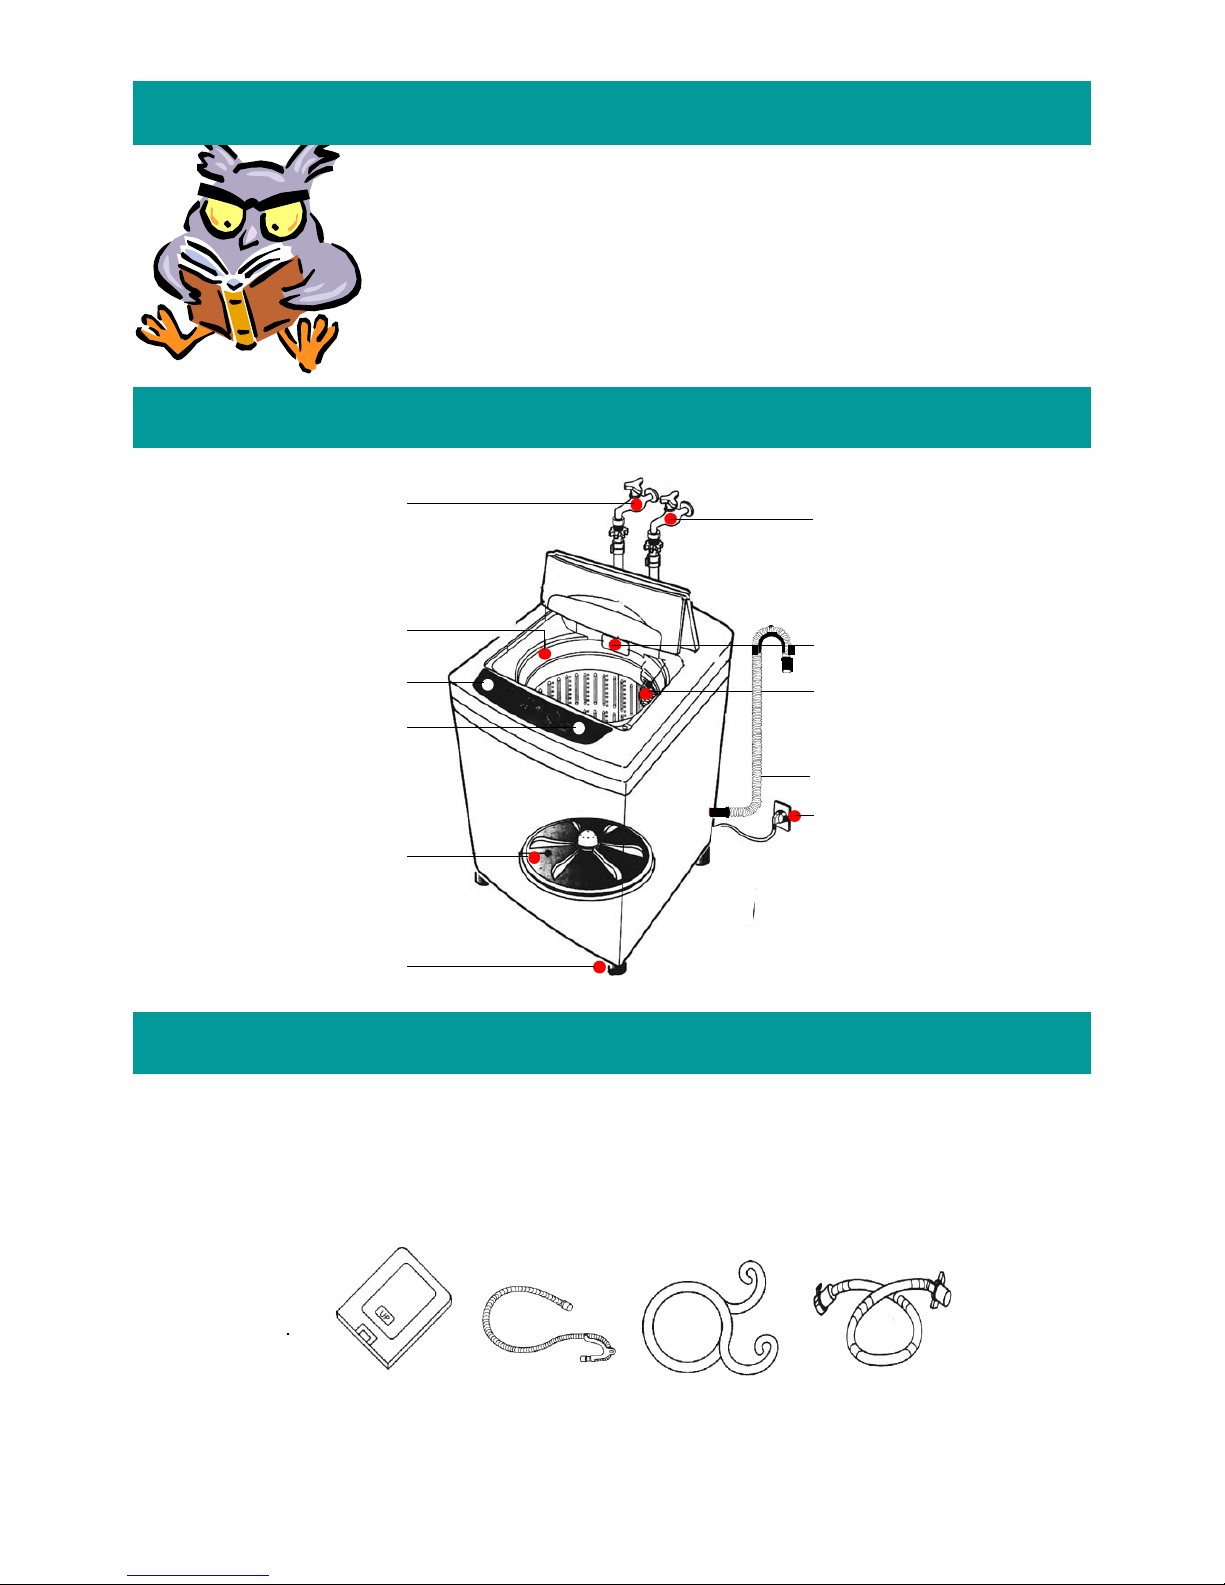
HOT WATER TAP
Close the tap when
the wash cycle has
been completed
.
SOFTENER INLET.
CONTROL PANEL.
POWER ON / OFF
SWITCH
.
PULSATOR.
ADJUSTABLE
LEVELLING FOOT
.
COLD WATER TA P
Close the tap when
the wash cycle has
been completed.
DETERGENT BOX
LINT FILTER
POWER CORD
AND PLUG
DRAIN HOSE
Accessories
BASE
COVER
DRAIN
HOSE
DRAIN
HOSE
CLAMP
INLET
HOSE
Page 3
Safety precautions
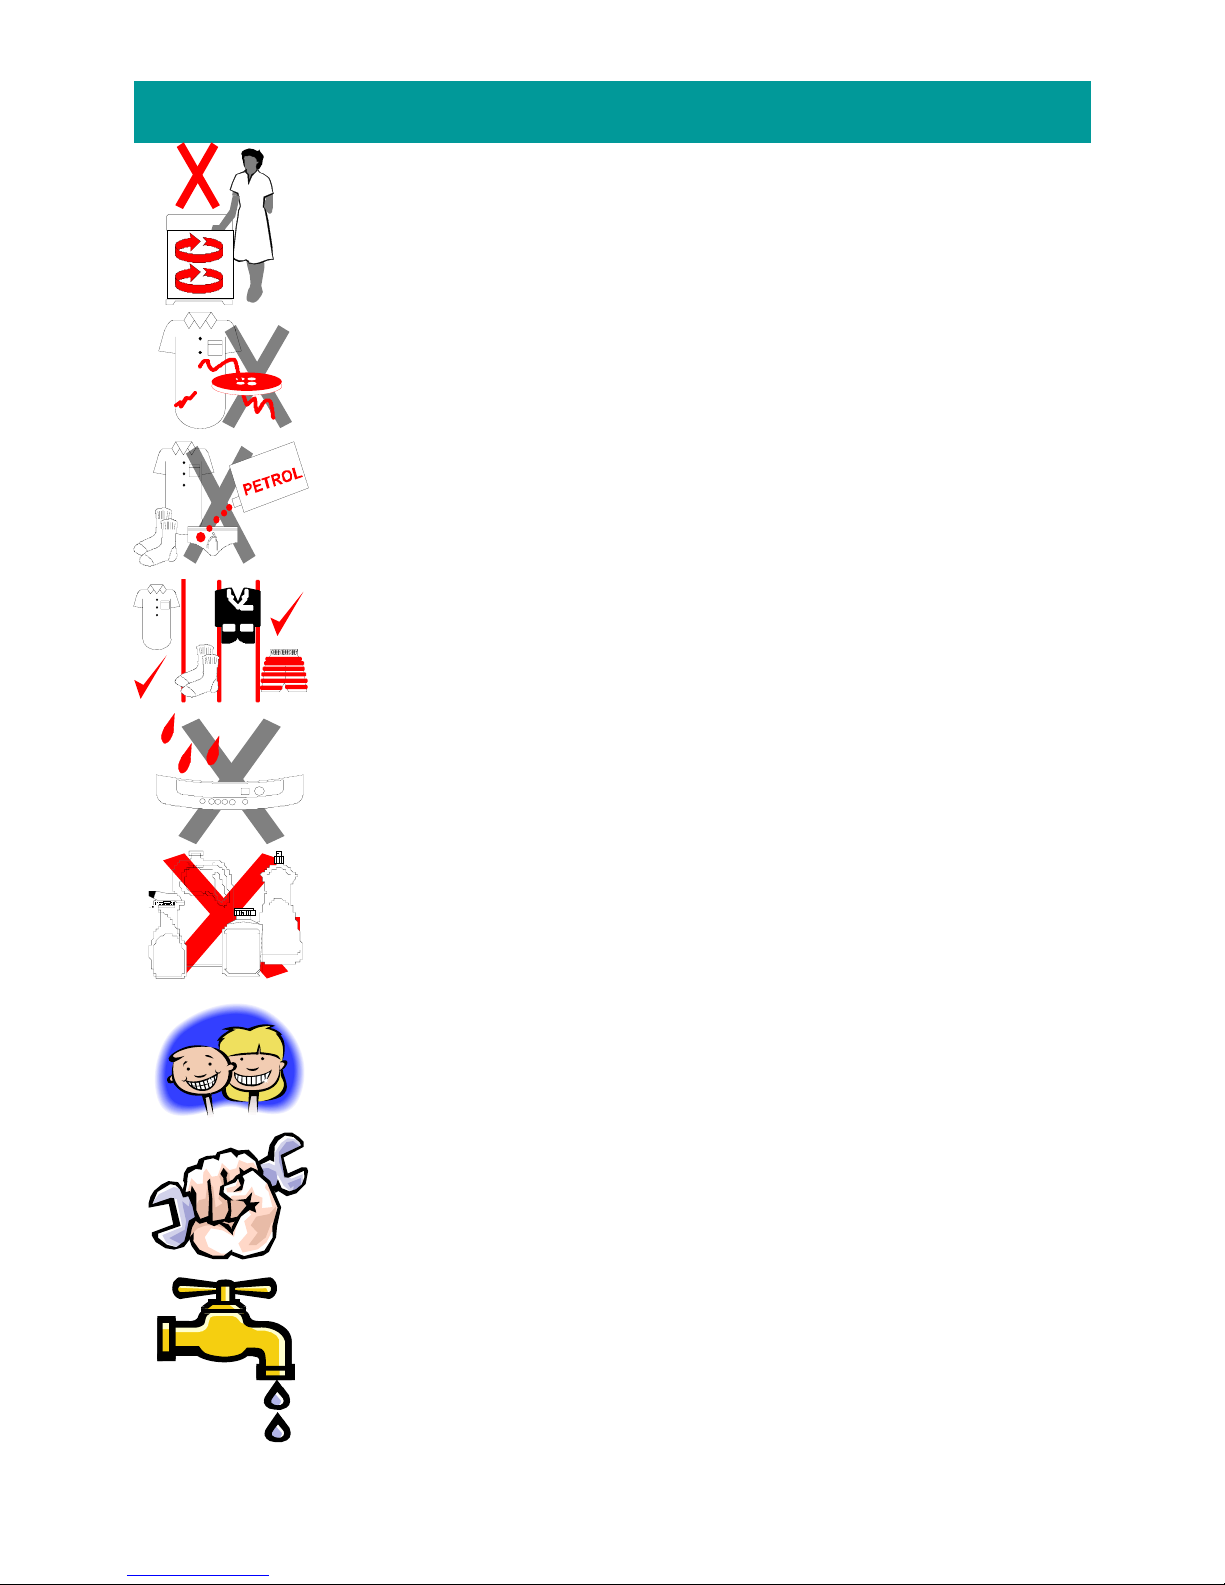
Before washing, check all clothes for loose buttons and tears.
Check pockets for coins , pins or other small articles.
Close zips and fasteners.
Wash small articles inside a pillow slip.
Do not wash clothes soaked in petrol, thinners, vegetable oil or any
other flammable liquids. Nor should any of these liquids be added to
the wash water as they constitute a fire hazard.
Only use the machine for washing fabrics. Do not atte mpt to wash
plastic leather or fibreglass. Sort and separate clothes by fabric, colour
and degree of dirt.
Avoid spraying water on to the control panel and back of the machine.
Do not use detergents which are not specifically designed for top loading automatic washing machines.
Do not allow children to play with or crawl inside the machine.
Supervise them closely when the washer is in use.
Always unplug the machine from the wall socket when it requires
cleaning or service. Only permit qualified persons to repair or install
parts in the washer.
Do not reach inside the tub while the machine is working.
Wait until all motion stops.
Do not use water which is hotter than 65 degrees Celsius as this may
deform plastic parts of the machine.
Page 4
UNPACKING
• Remove all packaging and dis pose of it in a re sponsibl e manner.
• Open the wash-tub lid a nd remove all the accessories st ored in the drum.
• Do not attempt to op erat e the ma chin e w hile any of the p ack a ging is st ill in plac e.
POSITIONING
• The machine should be installed in a well ventilated
place, away from direct sunlight.
• Hot and cold water taps should be located within 1 metre
of the inlet valves.
• Positioned the machine on a flat and stable uncarpeted
floor capable of supporting the fully loaded washer.
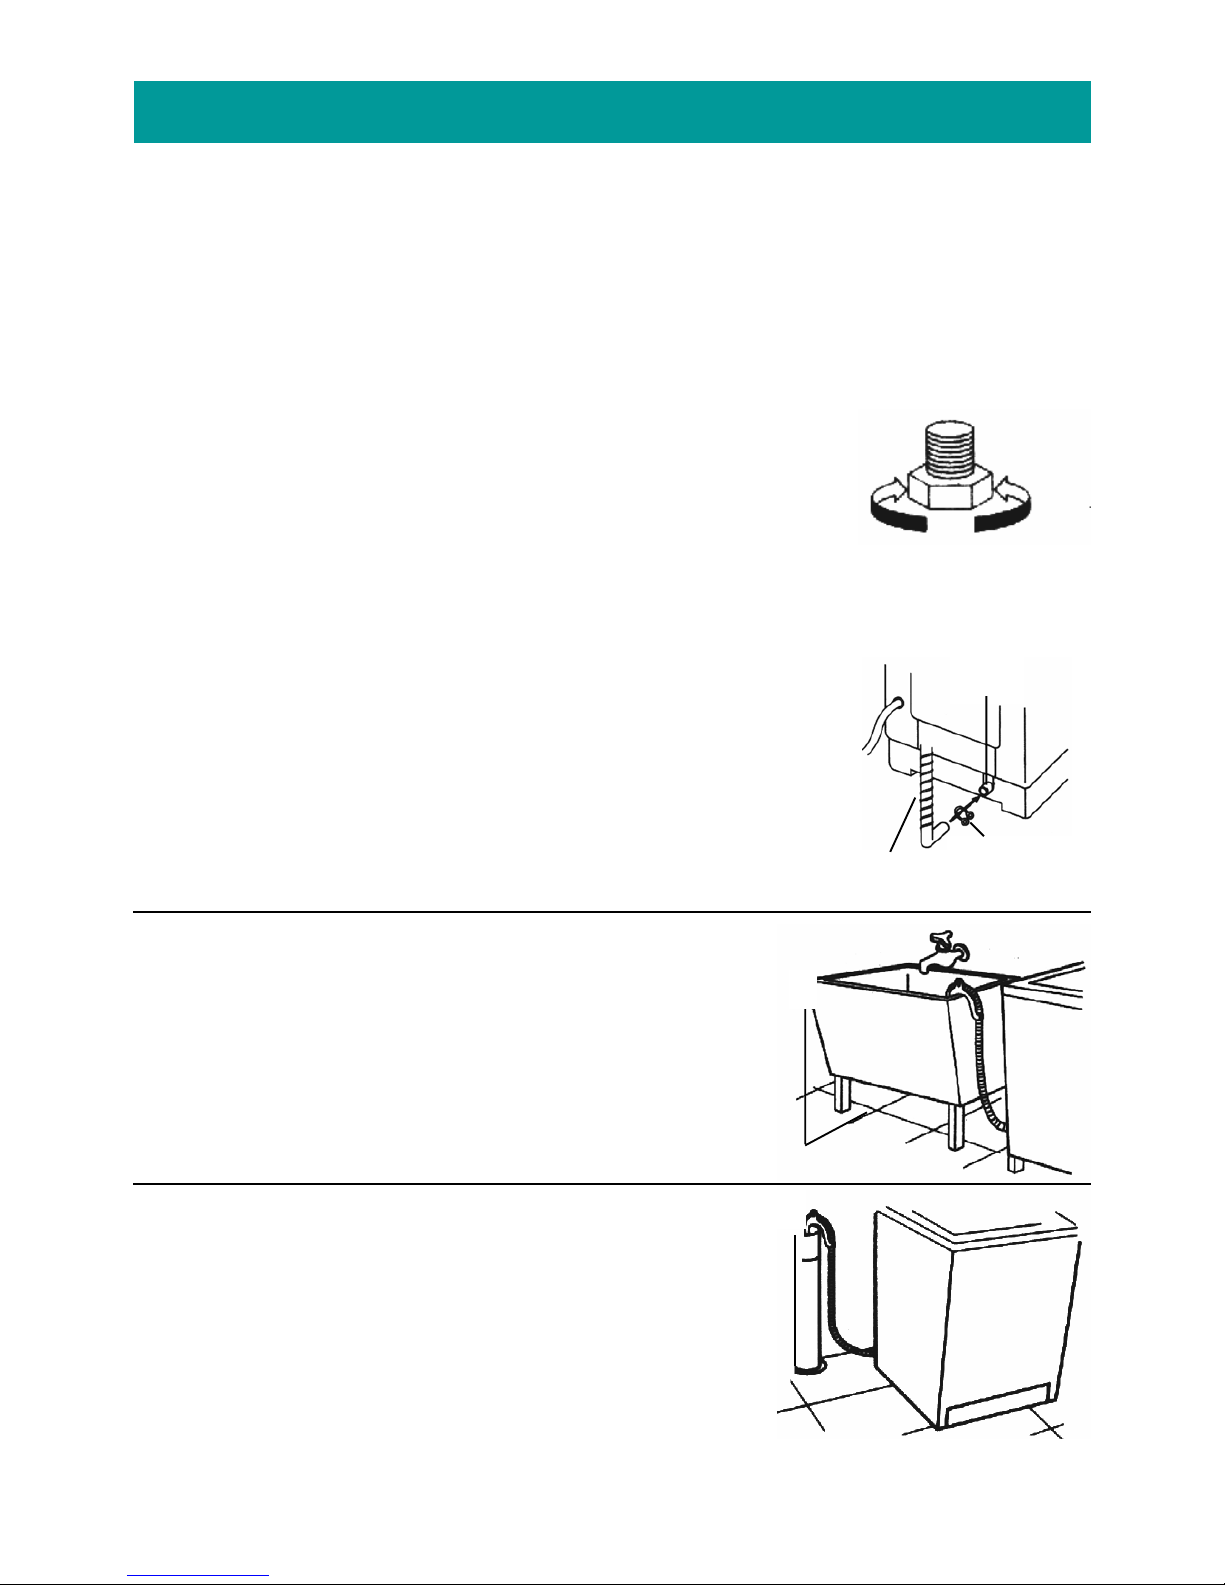
• An adjustable levelling foot is located at the right front
of the machine and may be turned in or out to achieve
stability. An unstable machine will vibrate and generate
excessive noise.
DRAIN HOSE
• Connect the drain hose to the drain outlet at the rear of
the machine and secure it with the hose clamp supplied.
• Hook the outlet end of the drain hose over the lip of a
sink or outlet pipe.
SINK OR LAUNDRY TUB DRAIN
• The top lip of the sink must be at least 860mm (A) above
floor level and not higher than 1300mm.
PIPE DRAIN
• The minimum inside diameter of the pipe drain should be
30mm and the pipe should be able to drain 30 litres per
minute.
• The top lip of the pipe should be at least 860mm (B)
above floor level and not higher than 1300mm.
Installation
Drain hose
Hose clamp
Drain
outlet
A
B
Page 5
Installation—continued
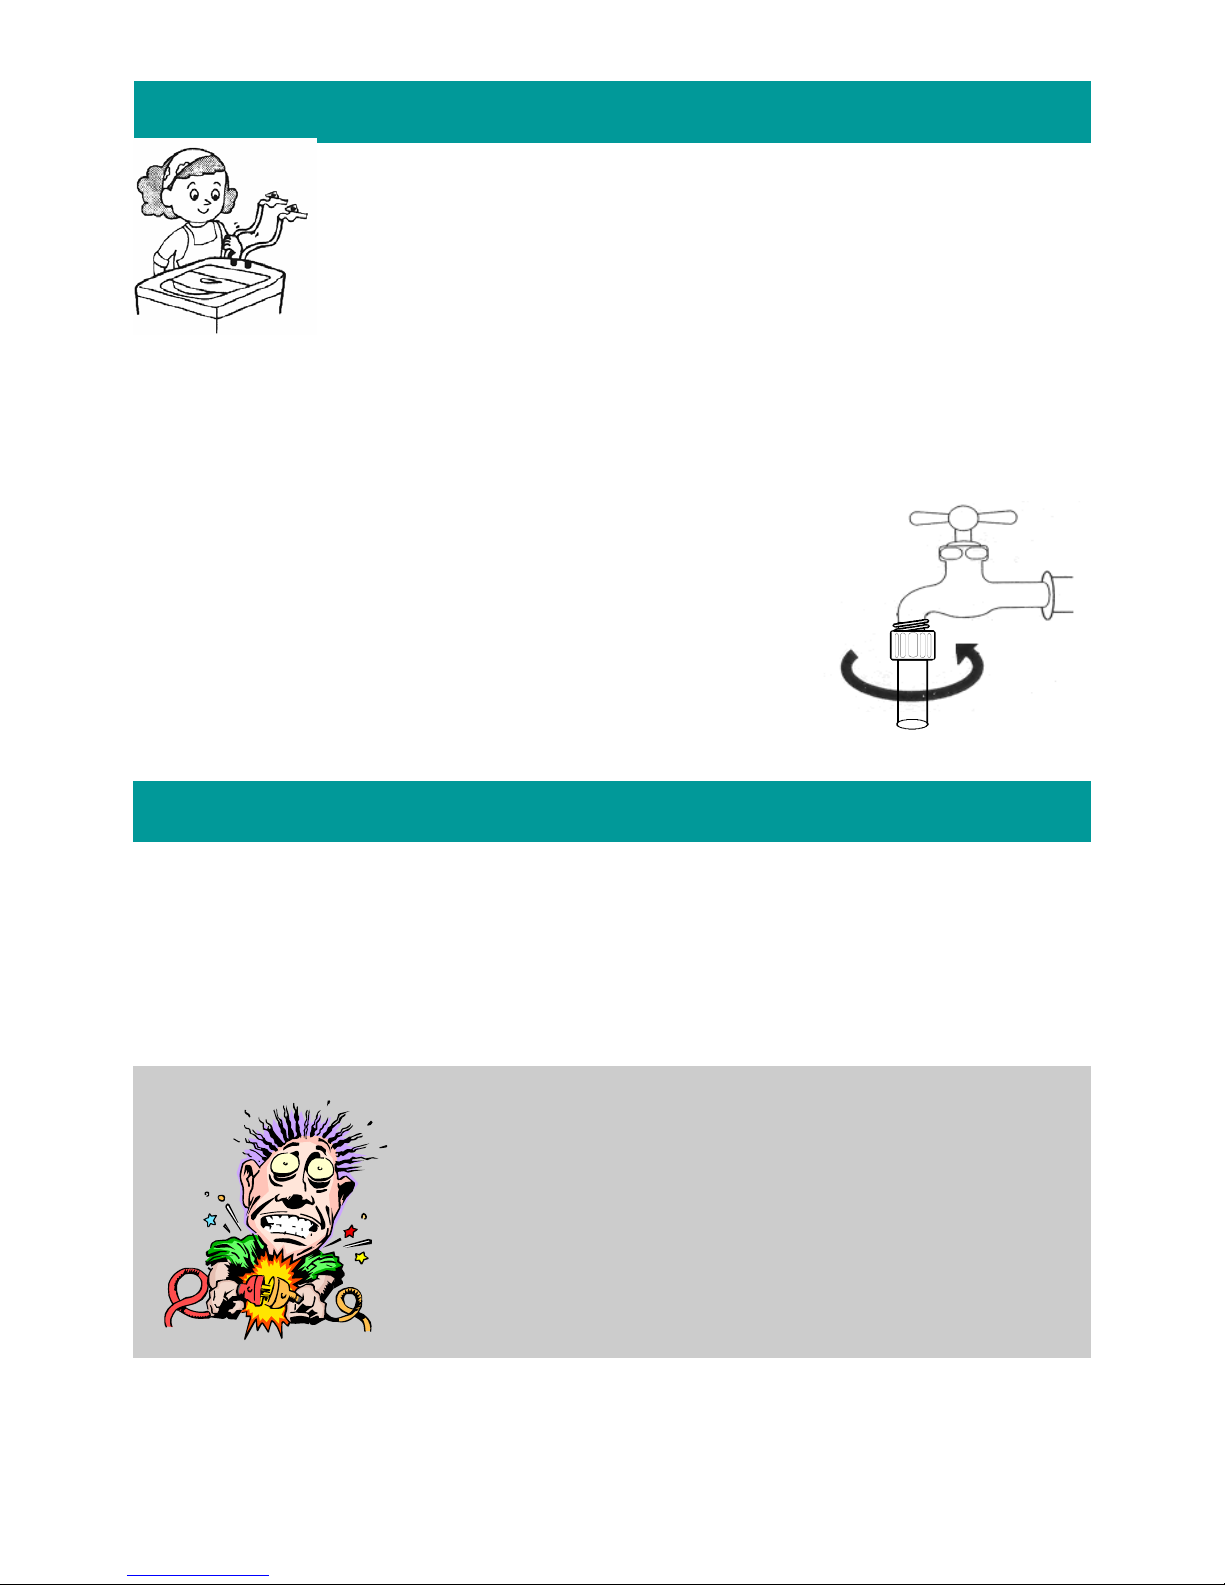
INLET HOSES
• Connect the respective inlet hoses to the hot and cold water taps and to the machine’s inlet
fittings. The hot water inlet is on the left and the c old w ater inlet on th e right.
CONNECTING THE WATER INLET HOSES
• Connect the inlet hoses to threaded hot and cold water taps and
to the machine’s inlet fittings. Take care not to confuse the hot
and cold water inlets. The hot water inlet is coloured pink and
the cold water inlet is coloured blue.
•
If only one water tap is available, connect the inlet hose to the
blue, cold water coupling.
•
Open the taps and check for leaks. Re-tighten couplings if necessary.
• The washing machine is designed to operate on a 230 Volt, 50 Hz, 15 Amp, AC power
supply.
• The machine should be connected to an earthed 3 pin wall socket.
• If the power-cord should ever need replacing, use only a genuine cord available from
the nearest Defy Service Centre.
The appliance must be earthed
and the manufacturer and seller
do not accept responsibility for
any damage due to incorrect
electrical connection.
Electrical installation
 Loading...