

Page 1

Owner’s
Manual
ELECTRIC CHEST
FREEZERS
CONTENTS
2 Introduction
2 Unpacking and Installation
2 Electrical Installation
3 Operating the Freezer
4 Freezing Guide
5 Defrosting
6 Maintenance
6 Service
7 Features and Benefits
www.defy.co.za
Page 2

INTRODUCTION
Congratulations on the purchase of this quality appliance. We, the manufacturer, trust
that you will enjoy many years of trouble free use. Please read these instructions carefully
before using the product. This book will provide you with information on how to operate
and care for your appliance in order that you gain the maximum benefit from it.
UNPACKING
• Please ensure that packaging material is disposed of in a responsible manner. Plastic
bags for example should be cut up to prevent children playing with them and
accidentally suffocating.
• If the appliance is damaged in any way, do not use it. Report the damage to your
dealer, who will take the necessary corrective action.
INSTALLATION
• The appliance should be solidly positioned on the floor in a dry, well aired place
away from heat sources such as stoves, geysers and direct sunlight and in such a way
that air flow through the grill on the right hand side is not restricted
ELECTRICAL INSTALLATION
This appliance must be earthed and the manufacturer and the seller do not
accept responsibility for any damage due to incorrect electrical connection.
• This appliance is designed for use on 220-250 Volt, 50 Hz, AC current.
• This makes it suitable for operation in all areas in South Africa with an Escom or
municipal supply.
• A 15A moulded plug is fitted by the manufacturer. .
• If the power supply cord is damaged it must be replaced by the manufacturer, their
service agent or a similarly qualified person in order to avoid a fire hazard
• No other appliance should be connected to the same terminal point.
Page 3
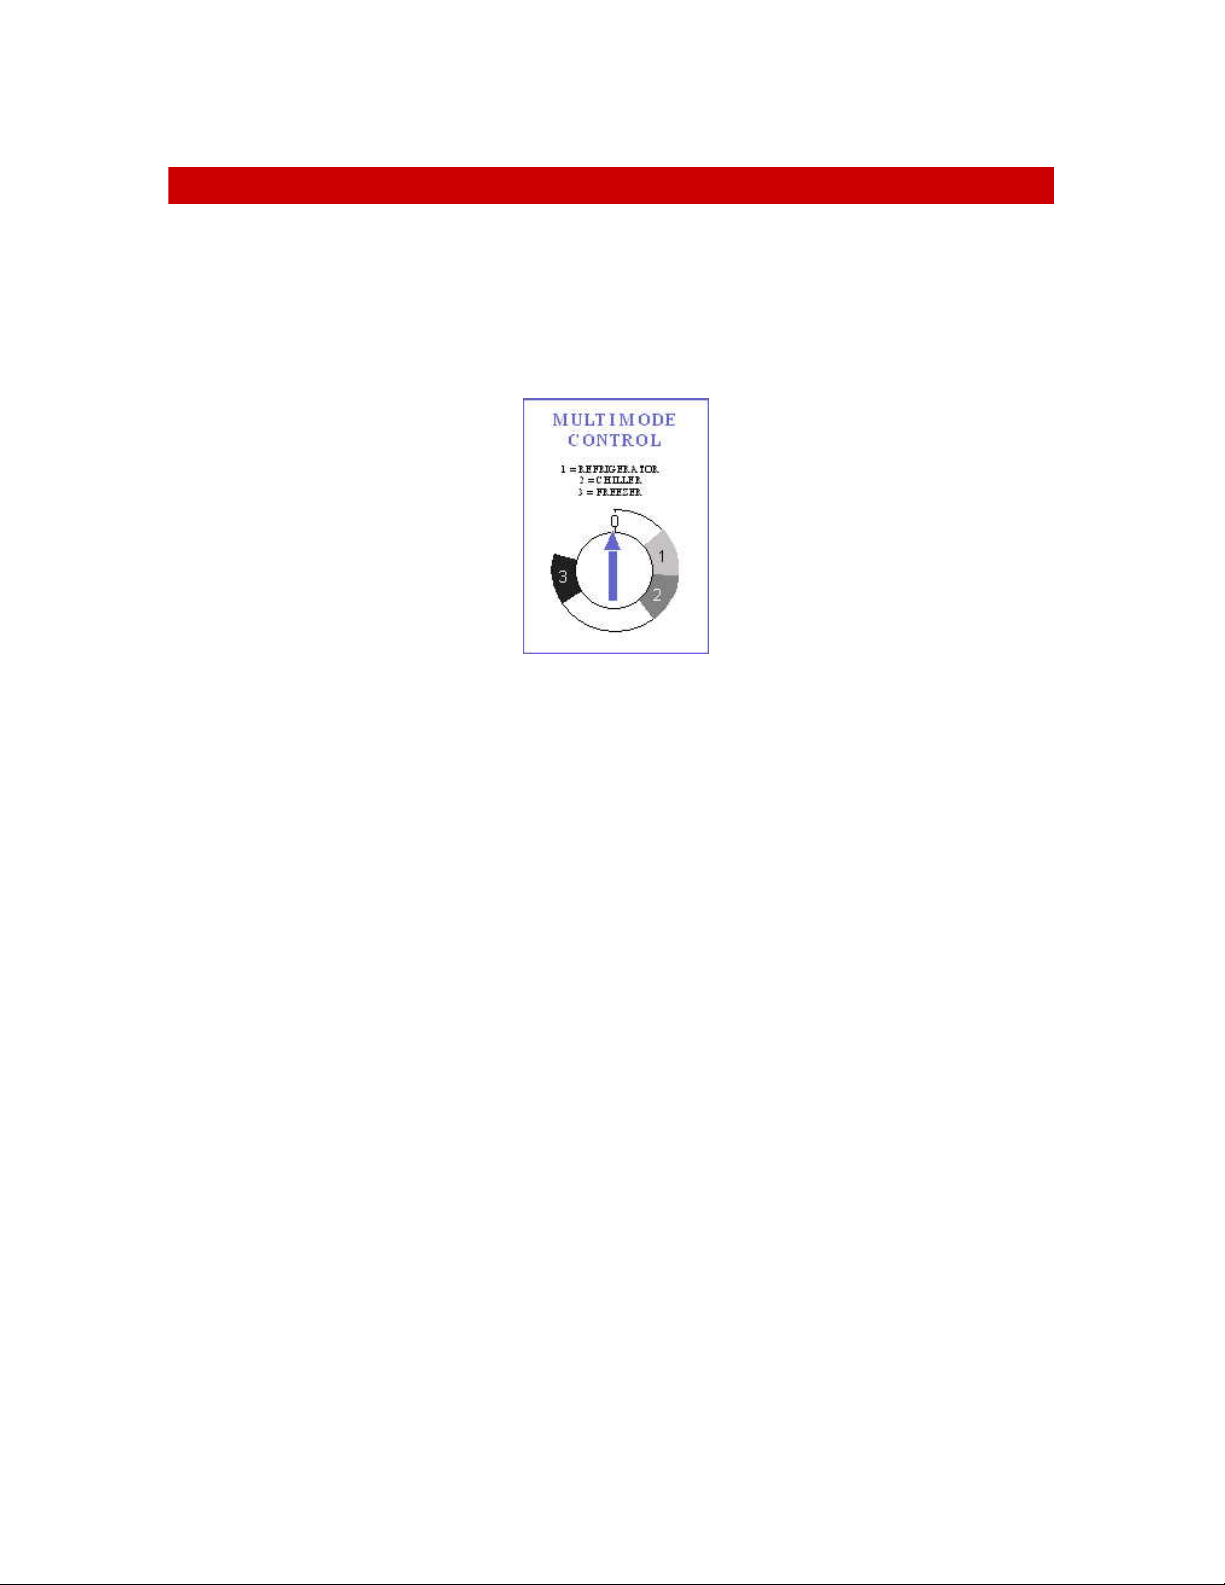
OPERATING THE FREEZER – Multi mode
Select the operating mode (see setting the temperature as set out below)
Plug the unit into a 15A earthed wall socket and switch on.
Wait at least six hours before loading the freezer with food.
An on /off indicator light, on the cabinet front, glows when there is power to the unit.
Setting the temperature
• The freezer is designed to
operate in three ways.
• It can operate as a:
1. Refrigerator,
2. Chiller,
3. Freezer.
The temperature selection knob
is located in the side grill.
Using the unit as a refrigerator.
At the refrigerator setting on the dial, the temperature in the cabinet will be about 5°C.
This temperature is ideal for storing perishable foods such as dairy products, fresh
vegetables, and cold meats. Cold drinks can also be stored at this temperature.
Using the unit as a chiller
At the chiller setting on the dial, the unit may be compared with a butcher’s cold storage
facility. The temperature in the cabinet can range from 2°C to –2°C. This temperature or
‘Partial Freeze’ is ideal for storing meat or fish for a short period. The advantage is that
the food can be cooked without first defrosting or thawing it. Food stored at the chiller
setting will not release water and will keep its natural fibre. Sometimes it is undesirable
to freeze a fine cut of meat as some of the flavour would be lost during freezing. At the
chiller setting, meat could be cooked as though it were fresh and portions could be
removed without thawing, while the balance could be stored for another occasion.
Using the unit as a freezer
At the freezer setting on the dial, the temperature in the cabinet is set at –18°C. This
temperature is ideal for storing frozen food for long periods of time.
Multi mode characteristics
During refrigerator or chiller operation, there could be a build up of condensation water
on the cabinet floor. This is normal and the water should be sponged up and removed
whenever it becomes excessive.
If the unit is used as a freezer, it will require periodic defrosting. The cabinet also
requires defrosting before switching from freezer to refrigerator or chiller operation. The
defrosting procedure is described in this book on page 5.
• A coin should be used to
turn the knob to the desired
sector on the dial.
Refrigerator, Chiller or
Freezer.
• The temperature in the
cabinet may be adjusted by
turning the knob slightly left
or right in each function
sector. Left for a higher and
right for lower temperature.
Page 4

FREEZING GUIDE
• Wrap all food before storage.
• Seal all foods, or place in airtight containers to prevent dehydration.
• The art of good packing is to eliminate all the air pockets from packages and to keep
air out by firm sealing. A heavy deposit of frost on the inner surface of a package
taken from the freezer means that air pockets were not eliminated before sealing.
• When packaging in sheet material such as aluminium foil, parcel tightly and press out
all air pockets. All folds should be sealed with deep-freeze sealing tape.
• Unwrapped food containing acids or salt could cause permanent staining of the
cabinet interior.
• When loading bulk into the freezer, load one quarter at a time and allow to freeze
before loading the next quarter.
• Allow hot food to cool before putting it in the freezer.
• Remember, liquids can increase in volume when frozen. Do not store sealed bottles,
jars or cans in the freezer as the contents will freeze, expand and rupture the
container.
• Do not exceed the expiry date shown on food packs.
• The storage baskets may be pulled out to facilitate loading.
• The calendar on the inside of the freezer door serves as a guide and shows the safe
storage period (in months) for the depicted foods.
Page 5

DEFROSTING
• The freezer should be defrosted whenever the ice build up on the inside wall exceeds
5 mm. in thickness,
• Remove the plug from the wall socket and proceed as follows:
1. Open the lid and leave it open during defrosting.
2. Remove the contents of the freezer, wrap them in newspaper and store in a cool place.
3. Remove the circular drain plug located at the inside floor of the cabinet near the left
hand front corner (see sketch 1)
4. A water discharge tube is located at the left front corner of the freezer (see sketch 2)
5. Pull this discharge tube forward to expose the drain hole (see sketch 2)
6. Place a suitable container below the drain hole to collect the defrost water.
Periodically empty the container to prevent overflow.
7. After defrosting, dry the cabinet, replace the drain plug, push the discharge tube back
and replace the freezer contents. Close the lid, insert the power plug in the wall socket
and switch the freezer on.
Note:
Never try to speed up the defrosting process by chipping at the ice with a
sharp object
WARNING:
If the appliance is fitted with a lock, always keep the key in a safe place
where small children cannot reach it.
1
2
Page 6

MAINTENANCE
Cleaning
• Always disconnect the plug from the mains socket before cleaning the appliance.
Remember that turning the thermostat to “0” does not switch the power off to the
unit.
• Clean the appliance whenever necessary using warm soapy water and a sponge.
• Dry with a soft cloth
• Do not use pot scourers or abrasive powders to clean the appliance.
• Spillages, especially citric and acidic juices, must be wiped up immediately as they
could stain the product.
• Always ensure that the defrost drain, at the bottom of the cabinet is clean and free of
obstructions.
• Freezer baskets may be removed for cleaning purposes.
• The back of the unit may be vacuumed or dusted using a soft bristle brush.
• A mild furniture polish may be used on the exterior cabinet to add lustre and protect
against finger marks.
Owner’s responsibility
Since the following are not factory faults they are the owners responsibility:
• Damage to the exterior finish.
• Breakage of components
• Damage caused through improper use of the appliance.
• Damage caused by moving the appliance.
• Blocked defrost drain.
• The Company shall not be held liable for the loss of goods stored in the freezer
should the unit malfunction.
SERVICE
Before calling a service technician to assist with a problem, please check:
• Is the thermostat in the OFF position? The thermostat should be ON
• Is the power switched OFF? The power should be ON.
• Has a house fuse blown or a circuit tripped out? Repair or re-set as necessary.
• Is the 15-amp plug pushed firmly into the wall socket? Check another appliance such
as a toaster or kettle in the same socket.
• Has the lid been left open for a long time? Close the lid and monitor performance.
• Is the drain hole blocked? Clean out the hole with a suitable flexible wire and pour a
small quantity of Bicarbonate of Soda and water solution down the hole to rinse away
any remaining debris.
Remember that you may be charged for a service call even during the
warranty period if the fault is caused by any of the above.
If you have followed the instructions and still have a problem, contact the
nearest Defy Service Centre. They will be able to advise you on any aspect
of the machine or send a qualified technician to repair it.
Page 7

MODEL RANGE
Features
Variable control thermostat
4 star freezer
Freezer baskets
On/off indicator lamp
Rollers
Spring loaded, counterbalanced lid
Horizontal freezing coils
Granite look vinyl covered lid
Thicker walls
Lockable lid
Chromadek steel cabinet
The Manufacturer strives for continuous improvements. For this reason, the text and
illustrations in this book are subject to change without notice.
Benefits
Can be used as a refrigerator, chiller or freezer.
Keeps food frozen longer.
Convenient storage and removal of contents.
Visual confirmation of power supply.
Easy moving to facilitate cleaning.
Lid will remain open while accessing food (not
on C210).
More efficient freezing.
Provides durable work-top.
Provide superior insulation and saves energy.
Provides security and safety.
Durable and corrosion resistant.
Part Number 10129
 Loading...