

Page 1

YOU CAN RELY ON DEFY
INSTRUCTION MANUAL
SPLIT-TYPE ROOM
AIR CONDITIONER
AH09HG
9 H/WALL INDOOR
AH12HG
12 H/WALL INDOOR
AH18HG
18 H/WALL INDOOR
AH24HG
24 H/WALL INDOOR
INDEX PAGE
INTRODUCTION
2
INSTALLATION
2
REMOTE CONTROL
2
AUTO ON/OFF TIMER OPERATION
3
MODE ADJUSTMENT
3
AUTOMODE
3
COOL MODE
4
DRY MODE
4
FAN MODE
4
HEAT MODE
4
SLEEP MODE
4
PARTS IDENTIFICATION
5
EMERGENCY OPERATION
6
SAFETY PRECAUTIONS
7
MAINTENANCE
7
CLEANING THE FILTERS
7
PROLONGED IDLE PERIOD
8
AFTER PROLONGED IDLE PERIOD
8
TROUBLE SHOOTING
8
RATED CAPACITIES
9
SERVICE CENTRES
10
WARRANTY
11
AC09HG
9 H/WALL OUTDOOR
AC12HG
12 H/WALL OUTDOOR
AC18HG
18 H/WALL OUTDOOR
AC24HG
24 H/WALL OUTDOOR
The Manufacturer strives for
continuous improvements.
For this reason, the text and
illustrations in this manual are
subject to change without notice.
www.defy.co.za
Page 2
Introduction.
Congratulations on the purchase of this quality Defy air conditioner.
Read this manual carefully. It will provide you with information on how to operate and care for your air
conditioner, so that you may gain the maximum benefit from it and enjoy many years of trouble free use.
Installation.
The installation and connection to the power supply must be carried out by a qualified technician who will
ensure that the air conditioner is correctly installed and safely earthed.
A separate installation manual is provided for this purpose.
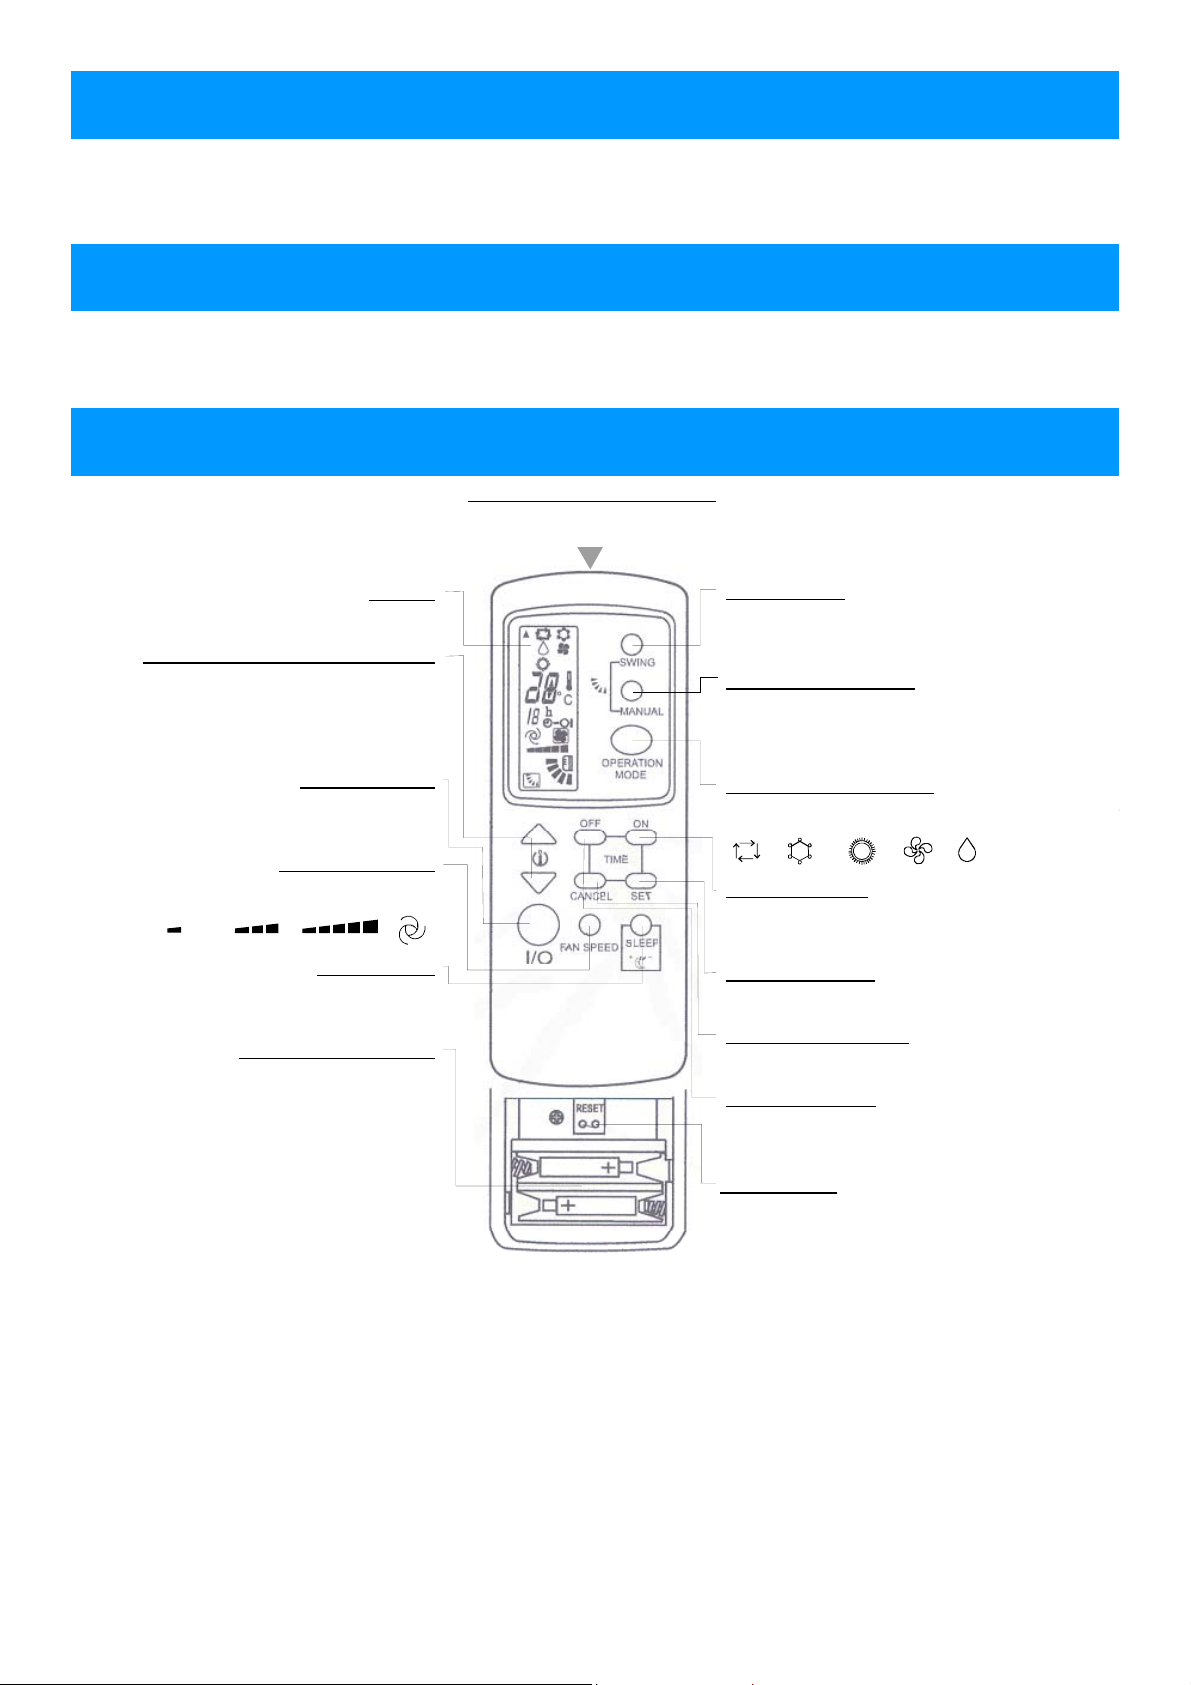
The Remote control.
SIGNAL TRAN SMITT ING WI NDOW
AIM AT THE INDOOR UNIT
WHEN SENDING AN INSTRUCTION.
DISPLAY
CURRENT SETTINGS ARE DISPLAYED.
TEMPERAURE ADJUSTMENT BUTTONS
THE TEMPERATURE RANGE IS 16°C TO 31°C
PUSHING THE UP OR DOWN BUT TON
INCREASES OR D ECREASES
THE TEMPERATURE BY 1°C.
ON / OFF BUTTON
PRESS TO SWITCH THE
AIR CONDITIONER ON AND OFF.
FAN SPEED BUTTON
PRESS TO C HANGE TH E FAN SPEED
LOW > MEDIUM > HIGH > AUTO
SLEEP BUTTO N
PRESS TO START
OR STOP TH E SL EEP MO DE
BATTERY COMPARTMENT
PRESS AN D SLIDE THE COVER OF F
REPLACE OLD BATETERIES WITH AAA SIZE 1.5V.
REPLACE OLD BATTERIES WITH AAA SIZE 1.5V.
AND ENSURE CORRECT POLAR FITMENT.
AND ENSURE CORRECT POLARITY.
SWING BUTTON
PRESS THIS BUTTON FO R AUTOMATIC
UP/ DOWN AIR F LOW DISTRIB UTION .
MANUAL SW ING BUTT ON
PRESS THIS BUTTON REPEATEDLY TO SET
THE UP/DO WN AIR DEFL ECTOR .
1 > 2 > 3 > 4 > 5
OPERATION MODE BUTTON
PRESS REPEATE DLY TO SELECT TE DESI RED MODE
AUTO >COOL > HE AT > F AN > DRY
TIMER ON BUTTON
SEE THE SECTION ON AUTO
ON/OFF TIMER O PERATION.
TIMER SET BUTTON
PRESS TO SET THE TIMER .
TIMER CA NCEL BUT TON
PRESS TO CANCE L THE TIME R SETTING.
TIMER OFF BUTTON
SEE THE SECTION ON AUTO
ON/OFF TIMER O PERATION.
RESET POINTS
RESET POINTS
SHOULD THE R EMOTE FAIL TO OPERATE
SHOULD THE REMOTE FAIL TO OPERATE
NORMALLY, S HORTIN G THE T WO ME TAL
NORMALLY, SHORTING THE TWO METAL
TABS WITH A PAPER CLIP OR OTHER METAL
TABS WITH A PAPER CLIP OR OTHER METAL
OBJECT, W ILL REST ORE FA CTOR Y S ETTI NGS .
OBJECT WILL RESTORE FACTORY SETTINGS.
Note:
• To operate the remote, it must be in clear line of sight and within 6 metres of the indoor unit.
• If the remote will not be used for an extended period we recommend that you remove the batteries
• The sketch above shows all the functions in the display and is for illustration purposes only.
• Cooling only models do not have a HEAT mode.
• Adjust the left /right deflector vanes by sliding the adjustment lever on the vanes to the desired posi-
tion. See page 6.
2
Page 3
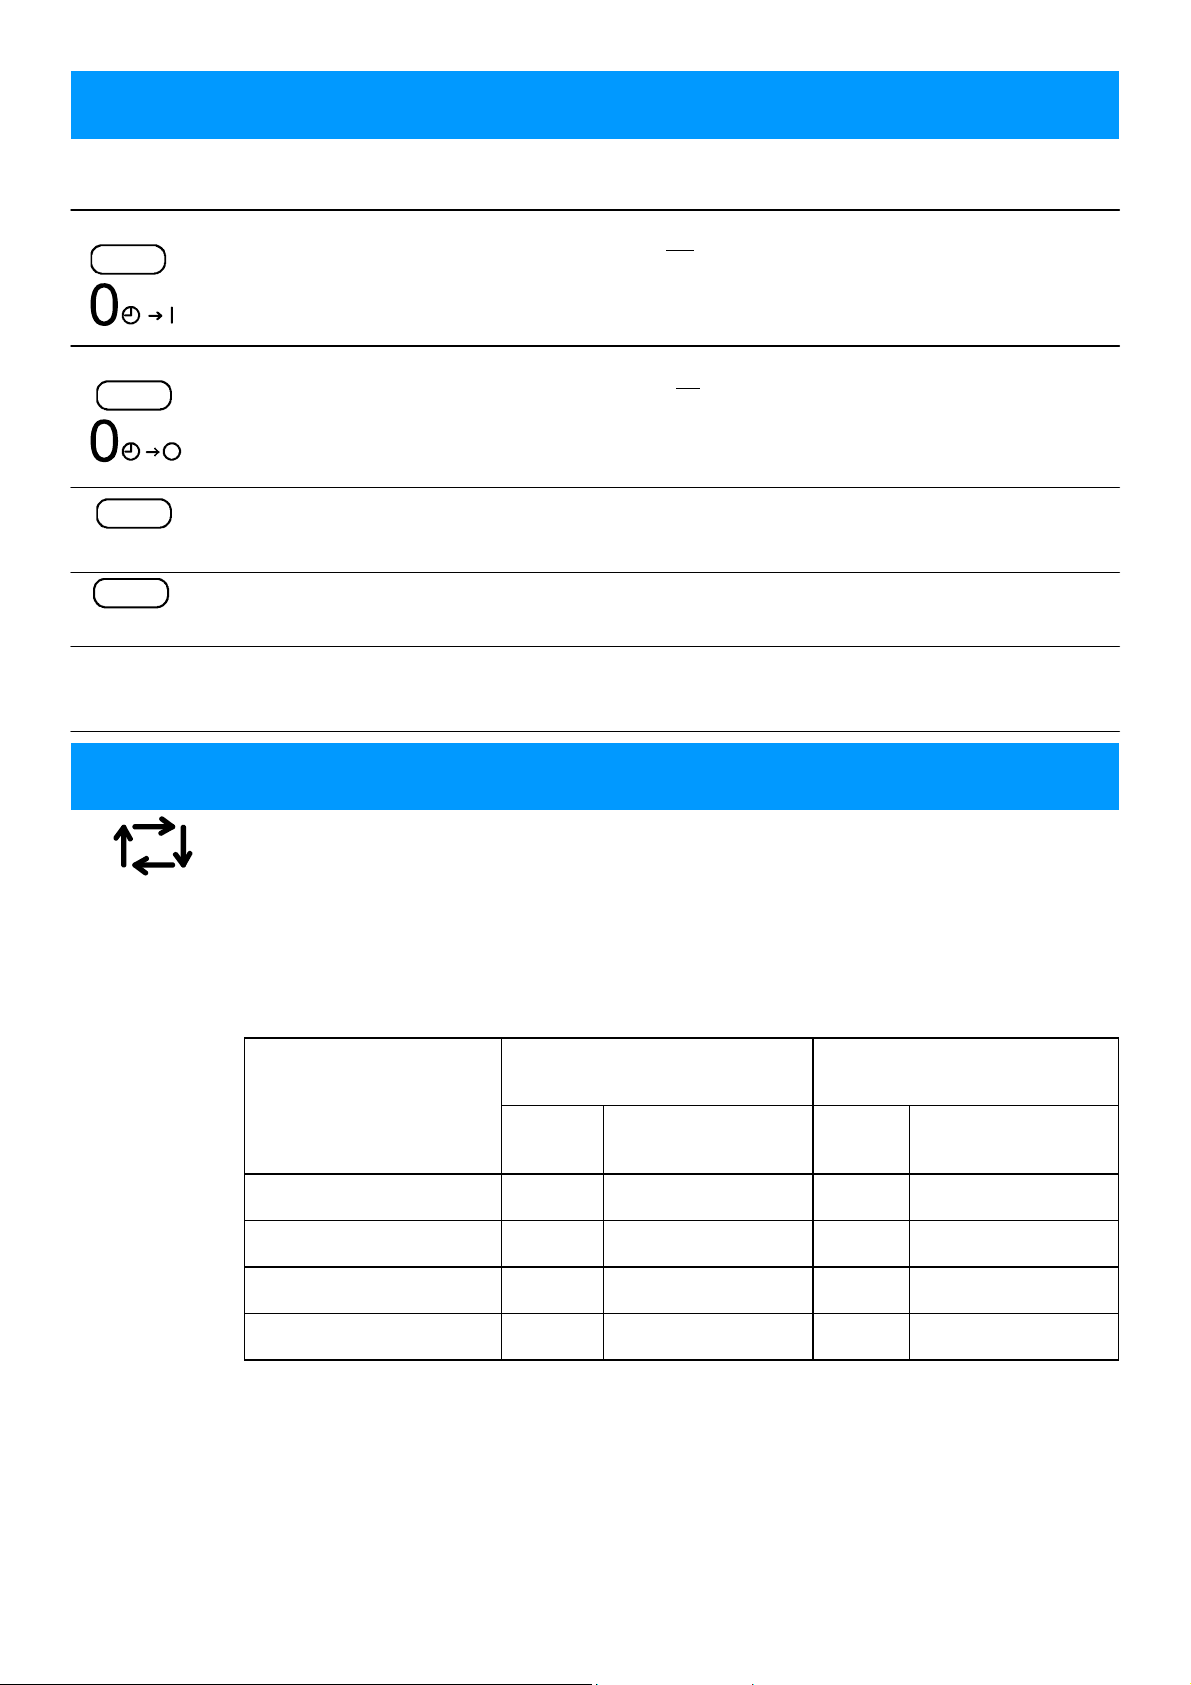
Auto On-Off timer operation.
It is possible to switch the air conditioner on or off automatically at selected times.
ON
h
OFF
h
SET
CANCEL
Press the ON button when the air conditioner is off to initiate the AUTO-ON timer function.
The display will flash.
Repeatedly pressing the button will increase the time by 1 hour increments.( maximum
12hours)
Press the OFF button when the air conditioner is on to initiate the AUTO-OFF timer function.
The display will flash.
Repeatedly pressing the button will increase the time by 1 hour increments.( maximum
12hours)
Press the SET button to set the selected AUTO-ON or AUTO-OFF time.
The display will stop flashing.
Press the CANCEL button to cancel the previously selected AUTO-ON or AUTO-OFF time.
The display will disappear and a new time may be set.
NOTE:
After a power failure or interruption, the TIMER ON-OFF function must be re-set.
Mode adjustment.
1 AUTO MODE
In this mode the air conditioner automatically selects the most appropriate mode and adjusts the room temperature to the most comfortable level.
The table below shows the settings at start up.
Room temperature
(RT)
26°C or higher Cool 24°C Cool 24°C
25°C to 25.9°C Cool RT - 2°C Cool RT - 2°C
23°C to 24.9°C Dry RT - 2°C Dry RT - 2°C
22.9°C or lower Dry 21°C Heat 26°C
Cooling only models Heat Pump Models
Mode Initial temperature
setting
Mode Initial temperature
setting
3
Page 4
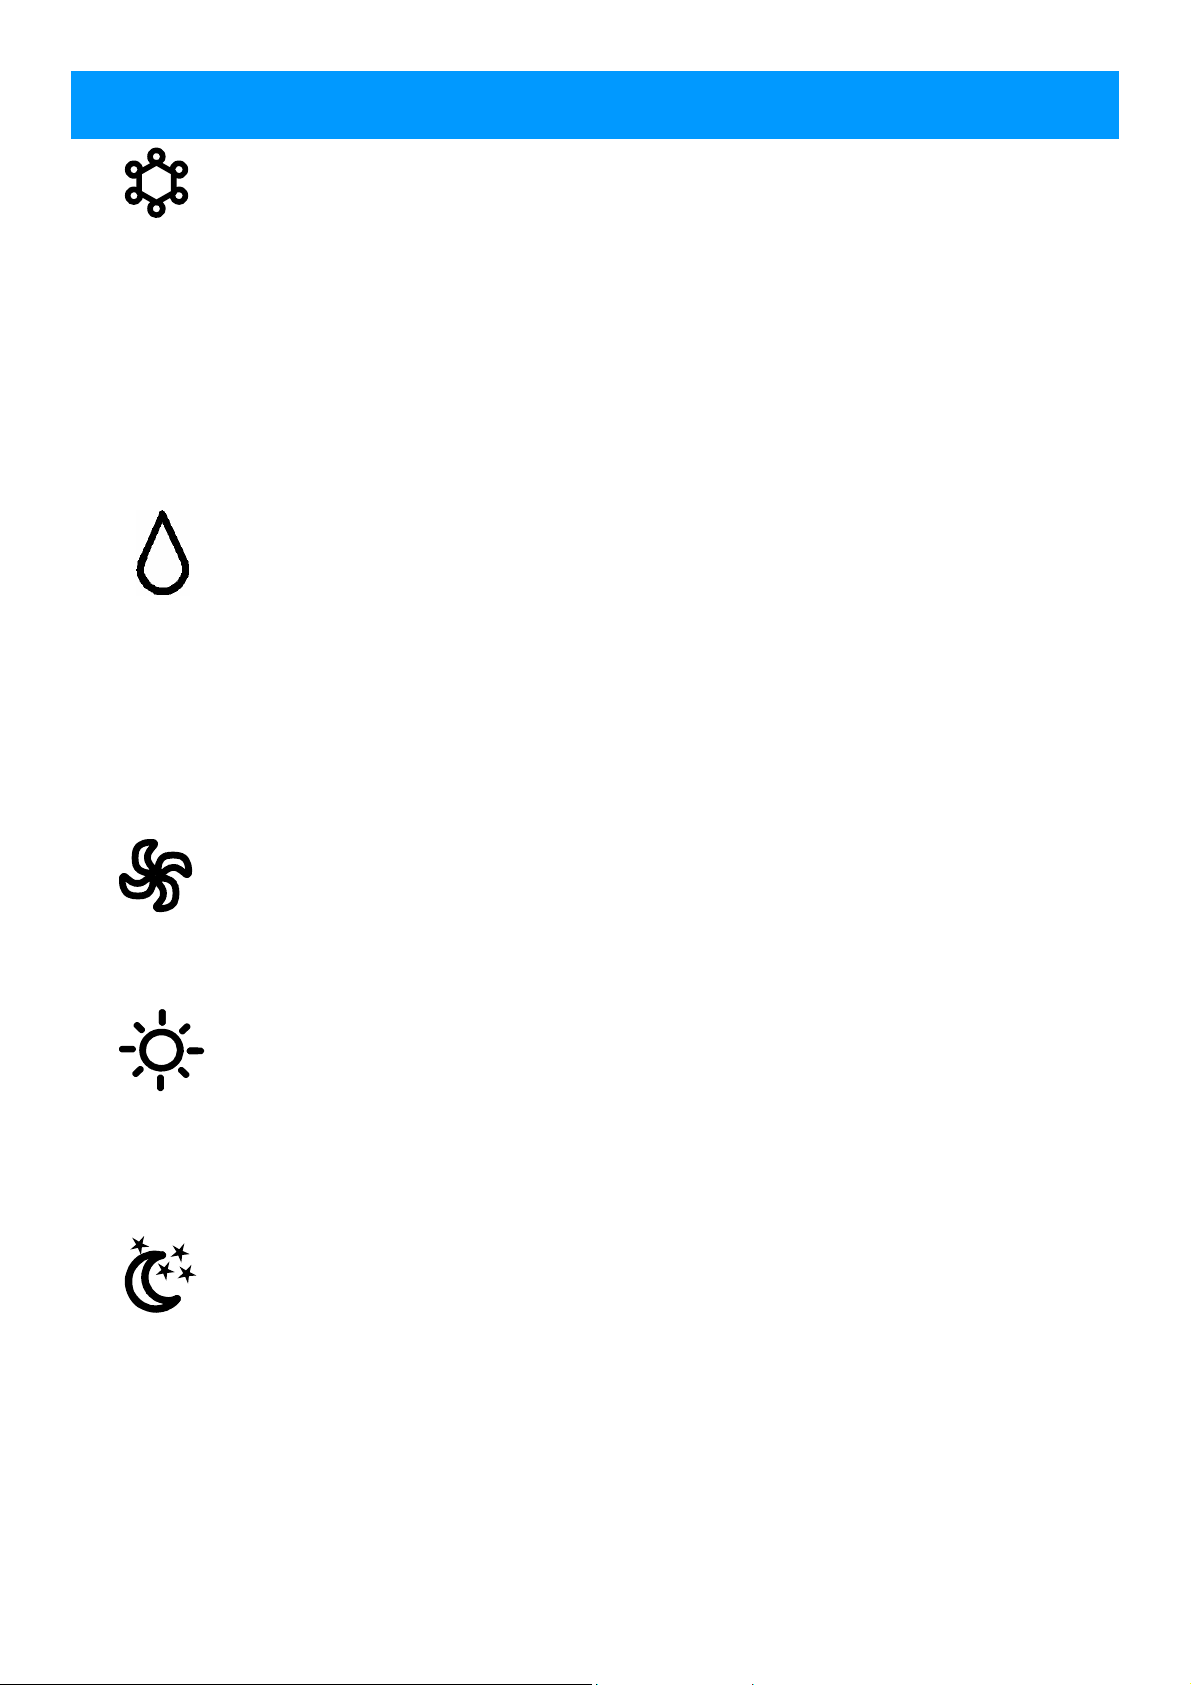
Mode adjustment continued
2 COOL MODE
• Press the MANUAL SWING or SWING button to set the desired up /down direc-
tion of the air flow.
• In Cool mode it is best to set the airflow to the up or horizontal position.
• Press the FAN SPEED button to set the fan speed of the indoor unit.
• Press the TEMPERATURE ADJUSTMENT buttons to set the desired temperature.
NOTE
MANUAL SWING
• Selecting MANUAL SWING enables the airflow direction to be set in the UP,
HORIZONTAL or DOWN position.
3 DRY MODE (DE-HUMIDIFYING AT ROOM TEMPERATURE)
• In this mode the air conditioner automatically sets a comfortable room temperature.
This temperature will not be displayed.
• Press the MANUAL SWING or SWING button to set the desired up /down direc-
tion of the air flow.
• The TEMPERATURE ADJUSTMENT buttons and the FAN SPEED buttons do
not operate in this mode.
4 FAN MODE
• In this mode. the outdoor unit will not operate. Only the indoor unit fan operates.
• Press the MANUAL SWING or SWING button to set the desired up /down direc-
tion of the air flow.
• Press the FAN SPEED button to set the desired fan speed.
5 HEAT MODE ( Heat pump models only)
• Press the MANUAL SWING or SWING button to set the desired up /down direc-
tion of the air flow.
• In Heat mode it is best to set the airflow to the down position as hot air rises.
• Press the FAN SPEED button to set the fan speed of the indoor unit.
• Press the TEMPERATURE ADJUSTMENT buttons to set the desired temperature.
6 SLEEP MODE ( Cool and dry operation)
• The indoor fan will operate at low speed.
• After one hour the set temperature will increase by 1°C.
• One hour later, the temperature will increase by a further 1°C.
• The air conditioner will continue to operate at 2°C above the set temperature.
7 SLEEP MODE ( Heating operation)
• The indoor fan will operate at low speed.
• After one hour the set temperature will decrease by 2°C.
• One hour later, the temperature will decrease by a further 2°C.
• The air conditioner will continue to operate at 4°C below the set temperature .
4
Page 5

Parts identification
Please note that the pictures below are for illustration purposes only.
Specifications and features differ from model to model.
Please use your model as a reference.
OUTDOOR AND INDOOR UNIT
DISPLAYS
MEDIUM FAN SPEED
5
Page 6

Emergency operation
REMOTE CONTROL FAILURE.
Should the batteries in the remote control lose power, the air conditioner may be operated manually using the emergency operating switch.
COOLING ONLY TYPE
• Press the switch to commence COOLING.
• Press again to STOP
• COOL > STOP >COOL > STOP and so on.
HEAT PUMP TYPE
• Press the switch to commence COOLING.
• Press again to commence HEATING.
• Press again to STOP.
• COOL > HEAT > STOP> COOL > HEAT > STOP and so on.
FIXED SETTINGS
The following table shows the fixed settings pertaining to emergency operation.
MODE SET TEMPERATURE FAN SPEED DEFLECTOR
COOLING 24°C HIGH SWING
HEATING 24°C HIGH SWING
SETTING THE HORIZONTAL AIR FLOW DIRECTION.
Set the vertical deflector to MANUAL SWING.
The horizontal air flow direction may be adjusted by using the deflector knobs to move the deflector blades
to the left or right.
Be careful not to adjust the vertical deflector at this time as it may pinch your fingers.
Thereafter the vertical deflector may be re-set using the SWING button on the remote.
6
Page 7

Safety precautions
ELECTRICAL
• Push the moulded plug into a 15A. 230V earthed wall socket. ( 9K and 12K models only. Larger
models require a dedicated connection to the mains.)
• Do not pull on the power cord.
• Do not use an adaptor plug to operate another appliance from the same wall socket.
• Do not make joints in the power cord.
• A frayed or damaged power cord must be replaced by a qualified electrician.
• Ensure that the wall socket is accessible should you need to remove the plug.
• Should anything abnormal occur, such as a burning smell or smoke, switch off the power supply at
the mains immediately and remove the plug from the wall socket. Call the nearest Defy Service centre for assistance.
INSTALLATION
• Do not install the air conditioner in places where a gas leak could occur.
• Do not use the air conditioner to control the temperature of specialised areas such as cold rooms or
chemical storage facilities.
• Do not place fuel burning appliances directly in the air flow. Incomplete combustion or flame failure
could result.
OPERATION
• In high humidity conditions ( 80% and above) and while operating the unit in COOL/DRY mode
some condensate or moisture may drip from the unit. To avoid this it is recommended that windows
and doors remain closed. Should the room become too stuffy, briefly open a door or window to let
some fresh air into the room.
GENERAL
• Do not spray insecticide on the air conditioner.
• Do not insert any object or body part into the outlet / inlet grille. The high speed fan could be dam-
aged or cause injury.
Maintenance
CLEANING THE FRONT AIR FILTERS
• The air filters must be cleaned regularly to ensure optimum performance.
• Switch the air conditioner off and unplug at the wall socket.
• Open the front grille by pulling the tabs on either side and hinging the grille upwards until it clicks
into the open position.
• Remove any accumulated dust from the grille and filters using a vacuum cleaner or brush. If neces-
sary the filters may be washed in soapy warm water. (below 45°C).Rinse in clean water and allow to
dry in the shade.
• Re-fit the filters and lower the front grille.
• Clean the surface of the air conditioner with a damp soapy cloth and wipe dry.
• Do not clean the air conditioner with chemical solvents, abrasive cleaners or flammable liquids.
7
Page 8

Maintenance continued
PROLONGED IDLE PERIOD
• If the air conditioner is not to be used for a prolonged period, it is best to follow the procedure below.
• Run the air conditioner for an hour at the coolest temperature and highest fan speed.
• Switch the air conditioner off and unplug at the wall socket.
• Clean the filters and outer cabinet.
• Remove the batteries from the remote controller.
AFTER A PROLONGED IDLE PERIOD
• Clean the filters and outer cabinet.
• Insert the plug and switch on at the wall socket.
• Insert the batteries into the remote controller.
Trouble shooting
FAULT
The air conditioner does not work. Is there power to the unit?
Check with another appliance in the same wall socket.
The remote control will not function. Are the remote batteries in good condition?
Check the correct polarity of the batteries.
Is anything obstructing the signal from the remote?
Immediately after the ON/OFF button pressed,
the air conditioner will not work
After operation the deflector vane does not
close properly
The thermal overload protection device is working.
Please wait 3 minutes.
The step motor could not locate the re-set point.
Start the air conditioner and stop again
Cooling and or heating is not adequate. Are the temperature setting appropriate?
Are the filters clean?
Is anything obstructing the air inlets/outlets of both the
indoor and outdoor units?
Has sleep mode been accidentally activated?
Is the fan speed setting too low?
Are the doors and windows closed?
CHECK
Immediately after starting the heating mode the
air does not blow.
Please wait a little while. The fan will operate when the
coil temperature is high enough.
Automatic re-start after a power failure Only available on models with AUTO RE-START.
8
Page 9

Trouble shooting continued
FAULT
The indoor fan stops working during heating. The air conditioner is de-icing and will resume normal
operation after about 10 minutes.
A cracking sound may be heard. Friction sounds resulting from the expansion and contrac-
tion of the front grille during temperature changes may be
the cause.
Sounds like running water may be heard This is normal and could be the sound of refrigerant flow-
ing in the system, or defrost water melting from the heat
exchanger.
The indoor unit makes a clicking and swoosh
sound
The air distribution vane stops swinging for
some 3 minutes at a time.
The outdoor unit appears to leak water. There will be some water visible during cooling or heat-
The click is the compressor switching on and off. The
swoosh is caused by refrigerant being released in the system.
This is designed to prevent water condensation and is normal
ing resulting from condensation or defrost water.
CHECK
9
Page 10

Service Centres
If you have followed the instructions and still have a problem, contact the nearest
Defy Service Centre. They will be able to advise you on any aspect of the product
or send a qualified technician to repair it.
It is recommended that the unit is inspected and serviced every 6 months by an
authorised
Defy Dealer. Units installed in coastal areas should be serviced more frequently.
BLOEMFONTEIN
CAPE TOWN
DURBAN
EAST LONDON
JOHANNESBURG
Commercial Head Office,
Administration, Distribution, National Groups,
Tel. Sales, Contracts and Credit.
POLOKWANE
PORT ELIZABETH
PRETORIA.
160 Long Street, Hilton,
Bloemfontein 9301.
Tel. 051 400 3900
Bloemfontein.Service@defy.co.za
5A Marconi Rd.
Montague Gardens, 7441.
Tel. 021 551 8314
CapeTown.Service@defy.co.za
35 Intersite Avenue,
Umgeni Business Park, Durban 4051.
Tel. 031 268 3300
Durban.Service@defy.co.za
16 Bowls Rd. Arcadia,
East London 5201.
Tel. 043 743 7100
EastLondon.Service@defy.co.za
Cnr. Mimetes & Kruger Sts. Denver ext.12
Johannesburg. 2094.
Tel. 011 621 0200 or 011 621 0300
Gauteng.Service@defy.co.za
87 Nelson Mandela Drive.
Superbia 0699.
Tel. 0152 92 1166 / 7 / 8 / 9.
Polokwane.Service@defy.co.za
112 Patterson Road,
North End, Port Elizabeth 6001.
Tel. 041 401 6400
PortElizabeth.Service@defy.co.za
Block A1 Old Mutual Industrial Park.
Cnr. D.F.Malan Drive & Moot Str.
Hermanstad. 0082.
Tel. 012 377 0061
Pretoria.Service@defy.co.za
OTHER AREAS ARE SERVICED BY OVER 200 AUTHORISED SERVICE AGENTS.
PLEASE CONSULT THE NEAREST REGIONAL DEFY SERVICE CENTRE FOR DETAILS
10
Page 11

Warranty
Defy Appliances (“the Company”) warrants to the purchaser to whom the product was sold by the dealer appointed by the
company to distribute its products (“authorized dealer”) and in respect of which no prior sale of the product was made
(“original purchaser”) that the Defy Air conditioning unit (“product”) sold with this certificate is free of defects in material of workmanship under normal use and service for a period of 2 years from the date of purchase thereof. The warranty
period of 2 years for console air conditioners is subject to a signed service and maintenance agreement between a Defy
authorized contractor and the end user for the full warranty period. Without a service/maintenance agreement the warranty period of 1 year applies. The warranty is subject to the following conditions:
1. This warranty shall apply to the product, provided the product is still owned by the original purchaser and provided
that it was purchased in and is retained for use in the Republic of South Africa, Swaziland, Lesotho, Botswana and
Namibia.
2. The Company undertakes to, within 2 years from date of the invoice issued to the original purchaser, through an
authorized dealer appointed by its regional office in its discretion, replace or repair, free of charge, any parts of the
product, which may be faulty.
3. It is a condition of this warranty that the Company shall not be responsible for any transportation, la bour, material
or any other costs not specified in the clauses contained herein.
4. The product shall be serviced regularly by an authorized dealer (which intervals shall not exceed 6 months) and
failure to comply with this condition shall render the warrant null and void.
5. The Company shall not be responsible for damage to the product resulting from incorrect voltage or fault in the
electrical power supply system, general misuse or abuse of the product, failure to use the product for the purpose
for which it was designed, fire, flood, war, civil disturbances, strikes, lockouts, acts of God, acts of Government, or
quasi-Government, or any other cause beyond the reasonable control of the Company.
6. The Company shall not accept any responsibility or liability (whether in contract and / or delict and / or otherwise),
for any loss suffered by or damage of any kind caused to the original purchase or any other person by or due to
failure of operation or malfunction of the product or for consequential damage of whatsoever nature, whether such
loss, damage or consequential damage was suffered by the original purchaser or any other person.
7. Should th e product be worked on by anyone other than a Regional Office service representative or authorised service dealer or be found to contain any component parts or accessories other than product component parts of accessories, this warranty will become null and void.
8. The defacement or removal of the nameplate and or serial number from the product will render the warranty null
and void.
9. The warranty does not apply to filters, external cables and plugs, nor to any parts where the length of life depends
on the amount of use and care given. Transport and handling damages are not covered by this warranty.
10. Save as set out in this warranty, no terms, conditions, provisions, representations or statements (whether express or
implied) shall be of any force or effect whether made prior to, on, or subsequent to the date of original purchase,
unless the same shall have been confirmed in writing by the Company.
11. The product has been designed for normal use. If the product is used for abnormal applications i.e. operation outside its design conditions, operation with restrictive louvers, which have not been approved by Defy Appliances
Ltd., extreme high or low temperatures, dusty and / or highly polluted areas or any other similar or related purpose,
the warranty shall be rendered null and void.
Defy Appliances Ltd
PO Box 12004
Jacobs 4026
1
11
 Loading...