

Page 1
2010 + Mustang Locking Fuel Door
Installation Instructions
Part #’s: 900708, 900709, 900710, & 900711
DO NOT SMOKE or HAVE AN OPEN
FLAME while Installing this product!
Tools Needed:
9/32 Socket or Box Wrench 1/8 Allen Wrench
Flathead Screwdriver or Plastic Prybar 2” Masking Tape
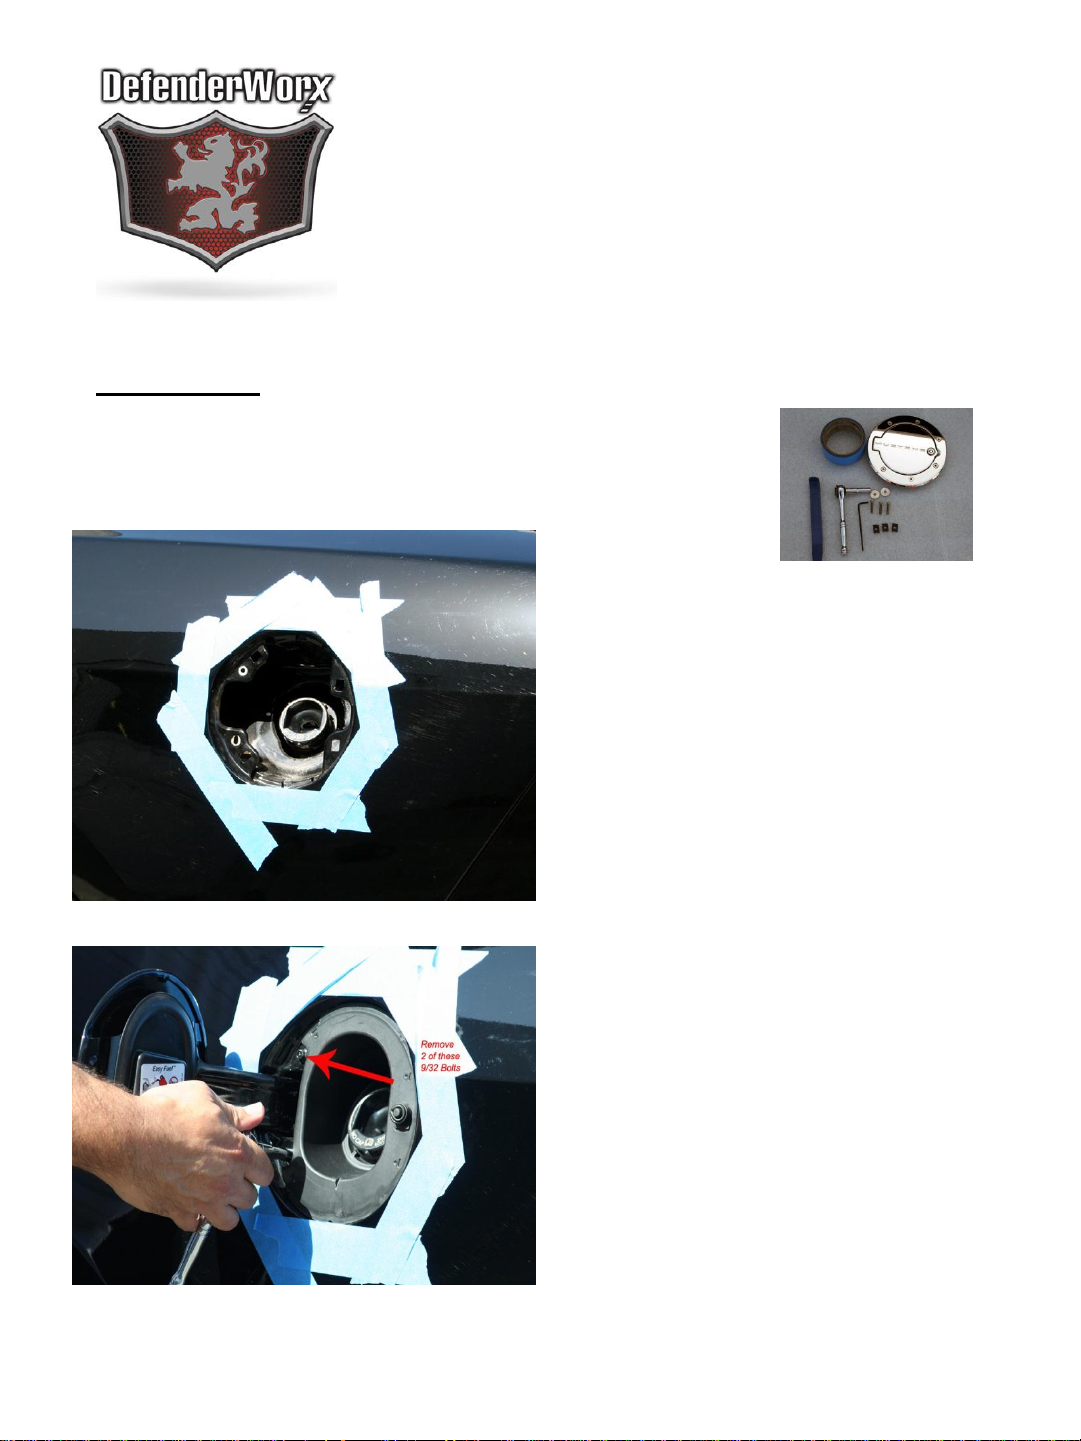
Step 1:
Tape around opening to protect
your Mustang from any damage
when you remove the factory door
or if you mishandle any tools
around the opening.
Made in the USA!
Step 2:
Open Factory door and remove 9/32
bolts in 2 locations. These are
noted in the picture where we have
our socket and the arrow.
Page 2
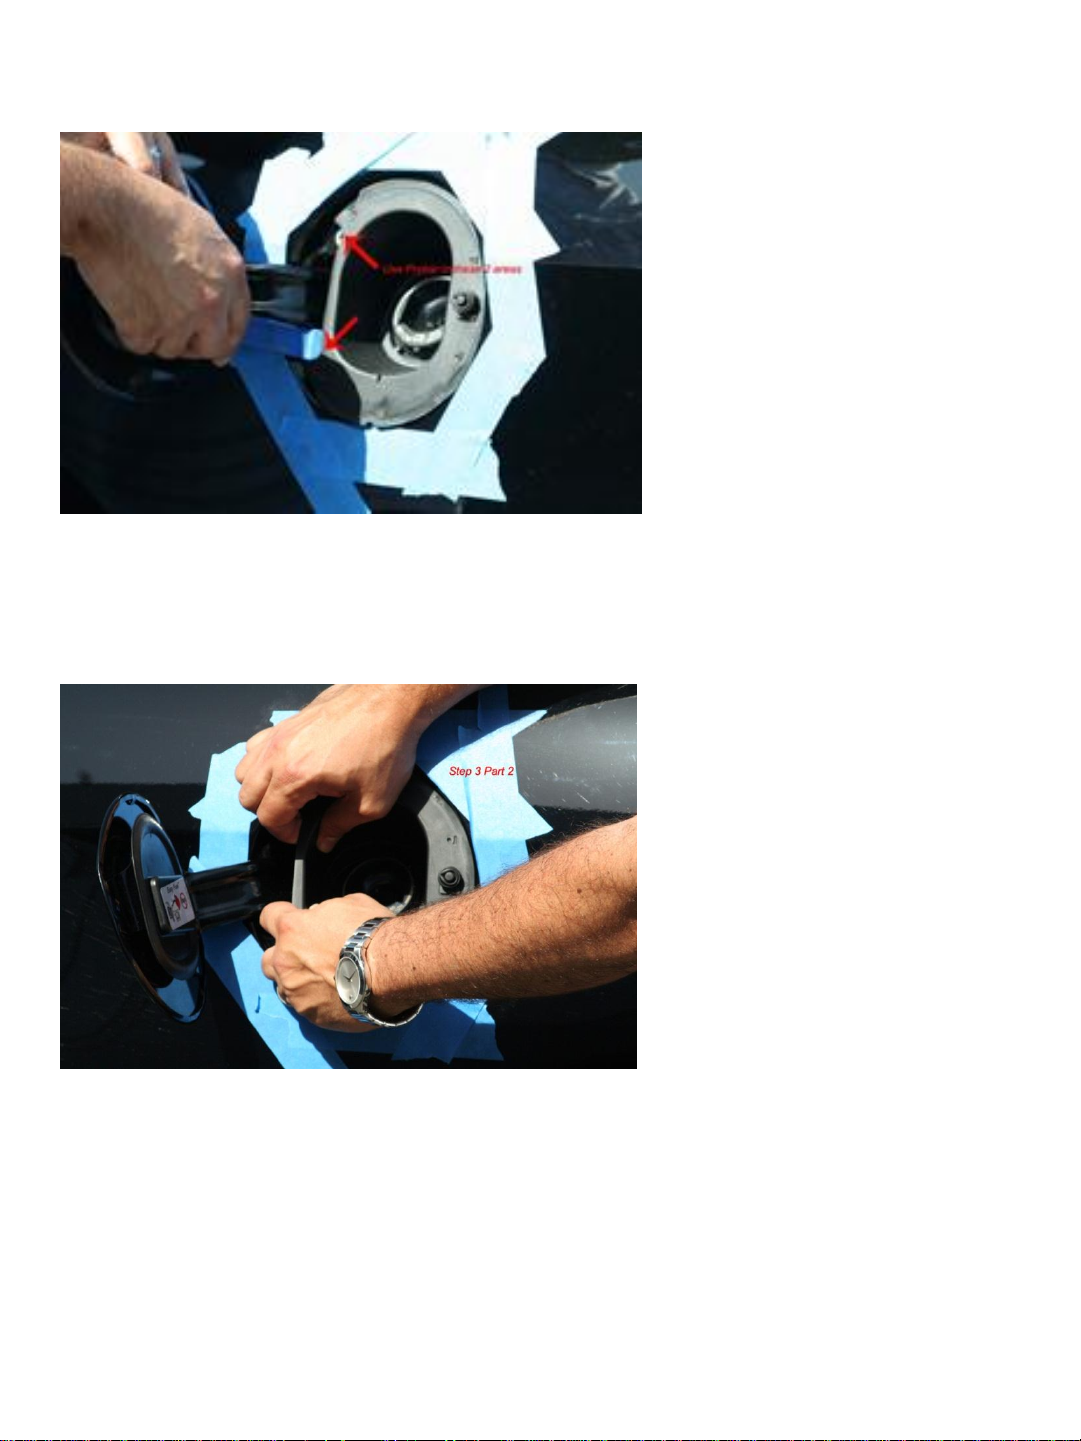
Step 3:
Remove factory rubber
housing by using a plastic
prybar or flat head
screwdriver covered in
masking tape or with a thin
rag. Notice the locations that
are being pried upon. These
need to be pulled out away
from the body so the factory
fuel door can be removed.
Step 3 B:
Once you pry the housing up,
you will need to pull the rubber
housing out of the body of the
car. The housing surrounds
the filler tube and needs to be
pulled away to expose the
areas for your fuel door to be
installed. It did take some
effort to pull it away. This step
took about 3-4 minutes just
mainly as we were being
careful not to damage the
vehicle.
Page 3

Step 4:
Remove factory fuel door from housing once you have the rubber insert removed. You
may need to bend the bracket slightly to get around the filler tube, but it will come out in
a few seconds. Note, the filler tube has some slight back and forth movement do not
be afraid that anything will break in this step.
Step 5:
Remove allen bolts from the
front of the Defenderworx
fuel door. Note, there are
only 3 bolts that need to be
removed and they are
holding the U clips needed
for install on the back of the
door. See image.
Step 6:
The image shows the 3
locations that the U clips
need to be installed in.
Once the U clips are
installed, you can use the
allen bolts to line up and
install your Defenderworx
fuel door.
Page 4

Step 6 B:
Note the image now showing the U
Clips installed. These slide right
into the factory locations and are
now ready to receive the fuel door
bolts and secure it to the vehicle.
Step 7:
Install your Defenderworx fuel
door. The arrows show the 3
locations that will be physically
attached to the body of the car.
We have supplied 2 washers
that will act as shims if your
door is not sitting flush with the
body.
Step 8:
Snug up your allen bolts,
remove the tape and clean up
your work area. Close the
door, lock it, and enjoy your
newest addtion to your Pony!
Thank you for choosing a
Genuine Licensed
Defenderworx product!
Page 5

Defenderworx takes great pride in the manufacturing of
its products. We use only the finest materials and
engineer each item to fit specifically to the vehicle it is
manufactured for. Should you encounter any difficulty
during your installation, please call Defenderworx
directly at 714.630.9700 for technical support.
Your product can be cared for with regular car washing
and wax.
Defenderworx backs your item with a 4 year warranty
against manufacturing defects from date of purchase.
This includes pitting of chrome caused by road salt in
tough weather conditions.
Defenderworx recommends that you care for your
products exposed to the elements regularly with your
favorite wax.
We are launching new products regularly for your
vehicle. Please visit our website at
www.defenderworx.com for updates and like us on
Facebook!
Thank you for your purchase!
 Loading...