

Page 1

Thank you for the purchase of the Defenderworx Pistol Grip Shift Knob for
your 2010-2013 Mustang! You have made the decision to purchase a
finely crafted accessory manufactured right here in the USA. Our products
are officially licensed by Ford Motor Co. and made from T-6061 Aircraft
Grade Aluminum. There are a couple of notes we need to address prior to
beginning the installation process.
1. If your automatic Mustang is equipped with the option to have Sport
Mode or Manual Shift mode via a button on the shift knob, with the
Defenderworx knob, that feature will not be able to be used.
If you desire to maintain that feature, check back shortly as our engineers
are working with switch manufacturers to build a custom switch that will
plug right into your existing wire harness without having to do any splicing.
It is something that can be added at a later date without a lot of extra work
should you choose to keep the knob and install it on your vehicle. This
will not affect the performance of the vehicle or trigger any
dash lights should you choose to use the Pistol Grip knob.
2. This is rated as a medium to difficult level of installation. Not because
there is heavy lifting, but it is time consuming and deals with small
components. Length of time while doing instruction sheets was 1.5
hours. It could be a 2 hour installation at the worst case scenario
Defenderworx products are warranted for 4 years to the original purchaser
against manufacturer’s defects. We appreciate you choosing our product
and believe it is the finest accessory for Mustangs in the automotive
aftermarket today. We appreciate feedback and can also assist if there are
any installation questions. You can e-mail us back at
info@defenderworx.com. You can call the tech line at 714.630.9700 M – F
8:30 A.M. – 4:30 P.M. PST.
Defenderworx, Inc. 1120 N. Armando Street, Anaheim, CA 92806 714.630.9700 Tech
www.defenderworx.com E-mail: info@defenderworx.com
Page 2
Mustang Pistol Grip Automatic Shift Knob
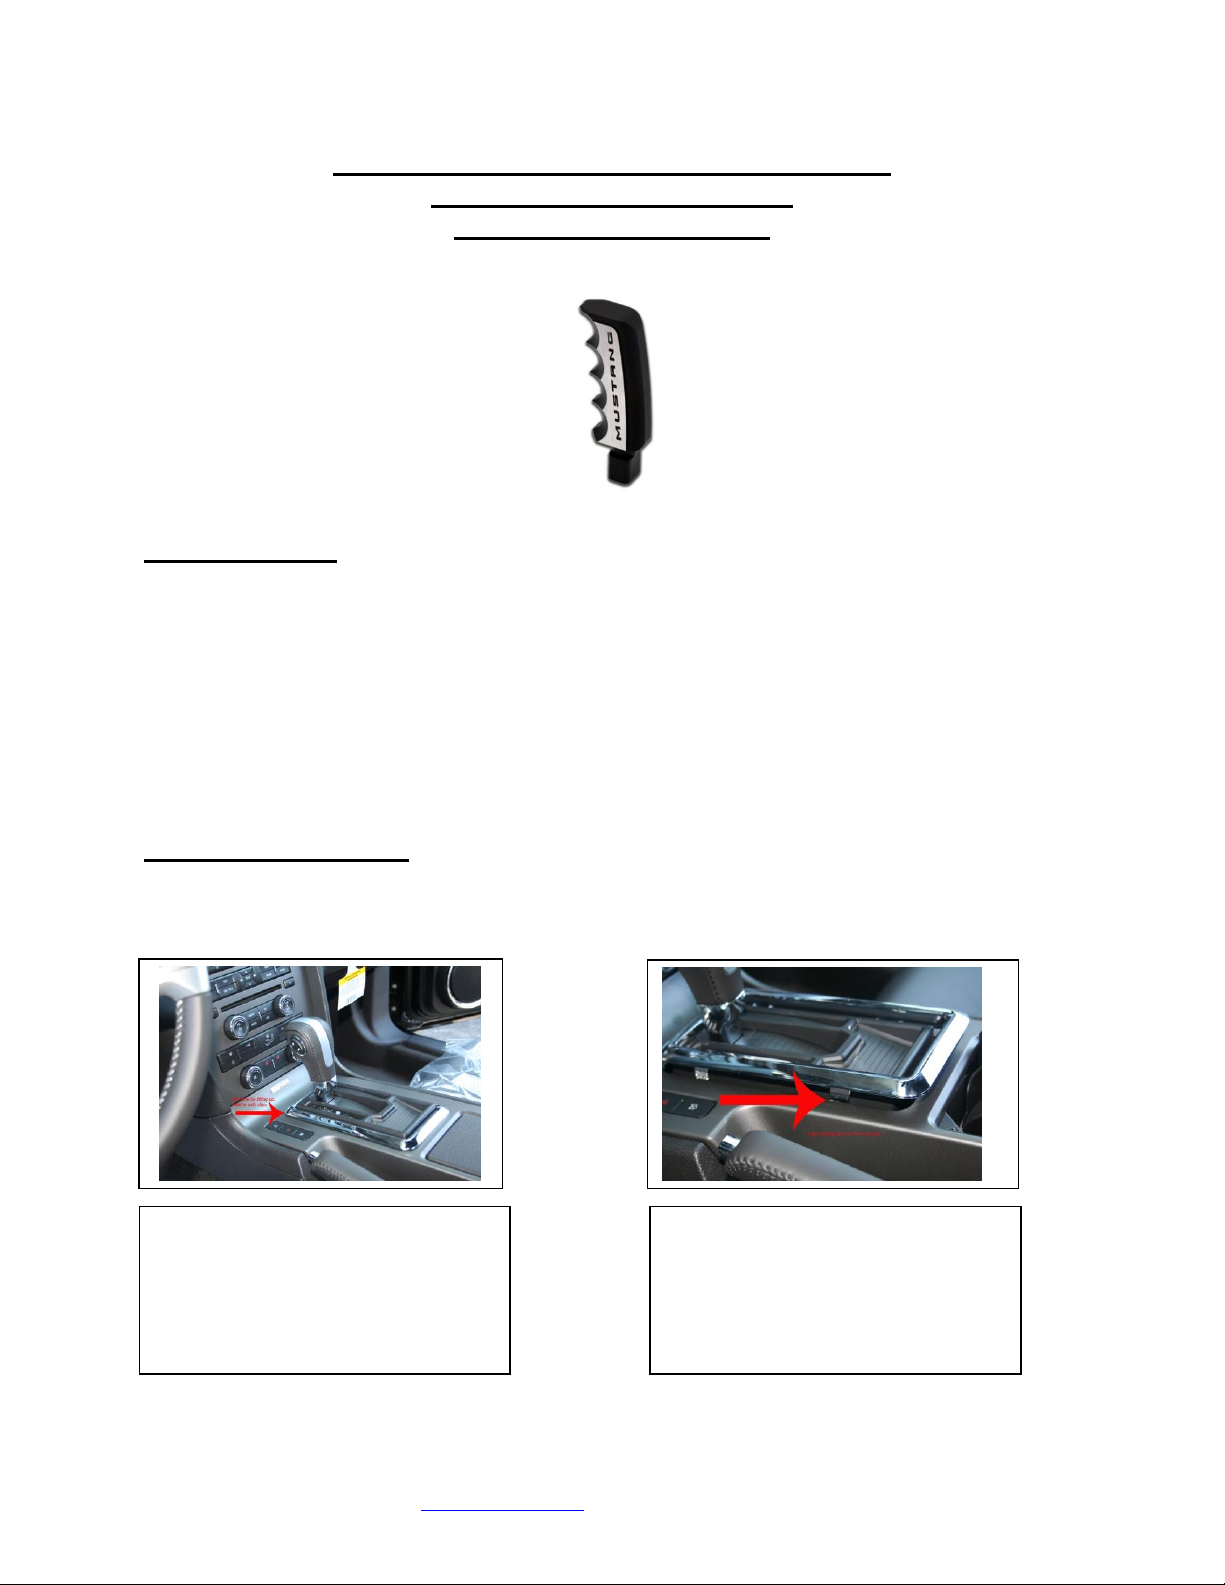
Step 1:
The factory chrome bezel needs to
be removed. This is just clipped in
Step 2:
Part #’s 900897 and 900899
Installation Instructions
Tools Needed:
#20 Torx Bit Driver – (Screwdriver style is preferred or a ratchet with
an extension
Plastic straight edge or plastic tip flat head screwdriver
3/32 Allen Wrench Set
Clean cloth
Small flat head screwdriver
Estimated Timeline: 1-2 Hours (may vary depending on experience)
and you just pull up on it.
Lift up bezel and set aside to be
reinstalled later.
Defenderworx, Inc. 1120 N. Armando Street, Anaheim, CA 92806 714.630.9700 Tech
www.defenderworx.com E-mail: info@defenderworx.com
Page 3

Step 3:
set in order to remove console.
This is the area we started to lift the
console and the console can be removed
and set aside to be reinstalled later.
Step 4: The chrome trim ring must
this. TAKE CAUTION and PATIENCE
with this step. Where the arrow is,
Note the location of the clip. If you can get the flat
The next item to remove is the center console
inner section. This is also held in with clips. We
started by lifting up from the rear of the console at
the backside of the cup holder area.
NOTE: Move shifter to N and insure park break is
console up at. It came up easily with a
finger. At this point, there are wired in
clips that you separate under the
be slid down next. We used a
plastic flat head screwdriver for
there are torx bit screws behind
that portion of the knob. The next
photo will show where the clip is
and where you should start with
the flat head for removal.
head in at this point to depress this clip and slide down
on the base it will separate from the top portion of the
knob. This step I took my time as it was a difficult
separation. I used the flat head and went around the
knob trying to insure I didn’t break any clips.
Once this is separate, you’ll have 2 #20 Torx bit screws
exposed. Remove these at this point and the next steps
will show how to remove the knob and base
Defenderworx, Inc. 1120 N. Armando Street, Anaheim, CA 92806 714.630.9700 Tech
www.defenderworx.com E-mail: info@defenderworx.com
Page 4

Step 5: This is one of the final steps and you will have the factory knob ready to remove. This base is held
start the assembly of your Defenderworx shift knob onto the vehicle.
This is the clip that is at the base of
crossed on our test unit, however, we
in with 4 clips at the base of the floor. It will pop out and underneath the shifter housing, you will find 2
wires that need to be unplugged. One set is black and read and the other is at the base of the shifters
shaft. You’ll have to get to the wires at the base of the shaft while holding this console base up slightly.
These wires are connected to the shift knob itself. Once unplugged, you can now remove the knob and
the housing on the floor. Please
make note of where any wires you
unplug and where they need to plug
back into. Ford has made it fairly
easy where the plugs are all different
and on our test unit, they were all
specific plugs. They couldn’t be
are unsure of all production models.
Please note where your wires go to
insure it assembles back together
properly.
Defenderworx, Inc. 1120 N. Armando Street, Anaheim, CA 92806 714.630.9700 Tech
www.defenderworx.com E-mail: info@defenderworx.com
Page 5

The clip featured in this image is the plug to the wiring that will allow you
together.
Step 6: You now just need to reassemble the shift area back to stock
to remove your shift knob from the factory shaft. It is a quick tug and it
will unplug from the base of the factory shifter’s shaft. You are now able
to remove the factory shift knob and start putting your console back
without the factory shift knob. Once you have it all in place, you can add
the Defenderworx base to the factory shaft. Line the bottom of the base
up with your factory plastic liner and tighten the set screws with your
allen wrench.
Defenderworx, Inc. 1120 N. Armando Street, Anaheim, CA 92806 714.630.9700 Tech
www.defenderworx.com E-mail: info@defenderworx.com
Page 6

Next slide the spring over the top of the base and slide the
are ready to go! Thank you for your purchase.
Defenderworx knob over that depressing the spring. You will
then tighten the supplied set screw in the shift knob to the
base. The set screw is in the front of the knob where the
hand grips are located. Once secure, your knob should move
freely up and down and allow you to put the car in gear and
out of gear by pushing this unit down.
You have successfully installed the Pistol Grip shift knob and
Defenderworx, Inc. 1120 N. Armando Street, Anaheim, CA 92806 714.630.9700 Tech
www.defenderworx.com E-mail: info@defenderworx.com
 Loading...