

Page 1
Before returning this product
to the store of purchase
Contact Dee Zee if you experience the following problems:
•MissingParts
•InstallationProblems/Questions
•WarrantyQuestions
1.800.779.2102
Hoursofoperation:8am-5pmCST,Mon-Friday
Reviewcompletewarrantypolicyandregisteryourproductat:
www.deezee.com/warranty.php
Page 2
Page 1 of 3 5/1/07 (AM)
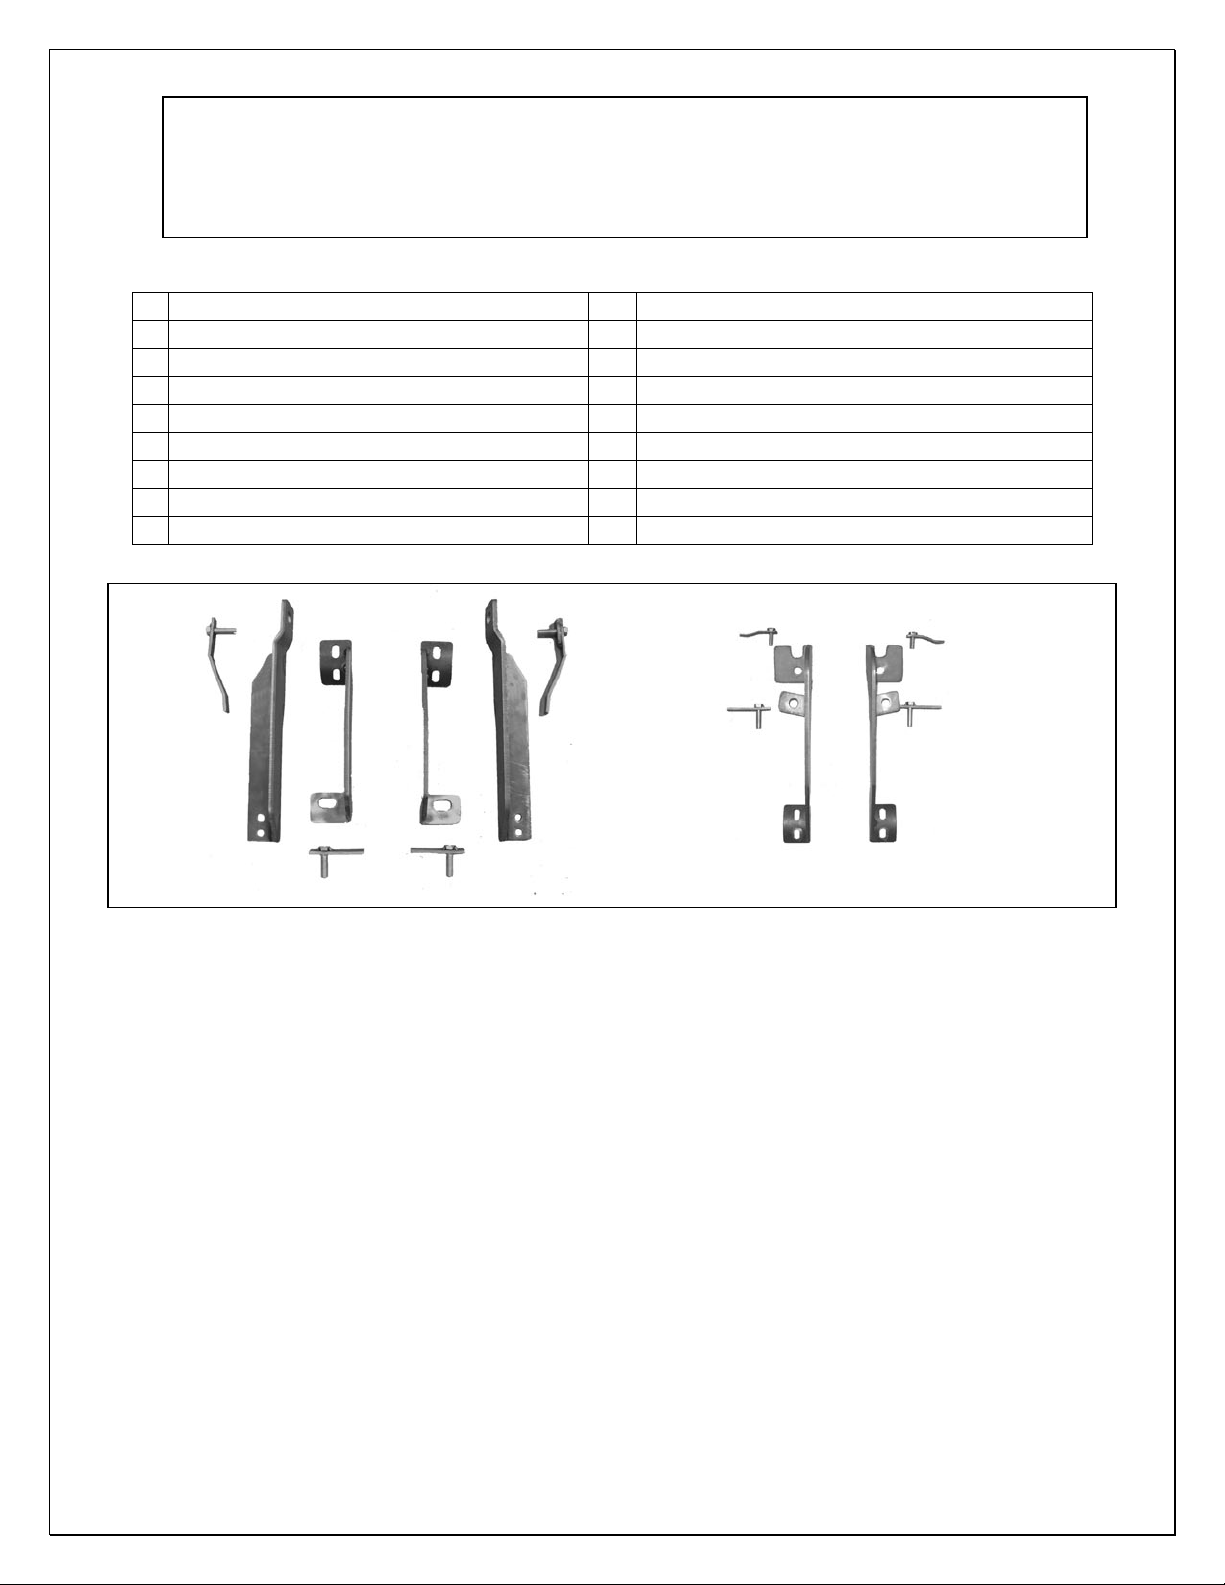
PARTS LIST:
1
Driver/Left Sidebar
2
10-1.50mm x 25mm Bolt Plate w/ Bent (small) (G)
1
Passenger/Right Sidebar
4
10-1.50mm x 30mm Bolt Plate (H)
1
Driver/Left Front Mounting Bracket (A)
2
10-1.50mm x 35mm Bolt Plate w/ Bent (Large) (I)
1
Passenger/Right Front Mounting Bracket (B)
4
10-1.50mm x 25mm Hex Head Bolts
1
Driver/Left Rear Mounting Bracket (C)
12
10mm Nylock Nuts
1
Passenger/Right Rear Mounting Bracket (D)
16
10mm ID x 26mm OD x 1.5mm Flat Washers
1
Driver/Left Front Support Bracket (E)
8
8-1.25mm x 25mm Hex Head Bolts
1
Passenger/Right Front Support Bracket (F)
8
8mm Lock Washers
8
8mm ID x 22mm OD x 1.5mm Flat washers
PROCEDURE:
1. REMOVE CONTENTS FROM BOX. VERIFY ALL PARTS ARE PRESENT. READ INSTRUCTIONS
CAREFULLY BEFORE STARTING INSTALLATION. DO NOT ATTEMPT INSTALLATION ALONE;
PERSONAL INJURY OR DAMAGE TO THE TRUCK MAY RESULT.
2. From underside of vehicle, insert (1) 10mm x 30mm Bolt Plate into factory front hole on the passenger side panel
(Figure 1).
3. Determine passenger and driver side front Mounting Brackets. Hang passenger side front Mounting Bracket
through Bolt Plate and into position by partially threading (1) 10mm Nylock Nut and (1) 10mm Flat Washer into
previously inserted Bolt Plate (Figure 2).
4. Insert (1) 10mm x 35mm Bolt Plate w/ Bent into factory hole on the frame (Figure 3).
5. Locate passenger side front Support Bracket. Partially hang passenger Support Bracket through previously
inserted Bolt Plate and into position by threading (1) 10mm Nylock Nut and (1) 10mm Flat Washer (Figure 4).
6. Attach opposite side of passenger Support Bracket to Mounting Bracket by using the included (2) 10mm x 25mm
Hex Head Bolts, (2) 10mm Nylock Nuts, and (4) 10mm Flat Washers (Figure 4). Do not tighten at this time.
7. The passenger rear Mounting Bracket mounts with two Bolt Plates. Insert (1) 10mm x 25mm Bolt Plate w/ Bent
into the two factory holes on the cross member (Figure 5). Insert (1) 10mm x 30mm Bolt Plate into lower factory
hole on the side panel (Figure 6).
8. Determine passenger and driver side rear Mounting Bracket. Position Mounting Bracket through both previously
inserted Bolt Plates and partially thread (1 ea ) 10mm Nylock Nut and (1 ea ) 10mm Flat Washer to secure
Mounting Bracket (Figure 7).
9. Locate the passenger/right Side Bar and carefully place it onto previously installed Mounting Brackets.
WARNING! Do not slide Side Bar back and forth on the Mounting Brackets; this may damage the finish on the
Side Bar.
INSTALLATION INSTRUCTIONS
SIDEBAR
07 FORD EDGE
PART NUMBER DZ 370343
( A )
(B)
(C)
(D)
(E)
(F)
(G)
(G)
(H)
(H)
(H)
(H)
(I)
(I)
Page 3

Page 2 of 3 5/1/07 (AM)
10. Align holes on the Side Bar with holes on the Mounting Brackets. Attach Side Bar to Mounting Brackets with the
included (4) 8-1.25mm x 25mm Hex Head Bolt, (4) 8mm Flat Washers, and (4) 8mm Lock Washers (Figure 8).
Do not tighten at this time.
11. Level and adjust Side Bar, and then tighten all hardware at this time now.
12. Repeat Steps 2-11 for driver/left Sidebar
13. Do periodic inspections to the installation to make sure that all hardware is secure and tight.
10mm x 30mm
Bolt Plate
(Bolt Plate)
10mm Nylock Nut
10mm Flat Washer
10mm x 35mm
Bolt Plate w/ Bent
(Bolt Plate w/ Bent)
10mm Nylock Nut
10mm Flat Washer
10mm x 25mm Hex
Head Bolts
10mm Nylock Nuts
10mm Flat Washers
Passenger Front
Mounting Bracket
Passenger Front
Support Bracket
Passenger Front Mounting Bracket Shown
Figure 1
Figure 2
Figure 4
Figure 3
Page 4

Page 3 of 3 5/1/07 (AM)
10mm x 30mm
Bolt Plate
10mm x 25mm
Bolt Plate w/ Bent
10mm Nylock
Nuts
10mm Flat
Washers
8mm x 25mm Hex
Head Bolts,
8mm Lock Washers, &
8mm Flat Washers
Installation Complete
Passenger Rear Mounting Bracket Shown
Passenger Front Mounting Bracket Shown
Figure 5
Figure 6
Figure 7
Figure 8
Figure 9
 Loading...