

Page 1
EN INSTRUCTION MANUAL
Page 2
Dea r Customer,
Pl e ase ca r e fully re a d th is manu al before using the
di shwa sh e r, it will h elp you use and ma inta in th e
di shwa sh e r pro pe rly.
Keep this man ual for fu ture ref e rence.
Pa ss it on to an y subseq uen t owner of the ap p liance.
This ma nu a l con tai ns se ctio ns o n safety Instr uctions,
Opera ting Ins tr u ctions, Installat ion Instructio n s and
Troubl eshooting Tip s, et c.
Reviewin g the s ection on tro ubleshooting Ti ps will he lp
you solve some common pro blems by your sel f .
If you canno t so lve the problems by y our self,
please ask f or help from a pr ofessional technician.
Control Panel. . .. . ........... . ... ... ... ...... ... . .. ............ . .. .. .6
Dishw ash er Fe atur es.................................... ....... .6
A Water So fte ner.... ........ ......... .... ..... ... . .... ..... . ... .7、
B Loading the Salt into the So ft ener......... ...... ...... .8、
C Fil ling the Rins e Aid Dispenser. . ... ... ... ..... . ........ 8、
D Function of Detergent ........... ........................ ...9、
Rec om m end at ions fo r loadin g and u nl oading
the dis h was her
...... ... ......... . ......... ... .... ... ... ........ . 12
Lo a ding the up per ...... . ............... ......... . ....13Baske t
Lo adi ng the Lower .... .. ....... ...... ... ...... ... .....1 3Ba sk et
Was h Cycle Tab le. . ..... ... . ...... .. . ...... ... ..... . ........ . ....14
Turni ng on the Appliance... ... ... ... ... . ... .. ... . ... ... ... ... 14
Ch ang ing the Program m id-cyc le
... ......... ......... . ....15
At the en d of th e Wash Cycle ... ... ...... ... ....... .. .. ..... .15
Filte r System.. ...... . .. ....... ......... ... ... .. . ...... ... . ..... . .. . 16
Carin g for the Dishwashe r........... .......... ............. .1 7.
The man ufacture r, follow i ng a policy of constant
dev elo p men t and updatin g of the pro d uct, ma y
make mo dificat io ns w itho ut g i vi ng pr ior no t ice.
If lost o r out -of-d a te, you can rec eive a new u ser
manual from the manufa ctur er or responsible
vendor.
Inst allat i on preparatio n. .. ......... ...... .. . ...... . .. .... ... ..1 8
... . ....19Aesthetic p ane l's di mension s and instal la t i on
Tens ion ad jus tmen t of the door spring..... . ...... .. . ....21
Connec tion of drain hose s .. . ...... .. . ...... ... ..... . ... . ....21
Dish washe r in s t al lat ion step s .. . ...... .. . ...... ... .... .....2 2
About Ele ctricity Con nec ting. .. . ...... ... ..... . ... ..... . ....23
Cold Wa ter Conne ction. .......... ......... .......... .... .....24
Before calling for serv ice.. ... ... ......... ... ... .... ....... ... 25.
Error codes....... ... . ... ......... ... ... ....... ... . ... ........ ... .26.
Techn ical inform ation.... ...... ...... .............. .. ... ... ..27..
Page 3

When using your dishwasher,
follow the precautions listed below:
This appliance is intended to be used in household
and similar applications such as:
-staff kitchen areas in shops, offices and other
working environments;
-farm houses;
-by clients in hotels, motels and other residential type
environments;
-bed and breakfast type environments.
This appliance can be used by children aged from 8
years and above and persons with reduced physical,
sensory or mental capabilities or lack of experience
and knowledge if they have been given supervision
or instruction concerning use of the appliance in a
safe way and understand the hazards involved.
Children shall not play with the appliance. Cleaning
and user maintenance shall not be done by children
without supervision.(For EN60335-1)
Packaging material could be dangerous for children!
This appliance is for indoor household use only.
To protect against the risk of electrical shock,
do not immerse the unit, cord or plug in water or
other liquid.
Please unplug before cleaning and performing
maintenance on the appliance.
Use a soft cloth moistened with mild soap, and then
use a dry cloth to wipe it again.
1
Page 4

This appliance must be earthed. In the event of a
malfunction or breakdown, earthing will reduce the
risk of an electric shock by providing a path of least
resistance of electric current. This applian ce is
equipped with an earthing conductor plug.
The plug must be plugged into an appropriate outlet
that is installed and earthed in accordance with all
local codes and ordinances.
Improper connection of the equipment-earthing
conductor can result in the risk of an electric shock.
Check with a qualified electrician or service
representative if you are in doubt whether the
appliance is properly grounded.
Do not modify the plug provided with the appliance;
If it does not fit the outlet.
Have a proper outlet installed by a qualified electrician.
Do not abuse, sit on, or stand on the door or dish
rack of the dishwasher.
Do not operate your dishwasher unless all enclosure
panels are properly in place.
Open the door very carefully if the dishwasher is
operating, there is a risk of water squirting out.
Do not place any heavy objects on or stand on the door
when it is open. The appliance could tip forward.
When loading items to be washed:
1) Locate sharp items so that they are not likely to
damage the door seal;
2
Page 5

2) Warning: Knives and other utensils with sharp points
must be loaded in the basket with their points
facing
down or placed in a horizontal position.
Check that the detergent powder is empty after
completion of the wash cycle.
Do not wash plastic items unless they are marked
dishwasher safe or the equivalent.
“ ”
For check the
unmarked plastic items not so marked,
manufacturer's recommendations.
Use only detergent and rinse agents recommended for
use in an automatic dishwasher.
Never use soap, laundry detergent, or hand washing
detergent in your dishwasher.
The door should not be left open, since this could increase
the risk of tripping.
If the supply cord is damaged, it must be replaced by the
manufacturer or its service agent or a similarly qualified
person in order to avoid a hazard.
During installation, the power supply must not be
excessively or dangerously bent or flattened.
Do not tamper with controls.
The appliance needs to be connected to the main water
valve using new hose sets. Old sets should not be reused.
The maximum number of place settings to be washed
is 13.
The maximum permissible inlet water pressure is 1MPa.
The minimum permissible inlet water pressure is 0.04MPa.
3
Page 6
This appliance's packaging materials are recyclable.
Dispose of the packaging into a suitable waste
collection container to recycle it.
It is prohibited to dispose of this appliance as
household waste.
Correct Disposal of this product: this symbol on the
product or in its packing indicates that this product
may not be treated as household waste. Instead,
it should be taken to the appropriate waste collection
point for the recycling of electrical and electronic
equipment. By ensuring this product is disposed of
correctly, you will help prevent potential negative
consequences for the environment and human health,
which could otherwise be caused by the inappropriate
waste handling of this product.
For more detailed information about the recycling of
this product, please contact your local council your
household waste disposal service, or the shop where
you purchased the product.
For disposing of package and the appliance please
go to a recycling centre. Therefore cut off the power
supply cable and make the door closing device
unusable.
Cardboard packaging is manufactured from recycled
paper and should be disposed in the waste paper
collection for recycling.
By ensuring this product is disposed of correctly, you
will help prevent potential negative consequences
for the environment and human health, which could
otherwise be caused by inappropriate waste handling
of this product.
For more detailed information about recycling of this
product, please contact your local city office and your
household waste disposal service.
DISPOSAL: Do not dispose this product as unsorted
municipal waste. Collection of such waste separately
for special treatment is necessary.
4
Page 7
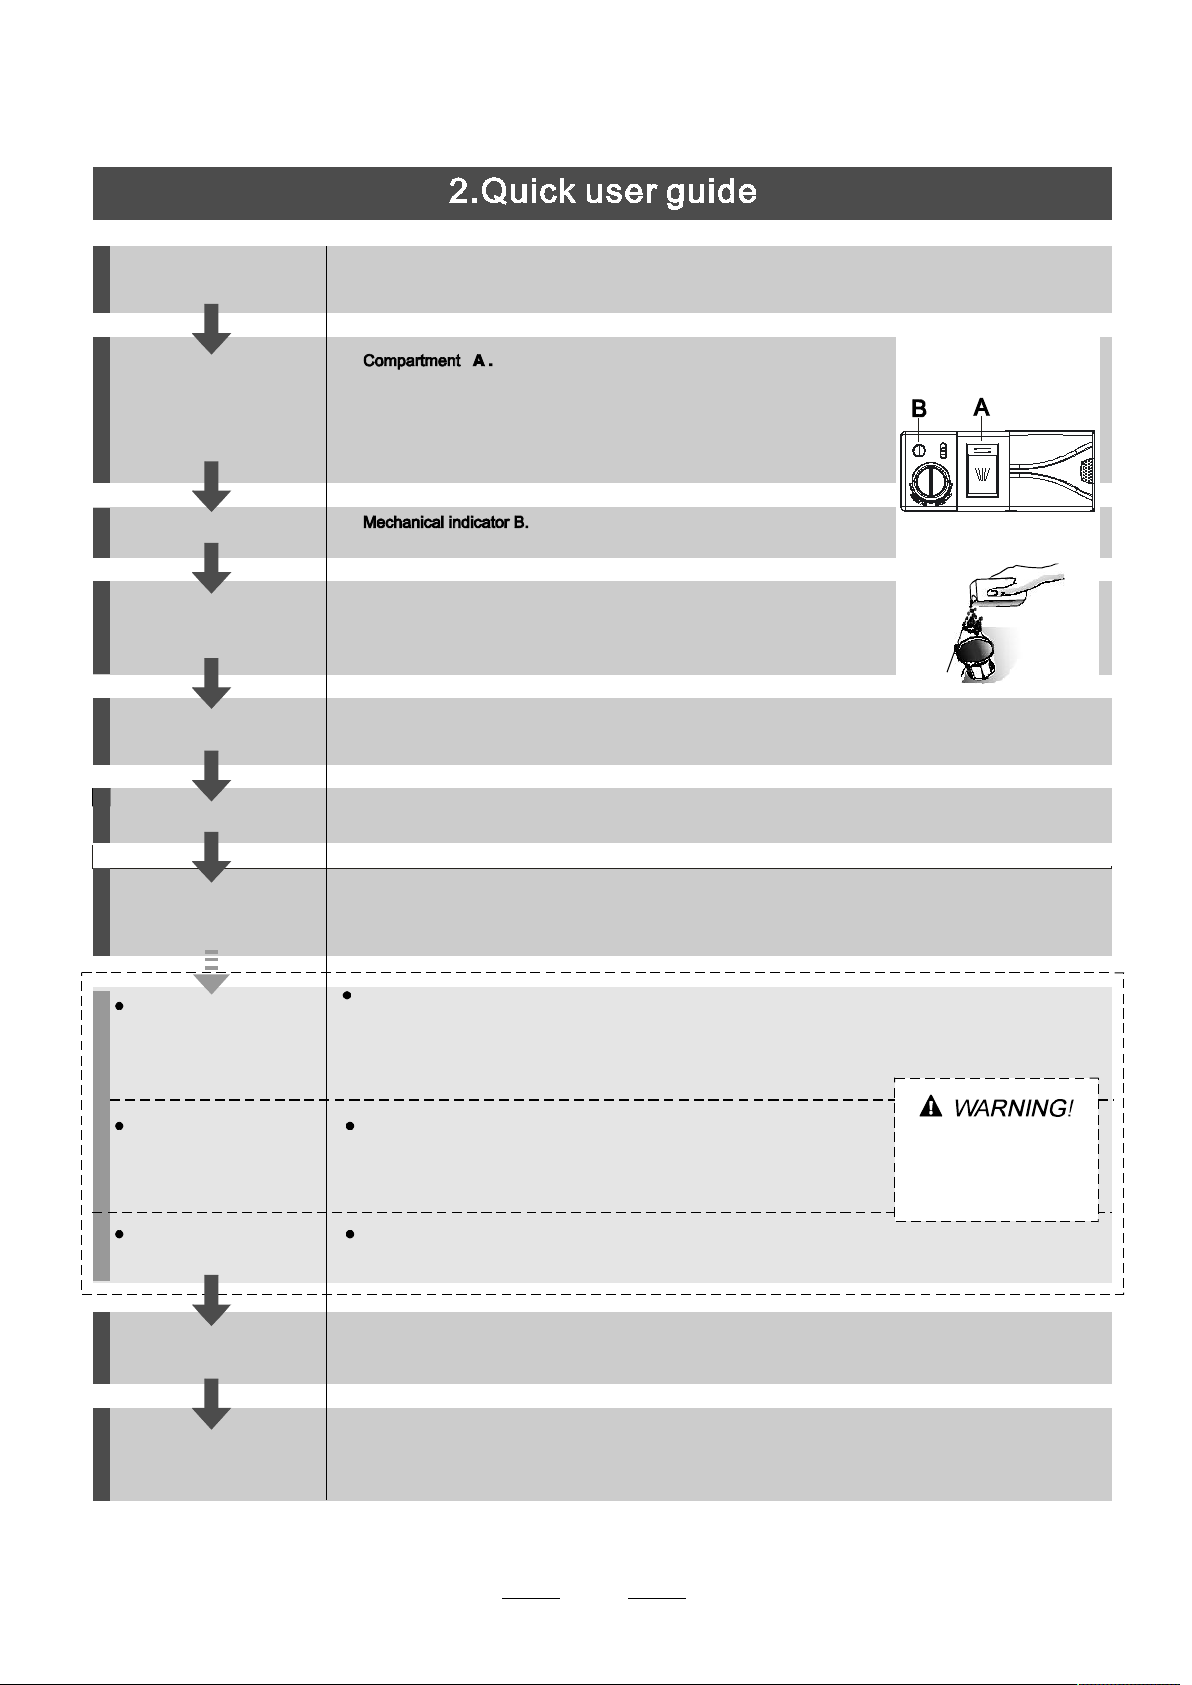
For detail ed ope ra ting method read the co rrespondi ng conte nt o n the instruc tion man ual.
Switch on the appliance Open the door, the On/Off button to switch on the appliance .
For each wash cycle.
Fill the detergent dispenser
Check the rinse aid level
Check the regeneration
salt level
Load the baskets
Select a programme
For programs with pre-wash,please put the detergent anywhere inside the
inner tank except in compartment A
(Follow the user instructions!)
Electric indicator on control panel (if provided).
(On models with water softener system only.)
Electric indicator on control panel (if provided).
If there is no salt warning light in the control panel
(for some models), you can estimate when to fill the salt into
the softener by the number of cycles the dishwasher has run.
To load the ba ske t s, ref er to th e sec t ion en t itled Loa d ing th e Dish washe r Bask ets .“ ”
Touc h an y p rogra mme button un til th e sele ct ed p rogram me l i ghts u p .
( See th e section e nt itled Opera ti o n in str uc tio n )“ ”
touch
Running the dishwasher
Changing the programme
Ad ding fo rgot te n dish es
in t h e dishwa sh er.
If the appliance is switched
off during a wash cycle.
Switch off the appliance
Turn off the water tap,
unload the baskets
Turn on the water tap ,close the door . The machine will start working at once.
1. A running cycle can only be modified if it has been running for a short time. Otherwise the detergent
may have already been released and the water already drained. If this is the case, the detergent
dispenser must be refilled.
2.Open the door.
3. for more than 3 seconds to cancel the running programme.
Touch any programme button
4. Select a new programme.
5. Restart the dishwasher.
1.Open the door a little to stop the dishwasher.
2.After the spray arms stop working, you can open the door completely.
3.Add the forgotten dishes.
4.Close the door, the dishwasher will start running again .
If the appliance is switched off during a wash cycle, when switched
on again, please re-select the washing cycle and operate the dishwasher
according to the original Power-on state ).
When the working cycle has finished, the buzzer of the dishwasher will sound 8 times, then stop.
Turn off the appliance using the On/Off Button.
Since the appliance is standing by, it will power off automaticly after 30 minutes without any operation.
Warning: wait a few min utes (abou t 1 5 minute s ) befo re unlo a ding the dis hwasher to avo id
han dling the dis h es an d uten s il s w hi le they ar e s till h o t an d more sus cepti ble t o brea k.
The di sh e s will als o dr y better. First start unloa ding th e lower bas k et .
Open the door carefu lly.
Look out for hot ste am
when openin g t he do or !
5
Page 8
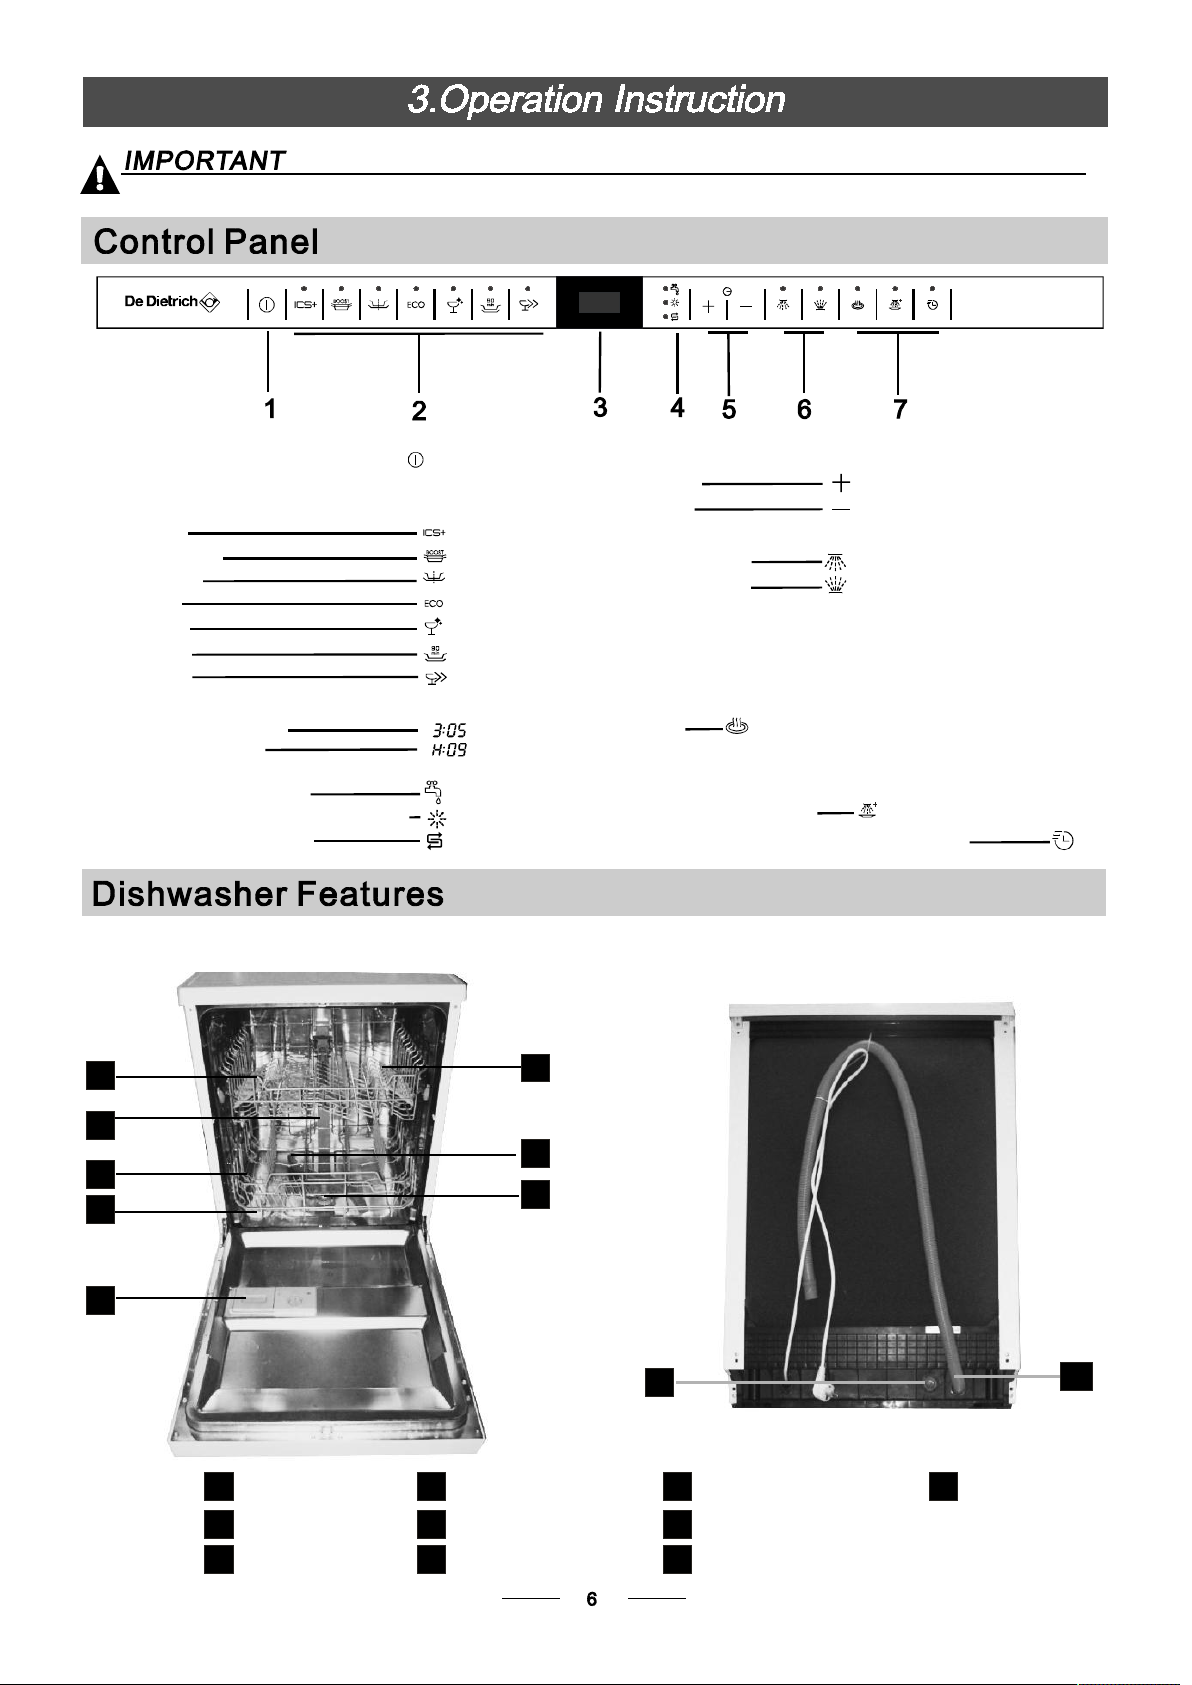
To g et th e best perform ance from your dish was her, read all operat i n g i ns tructio n s
bef ore u s ing it fo r the first t ime.
1. Pow er Butto n - to u ch on and off. 5. De lay Butt ons :
2. Pro gram Button s-touch to se l ect t he Pr og ra m,
corr e sp o ndi ng in dicator w ill be lig htened;
Auto
Int e n siv e
Normal
ECO
Gla s s
90M in
Rapid
3. S creen - S ho w the pr ogram ti me and delay tim e;
Eg: program tim e
Dela y tim e
4. S tat us In dic ators :
Faucet is not open
Rinse detergent need to be refilled
Salt need to be refilled
In c re a se
Reduce
6. Al t F unc tion Button s and indi cat ors :
Upper b as ket
Lower b as ket
7.P r og r a m function s , on ly one functi o n can be se lect ed in
a cycle:
Extra Dryi ng: Fina l rins e tempe rat u re in cre a ses and
an extend ed drying ph ase is ad d ed to impro ve drying
efficienc y. It involves a slight e nergy co nsu mpt ion in
cr e as e .
St rong wash: An in cr e a se d tempera tu re du r ing t he ma in
wash and a ad dit i onal ri sing are ad ded to imp rove c lean ing
efficie ncy. Thi s fu n ction will in v olve an energy a nd wate r
co nsu mpt ion i ncr e ase.
Expre ss, t o reduce the p ro gram t im e.
2
3
4
5
Fr on t v iew
1
6
Ba ck View
7
8
10
Upper Basket
1
In ne r pip e
2
Lower Basket
3
Salt Contai ner
4
Dis penser
5
Cup Sh elf
6
9
Spra y arms
7
Filter as s em b ly
8
Inle t pi p e con ne c tor
9
10
Drain pipe
Page 9
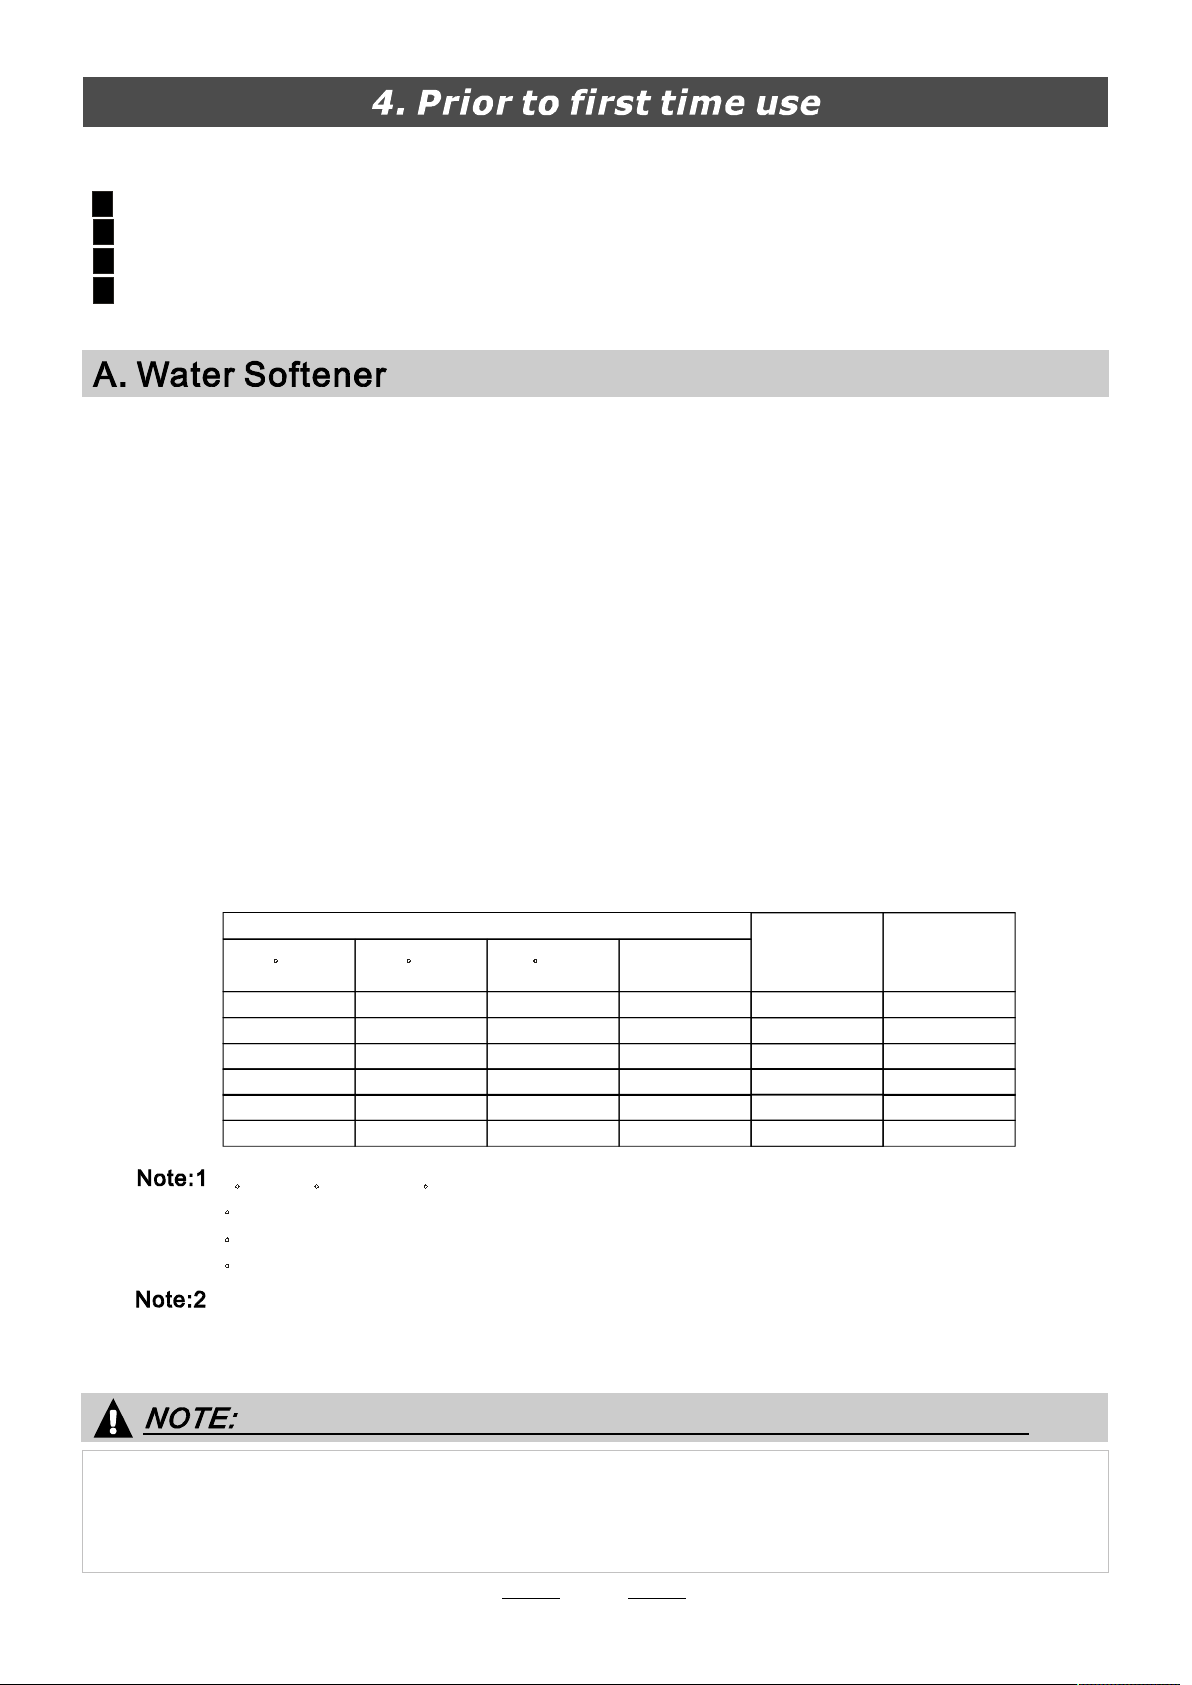
Before using your dishwasher for th e first ti me :
A. Set t he water softene r
B. Add 1.5K g dishwasher salt an d th en full fi ll the sal t con tain er w i th w ater
C. Fill t he r inse ai d dis p en ser
D. Fill i n de ter g ent
The wat er softener mus t be set m an u al ly, using the wa ter hard ness dial.
The wat er softener is des igned to rem ove minerals and sa l ts f rom t he water, wh ich wou l d have
a detrim ent a l or adverse effe ct on the op e rat ion of th e app liance.
The more mi ne rals ther e are , th e harder your wa te r is
The softene r should be a dj us ted acco rd ing to the hard nes s of t he wate r in your area. Your local Water Auth ority
can advise you o n the hardness o f th e wat er in your ar ea .
Adjusting Salt Consumption
The dishwasher is designed t o al l ow for adjus tment in the am o unt of sa lt co nsumed bas ed on the ha rdness o f
the water used. This is i n tended t o op tim ise and custo mise the level o f salt consumptio n.
Ple a se follo w th e steps below fo r adj u stm en t in sa l t co nsumption.
1. Op en th e door ,Sw itch on the applia n ce ;
2. Touch the pro gr am butto n for more th an 5 seconds to star t t he wate r softene r
setting mo de within 60seconds af t er the app lia nce was switc hed on(Salt and
Ri nse a id warni ng li ght s will be on pe ri odically );
3. the progr am b utton to sel e ct th e pro pe r s et according to ,
Touch
th e setting wi ll change in the foll owing sequence: H1->H2->H3->H4->H5->H6- >H1 ;
4. To end the setting mod e, ei t her t ouc h the On /Off button o r wa it 5 sec onds
Rapid
seet i ng mo de is o n
the hardness of y ou r loc al waterRapid
WATER H ARDN ESS
dH
6- 11
18-22 31-40 22-28 3 .1 -4.0
35-55 61-98 43-69 6 .1 -9.8
dH =1. 25 Clar ke=1.7 8 fH =0. 178 m mol/l
1
fH
0~90~ 5 0~ 0.94 0
10-20
21- 3012-17 2.1 -3 .0 12
41- 6023-34 4.1 -6 .0 30
Clar ke
0~6
7- 14
15-21
29-42
mm ol /l
1.0-2 .0 9
Sel ecto r Posit io n
H1
H2
H3
H4
H5
H6
Sa lt c on sum pt io n
(gra m/cy cle)
20
60
dH: German degree
fH : Fre nc h degr ee
Clar k: Bri tis h deg ree
The man ufa cto ry set ting : H3 (EN 50 242 )
Contact you r l oca l w ater b oar d for inf ormation on the hardn ess of your water supply.
If your model does no t have any water softene r, you may skip this section.
WATER SO FT E NER
The har dness o f the wa ter v aries from plac e to plac e. If ha r d water is us ed i n the dishwasher, de po s its wil l
for m on th e dis h es and ute n sils.
The applian ce is eq ui pped wit h a sp ecial so ft ener tha t u se s a salt c on tainer sp e ci fic al ly des ign ed to e lim inate
lim e and mi ne ra ls fr om the water.
7
Page 10
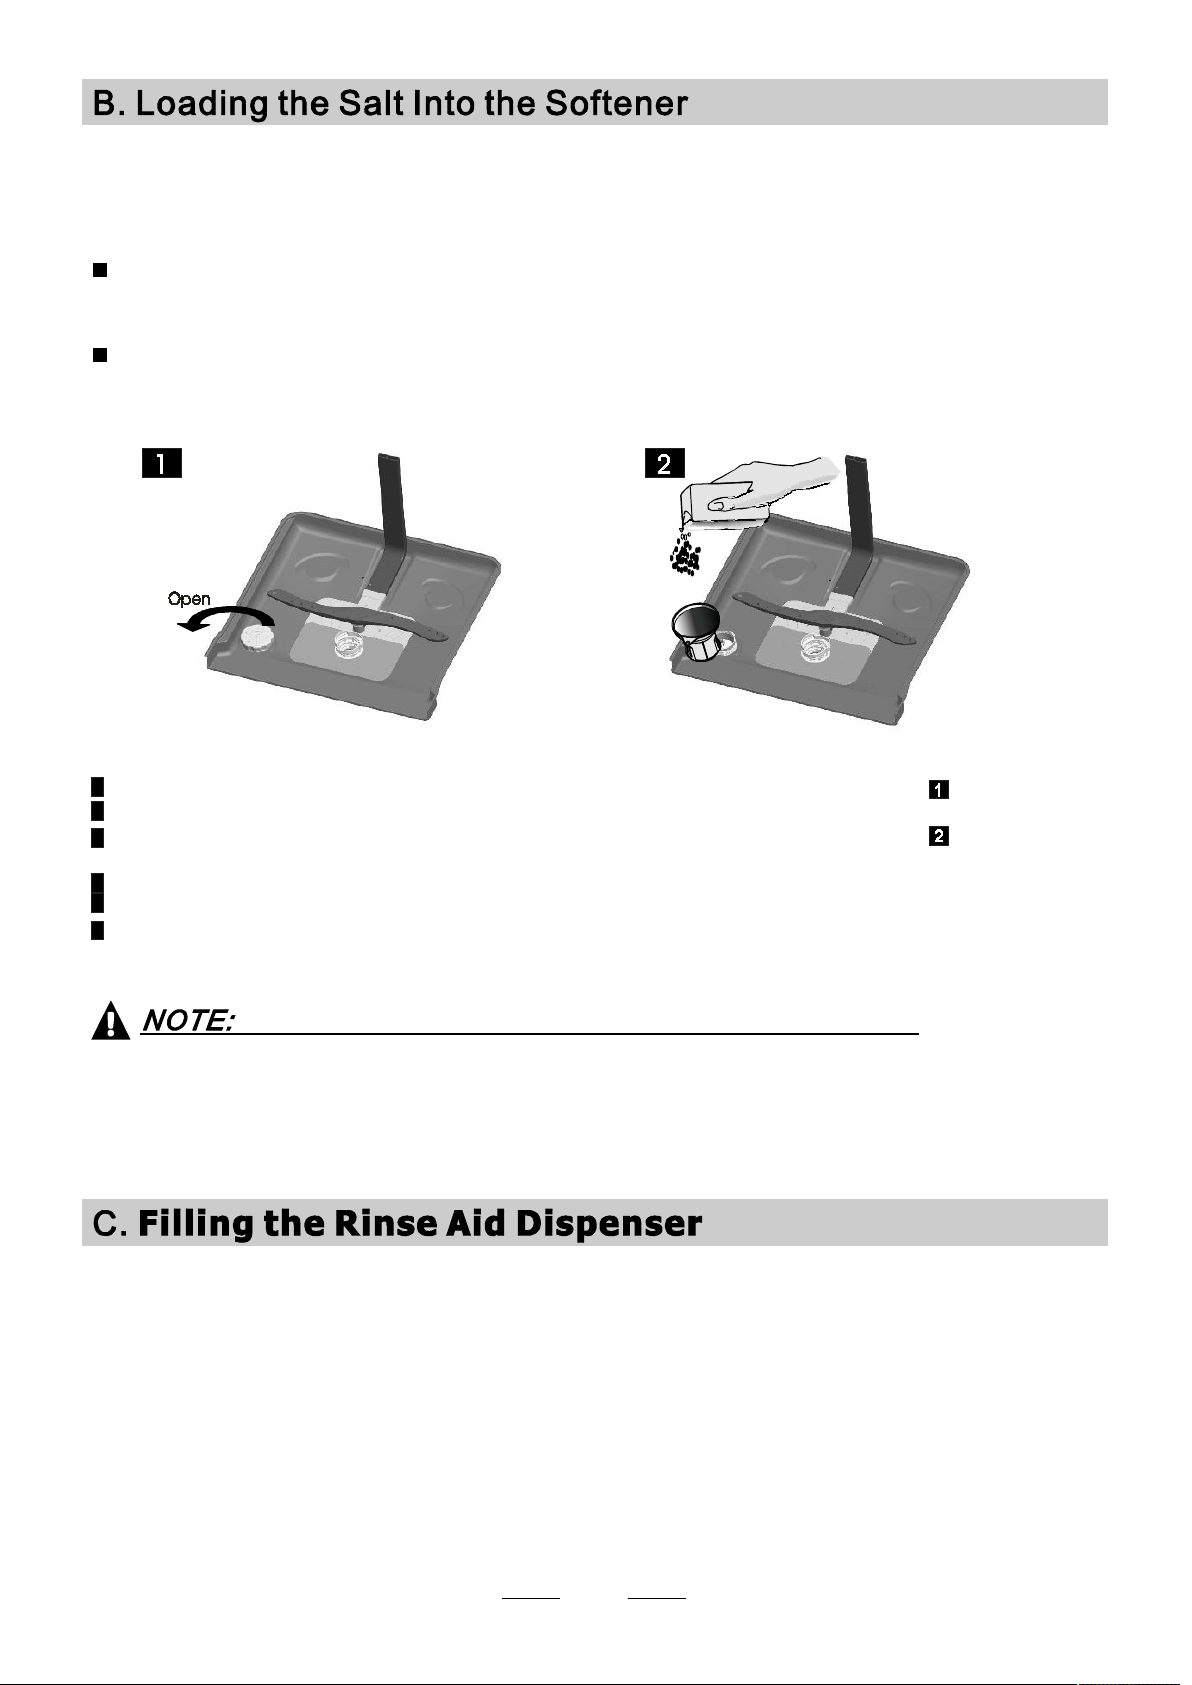
Always use the salt intended for dishwash er us e.
The sa lt co ntain er i s loc ated ben eath the l owe r bas ket and sh ould be fil led a s exp lai ned
in the foll owing:
Warning!
Onl y use salt spe cificall y desi gne d for d ishwa shers use! Every ot her type of
salt n o t spec i f ically d esigned fo r dishwas he r use, e s pecially ta bl e sal t , wil l
damage the w ater softener. In case of damages caused by the use of unsuitab le
salt t he ma nuf act ure r doe s not g i ve any wa rranty no r is li abl e for a ny damag e s cau sed.
Onl y fil l with sa lt befo re running a cycle.
This wi ll preve nt any grains of salt or sa lty wate r, wh ich ma y have b een spilled,
remaining on the bo ttom of th e m achine for any perio d of time, whi ch may cau se
corros i on.
A After th e low er ba sket has been remo ved, unscrew and r emove the cap from the salt con tainer.
B Pl ace th e end of the funnel (supplied) int o the ho le and in tro d u ce a bo u t 1.5 kg of di shwasher salt.
Fill the salt cont aine r t o its m aximu m li mit
C
com e out of the sa lt co ntainer.
D Af ter fil ling the co ntainer ,
E Th e salt warn ing l igh t wil l sto p being afte r th e sa lt co nt a in er ha s be en fi ll ed with sa lt .
F Imm ediately aft er filling the s alt in to the sa lt c o nta iner, a washing program should be s ta rte d
program Ot her wi se th e filt er s ystem, pump or other impor t a nt p a rts o f the machin e may b e damaged
by salt y wa te r. This is ou t o f wa rranty.
).
1. The salt con tai ner must only be r efil le d when the salt wa rning light in t he cont r ol panel c om es on.
Depending on how wel l the s alt diss olv e s, th e salt warni n g li g ht ma y still be on even tho ugh the
salt cont ain er is fi lled.
If the r e is no salt w ar n ing light in the con trol pan el (f o r so me Mo de ls),you can e st imate wh en to fill
the salt into the softener by th e cy c les t hat t he dishwashe r has run.
2.
I f sal t has spi lled, run a soak o r qu i ck pr og ram to r emo ve it.
screw back the cap t ightly.
with wate r,It is nor m al for a s mal l amo unt o f wa ter to
(We su ggest to use a short
Rinse Aid Dispenser
Th e rinse aid is re leased d uring th e final rinse to prevent wate r fro m for mi ng drople ts on your di she s, which c an
leave spots and stre aks . It also im pro ves drying by allowin g w ater to roll off the dish es. You r dishwa she r is
designed to use l iqu id ri nse aids. Th e r inse aid d ispens er is located insid e, on the door an d next to the det ergent
dispenser.
To fil l the dispenser, open the cap and pour the rinse ai d int o the disp e nser until the level indicator turns comple tely
black. The vol ume of the rinse aid co ntain er is about 110m l.
Function of Rinse Aid
Rinse ai d is au t oma t ic all y added during the l ast r ins e, ens uring th orough rinsi ng , a s po t and strea k fre e drying.
Warning!
Onl y use bran d ed rinse aid for di s hwasher. Nev er fi ll th e rin se ai d dis penser with an y other substanc es
(e.g. Dishwasher cle aning agent, liq u id detergent). Th is would damag e the app li ance.
8
Page 11

When to Refill the Rinse Aid Dispenser
Un less the rins e-ai d wa rnin g light on the co ntrol panel is on , you can alw ays esti mate the am ount from the color
of the optic al le vel indicat o r "C "loc ated nex t to the c ap. Whe n the rinse-ai d c ontai ner is f ul l, the ind icator
wi ll be ful ly dar k. The size o f the dar k do t de cr ea ses as t he ri nse -aid dim i ni shes. You sh o ul d neve r let
the rin se aid level be le ss than 1 /4 full.
As the rinse aid d imi n ishes, the siz e of the blac k dot
on the rinse a id l e ve l ind icator changes, as illustra ted belo w.
Ful l
3 / 4 ful l
1 / 2 ful l
1 / 4 ful l - Should refil l to elimi n ate sp otti ng
Emp ty
" "
To open the di spense r, tur n the cap to the "op en" ( left) ar row and lift it out.
1
Caref ully pour in the r ins e-ai d in to its di spen ser, whil st avo iding it to overflow.
2
Re place the cap by inse rting it align ed with "open " arrow and t urning it to the closed ( right) arro w.
3
Clea n up any ri ns e aid spil led whil e dur ing fi ll ing wit h an abs orb e nt c lot h to a void exc ess ive fo am i ng
duri n g the nex t w a sh. Don ' t fo r ge t t o re pla c e th e cap b e fore you clos e dis hwa she r door.
Adjusting Rinse Aid Disp enser
Th e rin se aid dis penser has six or four setting s. Alway s st art wi th th e dispe ns er
set on "4 ". If spot s and p oo r d ryi ng are a p rob lem, increas e the a mount of r i ns e
ai d dispen sed by rem ovi ng th e dispens er li d and rot atin g the d ial to "5" . If the
di shes still ar e no t dryi ng properly or sho w s pot s, adjust the dial to the next
hi gh e r lev er un til y our dish es are sp ot-f r ee. The r ecom mended setting is "4".
(Fact ory v alue is "4 ".)
Inc rea se t h e do se if there are drop s of w ater or li me spot s o n the di sh es afte r wash ing .
Re duce i t if th ere a r e sti ck y whi t is h sta ins on your dish es o r a bluish fil m on g lassware or
kn i fe bl ad es .
The chem ical ingr edients that comp ose the deter gen t are ne cessar y to remov e, cr ush a nd dispen se all di rt o ut of the
di sh w as he r. Most of the c ommerc ial quality de t erg en t s are sui t ab l e for thi s purpose .
Warning!
Pro per Use of Dete rgent
Use only d etergent s pe cific al ly m ade for the u se in dis hwa sher s. Keep your de t er gent fresh and dry.
Don't put powdered det ergent into the di s pe nse r u nt il yo u 're re ad y to wash dishes.
9
Page 12

Detergents
Ther e are 3 sor ts of deter gen t s
1.With phosphate an d wi t h ch lorine
2.W ith phosph ate and witho ut chlo rine
3.Witho u t phosph at e and without c hlorine
Normall y ne w pulverised deterge n t is with out phosphate. Thus the wa ter so ftener fu nction of
pho s ph a te is not given. In this ca s e we recomme n d to fill s alt i n the salt con taine r even w hen
the hardness o f w ater is o nly 6 dH . If de tergents witho ut ph osphat e are used in the case of h ard water
oft e n white spots appear on d ish e s and glasses. In this case pl ea se add m o re dete r gen t to reac h
bet t e r re su lt s. De te rgents without chlorine do on l y bl each a littl e. S tron g and coloured s pots wil l not
be removed c om pl etely. In th is ca se pleas e choose a prog r am with a hi gher te m per a ture.
°
Concentrated Detergent
Based on th e ir c h em i ca l c om p osi tion, deterge nts can be sp lit in two basic types:
co nve nt i o nal, alkaline detergen ts with caustic comp onents
lo w alkalin e co ncentr a t ed d et e r gen ts wi th n atu ral e n zym es
Detergent Tablets
Dete rg e n t ta bl et s of d iffe rent brands dissolve at di ffere nt s peeds. For this reason so me
det e rge n t ta b lets ca n not diss olve an d develop the ir fu ll cle an in g po wer during short
pro g ram s. T h ere fore pl ease u se long program s wh en u sin g deterg ent t ab l e ts, t o
ens u re the complete rem ov al of d ete r ge nt re s i dua ls.
Detergent Dispenser
The dispenser mus t b e re filled be fore the s ta r t of each was h cy cl e f ol lowi ng the i ns t ructi ons
pro v i ded in the w as h cyc le ta b le . Your dis hwasher uses less de tergent an d rins e aid than
Conven t i ona l dis hwa sh e r. Gener ally, on ly one tablesp oo n of d etergent is neede d fo r
a normal wa s h lo ad. More h eavily soiled items need more dete rge n t . Alway s ad d the
det e rge n t ju s t be fore st a r ting th e dish wa s he r, othe rw ise it coul d get damp a nd will not
diss ol ve pro p erly.
Amount of Detergent to Use
Detergent powder
If the lid is close d: pr ess release button. The li d will spring open.
Al way s add the detergent just b efo re st art ing each w ash cycl e.
Only use branded de t erg ent ai d fo r dis h washer.
Dishwasher detergent is corrosive!
Take care to keep it out of reach of children.
10
Page 13

Filling the detergent dispenser
Fill th e deter g e nt di sp e nser wit h deter gen t.
The mark ing indicates the d os ing le ve ls , as
Ill ust rated :on t he righ t
1. Place t he m ain washing cycle deter gent in the st or age
co mpa r tm e nt i ndi c ated wi th an A on the pic ture.
Th e marking on th e compartme nt ind ic a tes t he dosin g
le v el.
2. Place pre-wash de t ergent c ycle de tergent a nyw h ere
in s ide t he inne r tan k
Plea se observe the ma nufa ct urers do s ing and st or age
Recomm endati on s as sta ted on th e deterg ent packagi n g .
Close the lid and press on it until it locks into place.
If the dishes are he av ily soiled , ad d an additi on a l pre was h deterg ent dose.
Thi s detergen t will t ak e eff e ct duri ng th e pre- was h phase.
will fi nd
You in form ation ab ou t the a mount of de t ergent for th e si n gle pro g ram me on page 14.
Be aware that dep end ing on the so iling of wate r, se tting may be diffe rent.
Pl e ase observ e the ma nufa cturer's rec o mmendatio n s on the de t e rgent p a ckaging.
“ ”
11
Page 14

Consider buying ut ensils which are iden tified as dis hwasher-proof.
Use a mild detergen t that i s des cribed as 'ki nd to d ish es' . If nece ssary, see k furthe r
informa tio n fro m the de tergent man ufa ctu rers.
For pa rticular ite ms, sele ct a progr am with
To prevent damage, do no t take gla ss and cutl er y out of the di shw asher im med iat ely
after the programm e has ende d.
t he lowest po ssib le te mpe rature.
Are not suitable
Cutl ery with woode n, horn ch in a or
mother-of-p ea r l ha n dl e s
Plast ic ite ms that are not heat resi s t ant
Older cut lery w ith g lued pa r ts th at are not
temperatu re resist ant
Bonded cu tlery items or dis h es
Pewt er or coop e r ite ms
Crystal glass
Steel items su bject to rust i ng
Wooden pl atters
Items m ad e fro m synthet ic fibr e s
(F or b est performa nce of the d i sh was her, f ollow th e se l oad ing guid e lines.
Feat u re s and appearance of b as ke ts a nd cutler y ba ske t s may vary from your model.)
Sc ra p e off any larg e amo unts o f le ft over fo o d. S often re mna nts of burnt food in pa ns.
It i s not necess ary to r ins e t he d ish e s under running water.
Pl ac e obje ct s in the dishwasher in fol lowing wa y :
1.I tem s such a s cu ps, g lass es , pots /pa ns, e tc . a re fa ce d downwards.
2.Curv ed items, or ones wi t h reces s es , should be loaded as lan t s o th at water can run off .
3.All utens ils a re stacked securely and ca n not ti p over.
4.All utens ils a re placed in t he way that the s pray ar ms can rotate freely durin g washing.
Very s m al l it ems sho ul d not be wash e d in the di shwasher as th ey could easily fall out of th e bas k et .
Are of limited suitability
Some types of g l as s es can become
dul l aft e r a large number of washes
Sil v er a nd aluminum pa rts ha ve a
ten denc y to discolou r durin g washing
Gla zed pattern s may fa de if mach ine
washed frequent ly
Load holl ow ite ms suc h as cups , gl a sses, pa ns et c. With the opening f ac ing downward s so that
water can not collect in t he co ntainer or a deep base .
Dis hes and items of cu tler y must not lie ins ide o n e an ot her, or cover e ac h ot h e r.
To avoid damage , gla sses sh ould no t touc h on e an other.
Loa d large and d iffic ult to cle an it ems in the lo wer bask et.
The upper bas ket i s designed to hold m ore de li cate a nd li gh ter dishwa re s uc h as glasses, coffe e
and tea cu p s
Long bladed knives st o red i n an upright posit ion are a po t en tial haza rd!
Long and/or sharp item s of cutle ry su ch as carv ing knives must be positi oned
horizo n ta lly in the upper b asket.
Ple ase do n ot ove rload your dish was her. Th is is i mp o rt ant fo r goo d result s and for
rea sonab le co nsumpti on of energy.
To pre ve n t water drippi ng fr om the up pe r ba ske t into the lower basket, we re c om mend that you
empty the lower ba sk et fi rst
, fo llow ed by the
up p er b asket.
12
Page 15

The u ppe r bas k et is d e signed t o h o l d more delic ate
and l ighter d i shware such as glass e s, coffee and
te a c u ps and s au c ers, as well a s plates , sm all b owls
and s h allow pans ( as long as th ey ar e n ot to o di rty).
Posit i on the d i she s and co okw are s o t h at th e y w ill
not g e t moved by t he spray of w ate r.
Ple ase be reminded that:
Pots , ser ving bow l s, et c, mus t alw ays be p laced to p d o wn .
Deep po ts sh ould be slan ted to all o w w ate r to flow out.
The B ot to m Bas k et fe a tur es fo ldi n g spikes so that larger or more po t s and pans c an be loade d.
We s ug g est that you pla ce lar ge items and the most
difficult to cle an ite ms such as
pots, p ans , l ids, ser ving dishes and bowls, a s shown
in t he figure below. It is preferable t o place servin g
dishes and lids on t he sid e o f the rack s in order to
avoid blockin g the rot ation of th e top spra y a rm.
in t o the lo w er bask et:
The height of th e up per rack can be easi ly adjust ed to
ac com modate t alle r dis h es in ei ther the uppe r an d lo wer
rac k. To rai se th e ra ck to the upp e r p ositio n, li ft ra c k u ntil
both si d es are a t the sa me h ei gh t. The ra c k will s ecur e
into pla ce. To lo wer the rack , pu sh d o wn on t h e h andl e
and rel eas e .
Cutl ery should be pla ced in the cutle ry basket wi t h the han dle s at the bott om. If the rack ha s side bask ets , the
spoons sho uld be loa ded s ep ara tely into the ap p rop ria te slo ts, utensil s should be placed in the
hori zon tal position at the fr ont of the uppe r bask et .
For bett e r stacking o f cup s, th e s h el ve s ca n be fold ed
down as show o n the pi c t ur e belo w.
For bet ter stacking of pots and pan s, the spikes can be folded
down as sho w on the pictu re below.
Espec ially lon g
For a top qu a l ity clea ning, place the s ilverware in th e b a sket makin g su re th at:
They do not nes t together.
Silve rware is placed with the male fac e u p.
Long ute nsils in the middle.
Do not let an y item exte nd through the bottom.
Always load sharp utensils with th e sh arp point down!
13
Page 16

( )
Means : Ri nse -a id di sp e n s er ne e ds to be filled.
Int ensi ve
Norm al
( *EN 502 42)
Gl ass
90 Min
Auto sensing was h , ligh tl y,
normall y or heavi ly soi le d
crocke r y, with or with ou t
dried -on fo o d
For heav i e st s oil e d crock ery,
and norm ally soile d pot s
pans dishes etc with dried
、
、
on soil ing.
Fo r n ormal ly soiled loads,
such as po ts pl a tes
、 、
glass e s an d lig h tl y
soil ed pans.
Th is is stan dard progr amm e , it i s
sui tabl e t o clea n normally soi led
tableware and it i s the m ost eff ici ent
pr ogramme in terms of its com bined
en er gy and water con sumpt ion for
that type of tabl e ware.
Fo r lig htly soi le d cr ocker y
and gl ass.
For normal ly soiled loads
that need quick wash.
Pr e- w ash (45 )
Au tow ash( 45 -55 )
℃
℃
Rinse
Rinse (65 )
℃
Dryi ng
Pre- w ash(5 0 )
Was h (60 )
℃
℃
Rinse
Rinse
Rinse(70 )
℃
Dryi ng
Pre- wash(45 )
Was h (55 )
℃
℃
Rin se
Rin se (65 )
℃
Dryi ng
Pre- w ash
Was h (45 )
Rins e(65 )
℃
℃
Dryi ng
Pre- w ash
Was h (40 )
℃
Rins e
Rins e(60 )
℃
Dryi ng
wash
(65 )
℃
Rin s e
Rin s e (65 )
℃
Dry i ng
5/ 30 g
1or2 piec es
5/ 30 g
1or2 pie ce s
5/ 30 g
1or2 piec es
5/ 30g
1or2 pieces
5/3 0g
1 piece
35g
1 p iece
15 0
175
18 5
220
130
90
1. 6
1.3
0. 92
0. 9
11~150.9~1 .3
17.5
13. 5
10
13
12.51.35
Ra pid
A shorter wa sh fo r lightl y
soil ed loads and qu ick
wash.
Was h (45 )
Ri n se
(5 0 )℃
Ri n se (55 )℃℃
25g
30
*EN 50 242 : This p r ogramm e is t he te st cycle. T h e informatio n fo r co m par abi l ity t e st
in acc o rda n ce with EN 502 4 2, as f o llow s :
Capacity : 13 setti ngs
Posit i on Upper ba sket:
Lower pos iti o n
Rins e aid se tting: 6
PI :0. 4 9w ;Po :0. 45w
Sta r t ing a cycl e wash
Draw out the lowe r and up p er ba sk et, lo ad th e dis he s and pu sh them bac k.
1
It is lo a d the l owe r basket f irst, th en the u pp er one (s ee the sect i o n entit led
re com men ded to
Loadi ng th e D ish w as her ).
“ ”
Pour in th e dete rg ent ( see th e sect ion entit ledSa lt, Deterg en t an d Rinse Ai d).
2
Ins ert the plug into the s oc ket. The pow er suppl y is 220-240 VAC /50 HZ, the sp ec i fication
3
of the soc ket i s 10A 250VAC. Make su re th at th e wa ter supp ly is turn ed on to fu ll p res s ure.
Open the doo r, tou c h the powe r button, a nd the On/Off light will tur n on.
4
5 Touc h any program bu tton, i
f a program is selected, the r esp onse light wi ll . Then clo se th e door,
tu rn on th e d ishwash er
wi ll start its cyc le.
0. 75
11
Page 17

Pr emise:
A can only be modifie d if it has onl y bee n run ning f or a short time. Oth erw i se, t he
12runn ing cy cl e
deter gen t m ay have already be en relea s ed, a nd the ap pli ance m ay have already drain e d the w ash water.
If t his i s the case , the dete rgent dispenser must b e refilled (see the section ent itled " Load ing the
Deter gen t " ).
Open the door , , the machine will be in standby state,
th en yo u can change th e p ro gram to th e desi red c yc le set ting (see t he section en titled " St arting a
wash cycle. . ." ).
touch more th an 3 se con ds
the running pr og ram
butt o n
If you op en the door , th e machin e will pause . The pro g ram light will
durin g a wash cycle
stop b linking a nd the buzz er w ill moo ing every mi nute unle ss you close the door . After
yo u c l ose the doo r , the machine will ke ep o n working ag a in .
A forgotten dish can be added any time before the detergent cup opens.
Open the door a little .
1
After the spray arms stop working, you can open the door
2
completely.
Add forgotten dishes.
3
When the wo rki ng cyc le has finished, the buzzer o f th e dis h wa s her wil l s oun d for 8 sec o n ds, the n sto p. Turn o ff
the a ppliance using the ON/O FF button, sh ut off the wa te r s upp ly and op en the d oor of the di shw asher.
Wai t for a few mi n ut es bef or e unlo adi n g th e dis hw a sh er to av oid ha nd lin g the di shes an d utensi l s while th ey
are s till hot and m or e susc ept ibl e to br eak . The y will als o dry be tter.
Close the door
4
The dishwasher will start running again.
5
Switching Off the Dishwasher
The pro gram light is o n but i s not b lin king,
1.Open the door.S wit ch off th e dishwasher by pressing the ON/OFF butt on.
2.Turn off th e water tap!
only in this cas e has th e pro gra m end ed.
Open the door carefully.
Hot dishes are se nsi tive to minu tes befo re removi ng fr om
the applia nce .
Open th e dishwashe r's d oor, l eav e it ajar and w ait a few mi nut es be for e rem oving the dis hes. In this way t hey
will be c ooler an d the dryi ng will be im proved.
sho c ks. The dish es shoul d cool dow n for ar ou n d 15
Unloading the dishwasher
It i s nor mal for the dishw asher to be wet insid e.
Empty the lower b ask et first a nd th en the upper on e . Thi s will avoid water dripping fro m the uppe r Bas ket onto
the dishes in the l owe r one.
It is dangerous to open the door mid-cycle,
as hot steam may scald you.
15
Page 18

The f ilter prevent s lar ger remnant s of food or o t he r obj ect s fr om getting ins i d e th e pump.
The residues ma y blo ck th e filter, in this case they must be r em o ved .
The fi lter sys t em consi sts of a co ar se f i lter,a flat (Main filter)
And a micro filt er( F i ne fi lter ).
1
2
3
the m fr om bein g red epo site d on the dishes du rin g wa s h cycl e .
2
1
3
Main filter
Fo od and soi l par t icles trap ped in this filter are p ulverize d by a
sp e cia l jet on the lower sp r ay arm and wa sh e d down drain.
Coarse filter
La rge r ite ms, such as p ieces of bon es or glass, that c ou l d bl ock
th e drain are trapped in t he coa r se fil te r. To re mo v e the items
ca u gh t by the filter, gently s que eze the ta p on th e to p of this
fil ter and lift ou t.
Fin e filter
This filter holds soil and f oo d residu es in the sum p are a and
pr ev e nts
Filter assembly
The f ilter eff i cientl y
For best p er formance an d results , the filter mu st be cleaned re gularly. thi s reason, it is a goo d idea to
remove the la rger fo o d pa rticles trapped in the filter aft er ea ch was h cycle b y ri n sing t he s em ici rc ular filte r and
cup und e r ru nnin g wa t er. To remove th e fil ter device, pull the cu p handl e in t he up wa r d dir ect ion.
re mo ves f ood particl e s fro m the wa sh wate r, allo wi n g it to be re c y cle d du r ing t he cycl e.
For
The d ishwasher m us t never b e us ed with o ut th e fi lters.
Impro per rep lac e men t of the f ilter may re d uc e the perform ance level o f th e app lia n ce
and dama ge dish es and u tensils.
1
2
Ste p 1 Turn the:
St ep 2 lif t the filter as sy up:
When following this procedure from step1 to step 2, the filter system will be removed;
when following it from Step 2 to Step 1, the filter system will be installed.
16
fil ter cou n ter cloc kwise ,
Page 19

Remarks:
- After each cyc le, c heck for any deb ris in the filte r to avoid fut ure b lockage.
- By uns c rew ing t he coar s e fi l ter, y ou can rem ove the fil ter sys t em . Remove an y foo d re mna nts and
clean the filter s under running wa ter.
The entire filter assembly should be cleaned once a week.
Cleaning the Filter
To clea n th e coarse filte r an d the fine filt er, use a clea ning br u sh. Rea ssem bl e the filte r par t s (s ee page 15 ) a nd
reinser t them in the dish was her, position ing them in their sea t and pr e ssin g do wnw ard s .
When cleaning the filters, Othe rwi se , th e filte rs could be
do not k n oc k the m.
contorted and the performance of the dis hwashe r cou l d be d ecre ase d.
The control panel can be clea ned by u si ng a lightly dampe ned clot h .
Aft e r cl e an ing, m ake sure to dry i t tho r oug hly.
For t he exter ior, use a good applia nc e polish wax.
Never use s harp obj e ct s, sc o uring pa ds o r harsh c leaners on a ny part of the di s hw a sh er.
Cleaning The Door
To cle an th e edge around t he do or, yo u
cloth.
To avoid pe ne tration of wate r in to the door lock and el ect rical co mpo nen ts, do no t
use a spray cleaner of any ki nd.
Never u se a spr ay cleaner t o cl e an t he door panel a s it may d am age the do or lo c k
and electric al components.
Abrasiv e ag ents or so m e paper towels s hou ld not be used beca u se o f th e ris k of
scr atc h i ng o r leavi n g spots on th e stain l es s ste e l surfac e.
sh ould onl y use a s oft, ward and damp
Winterzing
ple ase take fros t protect io n measures on the dis hwasher in wi nter. Every fter wa shi ng cycle s ,
ple ase operate as follows
1 .Cut off th e elec trical power to th e dishwa sher at the supply so urc e.
2. Turn off the wate r supply a nd di sco nnect the wat er inl et pi pe from the wat er va lve.
3. Drai n the w ater from the inlet pipe a nd water v alv e. (Use a pa n to gather the wa ter )
4. Reco nnect th e wat er inlet pipe to the wa ter v alve.
5. Remove th e filt er at the bottom of th e tub and us e a sponge t o soa k up wa ter in the sump.
:
If you r dis hwa sher c annot wo rk beca use of t he ice,
please cont a ct professi onal se rvice pe rs ons.
time a
Cleaning the Spray Arms
It is necessary to c lean the s pra y arm s re gul a r ly fo r ha r d
wate r chemica l s wil l cl o g th e spra y arm jets an d bear i n gs.
To remove the up pe r s pray arm, hold the nut, rotat e the arm
clock wise to remov e i t.
To remove th e lower s pr ay arm, pull out the sp r ay arm u pwa rd .
Wash the ar ms in s oap y and warm water and us e a soft brush to
cl ean the je ts. R epl ace them after rinsin g them thor oughly.
17
Page 20

After Every Wash
Aft er ev er y wash, turn off the wa ter s up p ly to the
appli a nce a nd leave the do o r sli ghtly op en so that
moist u re an d odours ar e no t tra p pe d inside .
Remove the Plug
Befo re cleani ng or performing mainten ance, always
remove the p lug f rom the socket.
No Solvents or Abra sive Cleaning
To cle an the exterior and r ubb er parts of the di shw asher,
do not us e solven t s or abrasiv e cle ani ng products .
Only use a clo th with warm so apy wate r.
To rem ove sp ots o r st ain s f ro m the surface of t he
in teri or, us e a cloth da mp e ne d with water a n a little
vineg a r, or a clea n ing pro duc t mad e sp eci fica l ly fo r
dish w ash e rs.
When not in use for a Timelong
It is recommend t hat you r un a was h cy cle with the
dish washer e mpt y and then re mo v e the plug from the
soc k et , t urn o ff t h e wa ter supp ly and le ave the door of
the appl i ance sli g htly op e n. This w il l h elp t he door
sea l s to last longer and pr event od ou rs fr o m formin g
wit hi n th e applia n ce .
Moving the Applia nce
If the app liance m us t be mo ved, try to kee p it in the
vertical p os i tion. If a b solutely nec essary, it can be
posit ion e d on its back.
Seals
One of t h e fa c to rs th a t cau se odou r s to form in t he
dish washer n the seals.
Periodic cle a ning wi th a damp sp o nge will p re v e nt t his
from occ urri n g.
is re ma in ing food strap ped i
Th e instal lation of t he pipes
an d electr ica l e qu ipments
sh ould be do ne by profe ssionals.
Elec trical Shock elec trical power
before installing
Hazard. Disc onnect
dishwasher.
Failu re to do so can result in death or elec trical shock.
●
Installation preparation
The i nstallation po si tion of dis hwa sher sh o uld b e near t he exis ting in let a nd d rai n ho s es and p ow e r co rd.
One s id e of th e cabinet sink should be c ho s en to fac ilitate the co nne c tion of drai n ho ses of the dis h wa s her.
Note : please che ck t he accompanyin g ins tal lation accessorie s (ho ok for aes thetic pane l, screw)
18
Page 21

Please carefully read the installat ion i nstruction.
Illus t ratio ns of ca bi net dimen s io n s an d ins t al lation positio n of the dishw ash er
Prep a rat i on s sh o u ld b e made b efore mo vi ng th e dish was her to the install ation pla ce.
Choose a pla c e ne ar th e sink to fa c i lita t e the ins t al l a tion of i n let a nd d rai n hos es
1
(see figu re 1).
2
If dish wa s he r is instal l ed at the corner o f the ca b in et , th e re shoul d be some sp ac e
(illu strat e d in figur e 2) wh e n th e door is ope ne d.
【 】Figur e1
Cabinet dimensions
Less than 5mm
bet w een the t o p
of dishwasher a nd
cabin et and the
outer door al igned
to cabinet.
820mm
580mm
90 °
Electrical, drain and
water supply line
entrances
Space between cabinet
bottom and floor
600 mm
90 °
80
100
【 】Figur e2
Dis hwash er
Minim um space whe n
the do or is op e n ed
Do or of
dis hwash er
Minimum space of 50mm
●
Aesthetic panel's dimensions and installation
1
The ae st hetic wo o d en panel cou ld be processed according to the Fig u r e 3.
【 】Figure3
Th e aesthetic panel should
be processed in a cco r dan c e
wit h the illustra te d dim ensi ons
Cabinet
(Unit: mm)
19
Page 22

2 In st all th e hoo k on the aes thet ic woode n pan el a nd put the ho ok into the sl ot of the oute r door of
dishwas h er (see f igu re 4a ). After positi oning of the panel , fix th e panel on to the outer door by
screws and bolts(See fi gu re 4b) .
【 】Figure 4a
Installation of aesthetic panel
【 】Figure4b
Installation of aesthetic
wooden panel
. take away the four
1
short screws
. pin up the fo ur long
2
screws
20
Page 23

●
Tension adjustment of the door spring
The door springs ar e set at the factory to the pr oper tension for the outer door.
If aesthetic wooden panel are installed, you will have to adjust the door spring tension.
Rotate the adjusting screw to drive the adjustor to strain or relax the steel cable
(see figure 5).
Doo r sp ring tensi on is correct when
the doo r remains hor iz ontal in the
ful ly opened posit io n yet rises
to a cl ose with the slight lift of a
finger.
,
【 】Fig ure5
Tension adjustment
of the door spring
●
Connection of drain hoses
In se r t th e drai n hose into a dra in pipe with a minim u m diam eter of 40mm , or let it run into the s ink , ma k ing sur e to
avo i d bendin g or crimping it.
Th e height of t he drain p ip e must be les s th a n 10 00m m.
Front
Counter
NOTE
The top of the hose
must be less than
A
1000mm.
Drain pipe
B
21
φ 40mm
Page 24

●
Dishwasher installation steps
Install the furnit ure d oor to th e outer door of th e dishwash er us i ng the b rac kets provided . Re fer
1
to the template for posi tioning o f the bra cke t s.
2
Adj u st th e tension of the door spr i ngs by using an Allen key tu rn ing in a cloc kwis e mo ti on to
tig hten the left and righ t do o r springs. Failur e to do th is could cau se damage to your dis hwashe r
(I ll ust rat ion 2)
3 .
Connect the i nle t hos e to t he cold wat er su pply
4 .
Connect the drai n hose. Ref er to diagram (Fig ure 6)
5 .
Connect the pow er cord
6
Affix th e con dens ation st rip under the wor k su rfac e of cabi net. Please e nsu re th e co nde nsat ion
strip is flush wi th edge of work surfa ce.
7
Plac e the dis hwa sher into po sitio n.(Illustr atio n 4)
8
Level the dishwa she r. The re ar fo od c an be adjusted fr om the f ront of th e di shwasher by turning
th e Allen s crew in the middl e of the base of dishw asher u se an All en key ( I llus tration 5A ). To ad jus t
th e front feet, u se a flat scre w d river an d tur n the fro nt feet u ntil t he dishwasher is level (Illustr ation 5B ).
9 The dish was her mus t be secured in p lace . The re are two ways to do thi s:
A. Nor mal work sur face :Put the inst allat i on hook into the slo t of the si de plane an d secure it to the
work sur face wit h the wo od screws (I llust ration 6) .
B. Mar ble or gr anit e work to p:F ix the side wi th Screw. (Ill ustration 7).
.
【Figure 7】
22
Page 25

Dishwasher must be level for proper dish rack operation and wash performance.
1 Place a spirit level on door and rack track inside the tub as shown to check that the
dishwasher is .
2 level the dishwa sher by adjusting the three levelling legs individually.
3 When the dishwasher, please pay attention not to let the dishwashe r tip over.
levelling
levelled
【 】Figure 8
Illustration of feet adjustment
NOTE:
The maximum adjustment
height of the feet is 50 mm.
For personal safety:
Do not use an extension cord or an adapter plug
with this appliance.
Do not, under any circumstances, cut or remove
the earthing connection from the power cord.
Check level
Front to Ba ck
Spirit level
Ch ec k l eve l side to side
Plea se look a t t h e ra ting lab e l to know the ra t ing v ol ta ge and connec t t he dishwash er to the app rop riat e pow er s upp ly.
Use the r equired fuse 1 0 amp, time de la y fuse or c ircuit breaker rec om mended and pr o v id e sepa rate circ ui t s erving
only this app l ia nce.
Ensure the volt age an d frequ en cy of the p ow e r being cor res p ond s to
th os e on t he rati n g pl ate . On ly in s er t t he plug into an e lect rical socket wh ich is ear the d
prop erly. If th e electri ca l s ock et to which the a ppl i an c e mu st be co nn e ct ed is not
appropria te f or th e plug , repl ac e the sock et, rath er than using a adaptors or t he li ke as
th ey could ca use ov e rhe a ting an d burns.
23
Page 26

The appl iance mu s t be connected to th e wat er mai ns using new h os e-se ts.
The old ho se-sets sho u ld not be re used.
Water pr essu re m us t be b etween 0, 04 MPa and 1 MP a . If t he press u re is be low the m in i mum
con s ul t o ur Service Department for advice.
Pull The safety supply hoses completely out from storage compartment located at rear of dishwasher.
1
Tighter the screws of the safety supply hose to the faucet with thread 3/4inch.
2
Turn water fully on before starting the dishwasher.
3
Please close the h ydrant after use
Positioning the Appliance
Po s it ion the ap p li ance i n th e desired l oca t io n. The bac k should r est against the wa ll be hind i t, an d the sides,
al ong t h e adjacent cabi n et s or walls. The dishwasher is equipped with wa ter su ppl y and drain hoses that ca n
be positio ned ei ther to the rig ht or the le ft sides to fac ilitat e pro per inst alla tion.
How to Drain Excess Water From Hoses
If th e sink is 1 00 0 high er fro m the floor, the ex cess water in hoses ca nnot be draine d directly
in to th e sin k . It will b e n e cessa ry to d ra in exc es s w ater from hos es in to a bowl or su ita ble
con ta iner th at i s he ld out sid e and lower tha n t he s ink .
Water Outlet
Connect the wat er d rain ho se . Th e drain hose must be correc tl y fi tted to av oid w ate r lea ks .
Ensure that the wa te r inl et ho se i s not kinked or s q ua s hed .
Extension Hose
If you ne ed a drain h os e extensi o n, make su re to use a sim ilar drain ho se.
It m ust b e no longe r t ha n 4 met r e s; o t he rwise the cleanin g effe ct of the di s h wa s her could be re d uc e d.
Syphon Co nnection
The distance be tween th e dra in co nnectio n an d the bo ttom of the appli ance must n ot be l ong er than 100 0mm.
The wat er drain h ose should be fixed.
The following things should be checked before starting th e dishwasher.
1 The dishwasher is levelled and fixed properly
2 The inlet valve is open
3 To avoid any water leak, check if inlet valve is correctly screwed to the dishwash er
4 The wires are tightly connected
5 The power is switch ed on
6 The inlet and drain hoses are knotted
7 All packing materia ls and printings have been rem oved from the dishwash er.
After installation, please make sure to keep this manual.
The content of this manual is very helpful to the users.
24
Page 27

Fuse blown, or the
circuit breaker
tripped
Replace fuse or reset circuit breaker. Remove any other
appliances sharing the same circuit with the dishwasher
Power supply is not
turned on
Water pressure is low
Door of dishwasher
not properly closed.
Kink in drain hose
Filter clogged
Kitchen sink clogged
Improper detergent
Spilled rinse-aid
Make sure the dishwasher is turned on and the door is
closed securely.
Make sure the power cord is properly plugged into the
wall socket.
Check that the water supply is connected properly and
the water is turned on.
Make sure to close the door properly and latch it.
Check drain hose.
Check t he coars e fil ter
(se e section titl ed " Cleaning The Fi lter ")
Check the kitchen sink to make sure it is draining well.
If the problem is the kitchen sink not draining ,you may
need a plumber rather than a serviceman for dishwashers.
Use o nly the spec ial dishw ash er detergen t to avoi d
suds. If this o ccur s, o pen the dishwasher and l et
suds evaporate A dd 1 gal lon of co ld water to th e tu b.
Clos e an d lat ch the d ishwasher, t hen sele ct any c ycle .
Dish washer will d rain out the water at the first ste p.
Open the doo r aft er drain i ng is over and ch eck if th e
suds have dis app eared.
Always wipe up rinse-aid spills immediately.
Deter gen t wit h col orant
was used
Hard water minerals
The affected items are
not corrosion resistant.
A programme was not
run after dishwasher
salt was added.
Traces of salt have
gotten into the wash cycle.
The lid of the softer
is loose
A sp ay arm is
r
knocking against
an item in a basket
Items of crockery
are loose in the
wash cabinet
This may be caused
by on-site installation
or the cross-section of
the piping.
Ma ke sur e that th e de tergent is the one wit hou t
color ant.
To clean the interior, use a damp sponge with
dishwasher detergent and wear rubber gloves.
Never use any other cleaner than dishwasher
detergent for the risk of foaming or suds.
Always run the quick wash programme .
without any crockery in the dishwasher and
without selecting the Turbo function (if present),
after adding dishwasher salt.
Check the lid .Ensure the fix is fine.
Interrupt the programme, and rearrange the items
which are obstructing the sp ay arm.r
Interrupt the programme,
and rearrange the items of crockery.
This has no influence on the dishwasher function.
If in doubt, contact
a suitably qualified plumber.
25
Page 28

The dishes were not
loaded correctly.
See notes in " Loading the Dishwasher Baskets ".
The programme was
not powerful enough.
Not enough detergent
was dispensed.
Items are blocking
the path of sp ay arms.r
The filter combination
in the base of wash
cabinet is not clean or
is not correctly fitted.
This may cause
the sp ay arm jets
r
to get blocked.
Combination of soft
water and too much
detergent.
Aluminum utensils
have rubbed against
dishes.
Dishes block
detergent cups.
Improper loading
Too little rinse-aid
Select a more intensive programme.
See" Wash Cycle Table ."
Use more detergent, or change your detergent.
Rearrange the items so that the sp ay can rotate freely.r
Clean and/or fit the filter combination correctly.
Clean the sp ay arm jets. See "Cleaning the Spray
Arms".
Use le ss d etergent if y ou have soft wate r and se l ect
a shorter cycle to was h the glas swa re and to get
th em clean.
Use a mild abrasive cleaner to eliminate those marks.
Re-loading the dishes properly.
Load the dishwasher as suggested in the directions.
Increase the amount of rinse-aid/refill the rinse-aid
dispenser.
r
In case of malfunctions,
E1
E4
E8
E9
Longer inlet time.
Overflow.
Failure of orientat ion of di stributar y valve.
Keep pressin g a but ton fo r more
than 30 s econ ds.
Dishes are removed
too soon
Wrong program
has been selected
Use of cutlery with
a low-quality coating
Do no t em pty y our dish was her immediatel y aft e r
washi ng. O pen the do o r sl i ghtly so tha t the
st eam can es c ape . Beg in unlo a di ng th e dish was he r
on ly once the dishes ar e ba rely war m to the tou c h.
Empty the low er baske t first to p re v ent a ny w ater
fr om dripp ing i nto the lower basket.
With a sho rt pr ogram, t he washing temp era ture
is lower, d ecre asin g cleani ng performa n ce .
Choos e a pro g ram wit h a long w as h ing time .
Water drainage is more difficult with these items.
Cutlery or dishes of this type are not suitable for
washing in the dishwasher.
the appliance will displa y error codes to warn you:
Faucet is no t op ened, or wa t er in ta ke is
restricted, o r wa ter pr essure is too lo w.
So me element of th e dis hwa she r lea ks
Circ u it is open or br ok en distributa ry valve .
Wat e r leak ing into the base boar d.
If overflow occurs, turn off the main water supply before calling a service.
If the base pan overflows:
- Turn off the main water supply before calling for service
- Remove the excess water before restarting the dishwasher.
26
Page 29

Hei ght : 815mm
Width : 598 mm
with th e d oo r close d
Depth : 550mm
( )
Water pressure: 0.04-1.0MPa
Pow er s uppl y: see rating label
Capa city: 13 place settings
27
Page 30

DE D IETR ICH
DV H1342J
13
26 2
0.92
22 0
42
Build under
26 2
81. 5 cm
55 cm
193 0 W
Page 31

Page 32

Any maintenance on your equipment should be undertaken by:
-Either your dealer,
-Or another qualified mechanic who is an authorize d agent for the brand appliances.
When making an app ointment, state the full reference of your equipment (mode l, type and
serial number). This infor mation appears on the manufacturer's nam eplate attach ed to
your equipment.
 Loading...