

Decolav 5265 User Manual
VANITY INSTALLATION INSTRUCTIONS
1
CARE AND CLEANING
• DO NOT OVERTIGHTEN DRAIN. Overtightening of the drain can damage your DECOLAV® product.
• DO NOT clean the product with Detergents, Acid, Abrasives, Harsh Cleaners or a cloth with a coarse surface (S.O.S.® Pads, Scotch Brite®
Pads). This is good advice for any plumbing xture regardless of material.
• DO NOT leave any cleaning agents other than water on your DECOLAV® product.
• DO NOT allow your DECOLAV® product to unnecessarily encounter other solid objects.
• DO clean your DECOLAV® product. Wipe with a damp cloth and dry with a soft cloth. If necessary, a general mild soap and water solution
can be used. Use a mild furniture polish to clean wood frame.
RECOMMENDED TOOLS
Tape Measure
STEP #1
Scroll Saw Drill
o Carefully remove vanity from carton and place safely aside.
o Turn o water supply to faucet.
o Remove existing vanity.
o Determine the location on the wall where the vanity will be installed.
o Measure the vanity width and height and mark outline on wall.
o Locate and mark wall studs. .
STEP #2
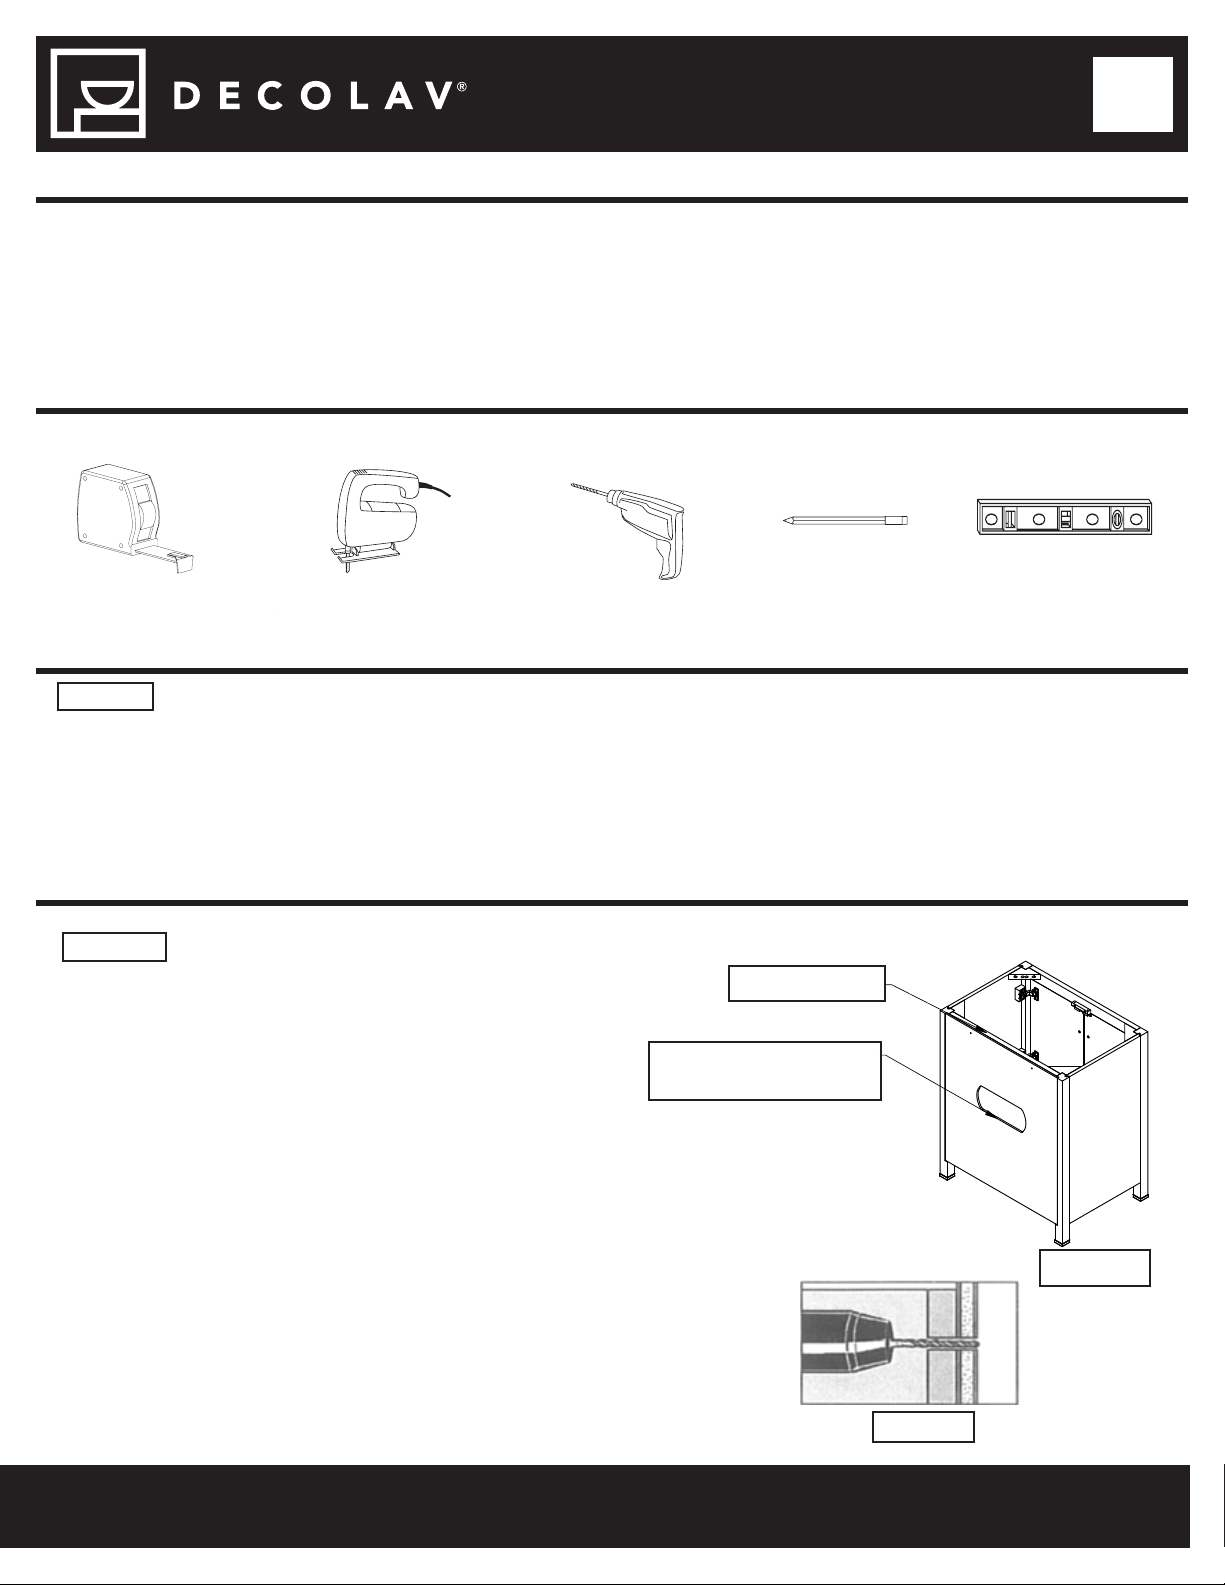
o Measure and mark the location of plumbing pipes and
lines.
o Make cutout in back using a circular or saber saw
allowing enough room for plumbing lines or pipes.
(See Figure 1).
o Carefully position the vanity in desired location.
o Level the vanity side-to-side and front-to-back using
a carpenter’s level and ajust leg levelers. (Leg levelers
are located on the bottom of each leg.
o Drill 3/16" (0.48 cm) diameter holes in vanity back
where screws will be positioned and centered on wall
stud. (See Figure 2). Drill through the top back rail and
back panel, DO NOT drill through back panel alone.
Customer to mark and
make cutout
Pencil
Top Back Rail
Level
Figure A
Notes:
o Pictured vanity may be di erent that actual vanity. This document is for instructional purposes only
o We recommend two people to install this vanity
Customer Service: 561-274-2110
www.decolav.com
•191010•
Figure B
LET YOUR DREAMS COME ALIVE, YOUR PASSIONS
BECOME REALITY, BE THE ENVY OF YOUR NEIGHBORS
®
VANITY INSTALLATION INSTRUCTIONS
STEP #3
o Install countertop and sink per manufacturers instructions.
o Knobs/pulls are located inside the vanity for shipping.
o Attach knobs/pulls in the pre-drilled holes on the doors/drawers with the screws
provided.
o NOTE: SINK NOT INCLUDED ON SOME MODELS, COUNTER TOP NOT INCLUDED
ON SOME MODELS, FAUCET, WATER SUPPLIES, DRAIN AND WASTE SYSTEM NOT
INCLUDED.
o Install faucet, water supplies, drain and waste system according to the
manufacturer’s installation instructions.
2
Figure C
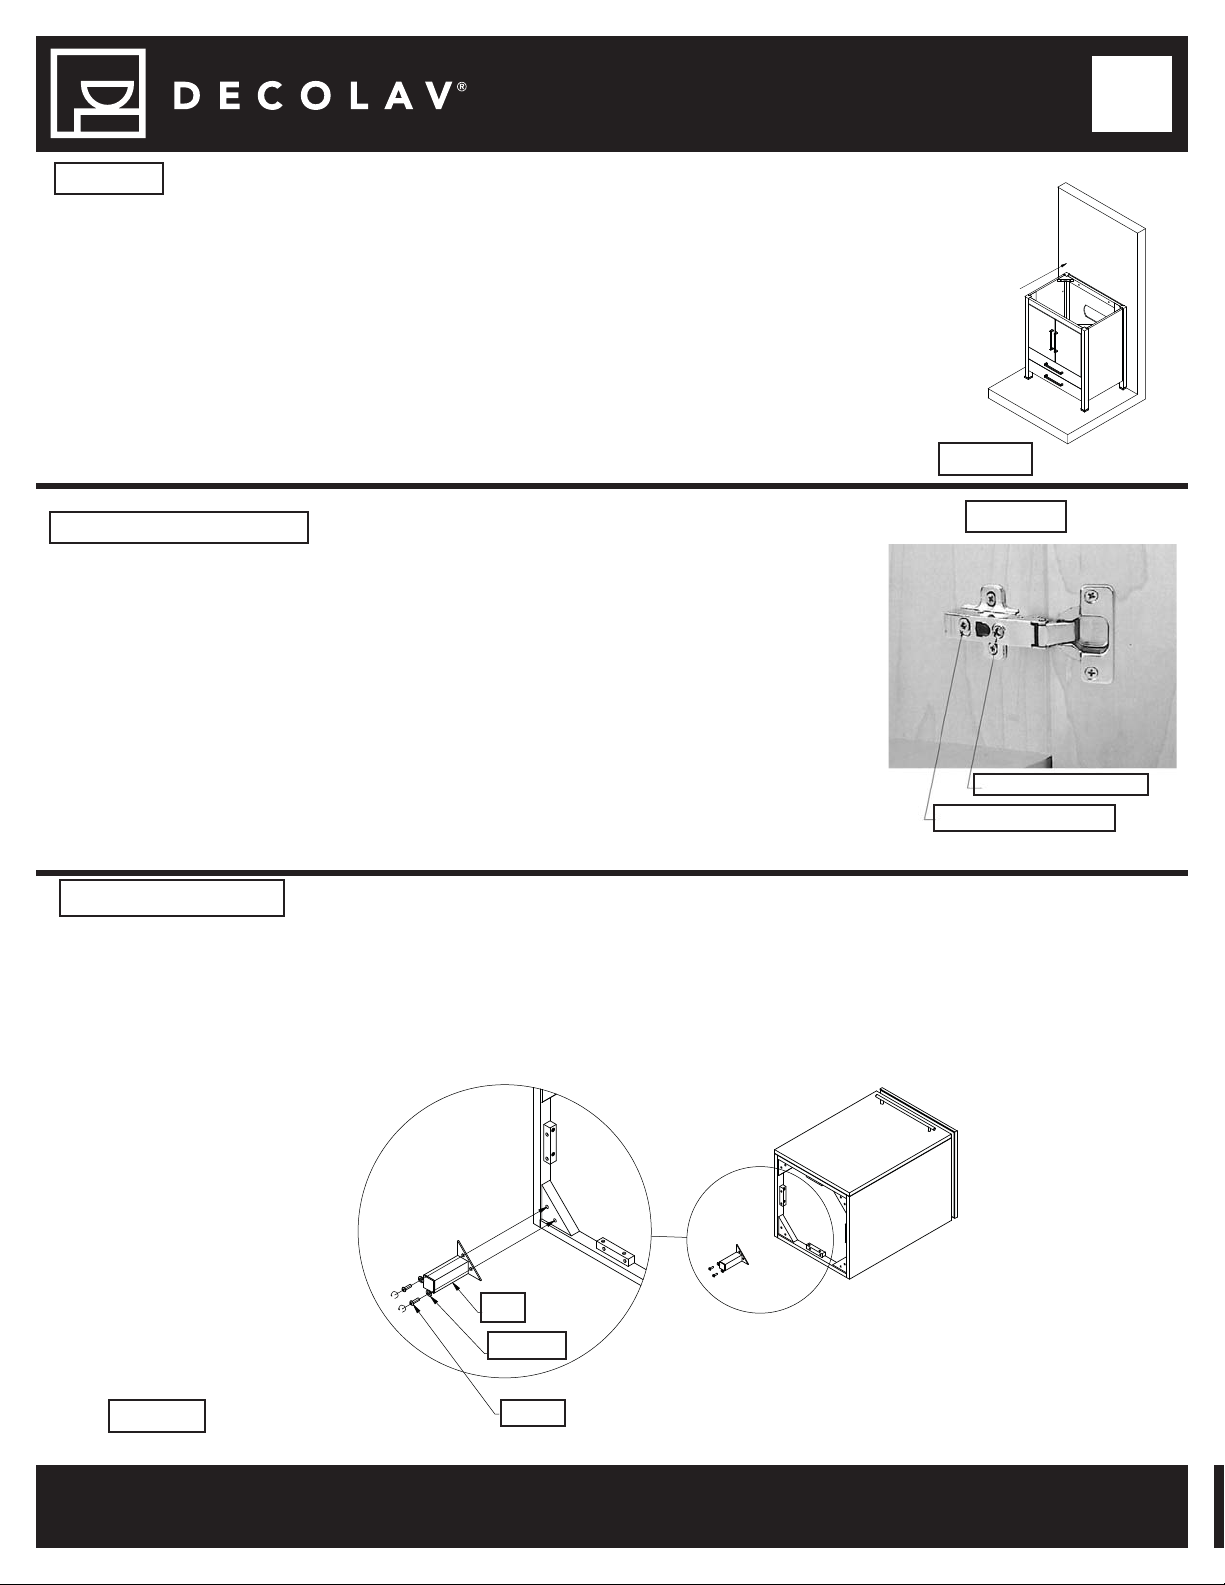
HINGE ADJUSTMENT
o The rear screw will move the door closer to the end panel or away from the
end panel. If the door is rubbing the end panel, use this adjustment screw.
Remember to adjust both hinges on the door for the desired clearance.
o To get the doors even across the top and bottom edges of the doors use the
side to side adjustment screw. Remember to adjust both hinges on the door
for the correct position.
o Doors were adjusted at the factory prior to shipping but due to the variances
in home walls and oors the hinges may need slight adjustment.
Attaching the Legs
o Remove the legs from the package.
o Position Leg over the pre-bored screw hole.
o Using the supplied screws attach the leg to the bottom of the vanity.
o Repeat for the remaining legs.
Figure D
Side to Side Adjustment
Front to back adjustment
Figure E
Customer Service: 561-274-2110
www.decolav.com
Leg
Washer
Screw
LET YOUR DREAMS COME ALIVE, YOUR PASSIONS
BECOME REALITY, BE THE ENVY OF YOUR NEIGHBORS
®
•191010•
 Loading...