

Decolav 5255 User Manual
PRODUCT DESCRIPTION
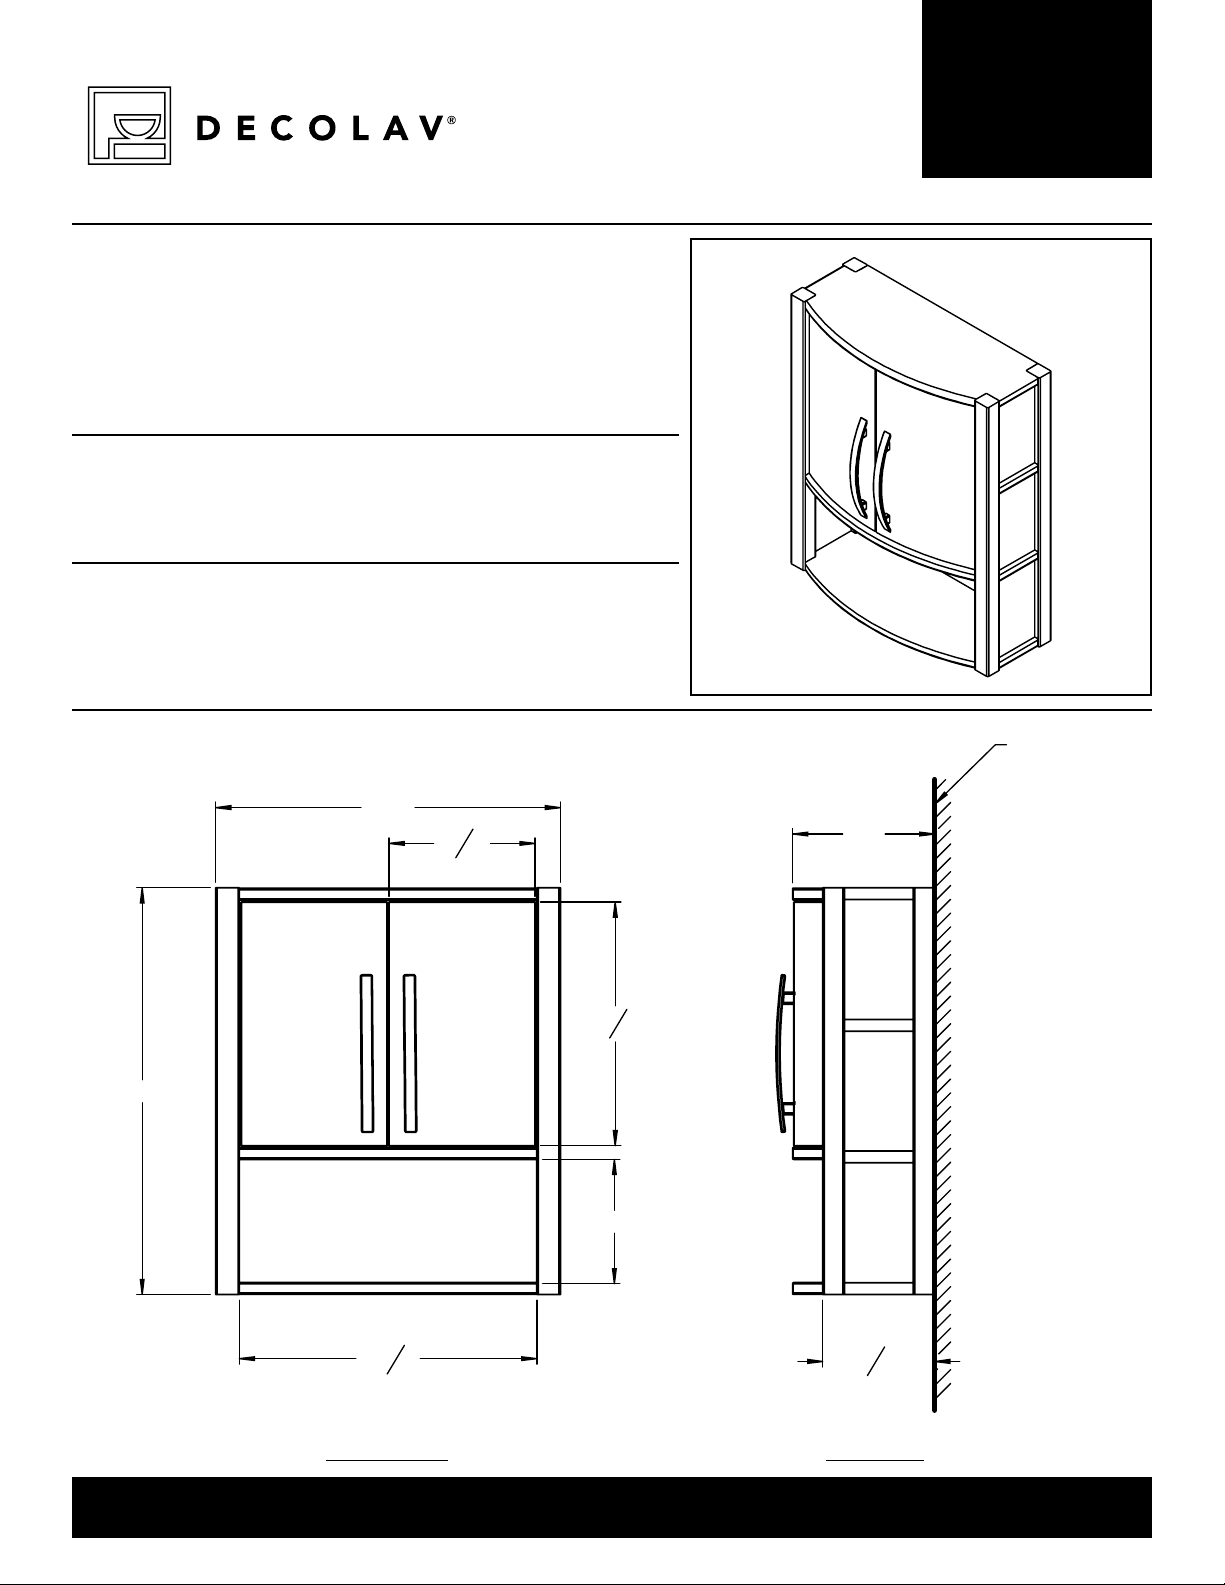
5255 Series 22” Wall Cabinet
• Available in White (WHT), Dark Walnut (DWN), or
Maple (MPL) Finishes
• Solid Wood Frame
• Curved Front Doors
• Satin Nickel Hardware
PRODUCT MEASUREMENTS
• Width: 22”
• Depth: 9”
• Height: 26”
RECOMMENDED ACCESSORIES
• 5254 Vanity
• 9716 Mirror
SPEC SHEET
5255 SERIES
ROUGHING-IN DIMENSIONS
Please Note: All drawings contain the necessary measurements which are subject to standard
industry tolerances. They are stated in inches and are non-binding. Exact measurements, in
particular for customized installation scenarios, can only be taken from the finished product.
22"
5
"
9
8
9
"
15
16
26"
8"
Finished
Wall
9"
FRONT VIEW
Customer Service: 561-274-2110
www.decolav.com
19
1
"
8
3
"
7
16
SIDE VIEW
WALL CABINET INSTALLATION
INSTRUCTIONS
CARE AND CLEANING
• DO NOT clean the product with Detergents, Acid, Abrasives, Harsh Cleaners or a cloth with a coarse surface (S.O.S.® Pads, Scotch Brite® Pads).
This is good advice for any plumbing xture regardless of material.
DO NOT allow your DECOLAV
•
DO clean your DECOLAV
•
be used. Use a mild furniture polish to clean wood frame.
DO clean your DECOLAV
•
RECOMMENDED TOOLS
Tape Measure
®
product to unnecessarily encounter other solid objects.
®
product. Wipe with a damp cloth and dry with a soft cloth. If necessary, a general mild soap and water solution can
®
mirror. Wipe with a glass cleaner and a clean soft cloth. Use a mild furniture polish to clean wood frame.
Phillips
Screwdriver
Drill
Level Pencil
1
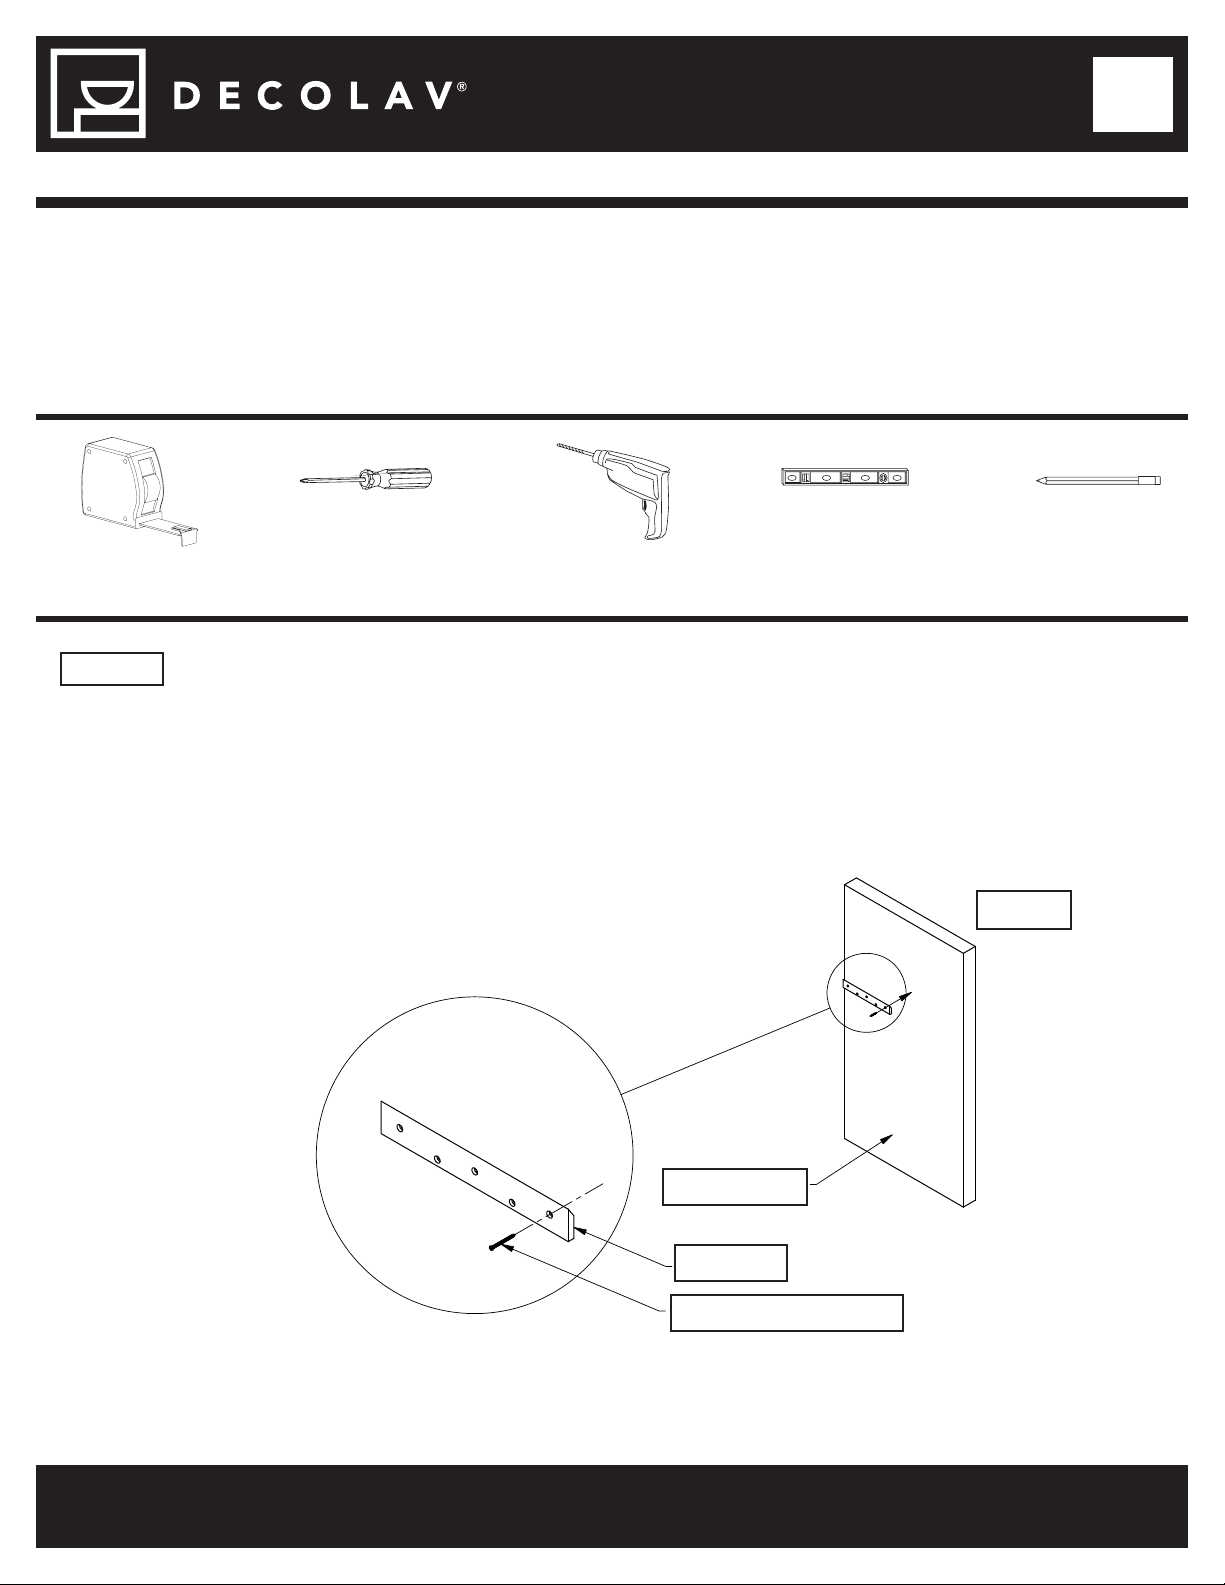
STEP #1
o Determine at what height the wall cleat is to be hung. Mark with pencil.
o Using a level make a horizontal line where the mirror is to be hung that is parallel to the oor.
o Place the wall cleat on this line in the desired location and mark for the drywall anchor holes (Note: if a hole
will hit a wall stud use a screw instead of a drywall anchor).
o Bore holes for the drywall anchors per manufactures recommendation and install drywall anchors.
o Attach the wall cleat to the wall by passing screws through the cleat and into the drywall anchor.
Figure A
Finished Wall
Wall Cleat
Screw or Wall Anchor
NOTE: Due to vast di erence in building materials, wall anchors and screws are not provided but are recomended throughout instructions.
Customer Service: 561-274-2110
www.decolav.com
LET YOUR DREAMS COME ALIVE, YOUR PASSIONS
BECOME REALITY, BE THE ENVY OF YOUR NEIGHBORS
®
 Loading...