

Decolav 1766 User Manual
KATESTON MIRROR WITH LED LIGHTING
37 27/23"
960.9
27"
685.8
28"
711.2
1 7/16"
36.2
Finished Wall
23 7/32"
590
31 7/16"
798.3
item #1766-SSA
USE AND CARE GUIDE
THANK YOU FOR CHOOSING DECOLAV
We appreciate the trust and condence you have placed in DECOLAV® through the purchase of our products. We strive to continually create and manufacture quality
products designed to enhance your home. Visit us online at decolav.com for our full line of products, and follow us on Facebook, Twitter and Pinterest for the most
up-to-date information, product care tips and trends.
PRE-INSTALLATION
NOTE: Actual wood color, grain pattern and other appearance
characteristics may vary within each veneer species and grade.
NOTE: It is recommended that a professional contractor be
retained for the installation of this product.
• Unpack your new DECOLAV product and inspect it for damage. Keep the product in its original package until you are ready to install it
• The oor and walls must be square and level
• Preparation of the oors and walls, including all additional wall supports, may be required
• Observe all local plumbing and building codes
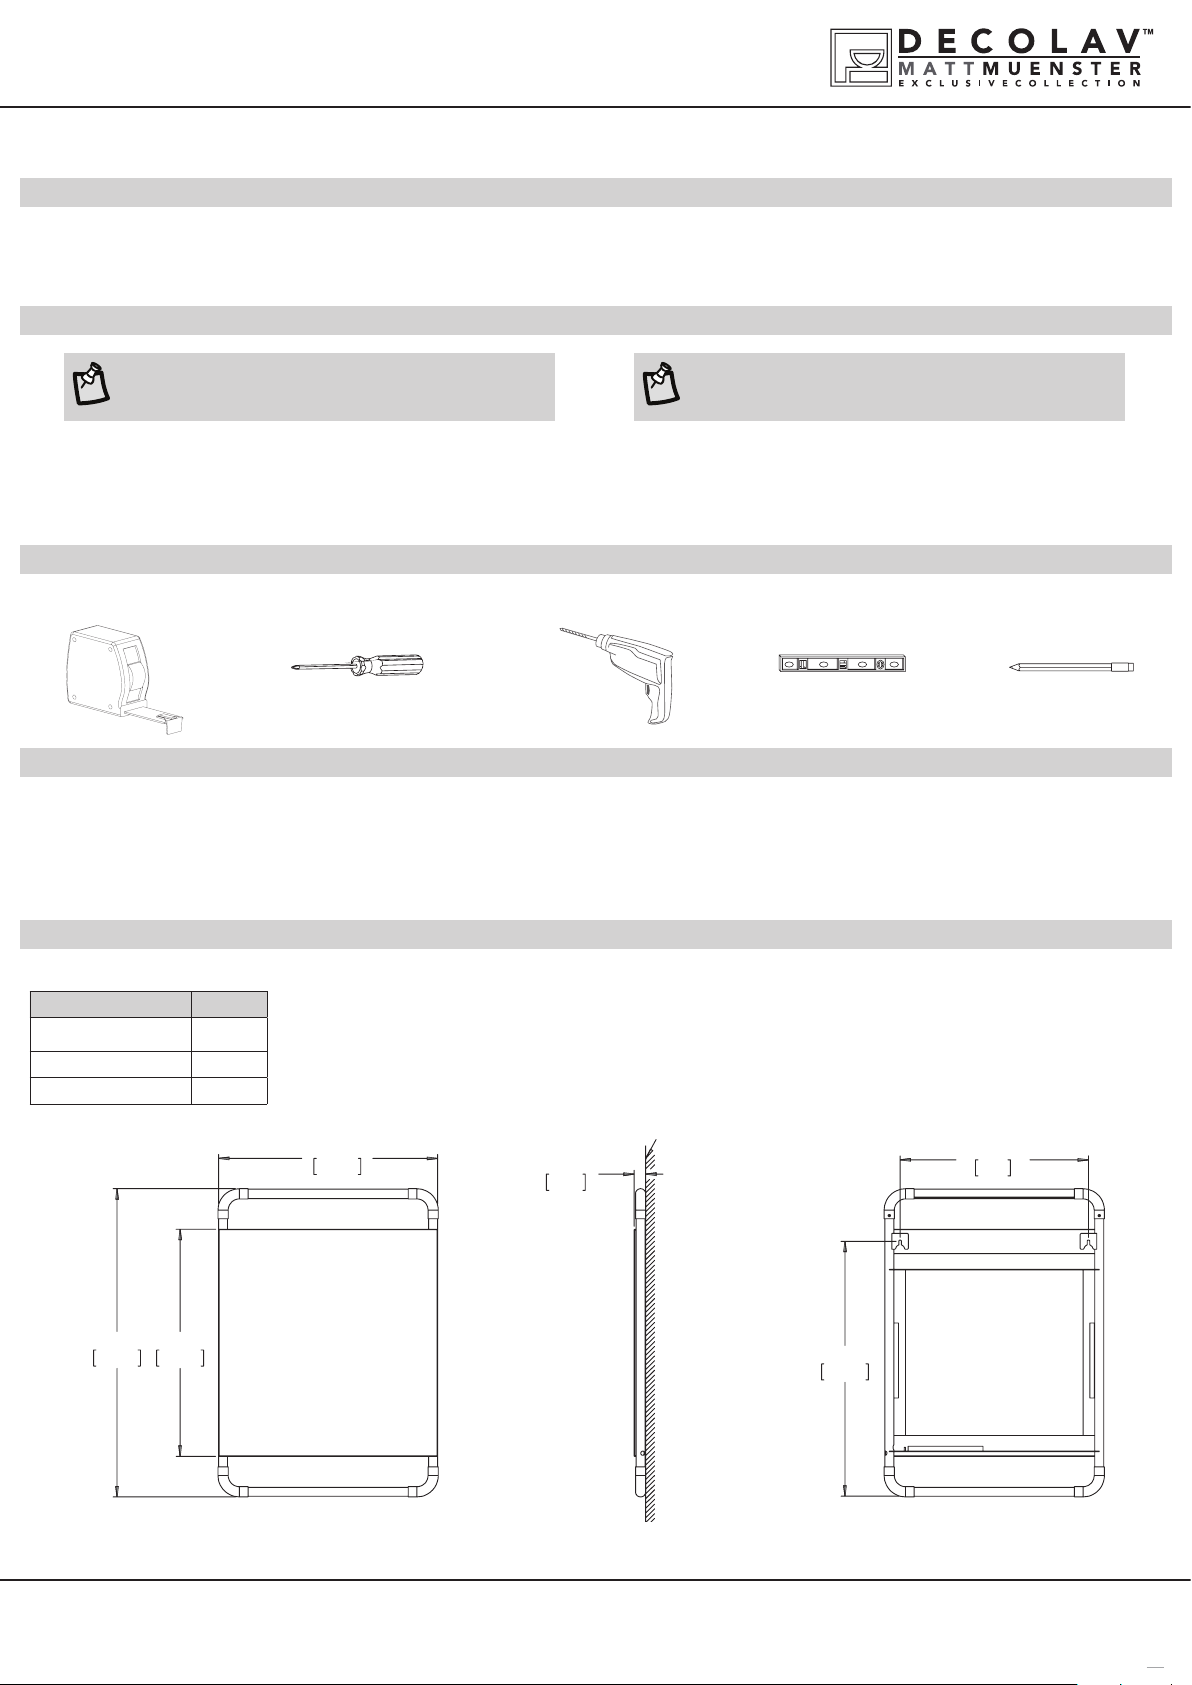
RECOMMENDED TOOLS
tape measure phillips screwdriver drill level pencil
CARE AND CLEANING
• Do clean your DECOLAV product to maintain its new appearance over the years. Wipe with a damp cloth and dry with a soft cloth. If necessary, a general glass cleaner
can be used. Use only a mild furniture polish to clean wood frame and shelves
• Do not clean the product with detergents, acids, abrasives, harsh cleaners or cloths with a coarse surface (S.O.S.® pads, Scotch Brite® pads etc.)
• Do not allow your DECOLAV product to unnecessarily encounter other solid objects
PRODUCT DESCRIPTION
item #1766-SSA
Part Quantity
Mirror assembly
Wall screw 2
Wall anchor 2
Mirror dimensions
27” W x 1.4” D x 37.8” H
1
side viewfront view
back view
© DECO LAV, INC. 2014
PLEASE CONTACT 18663326528 FOR FURTHER ASSISTANCE
DECOLAV.COM
1
KATESTON MIRROR WITH LED LIGHTING
23 7/32"
590
G
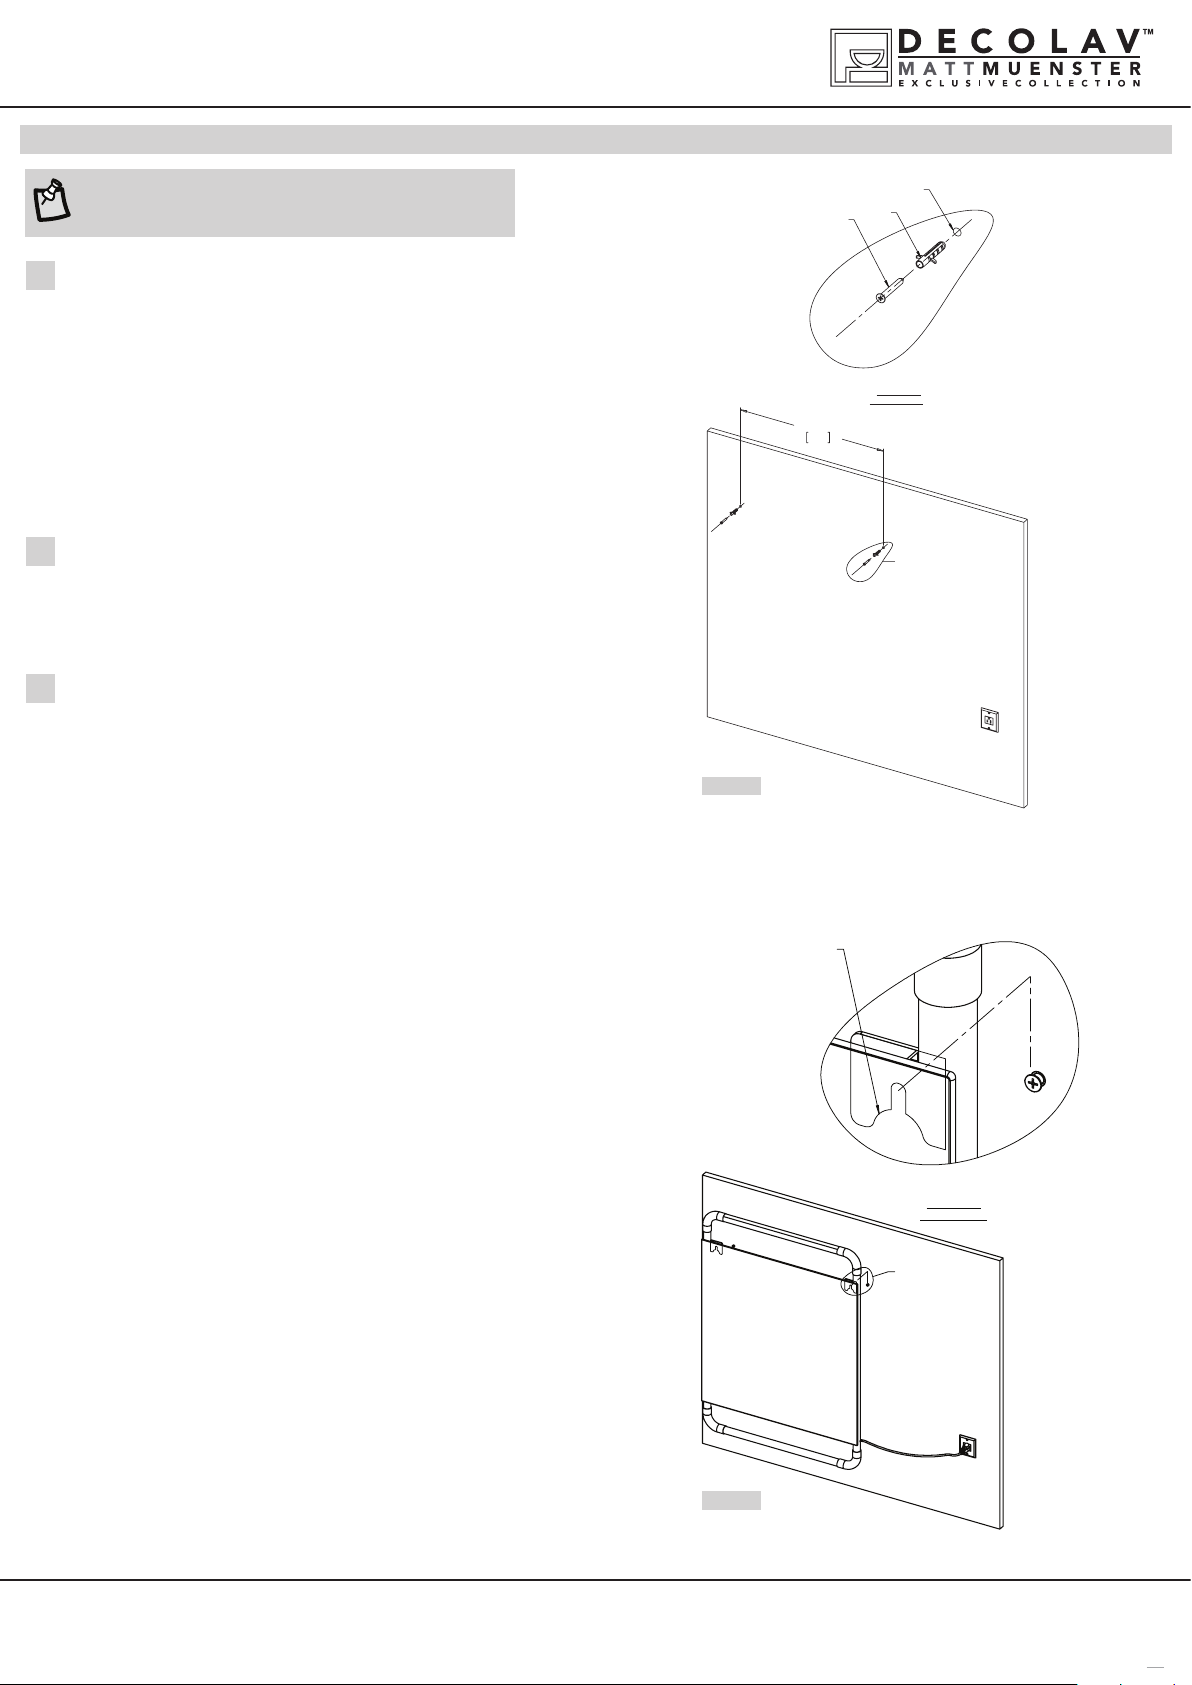
DETAIL G
SCALE 1 : 3
Wall hole
Wall
anchor
Wall
screw
H
DETAIL H
SCALE 1 : 2
Hook on the mirror body
item #1766-SSA
ASSEMBLY INSTRUCTIONS
NOTE: Two individuals are recommended for installation of this
product.
SETTING UP YOUR NEW WALL MOUNTED
1
MIRROR
• Carefully remove your new mirror from carton and place safely aside
• Determine at what height the wall cleat is to be hung. Mark with pencil
• Using a level, make a horizontal line where the mirror is to be hung that is
parallel to the oor
• mark for the drywall anchor holes (Note: if a hole will hit a wall stud use a
screw instead of a drywall anchor)
• Drill holes for the drywall anchors and install drywall anchors. See gure 1
CONNECTING THE POWER
2
• Make sure not to crimp or pinch wire for safe connections. Plug in the
power cord (please check local electrical codes for the height of the outlet,
as each area may be dierent. We recommend using a GFCI outlet.)
MOUNT MIRROR TO FINISHED WALL
3
• Raise the Mirror above the anchor and lower Mirror into
• position. See gure 2
• Slight side to side adjustments can be made by lifting up slightly on the
mirror or sliding the mirror left and right
Figure 1
Hook on the mirror body
H
DETAIL H
SCALE 1 : 2
© DECO LAV, INC. 2014
Figure 2
PLEASE CONTACT 18663326528 FOR FURTHER ASSISTANCE
DECOLAV.COM
2
 Loading...