

Decolav 1750 User Manual
ETHANPOINTE BATH VANITY
18"
457
1 1/4"32
1 3/8"
35
3"76
13 1/2"
343
1 1/2"
38
18"
457
14 21/32"
372
Finished Wall
item #1750-TSW / 1750-WEG
USE AND CARE GUIDE
THANK YOU FOR CHOOSING DECOLAV
We appreciate the trust and condence you have placed in DECOLAV® through the purchase of our products. We strive to continually create and manufacture quality
products designed to enhance your home. Visit us online at decolav.com for our full line of products, and follow us on Facebook, Twitter and Pinterest for the most
up-to-date information, product care tips and trends.
PRE-INSTALLATION
NOTE: Actual wood color, grain pattern and other appearance
characteristics may vary within each veneer species and grade.
NOTE: It is recommended that a professional contractor be
retained for the installation of this product.
• Unpack your new DECOLAV product and inspect it for damage. Keep the product in its original package until you are ready to install it
• The oor and walls must be square and level
• Shut the water supply o when replacing an existing xture
• Preparation of the oors and walls, including all additional wall supports, may be required
• Observe all local plumbing and building codes
RECOMMENDED TOOLS
tape measure phillips screwdriver drill level pencil
CARE AND CLEANING
• Do clean your DECOLAV product to maintain its new appearance over the years. Wipe with a damp cloth and dry with a soft cloth. If necessary, a general mild soap and
water solution can be used. Use only a mild furniture polish to clean wood frame
• Do not clean the product with detergents, acids, abrasives, harsh cleaners or cloths with a coarse surface (S.O.S.® pads, Scotch Brite® pads, etc.).
• Do not allow your DECOLAV product to unnecessarily encounter other solid objects
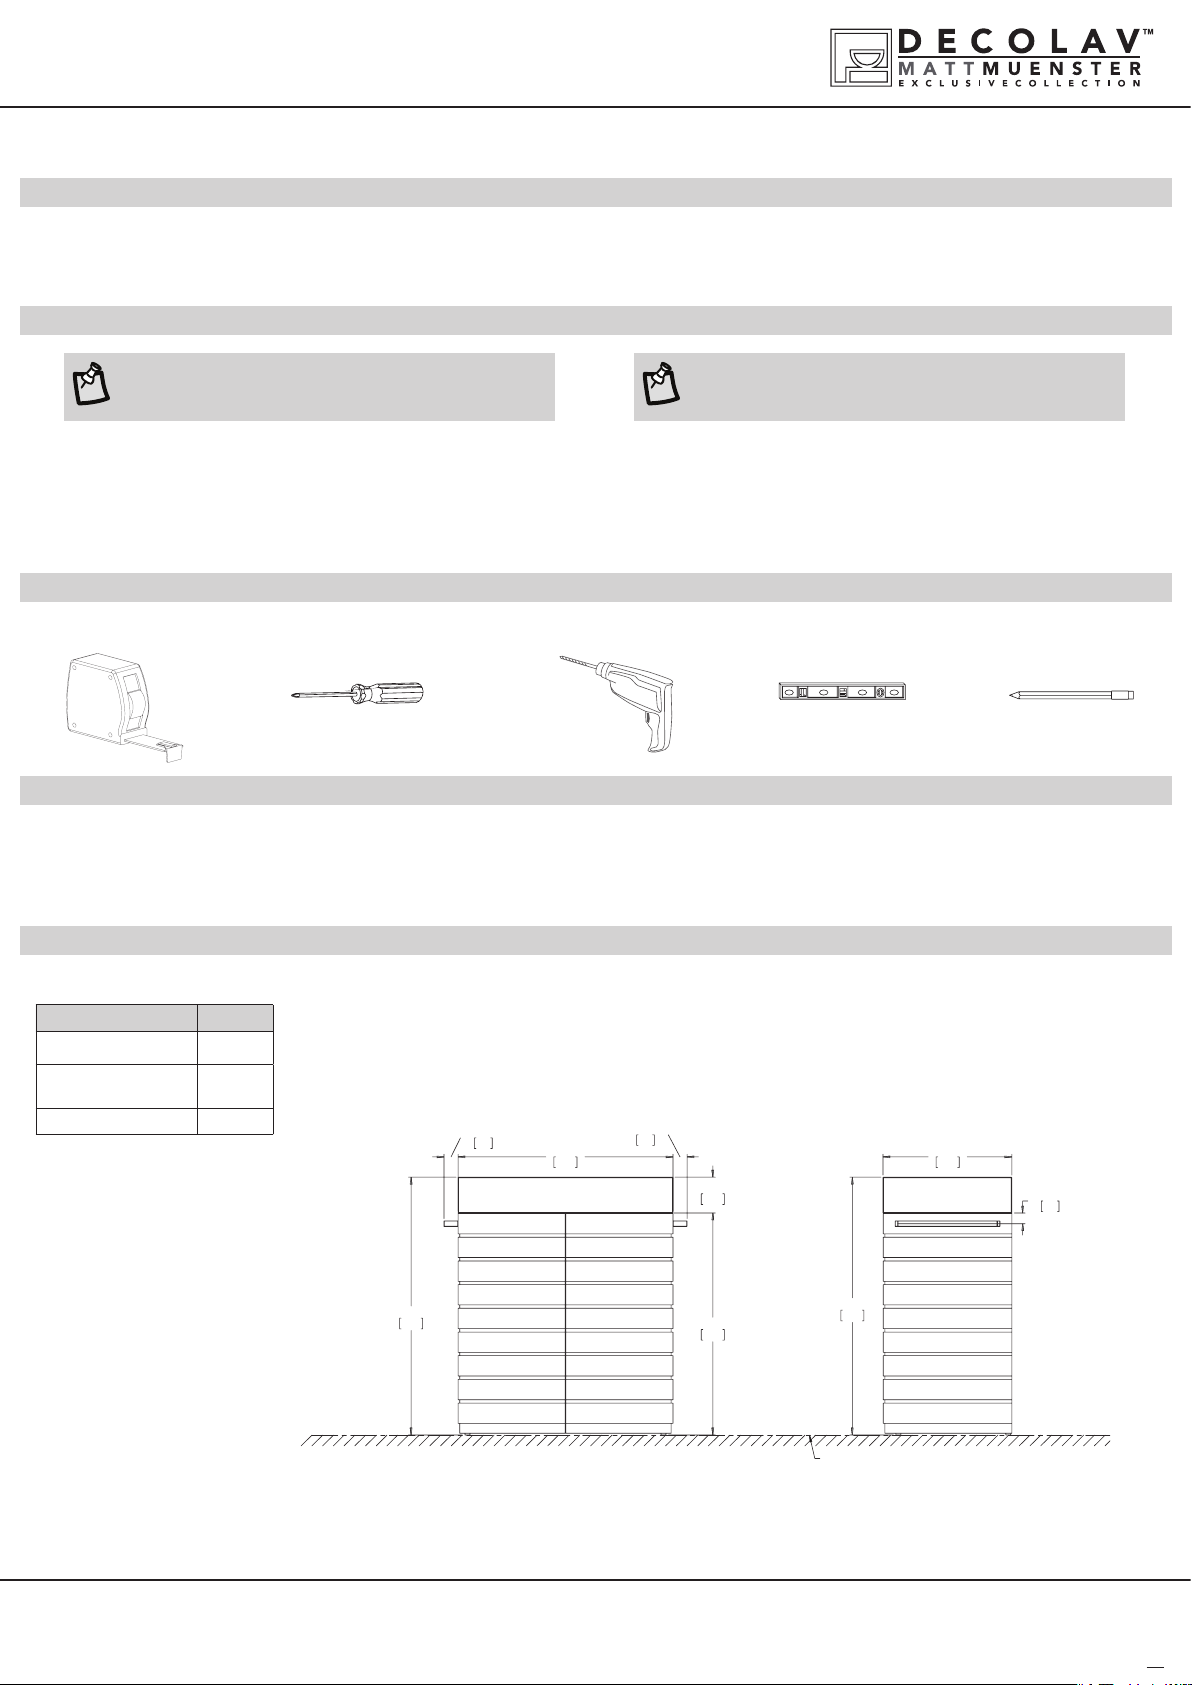
PRODUCT DIMENSIONS AND PARTS LIST
item #1750-TSW / 1750-WEG
Part Quantity
Vanity body
Towel bars
(Polished and Brushed)
Towel bar screw 4
Vanity dimensions:
30” W x 18” D x 36” H
with towel bar:
34” W x 18” D x 36” H
1
2 each
35 31/32"
914
1 31/32"
50
30"
762
Lavatory (sold seperately)
front view side view
1 31/32"
50
5"
127
35 31/32"
30 31/32"
787
914
Finished Floor
18"
457
1 1/2"
38
© DECO LAV, INC. 2014
PLEASE CONTACT 18663326528 FOR FURTHER ASSISTANCE
DECOLAV.COM
1
ETHANPOINTE BATH VANITY
Apply Silicone Here
Towel bar
Vanity body
Lavatory
(Not Provided
Purchased Separately)
item #1750-TSW / 1750-WEG
ASSEMBLY INSTRUCTIONS
NO
TE: Use Decolav drain item #9290-CP/SN/PN/DB,
9296-CP/SN/PN/DB or #9298-CP/SN/PN/DB.
Decolav cannot guarantee leakage wih other manufacturer drains.
1
SETTING UP YOUR NEW VANITY
• Carefully remove your new vanity from carton and place safely aside
• Turn o water supply to faucet
• Remove existing vanity
• Determine the location in the bathroom the vanity will be installed
• Measure the vanity width and height and mark outline on wall
• Move the vanity into place and level with the adjustable glides on bottom of
vanity
• Locate and mark wall studs
2
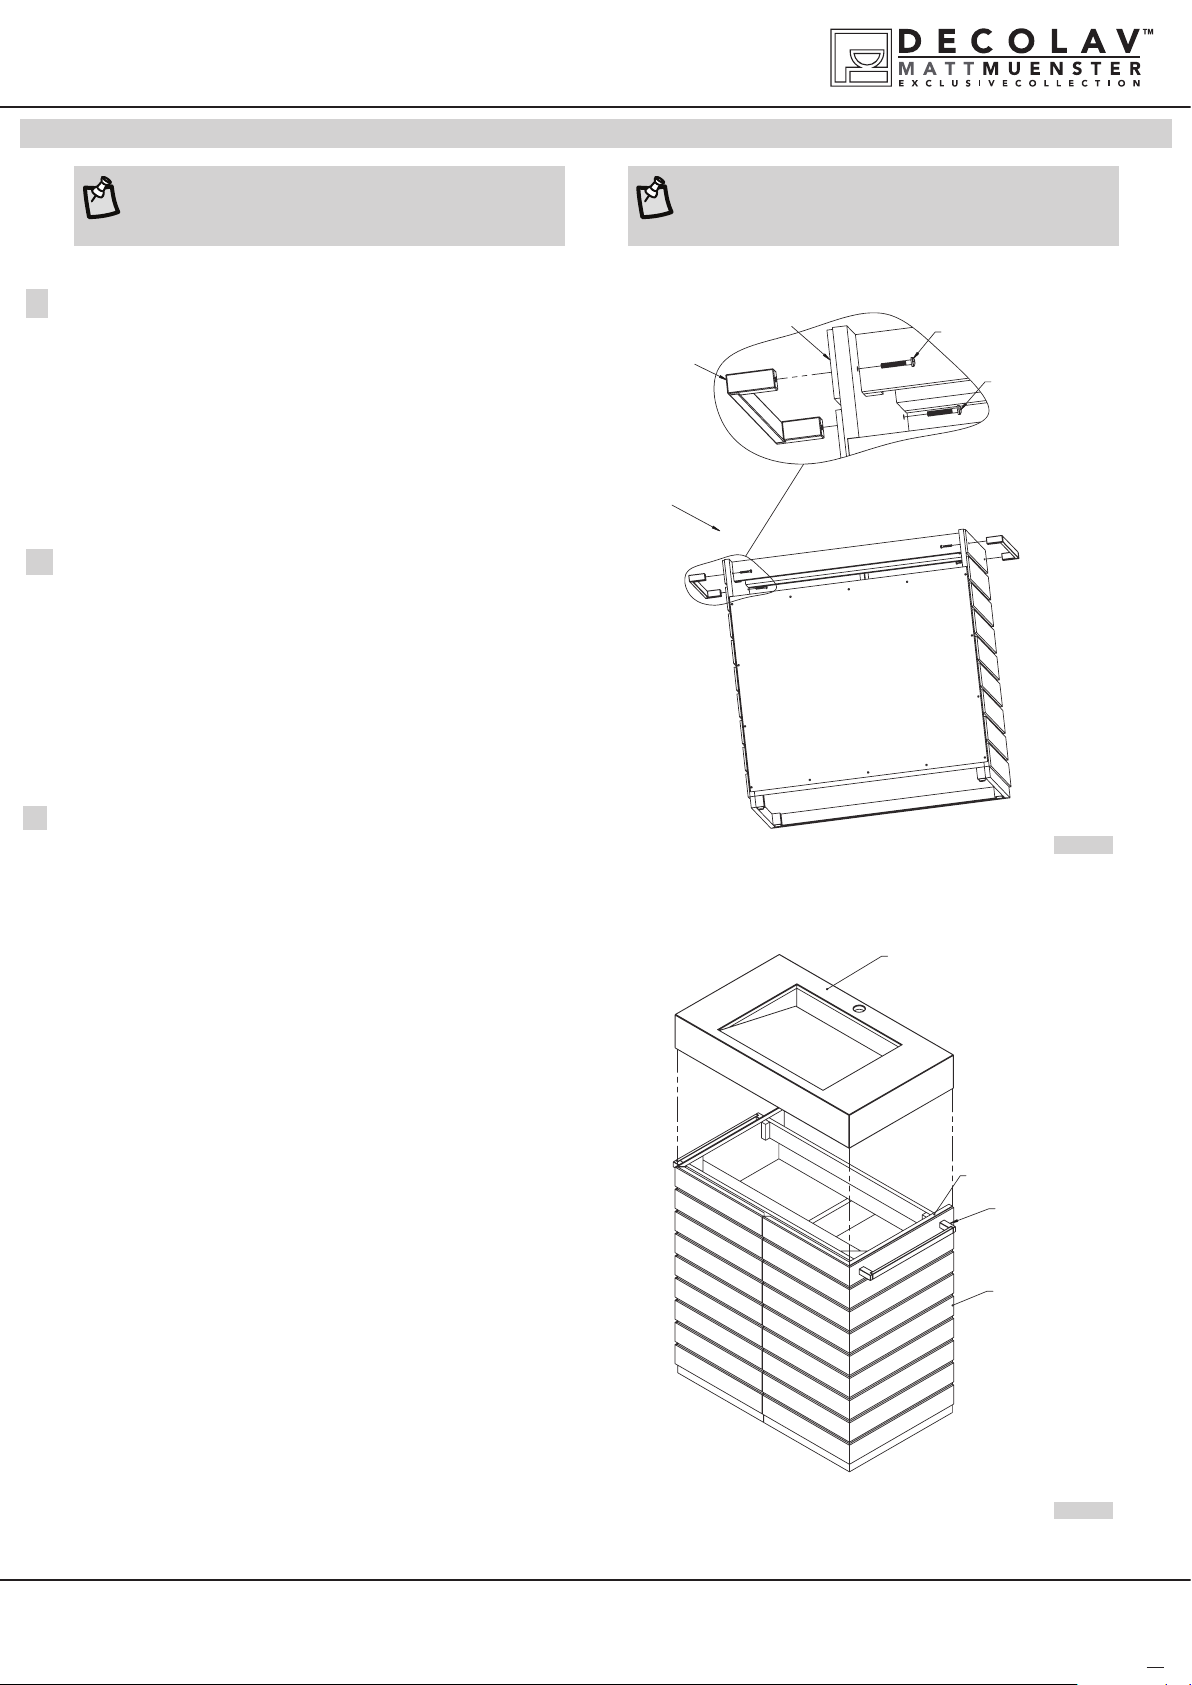
INSTALL TOWEL BAR
• Polished nish and Brushed nish Towel Bar are included
• Choose your preferred nish of towel bar and install them to your vanity. See
gure 1
NOTE: Use Decolav decorative bottle trap item #9102-CP/SN/
PN/DB to complete the look.
Vanity body
Towel bar screw
Towel bar
Towel bar screw
Vanity body
3
INSTALLING QUARTZ COUNTERTOP WITH
INTEGRATED LAVATORY
• Quartz countertop with Integrated Lavatory is sold separately
• Place the Quartz Countertop with Integrated Lavatory on top of the vanity
cabinet. Adjustments may be necessary to align correctly. See Figure 2
Lavatory
(Not Provided
Purchased Separately)
Figure 1
Apply Silicone Here
Towel bar
Vanity body
© DECO LAV, INC. 2014
PLEASE CONTACT 18663326528 FOR FURTHER ASSISTANCE
Figure 2
DECOLAV.COM
2
 Loading...