

Page 1
INSTALLATION INSTRUCTIONS
D206-LED
Large Flood
IMPORTANT SAFETY INSTRUCTIONS
1. Read carefully before installing fixture. Retain for future reference.
To prevent electrical shock, turn off electricity at fuse box before proceeding.
2. Failure to follow instructions may result in serious injury or death.
3. Upon receipt the fixture, thoroughly inspect for any freight damage which should be brought to the attention of
the delivery carrier. Compare the catalog description listed on the package slip with the fixture label on the housing to
assure you have received material.
4. This fixture must be wired in accordance with the international electrical code and applicable local codes and
ordinances. Proper grounding is required to insure personal safety. Carefully observe the correct grounding procedure
under installation section.
5. DECO luminaires may be damaged if connected to conduit systems containing water - Article 300-5G of National
Electric Code requires that “Conduits or raceways through which moisture may contact energized live parts shall be
sealed or plugged at either or both ends”.
*Deco Lighting assumes no responsibility for claims arising out of improper or careless handling or installation of this product.
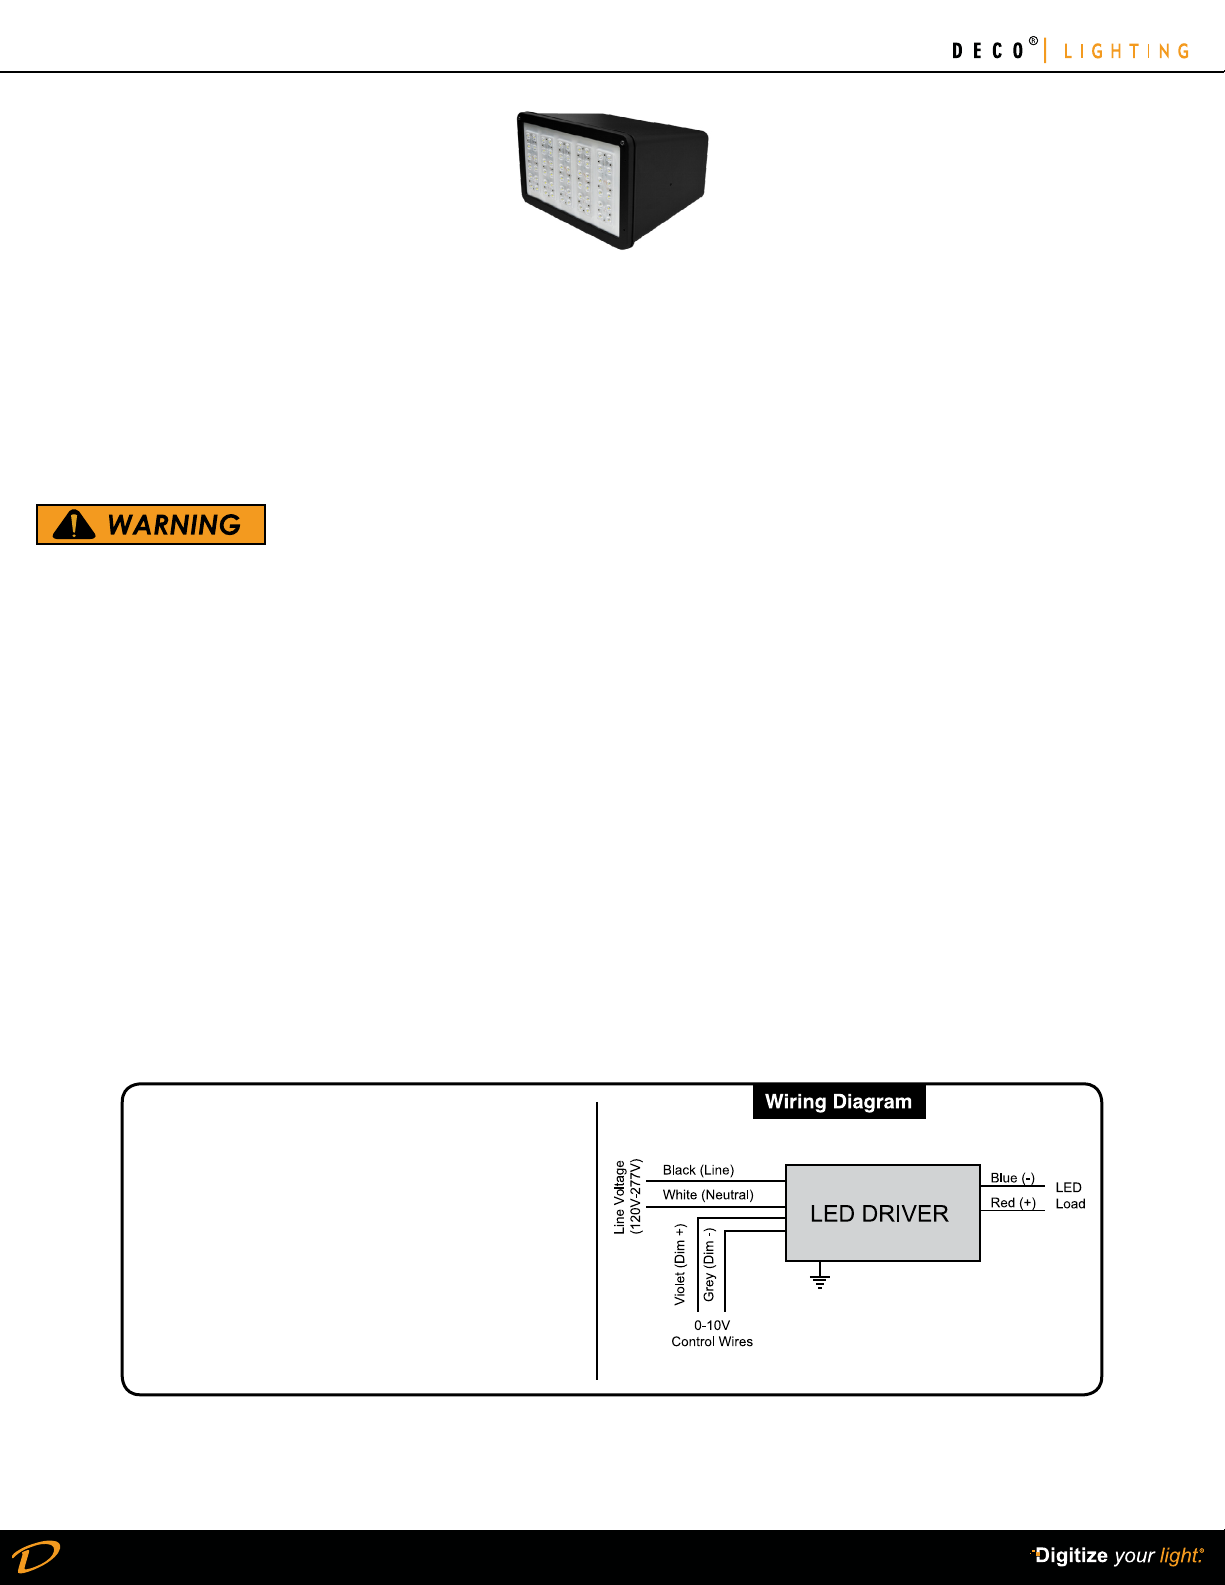
General Wiring Diagram
Electrical Connection
1. Connect BLACK (line) driver lead to voltage supply Line position
(HOT).
2. Connect driver WHITE lead to the NEUTRAL supply position.
3. Connect the GREEN ground lead to the supply ground lead.
If using 0-10V dimming:
4. Connect VIOLET lead to supply POSITIVE dimming lead.
5. Connect GREY lead to the supply NEGATIVE dimming lead.
If NOT using 0-10V dimming:
6. Ensure VIOLET and GREY 0-10V dimming leads are properly
capped.
Deco Lighting practices a program of continuous product improvement, and as a result product specications change frequently. We reserve the right to change
product specications without notice. Contact Deco for the latest product information.
2917 Vail Ave.Commerce, CA 90040
•
800-613-3326 • info@getdeco.com • www.getdeco.com
1
Page 2
INSTALLATION INSTRUCTIONS
D206-LED
Large Flood
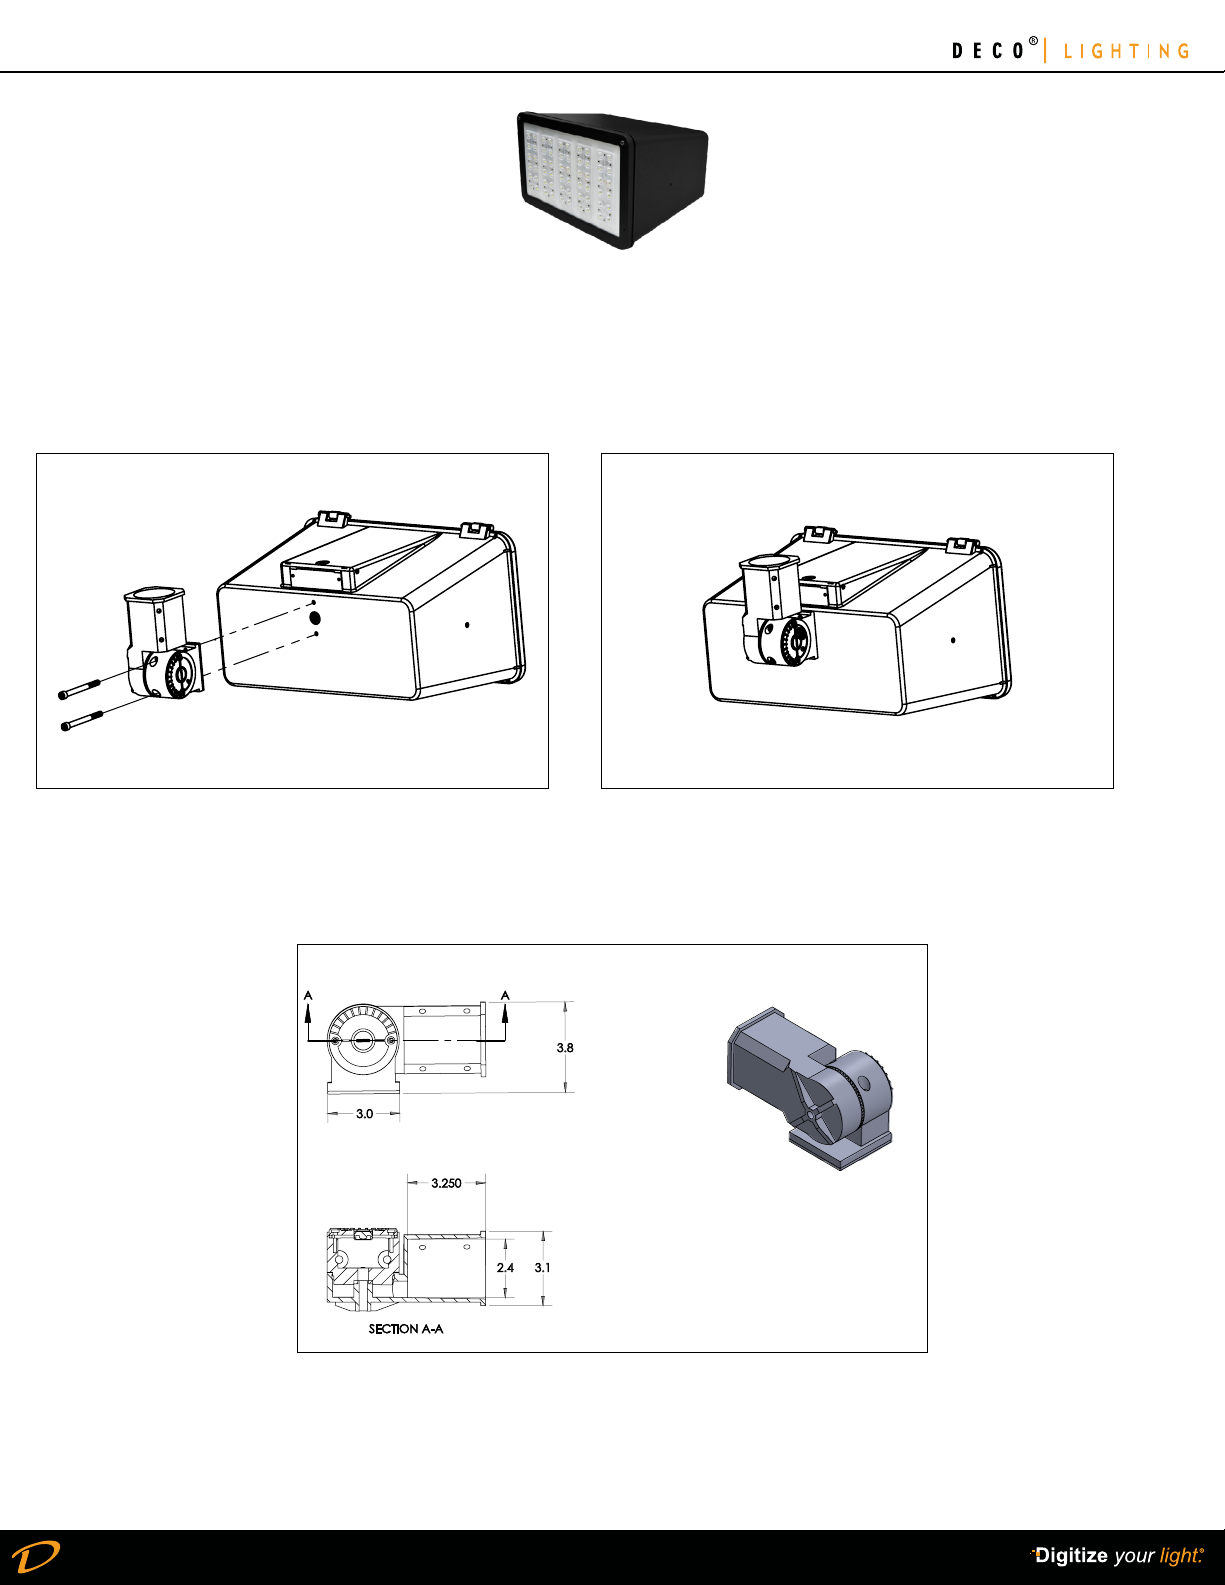
Slipfitter Installation:
1. Align the Slipfitter mounting holes with the (2) mounting holes on the rear side of the luminaire housing. (Fig. 1)
Fig. 1
2. Place the Slipfitter against the housing, and route the Line, Neutral, and Ground wires through the arm.
3. Fasten the arm to the housing using (2) included 1/4-20 bolts. (Fig. 2)
4. Loosen the (4) set screws on the sides of the arm so that the pole will not interfere with the bolts.
5. Connect the Line, Neutral, and Ground wires from the pole to the luminaire using the appropriate connectors.
6. Slide the pole completely into the arm and ensure that the luminaire is at the desired angle.
7. Tighten the (4) set screws to fasten the luminaire to the pole.
Fig. 2
Dimensional Drawings
Yoke Mount:
1. Drill (1) wire hole and (2) mounting holes using the dimensions in the attached diagram.
2. Connect the luminaire to the mounting surface using two included retaining bolts.
3. Feed the cable into an appropriate tting to maintain a watertight seal.
Deco Lighting practices a program of continuous product improvement, and as a result product specications change frequently. We reserve the right to change
product specications without notice. Contact Deco for the latest product information.
2917 Vail Ave.Commerce, CA 90040
•
800-613-3326 • info@getdeco.com • www.getdeco.com
2
 Loading...