

Page 1

DIGITAL Personal Workstation
Installation and Setup Guide
Part Number: EK-ALMIG-SI. A01
April 1998
a/au-Series
Digital Equipment Corporation
Maynard, Massachusetts
Page 2

April 1998
Digital Equipment Corporation makes no representations that the use of its products in the manner described in this
publication will not infringe on existing or future patent rights, nor do the descriptions contained in this publication
imply the granting of licenses to make, use, or sell equipment or software in accordance with the description.
Possession, use, or copying of the software described in this publication is authorized only pursuant to a valid
written license from DIGITAL or an authorized sublicensor.
© Digital Equipment Corporation 1998. All rights reserved.
The following are trademarks of Digital Equipment Corporation: DIGITAL, OpenVMS and the DIGITAL logo.
The following are third-party trademarks:
Microsoft and MS-DOS are registered trademarks and Windows NT is a trademark of Microsoft Corporation.
UNIX is a registered trademark in the United States and other countries, licensed exclusively through X/Open
Company, Ltd.
Page 3

FCC Information - Class B
This equipment has been tested and found to comply with the limits for a Class B digital device, pursuant to Part 15
of the FCC rules. These limits are designed to provide reasonable protection against harmful interference in a
residential installation.
Any changes or modifications made to this equipment may void the user's authority to operate this equipment.
This equipment generates, uses, and can radiate radio frequency energy and, if not installed and used in accordance
with the instructions, may cause harmful interference to radio communications. However, there is no guarantee
that interference will not occur in a particular installation. If this equipment does cause harmful interference to
radio or television reception, which can be determined by turning the equipment off and on, the user is encouraged
to try to correct the interference by one or more of the following measures:
•
•
•
•
The user may find the following booklet prepared by the Federal Communications Commission helpful: How to
Identify and Resolve Radio-TV Interference Problems. This booklet is available from the U.S. Government Printing
Office, Washington, D.C., 20402. Stock No. 004-00398-5.
All external cables connecting to this basic unit need to be shielded. For cables connecting to option boards, see
the option manual or installation instructions.
This digital apparatus does not exceed the Class B limits for radio noise emissions set out in the radio interference
regulations of the Canadian Department of Communications.
Reorient or relocate the receiving antenna
Increase the separation between the equipment and receiver
Connect the equipment into an outlet on a circuit different from that to which the receiver is connected
Consult the dealer or an experienced radio/TV technician for help
Page 4

help
Page 5

Table of Contents
1 Getting Started
Before You Begin................................................................................................... 1–1
Initial System Inventory...................................................................................1–1
Pre-Startup Checklist ....................................................................................... 1–2
Creating a Comfortable Work Environment..................................................... 1–2
Installing Your System............................................................................................1–4
Network Connection........................................................................................1–5
Connecting External System Devices...............................................................1–6
Starting Your System..............................................................................................1–8
Preloaded Operating System Software.............................................................. 1–9
Turning Off Your System ....................................................................................... 1–9
Microsoft Windows NT............................................................................. 1–9
DIGITAL UNIX........................................................................................ 1–9
OpenVMS............................................................................................... 1–10
System Security.................................................................................................... 1–10
Chassis Lockdown Hasp................................................................................. 1–10
Kensington Lock............................................................................................ 1–10
Passwords ...................................................................................................... 1–11
2 Setting Up an Operating System
Starting a Windows NT Installation........................................................................ 2–1
Starting a DIGITAL UNIX or OpenVMS Installation ............................................. 2–5
Updating Firmware................................................................................................. 2–5
Microsoft Windows NT Operating System Firmware....................................... 2–6
Using the Flash Update Utility from AlphaBIOS....................................... 2–6
Updating Firmware from AlphaBIOS........................................................2–6
Preparing a Firmware Floppy Diskette ...................................................... 2–6
v
Page 6

Contents
DIGITAL UNIX and OpenVMS Operating System Firmware.......................... 2–6
Update Utility........................................................................................... 2–6
Using the Flash Update Utility from the SRM Console ............................. 2–7
3 Troubleshooting
Tips........................................................................................................................ 3–1
Logging Equipment................................................................................................ 3–2
System Troubleshooting ......................................................................................... 3–2
4 Customer Support
Product Information................................................................................................ 4–1
Support Resources/Checklist................................................................................... 4–1
vi
Page 7
Welcome
This guide describes how to install, set up, and troubleshoot your DIGITAL Personal
Workstation a/au-Series system. Topics covered include:
• System inventory
• Ergonomics
• Connection of external devices
• System installation
• Preloaded operating system software
• System security
• Troubleshooting
• Customer support
The following table shows symbols used in this guide and their meanings:
Symbol Meaning
WWW
Preface
Indicates a reference to material located on a Web site.
Indicates an inventory step or checklist.
vii
Page 8
Preface
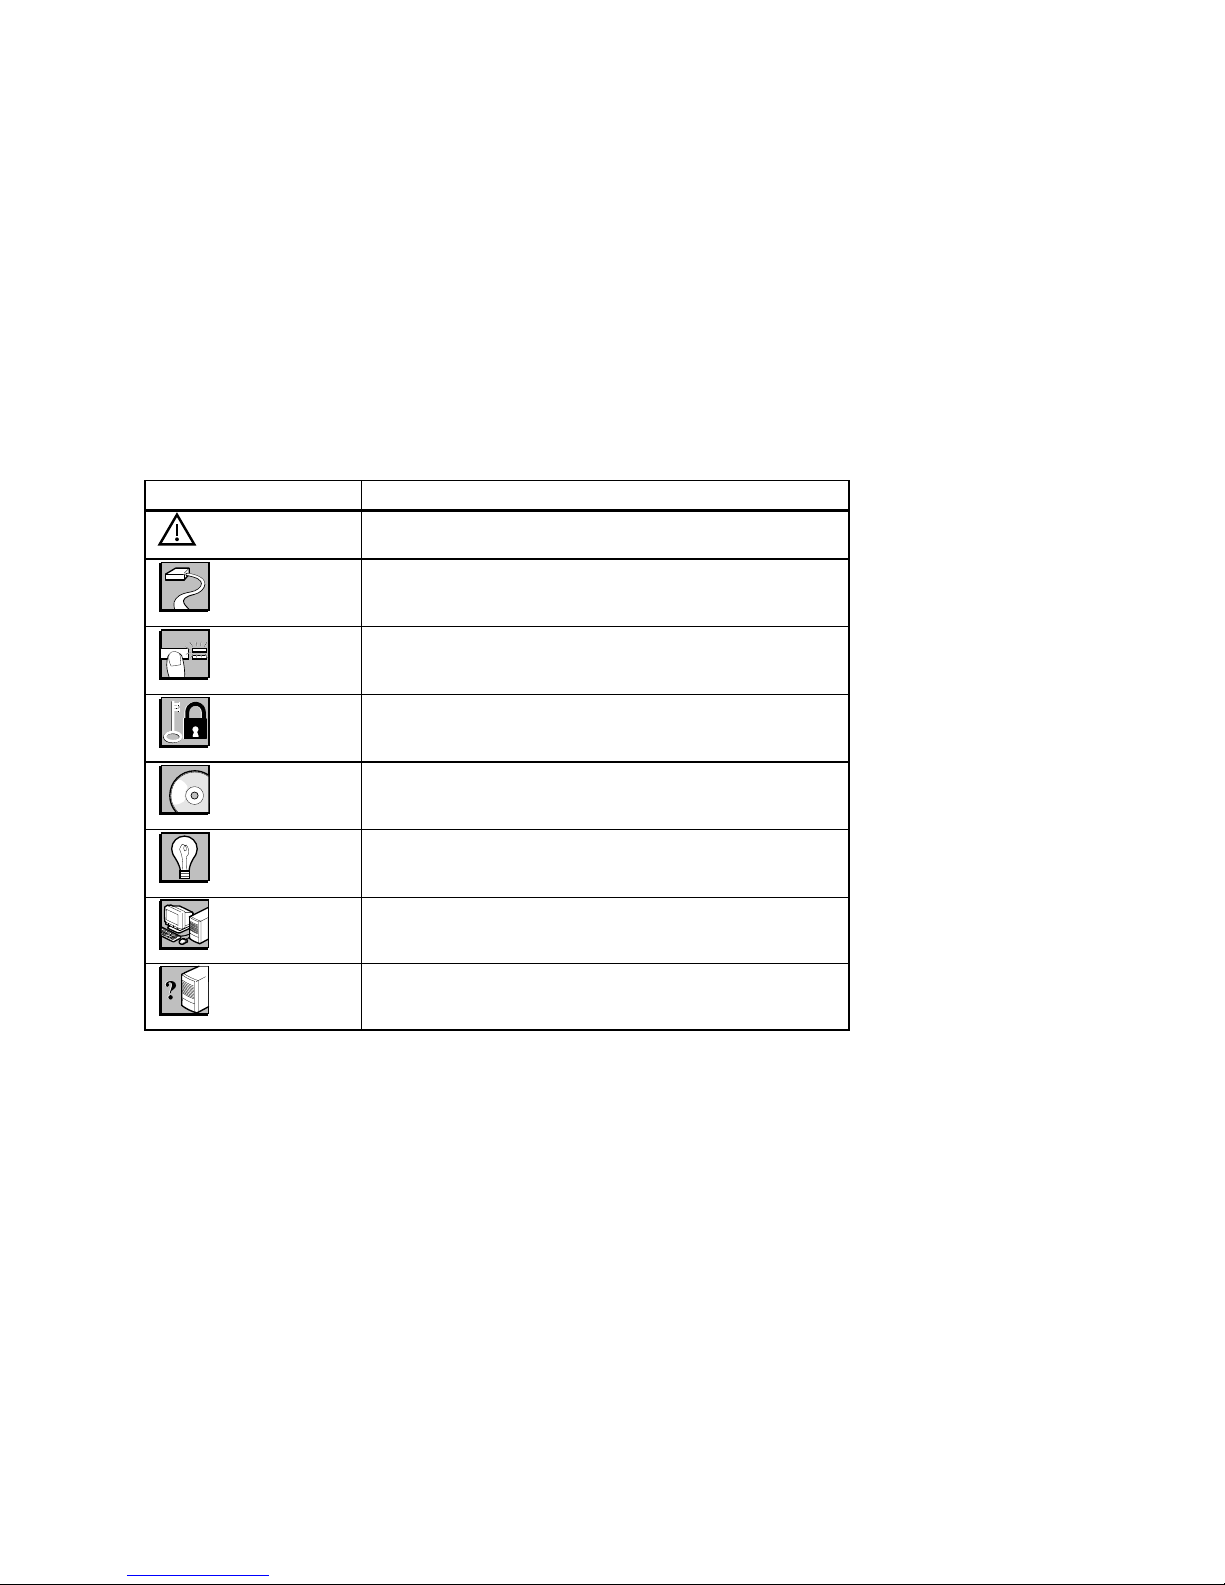
Symbol Meaning
Used to alert users to Warnings and Cautions.
Indicates installation and connection steps.
Indicates system startup and turning off steps.
Indicates system security topics.
Indicates topics on operating system installation or firmware
updates.
Indicates general troubleshooting tips.
Indicates system logging or general product information.
NOTE: Throughout this guide, illustrations and some textual explanations are intended as
examples only; based on your system’s particular hardware configuration, operating
system version, firmware update version, and so forth, your system’s display may differ.
Customer Support
See the Checklist in Chapter 4, Customer Support, for instructions on finding support and
additional information on the use of your new workstation.
Feedback
Our readers' opinions about this guide or any other DIGITAL product are important to us.
If you have any comments, please send e-mail to
Please reference order number EK-ALMIG-SI. A01 in your correspondence.
viii
Indicates topics on system troubleshooting.
reader_comments@eng.pko.dec.com
.
Page 9

This chapter includes an inventory of the items shipped with your system and tells you
how to start, install, restart, and turn off your system. Information about preloaded
software and guidelines for system security are included as well.
Your DIGITAL Personal Workstation is a high-performance system that uses the latest
microprocessor and core logic technology. Housed in a mini-tower box, the system can
Before You Begin
Initial System Inventory
Check to make sure you received the following components with your system, and note the
items in a safe place, for later reference:
1
Getting Started
stand alone or function as a client in an office
network environment.
A typical DIGITAL Personal Workstation
configuration is shown here. Your system may
differ.
Monitor
Power cords
Your system may include different components from those listed. Consult the shipping list
that came with your system for an accurate listing of parts. If you think something is
missing, contact your distributor or DIGITAL representative.
System box
Microphone
Mouse
Keyboard
Video cable
Headphones
1–1
Page 10

Getting Started
Pre-Startup Checklist
Before you start your system, perform the following checks:
• Review the information supplied with your system, including user documentation.
• Select a well-ventilated site for your system near a grounded power outlet and away
from sources of excessive heat. The site also should be isolated from electric noise
(for example, spikes, sags, and surges) produced by devices such as air conditioners,
large fans, radios, and televisions.
• Save all shipping containers and packing material for repackaging or moving the
system later.
NOTE: Do not install optional hardware or application software until you have started
your system and verified that the base system is working correctly.
WARNING: When unpacking and moving system components, be aware that
some components (such as the monitor) may be too heavy for you to lift alone safely.
If you are doubtful about whether you can lift these items alone, please get assistance.
Creating a Comfortable Work Environment
If you exercise poor posture while you work or if your equipment
is poorly set up, certain recent scientific articles suggest that
personal injury may result. Other articles suggest that there is no
cause and effect. Because the safety of our users is a great
concern to Digital Equipment Corporation, we strongly urge that
you read and follow the precautions outlined in the figure and
Table 1-1. In addition, be sure to adjust your work space so that
you are comfortable, and change your position frequently.
1–2
Installation and Setup Guide
Page 11
Getting Started
WARNING: If you experience pain or discomfort while using your system, rest
and review the posture and work habits instructions. If pain or discomfort continues,
discontinue use and report the condition to your job supervisor or physician.
Table 1-1: Recommendations for Posture and Work Habits
Adjust To allow the following conditions
Chair
Keyboard and
Mouse
Head 8. Avoid neck strain. Your head should incline downward, but no more than 15 to 20
Monitor
Work breaks Take periodic work breaks. Morning, lunch, and afternoon breaks during the 8-hour
Lighting Avoid direct lighting or sunlight on the screen, which causes glare and reflections.
Noise Keep background noise at a minimum. Background noise above 65 dBA is tiring.
Temperature 20 – 23 degrees C (68 - 74 degrees F).
Humidity 30% – 70%.
Ventilation Provide adequate air ventilation to operate the equipment and avoid fatigue.
Work Space > 70 cm (28 inches) center to center, preferably between > 152 cm (60 inches).
1. Feet are flat on the floor.
2. Legs are vertical and form a right angle to the floor.
3. Your thighs are horizontal, and they are not bearing weight. Keep the backs of
your knees away from the seat so you do not compress the area behind them, which
could restrict the blood flow.
4. Your upper body is erect and your lower back is supported with a backrest.
5. Your wrists are straight and do not flex more than 15 degrees. They are supported
and do not rest on sharp edges. If you use a mouse, rest your hand on the mouse so
your wrist is not on the work surface. Operate the mouse close to your body’s
centerline.
6. Upper arms are straight down at your sides, and elbows are close to your sides and
support your arm weight. Forearms are at a 70- to 90-degree angle.
7. If you use a mouse, rest your hand on the mouse so that your wrist is not on the
work surface. Operate the mouse close to your body’s centerline.
degrees.
9. No higher than the level of your eyes and at the correct distance for your vision.
10. Avoid eye fatigue, which can be caused by glare, image quality, uncomfortable
furniture, eye height, and uncorrected vision. If you cannot focus to read at different
distances, you may need special glasses. Relax your eyes periodically by focusing on
distant objects.
workday meet most recommendations. Take advantage of work breaks to move
around and do other activities.
Place lighting behind or to the side of your work area, and distribute the lighting
evenly on your work area.
Sound-absorbing materials (for example, curtains, carpeting, and acoustic tile) can
help reduce background noise.
Installation and Setup Guide
1–3
Page 12
Getting Started
Installing Your System
This section shows the installation and
connection steps for your system.
NOTE: All connectors are keyed with icons on
the back of the system box.
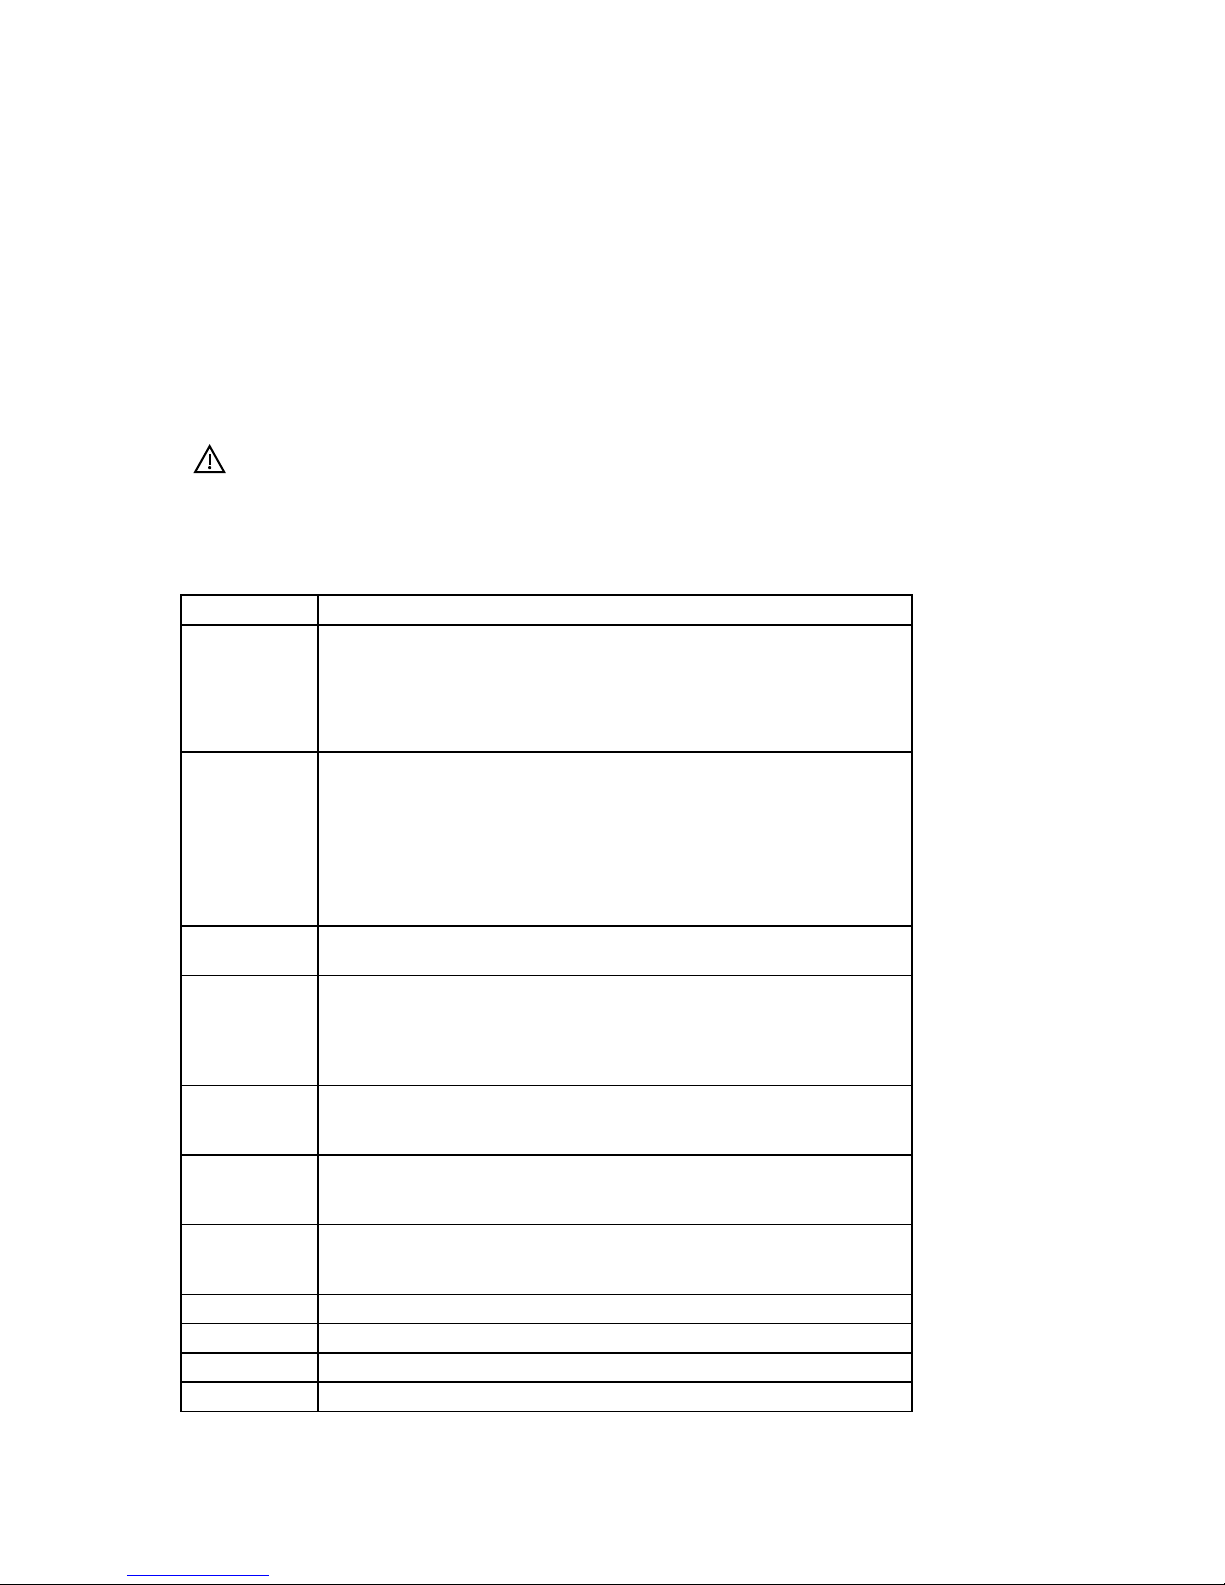
CAUTION: To ensure proper cooling, verify
that air can flow freely into the system front and
out the rear of the system. Position your system
so that air can flow freely to and from the vents,
as shown. Do not block any of the vents,
especially those on the system rear or bottom
front.
To connect system components, follow these
steps:
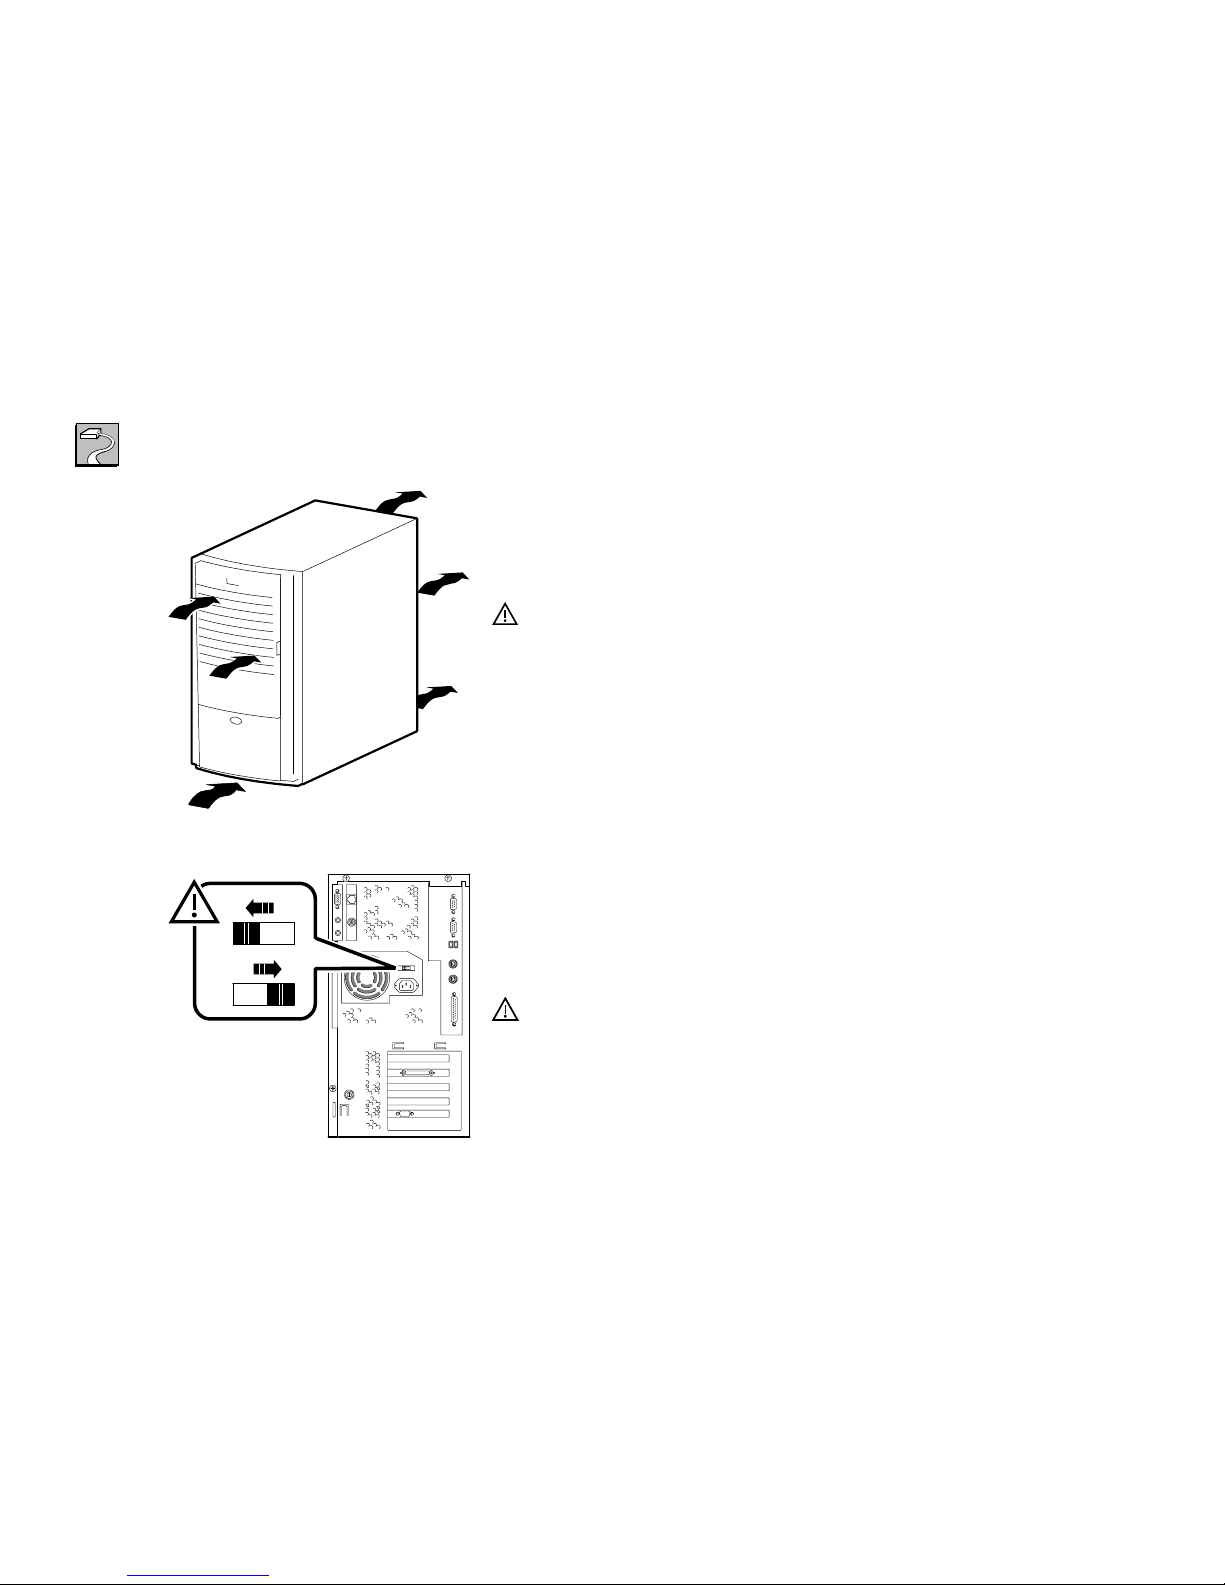
230V
115V
1. Confirm that the voltage selector switch
matches your local voltage (either 115 Volts
or 230 Volts), as shown.
CAUTION: Improper voltage selection can
damage the system’s power supply!
1–4
Installation and Setup Guide
Page 13
Getting Started
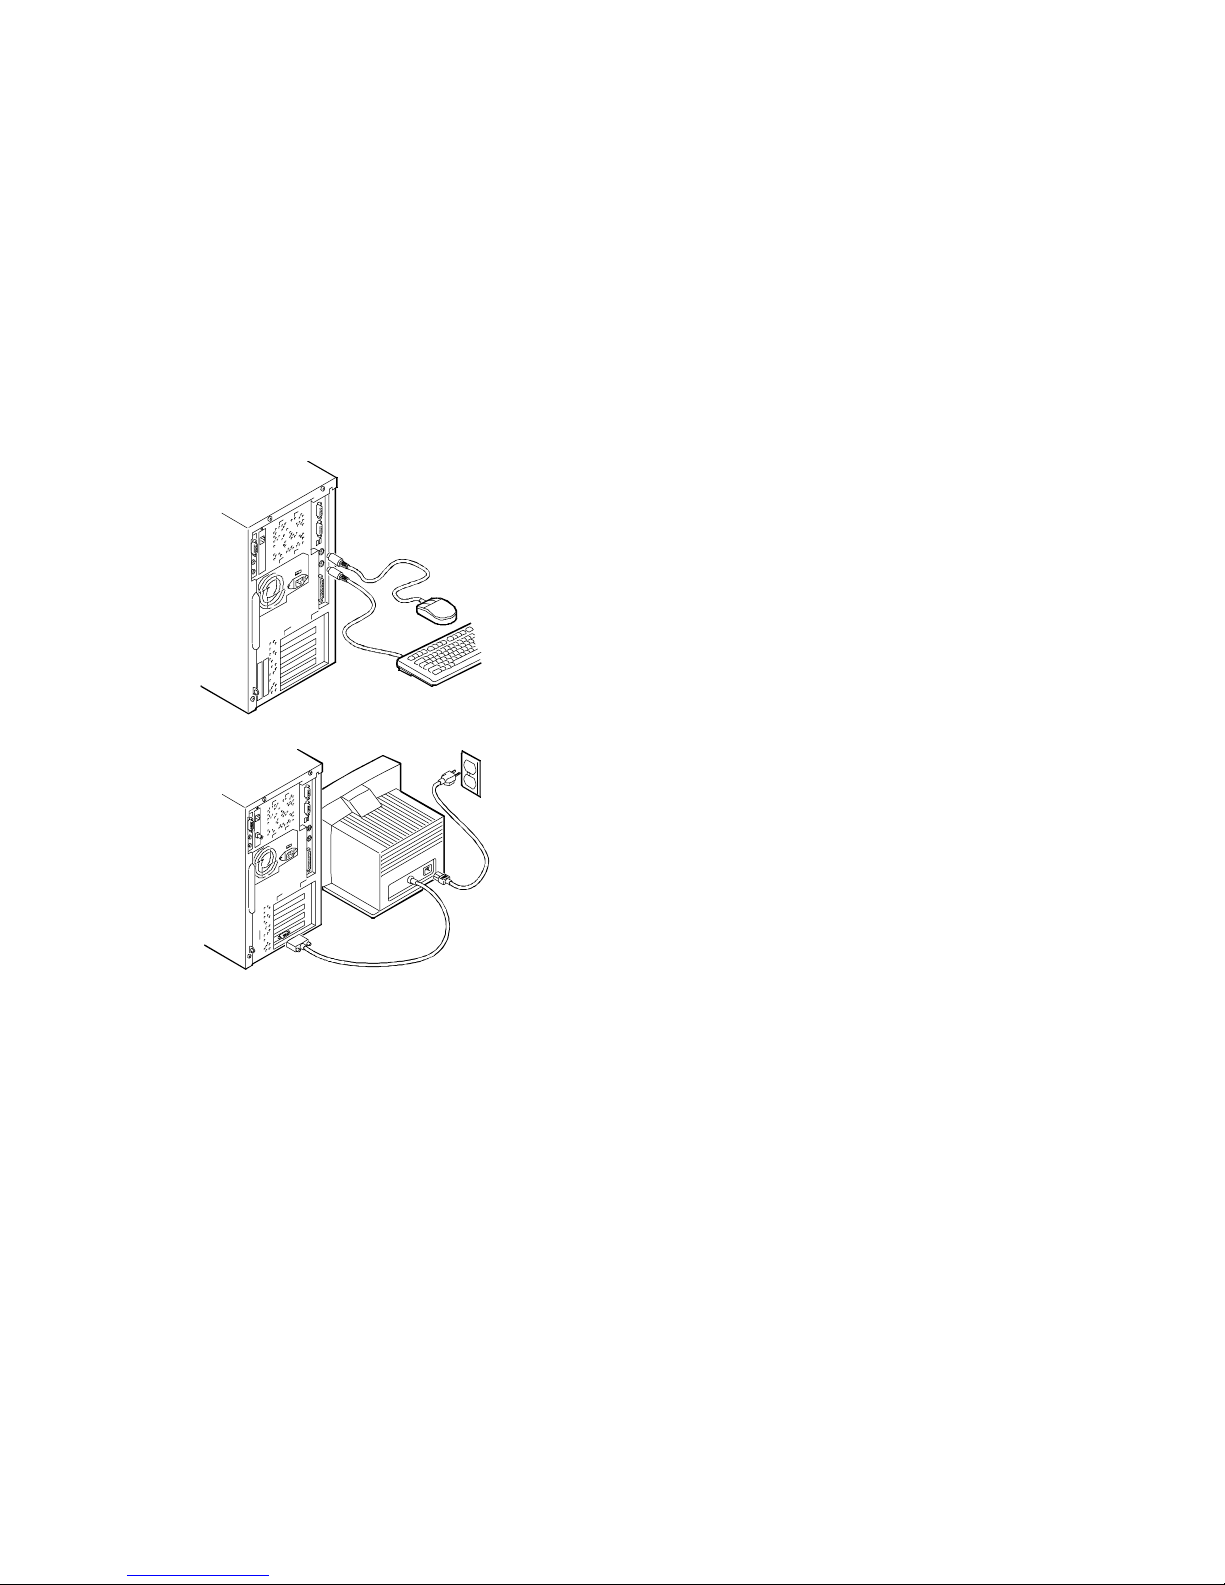
2. Connect the mouse and keyboard, as shown.
3. Connect the monitor, as shown.
Network Connection
Your DIGITAL Personal Workstation has an embedded Ethernet LAN controller. Refer to
the figure, which shows the MAU (media adapter unit) installed, and connect your system
to the network. Your system was preconfigured with either a 100-Mbps MII (media
independent interface) or a 10-Mbps MAU.
Installation and Setup Guide
1–5
Page 14
Getting Started
The internal network cables are already installed for you.
Optional network kits are available. Contact your DIGITAL
representative for more information about the availability of
these options.
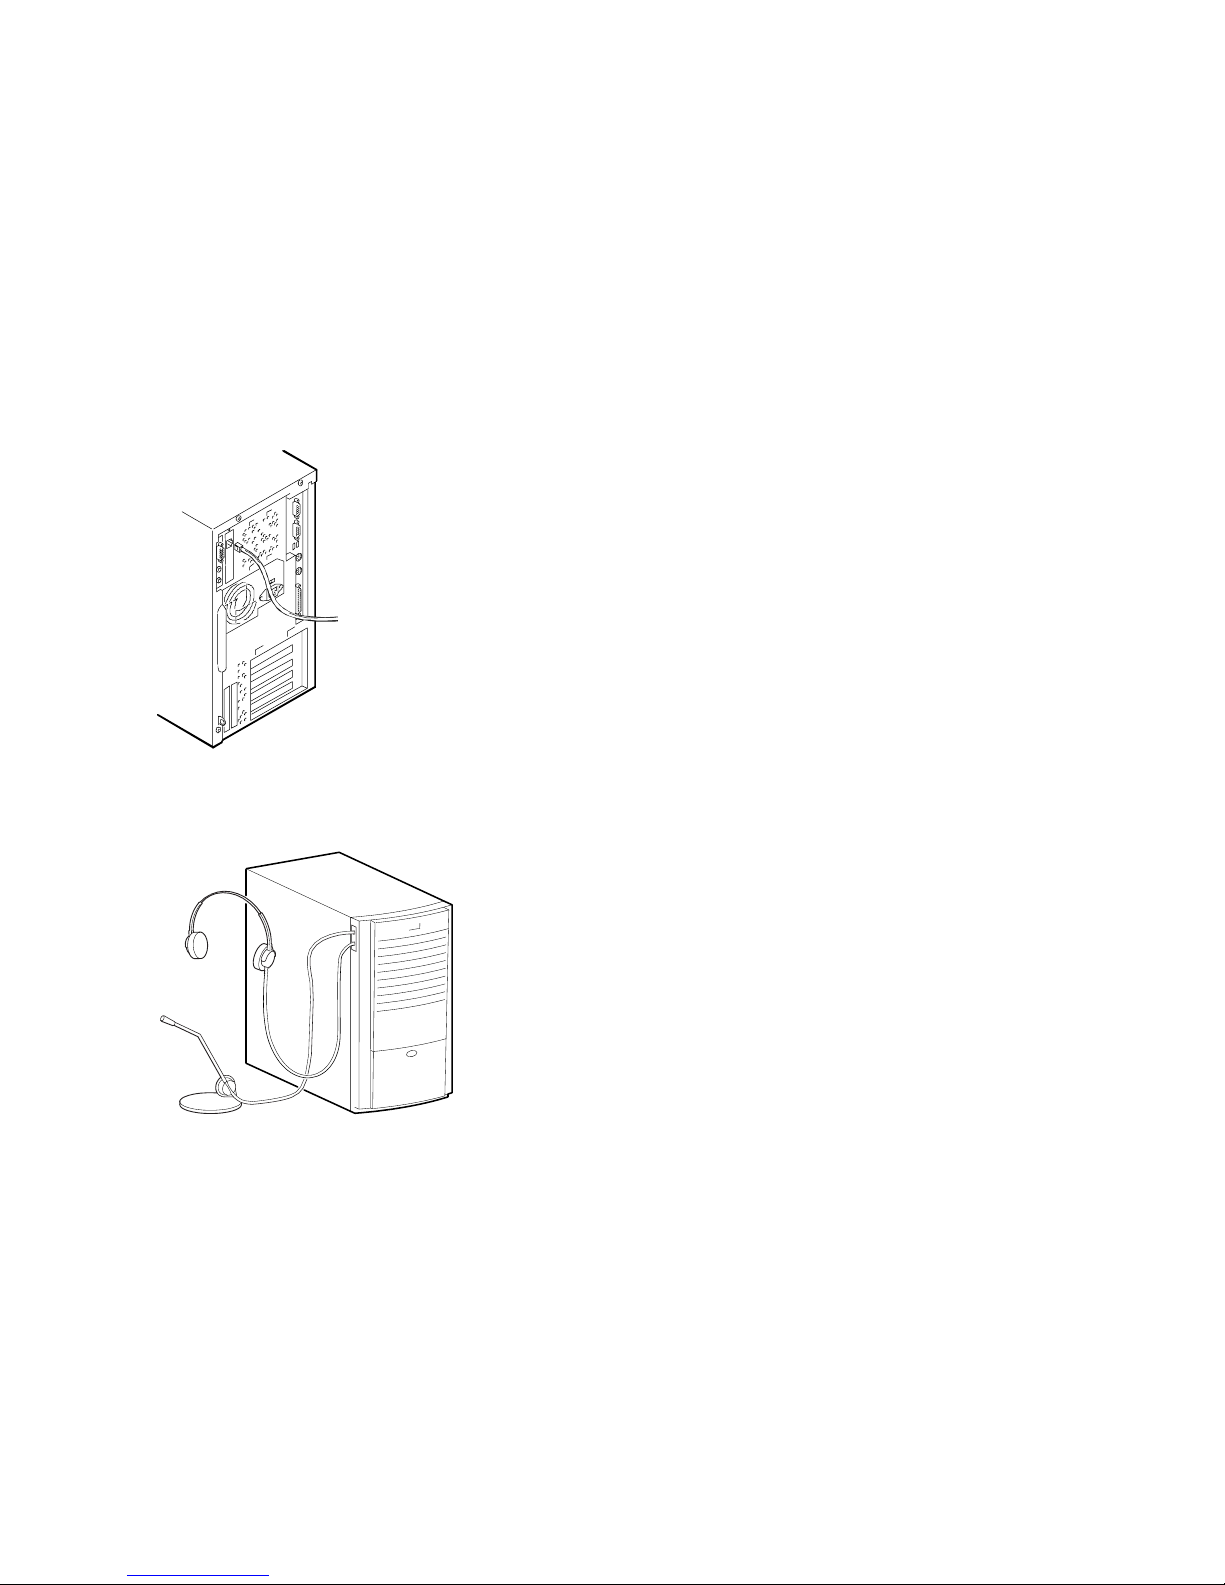
Connecting External System Devices
The following section describes how to install external devices into your system.
1. Connect the microphone and headphones into
2. If a SCSI controller is installed and you have an
the icon-keyed connectors on the side of the
system box, as shown.
optional external SCSI (Small Computer
System Interface) device or SCSI storage box,
connect the SCSI cable to the SCSI port on the
controller card.
If you purchased speakers for your workstation, refer to the figure and perform the
following steps to connect them:
1. Unpack the speakers.
2. Plug the secondary speaker cable into the primary speaker (“Speaker Output”).
3. Connect the loose cable to the primary speaker (“Audio Input”) and to the top
connector on the adapter card (“Speaker Out”).
1–6
Installation and Setup Guide
Page 15

Getting Started
4. Connect the AC adapter cord to the
primary speaker.
5. Plug the speaker AC adapter into a
power outlet.
NOTE: The figure shows a typical
speaker system. Your speakers and
connections may vary, depending upon
the make and model you purchased.
Refer to the documentation that came
with your speakers for further
information.
If you purchased a MIDI/joystick device for your workstation, refer to the figure and
perform the following steps to connect it:
1. Unpack the MIDI/joystick device.
2. Connect the MIDI/joystick device cable into the MIDI
port connector on the adapter card, as shown.
Installation and Setup Guide
1–7
Page 16

Getting Started
Perform the following steps to connect a local printer to your workstation:
1. Review your printer documentation and perform any pre-installation instructions
Starting Your System
before attempting to connect it to your workstation.
2. Make sure your printer and workstation are turned
off.
3. Plug the printer cable into the appropriate printer
port (the parallel port for a parallel printer, in
figure, or a serial port for a serial printer).
4. Turn on your printer and workstation.
5. Configure your printer for operation with your
workstation.
Refer to your operating system online Help and printed
documentation for instructions on installing your
printer’s device driver.
Perform the following steps to start (boot)
your DIGITAL Personal Workstation:
Refer to the information supplied with your monitor for adjustment instructions.
4. Allow your system to complete the power-on self test (POST) and device
initialization. (This takes approximately one [1] minute.)
1–8
Installation and Setup Guide
CAUTION: Verify the correct voltage
setting for your system before proceeding.
1. Plug the power cord into the system and
then into the wall outlet.
2. Turn on any external devices, system unit
power button (shown in figure), and
monitor power.
3. After waiting for the monitor to warm up,
if necessary, adjust the contrast and
brightness to obtain a readable screen
display.
Page 17

Preloaded Operating System Software
Your system was preloaded with the operating system that you specified when ordering
your system (i.e., Microsoft Windows NT, DIGITAL UNIX, or OpenVMS). See Chapter
2, Setting Up an Operating System, for instructions on reinstalling an operating system.
Turning Off Your System
Before turning off your system, save and close all open files according to the steps
outlined for your specific operating system. If you turn the system off without saving and
closing files, you might lose some or all of your work.
CAUTION: Do not turn off power to your system or peripherals until the shutdown
sequence has completed.
WARNING: Always disconnect the power cord from the wall before servicing
your system.
Microsoft Windows NT
Perform the following steps, in order, to turn off your system:
1. Close any application data files you have open as well as any applications you have
running. Most application programs prompt you to save the information before
closing.
Getting Started
2. To shut down your operating system:
• Click on Start on the Windows NT toolbar.
• Select Shut Down…
• The Shut Down Windows menu displays.
You are asked to confirm the shutdown.
• Select Shut Down and click the Yes button.
3. Wait for the operating system to complete the shutdown process. Your system displays
a message indicating it is safe to turn off or restart the system.
4. To turn off power, press the system unit power button.
5. Disconnect the power cord from the wall before servicing your system.
DIGITAL UNIX
Perform the following steps, in order, to turn off your system:
1. Close any open application data files as well as any running applications. Most
application programs prompt you to save the information before closing.
2. To shut down your operating system:
NOTE: You must be a superuser to shut down the system.
Installation and Setup Guide
1–9
Page 18

Getting Started
3. Your system displays >>> indicating it is safe to turn off or restart the system.
4. To turn off power, press the system unit power button.
5. Disconnect the power cord from the wall before servicing your system.
OpenVMS
Perform the following steps, in order, to turn off your system:
1. Close any open application data files as well as any running applications. Most
application programs prompt you to save the information before closing.
2. To shut down your operating system, follow these steps:
3. Your system displays >>> indicating it is safe to turn off or restart the system.
• Open a terminal window.
• Type Shutdown -h now.
• The system returns to the SRM console.
• Log into the system account.
• Open a terminal window (if not already opened).
• Type Shutdown.
• The system returns to the SRM console.
4. To turn off power, press the system unit power button.
5. Disconnect the power cord from the wall before servicing your system.
System Security
Chassis Lockdown Hasp
The system is equipped with a lock welded onto the back of the chassis. To use this
security feature, use a lock of your choice to attach the system to a secured surface such as
a table, cabinet, and so forth.
Kensington Lock
If you ordered an optional Kensington lock (order number PCP3H-AG), refer to the figure
and secure the lock onto your system as shown.
1–10
Installation and Setup Guide
Page 19

Passwords
For additional security, most screen saver and pause screen displays can have password
protection enabled. See Chapter 3, Troubleshooting.
Getting Started
1. Insert the lock into the opening at the back of
21
the system.
2. Turn the lock clockwise to secure it.
3. Connect the power cord and plug it into the
wall outlet.
4. Turn on the system.
Installation and Setup Guide
1–11
Page 20

help
Page 21

2
Setting Up an Operating System
Refer to the specific operating system information you received for details.
NOTE: This information provides what you need to begin an operating system
installation. Once you have started an installation, follow the on-screen instructions,
which may differ slightly from what is documented here.
This chapter describes how to install an operating system; set up partitions for a Microsoft
Windows NT installation; and update firmware.
Refer to Table 2-1 for instructions on installing the Microsoft Windows NT operating
system on a properly partitioned and formatted disk; see Table 2-2 for instructions on
setting up partitions for an NT installation. Refer to Table 2-3 for instructions on
installing the DIGITAL UNIX or OpenVMS operating systems.
CAUTION: If you boot from a DIGITAL UNIX disk and also occasionally boot
Microsoft Windows NT from another disk, use caution when you run the Windows NT
Disk Administrator. When the Disk Administrator detects additional disks, it updates the
system configuration. The Disk Administrator prompts you for permission to write a
signature to the additional disks. Writing the signature to a DIGITAL UNIX disk destroys
the boot block on that disk and makes the operating system on that disk no longer
bootable. Select NO when you are asked if you want to write a signature to your
DIGITAL UNIX disk.
Starting a Windows NT Installation
DIGITAL partitions and formats disk 0 on the first SCSI controller in non-RAID Windows
NT systems. The partitions are set up as follows:
Partition 1 (typically, the “C” drive) is the size of the disk less 6 MB and formatted
•
FAT. Normally, you select “convert to NTFS” during the Windows NT installation.
2–1
Page 22

Setting Up an Operating System
Partition 2 (typically, the “D” drive) is 6 MB, formatted FAT, and identified as the
•
system partition.
Table 2-1 describes how to install Microsoft Windows NT operating system on a properly
partitioned and formatted disk.
NOTE: You must have the AlphaBIOS console installed and running in order to install the
Windows NT operating system.
Table 2-1: Starting a Microsoft Windows NT Installation
Step Action Result or Displayed Text
1 From the AlphaBIOS boot screen,
press [F2].
2 Insert the Microsoft Windows NT
Workstation CD-ROM into the CD
drive.
Press [Enter].
3 Select
Install Windows NT.
4 Select
5 Insert the floppy diskette labeled
6 Select DIGITAL Personal Workstation
Other.
Hardware Support Disk for
Microsoft® Windows NT® 4.0 (AKR1SHH-CA)
Press [Enter].
433a, 500a, 600a.
show a different series name.)
Press [Enter].
into the floppy drive.
(Your screen may
AlphaBIOS setup screen displays.
CD-ROM drive is ready.
Windows NT setup procedure starts. The following
message is displayed:
Setup could not determine the type of computer you
have, or you have chosen to manually specify the
computer type.
Select the computer type from the following list, or
select “Other” if you have a device support disk
provided by your computer manufacturer.
.
.
.
=> Other
“Please insert the disk labeled Manufacturer-supplied
hardware support disk into drive A:.”
You have chosen to configure a computer for use with
Windows NT using a device support disk provided by
the computer’s manufacturer.
Select the computer type from the following list, or
press [Esc] to return to the previous screen.
=>DIGITAL Personal Workstation 433a, 500a, 600a
(Your screen may show a different series name.)
Setup could not determine the type of one or more mass
storage devices installed in your system, or you have
chosen to manually specify an adapter. Currently,
Setup will load support for the Qlogic PCI SCSI Host
adapter.
2–2
Installation and Setup Guide
Page 23

Setting Up an Operating System
Table 2-1: Starting a Windows NT Installation,
Step Action Result or Displayed Text
7 Type “S” to select additional devices.
or
Press [Enter] if you do not want to
specify additional storage devices.
8 Select Other. “Please insert the disk labeled Manufacturer-supplied
9 Insert the floppy diskette labeled
Hardware Support Disk, Disk 1 of 1
(AK-RC1YA-CA) in drive A.
Press [Enter] to select the driver.
10 Press [Enter] to load the driver. Follow the screen prompts for mass-storage device-
11 To continue,
Press [Enter].
12 (DIGITAL does not recommend
selecting [R] to repair Windows NT.)
Press [Enter] to continue with Setup.
13 Press [Enter]. Setup has recognized the following mass storage
14 Press [Enter]. The Microsoft Windows NT licensing agreement
15 Use the [Page Down] keypad to scroll
through the Windows NT licensing
agreement.
continued
Select the SCSI adapter you want from the following
list, or select “Other” if you have a device support disk
provided by an adapter manufacturer.
.
.
.
=>Other
hardware support disk into Drive A:.”
You have chosen to configure a SCSI adapter for use
with Windows NT, using a device support disk
provided by an adapter manufacturer.
Select the SCSI adapter you want from the following
list, or press [Esc] to return to the previous screen.
=>e.g., Microsoft ATAPI driver
loading support.
Setup will load support for the following mass storage
devices:
Qlogic PCI SCSI Host Adapter
Microsoft ATAPI driver
Welcome to Setup. The Setup program for the
Microsoft® Windows NT® operating system version
4.0 prepares Windows NT to run on your computer.
To learn more about Windows NT Setup before
continuing, press [F1].
To set up Windows NT now, press [Enter].
To repair a damaged Windows NT version 4.0
installation, press [R].
To quit Setup without installing Windows NT, press
[F3].
devices in your computer:
Qlogic PCI SCSI Host Adapter
Microsoft ATAPI driver
displays.
A message indicating your choices displays.
Installation and Setup Guide
2–3
Page 24

Setting Up an Operating System
Table 2-1: Starting a Windows NT Installation,
Step Action Result or Displayed Text
16 Press [F8] to indicate your acceptance
of the licensing agreement.
17 Press [Enter] to confirm your choice.
NOTE: Follow the screen prompts to choose a partition, to confirm a partition, and to decide whether or not to
format the partition.
18 Press [Enter] to accept the choice.
19
20 Follow screen prompts. Please wait while Setup copies files to the hard disk.
21 Press [Enter] to restart your computer. This portion of Setup has completed successfully.
22 Follow the screen prompts to set up
Insert the floppy diskette
(AK-R1SHH-CA) into the floppy
drive.
Press [Enter].
the reinstalled Windows NT operating
system.
continued
A message indicating your choices displays.
Setup has found Windows NT on your hard disk in the
directories shown below.
Setup will now examine your hard disks.
Please insert the disk labeled Hardware Support Disk
for Microsoft® Windows NT® 4.0.
The Windows NT operating system loads and starts.
If you are installing the operating system on a disk that has not been partitioned and
formatted, refer to Table 2-2.
Table 2-2: Setting Up Partitions for a Windows NT Installation
Step Action Result
1 From the AlphaBIOS boot screen,
press [F2].
2 Select Hard Disk Setup...
Press [F6] to format disk.
Press [F7] for express Hard Disk
Setup.
3 Press [F10] to continue. Express Setup Complete screen displays.
4 Press [Enter]. A list of disks, including partitions, displays.
5 Press [Escape]. AlphaBIOS setup screen displays.
2–4
Installation and Setup Guide
AlphaBIOS setup screen displays.
If disk 0 is not partitioned, a message asking if you
would like to proceed with default disk partitioning
displays.
Refer to Table 2-1 to re-attempt a Windows NT
installation.
Page 25

Setting Up an Operating System
Starting a DIGITAL UNIX or OpenVMS Installation
To start a DIGITAL UNIX or OpenVMS installation, follow the steps in Table 2-3.
NOTE: The SRM console must be installed and running in order to perform a DIGITAL
UNIX or OpenVMS installation. If the AlphaBIOS console is running, refer to the
DIGITAL Personal Workstation System Reference and Maintenance Guide for instructions
on loading the SRM firmware.
WWW See (http://www.workstation.digital.com/) for more information.
Table 2-3: Starting a DIGITAL UNIX or OpenVMS Installation
Step Action Result
1 At the SRM prompt, type:
>>>set boot_osflags
2 At the SRM prompt, type:
>>>set auto_action
halt
3 At the SRM prompt, type:
>>>set os_type (
DIGITAL UNIX or OpenVMS)
>>>init
4 Insert the DIGITAL UNIX
OpenVMS CD-ROM into the CD
drive.
5 At the SRM prompt, type:
>>>show device
6 From the SRM console, boot the
DIGITAL UNIX or OpenVMS
CD-ROM.
>>>boot dka400
e.g.,
or
Clears the
" "
Halts the system at the console prompt each time the system
is turned on, crashes, or when the reset button is pushed.
Sets the operating system (DIGITAL UNIX
CD-ROM drive is ready.
List of devices displays:
dka0.0.0.4.0 DKA0 TOSHIBA CD-ROM
XM-56 1796
dkc0.0.0.1008.0 DKC0 RZ1BA-BS 3001
dvc100.1.0.1008.0 DKC100 SEAGATE
ST15150W 9107
NOTE: For OpenVMS, the CD-ROM is DQA0
Installation information is displayed, and you are prompted
to select an option. For more information, see the
DIGITAL UNIX
OpenVMS
boot_osflags
Installation Guide.
variable.
Installation Guide or
the DIGITAL
OpenVMS).
or
.
Updating Firmware
The DIGITAL Personal Workstation system contains flashROM for the console firmware.
The flashROM contains the power-on self test (POST), AlphaBIOS console firmware (for
Installation and Setup Guide
2–5
Page 26

Setting Up an Operating System
the Microsoft Windows NT operating system), and the SRM console firmware (for the
DIGITAL UNIX and OpenVMS operating systems).
This section explains how to use the firmware update utility to install firmware upgrades.
Consult the appropriate operating system-specific section (e.g., Microsoft Windows NT,
DIGITAL UNIX, or OpenVMS).
NOTE: The user is responsible for performing system firmware upgrades.
Consult your upgrade documentation for more information.
Microsoft Windows NT Operating System Firmware
Using the Flash Update Utility from AlphaBIOS
You may update the firmware by either using the supplied CD or by copying the firmware
from the Internet onto a floppy diskette.
Updating Firmware from AlphaBIOS
To update the firmware from AlphaBIOS using the firmware CD or floppy diskette, follow
these steps:
1. Shut down the Windows NT operating system and restart the system.
2. Insert the Firmware Update CD-ROM or a floppy diskette (prepared as the next
section describes) into the appropriate drive.
3. From the AlphaBIOS boot screen, press [F2] to enter AlphaBIOS setup.
4. From the AlphaBIOS setup screen, select Upgrade AlphaBIOS.
HINT: AlphaBIOS verifies the system image and displays the old and new firmware
versions.
5. Follow the screen prompts to complete the update.
Preparing a Firmware Floppy Diskette
If you have access to the network, you may use an Internet browser to copy the firmware
from: ftp.digital.com/pub/Digital/Alpha/firmware area. Follow the directions outlined at
the site.
DIGITAL UNIX and OpenVMS Operating System Firmware
Update Utility
Use the update utility to update your SRM firmware. The update utility contains two
images: the update utility itself and the SRM image.
2–6
Installation and Setup Guide
Page 27

Using the Flash Update Utility from the SRM Console
To update the firmware from the SRM console, do the following:
1. Insert the Firmware Update CD-ROM into the CD-ROM drive.
2. Type the show device command to determine the device ID of the CD-ROM drive.
>>>SHOW DEVICE
dka0.1.0.4.0 DKA0 CD-524E 4.0D
dkc100.1.0.10098.0 DKC100 RZ29B 0016
dva0.0.0.0.1 DVA0
ewa0.0.0.3.0 EWA0 00-00-F8-75-44-22
pkc0.7.0.1009.0 PKC0 SCSI Bus ID 7 5.27
pqa0.0.0.4.0 PQA0 PCI EIDE
pqb0.0.1.4.0 PQB0 PCI EIDE
3. Boot the Firmware Update Utility CD-ROM using the device ID display in step 2.
>>>b -fl 0,a0 dka0 (for DIGITAL UNIX) or dqa0 (for OpenVMS)
Bootfile: e.g.,[alpha433au]as433au_vx_x.exe (where x_x is the
appropriate version)
You should see a display that reflects your system’s particular hardware configuration
and firmware update version while the update utility is loading and executing, for
example:
Setting Up an Operating System
bootstrap code read in
base = 1d4000, image_start = 0, image_bytes = 151e00
initializing HWRPB at 2000
initializing page table at 1c6000
initializing machine state
setting affinity to the primary CPU
jumping to bootstrap code
ff.fe.fd.fc.fb.fa.f9.f8.f7.f6.f5.CPU 0 speed is 2.00 ns
(500MHz)
ef.ee.ed.ec.eb.f4.ea.e9.e8.e7.e5.e4
Digital Personal Workstation 500au Consolbe V6.7-249 built
on Feb 19, 1998 at 11:01:35
>>>(boot pmem:180000 -flags 0)
bootstrap code read in
base = 180000, image_start = 0, image_bytes = 800000
initializing HWRPB at 2000
initializing page table at 7be000
initializing machine state
setting affinity to the primary CPU
jumping to bootstrap code
Installation and Setup Guide
2–7
Page 28

Setting Up an Operating System
Digital Personal Workstation 500 au Firmware Update V6.78
Use HELP or ? for help
Update
VERIfy
List
Show
DUmp
VERBose
NVerbose
DEbug
NDebug
?
Apu->
4. To update the firmware, type update and SRM. The following information is
displayed as the firmware is being updated. The actual information may change
between versions.
Apu-> update SRM
APU-I Are you ready to Program (SRM) ROM Device? (Y/N)Y
APU-I Erasing (SRM) ROM device
APU-I Programming (SRM) ROM device
APU-I Verify loaded (SRM) ROM image
APU-I Verify loaded (SRM) ROM image done
APU-I Programming (SRM) ROM completed
APU-I Verify SRM
SRM ROM verify successful
Apu-> Verbose
Verbose :Apu-> Verify SRM
Version = v6.7-250
5. To exit the update utility, cycle the power. Leave the power off for at least 45
seconds.
NOTE: Commands such as
Dump, List, Show,
enabled.
2–8
Installation and Setup Guide
and
Verify
must have verbose mode
Page 29

Troubleshooting
This chapter describes initial as well as some detailed troubleshooting for your DIGITAL
Personal Workstation.
Refer to the documentation supplied with additional options if you experience problems
with specific options that you have installed.
Tips
Use these troubleshooting tips should your computer ever fail to operate correctly.
• Keep it simple; troubleshoot one problem at a time. Also, only make one change at a
time. For example, if your SCSI hard disk drive fails to boot, do not try all the
suggested actions at once. Instead, start with one suggestion such as checking the
cables. After securing the cables, try booting your computer. If it does not work, try
another suggestion.
• Look for abnormal computer, keyboard, and monitor light-emitting diode (LED)
indications. For example, make sure the power-on LED lights when you turn on your
computer and the drive access indicators light when using either the diskette drive or
hard disk drive.
3
• If you installed external devices, make sure all cables are correctly and securely
connected to the appropriate devices and that the devices are installed correctly.
• If you installed devices inside the computer, make sure nothing was bumped or jarred
loose, and that all cable connections are securely in place.
• Make sure all device drivers are installed correctly.
• Press the Reset (or Halt) button. Try rebooting your system.
3–1
Page 30

Troubleshooting
• Pay close attention to any error message that appears on your screen. If the error
message is hardware related, refer to the troubleshooting tables later in this chapter for
recommended actions.
If the error message is operating system-related, refer to online Help and the
appropriate operating system documentation supplied with your computer.
• README files might be factory installed, on the CD-ROM disk, or as printed
material. This README information can help you setup, configure, and operate your
computer.
NOTE: If DIGITAL support tells you to return a failed component, pack it in its original
container and then return it to DIGITAL or your DIGITAL authorized distributor as
instructed.
• Check that the power indicator is on and that the fan is running.
• Check the power indicator on the monitor. Also, check the monitor, keyboard, and
mouse cables to ensure that they are connected and seated properly.
• Contact DIGITAL Services or your service provider for software- or hardware-related
problems.
Logging Equipment
Record all model numbers and serial numbers of your hardware components in the
Checklist portion of Chapter 4, Customer Support.
?
?
System Troubleshooting
Table 3-1 lists how to identify and solve problems that could occur with your system, disk
drive, audio, and monitor.
3–2
Installation and Setup Guide
Page 31

Table 3-1: System Troubleshooting
Problem Possible Cause Action
Power indicator not on. System is not plugged in.
Plug the system in, and then turn it
back on.
Troubleshooting
System is not turned on.
No power at the wall outlet.
Internal power supply
cables not reconnected after
installing options.
Power supply failure.
Correct voltage not set.
Fans not connected.
Fan vents blocked.
Power switch cable not
plugged into riser card.
Push the power button.
Use another wall outlet.
Reconnect power cables.
Contact your service representative.
Unplug the system, set correct voltage
on system back, and turn system back
on. (NOTE: The power supply may
have been damaged.)
Connect fans to the riser card.
Remove obstruction from fan vents.
Plug front-panel power switch cable
into the riser card.
Installation and Setup Guide
3–3
Page 32

Troubleshooting
Table 3-1: System Troubleshooting,
Problem Possible Cause Action
Power is on, but there is no
screen display and no
beeps.
Power is on, but there is no
screen display.
Monitor brightness and
contrast controls are not
correctly set.
Monitor is off.
Monitor cable or power
cord is incorrectly installed.
Configuration error.
Monitor is defective.
Bad monitor cable.
Defective video controller
module.
Keyboard or video
controller missing or
malfunctioning.
Various possible causes. Listen carefully for computer beep
continued
Adjust the brightness and contrast
controls.
Ensure AC power cord is plugged in
and turn on the monitor.
Check all monitor connections.
Refer to the video module
documentation for more information.
Try another monitor.
Try another cable.
Replace the video module.
The console tests for keyboard and
video before displaying information.
Check connections.
codes; record the number of beeps and
their patterns and then check the beep
codes below:
1-3-3 No usable memory detected
1-1-4 Firmware in flashROM is
corrupted
3–4
Installation and Setup Guide
Page 33

Troubleshooting
Table 3-1: System Troubleshooting,
Problem Possible Cause Action
System does not boot. Operating system software
is not installed on the hard
disk drive.
Hard drive cable is not
connected or there is no
power to the drive.
System cannot find the boot
device.
Environment variables
incorrectly set.
Hard disk drive is not
correctly formatted or the
requested partition does not
exist.
continued
Install the appropriate operating
system.
Connect hard drive signal and power
cables.
Check the system configuration for
correct device parameters. Use the
firmware to display system
configuration. Look at the hard disk
configuration to determine what hard
disk is available. Verify the operating
system selection information.
For AlphaBIOS: From the Boot screen,
press [F2] to go to setup. From there,
go to the desired location to correctly
set the environment variables.
For DIGITAL UNIX or OpenVMS:
Type >>>show all to get a list of
all environment variables.
Format the hard disk drive or correctly
partition the hard disk drive using the
supplied software.
There is no software on the
requested partition.
Windows NT overwrote the
UNIX or OpenVMS boot
block.
Install software on the requested
partition or point to the correct
partition.
Reinstall the operating system.
Installation and Setup Guide
3–5
Page 34

Troubleshooting
Table 3-1: System Troubleshooting,
Problem Possible Cause Action
System boots automatically
when you don’t want it to.
Target boot device not
listed in the SRM display
system configuration.
No response to keyboard
commands.
System is set to autoboot. For DIGITAL UNIX or OpenVMS
Loose power and/or data
cable.
SCSI bus too long.
SCSI drive not set as drive
0.
SCSI termination is done
incorrectly.
Keyboard is password
protected.
continued
users: When SRM starts, press [Ctrl/C]
to stop the autostart countdown. Type
>>>auto_action halt to change
a variable.
For Windows NT users: When
AlphaBIOS starts, press a È to stop
the autostart countdown. Go to Setup
to change a variable.
Secure all signal and power cable
connections.
Alter SCSI bus to correct length in
compliance with the 1.5-meter
limitation for combined cable and
signals on the circuit board.
Reset SCSI drive as drive 0.
Terminate the extreme ends of each
signal.
Make sure that there are two, and only
two, terminators.
Make sure there is no extra
termination.
Check that there is active termination
only.
Enter the keyboard password, if
supported by your operating system.
Keyboard is not connected.
Keyboard is connected to
the mouse port.
3–6
Installation and Setup Guide
Connect the keyboard to the keyboard
port.
Connect the keyboard to the keyboard
port.
Page 35

Troubleshooting
Table 3-1: System Troubleshooting,
Problem Possible Cause Action
No response to mouse
commands.
System forgets some
environment variables or
the time-of-day while
powered off.
For DIGITAL UNIX or
OpenVMS users: System
starts AlphaBIOS rather
than SRM firmware.
or
System forgets user
preference for SRM
firmware and starts
AlphaBIOS firmware when
powered on.
Mouse is not connected.
Mouse is connected to the
keyboard port.
Mouse driver not installed.
Mouse ball sticking.
Dead battery.
No contact between battery
holder and battery.
continued
Connect the mouse and restart the
operating system.
Connect the mouse to the mouse port
and restart the operating system.
Install the appropriate mouse driver.
Refer to your supplied application
software documentation.
Clean the mouse.
Replace the lithium battery. Use a
DIGITAL (P/N 12-41474-05) or type
2032 three-Volt DC lithium battery.
See the DIGITAL Personal
Workstation System Reference and
Maintenance Guide for details.
Carefully adjust metal tab on battery
holder to allow contact with battery.
Installation and Setup Guide
3–7
Page 36

Troubleshooting
Table 3-1: System Troubleshooting,
Problem Possible Cause Action
Security mode is enabled.
Password does not work.
User does not have correct
password.
continued
For Windows NT users, perform the
following steps:
1. Power off the system.
2. Open the system box.
3. Power on the system and wait for
the console to start.
4. Press the password reset button on
the MLB.
5. Power off the system.
6. Reassemble system.
7. Power on the system.
8. Set new password if desired.
NOTE: Take care to remember your
password.
Get necessary configuration data from
the equipment log where you recorded
it.
If you are a DIGITAL UNIX or Open
VMS user, consult Chapter 4 for
instructions on contacting DIGITAL
Customer Support.
3–8
Installation and Setup Guide
Page 37

Table 3-2: Disk Drive Troubleshooting
Problem Possible Cause Action
Hard disk drive cannot read
or write information.
Incorrect SCSI drive ID
settings.
Set the SCSI ID.
Refer to the disk drive installation
instructions.
Troubleshooting
C:
Floppy drive cannot read or
write information.
Loose or incorrectly
installed cables.
Disk drive is not correctly
formatted or partitioned.
External drive not powered
up.
Floppy diskette is not
formatted.
Floppy diskette is wrong
density.
Floppy diskette is worn or
damaged.
Floppy diskette is write
protected.
Floppy drive is empty.
Floppy drive power or data
cable not connected.
Floppy drive data cable
connector installed
backwards.
Make sure all cables are correctly
installed.
Format and partition as required using
the supplied operating system.
Turn on the external drive.
Format the floppy diskette.
Use a floppy diskette of the proper
density for your drive.
Try another floppy diskette.
Slide the write-protect switch so the
hole is not visible.
Insert a floppy diskette.
Connect floppy drive power or data
cable.
Install floppy drive data cable
connector correctly.
Installation and Setup Guide
3–9
Page 38

Troubleshooting
Table 3-3: Audio Troubleshooting
Problem Possible Cause Action
No sound. Cables not plugged in.
Plug in the cables.
Driver not installed.
Volume control set low.
Headset plugged in.
No power to external
speakers.
Internal speaker not
connected.
No keyboard beeps. Jumpers J40 (all sound
enabled) or J41 (buzzer) are
not in place.
Cannot record. Cables not plugged in.
Record volume level set
low.
Install the driver.
Use an on-screen volume control (if
available) to increase the volume.
Unplug headset and plug microphone
into correct connector.
Plug in external speakers.
Connect internal speaker.
Make sure J40 and J41 are enabled: that
is, jumpers connect both pins one and
two on the MLB.
Plug in the cables.
Use the appropriate control to increase
the record level.
Distorted sound. Record volume level set
high.
3–10
Installation and Setup Guide
Reduce the volume level. (Use
amplified speakers.)
Page 39

Table 3-4: Monitor Troubleshooting
Problem Possible Cause Action
Monitor power indicator is
not on.
Monitor is turned off.
Power cord is not connected.
Turn on the monitor.
Connect the power cord to the
system or a wall receptacle.
Troubleshooting
Distorted, rolling, or
flickering screen display, or
wrong/uneven color.
Monitor power indicator is
flashing.
No power at wall receptacle.
Monitor is defective.
Adjustments incorrect.
Wrong type of monitor.
Defective monitor.
Monitor signal cable loose or
damaged.
Monitor cable not connected. Connect monitor cable.
Use another receptacle.
Try another monitor.
Adjust accordingly.
Try another monitor.
Try another monitor.
Inspect connector pins. Replace
cable if damaged.
Installation and Setup Guide
3–11
Page 40

help
Page 41

Customer Support
This chapter provides information on obtaining additional product operating instructions as
well as ways to obtain advanced troubleshooting assistance.
Product Information
Several resources are available to answer your questions about using and maintaining your
system as well as product- and operating–system-related updates.
WWW Go to http://www.workstation.digital.com/products/guides/.
• DIGITAL Personal Workstation a/au-Series System Reference and Maintenance
Guide (available May 1998). Detailed service-, maintenance-, FRU-, and
configuration-related information.
• DIGITAL Personal Workstation a/au-Series Technical Information Guide (available
May 1998). Detailed information on CPU, ISA, PCI, interrupts, registers, addressing,
connectors and cables, LEDs, and FRU replacement, among other topics.
• DIGITAL Personal Workstation au-Series Operating System Installation Guide
(EK-ALUNX-OS). Instructions on running multiple operating systems.
4
Your distributor or DIGITAL representative can provide information on products and
services as well
Support Resources/Checklist
In addition to the resources listed above, DIGITAL provides telephone customer support
available at 1-800-354-9000 (in the United States) or 1-800-267-5251 (in Canada). To
reach customer support through the Web, go to
http://www.digital.com/services/mcs_howto.htm. To make the most of your telephone or
4–1
Page 42

Customer Support
Web inquiry, please fill in the following checklist prior to placing a call to ensure that the
customer support staff have the information necessary to process your request.
BEFORE YOU CALL, fill in the following information:
Today’s date
Customer company name
Address
Contact name
Phone number
System model number
Serial number
Date of purchase
Software platform and version
Layered software applications
System configuration
Problem description
Customer impact
Solutions attempted so far
CPU/MLB/revision:
Firmware
Console SRM:
PALcode VMS:
OSF:
BIOS SRM:
ARC:
Riser card/revision:
Memory/size (in total MB):
Graphics cards:
Number of drives/revision:
Power supply/revision:
Monitor type:
When did the problem start?
Is the system new?
Did the problem start after an upgrade?
Some time after installation?
Is the error repeatable?
Does the error happen occasionally?
Intermittently?
Are there any network-related issues?
Is the system running? Down?
What diagnostics have been used for testing?
(POST, boot operating system, etc.)
What hardware has been replaced?
4–2
Installation and Setup Guide
Page 43

Index
A
AlphaBIOS
console, 2–2
Audio
troubleshooting,
B
Battery
3–7
type,
Boot
multiple, precautions, 2–1
C
Checklist
pre-startup, 1–2
Console
update utility, 2–6
Customer support
checklist, 4–12
telephone numbers, 4–12
D
DIGITAL UNIX, 1–9
installing, 2–5
installing,
updating firmware, 2–6
Disk drive
troubleshooting,
table, 2–5
table, 3–10
table, 3–9
E
Equipment
logging, 3–2
Ergonomics, 1–2
Ethernet LAN, 1–5
External devices
connecting, 1–6
F
Firmware
preparing a floppy diskette, 2–6
update utility, 2–6
updating, 2–1,
Flash
update utility, 2–6
2–5
L
Local printer
connecting, 1–8
M
Microsoft Windows NT, 1–9
MIDI/joystick
connecting, 1–7
Monitor
troubleshooting,
table, 3–11
Index–1
Page 44

Index
N
Network
connection, 1–5
O
OpenVMS, 1–10
installing, 2–5
installing,
updating firmware, 2–6
Operating system
installing, 2–1
table, 2–5
P
Partitions
setting up, 2–1
setting up,
Problem solving, 3–1
table, 2–4
R
Reset button, 3–1
Resources
product information, 4–12
Web sites, 4–12
S
SCSI
controller, 1–6
Security
Kensington lock, 1–10
lockdown hasp, 1–10
system, 1–10
Software
preloaded, 1–9
Speakers
connecting, 1–6
System
configuration, 1–1
cooling, 1–4
installation and connection, 1–4
inventory, 1–1
passwords, 1–11
security, 1–10
startup, 1–8
startup, voltage selection, 1–4
turning off, 1–9
turning off, 1–9
voltage, 1–4
System components
lifting, 1–2
T
Troubleshooting, 3–1, 3–2
table, 3–10
audio,
basic tips, 3–1
boot device not listed,
boot problem,
dead battery,
disk drive,
disk read and write problem,
display problems,
keyboard,
monitor power indicator problem,
monitor,
mouse,
system forgets settings,
system,
3–5
3–7
table, 3–9
3–11
3–6
table, 3–11
3–7
table, 3–3
U
Update utility, 2–6
W
Web sites, 4–12
Windows NT
installing, 2–1
installing,
updating firmware, 2–6
Work environment
recommendations, 1–3
table, 2–2
3–6
3–9
3–11
3–7
Index–2
 Loading...