

Page 1
dbx AFS224
Quick Start Guide
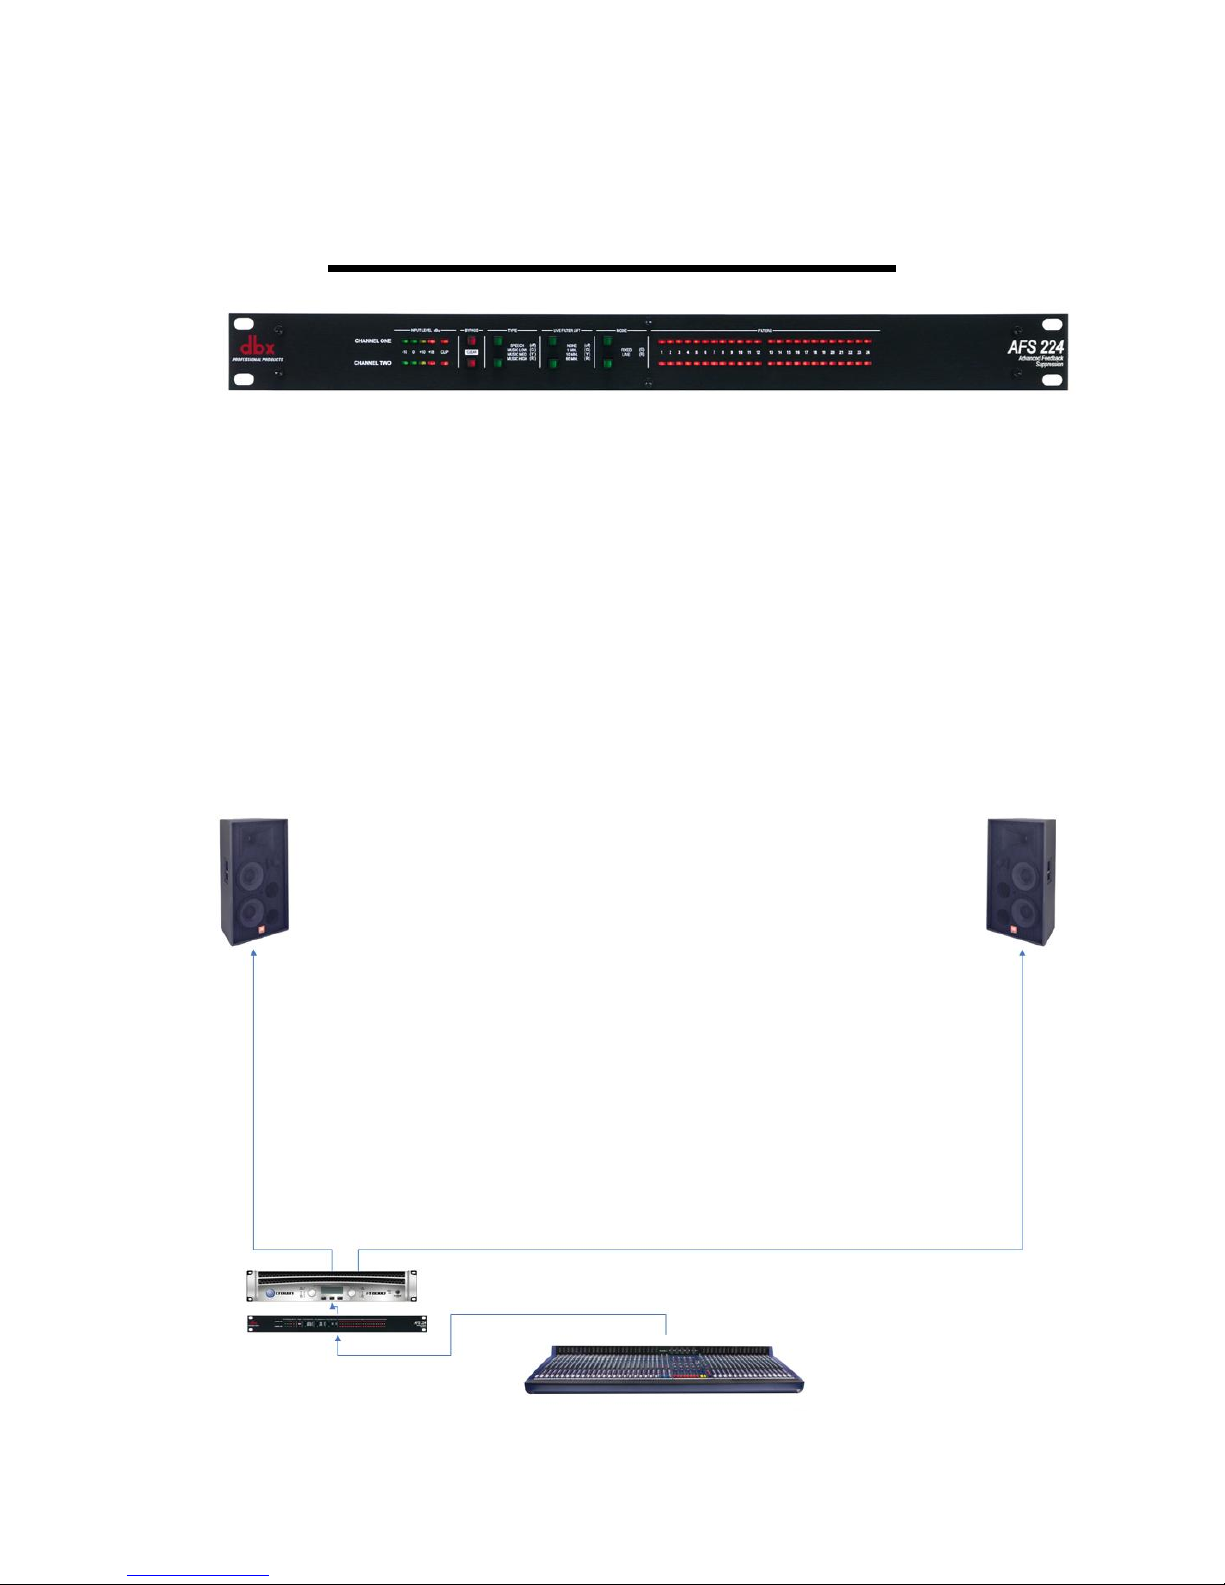
This step by step tutorial is based on a basic configuration
(AFS224 in line between mixer and amplifier) as shown below.
Page 2
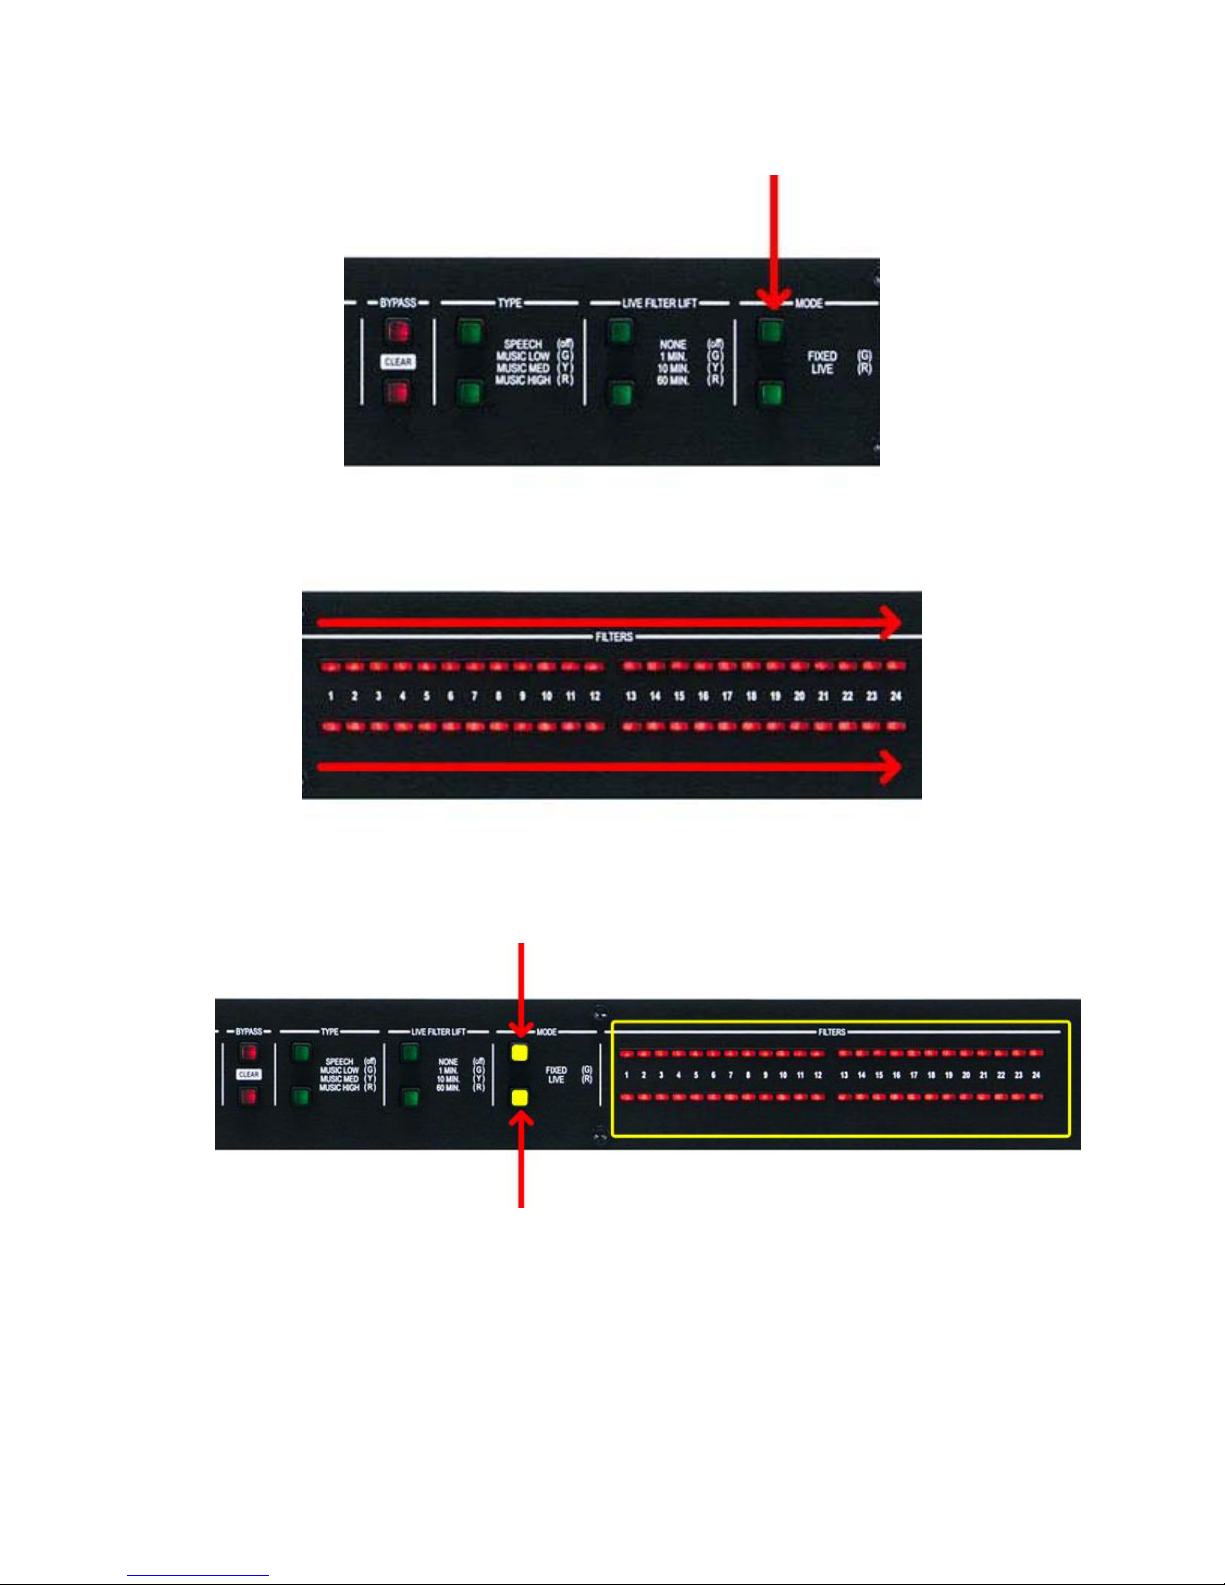
1. Go into the Setup mode by pressing and holding the channel 1 MODE button.
2. Hold this MODE button until the filter LEDs flash all the way across.
3. The Mode buttons should be lit a yellow or amber color. If they are not press each
MODE button until they are both yellow. The filter LEDs will indicate how many
total filters will be active.
Page 3
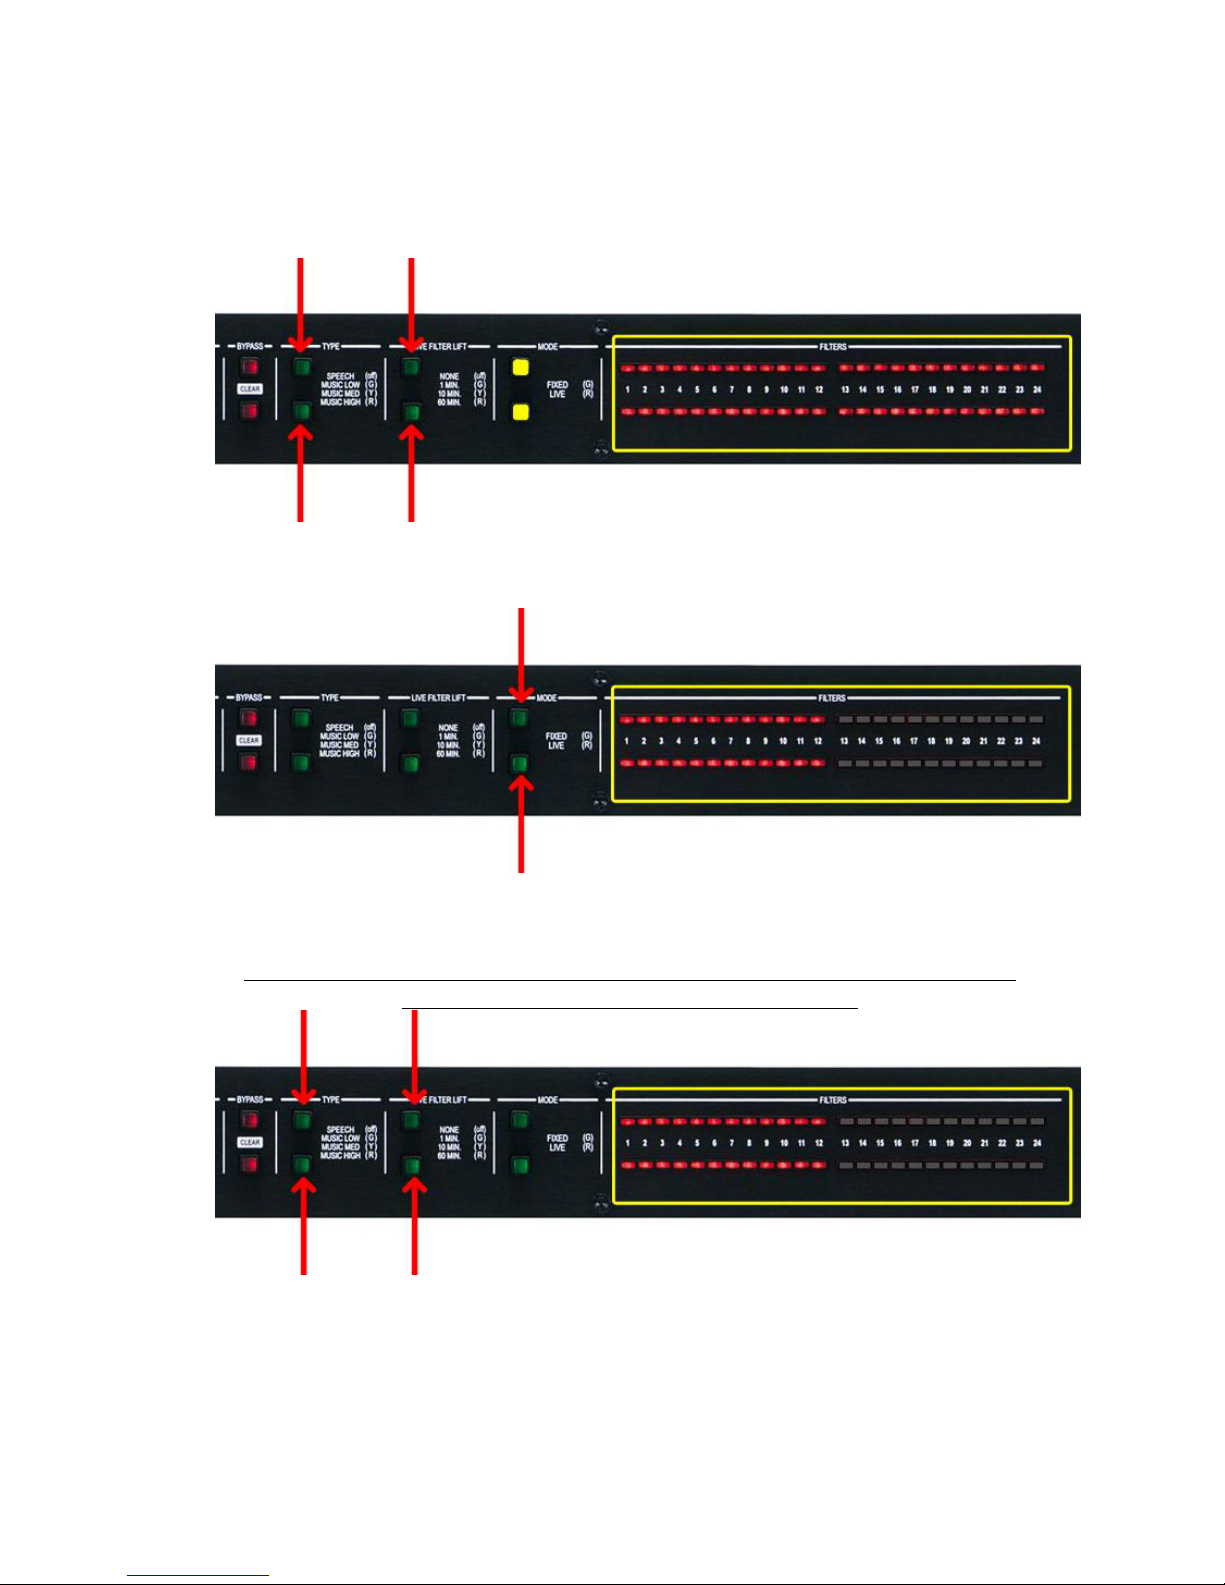
4. Select how many total filters that you want active. The default of 24 is a good
place to start. However, if you want to change the total # of filters, press the
LIVE FILTER LIFT button to increase the # of total filters for each channel or
the TYPE button to decrease the total # of filters for each channel.
5. Press the Mode buttons. They should now be lit green. The filter LEDS will
indicate how many of these total filters will be allocated as “Fixed” filters.
Press the LIVE FILTER LIFT buttons to increase the # of “Fixed” filters for each
channel. Press the TYPE buttons to decrease the # of “Fixed” filters for each channel.
The default of 12 Fixed and 12 Live is a good place to start.
Note: The difference between total filters (step 4) and fixed filters (this step) will
indicate how many “Live” filters are available.
Page 4
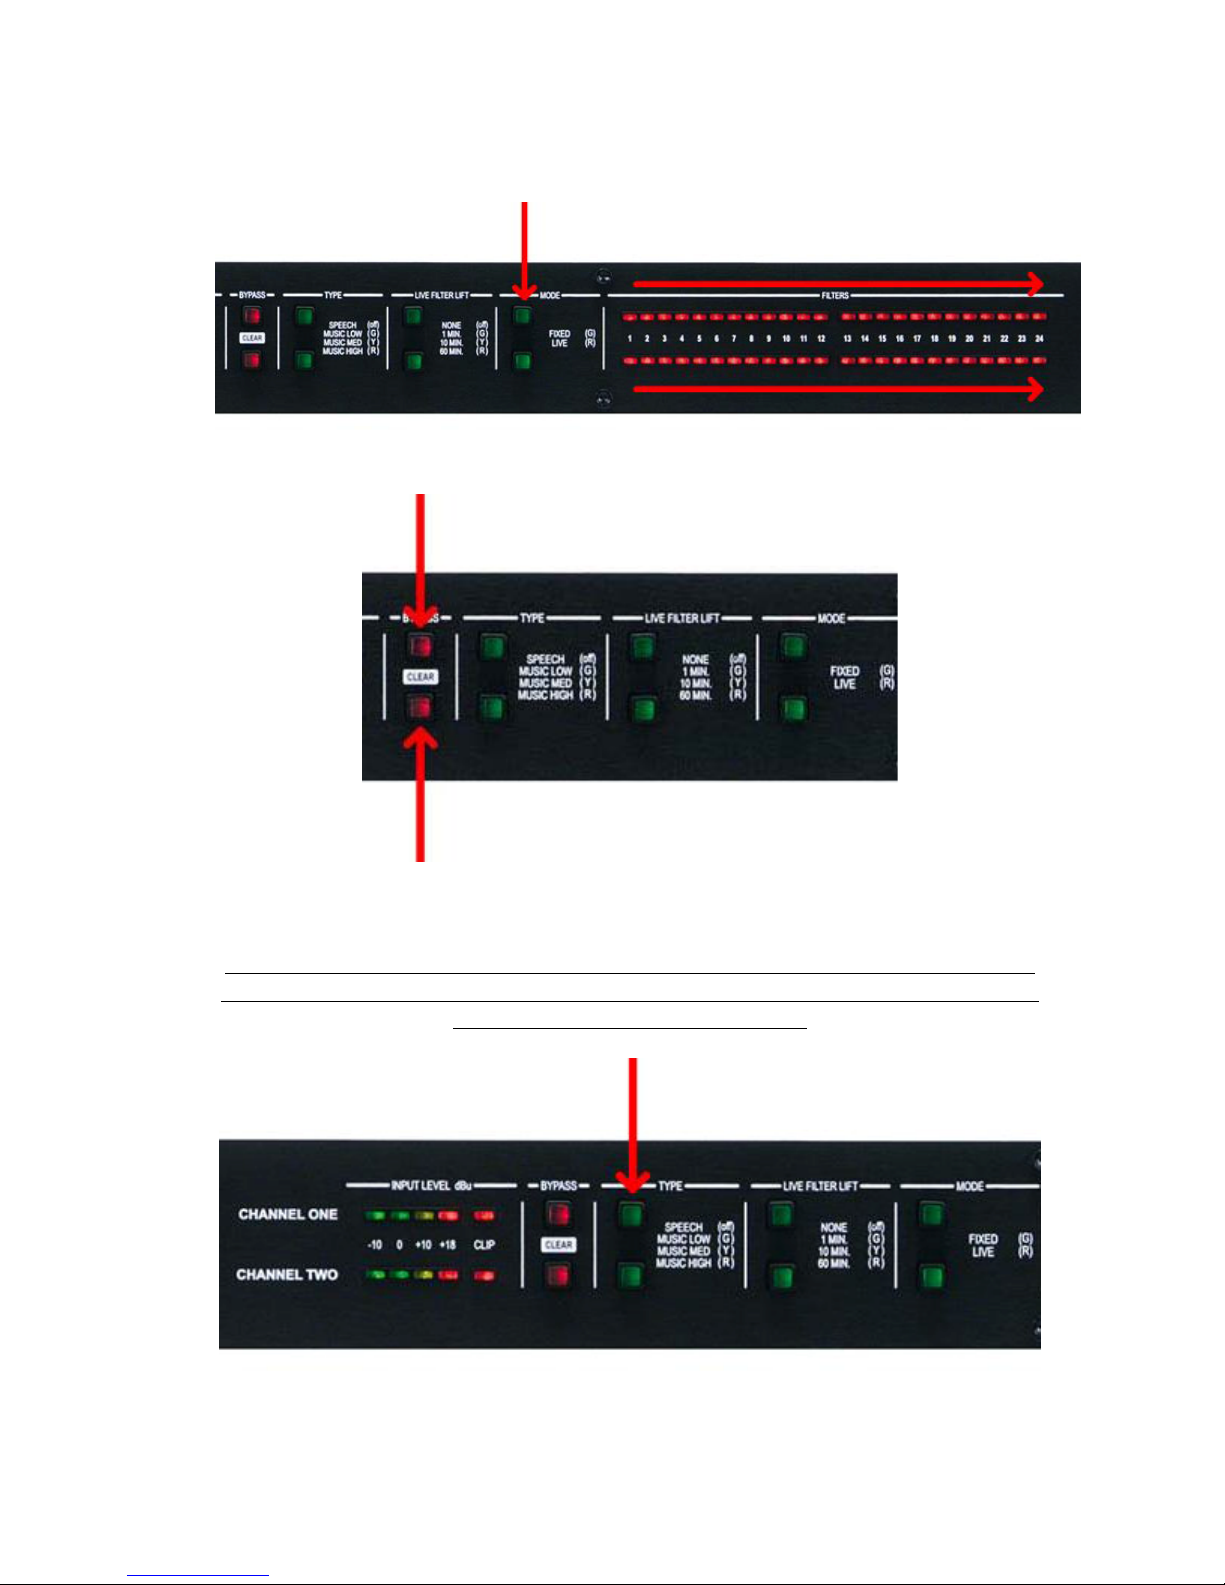
6. To exit the setup mode, press and hold the channel 1 MODE button. Hold this
button until the filter LEDs flash all the way across.
7. Press the BYPASS buttons so that they are both lit red (bypassed).
8. Press and hold the channel 1 TYPE button to select between dual mono or stereo
mode.
Note: You can tell which mode you are in by pressing any of the buttons. If the other
channel changes as well, the two channels are working in conjunction (stereo mode).
If not, the unit is in dual mono mode.
Page 5

9. Set the “Live Filter Lift” to 10 minutes (yellow).
10. Set the “Type” to Music Medium (yellow).
Page 6

11. Perform a sound check on all of the microphones that will be active. Get them as
close to the performance level as possible without feedback. You should get a
reading that is close to “0” dBu on the input meters of the AFS224 when
performing this sound check. When done ask all performers to be very quiet (and
possibly plug their ears) or walk off the stage (and plug their ears).
Page 7

12. Pull the master faders on the mixer all the way down (no signal).
13. Check the Mode buttons. If they are not lit green, press the buttons until they are
lit green. None of the filter LEDs should be lit at this point. If they are, press and
hold the BYPASS buttons until the filter LEDs flash, then release. All filters
should now be cleared.
Page 8

14. Disengage the Bypass buttons (LEDs off).
15. Slowly raise the master faders on the mixer. As feedback occurs, Fixed filters
will be set. You may want to push the faders a little past the unity gain point (or
performance level). This way the system will not be right on the verge of
feedback when set to performance level. If you run out of Fixed filters (this will
be indicated by the Mode buttons flashing green) you can go back into the Setup
mode and allocate more filters as “Fixed” (steps 1-5). You can then resume from
where you left off.
Page 9

16. When you have reached the desired performance level, press the MODE buttons
until they are both lit red. You are now in “Live” mode.
17. For a faster reaction time with the Live filters, try setting the filter TYPE to
“Music Low” (green) or “Speech” (off).
Note: A wider notch filter (such as “Speech”) will catch the feedback faster, but may
be more audible. A more narrow notch filter (such as “Music High”) will not catch
the filter as fast, but will be less audible once the filter is set. You will need to use
your discretion when setting the “Type” parameter.
Page 10

18. If you find that the feedback reoccurs when the Live filters are lifted, try setting a
longer Live Filter Lift time or try setting it to “None” (LED off).
he AFS process is now complete. If, for whatever reason, you would like to restart the
T
process, you can do so by step 1. To clear all of the
filters: Press lash, now and hold the BYPASS buttons until all lit filter LEDs begin to f
clearing the filters and restarting with
release. The filters are now cleared.
Page 11

19. If you would like to lock the front panel (to prevent tampering), press and hold
the channel 1 LIVE FILTER LIFT button. Hold this button until the filter LEDs
flash all the way across (from the outside inward).
To unlock the front panel press and hold the channel 1 LIVE FILTER LIFT button until
the filter LEDs flash all the way across (from the inside outwards).
A little practice and experimentation will make you an AFS expert in no time.
 Loading...