

Page 1
Large Portable Bluetooth Ammo Box Speaker Manual
Note: If mounting in a metal ammo box the antenna must be on the outside of the box. Use the included
antenna or use an external rubber antenna (sold separately).
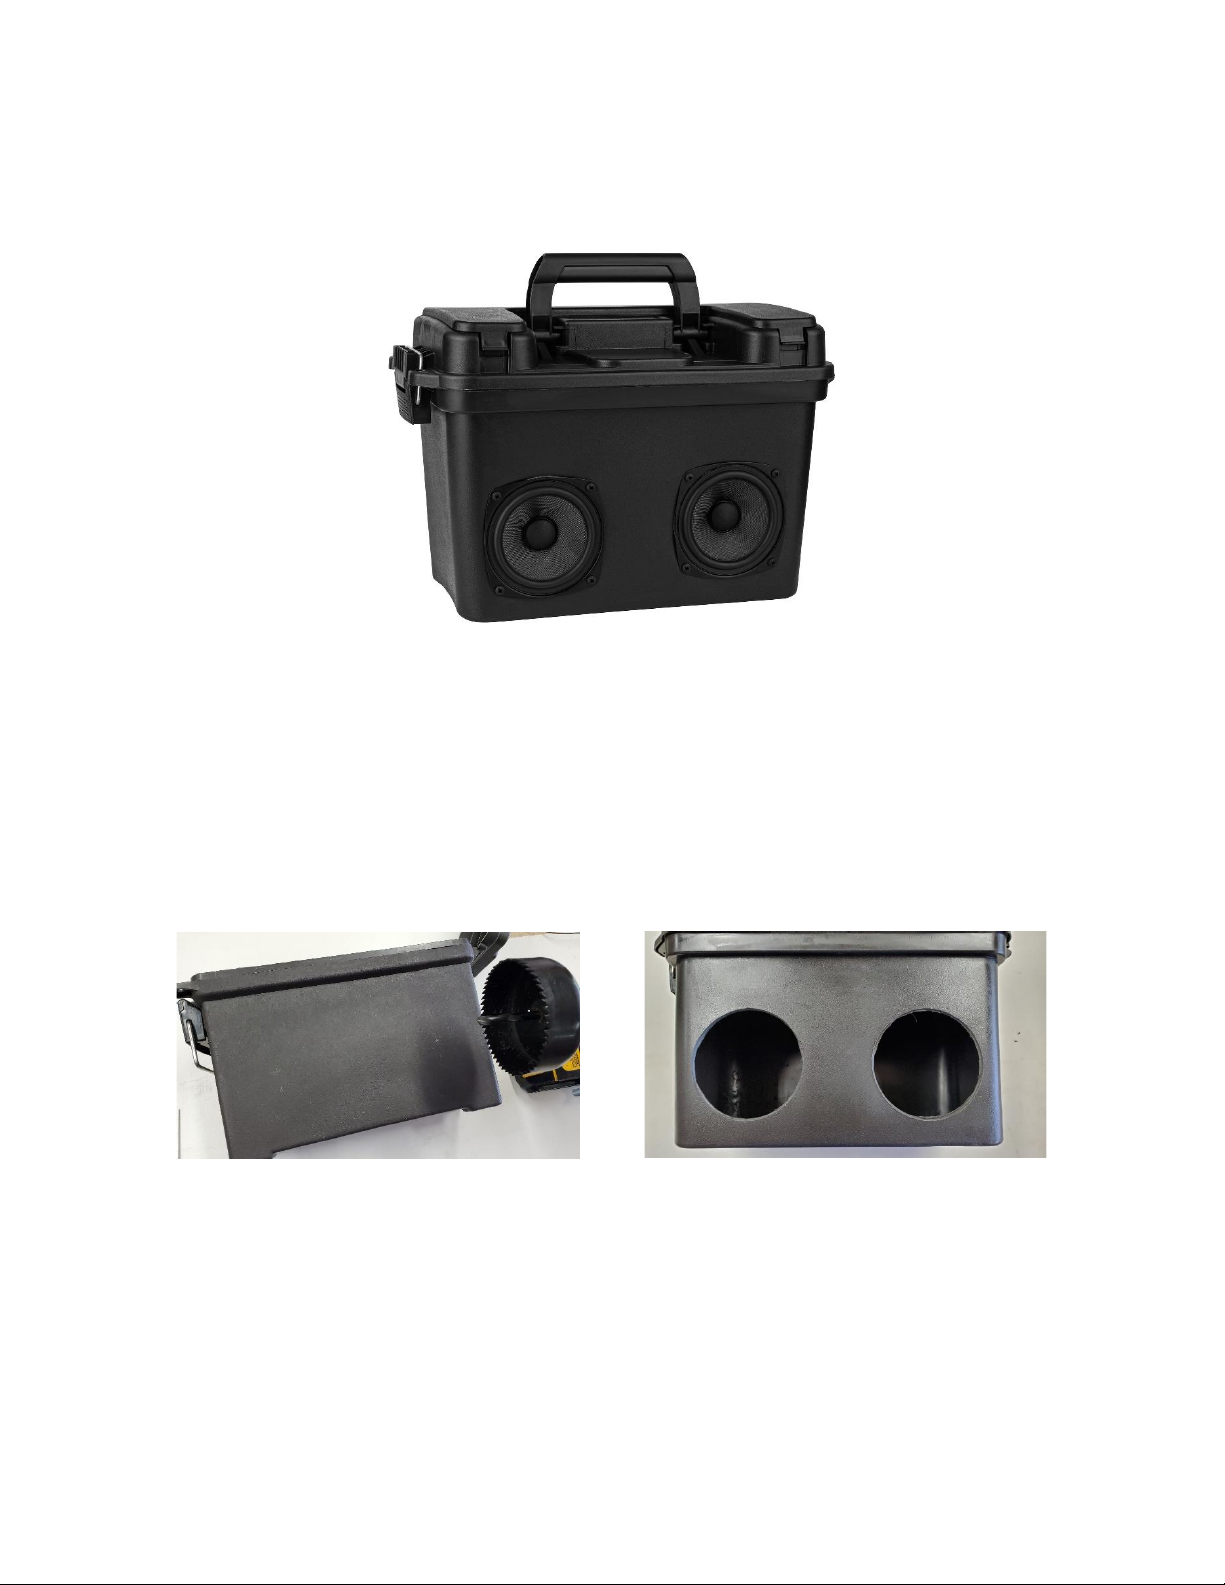
1. Cut two 4" Dia. holes on the flat surface of one side of an ammo box, 1" from the bottom and 1"
from the sides. The center of the hole should be 3" from the side and 3" from the bottom. Use a
hole saw (sold separately) for best results.
Page 2

2. On the opposite side cut a 3-2/3" H x 2-3/4" W rectangle hole in the center of the box 1-1/2"
from the bottom.
3. Mount all the electrical components to the control panel. The power LED has a red wire, the
Bluetooth LED has a blue wire and the charge LED has a green wire. The AUX port has a 3.5mm
hole and the DC jack has a 5.5mm hole.
Page 3

4. Use the included long standoffs to mount the panel to the KAB-250v3 amp board with the four
black machine screws. Face the board sockets towards the black panel. Plug in all the cables
according to the quick reference guide for the KAB-250v3 . Plug the AUX input cable in first and
plug the power LED right next to it. Attach the battery board with the remaining small standoffs
and the four silver machine screws. Attach the battery cable from the KAB-230v3 to the battery
board in one of the 4-pin sockets. Mark the speaker wires for polarity and channel.
5. Use the included gasket tape strips to outline the 3-2/3" H x 2-3/4" W hole. Place the batteries
in the battery holder and insert the panel into the hole. (Make sure the Bluetooth antenna is
outside the hole if mounting into a metal ammo box). Use the included eight black wood screws
to secure the panel. Use a 1/32" bit to drill a starter hole for each screw. Use the included Allen
wrench to secure the screws. Stick the Left + and - speaker wires out the left speaker hole and
the right + and - wires through the right hole.
Page 4

6. Attach the speaker wires to the + and - on the speakers with 0.205" and 0.110" quick
disconnects or solder the wires to each terminal. Use the eight included #6 black Phillips head
screws to secure the speakers. Drill 1/16" starter holes for best results.
7. Plug in the power adapter to charge the batteries and you're ready to crank it up. The power
adapter must be plugged in to initiate the battery holder. Anytime a battery is replaced or
changed the power adapter must be plugged in to initiate the battery holder.
8. Add sound damping material (sold separately) to make it sound even better.
Page 5

 Loading...