

Page 1
•
14mm socket
• 19mm socket
• 22mm socket
• 24mm socket
• 5/8 wrench
• 14mm wrench
• 19mm wrench
• 22mm wrench
• 24mm wrench
• Lug nut socket
TOOLS NEEDED
•
4 ton floor jack
• 2 Jack stands
• 2 Wheel chocks
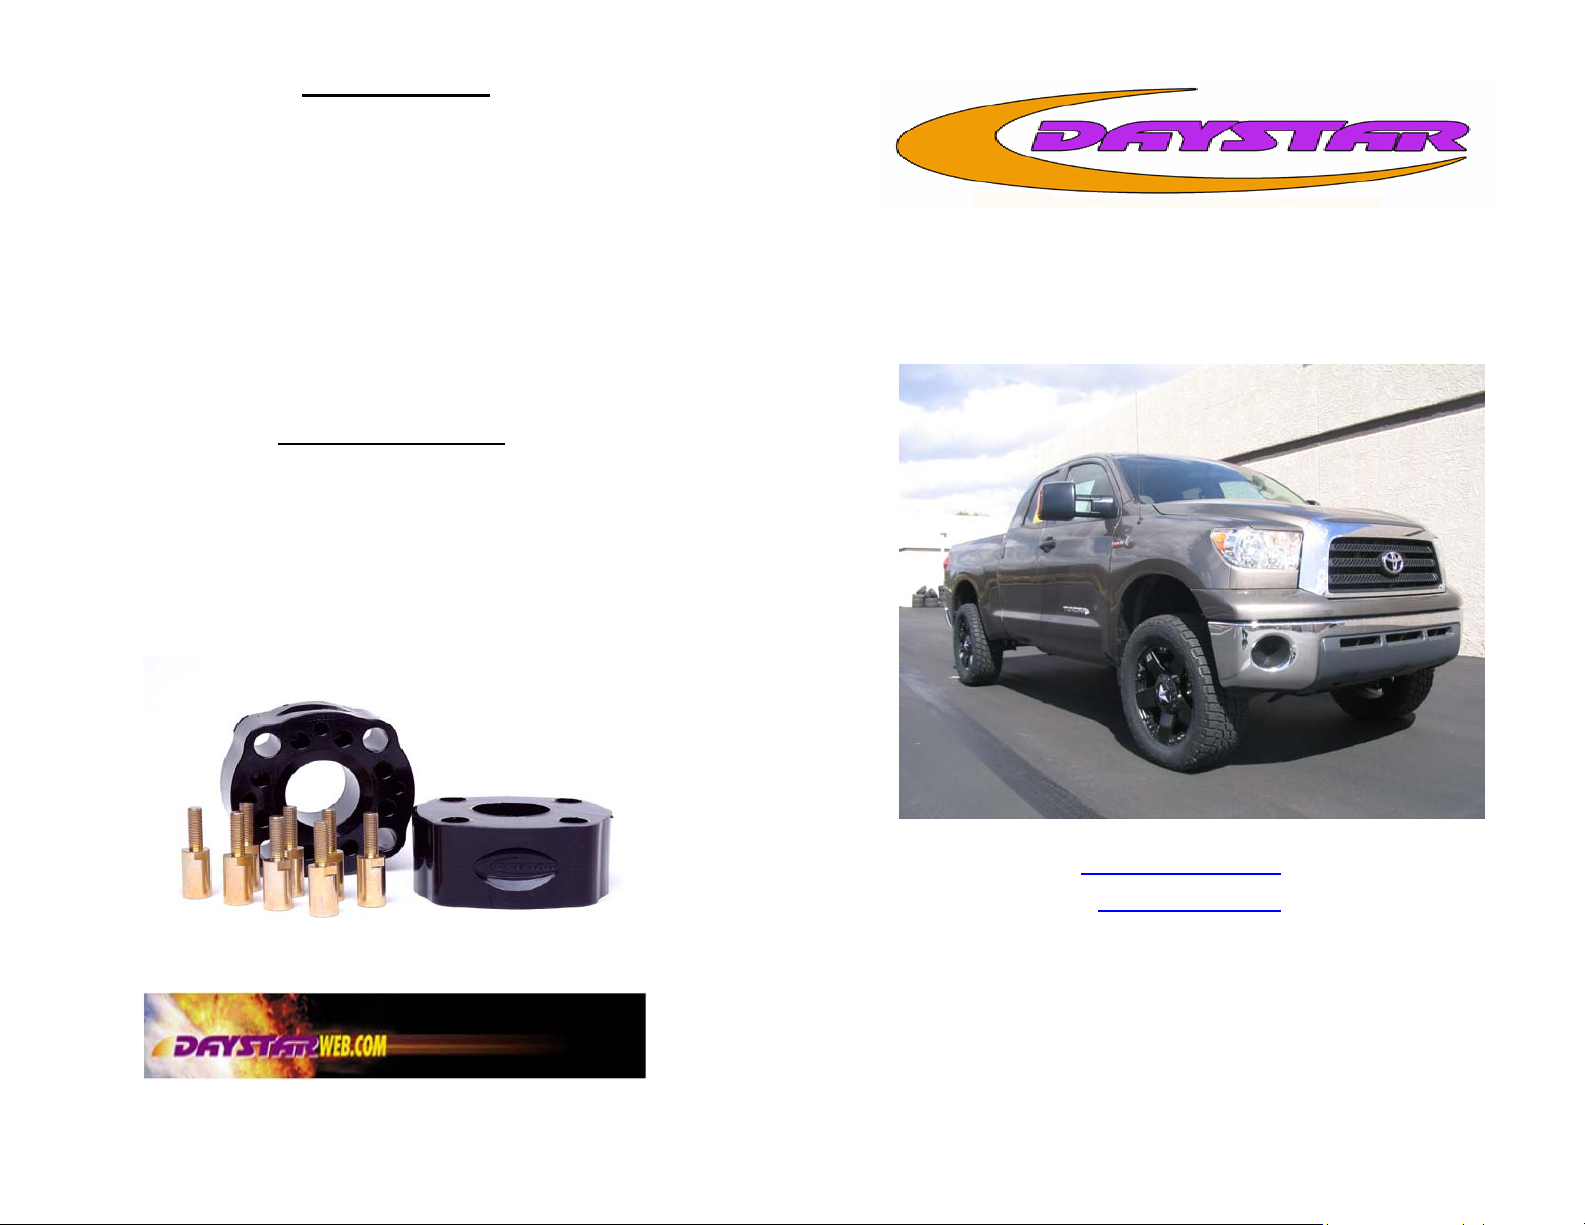
2007 Toyota Tundra 3” front lift kit
2WD & 4WD
Part KT09125
BILL OF MATERIALS
• M03800 x 2 spacers
• BU76093 x 1 hardware
♦ S11105 x 8 stud extenders
♦ P11153 x 1 thread lock
www.Daystaproducts.com
Tech Support Contact Info
Tech@DaystarWeb.com
Phone: 623.907.0081
Fax: 623.907.0088
841 South 71
st
Avenue
Instruction Sheet P11258
2007 Daystar Prod ucts Internat ional Inc.
Page 2
Thank you for choosing Daystar Products
Daystar recommends a certified technician install this system . In addition
to these instructions, professional knowledge of disassemble/reassembly
procedures as well as post instructions checks must be known. Attempts to
install this system without this knowledge and expertise may jeopardize the
integrity and/or operating of the vehicle.
Please read all the instructions before beginning the installation. Check the
kit hardware against the parts list. Be sure you have all the needed parts and
understand where they go. If anything is missing , do not proceed with the
installation, Call Daystar Products to obtain needed items. Torque specs are
on page 5.
Product Use Information
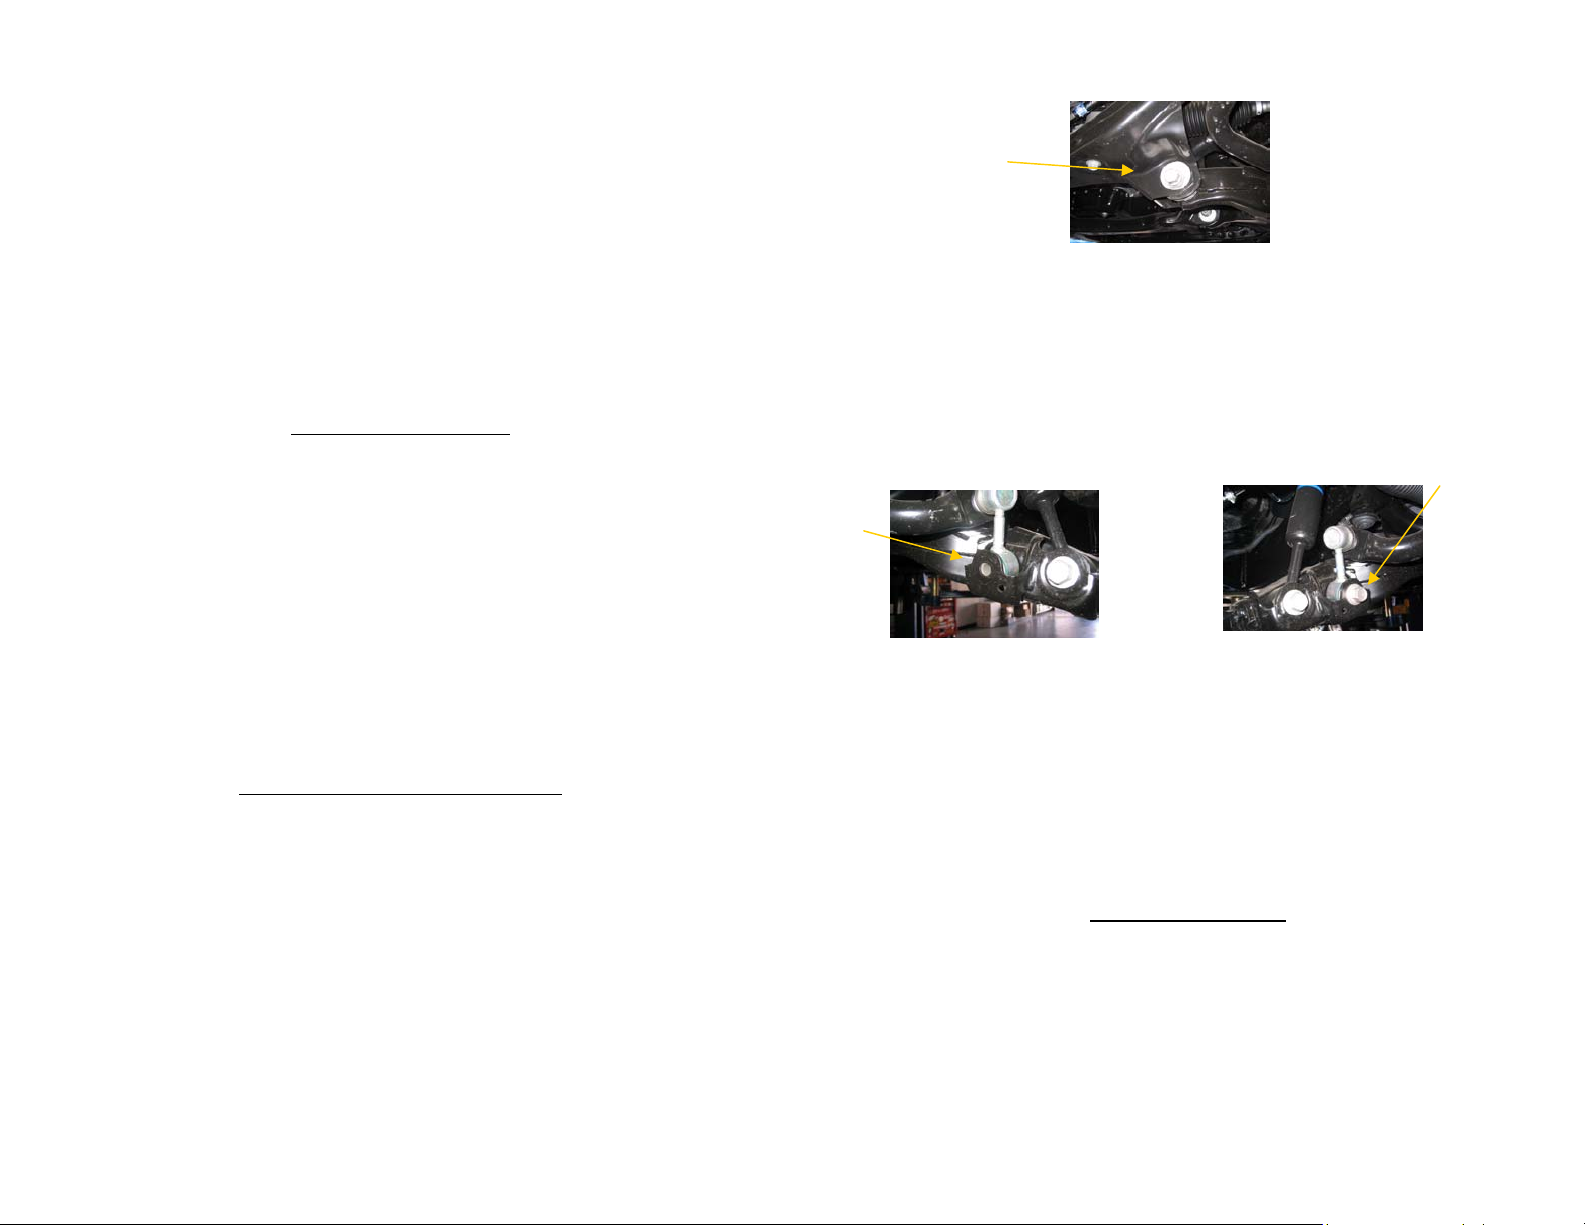
12. Using a 24mm socket tighten the inner lower control arm bolts.
13. Reinstall the tires and tighten the lugs to 85 ft lbs. Jack up the truck and
remove the jack stands. Lower Jeep back to the ground .
14. With the truck on the ground install the sway bar end-link. Using a 19mm
socket tightened the bolt.
As a general rule, the taller a vehicle is the easier it will roll. We strongly
recommend , because of rollover possibility, that seat belts and shoulder
harness be worn at all times. Avoid situations where a side rollover may
occur.
Braking performance and capabilities are decreased when significantly
large/heavier tires and wheels are used. Take this into consideration while
driving, Also, speedometer recalibration is necessary when larger tires are
installed.
Do no add, alter, or fabricate any factory or after-market parts which increase vehicle height over the intended height of the Daystar Product purchased. Mixing component brands, lifts, and/or combining body lift with
Notice to Dea ler and Vehicl e Owner
Any vehicle equipped with any Daystar Product must have the “Warning to
driver” decal installed on the sun visor or dash. The decal is to act a constant reminder for whoever is operating the vehicle of its unique handling
characteristics. INSTALLING DEALER— It is your responsibility to install the warning decal and forward these instructions on to the vehicle
owner for review and to be kept in the vehicle for service life.
After installation occurs, a qualified alignment facility is required to
align the vehicle to factory specs.
15. Install “Warning to driver” decal to sun visor.
16. Check all bolts and nut that they are installed and tighten down.
17. The vehicle must be aligned by a certified alignment center.
18. Headlights will need to be adjusted to factory specs.
19. Wheels must be retightened at 50 miles.
20. All components must be retighten at 500 miles and then at 3000 miles.
Torque Specification
• Upper strut nuts, 33 ft lbs x 4 per side
• Lower strut bolt/nuts, 144 ft lbs x 1 per side
• Lower sway bar bolt, 89 ft lbs x 1 per side
• Lower ball joint bolts, 221 ft lbs x 2 per side
• Inner lower control arm bolts, 207 ft lbs x 2 per side
Page 3

7. Put thread lock on the 8 ( S11105) stud extenders and using a 5/8 wrench install them on the strut, then install the strut spacer( M03800) over the stud
extenders.
8. Install the strut assembly with the spacer installed back into the truck and put
the 4 upper strut nuts on to hold the strut from falling out.
9. Raise the lower control arm so that the lower strut bolt/nut can be installed.
Put thread lock on the 2 lower ball joint bolts.
10. Using a 24mm socket install the lower ball joint bolts into the control arm/
knuckle assembly and tighten.
11. Using a 5/8 wrench tighten the upper strut nuts. With a 22mm socket and
wrench tighten the lower strut bolt and nut.
Installation steps
1. The tools needed for installation are on the back cover. A list of parts in the
kit are under the tool listing. Make sure you have all of the proper tools and
understand these directions before proceeding.
2. Place the truck on a clean level surface and set the parking brake. Chock the
rear wheels and using a floor jack raise the front of the truck and support
the truck with approved jack stands under the frame rail behind the front
wheels. NEVER WORK UNDER AN UNSUPPORTED VEHICLE.
Using a 21mm deep well socket remove the front wheels.
3. Disconnect the front sway bar lower end links using a 19mm socket.
4. Loosen the two inner lower control arm pivot bolt using
a 24 mm socket.
5. Place a floor jack under the lower control arm and support the arm, using a
14mm socket remove the upper strut nuts. Using a 22mm socket and
wrench remove the lower strut bolt and nut.
6. Using a 24mm socket remove the lower ball joint bolts and lower the con-
trol arm down, to remove the strut assembly.
 Loading...