

Dayfly Tech HMP-2H User Manual

0
HMP-2H
HD Network
PLAYER
User’s Manual

1
Table of Content
1. Introduction ................................................................................................ 1
1.1 Preface ............................................................................................................................. 1
1.2 Packing List...................................................................................................................... 2
1.3 Caution ............................................................................................................................. 2
1.3.1 Usage cautions
..................................................................................................................... 2
1.3.2 Power cautions
..................................................................................................................... 3
1.4 Repair .............................................................................................................................. 3
1.5 Others .............................................................................................................................. 3
2. About the Player......................................................................................... 4
2.1 Remote Control ................................................................................................................ 4
2.2 The front side ................................................................................................................... 6
2.3 The top side ..................................................................................................................... 6
2.4 The rear side .................................................................................................................... 6
3. Assembling and Connection ..................................................................... 7
3.1 Assembling Hard Disk ...................................................................................................... 7
3.2 YUV Output ...................................................................................................................... 8
3.3 AV Output ......................................................................................................................... 8
3.4 HDMI Output .................................................................................................................... 9
3.5 Connect to Computer ....................................................................................................... 9
3.6 USB device Connection ................................................................................................. 10
3.7 Multimedia Card Connection ......................................................................................... 10
3.8 NETWORK Connection ................................................................................................. 10
4. SETUP ....................................................................................................... 11
5. Multimedia Menu ...................................................................................... 12
5.1 Home Menu ................................................................................................................... 12
5.2 Movies Menu ................................................................................................................. 12
5.3 Music Menu.................................................................................................................... 14
5.4 Photo Menu.................................................................................................................... 15
5.5 TXT Menu ...................................................................................................................... 16
5.6 Flash Menu .................................................................................................................... 16
6. Network ................................................................................................... 17
6.1 The Setting on PC ......................................................................................................... 17
6.1.1 Install the software ............................................................................................................. 17
6.1.2 Run the software ................................................................................................................ 20
6.2 Ethernet setup ............................................................................................................... 22
6.3 WIFI setup...................................................................................................................... 23
6.4 Playing the shared files .................................................................................................. 25

1
1.Introduction
1.1 Preface
Dear Customer,
Thank you very much for purchasing our product. In the digital era, this product is a great
home entertainment partner. With an outstanding design, you can enjoy movies and music,
view photos of precious moments, record your favorite TV or movie programs and view
them in your free time. The editing function provides you with an easy way to save these.
It’s easy to use this product as a portable external storage device with its built-in HDD and
high-speed
USB 2.0.
This player has the following functionality:
Movie Playback - Complete
H.264, Real Video, MPEG 1/2/4 HD decoding backend
and video post processing. Decode RealVideo-8/9/10 video
streams (720p). MPEG 1/2/4 1080i/1080p 30fps decoding. H.264
HP @level 4.1
Logistic support
VOB (DVD), IFO (DVD), MPG (MPEG-2/1), AVI (MPEG-4 ASP:
XVID), DAT (VCD),MKV(H.264)
and MPEG-2 TS files; Resolution
up to 1080P;
Music Playback - supports MP3, OGG, and WMA files;
Photo Playback - supports JPEG, and BMP files;
Data Storage
- works as a portable hard disk using USB 2.0 port;
USB HOST
- supports USB 2.0 host ports.
HDMI
- High-Definition Multimedia Interface transmits the highest
quality digital video and audio via a single cable, simplifies
cabling and provides high quality home theater experience.
We hope that this product will bring you a lot of enjoyment. We are committed to apply
Multimedia technology in your work, entertainment, family, daily life, car and everywhere!
Welcome to be with us. Thank you again for choosing our product.
2
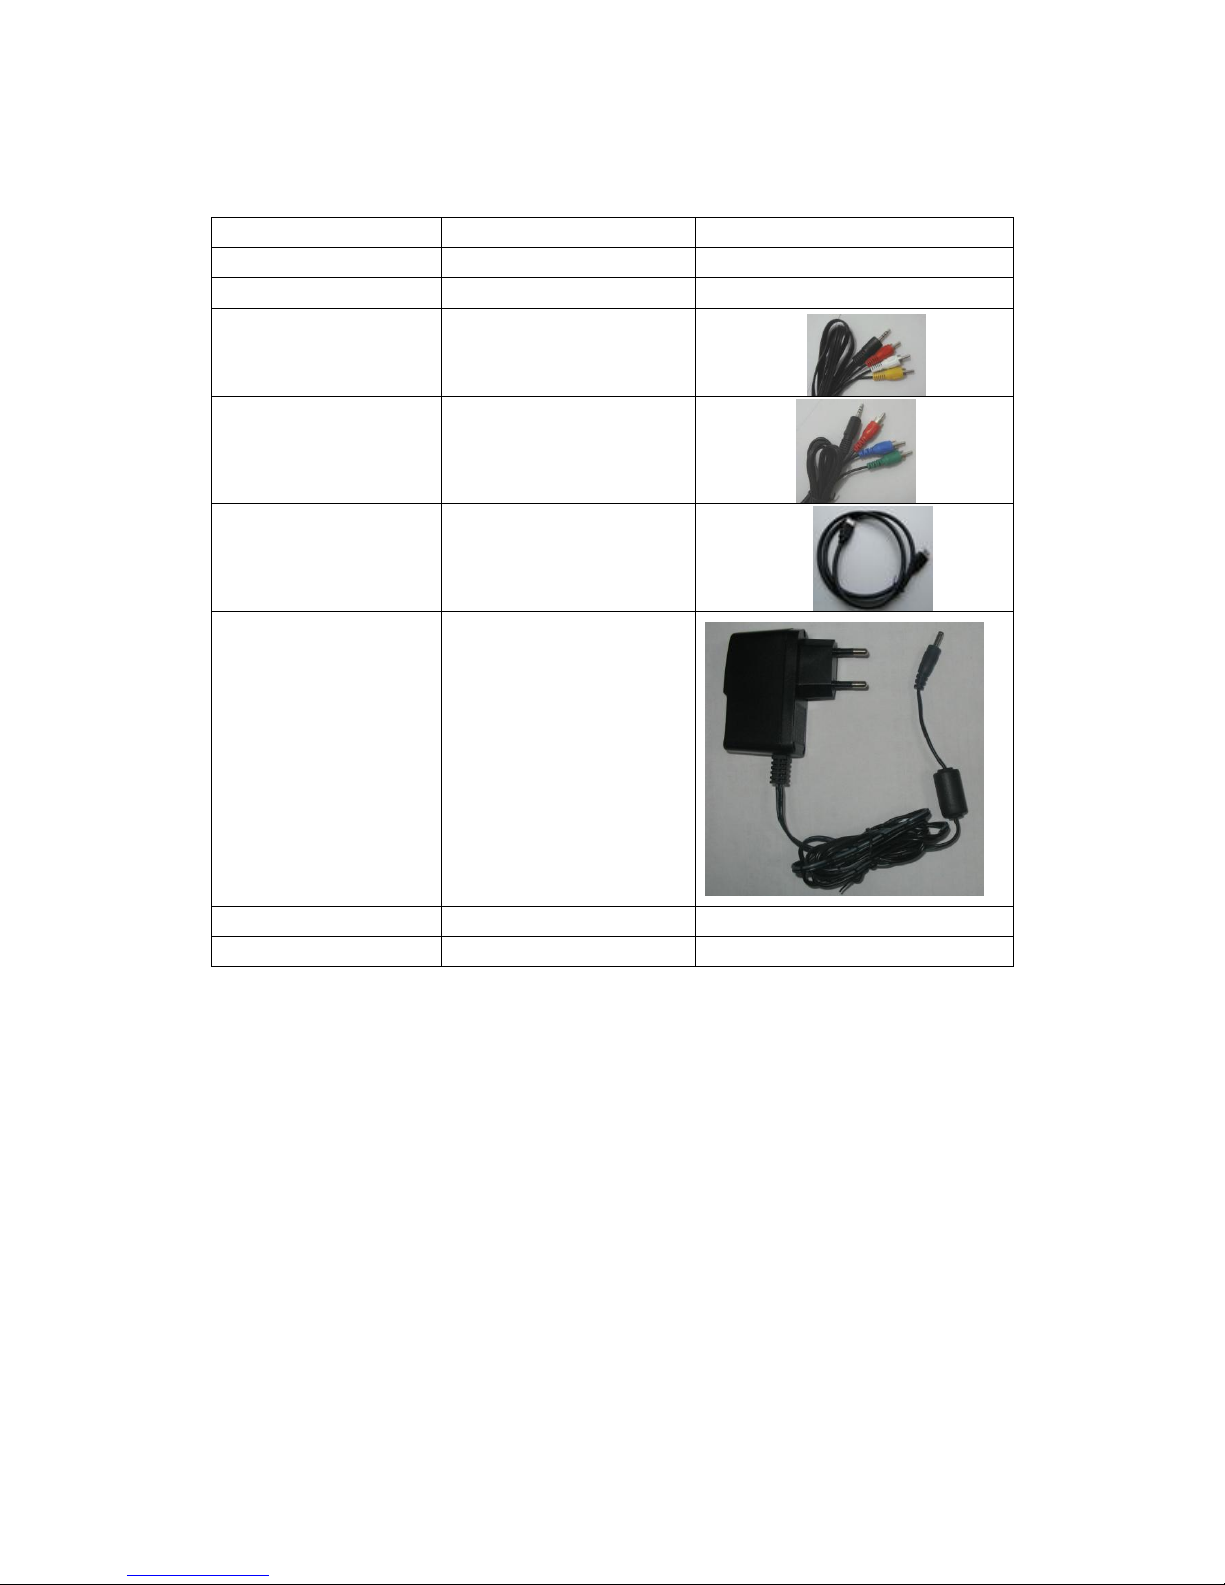
1.2 Packing List
Part
Quantity
Player
1
Remote control
1
AV cable
1
YUV cable
1
USB cable
1
AC/DC adaptor
1
Manual (Driver CD)
1
HDMI cable
1(optional)
Note:
The actual contents in the package might be different from the packing list in this manual.
1.3 Caution
This player’s design and manufacture has your safety in mind. In order to safely and
effectively use this player, please read the following before usage.
1.3.1 Usage cautions
User should not modify this player. If commercial hard disk is being used, the environmental
temperature should be within +5℃ ~
+35℃.

3
1.3.2 Power cautions
The player’s power voltage: DC 5V.
When using this player, please connect the supplied AC adapter cable to the player’s power
jack. When placing the adapter cable, make sure it can not get damaged or be subject to
pressure. To reduce the risk of electric shock, unplug the adapter first before cleaning it. Never
connect the adapter to the player in a humid or dusty area. Do not replace the adapter or
cable’s wire or connector
1.4 Repair
If the player has a problem, you should take it to an appointed repair center and let the
specialists do the repair, never repair the player yourself, you might damage the player or
endanger yourself or your data.
1.5 Others
When using this player, please do not let the player come into contact with water or other
liquid. If water is accidentally spilled on the player, please use a dry cloth to absorb the
spillage. Electronic products are vulnerable, when using please avoid shaking or hitting the
player, and do not press the buttons too hard.
Do not let the player come into contact with water or other liquid.
Do not disassemble the player; repair the player or change the design of the player, any
damage done will not be included in the repair policy.
Do not press the buttons of the player too hard.
Avoid hitting the player with hard object, avoid shaking the player, and stay away from
magnetic fields.
During electrostatic discharge and the strong electromagnetic field, the product will
malfunction,
and then
unplug the power cable and the product
will return to normal
4
2. About the Player
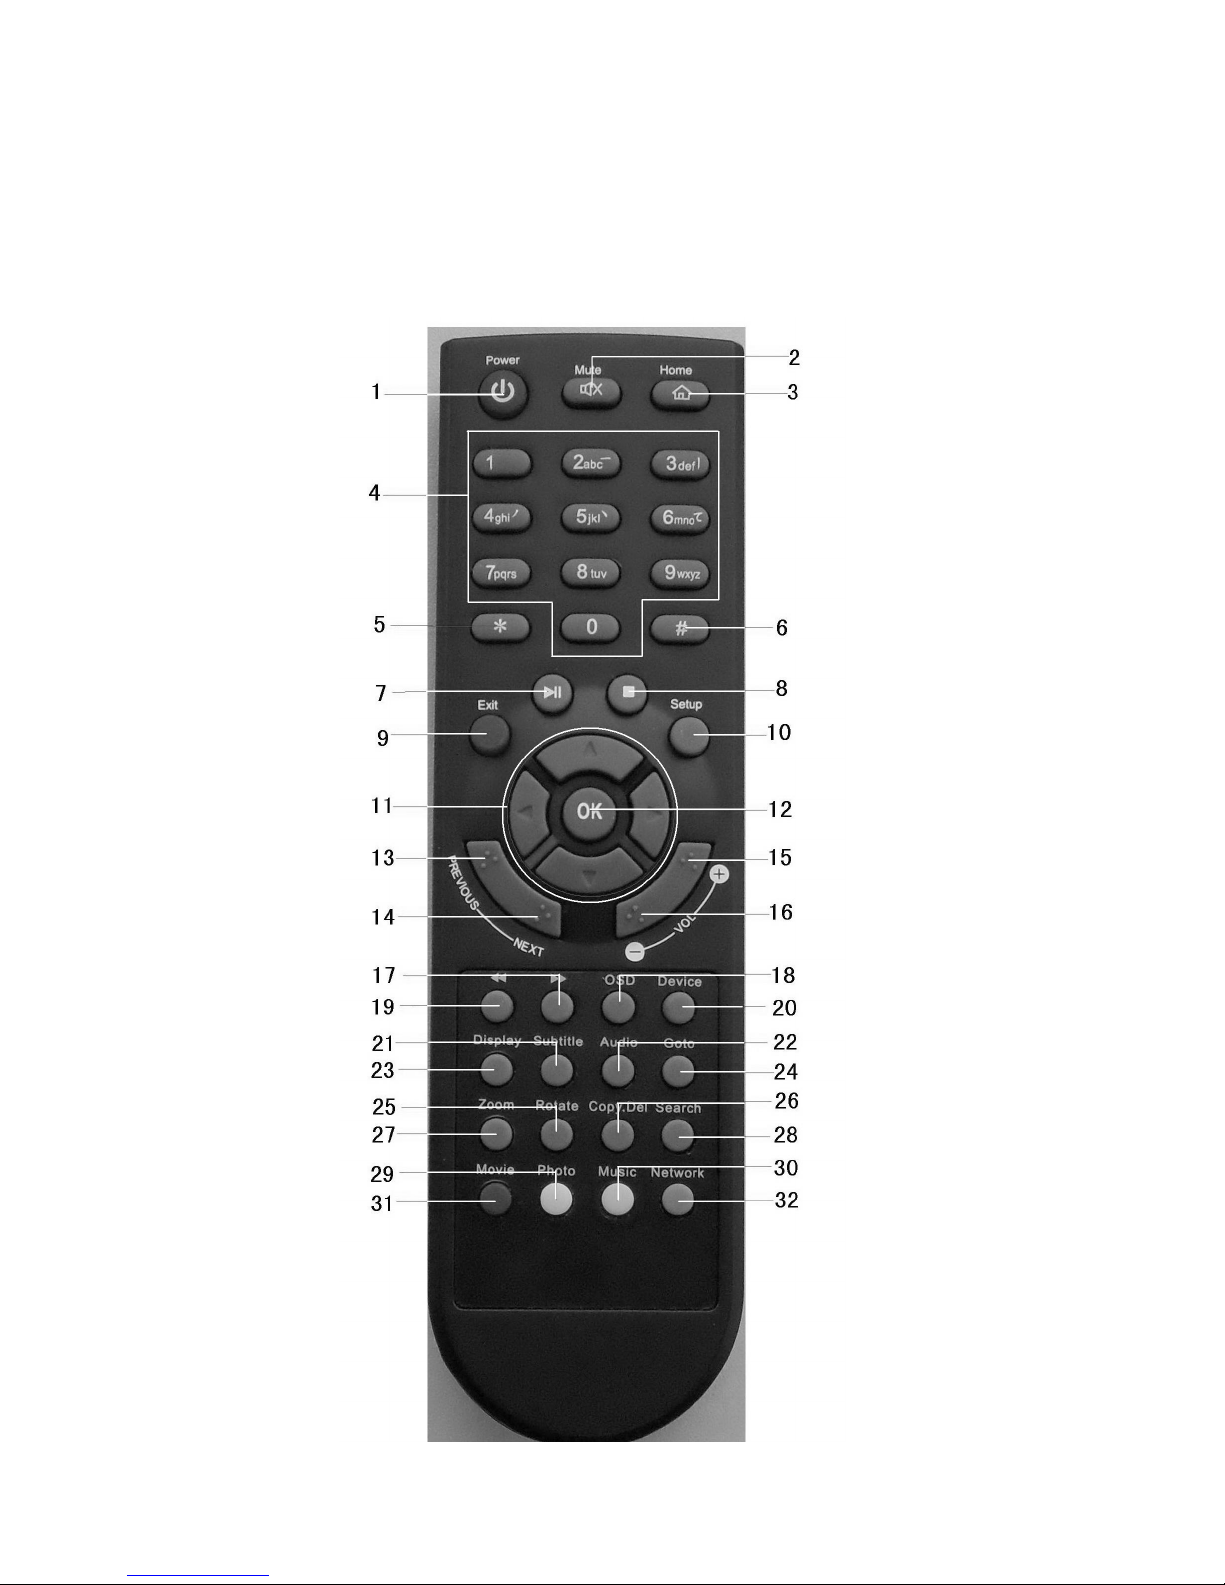
2.1 Remote Control

5
NO.
Name
Function
1
Power
To turn on/ off power mode
2
Mute
For mute
function
3
Home
To go to top menu
4
Numeric
For numeric input
5
*
For “* “ input
6
#
For “#* “ input
To change the resolution
7
Play/Pause
To play and pause the selected file
8
Stop
To stop file in play
9
Exit
For returning
10
Setup
To turn to SETUP menu
11
Direction key
To move and select cursor
12
OK
To confirm selection/ play
13
Previous
To go to the previous file
14
Next
To go to the next file
15
VOL+
To increase the volume.
16
VOL--
To decrease the volume
17
Fast forward
To fast forward the current playback.
18
OSD
to evocative function of column
19
Fast rewind
To fast rewind the current playback.
20
Device
To change device
21
Subtitle
To select multi-subtitles/turn off subtitle in a subtitle
video
22
Audio
To select multi-audio subtitle in a multi-audio file
23
Display
To change display mode
24
Goto
To jump to a specific point
25
Rotate
Rotate 90°in photo
26
Copy.Del
To copy/del the selected file
27
Zoom
Press to zoom in/out when playing photos or
Video programs
28
Search
Search related file
29
Photo
Photo Shortcuts
30
Music
Music Shortcuts
31
Movie
Movie Shortcuts
32
Network
Network Shortcuts
6
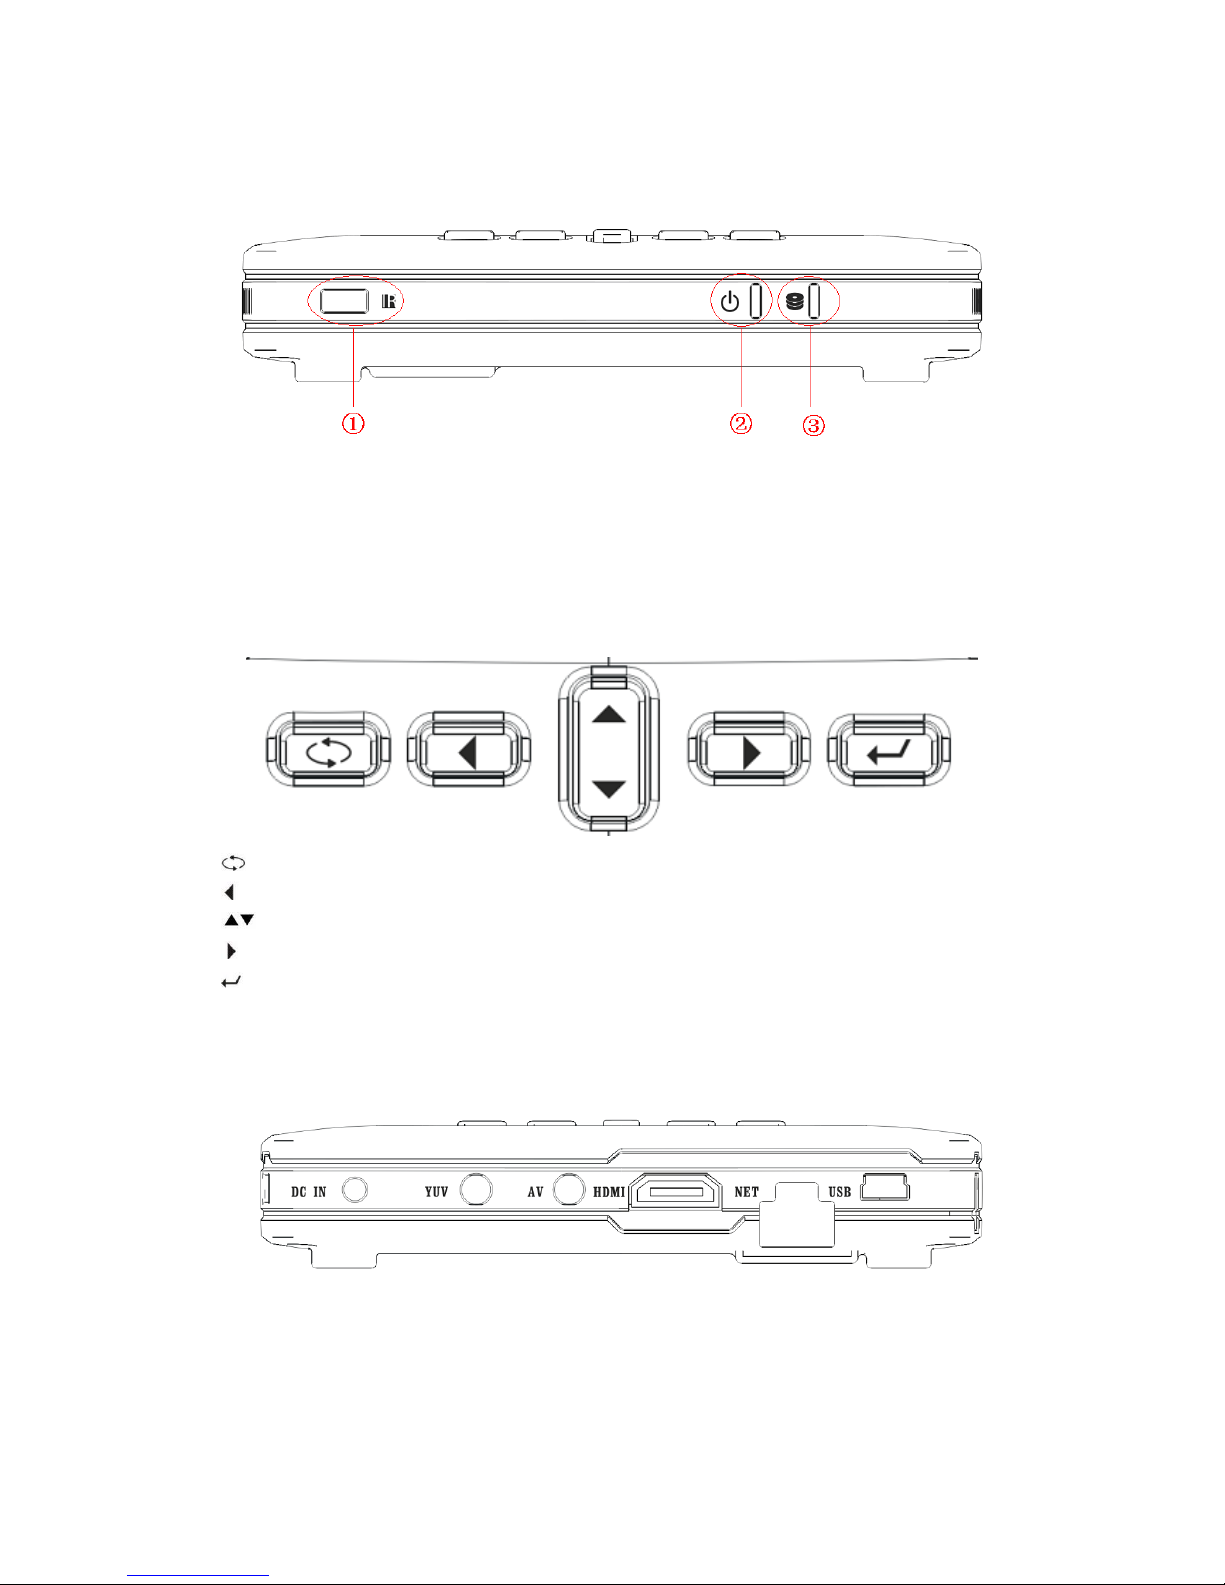
2.2 The front side
① IR receive part
② Power light
③ Hard dish light
2.3 The top side
Return to main menu
� Navigation button left
Navigation button up and down
Navigation button right
Start of playback or confirm the settings
2.4 The rear side
DC IN Power adapter input
YUV 3-wire Video component output
AV Audio/Video output
HDMI HDMI output
USB Connect to pc
NET Connect to UPNP
7
3. Assembling and Connection
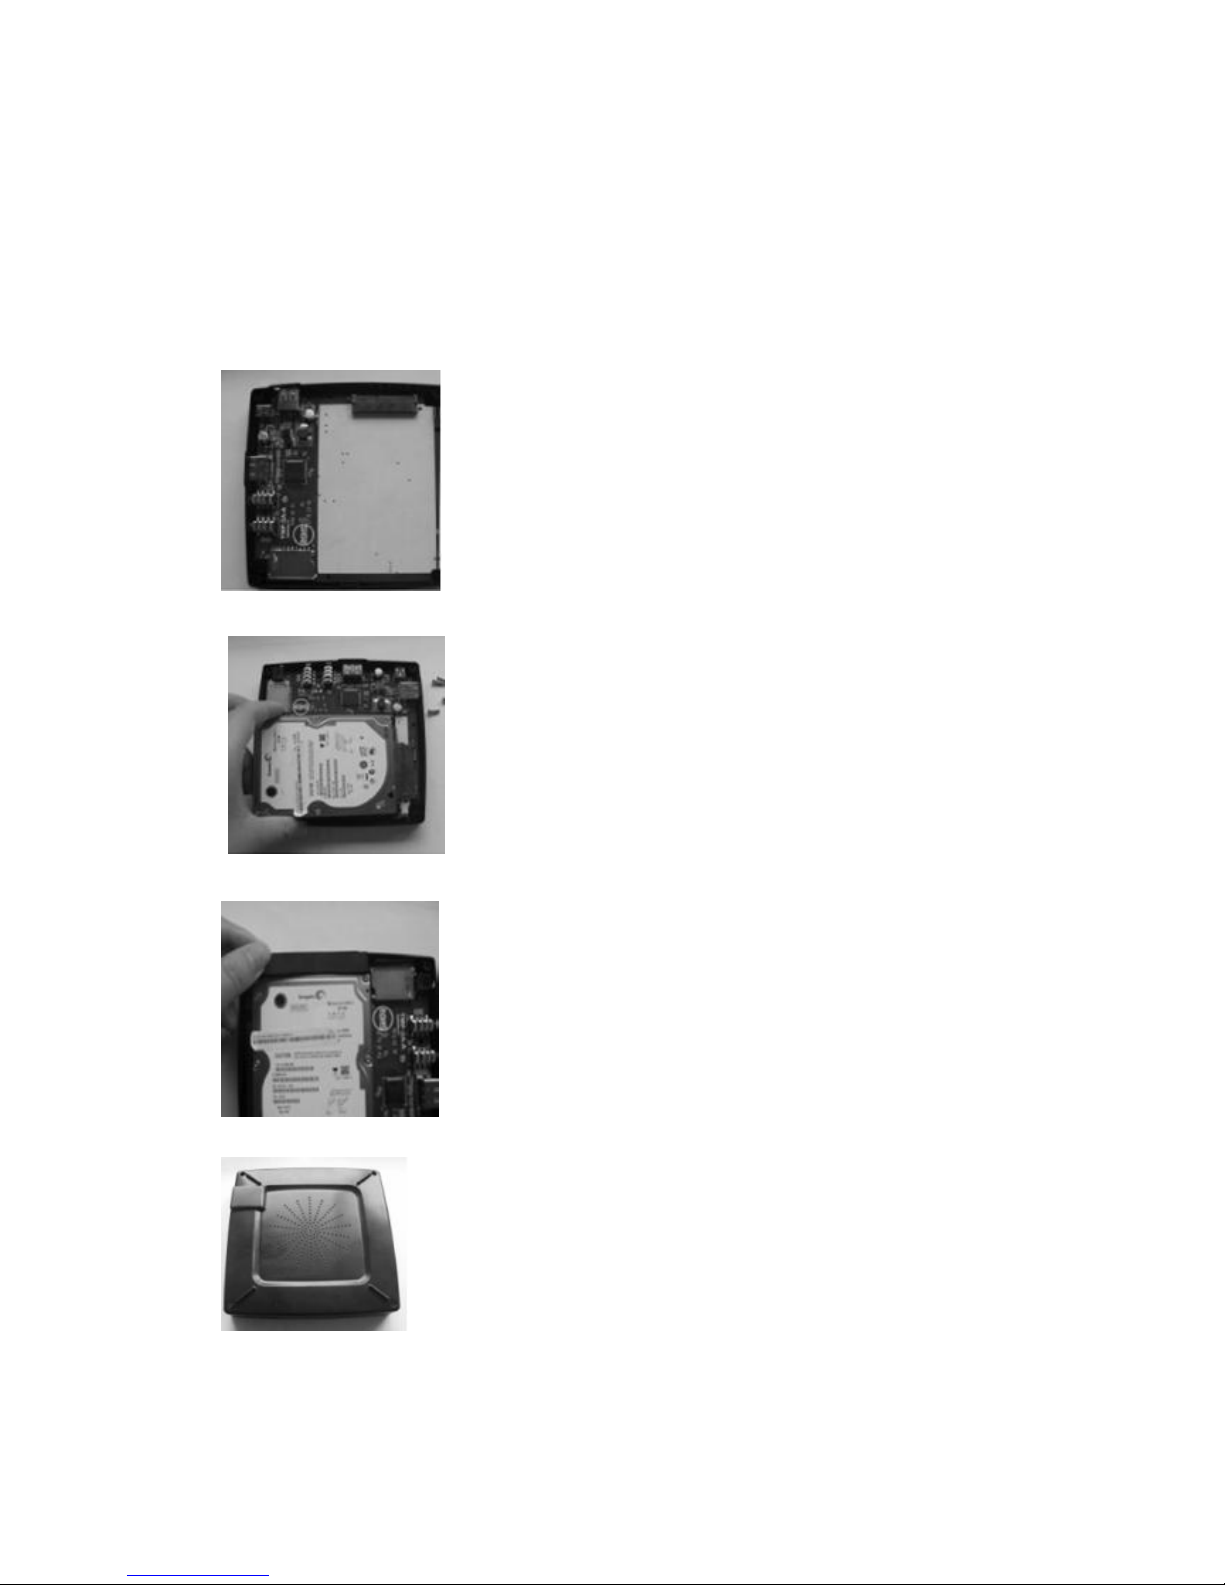
3.1 Assembling Hard Disk
Open the rear cover by screwdriver
Insert the HDD to SATA interface of the unit
Put the sponge between the interspaces to fix the HDD
Put the rear cover back to the unit, and put back the screws.
 Loading...