

Dayasa 6945, 7291, 7290, 7117, 6946 Instruction Manual

- Seite 1 -
Instruction manual

- Seite 2 -
Content
Seite
A - Quick start 3
B - How to operate your Dayasa 3
B1 - How to set the time 3
B2 - Setting the alarm clock 4
B3 - How to install the gong and test the sound 4
C - Further functions 5
C1 - Light 5
C2 - How to activate or deactivate the hourly gong 5
C3 - Countdown-Timer 5
C4 - The dierent gongs 7
C5 - Batteries 7
C6 - How to change the batteries 7
D - Warranty 8
E - The Fibonacci sequence, the Golden Ratio and the gentle waking-up 9
F - Appendix 10
F1 - Important advice 10
F2 - Maintenance instructions 10
F3 - The singing bowl 10
F4 - Proper disposal 10
- Seite 3 -
Instruction manual
Congratulations to your new Dayasa™. You have bought a quality product which was
produced in Germany. We wish you many years of joy with your singing bowl clock.
A QUICK START/THE MOST IMPORTANT THINGS AT A GLANCE
How to get your clock started
Open the battery compartment by lifting o the cover. It is hold by magnets. Install 4
batteries type „C” (also known as „baby”). All batteries should be brand new. Close the
battery door.
The standard setting appears on the display.
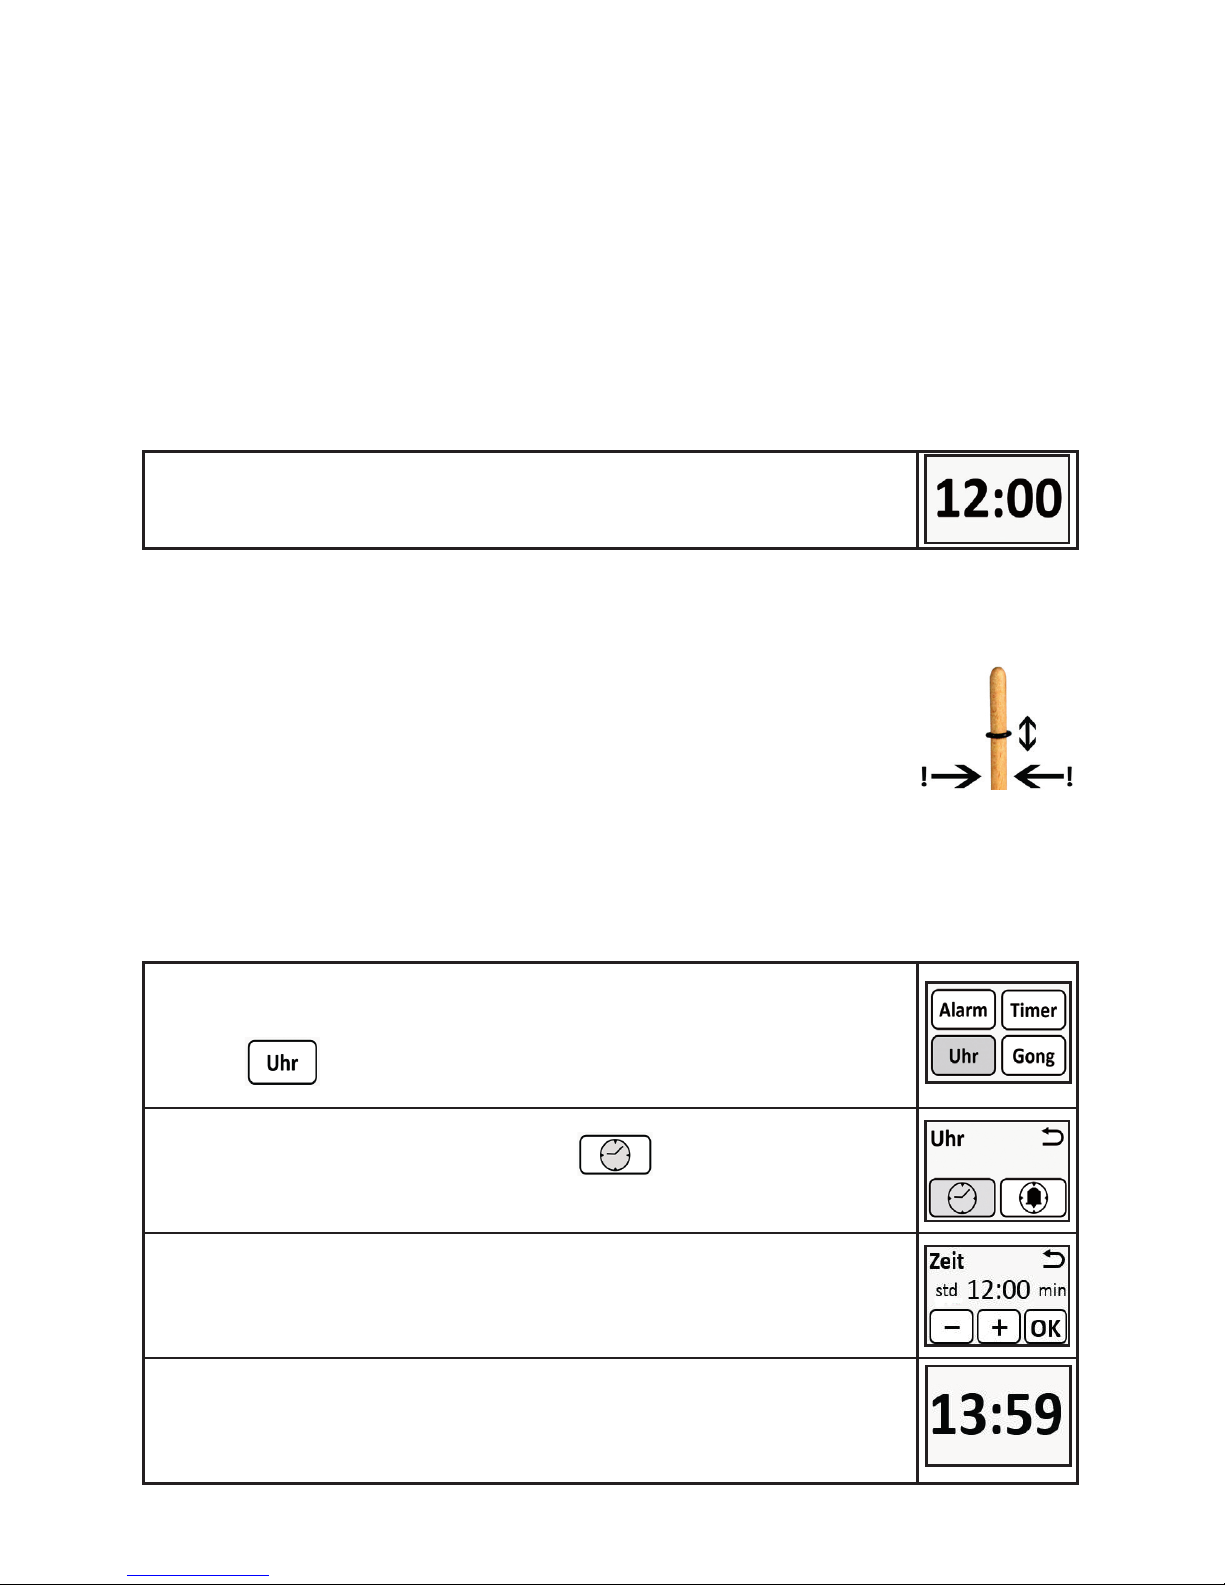
Put the singing bowl on the clock in such a way that it is adjusted horizontally.
Check if the rubber-ring is correctly positioned. The wooden bobbin should touch the
singing bowl right under the upper brim of the bowl. To adjust the rubber ring, hold it
with one hand, while you are rolling it up or down.
B - How to operate your Dayasa
The display serves to both display and adjust. It is a touch screen which you touch with
your nger tip to adjust.
B1 - How to set the time
When you see the standard setting/display, tip shortly on the display,
it will be lit. Tip again on the display, the main menu will appear.
Tip on
Press the time symbol in the submenu
In the time-setting the hours blink. First, set the hour with – and +,
conrm the hour with OK and the minutes blink. Choose the minute with + and – and conrm with OK. To save, press the blinking OK
again.
The standard setting shows the set time.
- Seite 4 -
B2 - Setting the alarm clock / wake up call
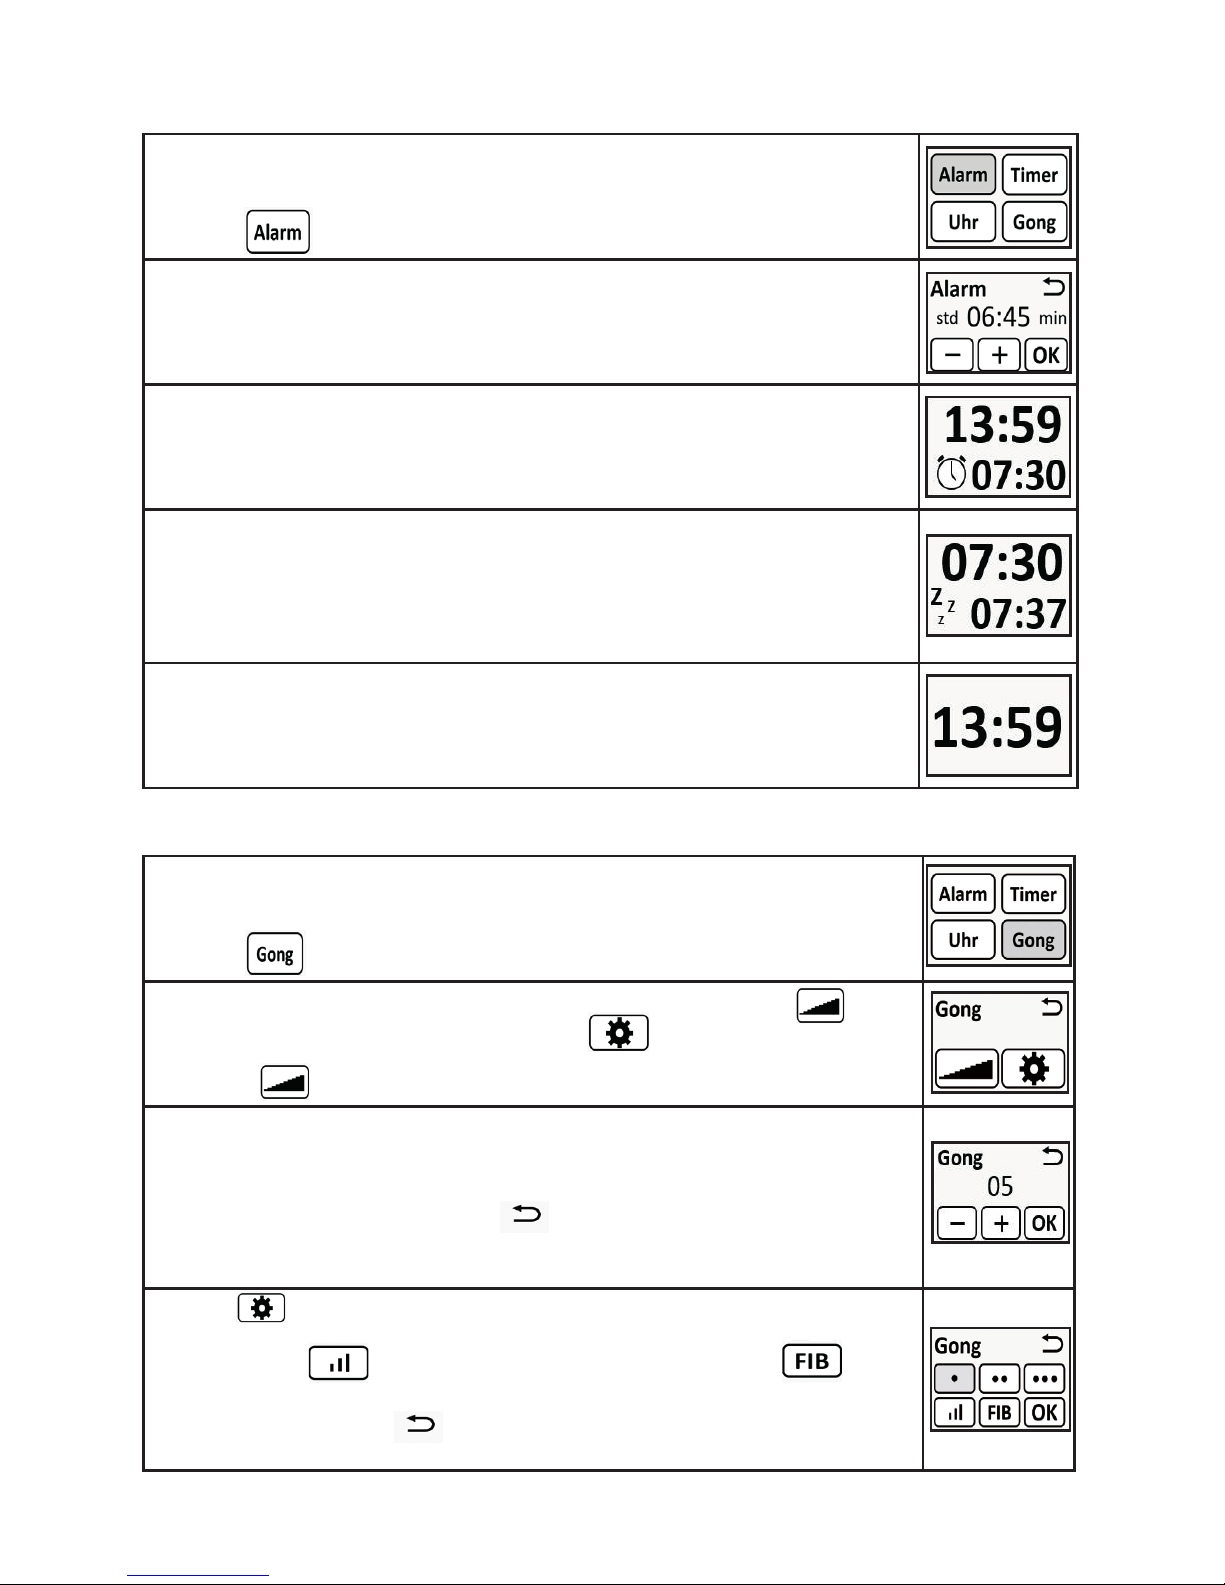
Tip the display shortly in the standard setting, which will be lit automatically. Tip again on the display and the main menu will appear.
Tip on
The hours blink in the alarm mode. For setting the hour, press – and +.
Conrm with ok. The minutes will start to blink. Proceed to press – and
+ to choose the minute and conrm with ok. To save the settings, tip
again on the blinking OK.
The main display shows the activated alarm.
When the alarm is ringing, you can tip on the display and the alarm
will pause for 7 minutes. (snooze-function). You can pause the alarm
up to 5 times in total. After the 6th alarm, the alarm will be automatically stopped. Please note: When you choose the Fibonacci mode, (see
chapter B3) there is no snooze function.
To stop the alarm, press the display about 3 seconds. The alarm time
disappears, the alarm has been stopped. To activate the saved alarm,
press the display again for about 3 seconds.
1)
B3 - How to install the gong and test the sound
Tip shortly on the display in the standard setting. It will be illuminated.
Tip again on the display and the main menu appears.
Tip on
In the submenu GONG you can adjust the volume with the symbol and you can choose the gong with .
First, tip
The set volume will be shown. Change the volume by pressing – and
+. Be sure not to tip too fast, then you will hear a test gong after every
step. To return to the gong menu tip
To return to the gong menu tip
Press OK to save your preferences and to return to the Gong menu.
Tip on to set the type of gong. You can choose between 1, 2 or
three gongs.
The settings (rising volume/strike strength) and
FIB (Fibonacci sequence) are only applicable for the alarm. To return to
the Gong menu press
Save your settings with OK and get back to the main display.
 Loading...