

Day6 Dream8, Dream24, Journey, Patriot, Cyclone Owner's Manual
...
Owner’s Manual
The most comfortable upright
bicycles ever made.

At Day 6, we hope you will enjoy riding our bicycles as
much as we enjoy designing them. We have truly
combined the best features of a recumbent (feet on the
ground; wide, comfortable seat and backrest; upright
head position; reduced stress on the wrists, shoulders,
low back, and crotch; easy on and off) with the best
features of a traditional bike (dual 26” wheels, positive
steering, classic styling, great visibility, easy to find
replacement parts) to give you one exceptional biking
experience!
If you have any questions about your bicycle, please call
the dealer you purchased it from or call Day 6 Bicycles at
406/570-1927, or email Day 6 at kelly@day6bikes.com.
For most accessories and replacement parts, call your
local bicycle dealer.
Warranty Activation
Email us at kelly@day6bikes.com. We will need the serial number from the bottom bracket along with your
name, address, phone number, name of dealer you purchased the bike from, copy of receipt, and the date
the bicycle was purchased. Or you can put this information on a piece of paper and mail to us at:
Day 6 Bicycles, 414 W 7th St, Logan,IA 51546
Page 1

Bicycle Assembly
All Day 6 bicycles must be assembled by a
professional bicycle dealer for proper set-up.
Failure to do this voids all warranties and could
result in damage to the bike or serious injury.
Important: Dream8, Dream24, and
Journey have a weight limit of 250
pounds. Patriot and Cyclone have
weight limits of 300 pounds. Samson
has a weight limit of 400 pounds.
Anyone weighing more than these
weight limits voids all warranties and
assumes all responsibility.
Page 2
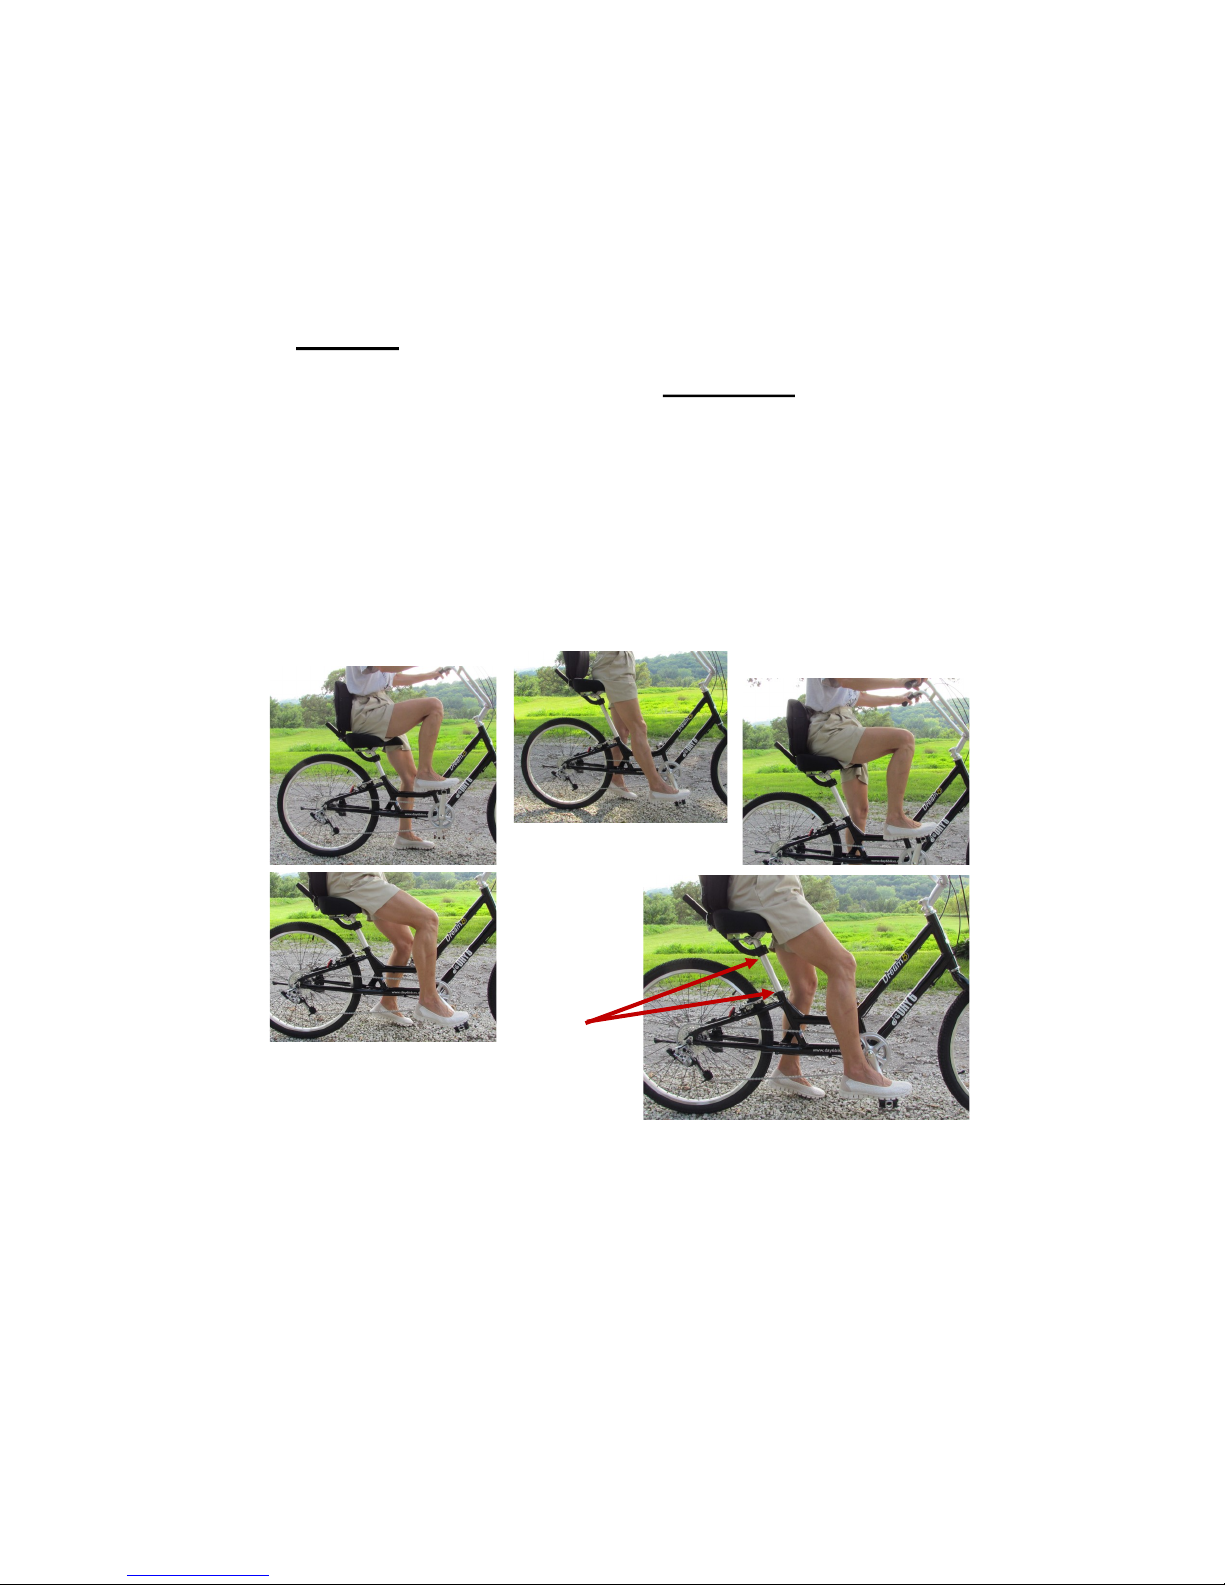
Bicycle Set Up
Seat.
Seat Height. When the seat height is properly
adjusted, the balls of your feet should easily touch the
ground, but more importantly, your leg should have a
slight bend when the pedal is in the extended position.
If your legs are completely straight when pedaling, you
need to lower the seat. If your legs have more than a
slight bend or your opposite knee and femur go above
parallel with the ground when pedaling, you need to
raise the seat.
Seat too low
Seat too high
Seat just right
CAUTION:
There is a maximum height for extending the seat post .
The horizontal backrest tube should never be more than
6” above the seat post collar.
Page 3
6”
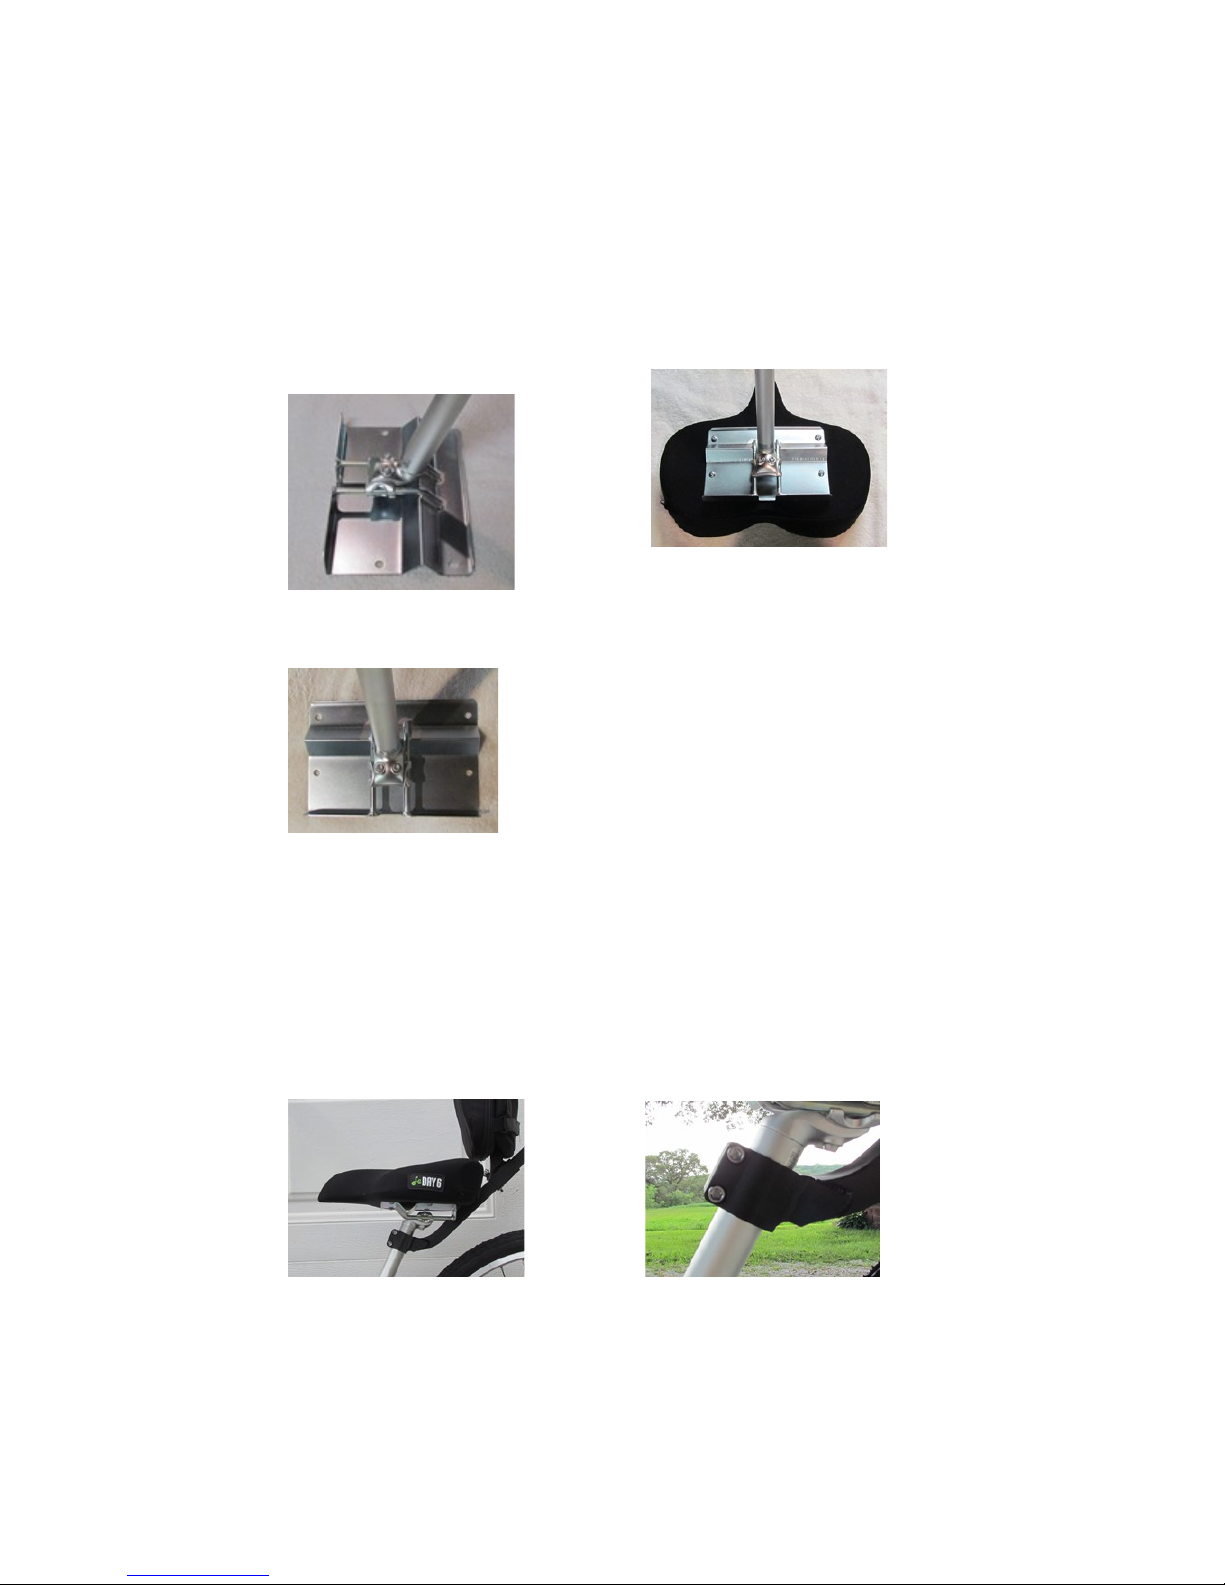
Seat Angle and Depth. Newer Day 6’s have two bolts
at the top of the seat post. Loosen them. (If the Horizontal
Backrest Tube is attached to the seat post, you will first need
to move it out of the way by loosening the two bolts that
attach it to the seat post.)
Seat post 1” back
from bend
Contour Seat attaches
to mounting base with
four 1/4-20 bolts
Place seat post about 1” from the seat
pan bend (see above) and allow seat
post to tilt back as far as it will go.
Tighten the two seat post bolts
securely, going back and forth
between them until they are tight. This
will put the bottom of the seat parallel to the ground
which is correct for most people. If not, loosen bolts
and readjust angle. Securely tighten the bolts after
finding the correct seat position and then reinstall the
Horizontal Backrest Tube.
NOTE: It is CRITICAL that the 2 seat post bolts are
tight at ALL times. Check your seat before each
ride. Failure to do this can cause serious injury.
Horizontal Backrest Tube
Proper seat angle
Page 4
 Loading...